301836 - Camera Aplic - Free user manual and instructions
Find the device manual for free 301836 Aplic in PDF.


| Product type | Parking assistance system with reversing camera and proximity sensors |
| Brand | Aplic |
| Model | 301836 |
| Power supply | 10-16 V DC |
| Operating temperature | -40 °C to +80 °C |
| Sensor detection range | Approximately 0.3 m - 1.5 m |
| Display range | Approximately 0.3 m - 2 m |
| Screen size | 4.3 inches (10.922 cm) |
| Package contents | 4.3" monitor, camera, 4 proximity detectors, adapter cable, 22 mm hole saw, 6 m Cinch cable, user manual |
| Main functions | Reversing camera display, obstacle detection by ultrasonic sensors, visual and audible parking assistance |
| Video inputs | 2 (CAM IN priority, VIDEO IN secondary) |
| Recommended sensor mounting | Height from ground 50-70 cm (ideal 55 cm), outer sensors 15-20 cm from bumper edge, distance between sensors 24-40 cm |
| Sensor test | Connect successively from A to D, move to 2 m then approach to check distance display |
| Safety instructions | Installation by specialist, check system before mounting, do not replace mirrors, watch out for blind spots |
| Maintenance and cleaning | Clean the camera lens regularly with a soft cloth to ensure a clear image |
Frequently Asked Questions - 301836 Aplic
User questions about 301836 Aplic
0 question about this device. Answer the ones you know or ask your own.
Ask a new question about this device
Download the instructions for your Camera in PDF format for free! Find your manual 301836 - Aplic and take your electronic device back in hand. On this page are published all the documents necessary for the use of your device. 301836 by Aplic.
USER MANUAL 301836 Aplic
ENG: Current drivers, user manuals and other relevant documents for this product can be found on our homepage.
Thank you for choosing an aplic product. Please read the following user manual carefully to have an enjoyable experience with your purchased product.
1. Scope of supply
4.3" (10.922cm) monitor
- Camera
4x proximity sensors
- Adapter cable
- 1x22mm hole saw
- 6 m cinch cable (with optional voltage line)
- User manual
2. Technical data
| Operating voltage DC 10-16 V | |
| Operating temperature -40 °C to +80°C | |
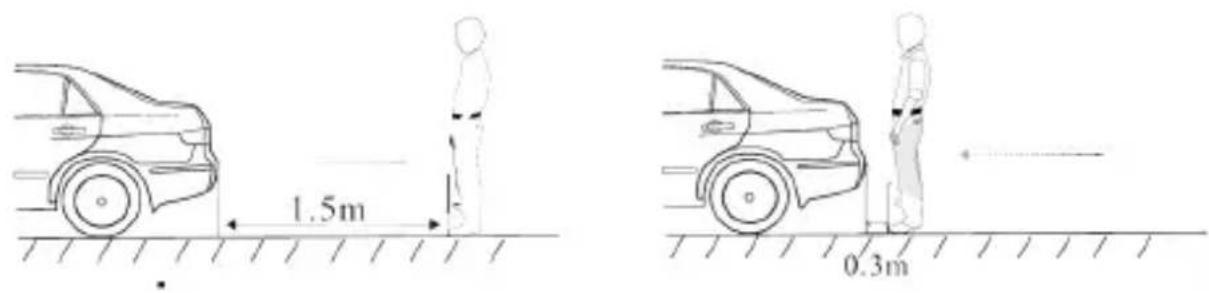
| Rear sensors - Sensing range about 0.3 m - 1.5 m | |
| Display range about 0.3 m - 2 m | |
| Features • Display | Wide-angle camera High light sensitivity Proximity sensors |
3. Function
With the parking assistant application, you have the option of adding additional parking sensors and a rear view camera to a car. You can see the rear view camera using the LCD monitor.

4. Installation and usage instructions
- The installation should be carried out only by a trained technician or a specialised workshop! The manufacturer shall not be responsible for incorrect installation!
- Check the parking assistant before installation for proper functioning (see chapter 5 "Testing the sensors")!
- Keep the camera lens clean. Otherwise, a clear view cannot be guaranteed!

- In spite of the rear view camera and proximity sensors, check the distance and use the rear and side mirrors. The system assists you only when reversing and parking the vehicle but does not replace these activities! Responsibility and necessary attention in road traffic remain with the driver.
- Ensure that your vehicle is safely parked and that all the electronic systems of the vehicle are switched off while installing the system. There is a risk of electric shock!
- Ensure that the camera is installed in the correct direction, otherwise the image will be displayed the wrong way around on the display.
- There are two coloured wires (blue and white) on the camera cable distributor. These two wires are intended for the camera overlay and for reflecting the display. If you disconnect the white wire, the camera is reflected vertically. If you disconnect the blue wire, the digital overlay disappears from the camera display.

- To enable these functions again, you have to connect the cables accordingly. To enable the settings, it is necessary to switch the power supply on and off once again.
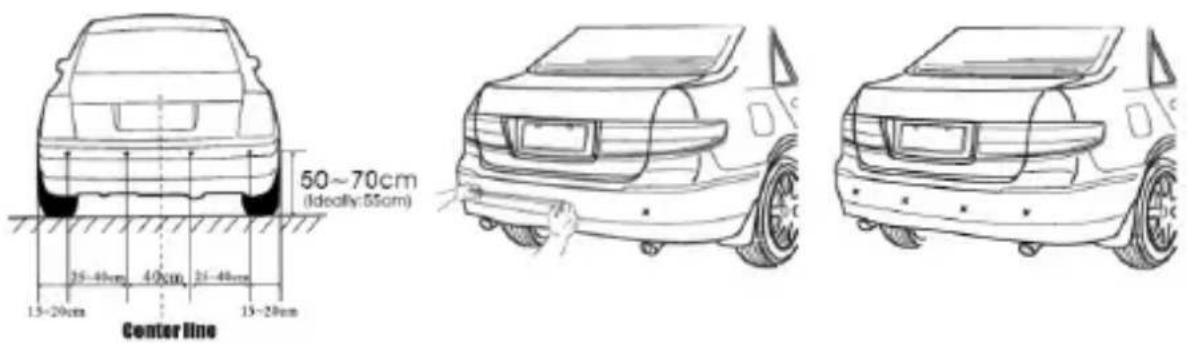
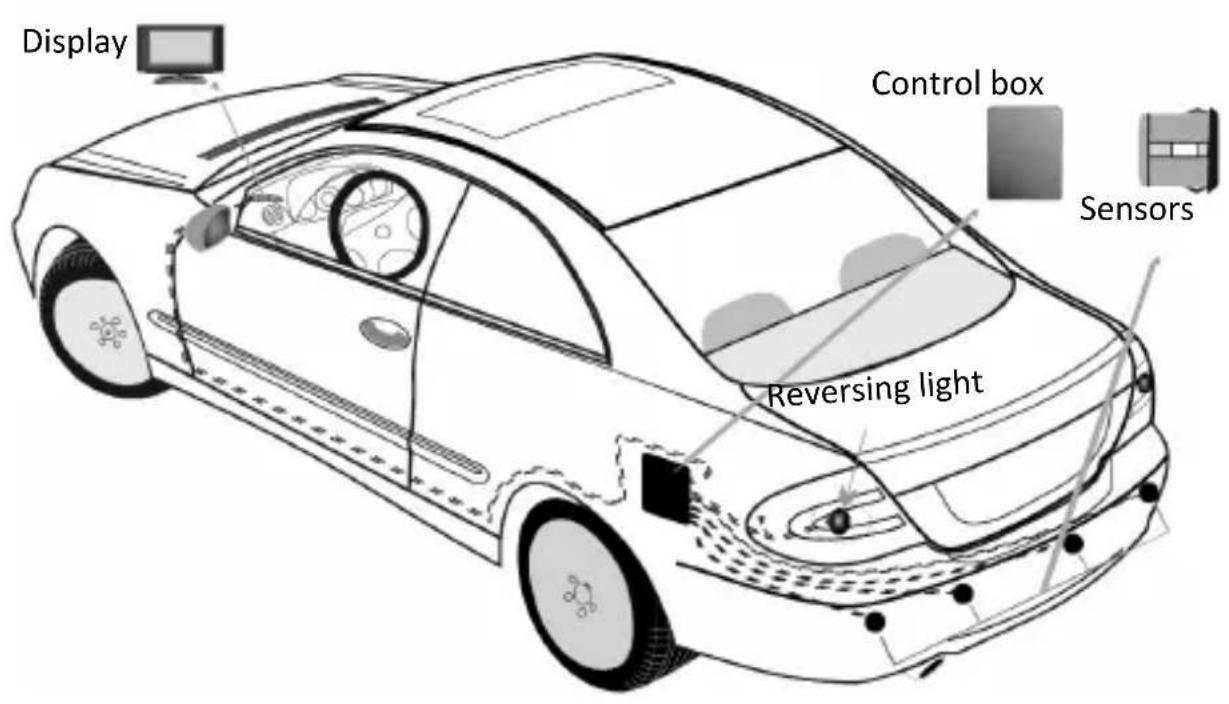
- It is advisable to install the sensors at a distance of about 50 - 70cm from the ground (ideally about 55cm ! The external sensors should be installed about 15 - 20cm from the outer edge of the bumper. The distances between the respective sensors should ideally be between 24 and 40cm in this case. Note: Ensure that the sensors are installed on a flat surface of the bumper.
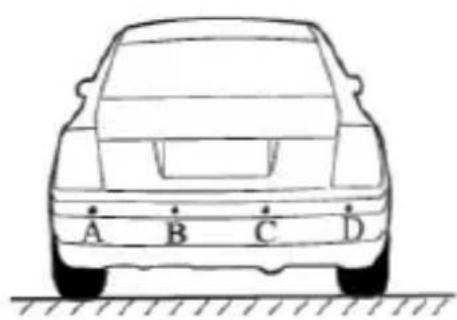
- The sensors A, B, C and D need to be installed from left to right. In this case, the sensor A has to be installed in the leftmost position, sensor B in the middle to the left, sensor C in the middle to the right and sensor D in the rightmost position.
- Check the position of the sensors before drilling!
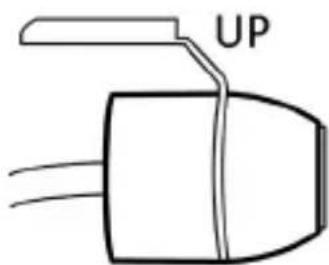
- The proximity sensors have to be installed correctly. Make sure that the "UP" mark is always at the top.

5. Testing the sensors
Check whether the parking assistant is working before installing it. Connect the sensors one after the other and check whether every sensor is working. Start with sensor "A" and continue with sensor "B", "C" and finally sensor "D". Stand about 2 meters behind the sensor and move slowly towards the sensor. The display should show a certain distance if you move towards the sensor or away from the sensor.
6. Sample installation and wiring

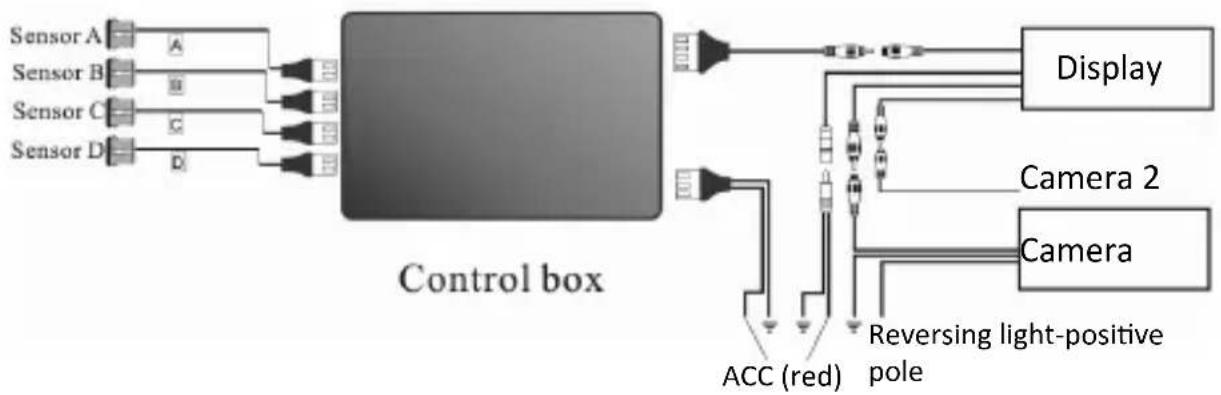
You have the possibility to connect two video inputs (CAM IN and VIDEO IN) on the display. "CAM IN" has always the highest priority. The display can only show a signal of a connection. If you have connected a camera to "CAM IN" and a camera to "VIDEO IN", the display will show the image of the camera which is connected to the "CAM IN" port. However, if there is not connected a signal to "CAM IN", but to "VIDEO IN", the signal of the "VIDEO IN" port will be displayed.
7. Additional information
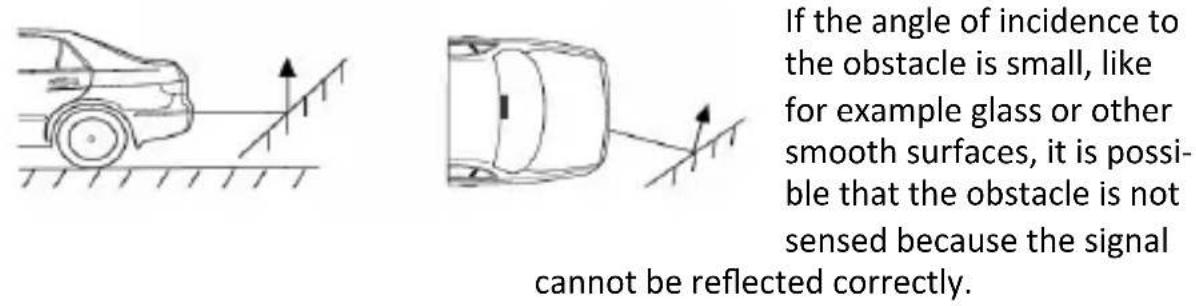
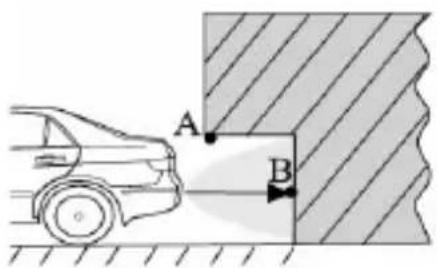
Point B is sensed sooner or later by the sensors. However, it is possible that point A may not be sensed. Hence always look at the rear and side mirrors!

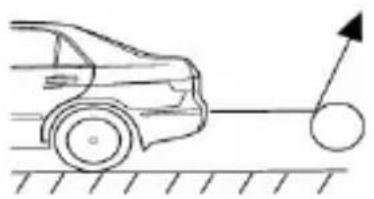
Spherical objects have a small and uneven surface.
Due to the curvature of the object, it may happen that the signal is not reflected correctly.
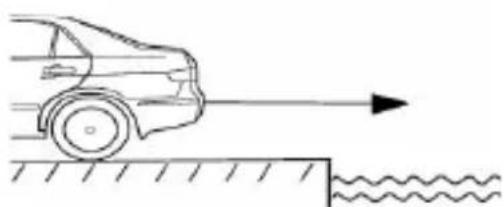
Cliffs or water edges, where there are no objects, are not sensed by the system. Please be especially careful in such situations!
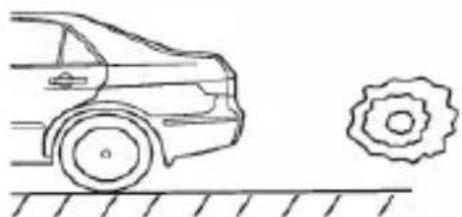
In case of foam or sponge-like objects, it may happen that the signals of the proximity sensors are absorbed and are not sensed properly.
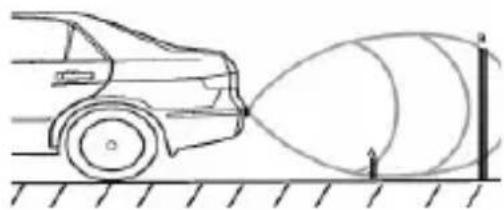
Since the height of the first obstacle is very less, this is sensed first. The second object is sensed once the first obstacle reaches the blind spot of the proximity sensors. In this case, you should be aware that the first obstacle is still present. Be very careful in such a situation!
- Troubleshooting
| Error Potential troubleshooting | |
| The display does not show any image | • Connect the power supply • Switch on the ignition • Engage the reverse gear • Check the camera connection and connect if necessary |
| The display constantly shows an image although the reverse gear is not engaged | Please connect the power supply to the reversing light |
| The camera quality is poor or blurred | • Clean the camera lens thoroughly |
| The proximity sensors are not working properly | Ensure that the sensors are properly connected to the "control box" |

9. Safety instructions and liability disclaimer
Never try to open the device to carry out repairs or conversions. Avoid contact with mains voltages. Do not short-circuit the product. The device is not certified for use in the open air; only use it in dry conditions. Protect it from high humidity, water and snow. Keep it away from high temperatures. Do not subject the device to sudden changes in temperature or heavy vibration as this might damage electronic components. Examine the device for damage before using it. The unit should not be used if it has received an impact or has been damaged in any other way. Please observe national regulations and restrictions. Do not use the device for purposes other than those described in the instructions. This product is not a toy. Keep it out of the reach of children or mentally impaired persons. Any repair or alteration to the device not carried out by the original supplier, will invalidate the warranty or guarantee. The product may only be used by persons who have read and understood these instructions. The device specifications may change without any separate prior notice to this effect.
10. Disposal instructions
Electrical and electronic devices may only be disposed of in accordance with the European WEEE Directive and not with household rubbish. Components must be disposed of or recycled separately as dangerous, toxic elements can inflict sustained damage on the environment if they are disposed of incorrectly. As a consumer, you are bound by the Electrical and Electronic Devices Act (ElektroG) to return electrical and electronic goods free of charge at the end of their useful life to the manufacturer, the place of purchase or to specially set up, public collection points. The details in each case are governed by national law. The symbol on the product, the operating instructions and/or the packaging refers to these regulations. By separating materials in this way, recycling and disposing of old devices, you are making an important contribution towards protecting our environment. For information on authorised collection points in your area, please contact your local city or municipal administration.

WEEE guideline: 2012/19/EU
WEEE register number: DE 67896761
WD Plus GmbH, herewith declares that this product 301836 conforms to the principle requirements and other relevant stipulations. The complete Declaration of Conformity can be obtained from: WD Plus GmbH, Wohlenbergstraße 16, 30179 Hanover
(IT) +49511/13221740
(ES) +49511/13221750
MO-FR 9:30am - 18pm CET

http://model.ganziinfach.de
WD Plus GmbH
Wohlenbergstraße 16
30179 Hannover, DE
V1.2


Brand : Aplic
Model : 301836
Category : Camera