301588 - Camera Aplic - Free user manual and instructions
Find the device manual for free 301588 Aplic in PDF.


| Product Type | Indoor IP Surveillance Camera |
| Brand | Aplic |
| Model | 301588 |
| Power Supply | 5 V DC, 2 A (power adapter included) |
| Video Resolutions | 1280 x 720 (HD), 640 x 360, 320 x 180, 160 x 90 |
| System Compatibility | iOS, Android, Windows, macOS, Raspberry Pi via app or browser |
| Network Connectivity | Ethernet RJ45, Wi-Fi 802.11 b/g/n (client and access point mode) |
| Main Functions | Motion detection, night vision, two-way audio intercom, motorized rotation (remote control) |
| Viewing Angle | Not specified, motorized rotation via web interface (pan and tilt) |
| Storage | SD card (not included), viewing via SDcardTool application on PC |
| Dimensions | Estimated: 100 x 80 x 80 mm |
| Weight | Estimated: 200 g |
| Package Contents | Camera, power adapter, Ethernet cable, external antenna, wall mount, mounting accessories |
| Installation | Setup via Ethernet or access point mode, then Wi-Fi connection |
| Remote Access | Via www.mipcm.com portal or MIPC app (iOS/Android) |
| Video Settings | Brightness, contrast, saturation, sharpness, day/night/auto mode, image rotation |
| Operating Temperature | Dry indoor, away from humidity and extreme temperatures |
| Certifications | CE marking, compliant with WEEE directive 2012/19/EU |
| Warranty | Legal warranty, out-of-warranty repairs void rights |
Frequently Asked Questions - 301588 Aplic
User questions about 301588 Aplic
0 question about this device. Answer the ones you know or ask your own.
Ask a new question about this device
Download the instructions for your Camera in PDF format for free! Find your manual 301588 - Aplic and take your electronic device back in hand. On this page are published all the documents necessary for the use of your device. 301588 by Aplic.
USER MANUAL 301588 Aplic
natural_image
Line drawing of a vintage rotary phone with a speaker and antenna (no text or symbols)CLOUD IP CAMERA
natural_image
User interface toolbar with three function icons: wrench, plus sign, and refresh (no text or labels)natural_image
Line drawing of a rotary digital device with rotating buttons and a speaker (no text or symbols)natural_image
Circular mechanical component with four triangular blades and a central hub (no text or symbols)https://ftp.csl-computer.com/pub/drivers/ipcam/49982_Gadget_ip_cam/
Thank you for choosing an aplic product. Please read the following user manual carefully to have an enjoyable experience with your purchased product.
1 Scope of supply
- Camera
- Power adapter
- Ethernet cable
- External antenna
- Wall mount bracket
- Mounting accessories
2 Technical data
| Power supply 5V DC 2A (power adapter) | |
| Resolutions | 1280x720640x360320x180160x90 |
| System compatibility • iOS (via app or web browser)Mac OS X (via web browser)Windows (via web browser)Android (via app or web browser)Raspberry Pi (via web browser) | |
| Features • Movement detectionNight vision modeIntercom system | |
3 Product details
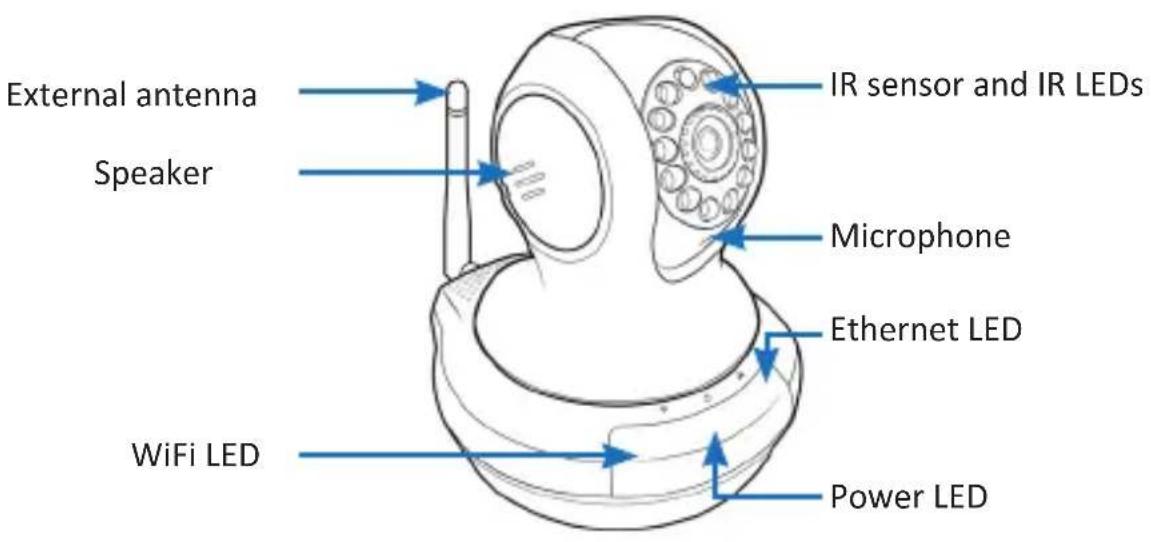
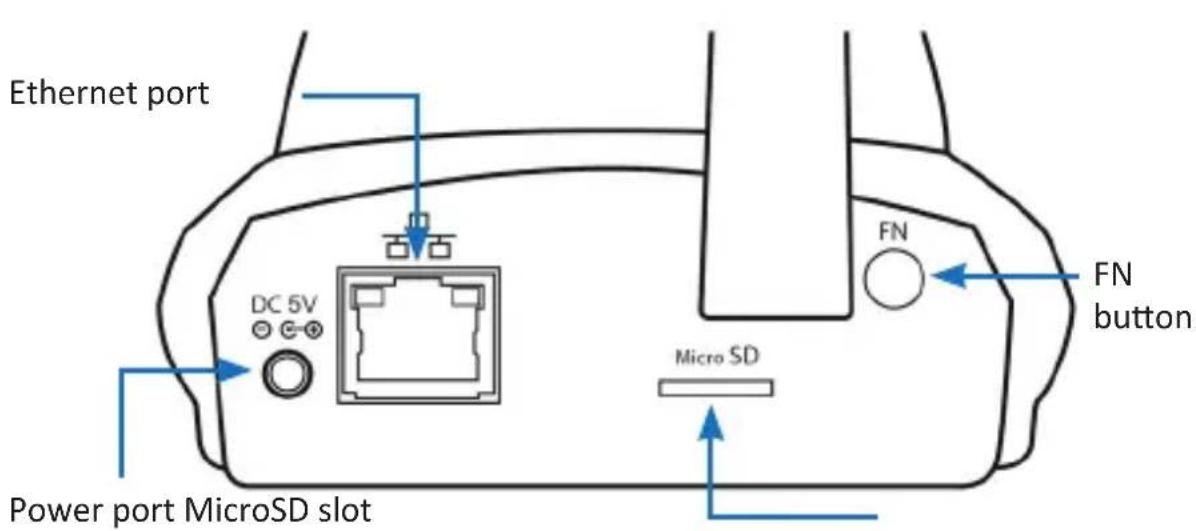
4 Initial use
Take the device out of the package and remove all the packaging material. Connect the external antenna to the port provided on the camera. Plug the provided power adapter into a properly installed power socket and then connect it to the power connector of the camera. The "Reset" button is at the bottom of the camera.
4.1 Setting up via Ethernet
If you want to configure the camera using the Ethernet cable, then connect the Ethernet cable to the camera and to the Ethernet port of your computer or notebook.
You will have to change your IP address manually to access the camera directly. The figure below shows the settings to be configured:
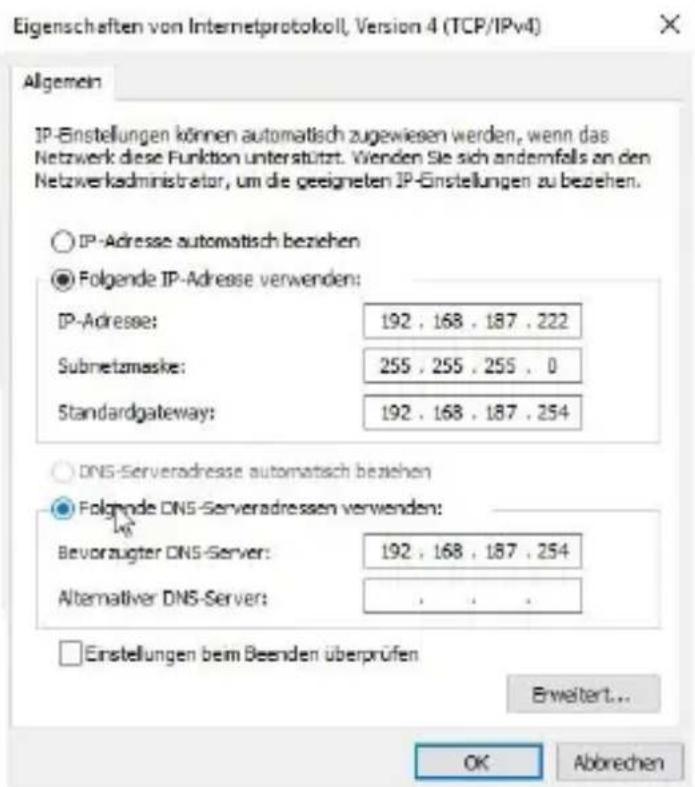
IP address: 192.168.187.222 (where "222" can be a number from 1-253)
Subnet mask: 255.255.255.0
Default gateway: 192.168.187.254
Preferred DNS server: 192.168.187.254
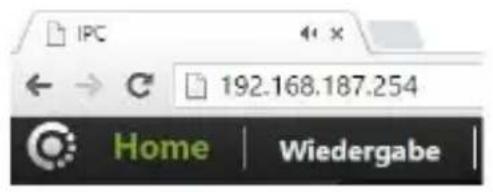
Enter the following IP address in the header of your web browser to access the web interface: "192.168.187.254" and confirm by pressing "Enter".
Then enter the login data of the camera. This is located below the camera.
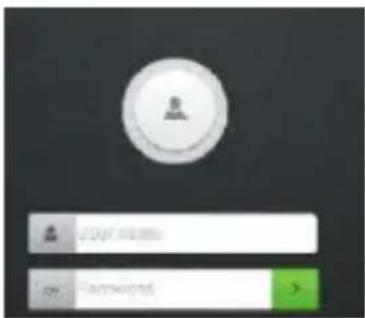
Once you are logged in, you will be prompted to enter a new password. Enter your new password and confirm the same.
After configuring your new password you can connect the camera to your WiFi network. To do this, select the desired SSID and enter the network key of your SSID in the "Password" field and then click on "Apply".
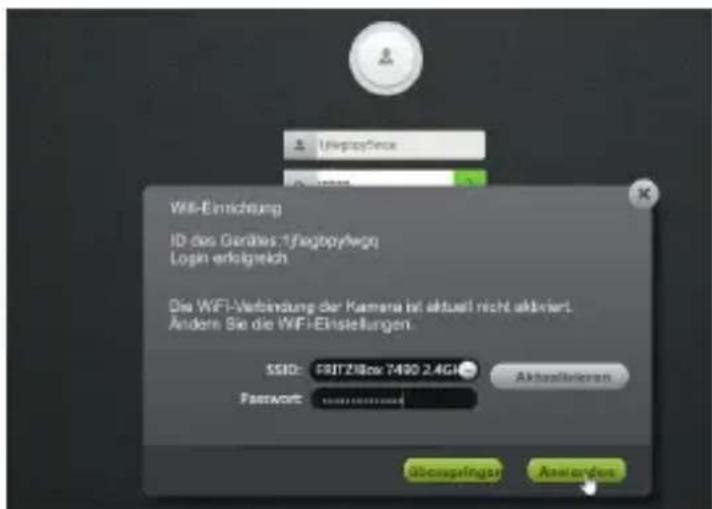
Once you are successfully connected to your WiFi network, you can disconnect the Ethernet cable.
Please refer to Chapter 5 "Accessing the Web interface" of this user manual to understand how to access the web interface.
5 Accessing the web interface
Once your camera has access to the Internet, you can access the web interface at any time.
- Open the website "www.mipcm.com"
- Enter the ID in the "User" field and the password of your camera (you can find the ID at the bottom of the camera)
Alternatively, you can configure several cameras using one profile and access it.
- Open the website "www.mipcm.com"
- Register a user account by clicking on "Register". Select the desired user name and the corresponding password and confirm by clicking on "Register"
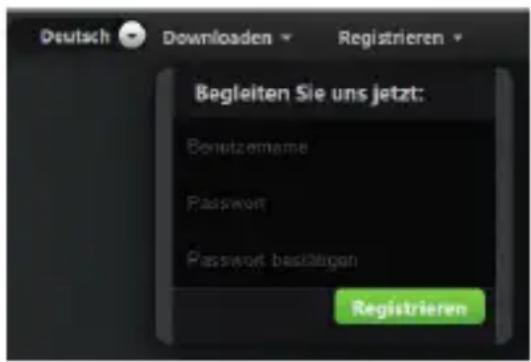
- Then enter the previously selected user data and log in

natural_image
Three gray button icons: wrench, plus sign, and refresh symbol (no text or labels)- Now you can add a device. Click on the "+" symbol to do this
- Enter the camera ID in the next window and follow the instructions of the Setup wizard
- Once the setup is complete, you can see your camera in your user profile and can control it using the web interface and define additional settings
The web interface of the camera can also be accessed using the "MIPC" app (Android and iOS). You can easily search for the "MIPC" app in your App store and download it.
Open the app and then enter the user name and password to log into the web interface.
6 WiFi network modes
6.1 Hotspot mode (iOS only)
If you do not plan to integrate the camera in a network, you can connect directly to the camera using your iOS mobile device (e.g. iPhone or iPad) and control it.
- Download the "MIPC" app from the App Store
- Connect to the hotspot of the camera (hotspot name = camera ID) with your mobile iOS device
- Open the "MIPC" app
- Enter the ID and password of the camera and log into the interface.
Now you can control the camera using the "MIPC" app and configure it.
6.2 Client mode
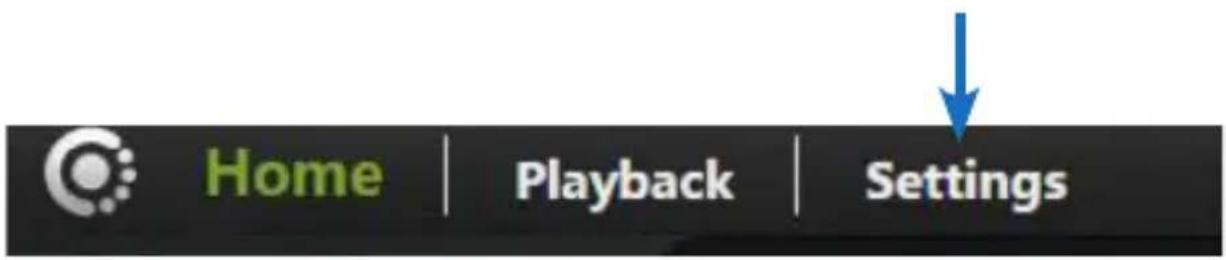
The "client" mode provides the option of accessing the camera with any compatible device. To do this, connect with the web interface of the camera. Click on "Settings" in the top navigation bar.
Click on "Network" after opening the settings.
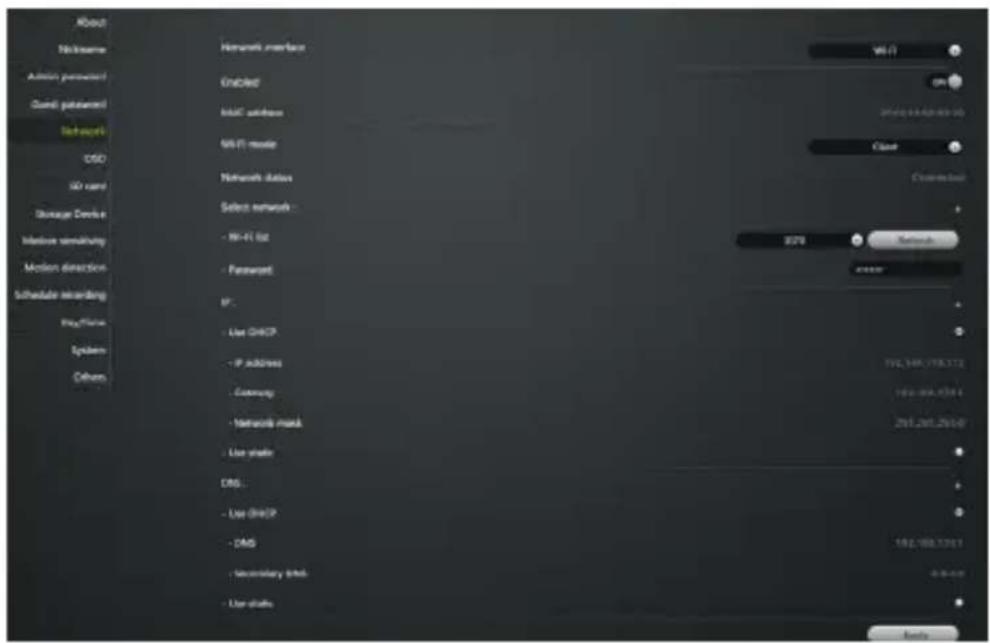
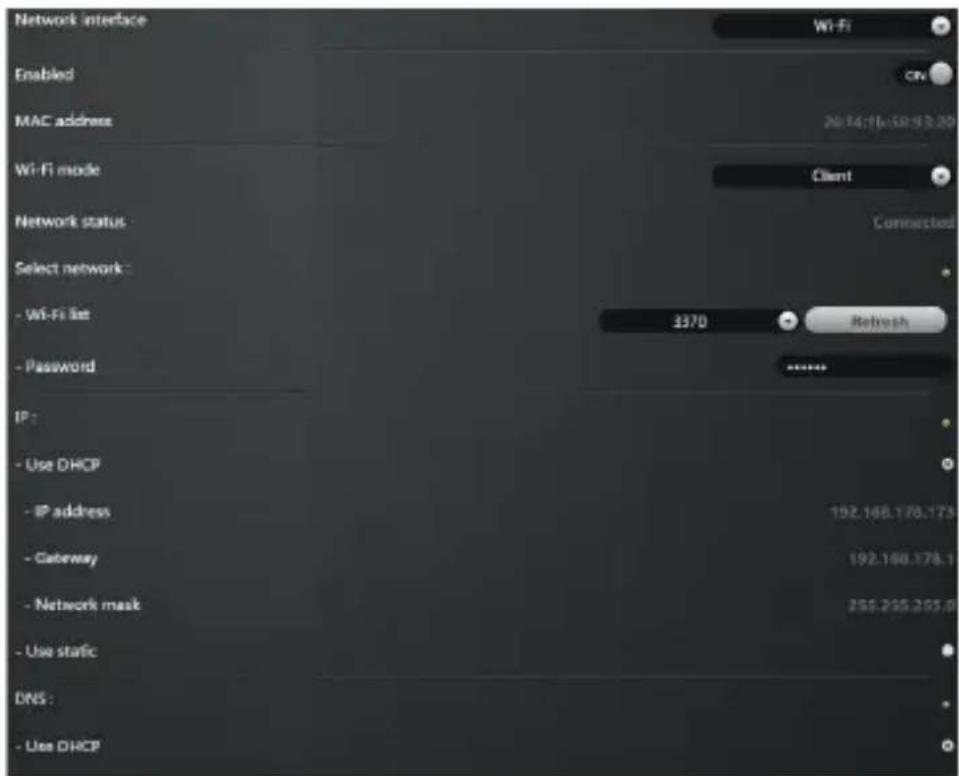
Select "Client" under "WiFi mode". In the "WiFi list" you can select the desired WiFi network to which you want to connect the camera. A field is provided under the "WiFi list" menu item. You can enter the password of the previously selected WiFi network here. After configuring the desired settings, click on "Apply".
The IP cloud camera is now in client mode.
Note: The client mode can only be enabled in the web interface. Therefore connect beforehand via the Ethernet cable (chapter "4.1") or via the hotspot function (chapter "6.1") in order to enable this mode.
7 Configuring the video quality
The following video settings are possible for the camera:
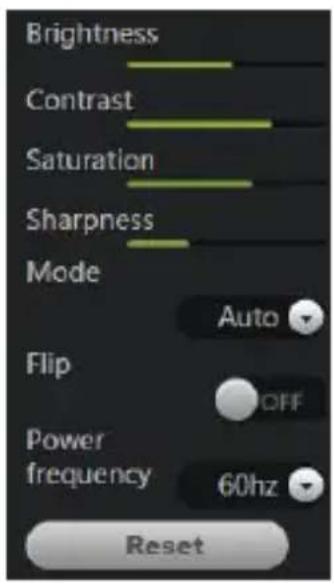
| Brightness Adjusting the brightness | |
| Contrast Adjusting the contrast | |
| Colour saturation | Adjusting the colour saturation |
| Sharpness Adjusting the sharpness | |
| Mode Here you can choose between 3 different modes: Night, Day and Automatic | |
| Rotate Rotating the display image | |
| Mains frequency | Configuring the mains frequency |
![Resolution : Small [160x90] Half [320x180] Normal [640x360] HD [1280x720] Password Guest password Options Exit](/content/2026/04/697905/images/6cb102b994200fa216a38ff82ac554ba7bcc7b29e6a5140b06a4065288b77223.jpg)
Click on the video menu in the upper right view of the web interface.
A drop-down menu is displayed. In this menu you can select between four different video qualities:
- Small (160x90)
- Half (320x180)
- Normal (640x360)
- HD (1280x720)
Simply click on the desired option to select these resolutions.
8 Web interface
natural_image
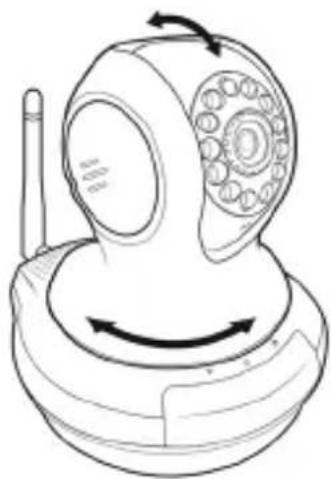
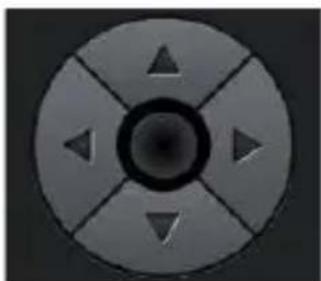
Line drawing of a rotary device with rotating buttons and a scroll wheel (no text or symbols)You can rotate the camera by clicking the corresponding direction on the control pad in the web interface.
natural_image
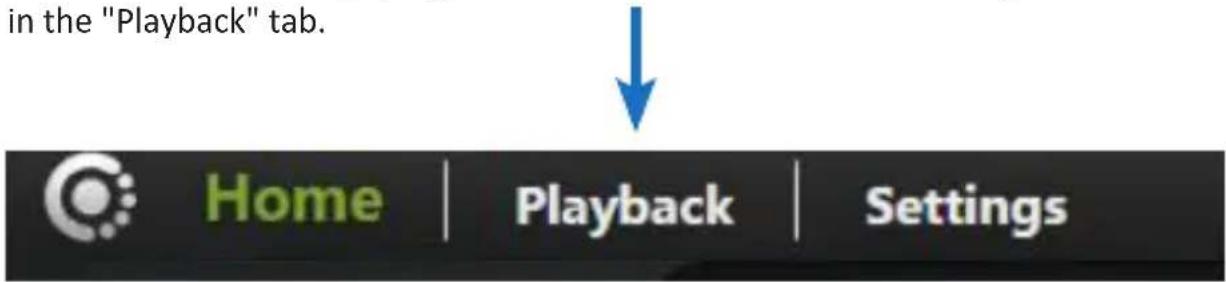
Circular mechanical component with four directional arrows (up, down, left, right) and a central hub, no text or symbols present.Certain camera messages, e.g. the screenshots of the motion alarm, can be viewed in the "Playback" tab.
All the camera settings can be selected in the "Settings" tab.


Using the "Nickname" menu option, the display name of your camera can be modified in the web interface.
You can change the passwords as desired in the menu options of "Admin password" and "Guest password" respectively.
Using the "Network" menu option, it is possible to configure the network settings of the camera. The WiFi modes of "Client" and "Hotspot" can also be selected in this menu.
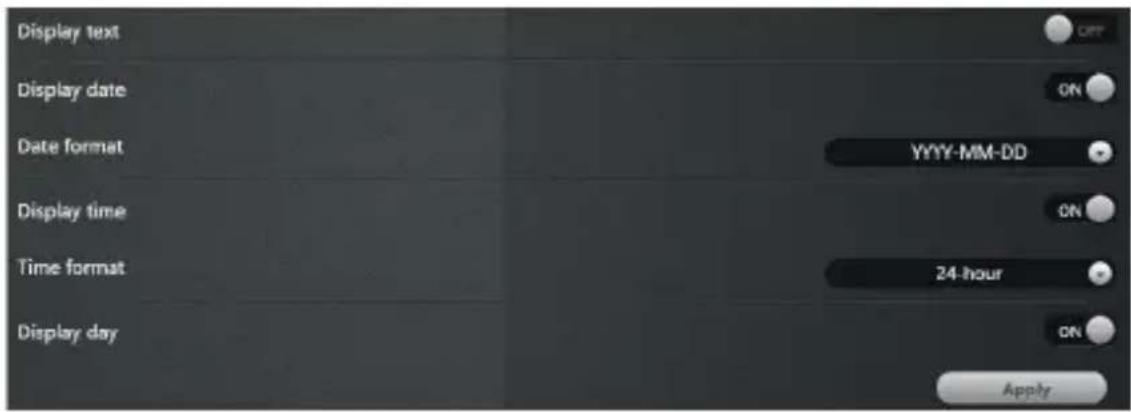
The "OSD" menu option allows you to configure the display of text, date, time and week. Likewise, you can also select a different time or date format.
The "Motion sensitivity" menu option allows the sensitivity of movement detection to be configured during the day and at night using regulators.

The alarm settings can be changed as desired under "Motion detection".
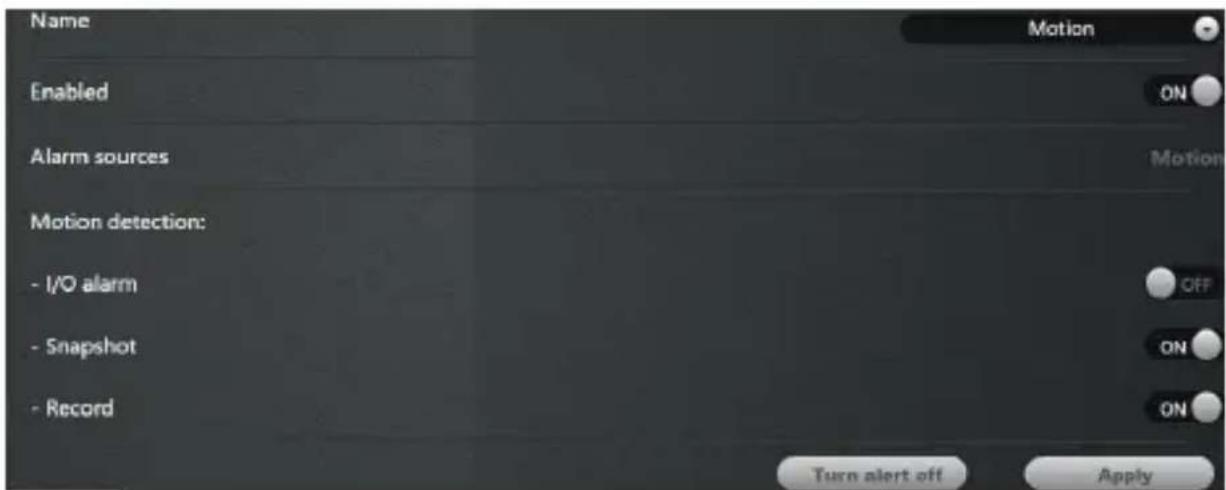
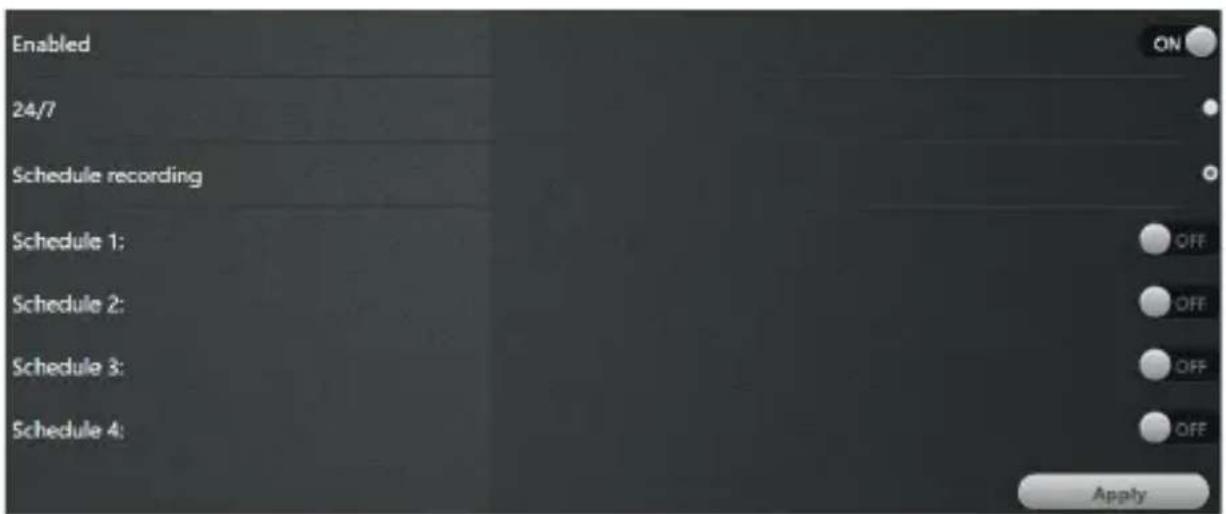
To carry out scheduled recording, you need to open the "Schedule recording" menu. Here you can select either 24 hours / 7 days a week, or create your own schedule.
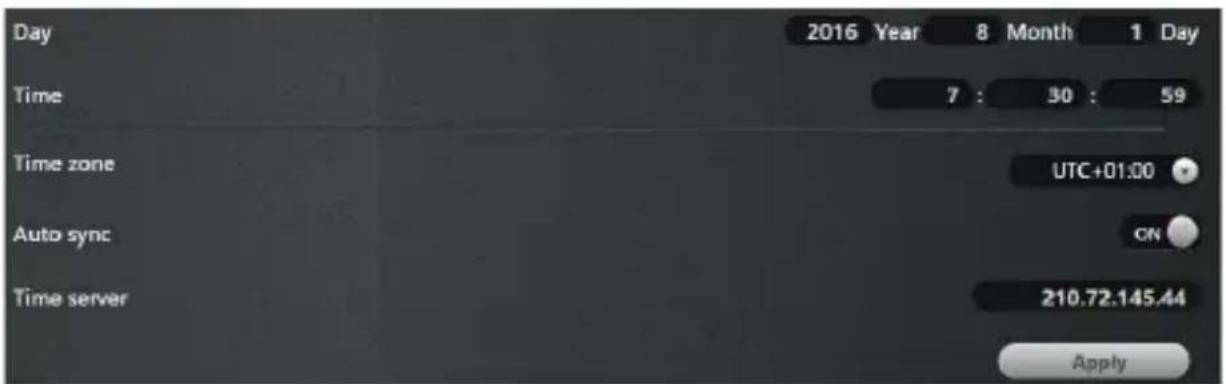
In the "Date / Time" settings, it is possible to configure any time and date settings.

Select the "System" menu option to restart the device, to update the firmware or restore the factory settings.
9 Reading out the SD card
In order to read out the SD card of your camera on your computer or notebook, you need a specific application. These you will find on our FTP server under the following link:
Https://ftp.csl-computer.com/pub/drivers/ipcam/49982_Gadget_ip_cam/
Download and install the "SDcardTool" application. Follow the installation wizard during installation.
Remove the SD card from the camera and connect it to the computer with the help of a card reader. After it, start the application “SDcardTool”. Click on “Select Path” in order to select the path where the contents of the SD card should be placed. Click on “Export data” to start the process. After this, you will find the SD card files in the folder on the specified path.

10 Safety instructions and liability disclaimer
Never try to open the device to carry out repairs or conversions. Avoid contact with mains voltages. Do not short-circuit the product. The device is not certified for use in the open air; only use it in dry conditions. Protect it from high humidity, water and snow. Keep it away from high temperatures. Do not subject the device to sudden changes in temperature or heavy vibration as this might damage electronic components. Examine the device for damage before using it. The unit should not be used if it has received an impact or has been damaged in any other way. Please observe national regulations and restrictions.
Do not use the device for purposes other than those described in the instructions. This product is not a toy. Keep it out of the reach of children or mentally impaired persons. Any repair or alteration to the device not carried out by the original supplier, will invalidate the warranty or guarantee. The product may only be used by persons who have read and understood these instructions. The device specifications may change without any separate prior notice to this effect.
11 Disposal instructions
Electrical and electronic devices may only be disposed of in accordance with the European WEEE Directive and not with household rubbish. Components must be disposed of or recycled separately as dangerous, toxic elements can inflict sustained damage on the environment if they are disposed of incorrectly. As a consumer, you are bound by the Electrical and Electronic Devices Act (ElektroG) to return electrical and electronic goods free of charge at the end of their useful life to the manufacturer, the place of purchase or to specially set up, public collection points. The details in each case are governed by national law. The symbol on the product, the operating instructions and/or the packaging refers to these regulations. By separating materials in this way, recycling and disposing of old devices, you are making an important contribution towards protecting our environment.


WEEE guideline: 2012/19/EU
WEEE register number: DE 94495668
WD Plus GmbH, herewith declares that this product 301588/20161222SZ108 conforms to the principle requirements and other relevant stipulations of Directive 1999/5/EG. The complete Declaration of Conformity can be obtained from: WD Plus GmbH, Wohlenbergstraße 16, 30719 Hanover
natural_image
Three gray button icons: wrench, plus sign, and refresh symbol (no text or labels)natural_image
Line drawing of a rotary device with rotating buttons and a pointer, no text or symbols presentnatural_image
Circular mechanical or electrical component with four directional arrows pointing inward (no text or symbols)https://ftp.csl-computer.com/pub/drivers/ipcam/49982_Gadget_ip_cam/
natural_image
User interface toolbar with three function icons: wrench, plus sign, and refresh (no text or labels)natural_image
Line drawing of a rotary device with rotating buttons and a pointer, showing no text or symbols.natural_image
Circular mechanical component with four directional arrows (triangle, arrow, circle, triangle) pointing at a central hole (no text or symbols)9 Lire la carte SD
https://ftp.csl-computer.com/pub/drivers/ipcam/49982_Gadget_ip_cam/
natural_image
User interface toolbar with three function icons: wrench, plus sign, and refresh (no text or labels)natural_image
Line drawing of a rotary device with rotating buttons and a scroll wheel (no text or symbols)natural_image
Circular mechanical component with four directional arrows pointing inward (no text or symbols)https://ftp.csl-computer.com/pub/drivers/ipcam/49982_Gadget_ip_cam/
- CLOUD IP CAMERA
- Scope of supply
- Technical data
- Product details
- Initial use
- Setting up via Ethernet
- Accessing the web interface
- WiFi network modes
- Hotspot mode (iOS only)
- Client mode
- Configuring the video quality
- Web interface
- Reading out the SD card
- Safety instructions and liability disclaimer
- Disposal instructions
- Lire la carte SD
Brand : Aplic
Model : 301588
Category : Camera