39385 - Switch Lindy - Free user manual and instructions
Find the device manual for free 39385 Lindy in PDF.


User questions about 39385 Lindy
0 question about this device. Answer the ones you know or ask your own.
Ask a new question about this device
Download the instructions for your Switch in PDF format for free! Find your manual 39385 - Lindy and take your electronic device back in hand. On this page are published all the documents necessary for the use of your device. 39385 by Lindy.
USER MANUAL 39385 Lindy
150m Cat.6 DisplayPort 1.2 & USB HDBaseT KVM Extender
User Manual English
Please read the following safety information carefully and always keep this document with the product.
Failure to follow these precautions can result in serious injuries or death from electric shock, fire or damage to the product.
Touching the internal components or a damaged cable may cause electric shock, which may result in death.

text_image
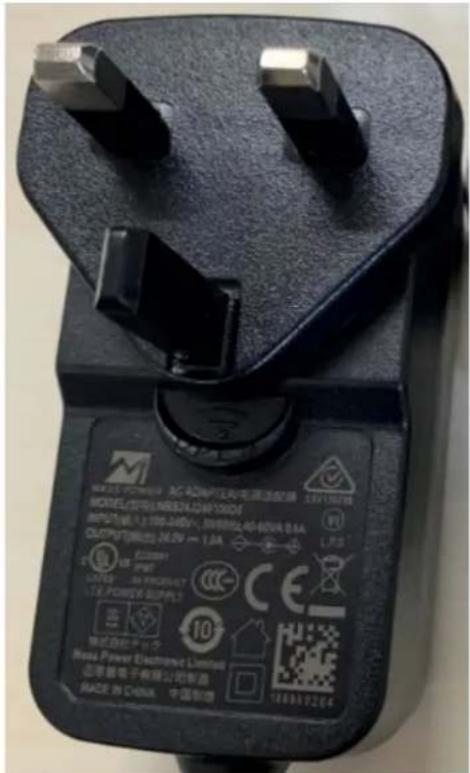
DANGER ELECTRIC SHOCK RISKThis device is a switching type power supply and can work with supply voltages in the range 100 - 240 VAC For worldwide usability four different AC adapters are enclosed: Euro type, UK type, US/Japan type and Australia/New Zealand type. Use the appropriate AC adapter as shown in the picture and ensure it is firmly secured in place and does not detach by pulling before installing into a power socket.
To reduce risk of fire, electric shocks or damage:
- Do not open the product nor its power supply. There are no user serviceable parts inside.
■ Only qualified servicing personnel may carry out any repairs or maintenance.
■ Never use damaged cables. - Do not expose the product to water or places of moisture.
- Do not use this product outdoors it is intended for indoor use only.
- Do not place the product near direct heat sources. Always place it in a well-ventilated place.
- Do not place heavy items on the product or the cables.
- Please ensure any adapters are firmly secured and locked in place before inserting into a wall socket.
Instructions for Use of Power Supply
To connect the adapter
Slide the desired plug adapter into the power supply until it locks into place.
To remove the adapter
Press the push button latch.
While pressed, remove the adapter.
text_image
MODEL POWER AC ADAPTE/电源适配器 MODEL/型号:LM8324.04010001 INPUT值:2.000-340V, 0.000A-40-80VA 0.1A OUTPUT输出:26.2V ~ 1.0A Eccaser PPT LTS POWER SUPPLY 10+ 单试自控子电路 Bass Power Electronic Limited 功率量电子有限公司制图 RACE IN CHINA 中国制造 166918264Introduction
Thank you for purchasing the 150m Cat.6 DisplayPort 1.2 & USB HDBaseT KVM Extender. This product has been designed to provide trouble free, reliable operation. It benefits from both a LINDY 2-year warranty and free lifetime technical support. To ensure correct use, please read this manual carefully and retain it for future reference.
The Lindy Cat.6 DisplayPort 1.2 HDBaseT KVM Extender is a high-performance, reliable solution for extending high quality DisplayPort signals over distances up to 150m (492.12ft) with standard Cat.6 or above network cable. Support for DisplayPort 1.2 allows for the transmission of highly detailed 4K Ultra HD resolutions, perfect for eye catching digital signage or detailed content in medical setups.
This extender also supports lossless audio formats including Dolby Digital Plus and DTS-HD to add powerful multi-channel sound to video content, providing an enhanced experience and sense of realism for the viewer.
USB KM connectivity allows for a full control of a DisplayPort PC from a local console, which can be stored in a secure or controlled temperature environment, while seamlessly providing consistent video content to the display.
HDBaseT™ and the HDBaseT Alliance logo are trademarks of the HDBaseT Alliance.
Please Note: The quoted lengths and resolutions are possible with a direct connection between Transmitter and Receiver using good quality Cat.6 cable. Using a different cable type, introducing couplers, wall plates or patch panels may result in a reduction of possible distances.
Package Contents
■ DisplayPort 1.2 HDBaseT KVM Extender, Transmitter
■ DisplayPort 1.2 HDBaseT KVM Extender, Receiver
■ USB 2.0 Type A to Type B cable, 1.5m
■ 2 x 3-Pin Terminal Block
■ IR Emitter Cable, 1.5m
■ IR Receiver Cable, 1.5m
■ 4 x Mounting Ears & 8 x Screws
■ 24VDC 1A Multi-country Power Supply (UK, EU, US & AUS), Screw Type DC Jack: 5.5/2.1mm
■ Lindy Manual
Features
■ Supports resolutions up to 3840x2160@60Hz 4:4:4 8bit
■ Extends DisplayPort 1.2 & KM signals up to 150m (492.12ft) distances with standard network cable
■ Extends digital audio signals up to 7.1CH
- Utilises smart methods of compression for visually lossless transmission
■ Control a single DisplayPort PC, keyboard and mouse via KVM function
■ Advanced EDID management
■ Bi-directional IR Control (20-60KHz) of equipment via the extender
■ Supports bi-directional RS-232 pass-through
■ Supports bi-directional POC (Power over Cable) function
■ Screw Type DC Jack for a secure power connection
Specification
■ Supports DisplayPort 1.2a (21.6Gbps), HDCP 2.2
■ Supports USB 1.1
- The following distance and resolution combinations are possible when using high quality Cat.6 U/UTP or F/UTP solid core cable:
- 150m: 1920x1080@60Hz 4:4:4 8bit
- 100m: 3840x2160@60Hz 4:4:4 8bit
■ Supported audio formats:
- 2CH LPCM 32\~96KHz
- 5CH Dolby Digital Plus
- 7CH DTS-HD
■ ESD Protection: ± 8kV (air-gap discharge)
■ Human Body Model: ± 4kV (contact discharge)
■ Operating Temperature: 0°C - 40°C (32°F - 104°F)
■ Storage Temperature: -20^ - 60^ ( -4^ - 140^ )
■ Relative Humidity: 20 - 90% RH (Non-condensing)
■ Black, metal housing
■ Power Requirements: AC100-240V 50/60Hz
■ Power Consumption: 13.2W Maximum
Installation and Operation
Transmitter Front and Rear

text_image
PWR ① COPY- STD- EDID SERVICE ② ③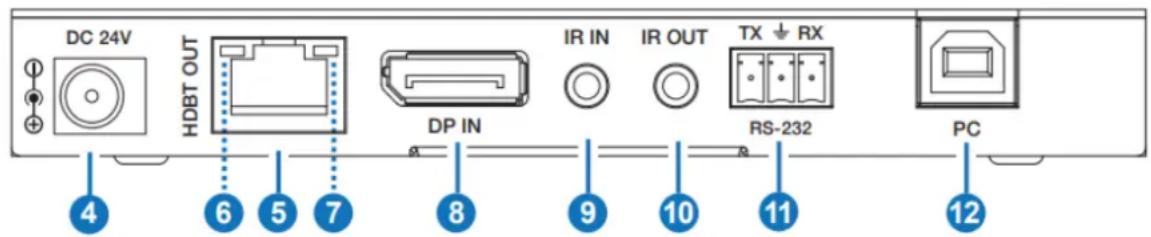
text_image
DC 24V HDBT OUT DP IN IR IN IR OUT TX ↓ RX RS-232 PC 4 6 5 7 8 9 10 11 12- Power LED: Indicates Power.
- EDID: Dip switch for EDID setting.
- COPY: copy the EDID from the DP OUT port on the Receiver.
- SDT: 1080P 2CH.
- SERVICE: Reserved for firmware updates.
- DC 24V: Connect the 24VDC 1A PSU to an AC wall outlet and securely connector to the Transmitter or Receiver. This is only required at one side of the installation.
- HDBT OUT: Connect the Receiver unit using a single Cat.6 or above cable for all data signals. Please do not connect to a network port.
-
Link indicator LED (green):
-
Illuminating when Transmitter and Receiver are connected.
- Flashing when the connection between Transmitter and Receiver is not stable.
-
Not illuminated when there is no connection between Transmitter and Receiver.
-
Data Signal Indicator LED (yellow):
- Illuminating when DP signal is with HDCP.
- Flashing when DP signal is without HDCP.
- Not illuminated when there is no DP signal.
- DP IN: Connect to a DisplayPort source device.
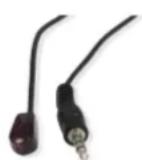
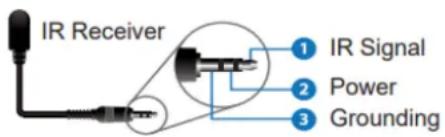
- IR IN: Connect the supplied IR Receiver cable for IR signal reception. Ensure the remote being used is within the direct line-of-sight of the IR Extender.
- IR OUT: Connect the supplied IR Transmitter cable for IR signal transmission. Place the IR Transmitter in direct line-of-sight of the equipment to be controlled.
- RS-232: 3-pin phoenix port, connect to a PC or serial control device.
- PC: USB Type B Input port, connect to the PC or laptop using a USB Type B to A cable.
Receiver Front and Rear
text_image
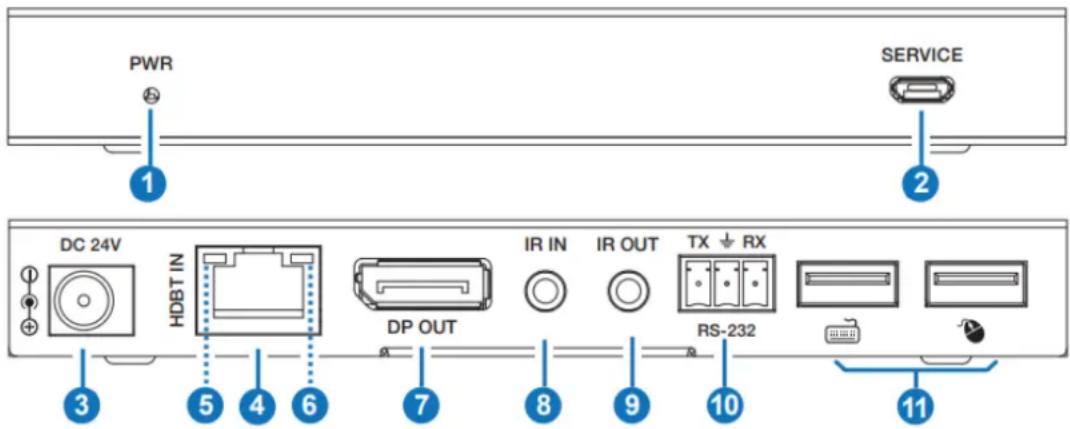
PWR SERVICE 1 2 DC 24V HDBT IN IR IN IR OUT TX ↓ RX DP OUT RS-232 3 5 4 6 7 8 9 10 11- Power LED: Indicates Power.
- SERVICE: Reserved for firmware updates.
- DC 24V: Connect the 24VDC 1A PSU to an AC wall outlet and securely connector to the Transmitter or Receiver. This is only required at one side of the installation.
- HDBT IN: Connect the Transmitter unit using a single Cat.6 or above cable for all data signals. Please do not connect to a network port.
-
Link indicator LED (green):
-
Illuminating when Transmitter and Receiver are connected.
- Flashing when the connection between Transmitter and Receiver is not stable.
-
Not illuminated when there is no connection between Transmitter and Receiver.
-
Data Signal Indicator LED (yellow):
-
Illuminating when DP signal is with HDCP.
- Flashing when DP signal is without HDCP.
-
Not illuminated when there is no DP signal.
-
DP OUT: Connect to a DisplayPort display.
- IR IN: Connect the supplied IR Receiver cable for IR signal reception. Ensure the remote being used is within the direct line-of-sight of the IR Extender.
- IR OUT: Connect the supplied IR Transmitter cable for IR signal transmission. Place the IR Transmitter in direct line-of-sight of the equipment to be controlled.
- RS-232: 3-pin phoenix port, connect to a PC or serial control device.
- USB: Connect to a USB Type A keyboard and mouse.
Important! Before starting the installation, please ensure that all devices are powered off.
- Connect a DisplayPort source device to the Transmitter unit using a DisplayPort cable and USB Type B cable.
- Connect one end of the Cat.6/7 cable to the HDBT OUT port on the Transmitter and the other end to the HDBT IN port of the Receiver. U/UTP or F/UTP solid core installation cables are recommended. For cable lengths please see the Specifications of this manual.
- Use another DisplayPort cable to connect a display to the DP OUT port on the Receiver unit.
- Connect a mouse and keyboard to the receivers USB Type A ports.
- Plug the DC power supply into the Transmitter or Receiver and switch on.
- Power on the source device and display to complete the installation.
In addition to the installation steps outlined above this DisplayPort extender can also provide the following additional/optional functionality:
RS-232 Serial
The Transmitter and Receiver both feature a 3-pin phoenix block serial connection for the extension of control signals.
Infrared Control
The Transmitter and Receiver units both feature an IR In and Out port, with 1 pair of IR extension cables provided. The extension cables allow an IR remote control to be used from the Transmitter to the Receiver or vice versa.
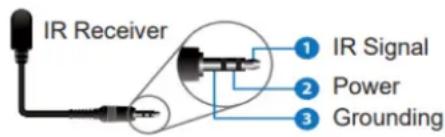
IR Receiver
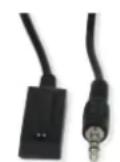
IR RECEIVER
IR Transmitter
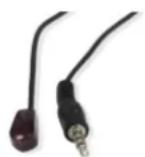
IR BLASTER
text_image
IR Receiver ① IR Signal ② Power ③ Grounding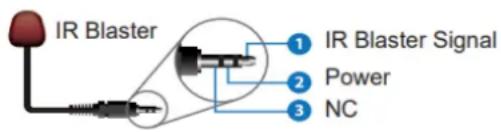
text_image
IR Blaster ① IR Blaster Signal ② Power ③ NCTroubleshooting
There is no display on the screen.
It has been found that there are significant differences in the cable lengths/types and even input ports which can be used on different brands of display using DisplayPort resolutions. If problems are experienced, please apply the following steps:
■ Try a different input port on the display.
■ Reduce the cable length on the Input and Output to 1m.
■ Try a different type of 1m DisplayPort Cable.
- Check that the DC plug and jack used by the external power supply is firmly connected.
- Check that the Cat.6/7 cable is plugged in correctly.
- Power off all the devices, then power on in this order: first, the extender, then the display and finally the source.
■ Reduce the length of Cat.6/7 or DP cable used or use a higher quality cable.
Lindy regularly checks and tests our product range to ensure maximum compatibility and performance. For the most up to date version of this manual, please refer to your local Lindy website, search for the relevant part number and find the manual under Downloads.
Sicherheitshinweise
! GEFAHR !
text_image
GEFAHR GEFAHR EINES STROMSCHLAGSEinführung
IR Receiver
IR Emitter
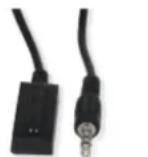
IR RECEIVER
IR BLASTER
text_image
IR Receiver ① IR Signal ② Power ③ Grounding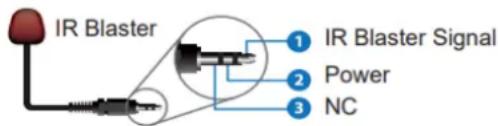
text_image
IR Blaster ① IR Blaster Signal ② Power ③ NCFehlersuche
text_image
IR Receiver 1 IR Signal 2 Power 3 Groundingtext_image
IR Blaster 1 IR Blaster Signal 2 Power 3 NCDépannage
text_image
IR Receiver 1 IR Signal 2 Power 3 Grounding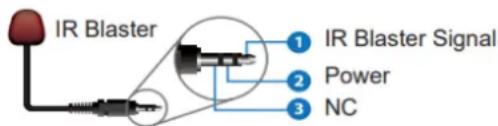
text_image
IR Blaster ① IR Blaster Signal ② Power ③ NCtext_image
IR Receiver ① IR Signal ② Power ③ Grounding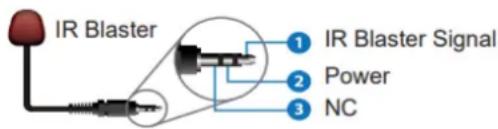
text_image
IR Blaster 1 IR Blaster Signal 2 Power 3 NCWEEE (Waste of Electrical and Electronic Equipment), Recycling of Electronic Products
Europe, United Kingdom
In 2006 the European Union introduced regulations (WEEE) for the collection and recycling of all waste electrical and electronic equipment. It is no longer allowable to simply throw away electrical and electronic equipment. Instead, these products must enter the recycling process. Each individual EU member state, as well as the UK, has implemented the WEEE regulations into national law in slightly different ways. Please follow your national law when you want to dispose of any electrical or electronic products. More details can be obtained from your national WEEE recycling agency.
LINDY declares that this equipment complies with relevant European CE requirements.
LINDY declares that this equipment complies with relevant UKCA requirements.
FCC Certification
This equipment has been tested and found to comply with the limits for a Class B digital device, pursuant to part 15 of the FCC Rules. These limits are designed to provide reasonable protection against harmful interference in a residential installation.
You are cautioned that changes or modification not expressly approved by the party responsible for compliance could void your authority to operate the equipment.
This device complies with part 15 of the FCC Rules.
Operation is subject to the following two conditions:
- This device may not cause harmful interference, and
- This device must accept any interference received, including interference that may cause undesired operation.
The enclosed power supply has passed Safety test requirements, conforming to the US American versions of the international Standard IEC 60950-1 or 60065 or 62368-1.
LINDY Electronics Ltd