Medicus Prestige S - Blood pressure monitor BOSO - Free user manual and instructions
Find the device manual for free Medicus Prestige S BOSO in PDF.


User questions about Medicus Prestige S BOSO
0 question about this device. Answer the ones you know or ask your own.
Ask a new question about this device
Download the instructions for your Blood pressure monitor in PDF format for free! Find your manual Medicus Prestige S - BOSO and take your electronic device back in hand. On this page are published all the documents necessary for the use of your device. Medicus Prestige S by BOSO.
USER MANUAL Medicus Prestige S BOSO
Upper arm blood pressure monitor
Tensiomètre bras
text_image
Scanned document with multiple form fields and a small diagram, likely a technical or administrative form.1 Blutdruckpass

natural_image
Diagram of a battery pack with four cells and external circuitry (no text or symbols)Bild 1
Contents of package....46
Symbols on the blood pressure monitor 47
Symbols on the power supply unit 50
Quick guide....51
Introduction......52
Purpose....53
Blood pressure values....54
Systolic and diastolic blood pressure value....54
WHO blood pressure cut-off values....54
Starting up....56
Inserting batteries....56
Battery status....57
Settings....58
General instructions for self-measurement 60
Preparing to measure your blood pressure....62

Table of contents

Note on cuff sizes....62
Attaching the cuff....63
Measuring your blood pressure....66
Interrupting a measurement....67
Measurement display....68
Note on guest mode....68
Completing the blood pressure record card /
Retrieving average and classification scale....70
Displaying stored individual readings and emptying the memory....72
Mains operation....73
Error messages....74
Cleaning and Disinfection....76
Warranty Conditions 77
Customer service / Disposal 78
Technical data....79
Calibration checks - Testing instructions
(for trained specialist staff only) 82
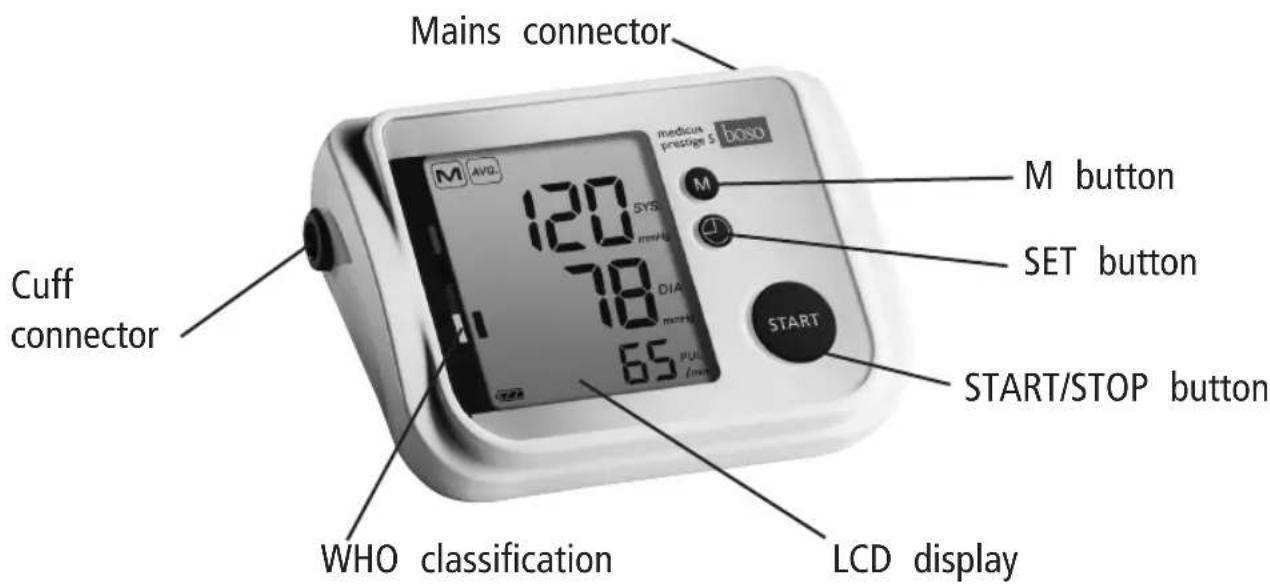
Product features
text_image
Mains connector medicare preslager s boxo M AVG 120 SYS mms/kg 78 DIA mms/kg 65 M button SET button START/STOP button Cuff connector WHO classification LCD display
Contents of package
1 boso-medicus prestige S blood pressure monitor
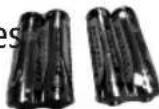
4 LR 6 (AA) batteries

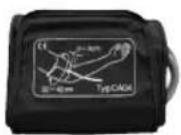
1 CA 04 universal cuff
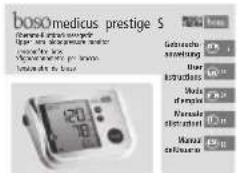
1 User instructions
text_image
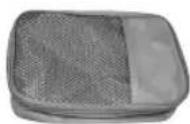
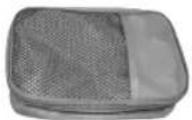
bosOmedicus prestige S Gesamtus sastigus Open the minutes minutes minutes minutes minutes minutes minutes minutes minutes minutes minutes minutes minutes minutes minutes minutes minutes minutes minutes minutes minutes minutes minutes minutes minutes minutes minutes minutes minutes minutes minutes minutes minutes minutes minutes minutes minutes minutes minutes minutes minutes minutes minutes minutes minutes minutes minutes minutes minutes minutes seconds1 Case
WHO classification sticker
text_image
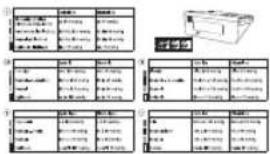
Scanned document with multiple form fields and a small diagram, likely for technical or administrative purposes.1 Blood pressure record card

Symbols on the blood pressure monitor
Symbol Function/meaning
| START | START/STOP button |
| M | M button (Memory button) |
| SET button | |
| Direct current | |
| SN | Serial number |
| Year of manufacture | |
| Type BF: The device, cuff and tubing have been designed to protect the patient against electric shock. | |
| Reading in progress. Flashes as soon as a heartbeat was detected. |
Symbols on the blood pressure monitor

Symbol Function/meaning
 | Cardiac rhythm disorder or movement during reading. |
 | Movement during measurement. |
 | Three consecutive measurements |
 | Stored value |
 | Display average value |
 | Inflation pressure |
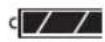 | Battery fully charged. |
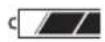 | Battery partly discharged. |
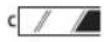 | Replace battery as soon as possible. |
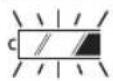 | Flashing! No further reading possible.Replace battery. |
Symbols on the blood pressure monitor
Symbol Function/meaning
| Protect against liquids | |
| SYS | Systolic blood pressure in mmHg |
| DIA | Diastolic blood pressure in mmHg |
| PUL | Pulse per minute |
| CE0124 | Device complies with the European Medical Devices Directive. |
| Device must not be discarded with household waste. | |
| Manufacturer | |
| Read instructions for use | |
| Polarity of power supply port |

Symbols on the power supply unit

 | Only for use in enclosed spaces. |
 | Protection class II device |
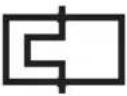 | Thermal fuse |
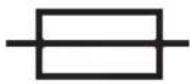 | Fuse |
 | Device complies with the European Medical Devices Directive |
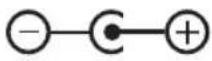 | Polarity of the mains adapter plug |
Quick guide
→Insert batteries, ensure correct positioning (P. 56)
→Connect cuff to monitor (P. 62)
→Attach cuff (P. 64)
→ Start (and stop) a measurement by pressing the START button (P. 66+67)
Measured systolic, diastolic and pulse values are displayed after the measurement is completed (P. 68)
stored (ALL), with WHO classification. The number of measurements stored is shown under 'ALL'. This is followed by displays of the morning averages (AM), the afternoon averages (PM) and then each individual reading.
This quick guide does not replace the detailed information on the use and safety of the blood pressure monitor featured in the user instructions.

Please be sure therefore to read the user instructions!
→Retrieving values from memory (p. 70): press the M button while the device is switched off. The first figure displayed is the average of all measurements
Introduction

Dear Customer, We are delighted that you have decided time, as correct blood pressure readings to purchase a boso blood pressure mon-can only be obtained if the instrument is itor. The boso brand is synonymous withoperated correctly. optimal quality and precision and is also in these user instructions, "→" means an number 1 among professionals: 96% of action by the user. all German general practitioners, physicians and internists work in practice with To get help concerning usage or mainten-blood pressure instruments from boso ance please contact your dealer or the (API survey conducted by GfK 01/2016). manufacturer (contact details can be The experience gained from decades of found on the back cover of this manual). use by profession-als has also been incorporated into all the patient monitors for An unexpected operating condition or an home measurement. incidence which has worsened the health This instrument has also passed our strictondition or could have worsened the quality control procedures and is your rehealth condition should be reported to the able partner for monitoring your blood manufacturer immediately. pressure values.

Please read these user instructions If the instrument is to be sold, ensure that these user instructions are enclosed.
Introduction
Purpose
The boso-medicus prestige S blood pres- Non-invasive recording of systolic and sure monitor is suitable for patients withdiastolic blood pressure and pulse rate in an upper arm circumference between 16 adults. Not suitable for use on newborn and 48 cm (see p. 62 for cuff sizes). babies and infants. The device is suitable for self-measurement at home. The
The use of accessories not referred to inpatient is regarded as the operator. these instructions for use can undermine safety. The instrument can be used with a
The instrument can be used with any circumference as shown on the corre-
Wireless communication devices, such as sponding cuff. home networking devices, mobile phones, cordless phones and their base stations, walkie-talkies can affect this blood pressure monitor. Therefore, a minimum distance of 12 inch should be kept from such devices.

Blood pressure values
To determine the blood pressure, two vaDiastolic (lower) blood pressure:
ues need to be measured:
Thisispresent whentheheart muscleexpands and fills with blood again.
●Systolic (upper) blood pressure:
This is produced when the heart muscle blood pressure measurement values are contracts and blood is forced into the expressed in mmHg (mm of mercury). blood vessels.

| The World Health Organization (WHO) has defined the following cut-off values for assessing blood pressure: | ||
| systolic diastolic | ||
| High blood pressure (hypertension) over | 140 mmHg over 90 | mmHg |
| Borderline normal blood pressure 130 to 139 mmHg 85 to 89 mmHg | ||
| Normal blood pressure 120 to 129 mmHg 80 to 84 mmHg | ||
| Optimum blood pressure up to 119 mmHg up to 79 mmHg | ||
Blood pressure values
Whether medical treatment is necessary than at the doctor's. The German depends not only on the blood pressure, Hypertension League has therefore defi-but also on the patient's risk profile. ned lower cut-off values for home measu-Please contact your GP if one of the valements:
ues (systole, diastole) consistently exceeds the cut-off point for high blood pressure.
Home measurement: 135/85 mmHg
Self-measurement of blood pressure oftenMeasurement in the produces somewhat lower values at homodoctor's surgery: 140/90 mmHg

Starting up
The device must be installed and put into! Never mix old and new batteries or operation in accordance with the instruc-different makes. tions in this manual.

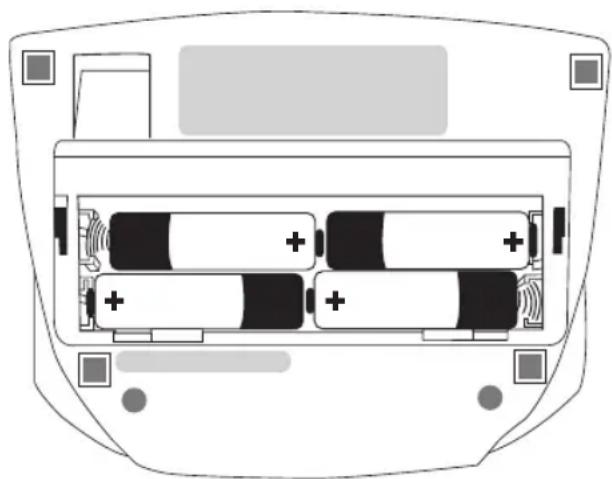
natural_image
Diagram of a battery pack with four cells and two charging elements, no text or symbols presentIllustration 1
→Use only high quality leak-proof batteries of the correct specifications (see "Technical data" P. 79).
⚠️If the batteries are not inserted correctly, the monitor will not work and this may cause the batteries to heat up and leak, damaging the monitor.
→Inserting the batteries
The battery compartment is located on the underside of the monitor. Insert batteries in the battery compartment as shown in illustration 1.
→Remove the batteries if the monitor is not to be used for any length of time.
⚠️Batteries that are short-circuited can become hot and cause burning.
Starting up
The monitor has a battery status display⚠️Care for the environment (see P. 48)

Battery fully charged.

Battery partially charged.

Replace battery soon.
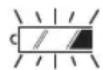
Flashing! No further measurements possible. Replace battery.
Do not dispose of used batteries and charger units in domestic waste.
You can take these to collection sites for used batteries or special waste.
Contact your local authority for information.

Settings

Use the SET button() to select settings be displayed and the automatic switch-off Press the START button to change any period of the device will be extended to 60 ting. minutes. N.B., this significantly increases
-
Press the SET button once = current
-
Press the SET button twice = current month
-
Press the SET button three times = 0 rent day
-
Press the SET button four times = cur hour
-
Press the SET button five times = current minute
-
Press the SET button six times = 12h/24pears and an extended set of measure-clock mode. If you select 'off', no time wants is performed:
-
Press the SET buttonseven times = select inflation pressure in mmHg (AUTO = inflation pressure is automatically selected)
-
Press the SET button eight times = automatic sequence of three consecutive measurements is switched on or off
If you select this option, the 3() symbol
Settings
There is a 60-second interval after the first measurement has been performed (display -1-). The screen shows a timer counting down from 60. Then a second measurement is started (-2-), and after a further 60-second interval a third measurement (-3-) is performed. Once these three measurements have been completed, the average of the three readings is displayed visually and stored.
- Press the SET-button to exit the setting. Setting will be finished after 3 minutes you don't press any button.

General instructions for self-measurement

- Fluctuations in blood pressure are quite normal. Even when measurements are repeated, there can be marked differences. Single or irregular measurements do not provide reliable information about the actual blood pressure. A reliable evaluation is only possible if reg-5. ular measurements are taken under comparable conditions and themeasurement values entered in the blood pressure record card.
- ⚠️Self-testing does not mean self-treatment. Do not on any account change the dose of medicine prescribed by your doctor of your own accord.
- Always measure your blood pressure
- Irregular heartbeats can affect the accu-from the arm with the higher blood racy of the monitor or result in incorrect pressure values (where not required measurements (see page 75). otherwise (see page 64)).
Incorrect measurements can also occur in patients with a weak pulse (possibly in patients wearing a pacemaker, for example). The blood pressure monitor itself has no effect on the pacemaker.
The device has not been validated for use on pregnant women.
Always take the measurement in a calm and relaxed state.
You are recommended to check your blood pressure twice a day—in the morning on getting up and in the evening once you have relaxed after work. - Always measure your blood pressure
from the arm with the higher blood pressure values (where not required otherwise (see page 64)).
General instructions for self-measurement
To do this, measure the blood pressure first in both arms and thereafter always from the arm with the higher blood pressure.

Preparing to measure your blood pressure
Note on cuff sizes:
Attach the cuff to the monitor by pressing the plug (click) into the socket on the left
The monitor may only be used with the following cuff types. These should be chosen according to the upper arm circumference printed on them.

| Type | Arm Order numbercircumference | ber |
| CA01 | 22 – 32 cm | 143-4-764 |
| CA02 | 32 – 48 cm | 143-4-756 |
| CA03 | 16 – 22 cm | 141-4-771 |
| CA04 | 22 – 42 cm | 143-4-765* |
* Universal cuff supplied as standard.
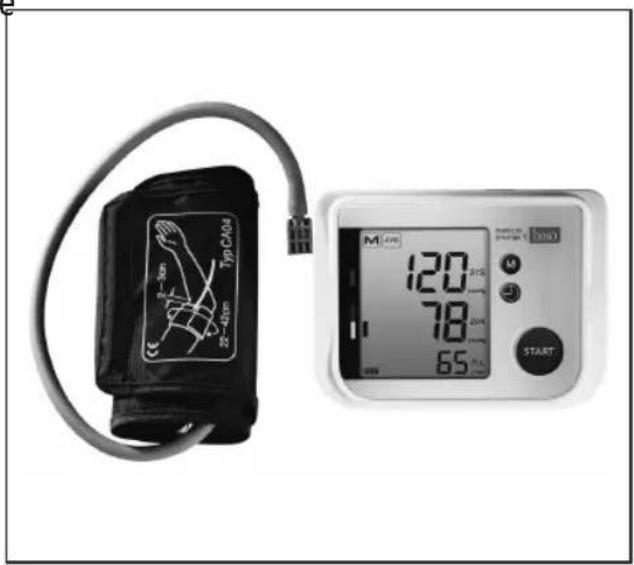
text_image
Typ CA04 22-48m 1-3m 120 78 65 STARTIllustration 2
Preparing to measure your blood pressure
Observe the following instructions Attaching the cuff
when measuring your blood pressure:
The measurement should be taken from

Avoid smoking or drinking coff for one hour before measuring your blood pressure.
⚠ In the case of tightly fitting outer clothing, ensure that the blood supply to

Sit comfortably for the blood preshe arm is not cut off when the sleeve is sure measurement. Support your rolled up (if necessary remove the article of back and arms. Do not cross your clothing before taking the measurement). legs. Place your feet flat on the
floor. Relax for 5 minutes before taking a measurement. Do not move during the measurement.
→Open out the cuff into the shape of a ring and slide it over the upper arm until the bottom edge of the cuff is about 2-3 cm above the elbow. The cuff must be positioned so that the marking is over the artery (see illustration 3).
Preparing to measure your blood pressure

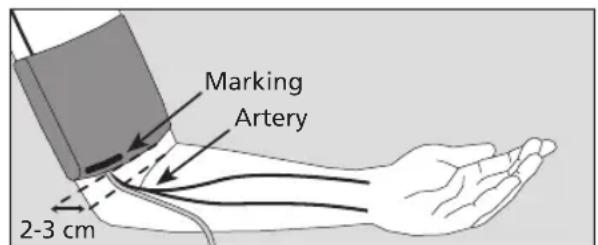
text_image
Marking Artery 2-3 cmIllustration 3
⚠ Other medical devices being used on the same arm at the same time may malfunction during measurement.
⚠ The cuff must not be too tight. There should be enough space to fit roughly two fingers between arm and cuff.
The metal ring should never lie over the artery (see illustration 3) as this may produce a false reading.
er-Grasp the end of the cuff that feeds though the metal ring and wrap it around the outside of your arm. Attach the Velcro fastener by applying gentle pressure.
⚠️Do not attach the cuff over wounds this can cause further injuries.
⚠ Ensure that the cuff is not attached an arm where arteries or veins are und going or have undergone medical treatment (e.g. shunt).
⚠ For women who have had a breast amputated, do not attach the cuff to the arm on the amputated side of the body.
Preparing to measure your blood pressure
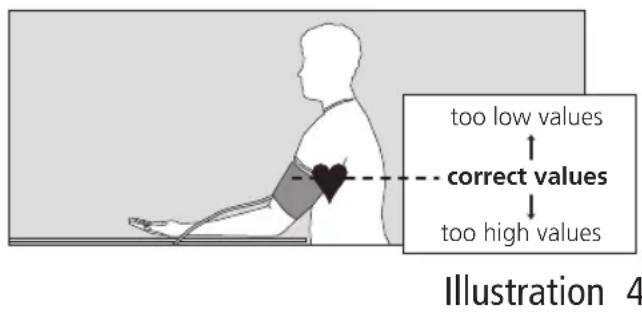
→Place your arm with the cuff attached on the table, holding it relaxed and slightly bent so that the cuff is level with your heart.
⚠ The blood pressure measurement should not prevent the flow of blood for an unnecessary length of time (> 2 minutes). If the monitor fails to function correctly, remove the cuff from the arm.
text_image
too low values correct values too high values Illustration 4Excessive frequent measurements cause injury by restricting blood flow.

⚠ The device may not be used by unsupervised children.
⚠️Do not use the device near infants. This can lead to accidents or damage.
⚠️Do not start the device without putting on the cuff.
There are small parts that may cause a choking hazard if swallowed by mistake by infants.

Do not talk during the measurement.
⚠️Check that the air tube is not kinked during the measurement. This could cause congestion of the blood flow and subsequent injury.

⚠️If the ambient temperature changes significantly, leave the device about an hour to adapt to the new ambient temperature before using it.
The performance of the device can be affected by excessive temperature, humidity or altitude.
Measuring your blood pressure
→Start the measurement with the START button

⚠️Now hold the arm absolutely still and do not talk.
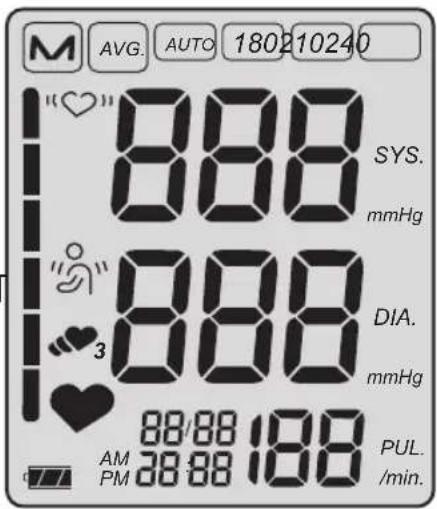
All the items on the LCD display appear briefly to indicate that the monitor is now ready for use (see illustration 5).
text_image
M AVG. AUTO 180210240 "♥" 888 SYS. mmHg "♥" 888 DIA. mmHg 3 AM 88/88 188 PUL. PM 38:88 188 /min.Illustration 5
Measuring your blood pressure
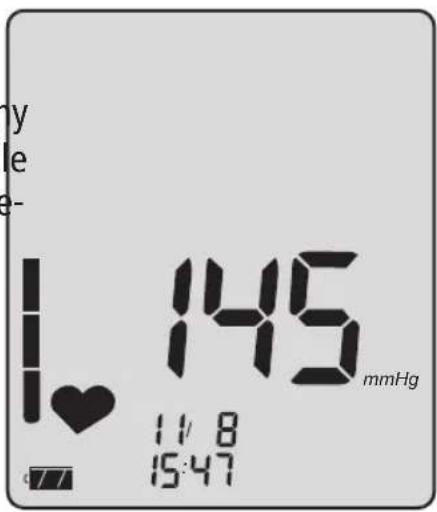
The pump starts to inflate the cuff to the during the measurement phase the quired pressure. Increasing cuff pressure descending cuff pressure and the flashing displayed. ♥ symbol are displayed (see illustration 6).
When the required pressure is reached, the pump switches off and the air is rePlease keep your arm still if the symbol leased slowly from the cuff. appears while a measurement is being taken.
ta-N
⚠️Interrupting a measurement:
A measurement can be interrupted at any stage by pressing the START button while taking a measurement again; the cuff deflates automatically.
text_image
y le - I I ♥ 145 mmHg 11/8 15:47Illustration 6
Measurement display
After the end of the measurement, the built valve opens automatically and the cuff deflates rapidly.
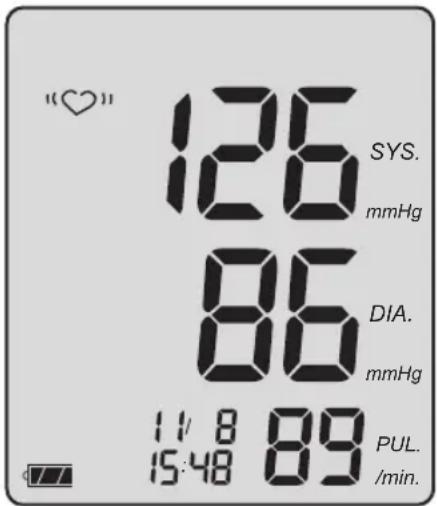
The measured blood pressure values (systole, diastole, pulse) are displayed (see illustration 7).
The measurement is stored automatically (except for guest mode, see below). If the memory store is full (90 measurements), the oldest measurement is deleted and the current one stored.

text_image
"♥" 126 SYS. mmHg 86 DIA. mmHg 11/8 89 15:48 PUL. /min.Illustration 7
Note on guest mode:
If a measurement value is not be kept, press „M“ while the measured values are still on display.
Invalid measurements with an "Err" message (see page 74) are not stored.
If the symbol appears after the measurement, it is recommended that the measurement is repeated, holding the arm completely still. If the symbol
Measurement display
appears again even with the arm held still unit switches itself off automatically this may be an indication of an irregular after about 1 min. To repeat a measure-heartbeat. Please discuss this with your ment, press the START button again doctor at your next visit. briefly.
The symbol indicates that the arm moved during measurement. You are advised to take another measurement. The device switches off automatically after 60 seconds (or 60 minutes, see settings). Press the START button again to repeat a measurement.
Blood pressure is a dynamic parameter and can be affected by the patient's position, e.g. sitting, standing, lying, moving, before or during the measurement, physical condition (stress, disease, etc.). Excess
Allow at least two minutes between measurements.
Excessively frequent measurements can cause injury as a result of impaired blood
→If the measurement result is obviously flow. wrong, repeat the measurement.
→If no further measurement is required, remove the cuff from the arm.
Completing the blood pressure record card Retrieving averages and classification scale
→Enter each individual value in your record card.
→Transfer the total average (ALL) into the relevant section of your blood pressure record card.
→When you have recorded 30 blood
pressure readings, retrieve your avera-If there is no reading in the memory, " " ge by briefly pressing the M button will be displayed for systole, diastole and withthedeviceswitchedoff.The pulse.
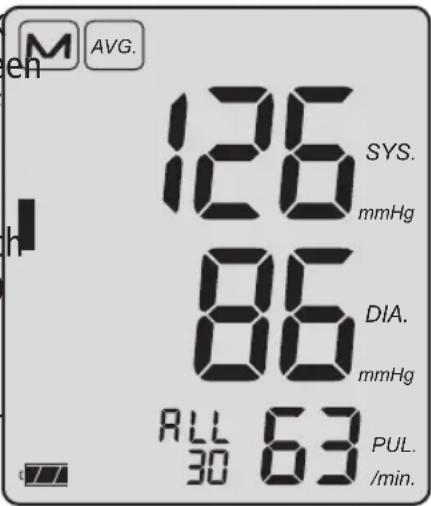
average of all stored readings will be displayed (ALL). If you press the M button repeatedly, the screen will show the average of all measurements taken between midnight and 11.59 (AM) and then those taken between noon and 23.59 (PM). The number of measurements from which the average was calculated is shown under ALL/AM/PM (see illustration 8).

Completing the blood pressure record card Retrieving averages and classification scale
When the averages are displayed, a dark rectangle appears on the left of the screen (see illustration 8) indicating the level of the average blood pressure. Use the accompanying evaluation scale (see illustration 9) to identify the range within which your blood pressure falls under the WHO classification (see page 54).
→For your information, attach the sticker (WHO classification) supplied, to the back of your unit.
text_image
M AVG. 126 SYS. mmHg 86 DIA. mmHg ALL 63 PUL. 30 /min.Illustration 8
EN
WHO classification
high blood pressure (hypertension)
borderline normal blood pressure
normal blood pressure
□ optimum blood pressure
Illustration 9
Displaying stored individual readings and emptying the memory
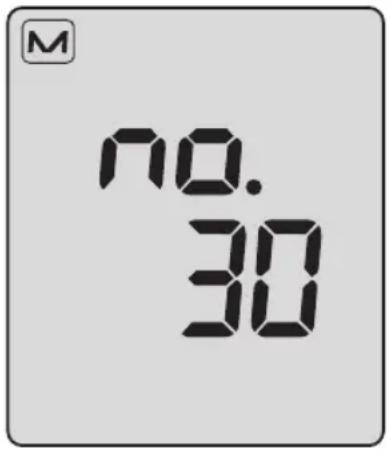
→To display the most recent reading stored, press→the M button again after retrieving the averages. The number of the measurement appears in the display (see illustration 10).
Repeated pressing of „M“ will now successively display all measurements contained in the memory as described above.

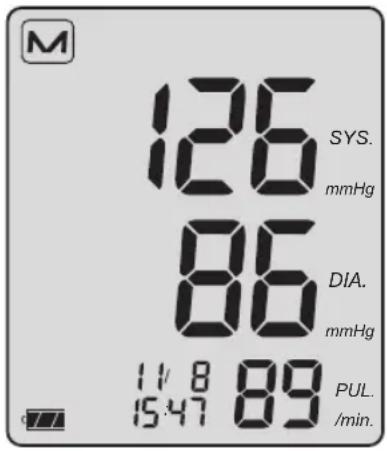
The corresponding measurement value appears after 3 seconds (see illustration 11).
text_image
M no. 30Illustration 10
text_image
M 126 SYS. mmHg 86 DIA. mmHg 11/8 89 15:47 89 PUL. /min.Illustration 11
→Pressing the START button switches off the device.
If no button is pressed, the device automatically switches off after 60 seconds.
⚠️Emptying the memory: hold down the M button for approximately 5 seconds until the Ⓜ symbol flashes. The memory is now empty.
Mains operation
The mains connection socket is located the rear of the monitor.
Do not touch the batteries, the power supply unit socket and the patient at the
Where required, use only the boso powersame time.
supply unit (order number 410-7-150).
This power supply unit produces a rectified Remove the power supply unit plug output of the correct polarity. Other comfrom the blood pressure monitor when it is
mercially available power supply units cannot in use.
cause damage to the electronic compo-
nents, which will invalidate the warranty.
There is also a risk of fire with these other
power supply units.

Error messages
If any problems occur during the measurement, the display will show an error messa instead of a blood pressure reading.
Meaning of error messages:

| Error cause: | Troubleshooting: | |
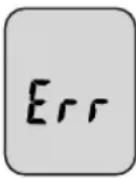 | Excessive variation in cuff pressure during measurement | Hold arm still position of cuff (see page 63) and repeat measurement. |
| No valid pulse readings Check | position of cuff (see page 63) and repeat measurement. | |
| Systole – diastole difference Check | position of cuff (see page 63) too small: and repeat measurement. | |
| Systole – diastole≤10 mmHg | ||
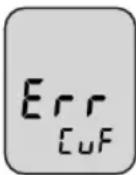 | Cause of Err CuF message: Troubleshooting: | |
| Incorrectly inflated Cuff possibly | too loose, attach cuff more firmly (see page 63) | |
Error messages
| Error cause: | Troubleshooting: | |
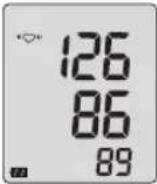 | If the symbol appears again even with the arm gheld still, this may be an indication of an irregular heartbeat.Please discuss this with your doctor at your next visit. | The measurement should be taken again, with the arm being kept completely still. |
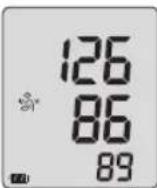 | The 'symbol indicates that the arm moved during measurement. | The measurement should be taken again, with the arm being kept completely still. |

Cleaning and Disinfection
Cleaning Monitor:
Use a soft, dry cloth to clean your mor
Cleaning Cuff:
Small stains on the cuff can be removed carefully with a proprietary washing-up liquid.
Disinfection Cuff:
For. disinfectant wipes (at least 5 minutes exposure time) of the device and the cuff, we recommend the disinfectant antifect li-quid (Schülke & Mayr). To disinfect the cuff, we recommend spray disinfection.
In particular, if the device is used on multiple users is to pay attention to regular cleaning and disinfections of the cuff.

Warranty Conditions
We give 3 years warranty from the date of claims for damages against us are sub-purchase. The purchase date has to be substantiated by the warranty.
ven by the invoice. Within the warranty pe-
period defects are eliminated free of charge in the case of justified warranty claims the After repairs the warranty period is not device has to be sent along with the originated on the whole unit, but only to that invoice to:
replaced components.
BOSCH + SOHN GMBH U. CO. KG,
Excluded from the warranty are parts subBahnhofstr. 64, D-72417 Jungingen.
ject to normal wear and tear (e.g. cuff), transport damages and any damage caused by improper handling (e.g. non-compliance with the instructions for use). Damages due to disassembly by unauthorized persons are also excluded from warranty.

Customer service
Disposal

Customer service:
Warranty and repair work must be under-
taken by trained and authorised personnel.
Do not modify this equipment without and the end of its lifespan, the monitor must be taken to a collection site for obsolete
Send the monitor, carefully packaged and electronic items.
with sufficient postage, to your authorised
dealer or directly to:
Do not dispose of monitors and batteries in the domestic waste.
At the end of its lifespan, the monitor must be taken to a collection site for obsolete
electronic items.
Please note that batteries and rechargeable batteries must be disposed of separately (local authority collection site).
Useful life device: 5 years (when used 6 times a day).
Useful life cuff: 2 years (when used 6 times a day).
Technical data
Measurement principle: oscillometric
Measurement range: Systolic: 60 to 279 mmHg Diastolic: 40 to 200 mmHg Pulse: 40 to 180 per minute
Cuff pressure: 0 to 299 mmHg
Memory store: 90 measurements
Display: LCD
Operating conditions: environmental temperature: +10°C to +40°C Relative humidity: 15 to 85% Air pressure: 800 hPa to 1060 hPa
Transport/ environmental temperature: -20^ to +60^ Storage conditions: Relative humidity: 10 to 95% Air pressure: 700 hPa to 1060 hPa

Technical data
Power supply: DC 6 V (4 x 1.5 V Mignon IEC LR 6 alkaline manganese batteries)
Alternative special option: DC 6 V power supply unit, Order No. 410-7-150

Typical battery life: 700 measurement cycles (depending on inflation pressure, frequency of use and switch-off time setting)
Battery check: symbol display in LCD window
Weight: 285 g without batteries
Dimensions (WxHxD): 140 mm x 65 mm x 105 mm
Classification: Medical device with internal energy source (in battery operation) / class II (in power supply unit operation), continuous operation mode
Applied part: Type BF ( )
Technical data
Protection against solid IP20
objects: IP classification is the degree of protection provided by enclosures in accordance with IEC 60529. This device is protected against solid foreign objects of 12mm diameter and greater such as fingers. This device is not protected against water.
Clinical test: Accuracy complies with the requirements of ISO 81060 Part 2
Maximum deviation of cuff ± 3 mmHg or 2% of the reading pressure measurement: (whichever is greater)
Maximum deviation of ± 5% pulse rate display:
Applicable standard: IEC 80601-2-30: "Particular requirements for basic safety and essential performance of automated non-invasive sphygmomanometers"

Calibration checks - Testing instructions
(for trained specialist staff only)
Calibration checks – every 2 years at the latest – must be performed by the following institutions or persons:
- Manufacturer
– Trade measurements authorities - Persons who fulfil the requirements of the legislation governing the operation of medical devices.
Note:
When the pressure in measurement mode increases above 299 mmHg, the quick release valve is triggered and the pressure circuit opens. When the pressure in test mode increases above 320 mmHg, the measured value display flashes.
b) A pump ball must also be introduced into the pressure circuit for the tests.
A) Function testing
Function testing of the monitor can only be carried out on a person or with a suitable simulator. 1.)
Testing
1.) Remove batteries.
B) Testing of pressure circuit integrity 2.) Hold START button pressed down and deviation of pressure display insert batteries.

Calibration checks - Testing instructions
(for trained specialist staff only)
3.) Release START button.
The device is now in test mode, and the current pressure is displayed in the SYS and DIA fields.
with a safety seal. Alternatively, a hole drilled in the bottom of the monitor for the connecting screw for the housing can be sealed for safety.
4.) Perform test for deviation of pressure! The device must not undergo service display and pressure circuit integrity or maintenance while it is in use. (observe setting time for cuff – at least 30 seconds) in the usual manner.
5.) Press the START button again to switch off the device.
C) Safety seal
As a safeguard, the upper and lower parts of the housing can be joined
Table des matières
Introduction......93
Destination 94
text_image
Scanned document with Chinese text and a small diagram showing a 3D object, likely for technical or administrative purposes.1 carnet de suivi


natural_image
Diagram of a car rear panel with battery cells and indicator lights (no text or labels)Figure 1
text_image
BOSO medicus prestige S Gestational monitoring User instructions Mode: 100% Mensate: 47.11 Mensay: 5.111 custodia
text_image
Scanned document page with Chinese text, tables, and a small diagram showing a 3D object labeled '汽车' (auto) in the top panel.
natural_image
Diagram of a battery pack with four cells and two external components, labeled Fig. 1 (no text or symbols on the diagram itself)Fig. 1
text_image
Scanned document page with Chinese text, tables, and a small diagram showing a 3D object labeled '可选' (Select)natural_image
Diagram of a battery pack with four black-and-white segments and positive charge indicators (no text or symbols)Figura 1