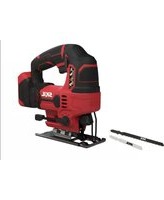
3410 CA - Saw SKIL - Free user manual and instructions
Find the device manual for free 3410 CA SKIL in PDF.


User questions about 3410 CA SKIL
0 question about this device. Answer the ones you know or ask your own.
Ask a new question about this device
Download the instructions for your Saw in PDF format for free! Find your manual 3410 CA - SKIL and take your electronic device back in hand. On this page are published all the documents necessary for the use of your device. 3410 CA by SKIL.
USER MANUAL 3410 CA SKIL
natural_image
Illustration of a SKIL video camera with no visible text or symbols on the device body
EAC
GB ORIGINAL INSTRUCTIONS 11
(F) NOTICE ORIGINALE 14
text_image
B A D G SKIL E C D F J H
natural_image
Icon of a person reading a document inside a circle (no text or symbols)
text_image
Warning sign with crossed-out symbols and a flame icon, indicating no fire or explosion hazard.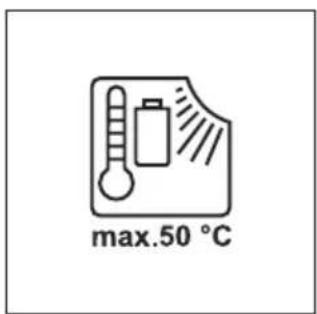
text_image
max.50 °C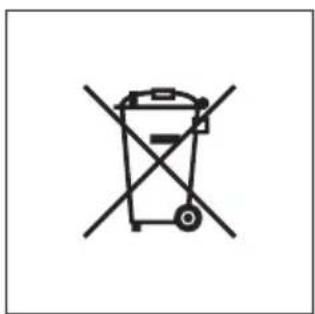
natural_image
Symbol of a trash bin crossed with no text or numbers, representing waste sorting or disposal (no text present)7
natural_image
Line drawing of a device casing with labeled component 'J' (no text or symbols beyond label)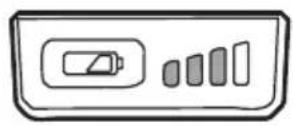
a
b⑧⑧

flowchart
graph LR
    A["Lock Icon"] --> B["Lock Icon"]
    B --> C["Leather with leaf icon"]
natural_image
Illustration of a hand pressing down on a mechanical component with an arrow indicating the process (no text or symbols present)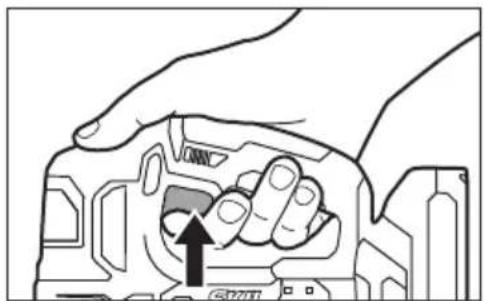
natural_image
Illustration of a hand inserting a component into a device housing (no text or symbols visible)
flowchart
graph LR
    A["Beck with diagonal lines"] --> B["STOP"]
    B --> C["Lock"]
natural_image
Illustration of a hand pressing down on a mechanical component with an arrow indicating motion (no text or symbols)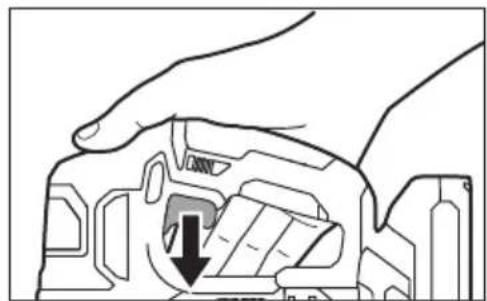
natural_image
Hand holding a mechanical component with a black arrow indicating a downward motion (no text or symbols present)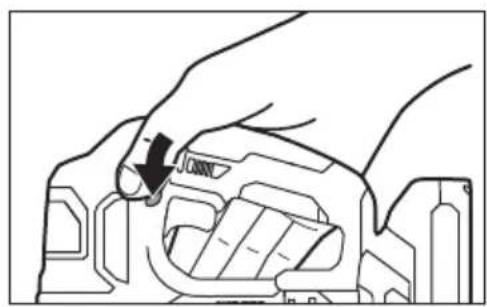
natural_image
Line drawing of a hand turning a component with an arrow indicating rotation (no text or symbols)⑨
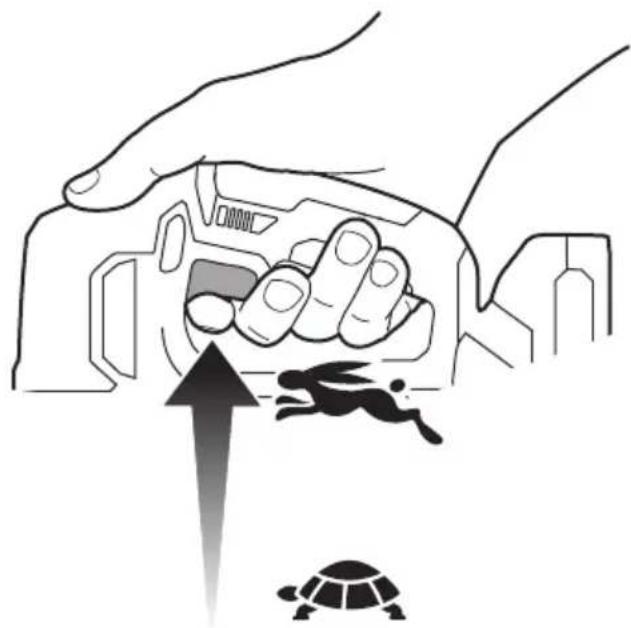
natural_image
Illustration of a hand holding a device with an upward arrow and turtle below (no text or symbols)10
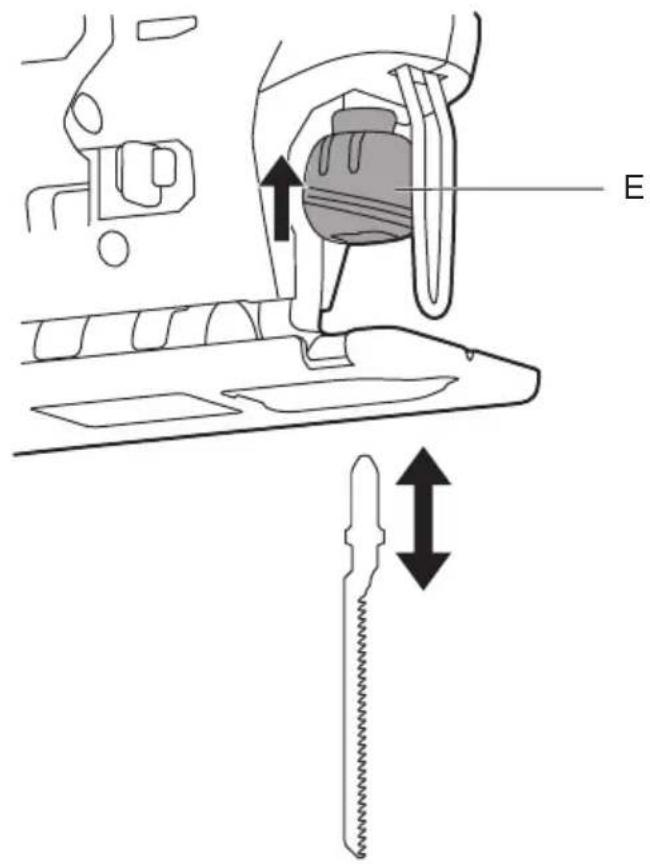
text_image
Technical diagram showing mechanical assembly with labeled component E and directional arrows indicating movement or force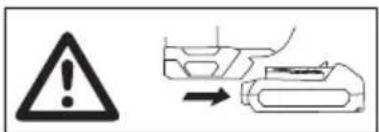
text_image
Warning symbol and process arrow indicating failure or rejection in a mechanical device
text_image
"T" "U"11
natural_image
Line drawing of a mechanical device with no visible text or symbols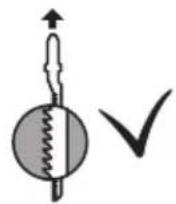
natural_image
Line drawing of a mechanical component or device with no visible text or symbols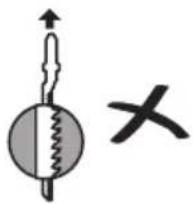
text_image
Diagram showing a mechanical or electrical component with an arrow and a cross symbol, likely indicating direction or force.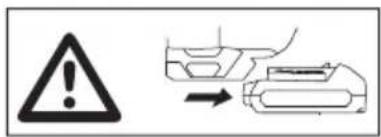
text_image
Warning symbol and process arrow indicating correct or incorrect action12
text_image
1 SKL F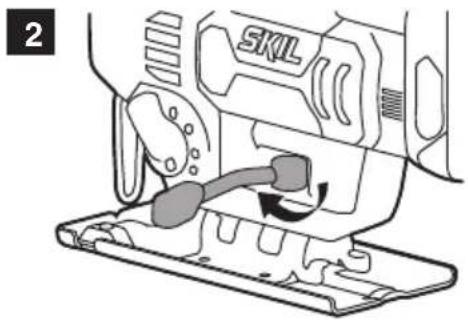
text_image
2 SKL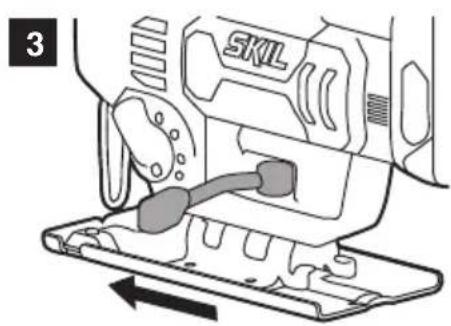
text_image
3 SKL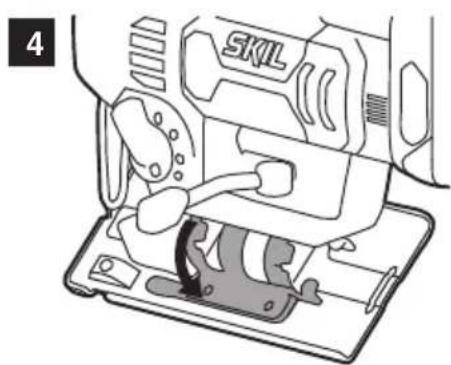
natural_image
Line drawing of a sewing machine with no visible text or symbols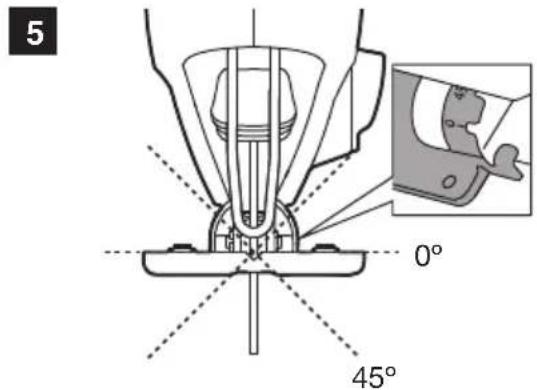
text_image
5 0° 45°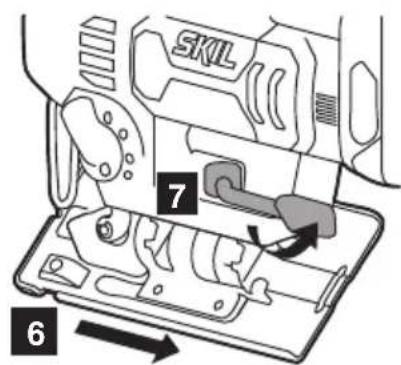
text_image
SKL 7 613
text_image
0 1 c 2 3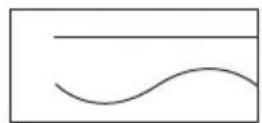
text_image
0 1 2 3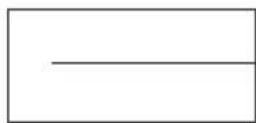
14

natural_image
Technical line drawing of a mechanical component or assembly (no text or symbols visible)15
text_image
H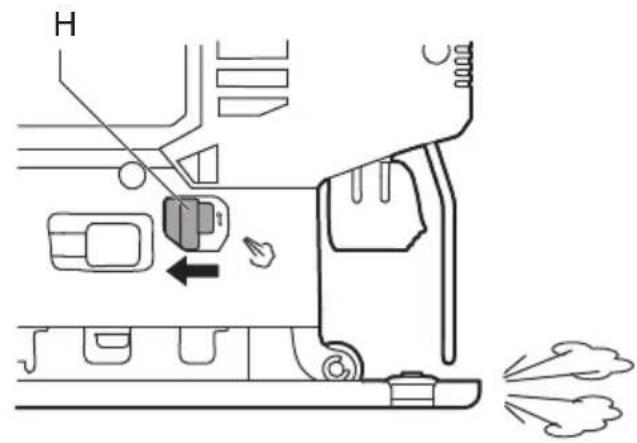
text_image
H16
natural_image
Technical line drawing of a SKYL camera module (no text or symbols)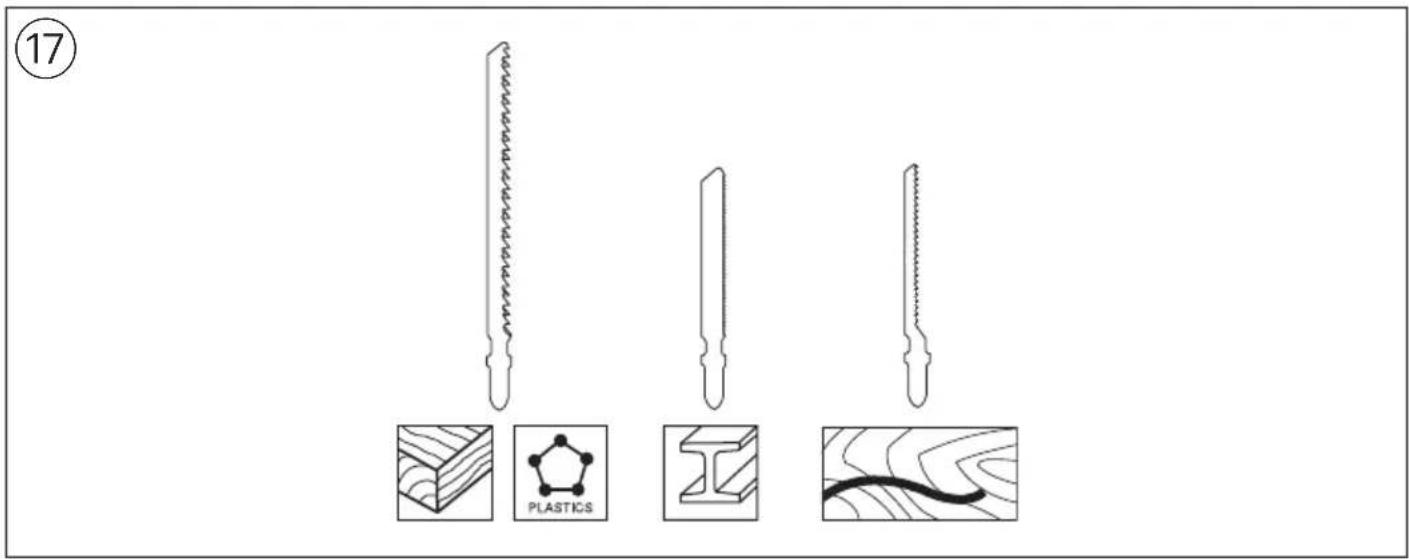
text_image
17 PLASTICS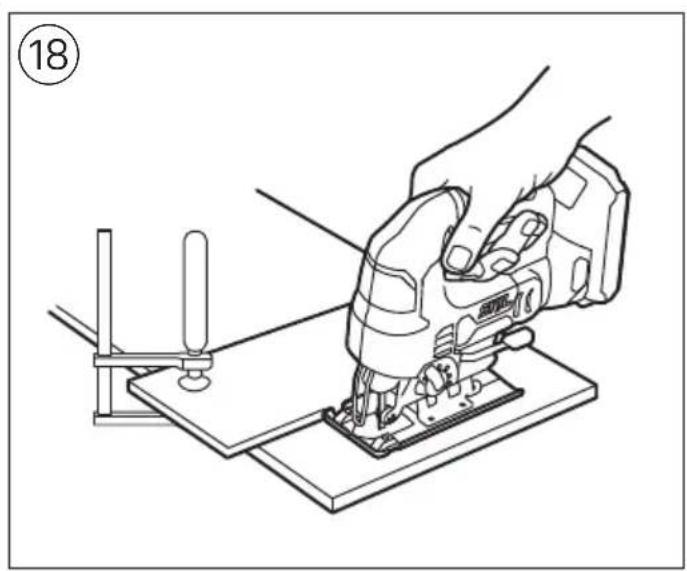
natural_image
Line drawing of a hand using a sewing machine on a workbench, no text or symbols present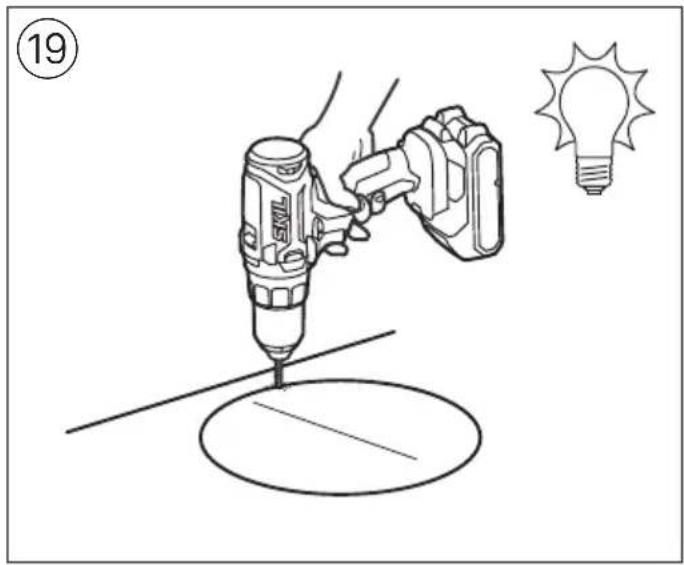
natural_image
Illustration of a hand using a power drill to lift a light bulb, with no text or symbols present.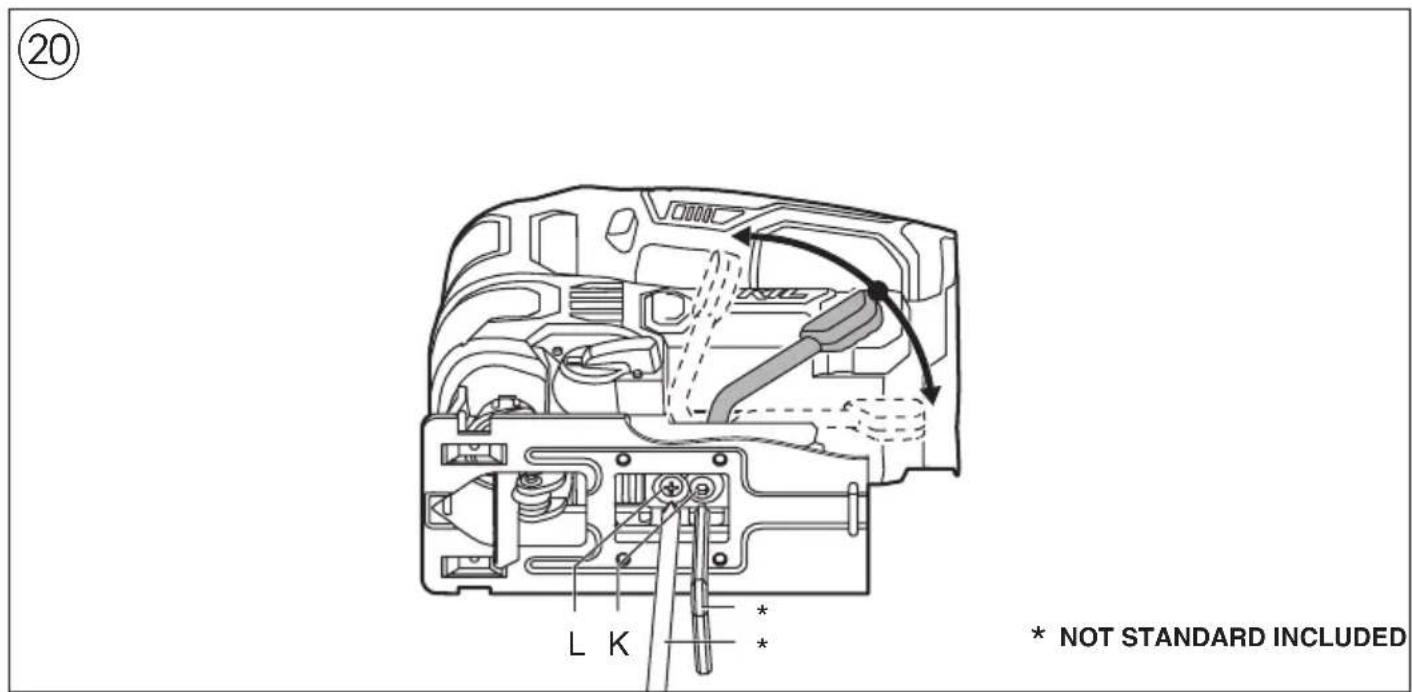
text_image
20 L K * * NOT STANDARD INCLUDEDGB
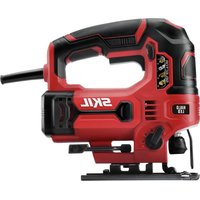
Cordless jig saw 3410
INTRODUCTION
- This tool is intended for making cut-throughs and cut-outs in wood, plastic, metal, ceramic plates and rubber, and is suitable for straight and curved cuts with mitre angles to 45°
• This tool is not intended for professional use - Read and save this instruction manual ③
TECHNICAL DATA①
TOOL ELEMENTS ②
A Switch for on/off and speed control
B Button for switch locking
C Lever for selecting sawing mode
D Ventilation slots
E Clic-system for changing saw blades
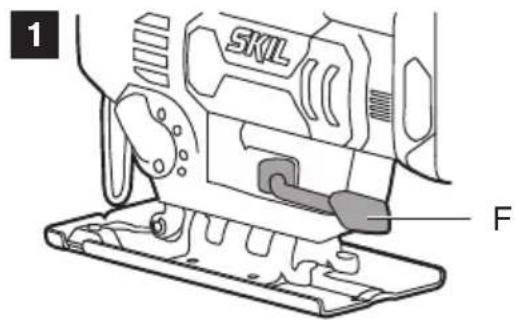
F Lever for adjusting footplate
G LED-light
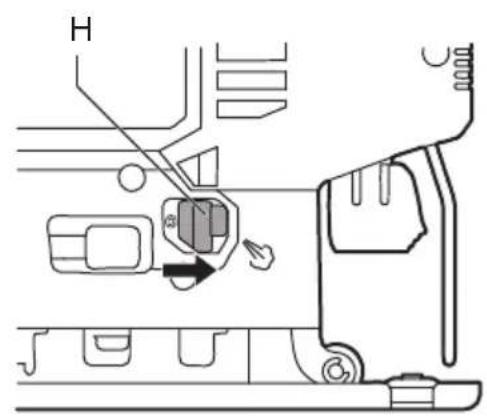
H Switch for dust blowing
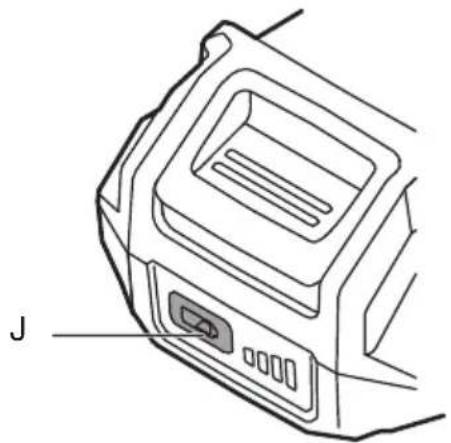
J Battery level indicator
K Set screw
L Lock screw
SAFETY
GENERAL POWER TOOL SAFETY WARNINGS
WARNING Read all safety warnings, instructions, illustrations and specifications provided with this power tool. Failure to follow all instructions listed below may result in electric shock, fire and/or serious injury.
Save all warnings and instructions for future reference.
The term "power tool" in the warnings refers to your mains-operated (corded) power tool or battery-operated (cordless) power tool.
1) WORK AREA SAFETY
a) Keep work area clean and well lit. Cluttered or dark areas invite accidents.
b) Do not operate power tools in explosive atmospheres, such as in the presence of flammable liquids, gases or dust. Power tools create sparks which may ignite the dust or fumes.
c) Keep children and bystanders away while operating a power tool. Distractions can cause you to lose control.
a) Power tool plugs must match the outlet. Never modify the plug in any way. Do not use any adapter plugs with earthed (grounded) power tools.
Unmodified plugs and matching outlets will reduce risk of electric shock.
b) Avoid body contact with earthed or grounded surfaces such as pipes, radiators, ranges and refrigerators. There is an increased risk of electric shock if your body is earthed or grounded.
2) ELECTRICAL SAFETY
c) Do not expose power tools to rain or wet conditions. Water entering a power tool will increase the risk of electric shock.
d) Do not abuse the cord. Never use the cord for carrying, pulling or unplugging the power tool. Keep cord away from heat, oil, sharp edges or moving parts. Damaged or entangled cords increase the risk of electric shock.
e) When operating a power tool outdoors, use an extension cord suitable for outdoor use. Use of a cord suitable for outdoor use reduces the risk of electric shock.
f) If operating a power tool in a damp location is unavoidable, use a residual current device (RCD) protected supply. Use of an RCD reduces the risk of electric shock.
3) PERSONAL SAFETY
a) Stay alert, watch what you are doing and use common sense when operating a power tool. Do not use a power tool while you are tired or under the influence of drugs, alcohol or medication. A moment of inattention while operating power tools may result in serious personal injury.
b) Use personal protective equipment. Always wear eye protection. Protective equipment such as a dust mask, non-skid safety shoes, hard hat, or hearing protection used for appropriate conditions will reduce personal injuries.
c) Prevent unintentional starting. Ensure the switch is in the off-position before connecting to power source and/or battery pack, picking up or carrying the tool. Carrying power tools with your finger on the switch or energising power tools that have the switch on invites accidents.
d) Remove any adjusting key or wrench before turning the power tool on. A wrench or a key left attached to a rotating part of the power tool may result in personal injury.
e) Do not overreach. Keep proper footing and balance at all times. This enables better control of the power tool in unexpected situations.
f) Dress properly. Do not wear loose clothing or jewellery. Keep your hair and clothing away from moving parts. Loose clothes, jewellery or long hair can be caught in moving parts.
g) If devices are provided for the connection of dust extraction and collection facilities, ensure these are connected and properly used. Use of dust collection can reduce dust-related hazards.
h) Do not let familiarity gained from frequent use of tools allow you to become complacent and ignore tool safety principles. A careless action can cause severe injury within a fraction of a second.
4) POWER TOOL USE AND CARE
a) Do not force the power tool. Use the correct power tool for your application. The correct power tool will do the job better and safer at the rate for which it was designed.
b) Do not use the power tool if the switch does not turn it on and off. Any power tool that cannot be controlled with the switch is dangerous and must be repaired.
c) Disconnect the plug from the power source and/or remove the battery pack, if detachable, from
the power tool before making any adjustments, changing accessories, or storing power tools. Such preventive safety measures reduce the risk of starting the power tool accidentally.
d) Store idle power tools out of the reach of children and do not allow persons unfamiliar with the power tool or these instructions to operate the power tool. Power tools are dangerous in the hands of untrained users.
e) Maintain power tools and accessories. Check for misalignment or binding of moving parts, breakage of parts and any other condition that may affect the power tool's operation. If damaged, have the power tool repaired before use. Many accidents are caused by poorly maintained power tools.
f) Keep cutting tools sharp and clean. Properly maintained cutting tools with sharp cutting edges are less likely to bind and are easier to control.
g) Use the power tool, accessories and tool bits etc., in accordance with these instructions, taking into account the working conditions and the work to be performed. Use of the power tool for operations different from those intended could result in a hazardous situation.
h) Keep handles and grasping surfaces dry, clean and free from oil and grease. Slippery handles and grasping surfaces do not allow for safe handling and control of the tool in unexpected situations.
5) BATTERY TOOL USE AND CARE
a) Recharge only with the charger specified by the manufacturer. A charger that is suitable for one type of battery pack may create a risk of fire when used with another battery pack.
b) Use power tools only with specifically designated battery packs. Use of any other battery packs may create a risk of injury and fire.
c) When battery pack is not in use, keep it away from other metal objects like paper clips, coins, keys, nails, screws, or other small metal objects that can make a connection from one terminal to another. Shorting the battery terminals together may cause burns or a fire.
d) Under abusive conditions, liquid may be ejected from the battery; avoid contact. If contact accidentally occurs, flush with water. If liquid contacts eyes, additionally seek medical help. Liquid ejected from the battery may cause irritation or burns.
e) Do not use a battery pack or tool that is damaged or modified. Damaged or modified batteries may exhibit unpredictable behaviour resulting in fire, explosion or risk of injury.
f) Do not expose a battery pack or tool to fire or excessive temperature. Exposure to fire or temperature above 130^ C may cause explosion.
g) Follow all charging instructions and do not charge the battery pack or tool outside the temperature range specified in the instructions. Charging improperly or at temperatures outside the specified range may damage the battery and increase the risk of fire.
6) SERVICE
a) Have your power tool serviced by a qualified repair person using only identical replacement parts. This will ensure that the safety of the power tool is maintained.
b) Never service damaged battery packs. Service of battery packs should only be performed by the manufacturer or authorized service providers.
SAFETY INSTRUCTIONS FOR CORDLESS JIG SAWS
- Hold the power tool by insulated gripping surfaces, when performing an operation where the cutting accessory or fastener may contact hidden wiring (cutting accessory and fasteners contacting a "live" wire may make exposed metal parts of the power tool "live" and could give the operator an electric shock)
- Use clamps or another practical way to secure and support the workpiece to a stable platform (holding the workpiece by hand or against your body leaves it unstable and may lead to loss of control)
GENERAL
- Do not work materials containing asbestos (asbestos is considered carcinogenic)
- This tool should not be used by people under the age of 16 years
- The noise level when working can exceed 85 dB(A); wear ear protection
- Wear protective goggles when working with materials which produce chips
- Dust from material such as paint containing lead, some wood species, minerals and metal may be harmful (contact with or inhalation of the dust may cause allergic reactions and/or respiratory diseases to the operator or bystanders); wear a dust mask and work with a dust extraction device when connectable
- Certain kinds of dust are classified as carcinogenic (such as oak and beech dust) especially in conjunction with additives for wood conditioning; wear a dust mask and work with a dust extraction device when connectable
- Follow the dust-related national requirements for the materials you want to work with
- Remove battery from tool before making any adjustments or changing accessories
BEFORE USE
- Remove all obstacles on top of as well as underneath the cutting path before you start cutting
- Avoid damage that can be caused by screws, nails and other elements in your workpiece; remove them before you start working
DURING USE
- Keep hands away from the saw blade while the tool is in use
ACCESSORIES
- SKIL can assure flawless functioning of the tool only when original accessories are used
- Do not use a saw blade which is cracked, deformed or dull
AFTER USE
- When you put away the tool, switch off the motor and ensure that all moving parts have come to a complete standstill
BATTERIES
- The battery supplied is partially charged (to ensure full capacity of the battery, completely charge the battery in the battery charger before using your power tool for the first time)
- Only use the following batteries and chargers with this tool
-SKIL battery: BR1*31****
-SKIL charger: CR1*31****
- Do not use the battery when damaged; it should be replaced
- Do not disassemble the battery
- Do not expose tool/battery to rain
- Permitted ambient temperature (tool/charger/battery): -when charging 4...40°C -during operation -20...+50°C -during storage -20...+50°C
EXPLANATION OF SYMBOLS ON TOOL/BATTERY
③ Read the instruction manual before use
④ Batteries may explode when disposed of in fire, so do not burn battery for any reason
⑤ Store tool/charger/battery in locations where temperature will not exceed 50°C
⑥ Do not dispose of electric tools and batteries together with household waste material
USE
- Charging battery ! read the safety warnings and instructions provided with the charger
- Removing/installing the battery ②
- Battery level indicator ⑦ - press the battery level indicator button J to show the current battery level.
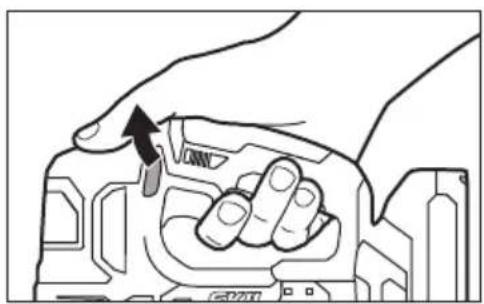
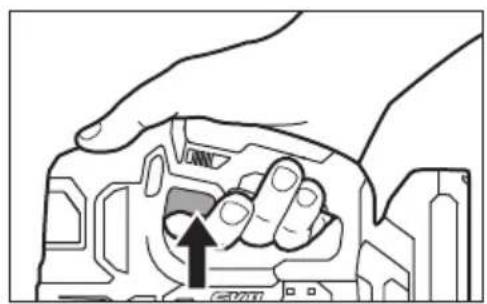
- On/off ⑧ a -move the button for switch locking B to the left to unlock -press switch A to start the tool -release switch A to stop the tool
• Speed control for smooth starting ⑨
- Transportation mode ⑧ b - release trigger switch A to stop the tool - put button B in the right position to prevent accidentally switching on the tool
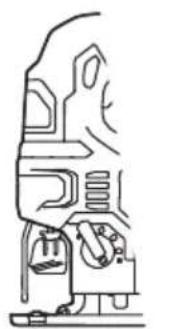
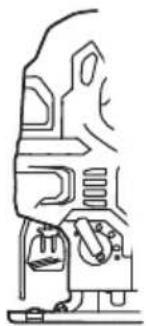
- Changing saw blades ⑩ ! remove battery from tool before making any adjustments or changing accessories ! insert blade to full depth with teeth facing forward ⑪ -tool accepts most commonly available T-shank and U-shank blades ⑩
- Sawing at 45^ ⑫
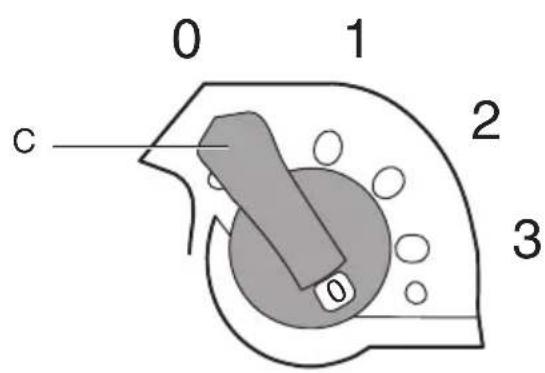
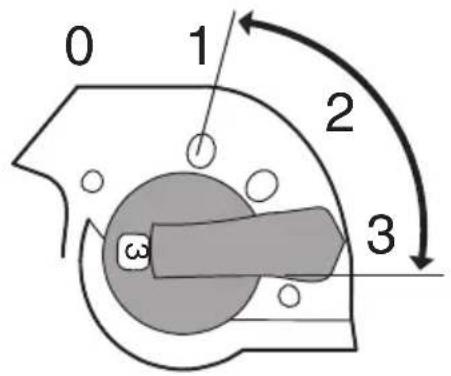
- Selecting sawing mode ⑬ Use lever C ② for adjusting the orbital action from accurate cutting (= 0) to fast cutting (= 3) -1 setting (“0”) for accurate cutting in all materials, straight + curved -3 settings for fast cutting in different materials, straight cuts only
1 = aluminum, plastic
2 = hard wood
3 = soft wood
! always select "0" when sawing splinter-sensitive material
- LED-light G ⑭ LED-light G automatically lights on when activating switch A
- Switch for dust blowing H ⑮
- Operating the tool
- before switching on the tool, ensure that front end of footplate rests flat on the workpiece
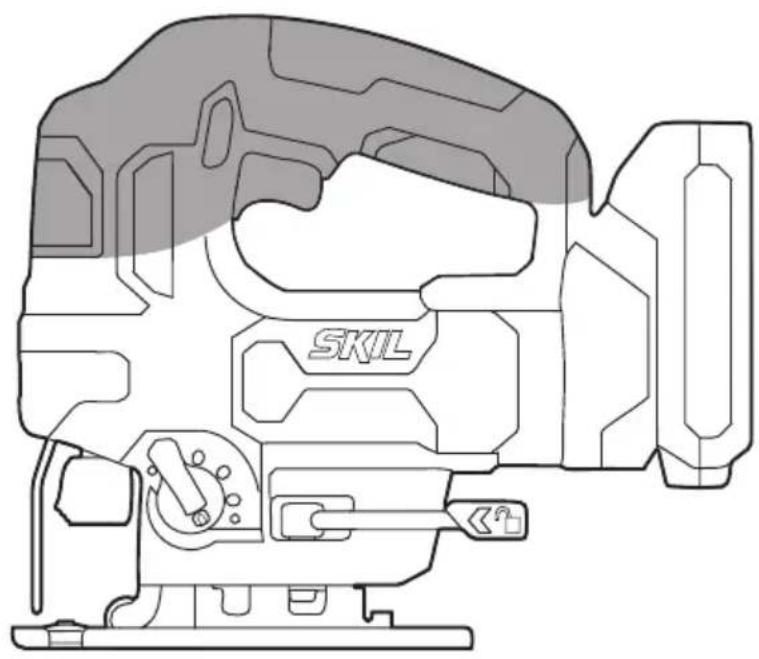
- hold tool firmly with both hands, so you will have full control of the tool at all times
! while working, always hold the tool at the grey-coloured grip area(s) ⑯
-ensure that complete surface of footplate rests firmly on the workpiece
! ensure that the blade has come to a complete standstill, before you lift the tool from the workpiece
-keep ventilation slots D② uncovered
- Battery protection
Switches off the tool or prevents the tool from being switched on, when
-the load is too high
-the battery temperature is not within the allowable operating temperature range of -20 to +50°C
-the lithium-ion battery is nearly empty (to protect against deep discharge)
! do not continue to press the on/off switch after the tool is switched off automatically; battery may be damaged
APPLICATION ADVICE
- Use the appropriate saw blades ⑰ ! tool accepts most commonly available T-shank and U-shank blades ⑩
- When cutting metals, lubricate saw blade regularly with oil
- For an accurate straight cut, guide tool with footplate along the edge of a straight piece of wood ⑱
• Pre-drill a hole before making cut-outs ⑲ - Splinter-free cutting
-cover cutting-line with several layers of wide tape before cutting
-always face the good side of the workpiece down
• For more information see www.skil.com
MAINTENANCE / SERVICE
• This tool is not intended for professional use
- Always keep tool clean (especially ventilation slots D ②)
! remove battery from tool before cleaning
- If lever F loosens during use, set the tightness of lever F ⑳
-place lever F in middle position
-loosen lock screw L with PH2 screw driver counter clockwise
-tighten set screw K finger tight with Allen key 4mm counter clockwise
! set screw K uses left hand thread
-tighten lock screw L with PH2 screw driver clockwise -tighten lever F
- If the tool should fail despite the care taken in manufacturing and testing procedures, please send the tool undismantled together with proof of purchase to your dealer.
- Be aware that damage due to overload or improper handling of the product will be excluded from the warranty (for the warranty conditions please ask your dealer).
ENVIRONMENT
- Do not dispose of electric tools, batteries, accessories and packaging together with household waste material (only for EU countries) - in observance of European Directive 2012/19/EC
on waste of electric and electronic equipment and its implementation in accordance with national law, electric tools that have reached the end of their life must be collected separately and returned to an environmentally compatible recycling facility -symbol⑥ will remind you of this when the need for disposing occurs
NOISE / VIBRATION
- Measured in accordance with EN 62841 the sound pressure level of this tool is 83.0 dB(A) and the sound power level 94.0 dB(A) (uncertainty K = 5 dB), and the vibration * (triax vector sum; uncertainty K = 1.5 m/s^2 )
*cutting board 4.0 m/s ^2
*cutting sheet metal 3.0 m/s ^2
- The vibration emission level has been measured in accordance with a standardised test given in EN 62841; it may be used to compare one tool with another and as a preliminary assessment of exposure to vibration when using the tool for the applications mentioned
-using the tool for different applications, or with different or poorly maintained accessories, may significantly increase the exposure level
-the times when the tool is switched off or when it is running but not actually doing the job, may significantly reduce the exposure level
! protect yourself against the effects of vibration by maintaining the tool and its accessories, keeping your hands warm, and organizing your work patterns
F
1 = Aluminium/Kunststoff
2 = Hartholz
3 = Weichholz
natural_image
Simple line drawing of a pencil (no text or symbols)
natural_image
Simple line drawing of a pencil (no text or symbols)
text_image
SKIL ENERGY PLATFORMwww.skil.com