Platinum Tone Factory - Audio Equipment FOCUSRITE - Free user manual and instructions
Find the device manual for free Platinum Tone Factory FOCUSRITE in PDF.


User questions about Platinum Tone Factory FOCUSRITE
0 question about this device. Answer the ones you know or ask your own.
Ask a new question about this device
Download the instructions for your Audio Equipment in PDF format for free! Find your manual Platinum Tone Factory - FOCUSRITE and take your electronic device back in hand. On this page are published all the documents necessary for the use of your device. Platinum Tone Factory by FOCUSRITE.
USER MANUAL Platinum Tone Factory FOCUSRITE
THANK YOU for purchasing the ToneFactory™ brought to you by the Focusrite team – Stephen, Trevor, Peter, Martin, Helen, Anna, Tony, Ben, Mick, Phil, Micky, Pauline, Jo, Chris, Michael, Ian, Rob and Simon.
The chaps at Focusrite are a jolly hard working bunch and take a great deal of pride in designing, building and delivering products which are considered the best audio units around; we hope your new Focusrite lives up to that reputation and that you enjoy many years of productive recording.
If you would like to tell us about your recording experiences then email us at:- sales@focusrite.com
Stephan Anna Ian Rob. to Lewis Tony Ben Helen Sina Paul Mick. Elkin
the Focusrite team
| English | page 4 | Deutch | page 12 | Français | page 16 | Italiano | page 22 | Español | page 28 |
Introduction ...5
Getting to know the unit ...5
Using the Discrete Transistor
Input ...5
Using the Filters ...6
Using the Opto Compressor ...6
Using the Tone Controller ...6
Using the Parametric
Equaliser ....7
Using the Noise Gate ...7
Using the Master Fader ...7
Obtaining a Good Quality
Electric Guitar Sound ...8
Obtaining a Goo Quality Acoustic
Guitar Sound ...8
Obtaining a Good Quality
Synthesiser Sound ...9
Obtaining a Good Quality Drum
Sound ...9
ToneFactory™
Flow Diagram ...33
Einleitung ...10
Transistor Discreti ...22
ToneFactory™ Connections
Introduction
The ToneFactory™ is a combined microphone preamplifier, dynamics unit and equaliser, for recording and mixing down instruments. When recording, do not assume you have to route your signal through a mixing desk: simply connect a microphone into the ToneFactory™ and connect the output of the ToneFactory™ directly into your recorder (such as a DAT machine or PC sound card). This form of direct recording will ensure you record the cleanest signal at the highest quality since it removes the possibility of noise that can be added to the signal when routing through a mixer.
Although designed specially to give a great sound with instruments such as guitar, the ToneFactory™ is sufficiently flexible that it can also be used when recording and mixing down other instruments such as drums or even vocals.
There are six separate parts to the ToneFactory™:
Discrete Transistor Input
Filters
Opto-Compressor
Tone Controller
Parametric Equaliser
Noise Gate
To ensure the cleanest signal path to your recording medium, all ToneFactory™ functions apart from the Discrete Transistor Input can be switched out of the audio path when not in use.
The signal meters for the Opto-Compressor and the Noise Gate are always active, even when they are switched out of the audio path. This allows you to see how each part will affect the signal before it is switched on.
Getting to Know the Unit
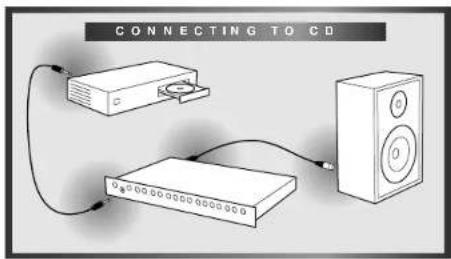
When you are getting to know the unit, use it on a track that you are familiar with (for example, you could run a favourite CD through the unit); working with a familiar track makes interpretation of the results easier. Note, however, that tracks are already compressed for CD, so you may find it hard to hear the results of using the Opto-Compressor. If this is the case, try using samples instead (if you have access to them), or record your own track uncompressed and then play it back through the ToneFactory™.
The easiest way to learn the creative power of the ToneFactory™, particularly if you are not familiar with all of its separate parts, is to try each control in turn. Finally try them all together to see the creative potential of using all the power in the ToneFactory™!
text_image
CONNECTING TO CDDo not turn all gain & level controls to maximum at any one time.
Using the Discrete Transistor Input
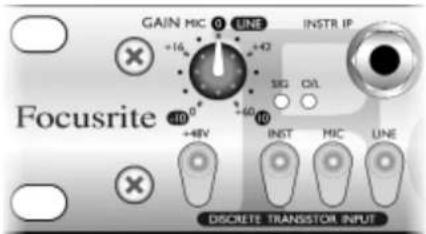
This part of the unit is a preamplifier, for setting the incoming signal to a suitable level.
text_image
GAIN MIC 0 LINE INSTR IP +16 +42 SIG OIL Focusrite +48V INST MIC LINE DISCRETE TRANSistor INPUTInstr IP - is the instrument input to the unit. This is a high impedance input, that allows you to connect an electric guitar or bass without loading the pickups, or connect a synth with low output.
Mic, Line, Inst - are used to select the input socket into the unit. Since only one of these buttons can be active at any time, you can connect up to three items to the unit and use the buttons to switch between them.
Gain - sets the level of the signal. With an input signal coming into the unit, slowly adjust the Gain control until the SIG LED starts to light. Continue adjusting the Gain control until you reach the optimum position, as shown by the SIG LED and the O/L (overload) LED.
SIG LED - should be lit whenever there is sound coming into the unit.
O/L LED - may light occasionally, but only if the input signal gets particularly loud. If the O/L LED stays on continuously for any period, or if you hear the unit distort during loud peaks, you should reduce the setting of the Gain control.
+48V - is used to provide phantom power to microphones that need it (such as condenser mics). If you are not sure whether your microphone requires phantom power, refer to its handbook.
Using the Filters
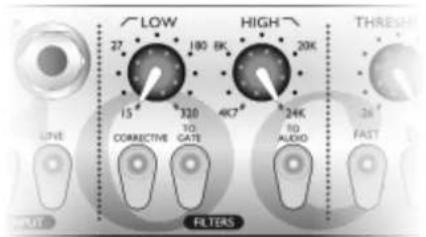
The Filters can be used to modify the sound of the signal coming through the unit, or to modify how the gate works. When used on the sound, the filters remove unwanted bass or treble. When used with the gate, the filters remove bass or treble from the signal that is fed to the gate, so giving frequency-selective gating (for example, to get rid of bleed from the bass drum).
text_image
LOW 27 180 6K HIGH 20K THRESH LINE 15 320 467 CORRECTIVE TO GATE 10 ALDO 10 ALDO FAST FILTERSTo Audio - when lit, switches the filters into the audio path.
To Gate - when in, switches the filters to the gate. When using the filters with the gate, you can use the To Audio button to temporarily switch the filters into the audio path; this lets you monitor the signal that is being sent to the gate, so you can adjust the filters to remove unwanted parts of the signal, and just leave the instrument you wish to gate.
Low - removes unwanted bass from the sound. The low filter has a gentle effect, so you can use it to tailor the bass without cutting it completely.
High - removes unwanted treble from the sound. The high filter is more aggressive than the low filter, to cut noise
and harshness, though its design lets you cut high frequencies without making the resulting signal sound dull (this is particularly good for acoustic guitars).
Corrective - when in, the Low filter removes all frequencies below the selected frequency, and the High filter removes all frequencies above the selected frequency.
Using the Opto-Compressor
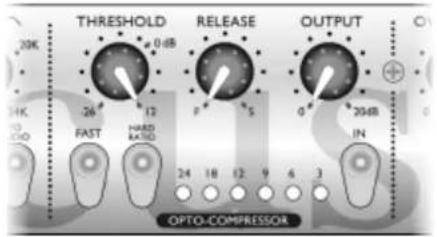
The Opto-Compressor acts like an automatic volume control, turning down the volume of a signal if it gets too loud. It reduces variation between loud and quiet passages, as it automatically reduces the gain when the signal gets louder than a certain volume (threshold). Therefore, it tends to even out a performance, stopping the instrument getting very loud or very quiet in the mix.
text_image
20K 1K 26 FAST HARD RATED 0 dB 12 5 0 20dB RELEASE OUTPUT IN 24 18 12 9 6 3 OPTO-COMPRESSORIn - when lit, switches on the Opto-Compressor.
Threshold - determines when the Opto-Compressor starts to compress the signal - the lower the threshold, the more the signal is compressed. By setting a threshold, you compress the signal only when it is louder than the threshold, so that quieter passages maintain their natural dynamic range, and only loud passages (that go above the threshold) are compressed.
Meter - displays the amount of compression applied to the signal. Since compression reduces the volume of the signal, the meter drops as compression is applied: for example, a 9 dB drop shows as 9 on the meter.
Output - sets the output volume of the compressed signal. Since compressing a signal makes it quieter, use the Output control to restore the signal to its original volume. Compare the volume of the original and the compressed signal by using the In switch to switch the Opto-Compressor on and off.
Release - sets the overall loudness. The faster the release, the louder the signal appears to be.
Fast - when in, compresses the initial attack of a signal (for example, use Fast to get rid of the initial pluck of a guitar string). This sort of compression tends to be more noticeable than when the Fast button is not used. For a punchy sound, do not use the Fast button.
Hard Ratio - when in, gives a very flat, compressed sound. Do not use the Hard Ratio button if you want to maintain some of the original dynamics.
Using the Tone Controller
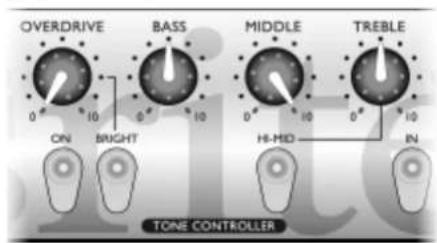
The Tone Controller is used to set the overall tone of the signal, and to add any overdrive to it.
text_image
OVERDRIVE BASS MIDDLE TREBLE ON BRIGHT HI-MID IN TONE CONTROLLERIn - when lit, switches on the Tone Controller.
Bass, Middle, Treble - provide standard tone controls, as you would find on any instrument amplifier.
Hi-Mid - when in, the Treble control acts on slightly lower frequencies, so is less aggressive. This gives you more control over the tone of a guitar.
English
On - when in, switches on the overdrive.
Overdrive - adds rounded overdrive to the signal, similar to valve distortion. The overdrive also contains speaker simulation, so you can, for example, record overdriven guitar by plugging the guitar into the ToneFactory™, and the ToneFactory™ straight into the recorder.
Bright - turns off speaker simulation in the overdrive section.
Using the Parametric Equaliser
The Parametric Equaliser is a sophisticated tone control, that boosts or cuts selected frequency bands, and so modifies the tone quality of the signal. You normally use the Tone Controller to set the overall tone of the signal, then use the Parametric Equaliser to fine tune the sound. For example, you can use it to fix problems with the original sound (by removing frequencies), or to help a track stand out in the mix (by accentuating frequencies).
text_image
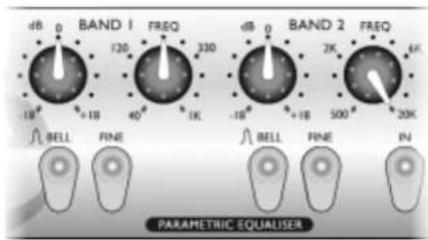
dB 0 BAND 1 FREQ 120 330 +1B 40 1K -18° -18° +1B 500° 20K BELL FINE BELL FINE IN PARAMETRIC EQUALISERIn - when lit, switches on the Parametric Equaliser.
Band 1 - is used to fine tune the bass.
Band 2 - is used to fine tune the middle and treble.
dB - cuts or boosts the frequency selected using the Freq control for this band.
Freq - selects a frequency band to cut or boost, centred on the selected frequency.
text_image
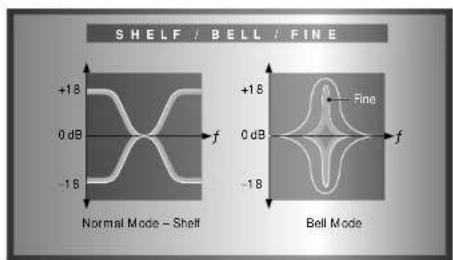
SHELF / BELL / FINE +18 0 dB -18 Normal Mode – Shell +18 0 dB -18 Fine Bell ModeBell - when in, the cut or boost applied to the selected frequency band is changed to a bell shape (see picture). This has the effect of emphasising the selected frequency, since the cut or boost applied is reduced as you move away from it.
Fine – when in, reduces the width of the frequency band that is affected. You normally use this in conjunction with the Bell button, to notch out a small range of unwanted frequencies (for example, fret rattle on a guitar).
Using the Noise Gate
The Noise Gate reduces the volume of quiet sections in the performance, and so can be used to remove background noise.
text_image
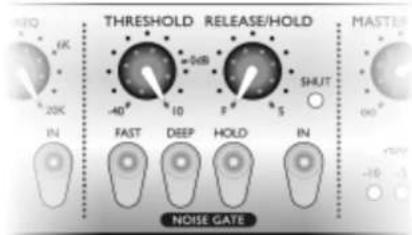
THRESHOLD RELEASE/HOLD FAST DEEP HOLD IN NOISE GATE MASTERS -10 -1 -10 -1 IN IN -40 10 F S SHUT 6dBIn - when lit, switches on the Noise Gate.
Threshold - determines when noise reduction begins. The higher the threshold, the more low-level noise is reduced.
Hold - when in, changes the Release/Hold control from a release control to a hold control. The difference between them appears when the signal passes below the threshold: with release, the gate starts to shut, at the speed determined by the Release control; with hold, the gate stays open for the time determined by the Hold control, then shuts immediately. When recording an instrument on its own, you usually use Release as this sounds most natural.
Release/ Hold - adjusts the release or hold of the gate (depending on whether the Hold button is lit) from Fast (F) to Slow (S). Release determines how quickly the gate shuts once the signal has passed below the threshold. Use Release on a signal where the gate should close quite quickly in a controlled manner. Hold determines how long the gate stays open once the signal has passed below the threshold. On a signal that has, for example, a short transient then reverb that you want to record, use Hold to hold the gate open so that the quieter reverb is not lost.
Fast - when in, makes the gate open very quickly when the signal passes the threshold. Use this on signals that have a very fast attack (such as a snare drum), so that the gate does not cut off the beginning of the signal.
Deep - when in, reduces all background noise to below the natural hearing level. This should only be used to clean up a noisy signal when mixing down, as its effect can be too drastic when recording, causing signal drop outs.
Shut - when in, the gate is shut so no signal is being allowed through.
Using the Master Fader
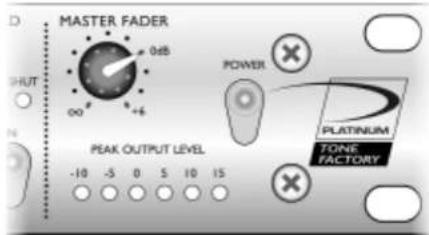
The Master Fader is used to match the output level from the ToneFactory™ to the input level of the next unit in the chain (such as a DAT recorder or PC sound card). When setting the output level, always start quietly and increase the output level until you reach the correct level - do not start
text_image
MASTER FADER 0dB 00 +4 POWER PLATINUM TONE FACTORY PEAK OUTPUT LEVEL -10 -5 0 5 10 15with the output level set high, as it may damage the next unit in the chain.
If you are inserting the 'ToneFactory™' into a channel of a mixing console, you normally set the Master Fader at 0 and adjust levels using the console.
Obtaining a Good Quality Electric Guitar Sound

With a guitar plugged into the instrument input, you should get a great sound straight away. Use the Tone Controller to get the sound you want; in particular:
The Hi-Mid button should be lit, so that the controls are centred round the guitar frequencies.
When using Overdrive, the Bright switch should not normally be lit, so that speaker simulation is enabled.
Adding effects using foot pedals
Put all effects in bypass, and use the Tone Controller to set the tone you want, then switch in the effects you want to use.
If the effects add noise, use the Noise Gate to remove it. Make sure the Hold button is not lit, and adjust the Release/Hold control so that the Noise Gate doesn't cut off the tail of the signal.
If necessary, use the Parametric Equaliser to modify the tone after the effects have been added. For example, if
you have added reverb and it is too brilliant, use Band 2 (with the Bell button not lit) to reduce the treble. If you have a lot of effects, and the sound is muddy, use Band 2 with the Bell button lit to boost frequencies around 2.5 kHz.
Using Compression and Overdrive
The Overdrive on the ToneFactory™ is a dynamic tool, since varying the volume of the input signal varies the amount of overdrive that is applied. Therefore, by varying the dynamics of your playing, from soft to loud, you can influence the amount of overdrive you get. This is great for blues, for example, since you can get more bite by playing more aggressively.
If you want to make sure that your guitar is overdriven evenly (particularly for a heavily overdriven sound), use the Opto-Compressor to reduce the dynamics of the signal. Set the Threshold quite low, and increase the output control to compensate for the loss in volume. Now the signal enters the Tone Controller at a fairly constant volume, so more of the signal is overdriven instead of just the peaks.
Recording Electric Bass
Since you normally want the bass to stay at a constant volume in the rhythm track, you tend to use quite a lot of compression. Set the Opto-Compressor as follows:
Try experimenting with the Release control and the Hard Ratio to get the sound you want. If you want a bass sound that has a lot of attack, make sure the Fast button is not lit. If you want a more rounded bass sound with less attack, switch on the Fast button.
Obtaining a Good Quality Acoustic Guitar Sound

The easiest way to get a good signal into the ToneFactory™ is from a piezo pickup into the instrument input. If miking up an acoustic guitar, the position of the microphone is very important.
Positioning the Microphone
In front of the guitar, about 6 inches (15 cm) from the sound hole. This gives a loud signal (which is good if there is background noise in the room), but tends to be bassy and boomy. Switch in the Filters, use the Low control to roll off the low frequency to compensate.
Also, moving the mic back towards the bridge tends to give a brighter sound.
In front of the guitar, about 2 ft (60 cm) from the sound hole. This gives more of an ambient sound, including some room characteristics, which may or may not be a good thing!
About 6 inches (15 cm) above the guitar, pointing down at the bridge. This gives a bright but realistic sound.
Guitar Tone
To accentuate or reduce the sound of the main body of the guitar, use Band 1 of the Parametric Equaliser with Bell lit. Set the Freq control at around 240 Hz, and increase or decrease the dB control, depending on how thick you want the sound to be.
To increase presence and clarity, use Band 2 of the Parametric Equaliser with Bell lit. Boost frequencies in the range 2.5 kHz - 5 kHz.
For a thin and bright sound, use the Filters, adjusting the Low control to remove bass.
Removing Fret Buzz
When mixing down, you can use the Parametric Equaliser to notch out a frequency (for example, to remove fret buzz or string rattle). To notch out a frequency:
-
In Band 2, switch on the Bell button, and add gain using the dB control. Ensure that the Fine button is not lit.
-
Adjust the Freq control until you are boosting the frequency you want to remove. For example, when you have isolated fret buzz, it sounds a lot louder when the Parametric Equaliser is on.
-
Switch on the Fine button. You may now need to adjust the Freq control, to isolate the frequency to remove.
- Reduce the dB control to remove the offending frequency. Be careful not to reduce the dB control too far, or you may adversely affect the overall tone of the instrument (since you are affecting all occurrences of the selected frequency).
Obtaining a Good Quality Synthesiser Sound

If the synthesiser is noisy (for example, if you are recording an old synth), use the Filters to get rid of the noise. With the Corrective button not lit, adjust the High control to remove the noise.
You should be able to remove unwanted noise but still retain the synth's presence.
On a particularly noisy synth (if the Filters are not sufficient), use the Noise Gate. If recording a sound that cuts of very quickly, switch on the Hold button. If recording a sound with a lot of decay (such as a string sound), ensure that the Hold button is not lit.
Overdrive is useful for creating effects, especially on the fly, by increasing and decreasing the Overdrive control. You normally do this when mixing down. If you want lo-fi sound effects, make sure the Bright button is not lit.
Obtaining a Good Quality Drum Sound

Adding EQ
When mixing down, you can use the Parametric Equaliser, Filters and Tone Controller, if necessary, to improve the drum sound you have recorded:
Snarc drum: To boost fullness, use Band 1 in the Parametric Equaliser with Bell lit, setting the Freq control to around 200 Hz. To boost attack and crispness, use Band 2 in the Parametric Equaliser with Bell lit, setting the Freq
control to around 5 kHz. If the snare drum needs more clarity, use the Tone Controller or the Filters to roll off some of the bass.
Toms Toms: To boost fullness, use Band 1 in the Parametric Equaliser with Bell lit. For high toms, set the Freq control to about 200 Hz; for low toms, set the Freq control to about 100 Hz. To boost attack and crispness, use Band 2 in the Parametric Equaliser with Bell lit, setting the Freq control to around 5 kHz.
Bass drum: To increase the punch, use Band 2 in the Parametric Equaliser with Bell hit, setting the Freq control to about 2.5 kHz.
Cymbals: To boost brilliance and sizzle, use Band 2 in the Parametric Equaliser with Bell not lit, setting the Freq control to 10 kHz or higher.
Removing bleed from other parts of the kit When recording a drum kit, it is possible for sound from one part of the kit to bleed into the microphone on another part of the kit. For example, the mic on the snare might also pick up the sound of the bass drum or high hat. When mixing down, you can use the ToneFactory™ to get rid of bleed, allowing you to be aggressive with the equalisation on a track without affecting the sound of another part of the kit. You can use either the Filters or the Noise Gate to get rid of bleed:
Using the Filters: If you can hear bleed from the cymbals on the bass drum track, use the Filters with Corrective lit, setting the High control to about 5 kHz.
If you can hear low-frequency bleed on the cymbal track (for example, from the bass drum), use the Filters with Corrective lit, setting the Low control to about 500 Hz.
Using the Noise Gate:
-
Solo the track, to hear how much bleed there is on the track.
-
Ensure the Hold button is not lit, so that you have a natural decay to the sound.
- In the Filters, switch on both the To Audio and the To Gate buttons. Adjust the Low and High controls until you can no longer hear the blood, but the recorded drum or cymbal is not affected. For example, on the bass drum track, set both the Low and High controls fully counter-clockwise.
- Switch off the To Audio button. In the Noise Gate, adjust the Threshold control so that the gate opens when the sound of the recorded drum or cymbal occurs. At this point, just listen to the attack, to make sure the Noise Gate is not cutting off any of the front end of the signal. You may need to switch the Fast button on so, that you do not lose the initial transient.
- Adjust the Release control, so that the tail of the signal sounds natural and not cut off.
- For a gated snare drum effect, switch on the Hold button and adjust the Release/Hold control to catch the tail of the reverb only.
Einleitung
text_image
CONNECTING TO CDtext_image
SEQ 1K 20K IN THRESHOLD RELEASE/HOLD -40° 10 -0dB F 5 SHUT FAST DEEP HOLD IN MASTERS 000 -10 NOISE GATEtext_image
REQ 5K 20K IN THRESHOLD RELEASE/HOLD +0dB -40° 10 F S SHUT FAST DEEP HOLD IN NOISE GATE MASTER 00° -10 °C -10 °Ctext_image
CONNECTING TO CDtext_image
SEQ 6K 20K IN THRESHOLD RELEASE/HOLD -40° 10 +4dB SHIFT FAST DEEP HOLD IN MASTEN DO -10 dB -10 dB NOISE GATEtext_image
CONNECTING TO CDWhilst every effort has been made to ensure the accuracy and contents of this manual, Focusrite Audio Engineering Ltd makes no representations or warranties regarding the contents.
Copyright:
Copyright June 1998 Focusrite Audio Engineering Ltd. All rights reserved. No part of this manual may be reproduced, photocopied, stored on a retrieval system, transmitted or passed to a third party by any means or in any form without the express prior consent of Focusrite Audio Engineering Ltd.
Warranty:
All Focusrite products are covered by a warranty against manufacturing defects in material or craftsmanship for a period of one year from the date of purchase. Focusrite in the UK, or its authorised distributor worldwide will do its best to ensure the fault is remedied as quickly as possible. This warranty is in addition to your statutory rights.
This warranty does not cover any of the following:
- Carriage to and from the dealer or factory for inspection or warranty
- Consequential loss or damage, direct or indirect, of any kind, however caused
- Any damage or faults caused by abuse, negligence, improper operation, storage or maintenance
If a product is faulty please first contact your dealer in the country of purchase; alternatively, contact the factory. If the product is to be shipped back, please ensure that it is packed correctly, preferably in the original packing materials. We will do our best to remedy the fault as quickly as possible.
Please help us by completing and returning the Warranty Registration Card at the back of this manual. Thank you.
Focusrite
audio engineering
Focusrite Audio Engineering Ltd, Lincoln Road, High Wycombe, Bucks HP12 3FX England
Phone: +44 (0)1494 462246 FAX: +44 (0)1494 459920
e-mail: sales@focusrite.com
www.focusrite.com