SuperConnect Stereo - Hi-fi system REVO - Free user manual and instructions
Find the device manual for free SuperConnect Stereo REVO in PDF.


User questions about SuperConnect Stereo REVO
0 question about this device. Answer the ones you know or ask your own.
Ask a new question about this device
Download the instructions for your Hi-fi system in PDF format for free! Find your manual SuperConnect Stereo - REVO and take your electronic device back in hand. On this page are published all the documents necessary for the use of your device. SuperConnect Stereo by REVO.
USER MANUAL SuperConnect Stereo REVO
Dynamic Label Plus 21
DRC einstellen 21
www.revo.co.uk/support
Umwelt Info
Copyright 2022 TELESTAR DIGITAL GmbH. All rights reserved.
natural_image
Two-step illustration showing hands holding a tool, labeled ① and ② (no text or symbols on the diagram itself)NETZTEIL
natural_image
Technical line drawing of a mechanical component with internal structure and mounting base (no text or symbols)natural_image
Pure electrical circuit lines without any symbols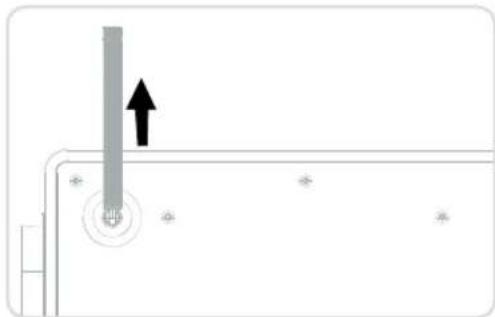
natural_image
Pure diagram of a vertical pipe with an arrow indicating upward motion, no text or symbols presenthttp://www.spotify.com/connect/third-party-licenses

Spotify®
DAB+ Radio
Was ist DAB+
text_image
COM Aux intext_image
SUPERCONNECT S... SOURCE Make Planning BROWNS Welcome to Login a Login with Amazon Subscribe④
Streamingdienst Deezer
text_image
SmartRadio SPTCONVEST ITEMS SmartRadio①
text_image
iTunes Podcasts Division Amazon Music Spotify Music Temp Hot Bluetooth Audio Sharing②
Operating Instructions
v2
content
Safety instructions 42
Operational safety 42
Connect device 43
Protect the device
from damage 44
Risk of injury 44
Information on the
radio interface 44
Handling batteries 45
Cleaning the device 46
Technical support 46
Environmental info 46
Warranty
Copyright
Disclaimer
Declaration of Conformity (RED) 47
Spotify Connect 56
DAB+radio 56
Internet radio / Podcasts 56
DAB radio reception 57
Carrying out a scan 57
Manual search 57
Selecting a station 58
Storing a station in the favourite list 58
Selecting the saved stations 58
Deleting a favourite memory
location 58
Signal strength 58
Dynamic Label Plus 59
Setting DRC 59
Deleting inactive stations 59
Adjust station order 59
Switching alarm off 65
Advanced functions 65
App operation 66
Equaliser 67
Own EQ setting 67
System settings 67
Internet settings 68
WPS connection 68
System settings 68
More information about
network connection 69
Settings 69
Language 69
Factory settings 70
Software update 70
System settings 70
Setup wizard 71
Info 71
Display lighting 72
Privacy Information 72
Amazon streaming service 72
Deezer streaming service 73
Welcome 48
Unpacking radio 48
SUPERCONNECT
STEREO Overview 49
Remote Control 50
Power Adapter 51
Power Connection 51
FM operation 60
Switching on radio mode 60
FM reception with RDS information 60
Manual station selection 60
Automatic station selection 60
Setting mono/stereo 61
Storing FM stations 61
Selecting the programmed stations 61
Deleting a favourite memory
location 61
FM operation 61
Activating Bluetooth mode 62
Pairing 62
Playing music 62
Troubleshooting 74
Technical data 75
Technical data for adapter 76
General operation 52
Switching on the device 52
Operating the device with the remote control 52
Setting the volume 52
Muting the sound 52
Open displays 52
Display 52
Using the menu 53
Closing the menu 53
Main menu 53
Source selection 53
Internet radio / Podcasts 54
Recent stations 55
Station list
Internet radio / Podcasts 55
Advanced functions 63
Sleep function 63
Alarm 63
Audio input 63
Setting alarm time 64
Switching off alarm clock
after alarm 64
A55 Advanced functions 64
Snooze function 65
Safety instructions

WARNING!
Check the device before use.
The device must not be used if it is defective or damaged.
Risk of injury!
Risk of injury to children and people with reduced physical, sensory or mental ability (e.g. disabled people, elderly people with limited physical and mental ability) or a lack of experience and knowledge.
Always keep the device out of the reach of children.
This device can be used by children aged 8 years and above and persons with reduced physical, sensory or mental ability or lack of experience and/or knowledge if they are supervised or have been given instruction concerning safe use of the device and understand the hazards involved.Never let children use the device unsupervised.
Danger of suffocation!
Packaging material is not a toy!
Do not store the packaging materials used (bags, polystyrene pieces, etc.) within the reach of children.
Children must not play with the packaging. There is a risk of suffocation, especially with packaging films.
Operational safety

DANGER!
Risk of injury!
Risk of injury from electric shock from live parts. There is a risk of electric shock or fire due to accidental short circuits.
Check the device for damage before each use.
If you notice visible damage or if the device shows visible damage, do not use it anymore.
If you discover a technical or mechanical problem, please contact TELESTAR Service.
Immediately disconnect the device from the power in the event of any malfunction. To do this, unplug the power adapter and remove it from the device immediately.
Only use replacement parts and accessories that have been supplied or approved by us.
Do not convert the device and do not use any additional devices or replacement parts that have not been explicitly approved or supplied by us.
Do not use the device in potentially explosive environments. These include fuel storage areas, tank facilities or areas in which solvents are stored or processed.
Do not operate the device in areas with air contaminated with particles (e.g. flour or wood dust).
Malfunctions may be indicated by the device heating up or smoke rising from the device or its power adapter. Loud or unusual noises can also be a sign of a malfunction.
Safety instructions
In this case, pull the power adapter out of the power socket immediately.
Only handle the power adapter by the casing.
Never pull the power adapter by the cable.
Unplug the device from the power socket if you are absent for a longer period and during thunderstorms.
Make sure that contact with moisture, water or spray is avoided and that no objects filled with liquids -
e.g. vases - are placed on or near the appliance or power adapter.
If foreign bodies or liquids get into the device or the power adapter, pull the power adapter out of the socket immediately. Have the device checked by qualified personnel before you use it again.
Otherwise, there is a risk of electric shock.
Make sure that the device and the power adapter are not exposed to dripping or splashing water and that there are no naked flames (e.g. burning candles) near the device or the power supply.
Connect device
Only connect the device to a power supply that complies with standard regulations.
Make sure that the power source (socket) is easily accessible.
Do not kink or crush any cable connections.
Before using the device, check whether the voltage information on the device corresponds to the local mains voltage. The specifications on the power unit must correspond to the local powernetwork
Only connect the device to the power supply unit included in the scope of delivery.
Place the device on a firm, level surface.
The device consumes power in standby mode. To fully switch off the device, the power supply must be disconnected.
Safety instructions
Protect the device from damage

PLEASE NOTE!
Unfavourable environmental conditions such as moisture, excessive heat or lack of ventilation can damage the device.
Only use the device in dry rooms.
Avoid the direct vicinity of: Heat sources such as radiators, open flames such as candles and devices with strong magnetic fields such as speakers.
Do not expose the device to extreme conditions, e.g. direct sunlight, high humidity, moisture, extremely high or low temperatures, naked flames.
Ensure that there is sufficient distance from other objects so that the device is not covered and adequate ventilation is always guaranteed.
Avoid direct sunlight and unusually dusty locations.
Do not place any heavy objects on the device or the power adapter.
Do not use the device in potentially explosive environments.
These include fuel storage areas, tank facilities or areas in which solvents are stored or processed.
Do not operate the device in areas with air contaminated with particles (e.g. flour or wood dust).
Risk of injury

WARNING!
Excessive sound pressure when using earphones or headphones can cause hearing damage or loss.
Using earphones or headphones at a high volume for a long period of time can cause injury to the user.
Please check the volume before putting the earphones or headphones in or onto your ears. Set the volume to low and only increase the volume enough that you still find it comfortable.
Information on the radio interface
The device generates an electromagnetic field.
Please pay attention to notices in your area that prohibit or restrict the operation of electronic devices.
This may be the case, for example, in hospitals, at petrol stations and tank facilities or at airports.
If corresponding warnings apply, disconnect the device from the power immediately. The components contained in the device generate electromagnetic energy and magnetic fields. These can affect medical devices such as pacemakers or defibrillators. Therefore, please maintain sufficient and safe distance between the radio and medical devices.
If you have reason to believe that the radio is causing interference with a medical device, immediately turn off or unplug the radio.
Safety instructions
Handling batteries
In principle, only use the type of battery included in the scope of delivery.

DANGER!
Risk of injury!
Improper handling of batteries poses a risk of injury!
Never open batteries, short-circuit them or throw them into flames.
Never charge batteries. Attempting to charge batteries can create a risk of explosion.
The polarity must be correct! Make sure that the plus (+) and minus (-) poles are inserted correctly to avoid a short circuit. Only use batteries specified for this product.
Remove batteries from the device if it is not going to be used for a long time.
Remove exhausted or leaking batteries from the device immediately.
If batteries have leaked, there is a risk of burns if the liquid comes into contact with the skin.
Keep both new and used batteries out of the reach of children.
There is a risk of internal injury if batteries are swallowed. The battery acid in the batteries can cause injuries if it comes into contact with the skin.
In the event of accidental ingestion or if there are signs of skin burns, rinse the affected areas with plenty of clean water and seek medical attention immediately.
Batteries are not toys! Always keep new and used batteries away from children.
Remove leaking batteries from the device immediately and clean the contacts before inserting new batteries.

WARNING!

There is a risk of explosion if batteries are used improperly!
Only use new batteries of the same type.
Please never use new and old batteries together in one device.
Pay attention to the correct polarity when inserting the batteries.
Never charge batteries.
Batteries should only be stored in cool and dry places.
Never throw batteries into fire.
If the device is not used for a long time,
please remove the batteries from the device.
Never expose batteries to extreme heat or direct sunlight.
Batteries must not be deformed or opened.Stop using the remote control if the battery compartment no longer closes properly.
Safety instructions
Cleaning the device
Before cleaning, unplug the device from the socket.
Use a soft, dry cloth to clean the device. Please do not use any liquids to clean the device. Do not use any solvent or cleaning agents, as these may damage
the surface and/or labelling of the device. Children should not clean the device.
Technical support
If you have any problems using this product, please refer to Troubleshooting in operating instructions. Otherwise, you can call Revo's technical support at:
+49 (0) 2676 / 9 52 01 01
Alternatively, e-mail support@revo.co.uk or visit the troubleshooting service on our website at:
www.revo.co.uk/support
Environmental info
PRODUCT DISPOSAL INSTRUCTIONS (WEEE GUIDELINES)

The symbol shown here and on the product means that it is classified
as electrical or electronic equipment and should therefore not be disposed of with household or commercial waste at the end of its life.
The Waste Electrical and Electronic Equipment (WEEE) Directive
(2002/96/EC) was established to recycle products using the best possible recovery and recycling techniques in order to minimise the impact on the environment and reduce the increase in landfill.
For more information, please contact your local authority or the retailer from whom the goods were purchased.
RoHS COMPLIANT & CE MARKING
This product has been designed to comply with the international Restriction of Hazardous Substances
(RoHS) directive and has been designed, type-tested and CE-marked to comply
with EU regulations.

Warranty
Revo Technologies Ltd warrants to the end user that this product will be free from defects in material and workmanship in normal use for a period of one year from the date of purchase. This warranty covers failures due to manufacturing defects and does not apply in cases such as accidental damage, general wear and tear, user negligence, modifications or repairs which are not approved by TELESTAR DIGITAL GmbH.
Copyright
Copyright 2022 TELESTAR DIGITAL GmbH. All rights reserved.
No part of this publication may be copied, distributed or transmitted without the permission of
Revo Technologies Limited.
REVO and SUPERCONNECT STEREO are trademarks or registered trademarks of TELESTAR DIGITAL GmbH.
The Bluetooth® tradename and logos are registered trademarks owned by Bluetooth SIG, Inc. and any use of such tradenames is under licence.
TELESTAR-DIGITAL GmbH, Am Weiher 14, 56766 Ulmen, Germany
Tel: +49 (0) 26 76 / 9 52 01 01 Email: enquiries@revo.co.uk
The Spotify product is subject to third party licensing terms which can be viewed at: www.spotify.com/connect/third-party-licenses.
Disclaimer
Revo Technologies Limited makes no representations or warranties with respect to the contents of this publication and specifically disclaims any implied warranties of merchantability or fitness for a particular purpose. In addition, Revo Technologies Limited reserves the right to make further changes to this manual without prior notice.
Declaration of Conformity (RED)
The company hereby declares that the radio device Revo SUPERCONNECT STEREO complies with Directive 2014/53/EU.
The full text of the EU declaration of conformity can be found at the following Internet address: http://www.telestar.de/de_DE/Konformitaetserklaerung/352-529/?productID=23408
TELESTAR-DIGITAL GmbH, Am Weiher 14, 56766 Ulmen, Germany
WELCOME
Thank you for purchasing our radio
SUPERCONNECT STEREO. We are sure that it will give you many years of pleasure and reliable service.
SUPERCONNECT STEREO is the latest expression of our design and engineering philosophy.
This manual has been designed to help you get your radio installed and ready to use quickly,
provide advice on the most complex features of the product and give information on safety, warranty, details and troubleshooting.
UNPACKING RADIO
The SUPERCONNECT STEREO box should contain the following:
• SUPERCONNECT STEREO Radio
- Remote control
• Power supply unit with multi-country adapter
• Display cleaning cloth
- Warranty card
- User manual
If any parts are missing or damaged, please contact your dealer or call Revo directly on
+49 (0) 2676 / 9 52 01 01
PLEASE NOTE: All packaging should be kept for possible future use: should it be necessary, it is the safest way to transport the radio.
text_image
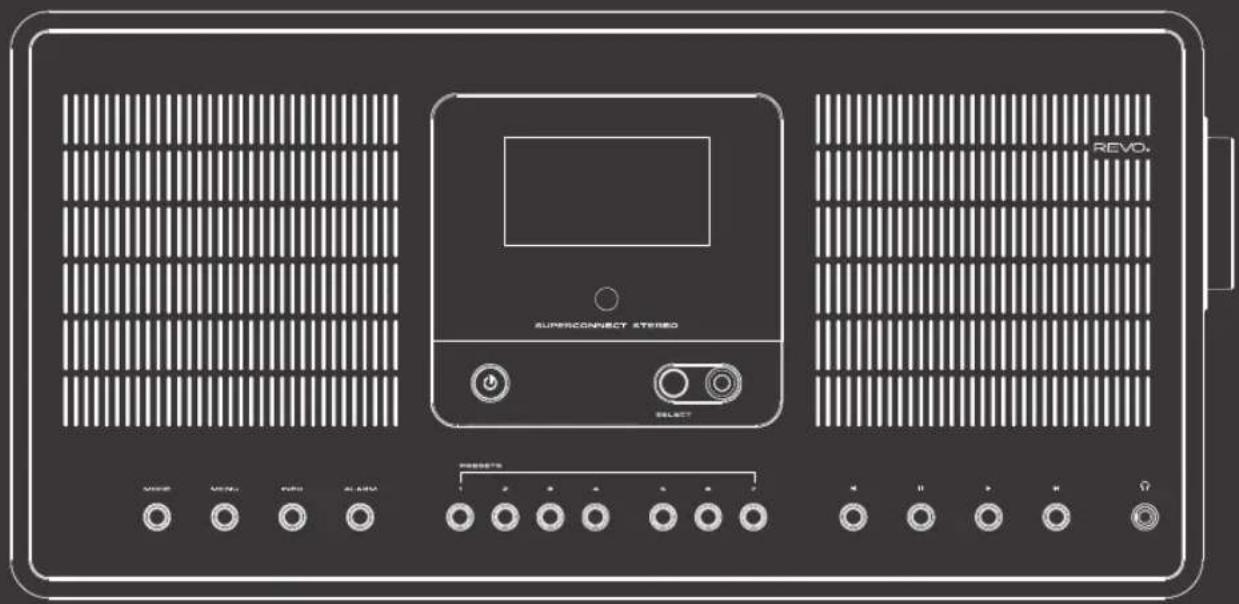
Volume Control knob Snooze Touch area Mode Menu INFO Alarmclock POWER Standby Station memory 1-4 Confirmation Button Station memory 5-7 Joystick Controller Previous track Pause Play Next Track Headphone Connection Telescopic antenna Cinch Ports AUX IN Digital optical Output DC-Power adapter Connection Kensington Anti-theft protectionREMOTE CONTROL
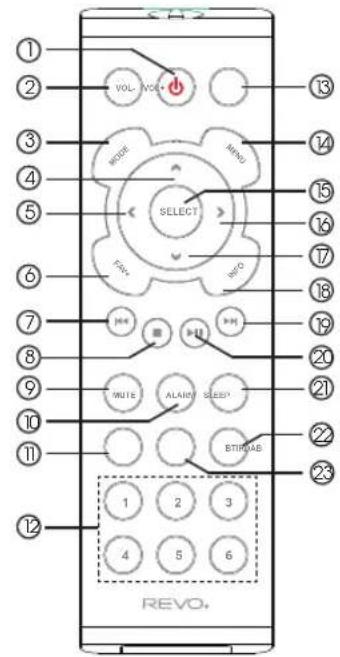
01 - On/Off
02 - Reduce volume
03 - Operating mode
04 - Scroll up
05 - Selection to the left (Back)
06 - Access the favourites memory
07 - Fast Rewind
08 - Stop
09 - Mute sound
10 - Alarm function
11 - DAB mode
12 - Station memory buttons 1-6
13 - Increase volume
14 - Menu
15 - Confirm selection
16 - Selection to the right (Forward)
17 - Scroll down
18 - Info
19 - Right (Forward)
20 - Play/Pause
21 - Sleep function
22 - Bluetooth mode
23 - Internet radio mode
CHANGING THE BATTERY
The SUPERCONNECT STEREO remote control is powered by a single 3V lithium battery. Depending on use, the battery lasts for 1-2 years.
Change the battery if the button press prompts are sluggish or if the operating range seems to have shrunk significantly.
Replace the battery with a new CR2025 lithium battery.
text_image
① ② ③ ④ ⑤ ⑥ ⑦ ⑧ ⑨ ⑩ ⑪ ⑫ ⑬ ⑭ ⑮ ⑯ ⑰ ⑱ ⑲ ⑳ ⑴ ⑵ ⑶ ⑷ ⑧ ⑨ ⑩ ⑪ ⑫ ⑬ ⑭ ⑮ ⑯ ⑰ ⑱ ⑲ ⑳ ⑪ ⑫ ⑬ ⑭ ⑮ ⑯ ⑰ ⑱ ⑲ ⑳ ⑪ ⑫ ⑬ ⑭ ⑮ ⑯ ⑰ ⑱ ⑲ ⑳ ⑪ ⑫ ⑬ ⑭ ⑮ ⑯ ⑰ ⑱ ⑲ ⑳ ⑪ ⑫ ⑬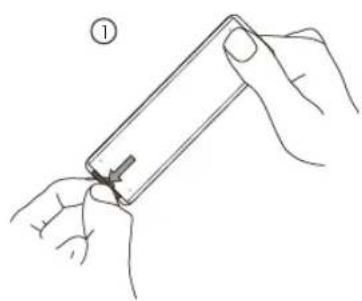
natural_image
Line drawing of hands holding a smartphone with a small object inserted (no text or symbols)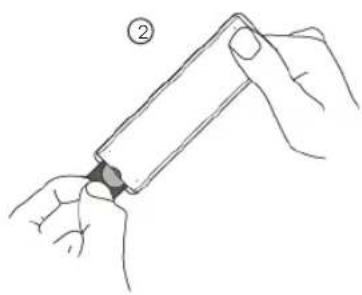
natural_image
Illustration of hands holding a small object with a dark cap, no text or symbols presentPOWER ADAPTER
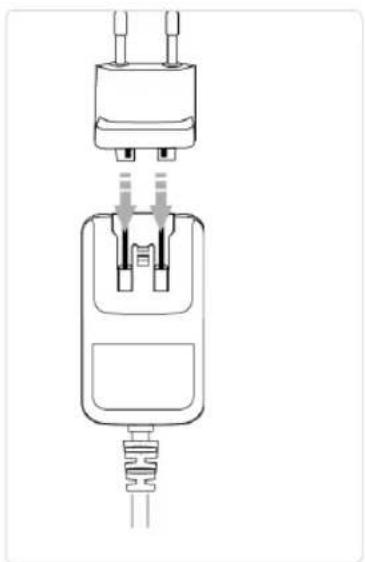
Your SUPERCONNECT STEREO radio comes with different multi-country adapters and this means that it can be used in different countries.
Simply select the adapter that suits your country and follow the instructions below.
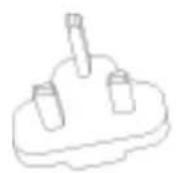
UK
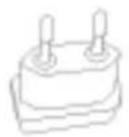
EURO

AUSTRALIA
natural_image
Technical line drawing of a mechanical component with internal components and a spring-like base (no text or symbols)② Pull out the antenna for DAB or FM operation.
POWER CONNECTION
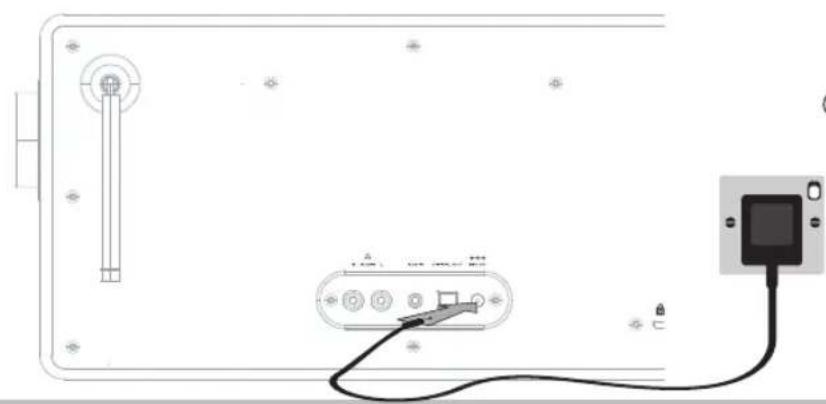
① When using the supplied power adapter, connectone end to the DC socket on the back of your radio and plug the opposite end into the wall socket.
natural_image
Pure electrical circuit lines without any symbols
natural_image
Pure diagram of a vertical pipe with an arrow indicating upward motion, no text or symbols present③ Press the power button once to start the start-up process.
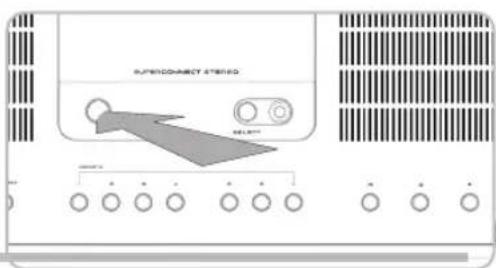
text_image
SUPERCONNECT STEREO SELECTGeneral operation
Switching on the device
By pressing the ⏻ button on the device or on the remote control, you can switch the device on or switch it back to standby.
After switching on for the first time, you can start the setup wizard. Here you can set the date and time either via DAB/FM, Internet or no update (manual). An attempt is then made to establish a connection to a WiFi network. To do this, select the corresponding WiFi network and, if necessary, enter the WiFi password with the remote control.
Switching off the device
By pressing the ⏻ button on the device or on the remote control, you can switch the device to standby. The date and time appear in the display.
Operating the device with the remote control
With the infrared remote control, you can operate the most important functions of the device from the comfort of your chair. When operating the device with the remote control, please observe the following points:
Point the remote control at the front of the device.
There must be a of sight between transmitter and receiver.
If the range of the remote control decreases, the batteries should be replaced with new ones.
The maximum range is approximately 5 metres within an area in front of the device.
Setting the volume
Adjust the volume with the VOL+/VOL- (12/2) buttons on the remote control or the knob on the device. The volume set is shown in the display.
Muting the sound
You can turn off the sound by pressing the MUTE (8) button on the remote control.
This mode is signalled in the status bar by a corresponding icon.
Pressing the MUTE button again turns the sound back on.
Open displays
Pressing INFO on the device or INFO (17) on the remote control several times while playing a source allows you to display and cycle through more information.
General operation

Depending on the selected function/source, the display may differ.
Follow the instructions on the display.
Current source
Station name, Title, Interpret, Additional info, Menu, Lists
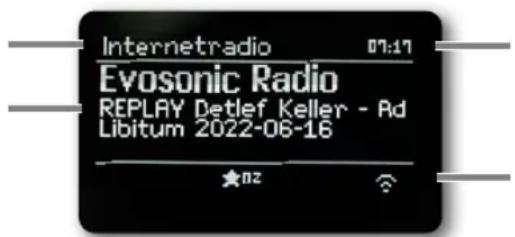
text_image
Internetradio 07:17 Evosonic Radio REPLAY Detlef Keller - Ad Libitum 2022-06-16 ★02Time
Status bar with reception strength WiFi and DAB+/FM, active alarm clock, stereo/mono, Memory position
Using the menu
Menu navigation is mainly done with the MENU, ◀/▶/▲/▼ and SELECT buttons on the remote control.
The menu is divided into the relevant submenu of the currently selected source and the main menu.
To navigate in submenus, highlight the corresponding item with the arrow buttons ▲/▼ and recall/activate with the SELECT button or alternatively the ▶ button. *** Marks the current selection. Pressing the ◀ button takes you back one step.
Closing the menu
Press the ◀ or MENU button several times or wait approx. 15 seconds.
Main menu
You can access all functions and settings of the SUPERCONNECT STEREO via the main menu.

ress the MENU button to enter the device menu.
If you are currently in a playback source, the MENU button opens the source submenu for this source
To enter the main menu, select Main Menu in the open Source submenu with the ▲ or ▼ > button and press the SELECT button.
General operation
Source selection
Press the MODE button repeatedly until the desired source is shown in the display.
Alternatively:
Press the MENU button.
From the source submenu, use the ▲ or ▼ buttons to select > (Main Menu) and press the SELECT button.
Press ▲ or ▼ to select the desired source and press SELECT to confirm your selection.
Internet radio / Podcasts
The SUPERCONNECT STEREO is equipped with an internet radio receiver.
To be able to receive and play internet radio stations or podcasts, you need a WiFi router with internet access.
Press the MODE button repeatedly until (Internet Radio) or (Podcasts) is shown in the display.
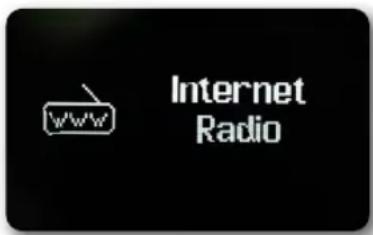
text_image
WWW Internet Radio
text_image
WWW PodcastAlternatively:
Press the MENU button and then select (Main Menu > Internet Radio) or (Podcasts).
If you start internet operation for the first time without having configured a WiFi connection, the search wizard appears, which shows you all WiFi networks within range.
V
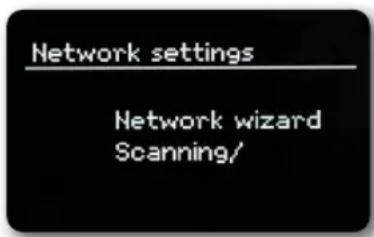
text_image
Network settings Network wizard Scanning/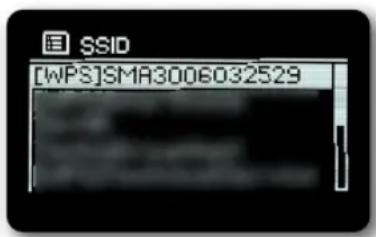
text_image
SSID [WPS]SMA3006032529Internet radio / Podcasts
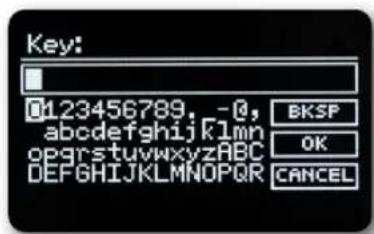
Select the WiFi network you know with ▲/▼ and SELECT, select (Skip WPS) and enter the appropriate password using the keypad that appears.
text_image
Key: 0123456789, -0, abcdefghijklmnopqrstuvwxyzABC DEFGHIJKLMNOPQRSTUVWXYZ BKSP OK CANCEL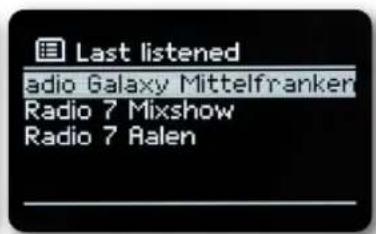
text_image
Last listened radio Galaxy Mittelfranken Radio 7 Mixshow Radio 7 AalenThen select the OK field and press the SELECT button. If the password was correct, a connection to this network is now established. You can see if there is a connection by the signal bars in the status bar of the display.
To cancel the entry, select CANCEL and press SELECT. If you make a mistake, you can delete the last letter entered by pressing BKSP.
Recent stations
Select (MENU > Last Listened) to display a list of recently played stations.
Select a station with ▲ or ▼ and play it with SELECT.
text_image
Internet radio Last listened > Station list > Main menu >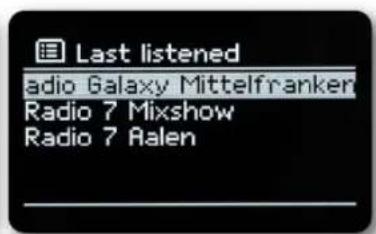
text_image
Last listened radio Galaxy Mittelfranken Radio 7 Mixshow Radio 7 AalenStation list
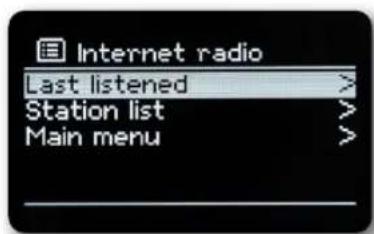
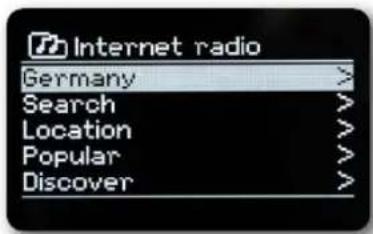
Press the MENU button and select Station List.
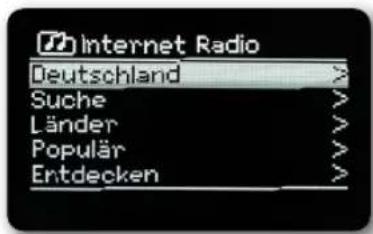
Station list displays all internet radio stations, divided into different categories.
You also have access to your favourites here.
Internet radio / Podcasts
text_image
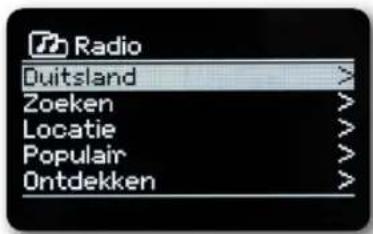
Internet radio Germany > Search > Location > Popular > Discover >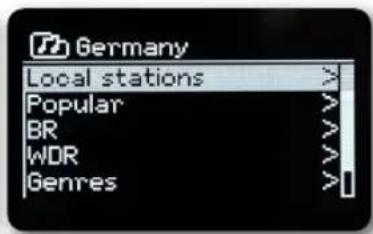
text_image
Germany Local stations > Popular > BR > WDR > Genres >Select a station by category/country/genre and press SELECT.
Press and hold one of the number buttons 1...7 to store a station to one of the number buttons. To get additional information about the currently playing station, press the INFO button.
Spotify Connect
Use your smartphone, tablet or computer as a remote control for Spotify. Go to spotify.com/connect to find out more. The Spotify software is subject to third party licences which can be found here: http://www.spotify.com/connect/third-party-licenses

Spotify®
DAB+radio
What is DAB+
DAB+ is a new digital format that lets you hear crystal clear sound without any background noise. Unlike conventional analogue radio stations, DAB+ broadcasts several stations on the same frequency. This is called ensemble or multiplex. An ensemble consists of the radio station as well as several service components or data services, which are broadcast individually by the radio stations. Find out more at www.dabplus.de or www.dabplus.ch for example.
DAB+ radio
DAB radio reception
Press the MODE button repeatedly until (DAB Radio) is shown in the display.
Alternatively:
Press the MENU button and then select (Main Menu > DAB).
If you are in a submenu, select the main menu as described under point.
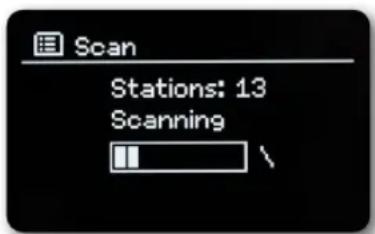
When DAB is started for the first time, a complete station search is carried out.
text_image
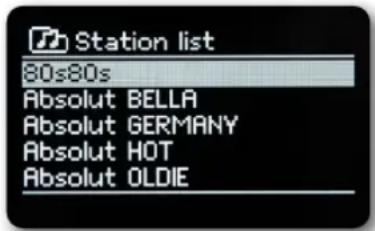
Scan Stations: 13 ScanningThe station list is then displayed.
text_image
Station list 80s80s Absolut BELLA Absolut GERMANY Absolut HOT Absolut OLDIECarrying out a scan
Press MENU and use ▲ or ▼ to select (Scan). Confirm by pressing the SELECT button.
If no station is found, check the antenna and change the installation location if necessary.
Manual search
If you want to perform a manual channel search, proceed as follows:
Press MENU, use ▲ or ▼ to select (Manual Tune) and press SELECT.
Press ▲ or ▼ to select a station frequency and press SELECT.
If stations are transmitted on the selected frequency, this is shown on the stability bar. If these stations are not yet in your channel list, they will now be saved there.
DAB+ radio
Selecting a station
Press ▲ or ▼ to open the station list and select a station.
To play a station, press the SELECT button.
Alternatively, press MENU and use ▲ or ▼ to select > (Station List).
Storing a station in the favourites list
The favourites memory can store up to 10 stations.
The stored station are retained even after a power failure.
Play the desired station.
Press one of the number buttons 1 ... 7 (1-6 on the remote control) and keep them pressed. (saved.)
appears in the display.
Storing additional stations: Repeat process.
Alternatively:
Press and hold the FAV+ button on remote control, use the Joystick on the device or the
▲▼ buttons on the remote control to select a favourite memory location and press the SELECT button.
Selecting the saved stations
Press the desired number button 1 ... 7. (1-6 on the remote control)
If you have not saved a channel to the selected favourite memory location, (Preset empty) appears.
Alternatively:
Press the FAV+ button on remote control, use the Joystick on the device or the
▲▼ buttons on the remote control to select a favourite memory location and press the SELECT button.
Deleting a favourite memory location
Simply save a new station to the relevant favourite memory location.
Signal strength
Press the INFO button several times. The signal strength is displayed.
The level of the bar indicates the current level.
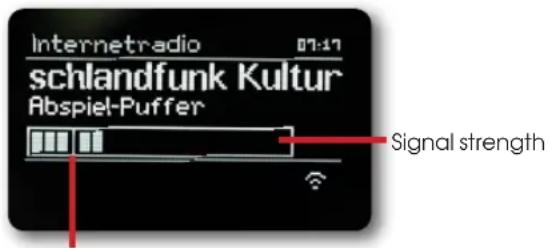
Minimum signal strength
DAB+ radio
Stations whose signal strength is below the required minimum signal strength do not send a sufficient signal. Align the antenna. Pressing the INFO button several times toggles through various information, such as programme type, multiplex name, frequency, signal error rate, data bit rate, programme format, date (depending on the active source).
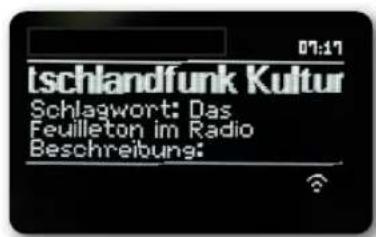
If it is supported by the programme provider, the Dynamic Label Plus service allows, for example, the name of the current programme or the title and artist to be displayed in addition.
Setting DRC
The compression rate compensates for dynamic fluctuations and associated volume variations.
Press MENU and select > (DRC) to select the desired compression rate
To select the compression rate use:
DRC high - high compression
DRC low - low compression
DRC off - compression switched off.
Confirm by pressing SELECT.
Deleting inactive stations
Press MENU and use ▲ or ▼ to select > (Prune invalid).
Confirm by pressing SELECT.
Press ▲ or ▼ to select > (Yes) and press SELECT to confirm.
Adjust station order
Press MENU and then press ▲ or ▼ > (Station order).
Select a sorting type with ▲ or ▼ and confirm your selection with SELECT.
You can choose between: Alphanumeric and Enseble.
FM operation
Switching on radio mode
Press the MODE button repeatedly until (FM Radio) is shown in the display.
text_image
FM RadioAlternatively:
Press the MENU button and then select (Main Menu > FM).
The frequency is set to 87.5 MHz when the device is switched on for the first time. If you have already set or saved a station, the radio plays the last station set.
For RDS stations, the station name appears.
To improve reception, adjust the antenna.
FM reception with RDS information
RDS is a method of transmitting additional information via FM stations. Broadcasting stations with RDS broadcast e.g. their station name or the programme type. It is shown in the display.
The device can show the RDS information:
RT (Radio text),
PS (Station name),
PTY (Programme type)
Manual station selection
Press ▲ or ▼ in FM mode to tune to the desired station. display shows the frequency in 0.05 MHz frequency steps.
Automatic station selection
Press SELECT to start the automatic station scan. The transmitter frequency scrolls upwards in the display. or In FM mode, press and hold ▲ or ▼ for about 2 seconds to automatically search for the next station with sufficient signal.
If an FM station with a sufficiently strong signal is found, the search will stop and the station will be displayed. If an RDS station is received, the station name and, if applicable, the radio text, will appear. To set up stations with a weaker signal, please use manual station selection.
FM operation
You can set in the menu > Scan setting whether the scan only finds strong stations (Only strong stations).
To do this, press MENU > Scan setting > Strong stations only> (Yes). Confirm the selection with SELECT. As a result, the channel search stops only for stations with strong reception. For weaker stations, please use the manual station search.
Setting mono/stereo
Press MENU and use ▲ or ▼ to select > Audio Setting > Listen in Mono only? > Select (YES) to play back in mono only when FM reception is weak.
Confirm by pressing the SELECT button.
Storing FM stations
The favourite memory can store up to 10 stations.
The stored station are retained even after a power failure.
Play the desired station.
Press and hold one of the number buttons 1 ... 7 (1-6 on the remote control). (saved.) appears in the display.
Storing additional stations: Repeat process.
Alternatively:
Press and hold the FAV+ button on the remote control. Use the Joystick on the device or the
▲▼ buttons on the remote control to select a favourite memory location and press the SELECT button.
Selecting the programmed stations
Press the desired number button 1 ... 7. If you have not stored a station in the selected favourite memory location (Preset empty) appears.
Alternatively:
Press the FAV+ button on the remote control. Use the Joystick on the device or the
▲▼ buttons on the remote control to select a favourite memory location and press the SELECT button.
Deleting a favourite memory location
When a new station is stored in a programme position that is already occupied, the previous programme assignment is deleted and overwritten.
Bluetooth
Activating Bluetooth mode
Press the MODE button repeatedly until (Bluetooth Audio) is shown in the display.
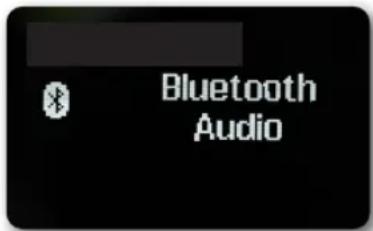
text_image
Bluetooth Audio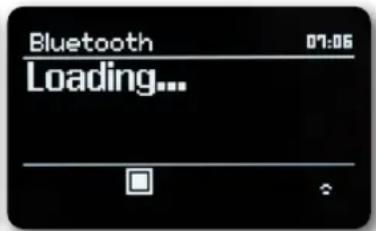
text_image
Bluetooth 07:06 Loading...Alternatively:
Press the MENU button and then select (Main Menu > Bluetooth).
In the status bar of the display, a flashing (BT) signals pairing mode.
If the SUPERCONNECT STEREO has already been paired once with another device that is within range the connection is established automatically.
Pairing
Activate Bluetooth on your music player, e.g. a smartphone or tablet.
For information on how to activate Bluetooth on your music player, please refer to the corresponding operating instructions of the device you want to pair with the SUPERCONNECT STEREO.
Please note that only 1 device can connect to the SUPERCONNECT STEREO at a time.
Be careful not to exceed the maximum Bluetooth range of 10 metres to ensure proper playback quality.
On your music player, select the list of Bluetooth devices found.
Find the entry SUPERCONNECT STEREO in the list and select it. If you are asked to enter a PIN, enter "0000" (4x zero).
When pairing is successfully completed, (BT) will stop flashing on the REVO Radio display.
Playing music
Select a music track on your music player and play it.
The sound is now played back via the SUPERCONNECT STEREO.
You can control playback on your music player using the playback buttons on the REVO radio remote control (compatible devices only).
To pair a new device with the SUPERCONNECT STEREO, you must first disconnect the old device. You can either start this on the external device or select STEREO MENU > (Bluetooth Setup) on the radio The SUPERCONNECT STEREO is now in pairing mode again.
Audio input
You can play back the sound from an external device via the loudspeaker of the SUPERCONNECT STEREO.
Connect the external device to the AUX-IN connector (3.5mm stereo jack) on the rear panel
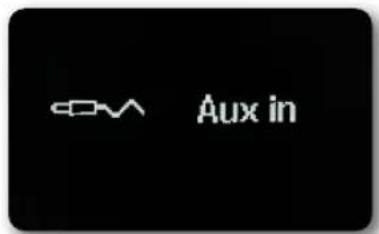
Select the audio input with the MODE button. The display shows (Aux-In).
text_image
Aux inControl and playback is done on the external device. Do not set the volume on the playback device too low to avoid noise disturbances.
Advanced functions
Sleep function
Press the MENU button and then select (Main Menu > Sleep).
Use the ▲ or ▼ buttons to set in steps of Sleep off, 15, 30, 45, 60 minutes to set the time period after which the device switches to standby in each mode.
Alternatively:
Press the SLEEP button several times.
A clock symbol appears in the status bar of the display with the time remaining until the SUPERCONNECT STEREO switches to standby.
Alarm
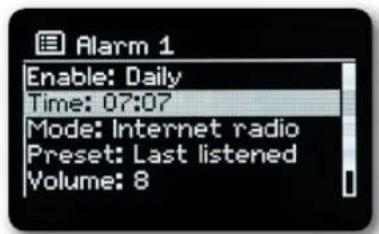
Press the MENU button and then select (Main Menu > Alarm).
text_image
Alarm 1 Enable: Daily Time: 07:07 Mode: Internet radio Preset: Last listened Volume: 8Alternatively:
Press the ALARM button on the device to directly start the alarm configuration.
Advanced functions
Setting alarm time
You cannot operate the alarm function until the correct time has been set. Depending on the configuration, this happens automatically or must be set manually. The time can be updated either manually, via DAB/FM or the internet.
Select one of the alarm time memories Alarm 1 or Alarm 2 with the ▲ or ▼ buttons and confirm with SELECT.
Alternatively:
Press the ALARM button on the device to directly start the alarm configuration.
Then go through all the points one by one. Confirm each entry with the SELECT button.
Repeat
You can choose between Daily (every day of the week), Once, Weekdays (Mon - Fri) or Weekend (Sat and Sun). Press the SELECT button to confirm the settings.
Time
Here you can enter the alarm time and, if necessary, the date.
First select the hours with the ▲/▼ buttons and press the SELECT button to accept.
Then the minutes are entered. Adopt these changes with the SELECT button as well.
If Repeat > (Once) was selected, you must enter the date as well as the time.
Mode
Then enter the source. The options are BUZZER, Internet Radio, DAB+ or FM.
Press the SELECT button to accept the setting.
Programme
If you have selected Internet Radio, DAB+ or FM, you can then specify whether you want to wake up to the station you were listening to last, or one from your favourites list.
Volume
Use the ▲/▼ buttons to select the volume at which you want to be woken up.
Save
Press the SELECT button to save the alarm.
The alarm is active as soon as you have set the alarm repeat to Daily, Once, Weekend, or Weekdays.
An alarm clock symbol with the corresponding digit of the active alarm then appears in the status bar.
Switching off alarm clock after alarm
Press the On/Standby button to turn the alarm off.
Advanced functions
Snooze function
In the event of an alarm, touch the metal surface on the front of the device (e.g. the speaker grille) to switch on the snooze function. You can select the length of the snooze period between 5, 10, 15 or 30 minutes by repeatedly touching the front of the device.
The alarm icon remains on the display when the alarm repeat is set to Daily, Weekend, or Weekdays.
Switching alarm off
Select > Repeat: Off from the corresponding alarm menu.
App operation
UNDOK App
This innovative and easy-to-use app works as a full remote control for the SUPERCONNECT STEREO.
First you will need to download the "UNDOK" app from the Apple App Store (iOS devices) or Google Play Store (Android devices).
Make sure that your phone or tablet works on the same WiFi network as your SUPERCONNECT STEREO.
Download the UNDOK app and an "Audio Systems" opening screen should appear on your UNDOK-enabled devices. The app allows you to control personal devices.
You can control your REVO radio not only with the local controls and remote control, but also conveniently with an app, which is available for Android and iOS.
To do this, download the UNDOK app from the Google Play Store for Android operating systems, or via App Store for iOS operating systems, and install the app on your smartphone/tablet.
Make sure that the radio and your mobile tablet are registered on the same network.
Start the app.
When the APP is started, it automatically recognises the REVO radio, provided it is registered in the same network.
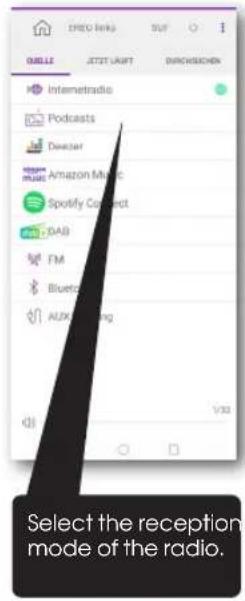
text_image
INTemetradio Podcasts Deasar Amazon Music Spotify Connect DAS FM Bluetooth AUX Select the reception mode of the radio.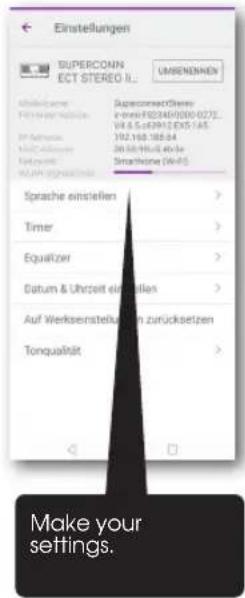
text_image
Einstellungen SUPERCONN ECT STEREO I... UMBENDENEN SuperconnectOwner e-mail: F52340/0100-0272_ V4.6.5@2991.8X5.145_ 102.168-188.84 20.50-19.5 40-5e Smartphone (W-95) Sprache einstellen > Timer > Equalizer > Datum & Uhrzeit einstellen > Auf Weksenstellungen zurücksetzen Tonqualität > Make your settings.
text_image
TRED WIKU GELLI JATZ LAUT DACHSCHEN Deutschland Funk Kultur Die Woche in der Musik Christoph Müller 1/32 The information from the radio station providers is displayed to you.This description corresponds to the app as at time of printing. The app's functions or appearance may be changed by software updates.
All settings explained under this point apply equally to all sources.
System settings
Open the menu and use the ▲ / ▼ > buttons to select ( Main Menu > System Settings ).
Press the SELECT button to open the system settings.
Equaliser
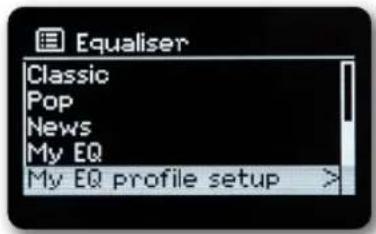
Press the MENU button and then select (Main Menu > System Settings > Equalizer).
Here you can apply various equaliser settings to adjust the sound to your liking.
text_image
Equaliser Classic Pop News My EQ My EQ profile setup >You can choose between:
Normal, Jazz, Rock, Movie, Classical, Pop, News, and My EQ.
Use the ▲/▼buttons to select an equaliser setting and press the SELECT button to apply the setting.
Own EQ setting
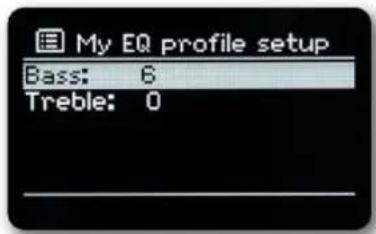
Select (System Settings > Equalizer > My EQ Settings) from the menu.
text_image
My EQ profile setup Bass: 6 Treble: 0Select (Bass) to boost/reduce the bass or (Treble) to boost/reduce the treble.
Change the value with the ▲ or ▼ buttons and then press SELECT.
You can recall this preset at any time under My EQ.
System settings
Internet settings
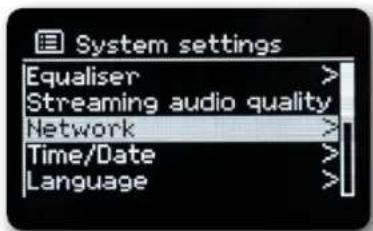
Press the MENU button and then select (Main Menu System Settings > Network). In this menu you will find some settings and information about the internet connection. Select Network Wizard to establish a WiFi connection.
text_image
System settings Equaliser > Streaming audio quality Network Time/Date Language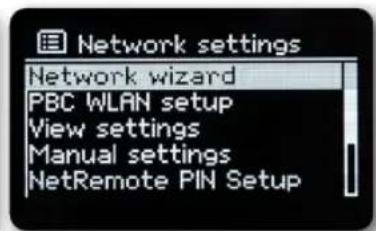
text_image
Network settings Network wizard PBC WLAN setup View settings Manual settings NetRemote PIN SetupThe network wizard shows you all WiFi stations within range.
Select the WiFi network you know using ▲/▼ and SELECT, and enter the corresponding password using the displayed keypad.
Then select OK and press the SELECT button. If the password was correct, a connection to this network is now established.
You can see if there is a connection by the signal bars in the status bar of the display.
To cancel, select CANCEL and press the SELECT button. If you make a mistake, you can delete the last letter entered by pressing
BKSP
If you want to establish a WPS connection instead of entering the password, proceed as follows after selecting the WiFi network:
For information on how to activate WPS on your router, please refer to its operating instructions.
Select (Press button) on the SUPERCONNECT STEREO after selecting the WiFi network. Follow the instructions on the display.
Start WPS on your router by pressing the corresponding button.
If your router only supports the WPS PIN, select (PIN) on the SUPERCONNECT STEREO and write down the PIN shown on the display. You must then enter the PIN in the router.
WPS connection
Select (Internet Settings > PBC WLAN Setup) if your router has the WPS function.
This establishes a direct connection to the router without having to enter the WiFi password.
For information on how to activate WPS on your router, please refer to its operating instructions.
Start WPS on your router by pressing the corresponding button.
System settings
More information about network connection
To view more information about the current connection, select Network.
Select Manual Settings if you know the parameters of your network and want to configure them manually. Follow the instructions on the display.
Select Delete Network Profile to delete connections that are no longer required.
Under NetRemote PIN you can configure a PIN for remote access (e.g. with the UNDOK app).
Select Keep network connected if the WiFi connection is to be maintained even in standby mode.
This setting increases the power consumption, but allows app control via the UNDOK app.
Settings
Press the MENU button and then select (Main Menu System Settings > Time and Date).
Select (Time/Date Setting) to set the time and date manually.
Use the ◀ or ▶ buttons to select a value. Use the ▲ or ▼ buttons to change it.
Confirm by pressing SELECT.
Select (Time Update) to set whether the time update should be done automatically via DAB, FM or internet or whether you want to enter it manually.
To do this, select (Update DAB+), (Update FM), (Update NET) or (No Update).
Under the option (Set Format) you can activate the 12 or 24 hour format. Confirm the selection with the SELECT button.
Select (Set Time Zone), to match the current time zone you are in (only when updating via the Internet).
Under (Daylight Saving Time) you can define whether daylight saving time should currently be active (only when updating via the internet).
Language
Press the MENU button and then select (Main Menu > System Settings > Language).
Press ▲ or ▼ to select the language and press SELECT to confirm.
System settings
Factory settings
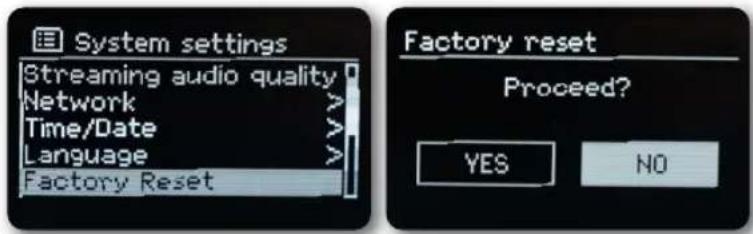
If you change the location of the device, e.g. when moving house, the stored stations may no longer be receivable. In this case, by restoring the factory settings, you can delete all stored stations and then start a new station scan.
Press MENU and then select (Main Menu > System Settings > Factory Reset).
text_image
System settings Streaming audio quality Network Time/Date Language Factory Reset Factory reset Proceed? YES NOConfirm by pressing SELECT.
Press ◀ or ▶ to select Yes and accept the confirmation prompt by pressing SELECT.
All previously stored stations and settings will be deleted.
After a reset, you can start or skip the setup wizard.
Software update
From time to time, software updates may become available which may include improvements or bug fixes. The SUPERCONNECT STEREO is therefore always up to date.
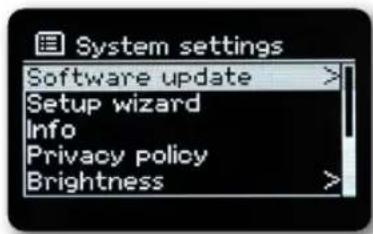
Press the MENU button and then select (Main Menu > System Settings > Software update).
Select (Auto-check setting) if you want the SUPERCONNECT STEREO to periodically check for new software versions
text_image
System settings Software update > Setup wizard Info Privacy policy Brightness >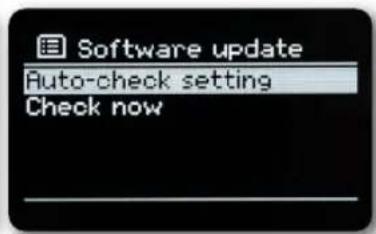
text_image
Software update Auto-check setting Check nowSelect (Check Now) if you want to check whether a newer software version is available now.
If a software update has been found, follow the instructions on the display.
To find and download software updates, the SUPERCONNECT STEREO must be connected to the internet.
Do not switch off the SUPERCONNECT STEREO during the update process!
System settings
Setup wizard
Press the MENU button and then select (Main Menu > System Settings > Setup wizard).
When the device is switched on for the first time, the setup wizard starts automatically.
When the display shows (Start now?), select (YES).
If you select (No), the wizard will exit and you will have to apply the necessary settings manually
You will now be guided through the settings step by step.
Select the desired display format for the time display under (Time Format). (For more details see chapter "Time settings")
In the next step, you must select which source is to be used to synchronise the time. (For more details see chapter "Time settings")
Once you have selected (Update form Net), you must then specify the time zone and the summer/winter
time.
After the time and date settings, some network settings are now applied.
Select whether the WiFi connection should also remain active in standby. press the SELECT button.
Make sure that the device is within range of the desired WiFi network and that you have the access details. In some cases it may be necessary to apply some settings on the router. In this case, please consult the relevant operating instructions.
After a search for available wireless networks, you will be shown the result.
Select the desired wireless network and confirm the selection with SELECT.
Select Skip WPS to enter the password.
If it is a protected network, you will be prompted to enter the corresponding access key
To do this, mark the corresponding character in each case.
Then enter the selected character by pressing the SELECT button.
Continue moving in this way until the complete access key is visible in the input field.
To cancel the entry, select CANCEL and press SELECT. If you make a mistake, you can delete the last letter entered by pressing BKSP.
Then select OK and press the SELECT button. If the password was correct, a connection to this network is now established.
When (Setup Wizard Completed) appears in the display, press the SELECT button.
Info
Press the MENU button and then select (Main Menu > System Settings >Info).
Confirm by pressing SELECT.
The software version is displayed.
Press the MENU button to switch back.
System settings
Display lighting
You can set the display brightness for both operation and standby.
Press the MENU button and then select (Main Menu > System Settings > Brightness).
Select (Power On) or (Standby) to set for operation or standby mode.
You can now adjust the brightness in three steps from High, Medium to Low and Off (only in standby mode).
Confirm the selection with SELECT.
Privacy Information
Press the MENU button and then select (Main Menu > System Settings > Privacy). Here you will find the link to the current data protection information for your device. If the device does not work as intended, check it using the following table.
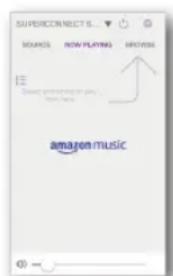
Amazon streaming service
The Amazon Music streaming service is integrated in your radio.
This allows you to control the music using the UNDOK app on your mobile phone, tablet or PC.
You need an Amazon account to use Amazon Music.
-
Download the Amazon Music app and the UNDOK app for your smartphone or tablet (iOS or Android).
-
Start the UNDOK app on your smartphone or tablet on the same WiFi network as your radio.
-
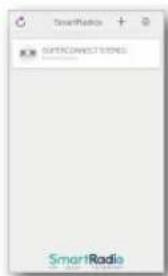
Select "SUPERCONNECT STEREO" from the list in the UNDOK app. (Figure 1)
-
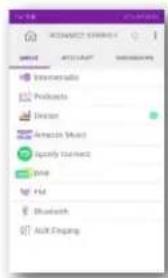
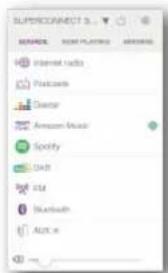
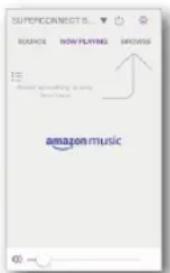
Select "Amazon Music" on the "SOURCE" tab or "SOURCE. (Figure 2)
Please note: Alternatively, press the MODE button on the device to select Amazon Music mode.
-
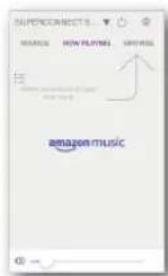
The "NOW PLAYING" screen is displayed and nothing is played. (Figure 3)
-
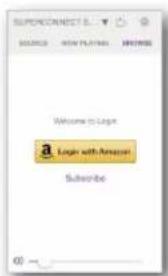
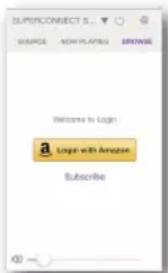
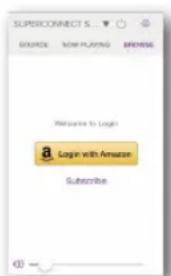
Tap on the "SEARCH" tab or "BROWSE" to select the music to play. For first time use, you need to sign in with an Amazon account. (Figure 4)
text_image
SmartRadio SMTCONNECTIONS SmartRadio①
text_image
SUPERCONNECT 3 IMPORTS Internet radio Paccords Dance Amazon Music Spotify Apple Intel Bluetooth ALIX.m②
text_image
SUPPLEMENTARY REFERENCE HOW PLAYING SUPERVIS amazon.music③
text_image
SUPONNECTS SOURCE NEW PLAYBACK FREESELL Welcome to Login a Login with Amazon Subscribe 00 -④
Deezer streaming service
The Deezer streaming service is integrated in your radio.
Deezer is pre-installed on your radio. Tracks, playlists and other programmes available on Deezer, can be selected using your radio or the UNDOK app to enjoy music on your radio.
You need a Deezer account. Find out more at www.deezer.com.
Play music on your radio
Press the MODE button to select Deezer mode.
You will need to enter your Deezer email address and then your password. Alternatively, you can log in using the UNDOK app.
Once you have successfully logged in, press the joystick and SELECT button on the radio or use the UNDOK app to access your favourite music.
This allows you to control the music using the UNDOK app on your mobile phone, tablet or PC. You need a Deezer account to use Deezer.
- Download the UNDOK app for your smartphone or tablet (iOS or Android).
- Start the UNDOK app on your smartphone or tablet on the same WiFi network as your radio.
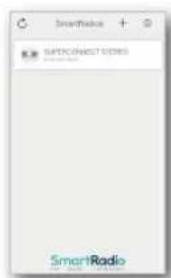
- Select "SUPERCONNECT STEREO" from the list in the UNDOK app. (Figure 1)
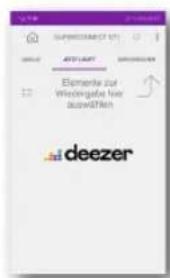
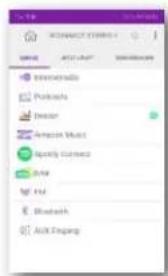
- Select "Deezer" on the "SOURCE" tab or "SOURCE. (Figure 2) Please note: Alternatively, press the MODE button on the device to select Deezer Music mode.
- The "NOW PLAYING" screen is displayed and nothing is played. (Figure 3)
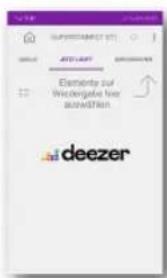
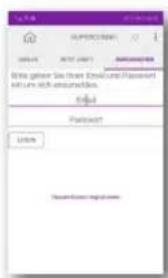
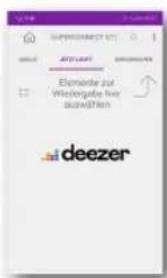
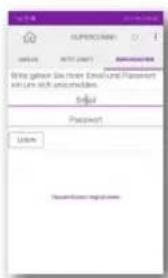
- Tap on the "SEARCH" tab or "BROWSE" to select the music to play. For first-time use, you need to sign in with a Deezer account. (Figure 4)
text_image
SmartRadio SPTCORRECT USED SmartRadio①
text_image
iTunes Pools Music Spotify Music Audio Flash Bluetooth Audio Singing②
text_image
SUPPORTSCHENZ (R) GOOLED ARTILENT DEEMERGEN Elemente zur Wieschungsfristes über automöten deezer③
text_image
SAPRISCHEM 00045 NEXT CARD SAPRISCHEM @www.guosen.Sie.com/Email and Password with Lumen with access credentials. Password: Login Download from https://www.1234567.com④
Troubleshooting
| Symptom | Possible cause and remedy |
| No display, radio not responding to operation | Connect to power using the power cable provided. |
| Remote control does not work | Battery dead or incorrectly inserted. Please check that the batteries are inserted in the correct direction. Point the remote control at the device. |
| DAB+ reception interrupted | No stations availablePerform a search.Antenna not fully extended. Change the radio's location (e.g. nearer to a window), perform another search. |
| Radio programmes glitching Change the location of the radio. | |
| AUX playback not working | The radio is in the wrong mode.Switch to 'AUX' modeCable connection faulty. Check the cable connection between the radio and the external device |
| Poor audio quality when playing music File with low bit rate. Check the audio file.Tip: For MP3 files, the bit rate should be 192Kbit/s or higher. | |
| Volume too low Check the volume setting on the radio. Check the volume setting on the paired device from which you are playing music. | |
| Network connection cannot be established | Check the WiFi function. Activate the DHCP function of the router to which the radio is to be registered.A firewall may be active in the network. |
| WiFi connection cannot be established | Check the availability of WiFi networks.Reduce the distance between the WiFi router and the radio.Make sure that you are using the correct WEP/WPA password when connecting to a WiFi router |
| No internet radio stations available Check network access points. The radio station is currently unavailable. The station's link has been changed or it is no longer transmitting. | |
| USB data carrier not recognised Make sure that the USB storage device is FAT32 formatted. | |
| No sound is coming from the device. All other functions are OK. | Headphones are plugged in.Unplug the headphones. |
If you are still unable to rectify the fault after carrying out the checks described, please contact the technical hotline.
Technical data
Technical changes and errors reserved.
| Model no. / Modellkennung / Désignation du modèle SUPERCONNECT STEREO | |
| Radio frequency / Radio Empfangsfrequenz / Fréquence de réception radio DAB/DAB+: 174 | -240MHzFM: 87.5 - 108MHzBluetooth: 2.402 - 2.480GHzWIFI: 2.412 - 2.472GHz,5.150 - 5.725GHz |
| Maximum radio-frequency power transmitted / Maximale Sendeleistung/ Puissance d’émission maximale | Bluetooth: 4dBmWIFI: 16dBm |
| Speaker Output Power / Lautsprecher Ausgangsleistung / Puissance de sortie du haut-parleur | 15W rms x 2 |
| Power Consumption of Operation Mode / Leistungsaufnahme im Betrieb/ Consommation d’énergie du mode de fonctionnement | 36W (Max) |
| Power Consumption of Standby Mode / Leistungsaufnahme im Standby Betrieb/Consommation d’énergie du mode veille | < 1W |
| Network Standby Power Consumption / Leistungsaufnahme im Netzwerk Betrieb /Consommation électrique en veille du réseau | < 2W |
| Time interval for power management function switched to unit automatically into standby /Automatic standby switch-off / Intervalle de temps pour la fonction de gestion del’alimentation commutée automatiquement sur l’unité en veille | 15 min. |
| Working Environment - Temperature / Umgebungsbetriebstemperatur / Environnement detravail - Température | 0°C ~ 40°C |
| Working Environment Relative Humidity / Arbeitsumgebung - Relative Luftfeuchtigkeit /Environnement de travail - Humidité relative | 5% ~ 80% |
| Storage Condition - Temperature / Lagerbedingungen - Temperatur / Condition destockage - Température | -10°C ~ 50°C |
| Storage Condition - Humidity / Lagerbedingungen - Feuchtigkeit / Condition de stockage- Humidité | < 95% |
| Dimensions (W x D x H) / Abmessungen / Dimension 370mm x 150mm x 190mm |
Technical data for adapter
Technical changes and errors reserved.
| Manufacturer / Hersteller / Fabricant TELESTAR-DIGITAL GmbH, | Am Weiher 14, 56766 Ulmen, Germany |
| Model no. / Modellkennung / Désignation du modèle GPE036W-A180200-Z | |
| Input Power / Eingangsspannung / Tension d'entrée AC 100 - 240 V | |
| Input AC frequency / Eingangswechselstromfrequenz / Fréquence d'entrée CA 50/60 Hz | |
| Output voltage / Ausgangsspannung / Tension de sortie DC 18.0 V | |
| Output power / Ausgangsstrom / Courant de sortie 2.0 A | |
| Output wattage / Ausgangsleistung / Puissance de sortie 36.0 W | |
| Average efficiency in operation /Durchschnittliche Effizienz im Betrieb / Efficacité moyenne en fonctionnement | 89.55 % |
| Efficiency @ 10% power / Effizienz bei geringer Last (10%) / Efficacité à 10 % de puissance 87.57 % | |
| Power consumption @ 0% power / Leistungsaufnahme bei Nulllast / Consommation d'énergie à 0 % de puissance | 0.07 W |
REVO.
SUPERCONNECT STEREO
text_image
REVO. SUPERCONNECT STEREO SELECT PROSETS 1 2 3 4 5 6 7 8 9 10 11 12 13 14 15 16 17 18 19 20 21 22 23 24 25 26 27 28 29 30 31 32 33 34 35 36 37 38 39 40 41 42 43 44 45 46 47 48 49 50 51 52 53 54 55 56 57 58 59 60 61 62 63 64 65 66 67 68 69 70 71 72 73 74 75 76 77 78 79 80 MOSO MENS FINS ALABO Ω
Support technique 84
Dynamic Label Plus 97
Régler le DRC 97
Supprimer les stations inactives 97
www.revo.co.uk/support
natural_image
Line drawing of hands holding a small object with a pointed tip, no text or symbols present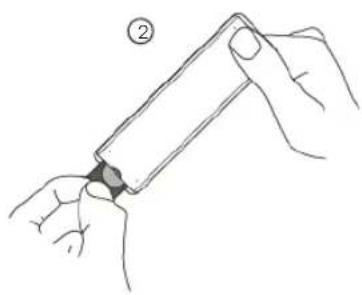
natural_image
Line drawing of hands holding a small object, no text or symbols presentBLOC D'ALIMENTATION
natural_image
Pure electrical circuit lines without any symbols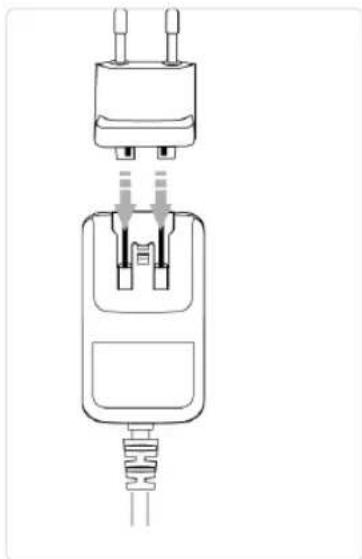
natural_image
Technical line drawing of a mechanical component with no visible text or symbolsnatural_image
Pure diagram of a vertical pipe with an arrow indicating upward motion, no text or symbols presentRadio Internet / Podcasts
Radio Internet / Podcasts
Radio Internet / Podcasts
text_image
CDV Aux inCommande via application
Application UNDOK
text_image
SUPERCONNECT S... SERVICE NOW PLANNING Internet Internet radio Podcasts Doxair Amazon Music Spotify OAS ZM Bluetooth AUX is②
text_image
SUPERCONNECT 8... SEARCH NOW PLAYING DOWNLOAD Decision something to any Best Choice amazon music③
text_image
SUPERCONNECT S... SOURCE NOW PLAYING EXPONE Welcome to Login a. Log with Amazon Subscribe④
Services de streaming Deezer
text_image
SUPPORTS Password Password Password Password Password Password Password Password Password Password Password Password Password Password Password Password Password Password Password Password Password Password Password Password Password Password Password Password Password Password Password Password Password Password Password Password Password Password Password Password Password Password Password Password Password Password Password Password Password Password Authentication④
www.revo.co.uk/support
Milieu-info
INSTRUCTIES VOOR DE VERWIJDERING VAN PRODUCTEN (AEEA-RICHTLIJNEN)

RoHS-CONFORM EN CE-MARKERING


Copyright 2022 TELESTAR DIGITAL GmbH. All rights reserved.
natural_image
Two-step illustration showing hands holding a device with a small object, labeled ① and ② (no text or symbols on the devices themselves)STEKKER
natural_image
Technical line drawing of a mechanical component with no visible text or symbolstext_image
Diagram showing a device panel with labeled ports and cable connections, including a 100% power outlet and a connected device.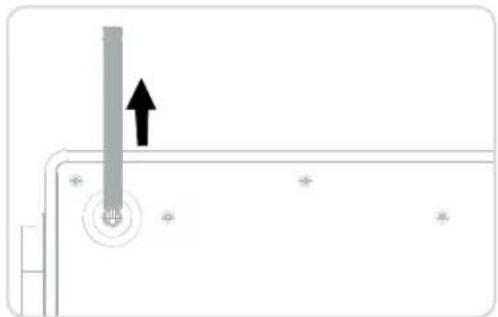
natural_image
Pure diagram of a vertical pipe with an arrow indicating upward motion, no text or symbols presenttext_image
Internetradio 07:17 Evosonic Radio REPLAY Detlef Keller - Rd Libitum 2022-06-16 ★02Tijdstip
Internetradio/Podcasts
text_image
WWW PodcastAlternatief:
Internetradio/Podcasts
Internetradio/Podcasts
http://www.spotify.com/connect/third-party-licenses

Spotify®
DAB+ Radio
Wat is DAB+
text_image
SUPERCONNECT IS SOURCE HOW PLAYING BROWERS Internet radio Podcastra Docoser Amastra Myatic Spotify Coads RPU Skutusoft ALIX in 03 -②
text_image
SUPERCONNECT IS SOURCES NOW PLAYING HISTORY Search programming on play... Amazon Music③
text_image
SUPERCONNECT S... SOURCE NEW PLANNING BROWNS Welcome to Login a Login with Amazon Subscribe④
Streamingdienst Deezer
text_image
Microsoft Teams Microsoft Teams Universal Podcasts Davon Comcast Music Spotify Connect Snap Fid Bluetooth Audio Campaign②
text_image
Supercomputer (S1) GOOGLE ATLANT Elemente zur Weschäume für davastern deezer③
text_image
SUPERCIAL OK NEXT START PRESERVATORY Wing geben Six times Email and Passport with links with unconsoliders. Send Preschool Unknown Cancel④
Foutoplossing
E-MAIL - support@revo.co.uk
WEBSITE - www.revo.co.uk/support