Super Pro Smart - Car charger GYS - Free user manual and instructions
Find the device manual for free Super Pro Smart GYS in PDF.


User questions about Super Pro Smart GYS
0 question about this device. Answer the ones you know or ask your own.
Ask a new question about this device
Download the instructions for your Car charger in PDF format for free! Find your manual Super Pro Smart - GYS and take your electronic device back in hand. On this page are published all the documents necessary for the use of your device. Super Pro Smart by GYS.
USER MANUAL Super Pro Smart GYS
natural_image
Technical line drawing of a rectangular electronic device with a cable inserted, showing internal components and casing (no text or symbols)| FR | 02-07 / 44-48 |
| EN | 08-13 / 44-48 |
| DE | 14-19 / 44-48 |
| ES | 20-25 / 44-48 |
| RU | 26-31 / 44-48 |
| NL | 32-37 / 44-48 |
| IT | 38-43 / 44-48 |
SUPER PRO SMART EV CHARGE
INSTRUCTIONS DE SÉCURITÉ

text_image
A Current Delay + 12hnatural_image
Line drawing of a hand inserting a plug into an electric vehicle charging plug (no text or symbols)natural_image
Hand inserting a plug into an electric plug socket (no text or symbols visible)natural_image
3D technical diagram of a device housing with internal components and mounting brackets (no text or symbols)CONDITIONS DE GARANTIE
This user manual includes operation instructions, and the safety precautions to be followed by the user. Please read it carefully before first use and keep it for future reference. These instructions must be read and fully understood before use. Do not carry out any alterations or maintenance work that is not directly specified in this manual. The manufacturer shall not be liable for any damage to persons or property resulting from use not in accordance with the instructions in this manual. If you have any problems or queries, please consult a qualified person to correctly operate the equipment. This device may only be used for Hybrid Electric Vehicle (HEV) charging within the limits indicated on the device and in the manual. The safety instructions must be followed. The manufacturer cannot be held responsible in the event of improper or dangerous use.
This device provides additional protection in the absence of any verification of the conformity of the power supply wiring, or the presence of a functional RCD (Residual Current Device) with a rated operating differential current not exceeding 30 mA (AC) and 6 mA (DC) upstream.
Do not use the charger if the mains cable or plug is damaged.
Do not use the device if the charging cable is damaged or has a faulty connection, in order to avoid the risk of short-circuiting the vehicle.
Do not cover the device while it is in use.
Do not remove the mains plug from the device and replace it with a different one. Only use accessories sold by GYS, with no user modifications.
The device must not be used if it does not operate correctly in accordance with the manual. If this is the case, please seek advice from the manufacturer, the relevant distributor, or an electrician.
The device must not be stored or used beyond the specified operating conditions, and be protected against misuse, such as dropping, submersion, etc.
The device must be connected without the use of a power adapter, unless it is part of the original product or supplied accessories.
The device must be connected directly to the power socket, without the use of an additional cable (extension cord/multiplug etc.).
Cables and components must not be removed/disconnected while the product is in use.



CE
UK CA


Do not subject the device to excessive impact, twisting or crushing.
Store the device appropriately when it is not in use. Always wrap the cables in a loop, do not twist/kink/bend them.
Be sure to follow the instructions in this manual to avoid the risk of fire, electric shock, serious injury, or death.
Do not leave a charging vehicle unattended for long periods of time.
EV charging mode:
- Mode 2
Power supply:
- The charger must be connected to an EARTHED power supply.
Function to check the presence of a protective conductor on the input circuit.
- The device may not work if used on a computer system or any other ungrounded installation, such as an insulated winding generator or isolation transformer.
- The connection to the power supply must be carried out in compliance with national standards.
It is recommended that the electrical installation intended for EV charging is inspected by an experienced electrical installer.
Maintenance:
- Do not use solvents or any agressive cleaning products.
- Clean the surfaces of the unit with a dry cloth.
Regulations:
• Equipment complies with European directives
- The Declaration of Conformity is available on our website.
- This equipment conforms to UK requirements.
- The UK Declaration of Conformity is also available on our website (see cover page).
• This device complies with Moroccan standards.
- TheC _o (CMIM) declaration of conformity is available on our website.
Disposal:
- This machine is subject to selective collection. Do not dispose of in domestic waste.
DESCRIPTION
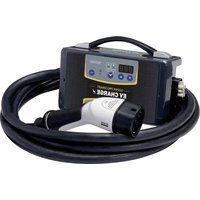
The SUPER PRO SMART EV CHARGE GYS is a Type 2 electric vehicle (EV) charging cable. It is suitable for daily charging applications, and can be easily stored in a vehicle. It is IP65 rated, meaning that it is not vulnerable to dust or rain. This charger is Type 2 compatible, and complies with European standards.
TYPE 2 (European Standard IEC 62196-2)

Audi A3 e-Tron, BMW 13, BMW i8, Chevrolet Spark, Mercedes B Class E-Celi, Mercedes S500 PFIEV, Mercedes SLS EV, Mercedes Vito E-Cell Van, Porsche Panamera S PFIEV, Renault Zoé, Renault Zoé 2013, Volkswagen e-Up, Volkswagen e-Golf, Volvo V60 PHEV ...
SINGLE-PHASE / THREE-PHASE

This device must be supplied with at least 3 cores (Neutral + Phase + Earth) or 5 cores (Neutral + 3 Phases + Earth) and is suitable for use in different types of sockets.
| The SUPER PRO SMART EV CHARGE is supplied with : | 075320 080676 | (UK) | |||||||
 | 1 cable with a single-phase UK plug (13 A) Selectable calibres 6 A 8 A 10 A 13 A | - | √ | ||||||
 | 1 cable with a single-phase plug (16 A) Selectable calibres 6 A 8 A 10 A 13 A 16 A | √ | - | ||||||
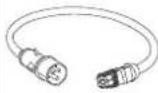 | 1 cable with a single-phase CEE plug (16 A) Selectable calibres 6 A 8 A 10 A 13 A 16 A | - | √ | ||||||
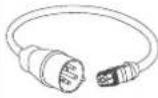 | 1 cable with a three-phase plug (32 A) Selectable calibres 6 A 8 A 10 A 13 A 16 A | √ | √ | ||||||
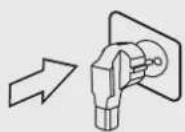
Connect the charging cable with the appropriate plug for the power supply system you are using. The charger automatically recognises the selected plug and limits the charging current accordingly.
Power output table
| 6 A | 8 A | 10 A | 13 A | 16 A | 20 A | 32 A | |
| 230 V | 1.4 kW | 1.8 kW | 2.3 kW | 2.9 kW | 3.7 kW | 4.6 kW | 7.4 kW |
| 400 V | 4.1 kW | 5.5 kW | 6.9 kW | 8.9 kW | 11 kW | 14 kW | 22 kW |
CHOICE OF CHARGE CURRENT
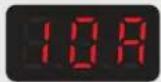 | When the charger is switched on, select the charging current with the arrows ▼ ▲The charger always switches on with a default charging current of 10 A. |
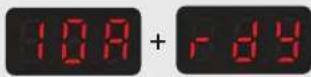 | Press Select to confirm the desired current (if there is a calibration error, press Select for 3 seconds and then repeat the process).→ The display alternates between the selected current rating, and the "Ready" message. |
| The charger is now set up, and ready to be connected to a vehicle. |
Setting up a delayed charge
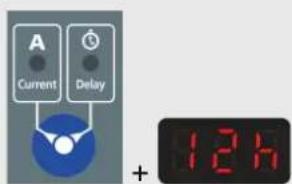
You can set a delayed start to the charge (off-peak/peak hours).

This process must be carried out before confirming the charge rating.
text_image
A Current Delay + 12hPress the «Current/Delay» button The Delay LED will light up. Then use the arrows to set the desired time delay (can be set from 1 to 24 hours, adjustable in hourly increments). Then press Select to confirm.
Memorising the charge rating

This function should only be considered if the electrical installation is suitable. The charging cable must be disconnected from the vehicle.
The settings can be saved in the unit's memory so that they are not lost in the event of a power failure. After disconnecting, the charger will automatically restart with the memorised charging current.
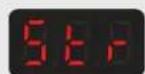
After selecting & confirming the desired rating, press & hold for & seconds simultaneously. The LEDs Current & flash, and the «Storage» message appears briefly on the display.
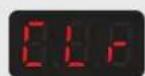
To delete the stored data, repeat the same process of pressing and holding for 3 seconds. The LEDs & flash, and the «Clear» message appears briefly on the screen.
VEHICLE CONNECTION
natural_image
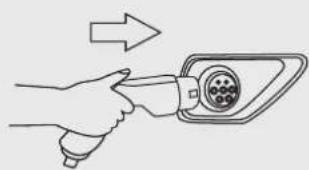
Line drawing of a hand inserting a plug into an electric vehicle charging plug (no text or symbols)Once the appropriate charge setting has been selected, connect the device to the vehicle. The charger shows 📄 on the display (connected).
The charge will then start automatically after a few seconds. The display will show CHA (charging in progress).
If charging has been delayed, the display shows alternately CNR and the remaining time 30' until charging begins. It will indicate CHR when charging is in progress.
END OF CHARGE
The charge can be stopped at any time by pressing for 3 seconds.

Following a voluntary stop, some vehicles have a delay of up to one minute before allowing the charge to be restarted or changed. Wait until End flashes on the display. As long as it is fixed, the charger is locked by the vehicle, no manipulation is possible.
natural_image
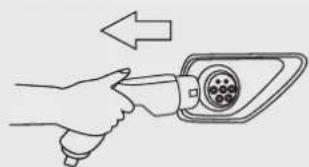
Illustration of a hand inserting a plug into an electric vehicle charging plug (no text or symbols)When the vehicle is fully charged, the charger will show 📄 in the display. If a vehicle decides to relaunch the charge, the charger will automatically restart itself. Remove the charging cable from the vehicle.
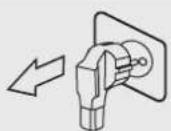
Disconnect the device from the power supply.
LIST OF AVAILABLE OPTIONS
Adaptor Limitation Network Power
Schuko 10 A Single-phase 2.3 kW max
Swiss T13 8 A Single-phase 1.8 kW max
CEE 32 Single-phase 32 A Single-phase 7.4 kW max
CEE 16 Three-phase 16 A Three-phase 11 kW max
... ... ... ...
TROUBLESHOOTING
| Troubleshooting | Causes | Solutions |
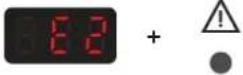 | Accessory fault. | - The attachment connected to the device is not a GYS accessory.- Defect in the accessory. Contact your dealer / service agent. |
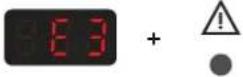 | Thermal protection. | - Ambient temperature too high, ventilate the room and let the charger cool down.The load will automatically restart as soon as the temperature is lower. |
If manufactured before 12/2023
| Troubleshooting | Causes | Solutions |
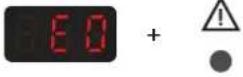 | Electrical fault.Residual DC current detected in electrical installation (>6mA). | - Check your electrical installation and follow the relevant electrical recommendations for this type of product.This error will only disappear after the electrical installation has been brought into conformity. |
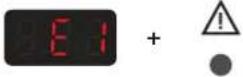 | Electrical fault.Residual AC current detected in electrical installation (>30mA). | - Check your electrical installation and follow the relevant electrical recommendations for this type of product.This error will only disappear after the electrical installation has been brought into conformity. |
| Electrical fault.Residual AC current (>30mA) and/or DC current (>6mA) detected in electrical installation. | - Check your electrical installation and follow the relevant electrical recommendations for this type of product.This error will only disappear after the electrical installation has been brought into conformity. |
If manufactured after 12/2023
| Anomalies Causes Remèdes | ||
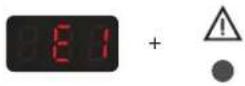 | Electrical fault.Residual AC current (>30mA) and/or DC current (>6mA) detected in electrical installation. | - Check your electrical installation and follow the relevant electrical recommendations for this type of product.This error will only disappear after the electrical installation has been brought into conformity. |
| To test that the leakage current detection is working correctly, press and simultaneously for 10 seconds. The product will then display error E1. Switch the product off and on again to restore normal operation. | ||
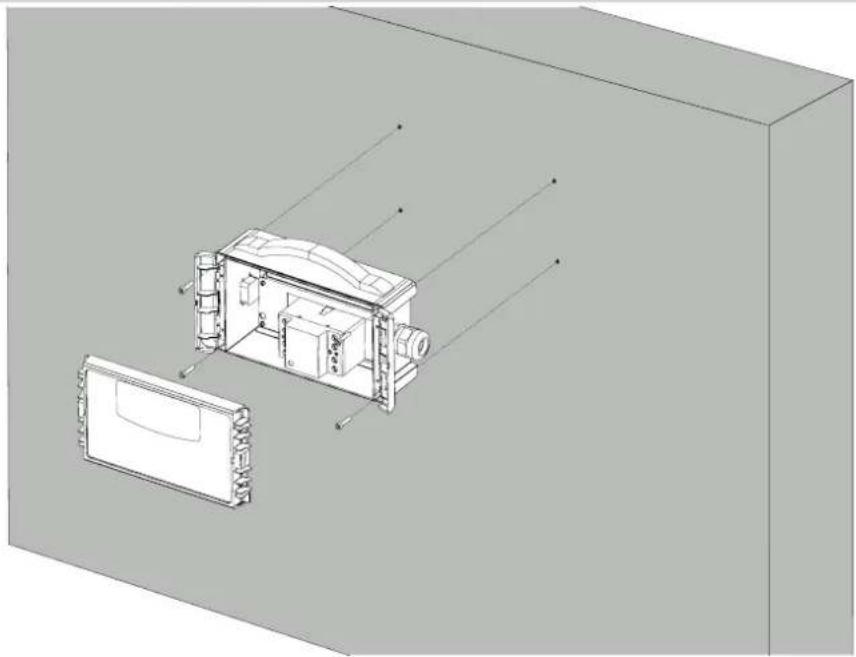
WALL MOUNTING (SCREWS NOT INCLUDED)
natural_image
3D technical illustration of a device housing with internal components and mounting brackets (no text or symbols)WARRANTY CONDITIONS
The warranty covers any defects or manufacturing faults for two years from the date of purchase (parts and labour). The warranty does not cover:
- Any other damage caused during transport.
• The general wear and tear of parts (i.e.: cables, clamps, etc.). - Incidents caused by misuse (incorrect power supply, dropping or dismantling).
- Environment-related faults (such as pollution, rust and dust).
In the event of a breakdown, please return the item to your distributor, along with: - a dated proof of purchase (receipt or invoice etc.).
- a note explaining the malfunction.
text_image
A Current Delay + 12hnatural_image
Line drawing of a hand inserting a plug into an electric vehicle charging plug (no text or symbols)natural_image
Line drawing of a hand inserting a plug into an electric plug socket (no text or symbols)natural_image
3D technical diagram of a device housing with internal components and mounting base (no text or symbols)GARANTIEBEDINGUNGEN
text_image
A Current Delay + 12hnatural_image
Line drawing of a hand inserting a plug into an electric vehicle charging plug (no text or symbols)natural_image
Line drawing of a hand inserting a plug into an electrical outlet (no text or symbols)natural_image
3D technical diagram of a device housing with internal components and mounting brackets (no text or symbols)CONDICIONES DE GARANTÍA
text_image
A Current Delay + 12hnatural_image
Line drawing of a hand inserting a plug into an electric vehicle charging plug (no text or symbols)natural_image
Illustration of a hand inserting a plug into an electric plug socket (no text or symbols)natural_image
3D technical illustration of a mechanical assembly with internal components and alignment lines (no text or symbols)УСЛОВИЯ ГАРАНТИИ
TYPE 2 (Europese Norm IEC 62196-2)

Audi A3 e-Tron, BMW 13, BMW i8, Chevrolet Spark, Mercedes B Class E-Celi, Mercedes S500 PFIEV, Mercedes SLS EV, Mercedes Vito E-Cell Van, Porsche Panamera S PFIEV, Renault Zoé, Renault Zoé 2013, Volkswagen e-Up, Volkswagen e-Golf, Volvo V60 PHEV ...
ENKELFASE / DRIEFASEN

text_image
A Current Delay + 12hnatural_image
Hand inserting a plug into an electric vehicle charging plug (no text or symbols visible)natural_image
Line drawing of a hand inserting a plug into an electric vehicle charging plug (no text or symbols)natural_image
3D technical illustration of a mechanical assembly with internal components and mounting brackets (no text or symbols)GARANTIEVOORWAARDEN
text_image
A Current Delay + 12hnatural_image
Illustration of a hand inserting a plug into an electric vehicle charging plug (no text or symbols)natural_image
Illustration of a hand inserting a plug into an electric vehicle charging plug (no text or symbols)natural_image
3D technical diagram of a mechanical assembly with internal components and directional arrows (no text or symbols)text_image
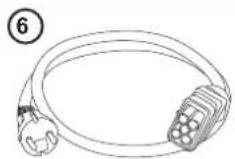
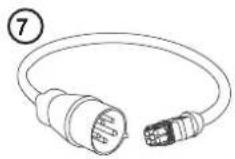
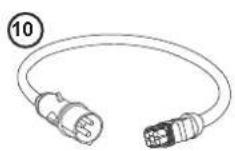
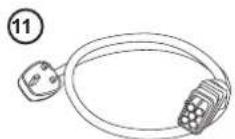
Exploded view diagram of an electronic device with numbered components and corresponding cable images labeled 1 through 11.| 075320 | 080676(UK version) | ||
| 1 | Clavier / Keypad / Bedlenfeld / Teclado / Панель управления / Bedieningspaneel / Tastiera | 51995 | |
| 2 | Carte EON / EON board / EON-Karte / Tarjeta EON / Плата EON / Kaart EON / Scheda EON | E0176C | |
| 3 | Contacteur de puissance / Power contactor / Leistungsschütz / Contactor de potencia / Силовой контактор / Vermogensschake-laar / Connettore di potenza | 52359 | |
| 4 | Cordon VE Type 2 / Type 2 EV cable / EV-Kabel Typ 2 / Cordón VE Tipo 2 / Кабель VE Тип 2 / Kabel EV Type 2 / Cavo VE Tipo 2 | 21582 | |
| 5 | Pied adhésif / Adhesive foot / Klebefuß / Pie adhesivo / Клеящаяся лапка / Zelfklevende voetjes / Piede adesivo | 15123 | |
| 6 | Accessoire monophasé / Single-phase accessory / Einphasiges Zubehör / Accesorio monofásico / Однофазное дополнительное оборудование / Accessoire enkelfase / Accessorio monofase | F0713 - | |
| 7 | Accessoire triphasé / Three-phase accessory / Dreiphasiges Zubehör / Accesorio trifásico / Трехфазное дополнительное оборудование / Accessoire driefasen / Accessorio trifase | F0712 | |
| 8 | Connecteur d'entrée / Input connector / Eingangsanschluss / Conector de entrada / Входной разъем / Ingangsaansluiting / Connettore di ingresso | 53033 | |
| 9 | Capteur de courant résiduel / Residual current sensor / Reststromsensor / Sensor de corriente residual / Датчик остаточного тока / Sensor reststroom / Sensore di corrente residua | Si fabrication avant le 15/09/2023If manufactured before 15/09/2023 | 64768 |
| Si fabrication entre le 15/09/2023 et le 01/12/2023If manufactured between 15/09/2023 and 01/12/2023 | 63187 | ||
| Si fabrication après le 01/12/2023If manufactured after 01/12/2023 | 63188 | ||
| 10 | Accessoire monophasé CEE 16A / Single-phase CEE 16A accessory / Einphasiges Zubehör CEE 16A / Accesorio monofásico CEE 16A / Однофазное дополнительное оборудование CEE 16A / Accessoire enkelfase CEE 16A / Accessorio monofase CEE 16A | - F0972 | |
| 11 | Accessoire monophasé UK 13A / Single-phase UK 13A accessory / Einphasiges Zubehör UK 13A / Accesorio monofásico UK 13A / Однофазное дополнительное оборудование UK 13A / Accessoire enkelfase UK 13A / Accessorio monofase UK 13A | - F0973 | |
CIRCUIT DIAGRAM / SCHALTPLAN / DIAGRAMA ELECTRICO / ЭЛЕКТРИЧЕСКАЯ СХЕМА / ELEKTRISCHE SCHEMA / SCEMA ELETTRICO
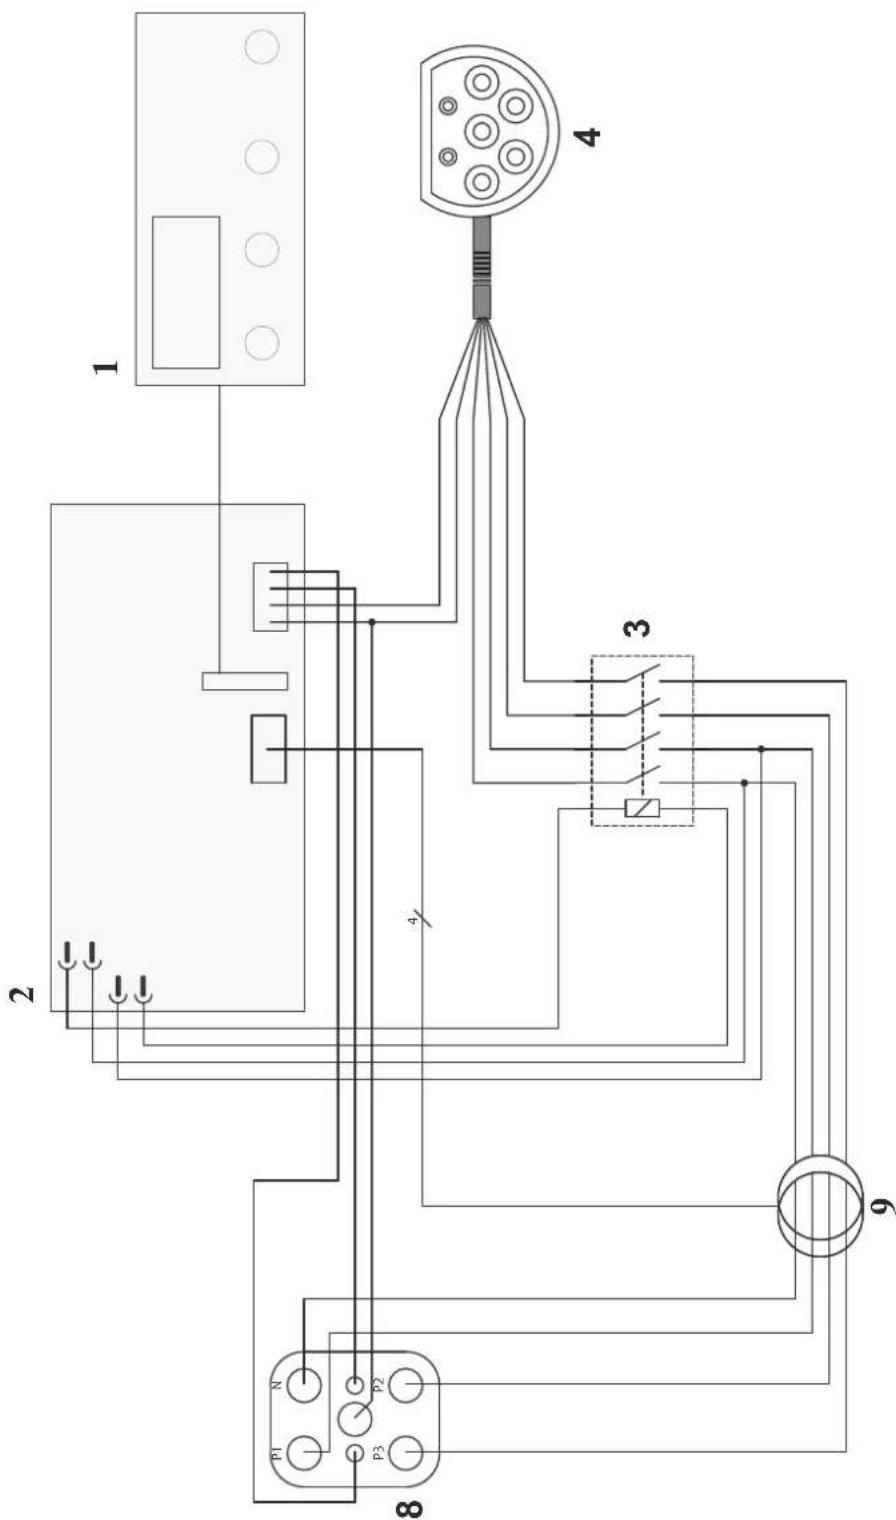
text_image
1 2 3 4 5 6 7 8 9 P1 P2 P3TECHNICAL SPECIFICATIONS / TECHNISCHE DATEN / ESPECIFICACIONES TÉCNICAS / ТЕХНИЧЕСКИЕ СПЕЦИФИКАЦИИ / TECHNISCHE GEGEVENS / SPECIFICHE TECNICHE
SUPER PRO SMART EV CHARGE
| Tension d'alimentation assignéeRated input voltageNetzspannungTensión de red asignada | Номинальное напряжение питанияNominale voedingsspanningTensione di alimentazione nominale | 230 / 400 V | |
| Courant de sortie assignéeRated output currentNennstromCorriente de salida asignada | Номинальный выходной токUitgaande nominale spanningCorrente di uscita nominale | 6-8-10-13-16-20-32 A | |
| Courant différentiel de fonctionnement assignéRated operational differential currentNennbetriebsdifferenzstromCorriente diferencial nominal de funcionamiento | Номинальный рабочий дифференциальный токNominale differentièle stroomCorrente differenziale nominale di esercizio | I n = 30 mA (AC) / 6 mA (DC) | |
| Température de fonctionnementOperating temperatureBetriebstemperaturTemperatura de funcionamiento | Рабочая температураWerktemperatuurTemperatura di funzionamento | -30°C – +40°C | |
| Indice de protectionProtection ratingSchutzartÍndice de protección | Степень защитыBeschermingsklasseIndice di protezione | 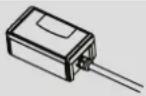 IP65 IP55 IP65 IP55 |  |
| Longueur de câblesLength of cablesKabellängeLongitud del cable | Длина кабеляLengte van de kabelLunghezza del cavo |  1 m 5 m 1 m 5 m |  |
| PoidsWeightPesoBec | GewichtGewicht van het toestelPeso | 4,5 kg | |