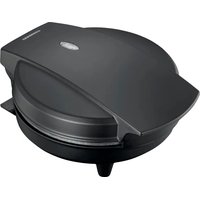
16310232 - Ice machine Melissa - Free user manual and instructions
Find the device manual for free 16310232 Melissa in PDF.


User questions about 16310232 Melissa
0 question about this device. Answer the ones you know or ask your own.
Ask a new question about this device
Download the instructions for your Ice machine in PDF format for free! Find your manual 16310232 - Melissa and take your electronic device back in hand. On this page are published all the documents necessary for the use of your device. 16310232 by Melissa.
USER MANUAL 16310232 Melissa
natural_image
Black plastic kitchen appliance with lid and side legs (no visible text or symbols)16310232
NL Ijshoorntjesmaker....2
natural_image
Line drawing of a hand holding a waffle with its open lid (no text or symbols)OPMERKING
natural_image
Hand pouring a creamy mixture into a black waffle-shaped baking pan (no text or symbols visible)Fig. 2
text_image
Technical diagram of a two-wheat grating with labeled parts including flaky top, woven mat, and side views4.1 Übersicht:
natural_image
Hand placing a piece of food into a waffle-shaped baking pan (no text or symbols visible)Fig. 2
Please read the information contained herein so that you can become familiar with your device quickly and take advantage of the full scope of its functions.
1.2 Information on this manual
These Operating Instructions are a component of 16310232 ice cream cone maker and provide you with important information for the initial commissioning, safety, intended use and care of the device.
The Operating Instructions must be available at all times at the device. This Operating Manual must be read and applied by every person who is instructed to work with the device:
- Commissioning
- Operation
- Troubleshooting and/or
- Cleaning
Keep the Operating Manual in a safe place and pass it on to the subsequent owner along with the device.
1.3 Warning notices
The following warning notices are used in the Operating Manual concerned here. DANGER
A warning notice of this level of danger indicates a potentially dangerous situation.
If the dangerous situation is not avoided, this can lead to death or serious injuries.
- Observe the instructions in this warning notice in order to avoid the danger of death or serious personal injuries.
WARNING
A warning notice of this level of danger indicates a possible dangerous situation.
If the dangerous situation is not avoided, this can lead to serious injuries.
- Observe the instructions in this warning notice in order to avoid the personal injuries.
ATTENTION
A warning notice of this level of danger indicates a possible dangerous situation.
If the dangerous situation is not avoided, this can lead to slight or moderate injuries.
- Observe the instructions in this warning notice in order to avoid the personal injuries.
PLEASE NOTE
A notice of this kind indicates additional information, which will simplify the handling of the machine.
2 Safety
This chapter provides you with important safety notices when handling the device. The device corresponds with the required safety regulations. Improper use can result in personal or property damages.
2.1 Intended use
This device is only intended for use in households in enclosed spaces for
• Making ice cream cones, waffle scones or waffle rolls
Uses for a different purpose or for a purpose which exceeds this description are considered incompatible with the intended or designated use.
WARNING
Danger due to unintended use
Dangers can emanate from the device if it is used for an unintended use and/or a different kind of use.
• Use the device exclusively for its intended use.
- Observe the procedural methods described in this Operating Manual.
- Attention! only use the original power base to heat the device!
Claims of all kinds due to damages resulting from unintended uses are excluded. The User bears the sole risk.
2.2 General Safety information
PLEASE NOTE
Please observe the following general safety notices with regard to the safe handling of the device.
- Examine the device for any visible external damages prior to using it. Never put a damaged device into operation.
- If the connection lead is damaged, you will need to have a new connection lead installed by an authorized electrician.
- Make sure the voltage in your outlet is the same as the voltage indicated in the appliance's rating label.
- The appliance is not to be used by children or persons with reduced physical, sensory or mental capabilities, or lack of experience and knowledge, unless they have been given supervision or instruction concerning use of the appliance by a person responsible for their safety; children should be supervised to ensure that they do not play with the appliance.
- This appliance can be used by children aged from 8 years and above and persons with reduced physical, sensory or mental capabilities or lack of experience and knowledge if they have been given supervision or instruction concerning use of the appliance in a safe way and understand the hazards involved. Children shall not play with the appliance. Cleaning and user maintenance shall not be made by children unless they are older than 8 and supervised.
- Keep the appliance and its cord out of reach of children less than 8 years.
- Do not leave the device unsupervised when it is in operation.
- Turn the power off before you insert or remove a plug. Remove by grasping the plug – do not pull on the cord.
- Only qualified electricians, who have been trained by the manufacturer, may carry out any repairs that may be needed. Improperly performed repairs can cause considerable dangers for the user.
- Only customer service departments authorized by the supplier may carry out repairs on the device during the guarantee period, as otherwise the guarantee entitlements will be null and void in the event of any subsequent damages.
- Defective components must always be replaced with original replacement parts. Only such parts will guarantee that the safety requirements are fulfilled.
- Do not immerse the appliance in water or any other liquid
2.3 Danger of burns
DANGER
The prepared ice cones and the interior of the ice cone maker get very hot.
Observe the following safety instructions and be careful not to burn or scald yourself or others:
- When the device is in use, the interior of the ice cone maker gets very hot!
- When you are preparing the ice cone waffle, keep the lid closed.
2.4 Dangers due to electrical power
DANGER
Mortal danger due to electrical power!
Mortal danger exists when coming into contact with live wires or subassemblies!
Observe the following safety notices to avoid dangers due to electrical power:
- If the connection lead is damaged, you will need to have a special connection lead installed by an authorized electrician.
- Do not operate this device if its power cable or plug is damaged, if it does not work properly or if it is damaged or has been dropped. If the power cable is damaged, it will need to be replaced by the manufacturer or his service agency or a similar qualified person, to avoid any dangers.
- Do not open the housing on the device under any circumstances. There is a danger of an electrical shock if live connections are touched and the electrical or mechanical structure is altered. In addition, functional faults on the device can also occur.
3 Commissioning
This chapter provides you with important safety notices during the initial commissioning of the device. Observe the following notices to avoid dangers and damages:
3.1 Safety information
WARNING
Personal and property damages can occur during commissioning of the device!
Observe the following safety notices to avoid such dangers:
- Packaging materials may not be used for playing. There is a danger of suffocation.
3.2 Delivery scope and transport inspection
As a rule, the ice cone maker is delivered with the following components:
- Waffle maker
- Ice cream cone form
• Operating Instructions
PLEASE NOTE
- Examine the shipment for its completeness and for any visible damages.
- Immediately notify the carrier, the insurance and the supplier about any incomplete shipment or damages as a result of inadequate packaging or due to transportation.
3.3 Unpacking
Unpack your device as follows:
• Take out the device from the box and remove the interior and exterior packaging.
- Clean the appliance thoroughly before the first use. (see chapter Cleaning and maintenance)
3.4 Disposal of the packaging
The packaging protects the device against damages during transit. The packaging materials are selected in accordance with environmentally compatible and recycling-related points of view and can therefore be recycled.
Returning the packaging back to the material loop saves raw materials and reduces the quantities of accumulated waste. Take any packaging materials that are no longer required to "Green Dot" recycling collection points for disposal.
PLEASE NOTE
- If possible, keep the original packaging for the device for the duration of the guarantee period of the device, in order that the device can be re-packaged properly in the event of a guarantee claim.
3.5 Setup location requirements:
In order to ensure the safe and trouble-free operation of the device, the setup location must fulfill the following prerequisites:
- The device must be set up on a firm, flat, horizontal surface with sufficient load-bearing capacity.
- Choose the setup location in such a way that children cannot reach the device.
• The device is not intended to be installed in a wall or a built-in cupboard. - Do not set up the device in a hot, wet or extremely damp environment or near flammable material.
- The electrical socket must be easily accessible so that the power lead can be disconnected easily, in the case of an emergency.
- The installation and assembly of this device in non-stationary setup locations (e.g. on ships) must be carried out by specialist companies / electricians, provided they guarantee the prerequisites for the safe use of this device.
3.6 Electrical connection
In order to ensure the safe and trouble-free operation of the device, the following instructions must be observed for the electrical connection:
- Before connecting the device, compare the connection data (voltage and frequency) on the rating plate with those of your electrical network. This data must agree in order that no
damages occur in the device If in doubt, ask your qualified electrician.
- The electrical outlet must be protected by a 16A safety cut-out switch.
- The connection between the device and the electrical network may employ a 3 meter long (max.) extension cable with a cross-section of 1.5 ~mm^2 . The use of multiple plugs or gangs is prohibited because of the danger of fire that is involved with this.
- Make sure that the power cable is undamaged and has not been installed under the ice maker or over hot or sharp surfaces.
- The electrical safety of the device is only guaranteed if the device is connected to a properly installed protective conductor system. Operations using an electrical outlet without a protective conductor are prohibited. If in doubt, have the house installation checked over by a qualified electrician. The manufacturer cannot be made responsible for damages that are caused by a missing or damaged protective conductor.
4 Function
In this chapter, you'll find important information on the function of the device.
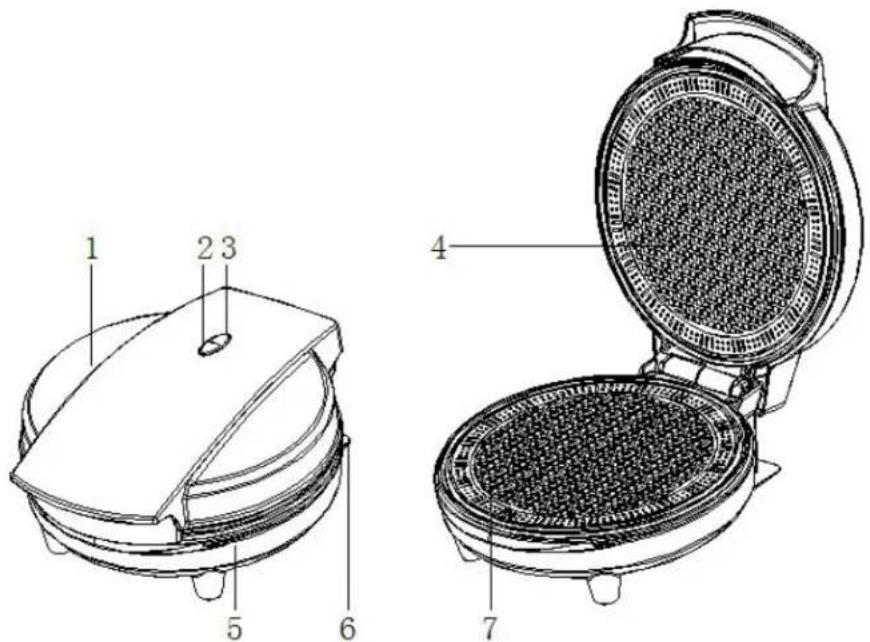
4.1 Overview:
text_image
1 2 3 4 5 6 71 Upper housing
5 Bottom housing
2 Power indicator
6 Power cover
3 Ready indicator
7 Bottom plate
4 Upper plate
4.2 Rating plate
The rating plate with the connection and performance data can be founded beneath the device.
5 Operation and Handing
This chapter provides you with important notices with regard to operating the device. Observe the following notices to avoid dangers and damages:
WARNING
- Do not leave the device unsupervised when it is in operation, so that you can intervene quickly in the event of dangers.
5.1 First time use
Before using the appliance for the first time, peel off any promotional materials and packaging materials, and check that the cooking plates are clean and free of dust. If necessary, wipe over with a damp cloth. For the best results, pour a teaspoon of vegetable oil on to the non-stick plates. Spread over with an absorbent kitchen towel and wipe off any excess oil.
PLEASE NOTE
When your ice cone maker is heated for the first time, it may emit slight smoke or odor. This is normal with many heating appliances. This does not affect the safety of your appliance.
5.2 Waffles
-
Insert the pin plug into the power outlet, you will notice that the ready indicator will go on, indicating that the ice cone maker has begun preheating.
-
Prepare a waffle batter. You can use your own recipe or the recipe you will find in this instruction manual.
-
Allow your ice cone maker to pre-heat until the ready indicator goes out. This indicates that the cooking plates have reached the correct temperature for cooking.
-
For best results, lightly spray the cooking plates with a cooking oil spray before using. This will assist in the removal of the donuts after cooking.
-
Divide batter into pan holes as per recipes using a jug and spoon or fabric piping bag. Leave the batter at least 2 cm away from the sides, if you use too much batter, some batter may flow out of the device.
-
Gently close the lid, ensuring the latch locks in place. Do not slam the lip down as it may cause the mixture to run off the cooking plates.
-
Allow to cook for approximately 3-5 minutes or until golden.
-
To remove the ice cone waffle, always use a plastic or wooden spatula. Never use a sharp object or metal, as this will damage the non-stick surface of cooking plates.

text_image
with a removal golden. stic or as thisPLEASE NOTE
Do not use disposable plastic piping bags as these may melt if they come into contact with hot plates.
5.3 Ice cones
-
Follow up the instructions 1 t/m 7 in 'Waffles'.
-
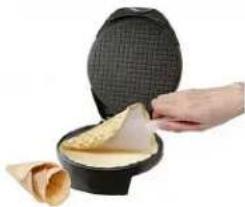
Leave the waffle on the baking plate and place the accessory for waffle cones on the waffle like in Fig. 2. Roll the waffle around the cone accessory.
PLEASE NOTE
The waffle and the baking plates are hot! Use a heat resistant nylon or wooden utensil or use oven gloves.
natural_image
Hand placing a piece of bread into a waffle pan, with additional dough balls nearby (no text or symbols visible)Fig. 2
- Leave the waffle cone on the accessory to dry (see Fig. 3).
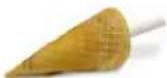
Fig. 3
5.4 Waffle trays
- Follow up the instructions 1 - 8 in 'Making waffles'.
- Fold the waffle over a glass or cup.
- Leave the waffle tray on the glass to dry.
PLEASE NOTE
The waffle and the baking plates are hot! Use a heat resistant nylon or wooden utensil or use oven gloves.
5.5 Recipe waffle batter
Ingredients:
150 grams butter
250 grams sugar
1/2 liter of lukewarm water
500 grams flour
1 knife point of cinnamon
2 eggs
Make a creamy batter of the butter, sugar and eggs. While stirring, add the other ingredients slowly until the whole has become a smooth and slightly thick batter.
5.6 After use
Turn the device off by unplugging it. Let the device cool down entirely.
6 Cleaning and Maintenance
This chapter provides you with important notices with regard to cleaning and maintaining the device. Please observe the notices to prevent damages due to cleaning the device incorrectly and to ensure trouble-free operation.
6.1 Safety information
ATTENTION
Please observe the safety instructions, before cleaning your ice cone maker.
- Before cleaning switch off the unit and take the power plug out of the outlet.
- Clean the unit with a soft cloth.
- Don't clean the ice cone maker with detergents.
6.2 Cleaning
- The cooking plates are coated with non-stick cooking surface, therefore little cleaning is required. Simply wipe cooking plates over with a damp cloth.
- Do not immerse the ice cone maker in water or other liquids.
- Do not use abrasive scouring pads, powders or cleaners.
• Do not place in the dishwasher. - Before next use, lightly grease the cooking plates for easy removal of cooked ice cream cone waffles.
• Always make sure the ice cone maker is cool and dry before string.
7 Troubleshooting
This chapter provides you with important notices with regard to operating the device. Observe the following notices to avoid dangers and damages:
7.1 Security advices
ATTENTION
- Repairs of electrical appliances must be carried out by qualified personnel who are trained by the manufacturer.
- Repairs performed by untrained persons may result in considerable hazards for the user and damage the machine.
7.2 Troubleshooting
Error
The appliance doesn't work.
Possible cause
Mains plug is not connected correctly.
Problem solving
Please check that the mains plug of the appliance is connected correctly.
Electronic defect.
Please contact customer support.
ATTENTION
- If above mentioned steps don't solve the problem, please contact your customer service.
8 Disposal of the Old Device

Old electric and electronic devices frequently still contain valuable materials. However, they also contain damaging substances, which were necessary for their functionality and safety. If these were put in the non-recyclable waste or were handled incorrectly, they could be detrimental to human health and the environment. Therefore, do not put your old device into the non-recyclable waste under any circumstances.
PLEASE NOTE
- Utilize the collection point, established in your town, to return and recycle old electric and electronic devices. If necessary, contact your town hall, local refuse collection service or your dealer for information.
- Ensure that your old device is stored safely away from children until it is taken away.
9 Guarantee
- We provide a 24 month guarantee for this product, commencing from the date of sale, for faults which are attributable to production or material faults.
- Your legal guarantee entitlements in accordance with § 439 ff. BGB-E remain unaffected by this.
- The guarantee does not include damages, which were incurred as a result of improper handling or use, as well as malfunctions which only have a minor effect on the function or the value of the device. Consumables, transit damages, inasmuch as we are not responsible for these, as well as damages, which were incurred as a result of any repairs that were not performed by us, are also excluded from the guarantee entitlements.
- This device is designed for use in domestic situations and has the appropriate performance levels.
- Any use in commercial situations is only covered under the guarantee to the extent that it would be comparable with the stresses of being used in a domestic situation. It is not intended for any additional, commercial use.
- In the event of justified complaints, we will repair the faulty device at our discretion or replace it with a trouble-free device.
Any pending faults must be reported within 14 days of delivery. All further claims are excluded. To enforce a guarantee claim, please contact us prior to returning the device (always provide us with proof of purchase).
10 Technical Data
| Device | Ice cone maker |
| Model | 16310232 |
| Mains data | 230 V, 50 Hz |
| Power consumption | 700 W |
| External measurements (H x W x D): | Diameter: 25,5 cm Height: 11,3 cm Width: 20,6 cm |
| Net weight | 1,3 kg |
11 CE Regulations
Commaxx B.V., Wiebachstraat 37, NL-6466 NG Kerkrade, Netherlands, declares that this product is in compliance with the essential EU directive requirements.
The declaration of conformity may be consulted via techdoc@commaxxgroup.com

12 Service
If you have any further questions about the product after reading this manual, please contact the customer service: service@commaxxgroup.com
MANUFACTURED IN CHINA FOR
Commaxx B.V., Wiebachstraat 37, NL-6466 NG Kerkrade, Netherlands, www.commaxx.nl
Français
text_image
Technical diagram of a waffle oven with labeled parts including one open and seven closed, showing internal structure and mounting points.natural_image
Hand placing a waffle into a black baking pan with rolled dough (no text or symbols visible)Fig. 2
text_image
Technical diagram of a waffle oven with labeled parts including one open and seven closed, showing internal structure and mounting points.1 Ylärunko
5 Alarunko
2 Virran merkkivalo
6 Virtakansi
natural_image
Line drawing of a waffle oven with open lid and side legs, no text or symbols presentHUOMAA
natural_image
Hand placing a piece of food into a waffle-shaped container (no text or symbols visible)Kuva 2
text_image
Technical diagram of a waffle oven with labeled parts including one open and seven closed, showing internal structure and mounting points.1 Övre hölje
5 Undre hölje
2 Strömindikering
6 Strömlock
3 Klarindikering
7 Nedre platta
4 Övre platta
4.2 Märkplåt
natural_image
Hand placing a waffle into a black baking pan with rolled dough balls nearby (no text or symbols visible)Fig. 2
natural_image
Hand placing a piece of cream into a waffle pan (no text or symbols visible)Fig. 2
text_image
Technical diagram of a waffle oven with labeled parts including one open and seven closed, showing internal structure and mounting points.natural_image
Line drawing of a waffle oven with open lid and side legs, no text or symbols presentINFORMACJA
natural_image
Hand placing a waffle into a black baking pan with rolled dough balls nearby (no text or symbols visible)Ryc. 2
WYPRODUKOWANO W CHINACH DLA
Commaxx B.V., Wiebachstraat 37, NL-6466 NG Kerkrade, Netherlands, www.commaxx.nl
Italiano
natural_image
Line drawing of a two-walled air fryer with a hand holding the lid (no text or symbols)NOTA
natural_image
Hand placing a flaky pastry into a waffle-shaped baking pan, with rolled dough pieces nearby (no text or symbols visible)NOTA
service@commaxxgroup.com
PRODOTTO IN CINA PER
Commaxx B.V., Wiebachstraat 37, NL-6466 NG Kerkrade, Netherlands, www.commaxx.nl