
16310193 - Ice Maker Melissa - Free user manual and instructions
Find the device manual for free 16310193 Melissa in PDF.


| Product Type | Ice Cream Maker with built-in compressor |
| Model | 16310193 |
| Brand | Melissa |
| Power Supply | 230 V, 50 Hz |
| Power Cord | Detachable, must be fully extended |
| Functions | Ice Cream (mix & freeze), Cooling Only (freeze), Mixing Only (mix) |
| Timer Range | 5 to 60 minutes per cycle |
| Mixing Bowl Capacity | Do not fill more than 60% with mixture |
| Compressor Protection | Automatic switch-off if overloaded; avoid rapid power cycling |
| Ventilation Clearance | At least 8 cm from sides |
| Safety Features | Overheating protection; lid lock; no metal tools near bowl |
| Cleaning | Hand wash only; parts not dishwasher safe; wipe exterior with damp cloth |
| Materials | Plastic casing, mixing bowl with non-stick coating |
| Usage | Indoor household use only; not for outdoor or commercial |
| Age Restriction | Children 8+ with supervision; no unsupervised cleaning |
| Dimensions (approx) | 25 x 25 x 30 cm |
| Weight (approx) | 5 kg |
| Included Accessories | Mixing bowl, lid, paddle |
| Warranty | Standard manufacturer warranty; see manual for terms |
Frequently Asked Questions - 16310193 Melissa
User questions about 16310193 Melissa
0 question about this device. Answer the ones you know or ask your own.
Ask a new question about this device
Download the instructions for your Ice Maker in PDF format for free! Find your manual 16310193 - Melissa and take your electronic device back in hand. On this page are published all the documents necessary for the use of your device. 16310193 by Melissa.
USER MANUAL 16310193 Melissa
UK Ice cream maker 46

DK
FREMSTILLING AF IS ELLER SORBET
natural_image
Line drawing of a kitchen appliance with a bucket and lid, showing a downward arrow indicating rotation (no text or symbols)natural_image
Line drawing of a microwave oven with control panel and fan (no text or symbols)
NO
SLIK LAGER DU ISKREM ELLER SORBÉ
natural_image
Line drawing of a kitchen appliance with a bucket and lid, showing a downward arrow indicating rotation (no text or symbols)natural_image
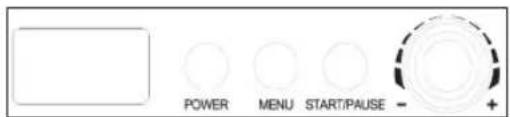
Line drawing of a microwave oven with control panel and fan (no text or symbols)Bare avkjøling: Bare frying. Standardinnstilling: 30 minutter.
Bare blanding: Bare blanding. Standardinnstilling: 10 minutter.
SE
natural_image
Line drawing of a kitchen appliance with a bucket and lid, showing a handle and arrow indicating rotation (no text or symbols)natural_image
Line drawing of a microwave oven with control panel and side vent (no text or symbols)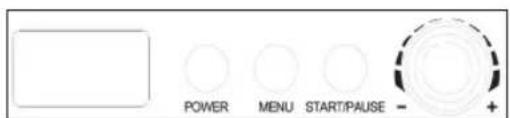
FI
JÄÄTELÖN TAI SORBETIN VALMISTUS
natural_image
Line drawing of a kitchen appliance with a bucket and lid, showing airflow direction (no text or symbols)natural_image
Line drawing of a microwave oven with control panel and ventilation slots (no text or symbols)To get the best out of your new ice cream maker, please read through these instructions carefully before using it for the first time. Take particular note of the safety precautions. We also recommend that you keep the instructions for future reference.
GENERAL SAFETY INSTRUCTIONS
- This appliance may only be used by children aged from 8 years and above and persons with reduced physical, sensory or mental capabilities or lack of experience and knowledge if they are supervised or have been given instructions concerning use of the appliance in a safe way and understand the hazards involved. Children must not play with the appliance.
Cleaning and user maintenance must not be performed by children without supervision.
- Keep the appliance under constant supervision while in use. Keep an eye on any children in the vicinity of the appliance when it is in use. The appliance is not a toy.
- Incorrect use of this appliance may cause personal injury or damage the appliance.
- Use for its intended purpose only. The manufacturer is not responsible for any injury or damage resulting from incorrect use or handling (see also Warranty Terms).
UK
- For domestic use only. Not for outdoor or commercial use.
- Remove all packaging and transport materials from the inside and outside of the appliance.
- Check that the appliance has no visible damage and that no parts are missing.
- Do not use with any cords other than that supplied.
- Check that it is not possible to pull or trip over the cord or any extension cord.
- The appliance must not be used together with a timer switch or a separate remote control system.
-
Turn off the appliance and remove the plug from the socket before cleaning, or when the appliance is not in use.
-
Avoid pulling the cord when removing the plug from the socket. Instead, hold the plug.
- Keep the cord and appliance away from heat sources, hot objects and naked flames.
- Ensure that the cord is fully extended.
- The cord must not be twisted or wound around the appliance.
- Check regularly that neither the cord nor plug is damaged and do not use the appliance if there is any damage, or if it has been dropped on the floor, dropped in water or damaged in any other way.
- If the appliance, cord or plug has been damaged, have the appliance inspected and if necessary repaired by an authorised repairer.
UK
- Connect to 230 V, 50 Hz only. The warranty is not valid if the appliance is connected to incorrect voltage.
- Never try to repair the appliance yourself. Please contact the store where you bought the appliance for repairs under warranty.
- Unauthorised repairs or modifications will invalidate the warranty.
SPECIAL SAFETY INSTRUCTIONS
- Always place the appliance on a dry, level and firm surface, and well away from the edges. There must be a clearance of at least 8 cm from the sides of the appliance to ensure sufficient ventilation.
-
The appliance must not be turned upside down or tilted more than 45°.
-
Ensure that the appliance is correctly assembled before switching it on.
- Avoid pressing the on/off switch of the appliance several times in quick succession, as this can damage the compressor. Always leave the appliance running for at least 5 minutes at a time!
- Do not place warm food in the mixing bowl. Always cool warm, freshly prepared ice cream or sorbet mixture (for example in the fridge) before pouring it into the appliance. Do not cool the mixture in the freezer before pouring it into the appliance, as a very cold mixture can prevent the paddle from turning freely.
UK
- Never fill the mixing bowl more than 60 % with ice cream or sorbet mixture, as the mixture expands when frozen.
- Do not use the mixing bowl if it is cracked or damaged in any way. Avoid subjecting the mixing bowl to heavy impact.
- Never put tools or your fingers into the filling port while the appliance is switched on.
- Never try to remove the paddle when the appliance is on.
- Do not use metal tools to remove the ice cream from the mixing bowl, as they can scratch the inner coating of the bowl.
-
Never insert anything into the openings of the appliance.
-
Keep ventilation openings, in the appliance enclosure or in the built-in structure, clear of obstruction.
- Do not use mechanical devices or other means to accelerate the defrosting process, than those recommended by the manufacturer.
- Do not damage the refrigerant circuit.
- Do not use electrical appliances inside the food storage compartments of the appliance, unless they are of the type recommended by the manufacturer.
- Do not store explosive substances such as aerosol cans with a flammable propellant in this appliance.
UK
MAIN COMPONENTS
-
Lid
-
Paddle
-
Air vents
-
Casing
-
Control panel
-
Display
-
Mixing bowl
Buttons
POWER
MENU
START/PAUSE
+/-
BEFORE USING FOR THE FIRST TIME
- Remove all packaging and transport materials from the inside and outside of the appliance.
- Check that the appliance has no visible damage and that no parts are missing.
- Clean all parts that come into contact with food before using the appliance for the first time (or after prolonged storage). See "Cleaning".
Please note: It is not necessary to place the mixing bowl (7) in the freezer before use, as the appliance has a built-in compressor, which cools the ice cream or sorbet mixture.

UK
PROCEDURE FOR MAKING ICE CREAM OR SORBET
- Plug the appliance into the mains.
- Pour the ice cream or sorbet mixture into the mixing bowl (7).
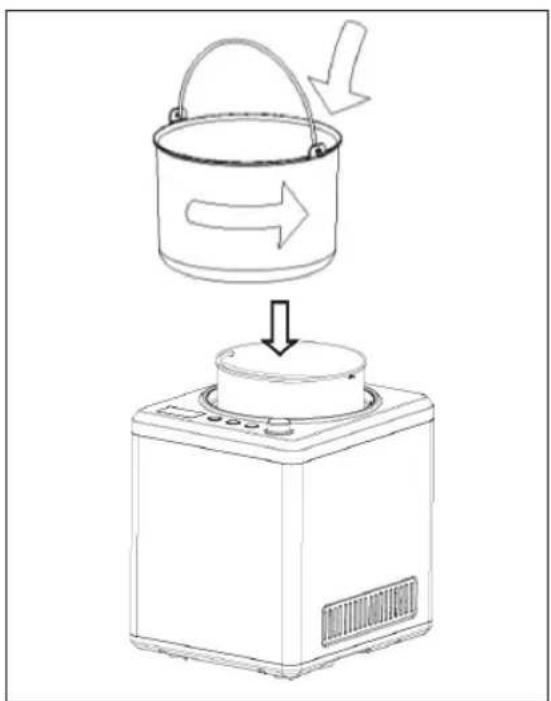
- Insert the mixing bowl into the appliance casing (4) and gently turn it so that it is correctly positioned. Attach the paddle.
natural_image
Line drawing of a kitchen appliance with a bucket and lid, showing a downward arrow indicating rotation (no text or symbols)- Attach the lid (1) over the mixing bowl and turn it anticlockwise to lock it in place.

natural_image
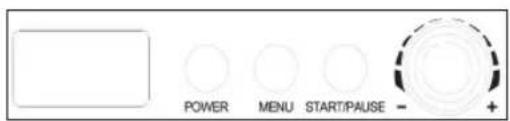
Line drawing of a microwave oven with control panel and fan (no text or symbols)- Switch the appliance on using the POWER button. The appliance is now in standby and the display (6) shows "60:00", which indicates the standard setting of 60 minutes for the Ice Cream function.
- Press the MENU button to select the function required.
Ice Cream: mixing and freezing. Standard setting: 60 minutes.
Cooling Only: freezing only. Standard setting: 30 minutes.
Mixing Only: mixing only. Standard setting: 10 minutes.
The symbol for the selected function flashes on the display.
- Select the desired preparation time by turning the +/- button. The possible preparation time is from 5 to 60 minutes and the standard setting depends on the function selected.
- Press the START/PAUSE button to commence preparation.
- When the set time has passed, the display shows "00:00" and the appliance automatically stops mixing.
Switch off the appliance using the POWER button, remove the mixing bowl and serve the ice cream.

flowchart
graph LR
    A["POWER"] --> B["MENU"]
    B --> C["START/PULSE"]
    C --> D["+"]
    D --> E["Output"]
UK
The finished ice cream is quite soft in consistency, so it can be served using a spoon. If you would like the ice cream to have a firmer consistency, transfer the bowl to the freezer (at -18 °C) for 30-60 minutes, depending on how firm you want it to be.
If you wish to continue cooling the finished ice cream in the appliance, just leave the appliance to stand. After the preparation process has ended, the appliance switches to cooling function.
- Always switch off the appliance and disconnect the plug from the socket when you have finished using the appliance.
- Take the appliance apart and clean all parts before storing. See "Cleaning".
Please note:
- The appliance is fitted with overheating protection, which will automatically switch the motor for the paddle off if it is overloaded.
CLEANING
When cleaning the appliance, you should pay attention to the following:
- Remove plug from the mains socket, and allow the appliance to reach room temperature before cleaning it.
- Do not immerse the appliance in water and make sure no water enters the parts.
- Clean the apparatus by wiping it with a damp cloth. A little washing-up liquid can be added if the appliance is heavily soiled.
- The parts are not dishwasher safe. Clean the mixing bowl, lid and paddle in warm water with a little detergent.
- Do not use scouring pads, steel wool or any form of strong solvents or abrasive cleaning agents to clean the appliance, as they can damage the external surfaces of the appliance.
- IMPORTANT! Allow to dry completely after cleaning. Do not use the appliance if it is damp.
• Always clean the appliance before putting it away if it is not to be used for a prolonged period.
UK
RECIPES TO INSPIRE YOU
General instructions
- Use caster sugar, as it dissolves easily.
- Mix all ingredients in a bowl before pouring the mixture into the mixing bowl and starting the mixing. Do not add ingredients such as chocolate pieces, nuts or alcohol through the filling port until the ice cream is almost ready.
- Use ripe fruit. Wash fruit thoroughly, peel it, and remove any pips or stones as necessary.
- Use pure fruit juice. This produces a stronger and richer flavour.
- Avoid filling the mixing bowl completely with ice cream or sorbet mixture.
- Certain ingredients require heating, for example boiling of fruit or berries with sugar or melting of chocolate. Mixtures containing warm ingredients should be left to cool in the fridge for 2 hours before being used to make ice cream. By using a basic recipe and adding different ingredients, you can create exactly the flavour you want.
Basic recipe, dairy ice cream
3 pasteurised egg yolks
350 ml milk
70 g sugar
Slowly heat the milk until small bubbles form. Whisk egg yolks and sugar until the sugar has been completely dissolved. Gradually add the egg mixture to the milk and heat the mixture until it starts thickening. Leave the mixture to cool in the fridge for about 2 hours. Pour the mixture into the appliance while the paddle is turning. Continue mixing until the sorbet has the desired consistency.
Tip:
- Add blended fruit, grated chocolate or other ingredients, as required.
- Depending on how creamy you want the ice cream to be, you can replace the milk either partially or wholly with cream.
- You can also substitute yoghurt for the milk to make yoghurt ice cream instead.
Basic recipe, sorbet
200 ml water
200 g sugar
200 g blended fruit or 200 ml fruit juice
Pour the water into a saucepan, add the sugar, and stir until the sugar is completely dissolved. Bring to the boil and allow to boil for 2 minutes. Remove the saucepan from the heat and allow the mixture to cool. Add blended fruit/fruit juice to the cold mixture. Then pour the entire mixture into the bowl while the paddle is turning.
Continue mixing until the sorbet has the desired consistency.
UK
BANANA SORBET
4 portions
Ingredients
250 g bananas
100 ml lemon juice
170 g sugar
2 egg whites
Procedure
Mix the soft, ripe bananas with the lemon juice and sugar.
Whisk the egg whites until they are stiff and then fold in.
Then pour the mixture into the bowl while the paddle is turning. Continue mixing for around 40 minutes or until the desired consistency is achieved.
CHOCOLATE CHIP ICE CREAM
4 portions
Ingredients
2 yolks
200 ml semi-skimmed milk
200 ml whipping cream
70 g sugar
10 g vanilla sugar
40 g dark chocolate
Procedure
Whisk the egg yolks with the sugar and vanilla sugar.
Add the milk as you keep stirring.
Whip the cream until it foams (not too firm) and mix with the other ingredients.
Chop the chocolate into 2-4 mm pieces. These are not added to the mixture initially.
Then pour the mixture into the bowl while the paddle is turning. Continue mixing for around 40 minutes or until the desired consistency is achieved.
Pour the chocolate into the ice cream maker after it has been running for approx. 15-20 minutes.
UK
RASPBERRY ICE CREAM
4 portions
Ingredients
250 g raspberries
100 g sugar
375 ml natural yoghurt
50 ml whipping cream
1 tbsp lemon juice
100 ml quark
Procedure
Rinse the berries and purée with the sugar and lemon juice.
Add the fruit mixture to the yoghurt, quark and cream. Mix well.
Then pour the mixture into the bowl while the paddle is turning. Continue mixing for around 40 minutes or until the desired consistency is achieved.
The raspberries may be replaced with other berries.
STRAWBERRY ICE CREAM
4 portions
Ingredients
1 egg yolk
100 ml semi-skimmed milk
150 ml whipping cream
70 g icing sugar
10 g vanilla sugar
2 tbsp lemon juice
200 g strawberries
Procedure
Clean the strawberries and mix with the milk and lemon juice.
Whisk the egg yolks and vanilla sugar thoroughly.
Whip the cream until it foams (not too firm) and mix everything thoroughly.
Then pour the mixture into the bowl while the paddle is turning. Continue mixing for around 40 minutes or until the desired consistency is achieved.
UK
INFORMATION ON DISPOSAL AND RECYCLING OF THIS PRODUCT
Please note that this Adexi product is marked with this symbol:

This means that this product must not be disposed of along with ordinary household waste, as electrical and electronic waste must be disposed of separately.
In accordance with the WEEE directive, every member state must ensure correct collection, recovery, handling and recycling of electrical and electronic waste. Private households in the EU can take used equipment to special recycling stations free of charge.
In some member states you can in certain cases return the used equipment to the retailer from whom you purchased it, if you are purchasing new equipment. Contact your retailer, distributor or the municipal authorities for further information on what to do with electrical and electronic waste.
WARRANTY TERMS
The warranty does not apply:
- if the above instructions have not been followed
- if the appliance has been interfered with
- if the appliance has been mishandled, subjected to rough treatment, or has suffered any other form of damage
- if the appliance is faulty due to faults in the electricity supply.
Due to the constant development of our products in terms of function and design, we reserve the right to make changes to the product without prior warning.
FREQUENTLY ASKED QUESTIONS
If you have any questions regarding the use of the appliance and cannot find the answer in this user guide, please try our website at www.adexi.eu.
You can also see contact details on our website if you need to contact us for technical questions, repairs, accessories or spare parts.
MANUFACTURED IN CHINA FOR
Adexi A/S
Lægårdsvej 9C
DK-8520 Lystrup
Denmark
www.adexi.eu
We cannot be held responsible for any printing errors.
DE
EINLEITUNG

DE
natural_image
Line drawing of a kitchen appliance with a bucket and lid, showing a downward arrow indicating motion (no text or symbols)natural_image
Line drawing of a microwave oven with control panel and side vent (no text or symbols)- DK
- FREMSTILLING AF IS ELLER SORBET
- NO
- SLIK LAGER DU ISKREM ELLER SORBÉ
- SE
- FI
- JÄÄTELÖN TAI SORBETIN VALMISTUS
- GENERAL SAFETY INSTRUCTIONS
- UK
- SPECIAL SAFETY INSTRUCTIONS
- MAIN COMPONENTS
- Buttons
- BEFORE USING FOR THE FIRST TIME
- PROCEDURE FOR MAKING ICE CREAM OR SORBET
- CLEANING
- RECIPES TO INSPIRE YOU
- General instructions
- Basic recipe, dairy ice cream
- Tip:
- Basic recipe, sorbet
- BANANA SORBET
- Ingredients
- Procedure
- CHOCOLATE CHIP ICE CREAM
- RASPBERRY ICE CREAM
- STRAWBERRY ICE CREAM
- INFORMATION ON DISPOSAL AND RECYCLING OF THIS PRODUCT
- WARRANTY TERMS
- FREQUENTLY ASKED QUESTIONS
- MANUFACTURED IN CHINA FOR
- DE
- EINLEITUNG
Brand : Melissa
Model : 16310193
Category : Ice Maker