HWO15NVD6XB1 - Warming drawers and cabinets HAIER - Free user manual and instructions
Find the device manual for free HWO15NVD6XB1 HAIER in PDF.

| Product type | Built-in vacuum drawer for vacuum packaging of food |
| Brand | Haier |
| Model | HWO15NVD6XB1 |
| Built-in dimensions (W x H x D) | 553 x 140 x 550 mm |
| Power supply | 220-240 V, 50/60 Hz, 240 W, 1 A |
| Vacuum compartment volume | 6.4 L |
| Sealing bar length | 250 mm |
| Maximum bag dimensions | 250 x 350 mm |
| Drawer load capacity | 30 kg max |
| Main functions | Vacuum sealing in bags, vacuum sealing in containers (internal/external), Chef Sous Vide cycle, adjustable vacuum and sealing levels, emergency stop |
| Vacuum levels | Sealing only, Min vacuum (1), Medium vacuum (2), Max vacuum (3) |
| Sealing levels | 3 levels (fine, standard, thick/aluminum) |
| Chef Sous Vide cycle | Specific program for sauces, marinades, oil/vinegar preserves |
| Cleaning and maintenance | Clean with a soft cloth and mild detergent; removable sealing bar; automatic drying cycle (20 min); do not use abrasives |
| Safety | Lid locking during cycle, pump thermal protection, sealing bar protection, alarm indicator |
| Included accessories | Power cable (L=2000 mm), mounting brackets, screws, external container adapter, oil filter |
| Spare parts available | Sealing bar, oil filter, external adapter, gaskets |
| Repairability | Repairs by authorized service center; use original parts |
| Warranty | According to applicable standards, warranty certificate included |
Frequently Asked Questions - HWO15NVD6XB1 HAIER
User questions about HWO15NVD6XB1 HAIER
0 question about this device. Answer the ones you know or ask your own.
Ask a new question about this device
Download the instructions for your Warming drawers and cabinets in PDF format for free! Find your manual HWO15NVD6XB1 - HAIER and take your electronic device back in hand. On this page are published all the documents necessary for the use of your device. HWO15NVD6XB1 by HAIER.
USER MANUAL HWO15NVD6XB1 HAIER
natural_image
Abstract black-and-white diagram with three upward arrows emerging from a curved surface (no text or symbols)CASSETTO SOTTOVUOTO DA INCASSO
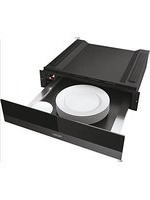
BUILT-IN VACUUM DRAWER
TIROIR SOUS VIDE À ENCASTREMENT
EINBAU-VAKUUMIERGERÄT
VESTAVNÁ VAKUOVÁ ZÁSUVKA
VSTAVANÁ VÁKUOVÁ ZÁSUVKA
VACUÜMLADE
GAVETA DE VÁCUO EMBUTIDA
Pannello comandi

flowchart
graph TD
    A["●"] --> B["1"]
    C["●"] --> D["2"]
    E["●"] --> F["3"]
    G["●"] --> H["4"]
    I["●"] --> J["5"]
    K["●"] --> L["6"]
    M["●"] --> N["7"]
    O["●"] --> P["8"]
    Q["●"] --> R["9"]
    S["●"] --> T["10"]
    U["●"] --> V["11"]
    W["●"] --> X["start stop"]
    Y["●"] --> Z["①"]
natural_image
Illustration of a hand cleaning a metal tray with a lid, showing the interior and exterior (no text or symbols)
natural_image
Illustration of a hand cleaning a metal tray with a cloth (no text or symbols)natural_image
3D mechanical assembly diagram showing a component with labeled point A (no text or symbols beyond label)Installazione
natural_image
Two metal bracket components with screw fasteners inserted, shown from different angles (no text or symbols)Fig. 2
natural_image
3D rendering of a gray server rack unit with mounting holes and ventilation slots (no text or symbols)Fig. 1

natural_image
Two identical screwdrivers with metal fasteners, shown in grayscale (no text or symbols)Fig. 3

natural_image
3D rendering of a mechanical device with a curved pipe and flanged housing (no text or symbols visible)Fig. 5 Fig. 6

natural_image
Illustration of a coiled electrical plug with two terminal pins, lying on a wooden surface (no text or symbols)Fig. 4
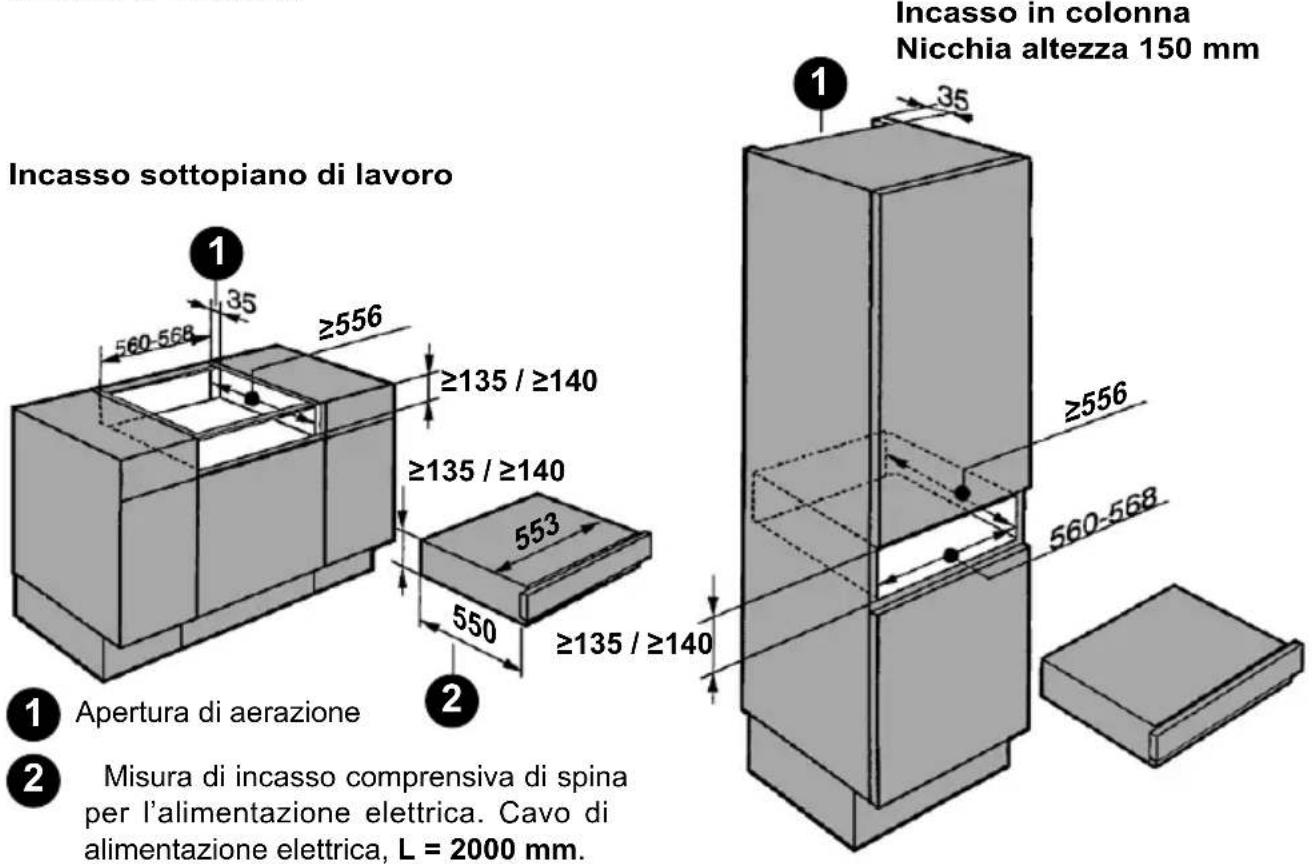
Misure d'incasso
natural_image
Illustration of an open cardboard box with arrows indicating movement or force (no text or symbols)
natural_image
Illustration of two people exchanging a cardboard box, with stacked boxes and arrows indicating movement (no text or symbols)natural_image
3D architectural detail of a structural beam with dashed vertical and horizontal lines indicating hidden edges (no text or symbols)Fig. 5
natural_image
Hand inserting a plug into a wall socket (no text or symbols visible)Dati tecnici
Safety precautions and warnings 38
Intended use 38
Children 38
Technical safety 39
Correct use 40
Cleaning and maintenance 41
Recommendations for protecting the environment 42
Description of the packaging machine 43
Control panel 44
Before using the appliance 45
Preliminary cleaning of the vacuum chamber and the lid 45
Creating vacuum in bags 46
Creating vacuum in containers 50
Containers in tray 50
External containers 53
Cleaning and maintenance 58
External cleaning 58
Cleaning the tray 58
Cleaning the sealing bar 58
External vacuum adapter cleaning 58
Drying cycle 58
Troubleshooting 59
Installation 62
Safety instructions 62
Packing list 64
Built-in measurements 65
Unpacking 66
Assembly and installation 67
Front panel adjustment 71
Electrical connection 71
Technical data 72
Useful notes 72
Spare parts 72
Safety precautions and warnings
- This product complies with current safety regulations. Improper use can in any case cause personal injury and/or damage to property.
- This manual is an integral part of the product and supplies all indications necessary for correct installation, use and maintenance of the appliance to avoid the dangers that could cause personal injury and/or damage to property. The manufacturer is not liable for damage resulting from failure to comply with these instructions.
- The user and installer must read this manual carefully and always make reference to it. Moreover, it must be kept in a place that is known and easily accessible and must also be delivered to any future users.
Intended use
- This appliance is solely intended for normal household use.
- It must not be used in outdoor environments.
- The appliance is only intended for the use for which it was designed, i.e. for vacuum packing foodstuffs.
- All other use must be considered improper and potentially dangerous.
- Under no circumstances place live foods (shellfish and animals in general, etc.) under vacuum.
- This appliance is not suitable for use by persons with reduced physical, sensorial and mental capacities, or unskilled persons, unless they are supervised and trained regarding use of the appliance by a person responsible for their safety. Such persons may only use the appliance without supervision if it has been explained to them how to proceed and if they are able to do so in complete safety. It is important that they are able to recognise and understand what dangers may arise from incorrect use of the appliance.
Children
- Keep children below the age of eight away from the appliance or constantly supervise them.
-
Children over the age of eight may only use the appliance without supervision if it has been explained to them how to proceed and if they are able to do so in complete safety. It is important that they are able to recognise and understand what dangers may arise from incorrect use of the appliance.
-
Supervise children who may be in the immediate vicinity of the tray. Do not allow children to play with it.
- Keep children away from the appliance until the sealing head and the sealing line have cooled in order to avoid any risk of scalding.
- The packaging material (plastic bags, polystyrene parts, etc.) must be kept out of the reach of children as they are a potential source of danger.
- Scrap the appliance following local Standards regarding disposal of waste and take it to appropriate collection points. Do not leave it unguarded even for just a few days as it is a source of danger to children.
Technical safety
- Installation work and extraordinary maintenance or repairs performed below standard can cause serious hazards for the user. Ensure this type of intervention is only performed by qualified personnel authorised by the manufacturer.
- Pay particular attention to the general conditions of the lid (presence of cracks, chips, scratches and deep marks). Possible damage could cause an implosion with serious danger to the user. Never use the appliance if the lid is damaged.
- An oil vacuum pump is installed in the appliance. Never tilt or overturn the device to prevent the oil overflowing.
- Correct operation of the appliance is only guaranteed if it is connected to legally compliant electrical systems with absolute correspondence (voltage, frequency) with the data shown on the appliance data plate. In case of uncertainty arrange for the system to checked by a qualified electrician.
- Electrical safety is only guaranteed if the device is connected to a compliant earthing system. Make sure that this fundamental safety condition is confirmed. In case of uncertainty arrange for the system to checked by a qualified electrician.
- Multiple sockets or extension cords do not guarantee the required level of safety (fire hazard). Therefore do not connect the appliance using these types of devices.
- Touching or altering electrical or mechanical components can result in injury and equipment failure. Never open the appliance casing.
-
If the power supply cable is damaged, it must be replaced by an authorised after-sales centre.
-
When removing the plug or if the cord is not provided with a plug, make sure the appliance is connected to the electrical mains by a qualified electrician.
- If anomalies are noticed of the appliance (e.g. the electric power supply cable is damaged of the control panel does not work) do not use the machine and inform your authorised support centre immediately.
- Do not use the appliance with wet hands or where there is any contact with water.
- The right to warranty is invalidated if the tray is not repaired by an authorised support centre.
- Only replace any broken or defective parts with original spare parts supplied by your dealer.
- In the event of a power outage during the vacuuming process, the vacuum state is maintained in the chamber and the lid cannot be opened. Never attempt to open the lid by force or with the use of tools. Once electrical power is restored it will again be possible to open the lid.
- To perform work of extraordinary maintenance, installation and repair, disconnect the appliance from the electrical mains and remove the plug from the electrical socket. If the plug is not accessible, turn off the electrical system to which the appliance is connected via the corresponding main switch. Before performing any works of repair or installation, make sure that the appliance is effectively disconnected from the mains.
- On scrapping, cut the power supply cable and make the appliance unusable by removing the lid, in a way that children cannot close themselves inside the appliance.
Correct use
- Scalding hazard! After the bag sealing process, the sealing bar and the sealing area of the bag itself are very hot. Do not touch the sealing bar or the sealing line immediately after the sealing process.
- Fire hazard! Do not store materials or substances that are easily flammable in the immediate vicinity of the tray.
-
The slides have a maximum capacity of 30kg. Do not overload or lean on the open tray as this could damage the slides.
-
Any damage to the lid could cause an implosion. Do not place any objects on the lid and avoid striking its surface with any object. In case of accidental impact with the lid, carefully inspect it for damage. If in doubt, contact the authorised technical support centre.
- Do not use the appliance or lid as a work surface, for support or for cutting.
• Install the tray in such a way that it is possible to completely extract the tray and to ensure the lid can be fully opened. Only in this way is it possible to supervise the vacuum chamber at each phase and to avoid entering into contact with the sealing bar and the sealing line when these are still hot. - Always pack foods when they are sufficiently cold; products cooled to 3^ provide the best preservation results. Furthermore, the formation of vapours is avoided which may cause problems with functioning of the tray. Monitor the vacuum process carefully and where the formation of bubbles in the liquid is noticed, prevent leakage prior to sealing.
- If liquids reach the pump suction, the latter can become damaged.
- Before using containers or vessels of any type, make sure that they are sufficiently robust to withstand the degree of vacuum including when placed in a refrigerator, thereby preventing an implosion that could be dangerous to the user.
- Never close the tray during operation as this would prevent ventilation of the appliance. Only close the tray at the end of its use.
Cleaning and maintenance
- To clean the appliance only use damp cloths and non aggressive disinfectants and detergents. Do not use abrasive sponges or cloths to avoid damaging the stainless steel surfaces and the cover surfaces.
- Water or steam could reach live parts and cause a short circuit. Never use running water or steam cleaning equipment.
- Cleaning and user maintenance shall not be made by children without supervision.
Recommendations for protecting the environment
1) Packaging:
The packaging material is 100% re-cyclable and is marked with the re-cycling symbol. Follow local Standards regarding disposal. The packaging material (plastic bags, polystyrene parts, etc.) must be kept out of the reach of children as they are a potential source of danger.
2) Scrapping/Disposal:
The appliance has been made with material that can be re-cycled. This appliance is marked in compliance with the 2002/96/EC European Directive, Waste Electrical and Electronic Equipment (WEEE). By making sure that this appliance is scrapped correctly, you contribute to preventing the potential negative consequences on the environment and health.

The symbol on the appliance or on the accompanying documentation indicates that as the product must be treated separately from domestic waste, at the end of its life span it must be taken to a collection site for electric and electronic appliances.
On scrapping, cut the power supply cable and make the appliance unusable by removing the lid, in a way that children cannot close themselves inside the appliance.
Scrap the appliance following local Standards regarding disposal of waste and take it to appropriate collection points. Do not leave it unguarded even for just a few days as it is a source of danger to children.
For further information regarding treatment, recovery and re-cycling of this appliance, contact the suitable local office, the waste recovery service or the dealer where the appliance was purchased.
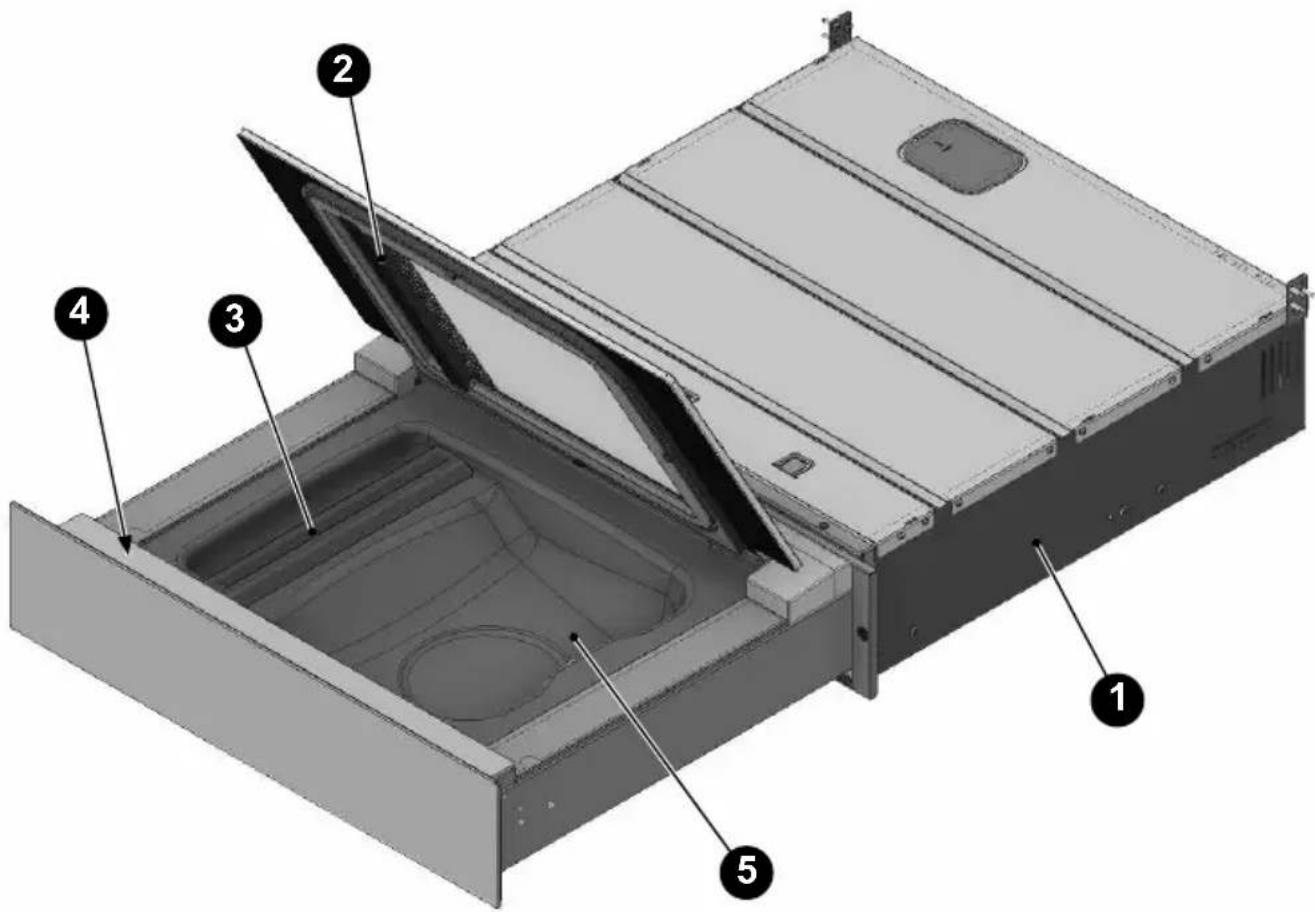
Description of the packaging machine
1) Recessed box
2) Lid
3) Sealing bar
4) Control panel
5) Vacuum chamber tray
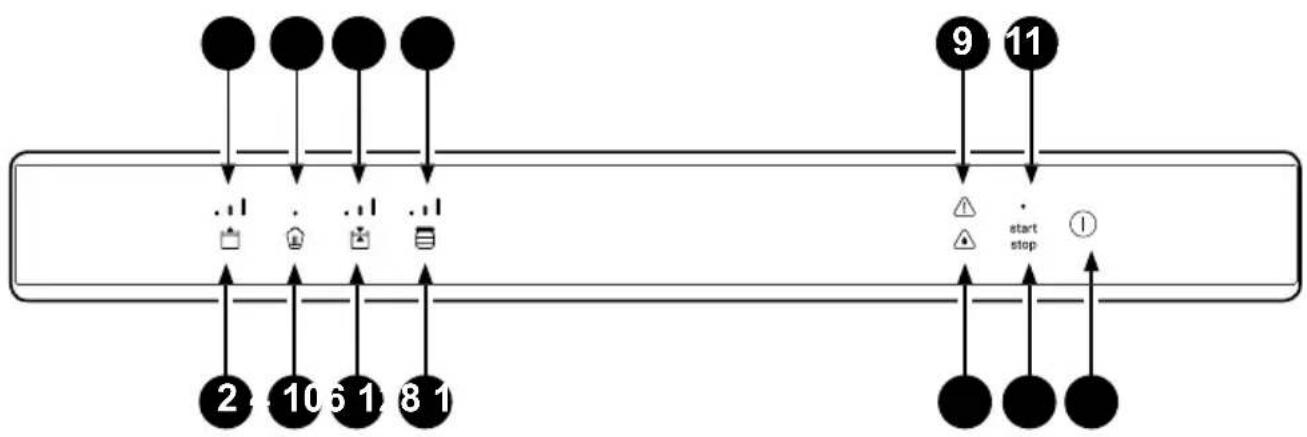
Control panel

flowchart
graph TD
    A["3"] --> B["1"]
    C["7"] --> D["2"]
    E["●"] --> F["10"]
    G["●"] --> H["6"]
    I["●"] --> J["1"]
    K["●"] --> L["8"]
    M["●"] --> N["1"]
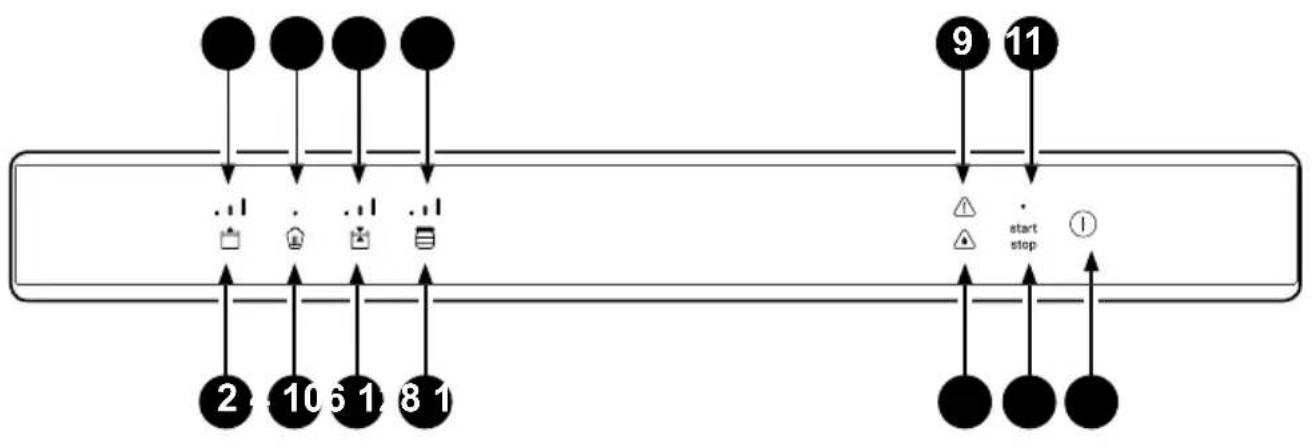
| NR | DESCRIPTION |
| 1 | Bag vacuum level segments indicator |
| 2 | Key for the selection and setting of the bag vacuum level |
| 3 | Chef Sous Vide cycle indicator |
| 4 | Chef Sous Vide cycle selection key |
| 5 | Sealing intensity segment indicator |
| 6 | Bag sealing level selection key |
| 7 | Container vacuum level segments indicator |
| 8 | Key for the selection and setting of the container vacuum level |
| 9 | Alarm status indicator |
| 10 | Indicator of the need to start a drying cycle |
| 11 | Cycle started indicator |
| 12 | Cycle start/stop key |
| 13 | Packaging machine ON/OFF |
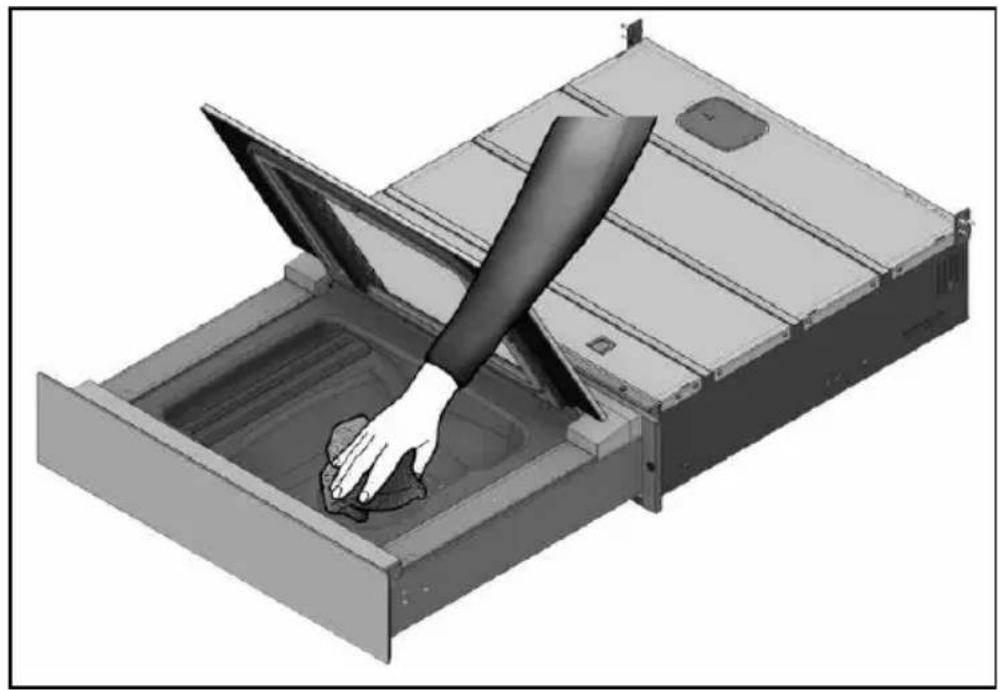
Before using the appliance
Preliminary cleaning of the vacuum chamber and the lid
- Before using the machine, the vacuum chamber and lid must be cleaned using a damp cloth and drinking water.
- It is recommended not to use aggressive detergents, stainless steel scrubbers, scrapers or abrasive, acid or aggressive substances, which could damage the stainless steel surface inside the vacuum chamber irreparably.
natural_image
Illustration of a hand cleaning a metal tray with a lid, showing the interior and exterior (no text or symbols)
natural_image
Illustration of a hand cleaning a metal tray with a cloth (no text or symbols)Creating vacuum in bags
| Step | Description Image | |
| 1 | Choose the bag according to the use (preservation or cooking), suitable to the sizes of the product: a solid product must not occupy more than 2/3 of the actual volume of the bag; liquid products must not occupy more than the 1/3 of the volume of the bag. Introduce sufficiently cold foods; products cooled to 3°C (refrigerator temperature) provide the best preservation results. |  - - 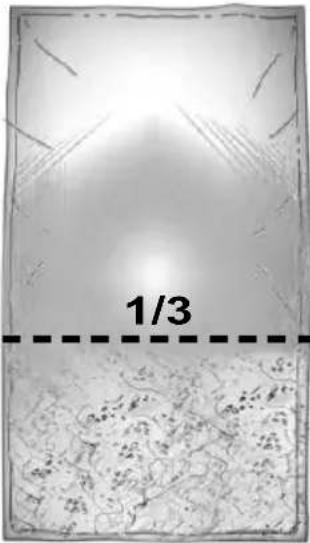 - - |
| 2 | Open the lid and make sure the vacuum chamber and the product to be packaged are dry. Be careful not to let the inner part close to the opening of the bag become dirty or wet. | 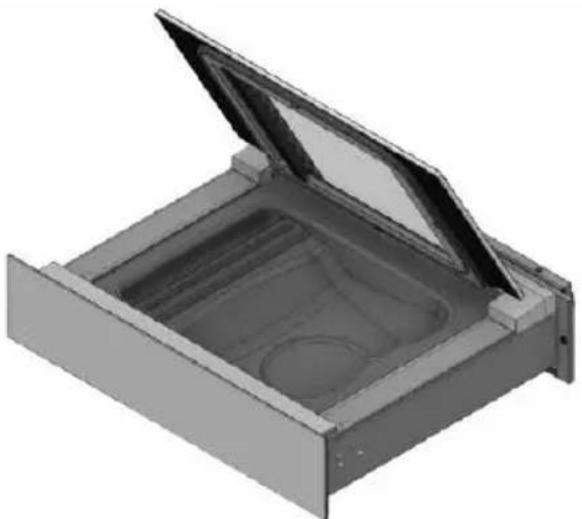 |
| 3 | Position the bag, centred on the sealing bar (A) so that the open flap protrudes by approximately 2 cm with respect to the bar itself.If the sealing bar is provided with Clips (B) stop the bag under the Clips. | 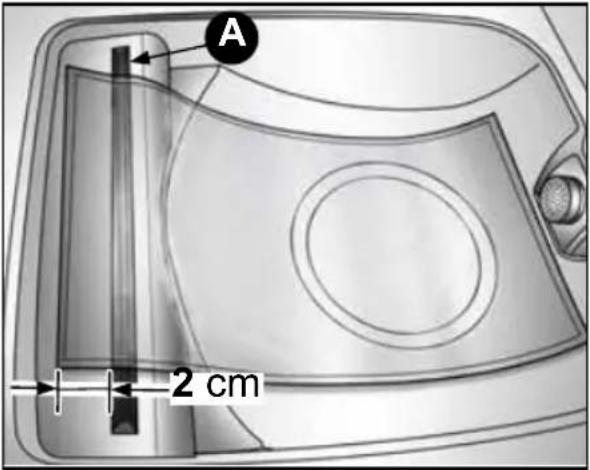 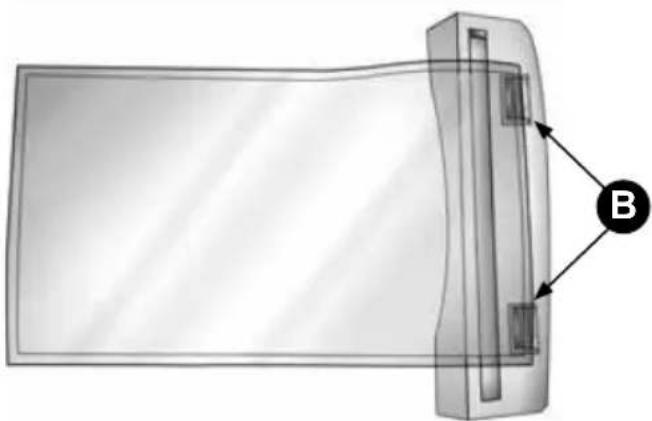 |
| 4 | Close the lid of the device. | |
| 5 | Press 2" to switch on the packaging machine. | 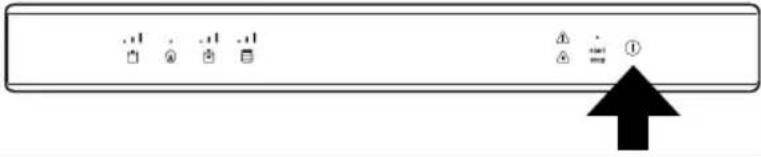 |
| 6 | If the light, is not already on, press on the icon to select the programs for vacuum in bags. |  |
| 7 | Repeatedly press to select the desired level of- vacuum: | 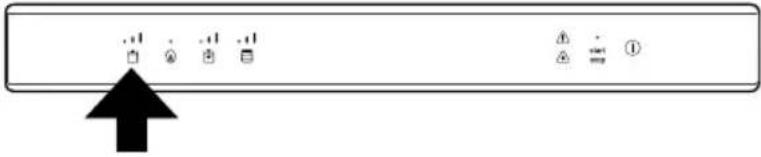 |
| Sealing Only. No preservation effectTo be used to:• Close bags.• Pack delicate products.• Repackage products such as chips, bread and biscuits. | ||
| Minimum vacuum.To be used for:• The packaging of delicate products.- products sensitive to pressure such as salads, strawberries and berries,- products sensitive to loss of volume, such as mousse, whipped cream,- fresh cheeses (brie, gorgonzola). | ||
Medium vacuum. To be used for: To be used for: The preservation of raw or cooked products sensitive to pressure as:- fish fillets,- chicken meat with bone,- rabbit meat with bone,- whole crustaceans (prawns with head),- courgettes, tomatoes and aubergines,- sauces or soups (meat sauce, minestrone soup, barley soup). The preservation of raw or cooked products sensitive to pressure as:- fish fillets,- chicken meat with bone,- rabbit meat with bone,- whole crustaceans (prawns with head),- courgettes, tomatoes and aubergines,- sauces or soups (meat sauce, minestrone soup, barley soup). | ||
Maximum vacuum. To be used for: To be used for: The preservation of non-delicate raw or cooked products:- potatoes and carrots,- meatthe preservation of products with liquid- vegetables in oilthe preservation of slices of cheeseProducts to be cooked- meat- fish- vegetables- meat or vegetarian saucesi The preservation of non-delicate raw or cooked products:- potatoes and carrots,- meatthe preservation of products with liquid- vegetables in oilthe preservation of slices of cheeseProducts to be cooked- meat- fish- vegetables- meat or vegetarian saucesi | ||
| 8 | I  at the desired sealing level. The higher the level of sealing chosen, the longer the sealing time. For the preservation of food and for vacuum cooking, the use of level 2 or 3 is recommended. at the desired sealing level. The higher the level of sealing chosen, the longer the sealing time. For the preservation of food and for vacuum cooking, the use of level 2 or 3 is recommended. | 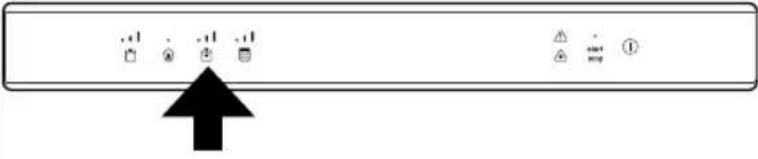 |
 Level 1. To be used for thin bags also not suitable for vacuum. Level 1. To be used for thin bags also not suitable for vacuum. | ||
 Level 2. To be used for bags normally commercially available for vacuum. Level 2. To be used for bags normally commercially available for vacuum. | ||
 Level 3. To be used for aluminium bags or for very thick bags for vacuum.. Level 3. To be used for aluminium bags or for very thick bags for vacuum.. | ||
| 9 | Press to start the program. |   |
| 10 | Press the lid lightly to start the vacuum | |
| 11 | The cycle ends with sealing of the bag and the air re-entering the tray | |
| 12 | Open the lid and remove the bag. | |
It is possible to interrupt the cycle at any time:
| Press stop.The air re-enters the tray.. | 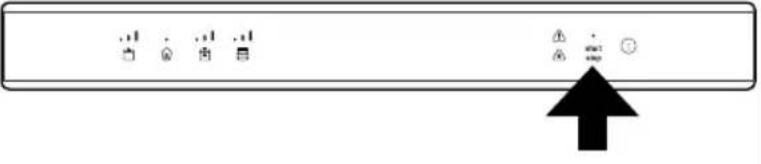 |
Creating vacuum in containers
Containers in tray
OPTIONAL KIT (not included in vacuum sealer drawer accessories)
| Step | Description Image | |
| 1 | Choose a container suitable to the vacuum, that can enter the tray and that, once inserted, remains at approximately 1 cm from the closed lid of the packaging machine. | 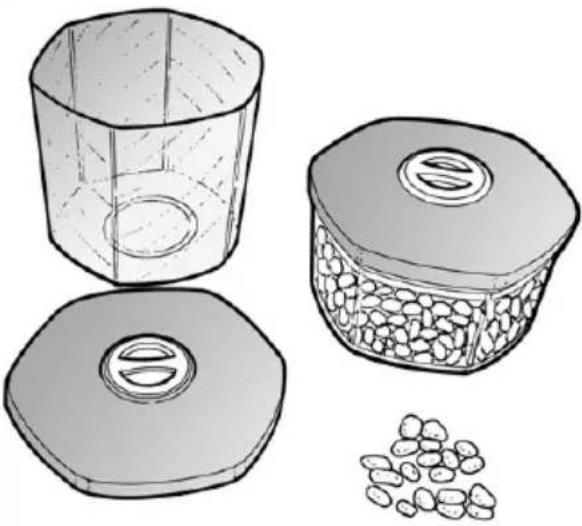 |
| 2 | Insert the product into the container and close it.Introduce sufficiently cold foods; products cooled to 3°C (refrigerator temperature) provide the best preservation results.Filling limits:Solid products: 100%Broths, infusions: 1⁄2Vegetarian and meat sauces: 1/3Creams, cream-based sauces: 1⁄4Products based on eggs or egg white: 1/6 | |
| 3 | Open the lid and make sure the vacuum chamber and the product to be packaged are dry.Be careful not to contaminate or wet the inner part. | 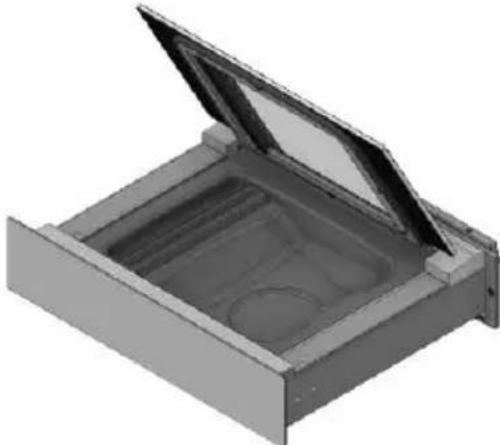 |
| 4 | Insert the container into the packaging machineMake sure there is a distance between the container and lid of at least 1 cm, otherwise do NOT change the container. | 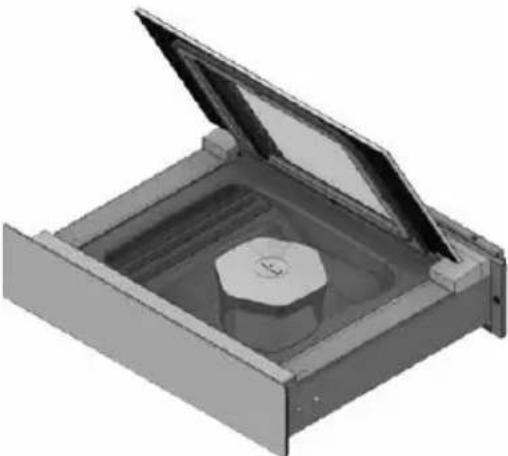 |
| 5 | Close the lid of the device. | 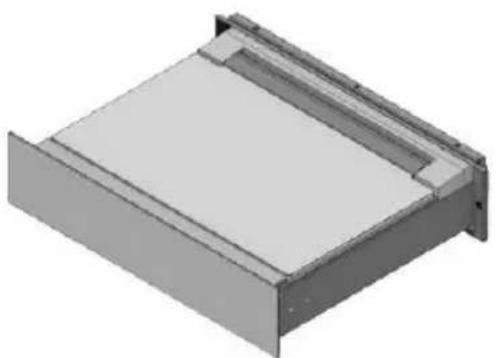 |
| 6 | Press 2" to switch on the packaging machine. | |
| 7 | Press , to selectthe container vacuum programs. | |
| 8 | Press repeatedly to select the desired vacuum level: |   |
| Level 1.To be used for:· jars with screw lid (twist-off), new or already packaged:- jams and marmalades,- meat sauces and preserves (tomato sauce, vegetables in oil, pickles),- mousse, whipped cream. | ||
| Level 2.To be used for:· Professional jars, jars with screw lid (twist-off):- jams and marmalades,- meat sauces and preserves (tomato sauce, vegetables in oil, pickles),- creams,- vegetables. | ||
| Level 3.To be used for:· Professional jars:- jams and marmalades,- meat sauces and preserves (tomato sauce, vegetables in oil, pickles),- vegetables,- pot cooking,- biscuits. | ||
| 9 | Press start the program.. | |
| 10 | Press the lid lightly to start the vacuum. | |
| 11 | The cycle ends with re-entry of the air into the tray. | |
| 12 | Open the lid and remove the container. | 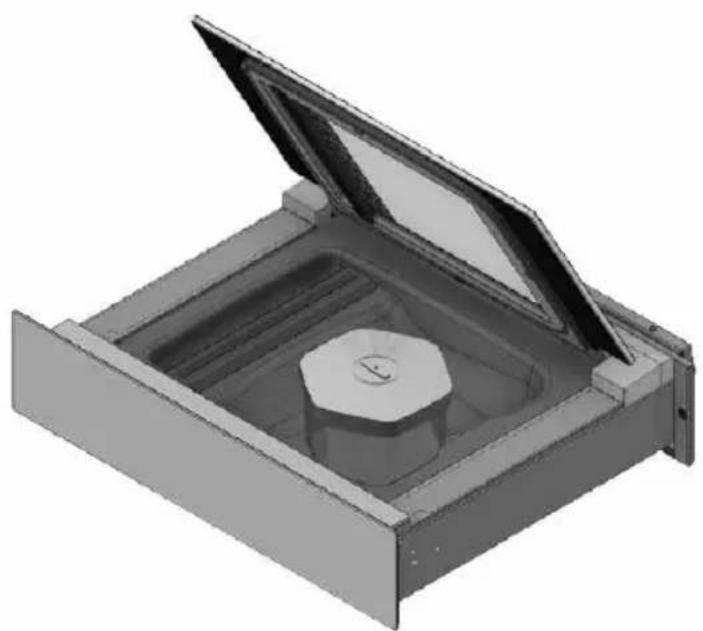 |
It is possible to interrupt the cycle at any time:
| Press stop.The air re-enters the tray. The container remains with the internal vacuum created. | 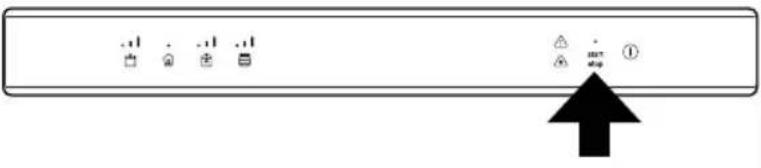 |
External containers
OPTIONAL KIT (not included in vacuum sealer drawer accessories)
| Step | Description Image | |
| 1 | Choose a container suitable for the vacuum. | 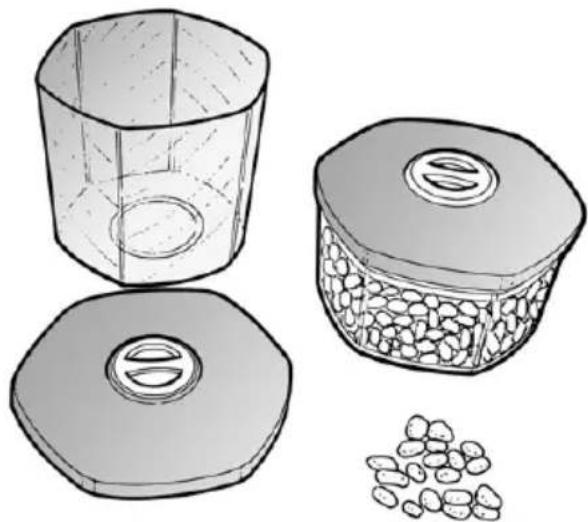 |
| 2 | Insert the product into the container and close it.Introduce sufficiently cold foods; products cooled to 3°C (refrigerator temperature) provide the best preservation results.Filling limits:Solid products: 100%Broths, infusions: 1⁄2Vegetarian and meat sauces: 1/3Creams, cream-based sauces: 1⁄4Products based on eggs or egg white: 1/6 | |
| 3 | Open the lid of the packaging machine | 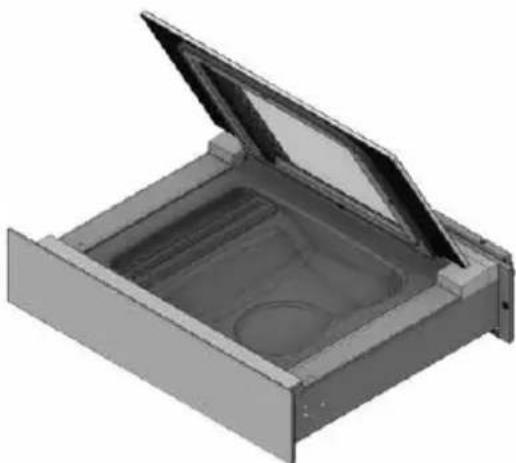 |
| 4 | Attach the accessory (A) for external containers in the tray and on the lid of the container. | 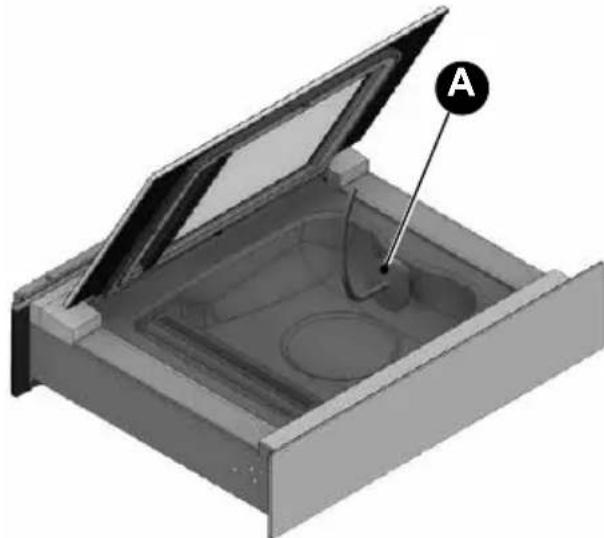 |
| 5 | Press 2" to switch on the packaging machine. | 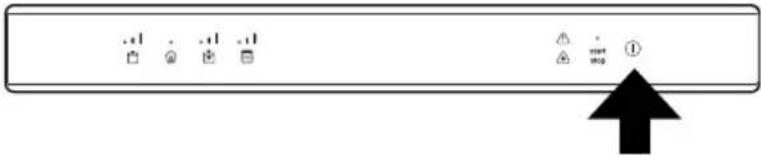 |
| 6 | Press to select the container vacuum programs. | 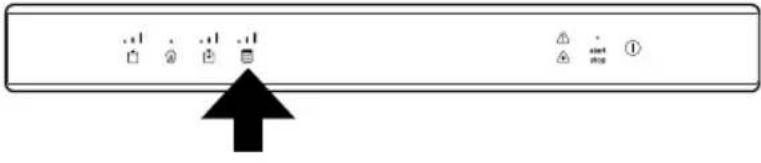 |
| 7 | Press repeatedly to select the desired vacuum level: | 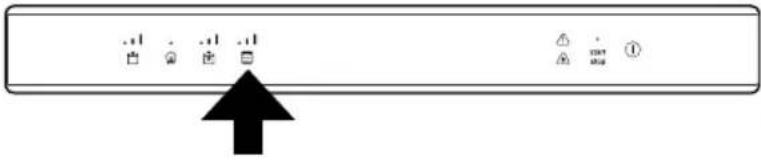 |
| Level 1.To be used for:jars with screw lid (twist-off), new or already packaged:- jams and marmalades,- meat sauces and preserves (tomato sauce, vegetables in oil, pickles),- mousse, whipped cream. | ||
| Level 2.To be used for:Professional jars, jars with screw lid (twist-off):- jams and marmalades,- meat sauces and preserves (tomato sauce, vegetables in oil, pickles),- creams,- vegetables. | ||
| Level 3.To be used for:Professional jars:- jams and marmalades,- meat sauces and preserves (tomato sauce, vegetables in oil, pickles),- vegetables,- pot cooking,- biscuits. | ||
| 8 | Press to start the program. | |
| 9 | Press the lid lightly to start the vacuum. | |
| 10 | At the end of the cycle remove the accessory from the tray. | |
It is possible to interrupt the cycle at any time:
| Press stop.The air re-enters the tray. The container remains with the internal vacuum created. |  |
- Tomato sauce.
- Fruit juices and coulis
- Syrups and concentrates (of wine, of vinegar).
- Meat marinade.
- Fish marinade.
• Preparation of salted meat, thin slices of beef
• Preparation of vegetables in oil and pickles
| Step | Description Image | |||
| 1 | Choose the bag according to the use (preservation or cooking), suitable to the sizes of the product: a solid product must not occupy more than 2/3 of the actual volume of the bag; liquid products must not occupy more than the 1/3 of the volume of the bag.Introduce sufficiently cold foods; products cooled to 3°C (refrigerator temperature) provide the best results. | -C8H2 | - | 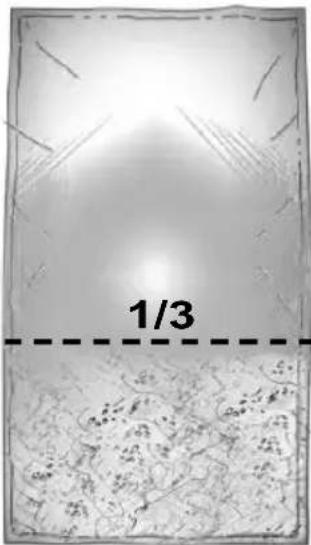 |
| 2 | Open the lid and make sure the vacuum chamber and the product to be packaged are dry.Be careful not to le the inner part close to the opening of the bag come dirty or wet. | 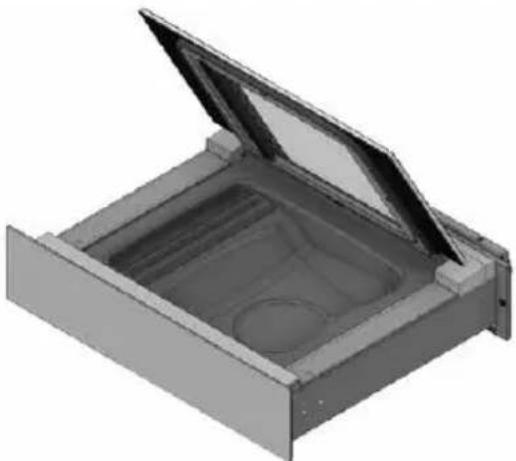 | ||
| Step | Description Image | |||
| 3 | Position the bag, centred on the sealing bar (A) so that the open flap protrudes by approximately 2 cm with respect to the bar itself. | 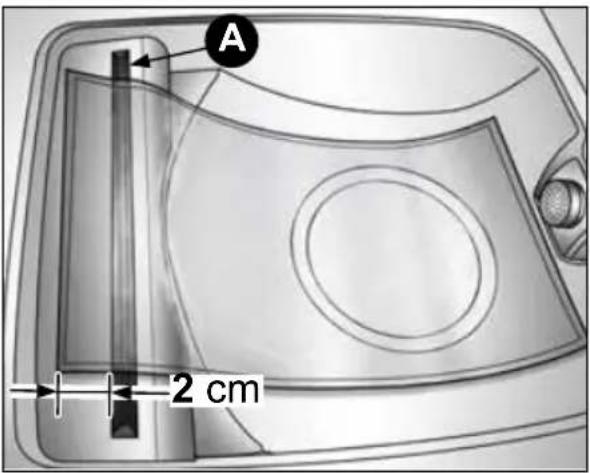 | ||
| If the sealing bar is provided with Clips (B) stop the bag under the Clips. | 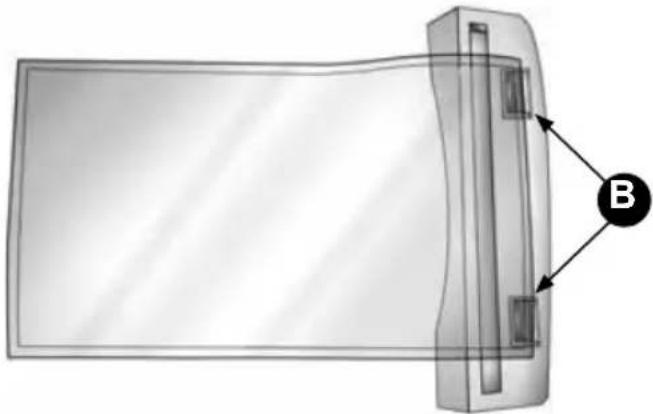 | |||
| 4 | Close the lid of the device. |  | ||
| 5 | Press 2” to switch on the packaging machine. |   | ||
| 6 | Press to select the “Chef” cycle. | 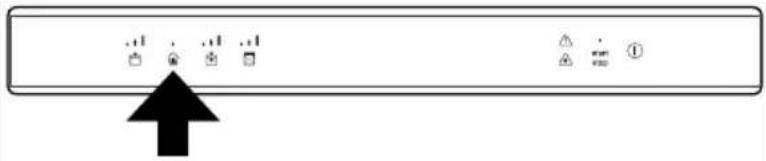 | ||
| 7 | Press to set the desired sealing level. The higher the level of sealing chosen, the longer the sealing time. For the preservation of food and for vacuum cooking, the use of level 2 or 3 is recommended. | 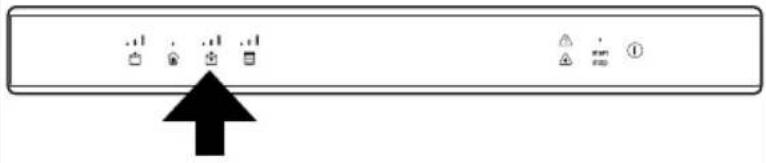 | ||
| Level 1. To be used for thin bags also not suitable for vacuum. | ||||
| Level 2. To be used for bags normally commercially available for vacuum. | ||||
| Level 3. To be used for aluminium bags or for very thick bags for vacuum. | ||||
| 8 | Press to start the program.. |   | ||
| 9 | Press the lid lightly to start the vacuum | |||
| 10 | The cycle ends with sealing of the bag and the air re-entering the tray | |||
| 11 | Open the lid and remove the bag. | |||
It is possible to interrupt the cycle at any time:
| Pressstop.The air re-enters the tray. |   |
After use
- Switch off the machine by pressing for 2".
- Clean and dry the packaging machine and the accessories used.
- When the tray is completely dry, close the lid.
- Close the drawer.
Cleaning and maintenance
- For cleaning, do not use stainless steel sponges, scrapers, abrasive, acid or aggressive materials which could irreversibly damage the surfaces.
- Use a soft cloth and a mild detergent.
- Switch off the machine by pressing Ⓘ for 2".
External cleaning
- For steel parts it is advisable to clean by following the direction of the satin finish.
- For the lid and the controls front, use a soft, clean and damp cloth.
Cleaning the tray
1) Wait until the sealing bar has cooled down
2) Remove the sealing bar by pulling it upwards
3) Avoid cleaning the intake opening with water. The water if aspirated could result in damage to the packaging machine.
4) Remove any dirt with a soft cloth moistened with warm water. If required, use a neutral disinfectant.
5) Dry with a soft cloth.
Cleaning the sealing bar
1) Wait until the sealing bar has cooled down.
2) Remove the sealing bar by pulling it upwards.
3) Clean with a soft cloth moistened with warm water.
4) Dry thoroughly before using the packaging machine.
External vacuum adapter cleaning
1) Use hot water and detergent for dishes.
2) Rinse thoroughly.
3) Dry with a clean cloth.
4) Reuse the adapter when it is completely dry.
Drying cycle
- The packaging machine prompts the need to start a DRYING CYCLE when the signal comes
on
- Remove from the tray any object and residual liquid.
- Press start .
- Wait until the end of the cycle. The duration is approximately 20'. In the case of early interruption, the cycle will be repeated.
58
EN
Troubleshooting
Most of the problems that occur during daily use of the packaging machine can be eliminated personally. The following table serves as a support.
Request the intervention of Technical Assistance if it is not possible to solve the problem personally.
| Problem Cause Solution | ||
| The packaging machine does not come out of the drawer. | • Guides “push to open” system jammed.• Coiled power cable jammed. | • Contact the installer.• Contact the installer. |
| The packaging machine does not switch on | • The packaging machine is not powered.• The power plug is not inserted in the socket. | • Check that there is power to the socket used.• Insert the plug of the power supply into the socket. |
| The packaging machine is off. | • No electrical power.• Electronic fault. | • Disconnect the electrical power supply.• Contact the technical support service. |
| The keys do not react to the commands. | • The surface of the control panel is dirty or wet. | • Clean and dry the surface of the control panel. |
| The lid doesn't open. • A cycle is running.There is no indicator light illuminated on the panel | • It is normal that during the operating cycles the lid remains closed. Wait for the end of the cycle or press stop to interrupt the cycle and emptythe tray.• During the cycle there is no electrical power. NEVER ATTEMPT TO OPEN THE LID. Restore the power supply and wait for decompression of the tray. | |
| Too much air remains in the sealed bag. | • The bag is not suitable to the dimensions of the product to be packaged.• The level of vacuum chosen is too low.• The product is liquid. | • Use a bag of suitable size.• Repeat the cycle with a higher level of vacuum.• It is normal that with a liquid product, some air bubbles remain inside. |
| Problema Causa Soluzione | ||
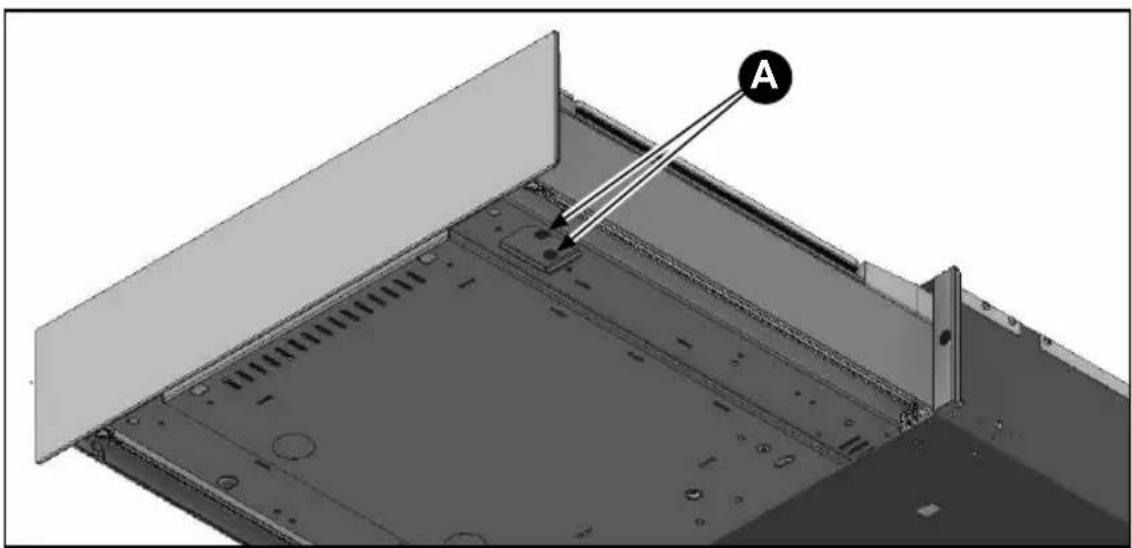
| The sealing bar is raised but sealing is not performed. | · The protection device of the sealing bar is activated.· The sealing bar is broken. | · In the bottom right of the packaging machine there are 2 buttons (A) that restore the internal protections. Press the keys to restore the protections. If the fault recurs contact the Technical Support service.· Contact the Technical Support service. |
| Sealing is not optimal · | The level of sealing set is not correct for the type of bag being used.· Many consecutive cycles were performed with sealing.· The bag is larger than the sealing bar.· The edge of the bag was not positioned correctly.· The edge of the bag is dirty.· The counter-pressure rubber and the sealing bar are dirty.· The counter-pressure rubber and the sealing bar are damaged. | · Repeat the cycle by adjusting the sealing level.· Wait at least 2 minutes between one cycle and another to allow the sealing bar to cool.· Use a suitable bag.· Position the edge of the bag centrally and so that it protrudes approximately 2 cm from the sealing bar.· Avoid the edge forming creases close to the sealing bar.· When the product is inserted, turn the edge of the bag over so that the outer part remains clean.· Clean the sealing bar and the counter-pressure rubber.· Contact the Technical Support service. |

natural_image
3D technical diagram of a mechanical assembly with labeled component A, showing internal components and mounting brackets (no text or symbols beyond label)| Problem Cause Solution | ||
Flashes  | ·The pump has absorbed moisture. | ·Start the DRYING CYCLE. |
During a cycle  comes on, accompanied by an audible signal. comes on, accompanied by an audible signal. | ·The vacuum is not activated. The lid has not been closed. ·The vacuum is not activated. There is dirt on the seal of the lid. ·The vacuum is not activated. The lid seal is broken. ·The pump won't start The pump protection has been activated. | ·When the cycle has been started, gently press the lid to activate the vacuum. ·Clean the tray and the seal. ·Contact the Technical Support service for replacement. ·In the bottom right of the packaging machine, there are 2 buttons (A) that restore the internal protections. Press the keys to restore the protections. If the fault recurs contact the Technical Support service. |
During a cycle with external container  comes on accompanied by an acoustic signal comes on accompanied by an acoustic signal | ·The lid of the external container is not positioned correctly. ·The external suction device was not properly connected. | ·Correctly position the lid of the external container. ·Correctly connect the external suction device to the packaging machine and to the container. |
It comes on  and flashes and flashes | ·Many consecutive cycles were performed and the oil in the pump has overheated. | ·Cool the packaging machine for at least 1 hour. |
Installation
Safety instructions
This manual is an integral part of the product and supplies all indications necessary for correct installation and maintenance of the machine.

It is mandatory for the user and installer to read this manual carefully and always make reference to it. Moreover, it must be kept in place that is known and accessible to the authorised operators (installer, user, maintenance technician).
The appliance is only intended for the use for which it was designed, i.e. for vacuum packing foodstuffs.
All other use must be considered improper and potentially dangerous.
The manufacturer declines any liability and all warranty obligations, whenever damage/injury occurs to persons, the appliance and objects that can be blamed on:
- Incorrect installation and/or that is not in compliance with the laws in force.
- Modifications or interventions that are not specific for the model.
- Use of non-original spare parts or that are not specific for the model.
- Failure to comply, even partial, with the instructions in this manual.
- Failure to comply with Accident-prevention Standards and the Laws in force during installation.
Foreword

Installation must be carried out exclusively by authorised and specialised staff, respecting the instructions and the prescriptions in this manual.
- Before installing the appliance, make sure that any pre-existing electric plants are in compliance with the Law and suitable for the plate data of the appliance to be installed (V, kW, Hz, N° of phases and power available).
- The installer must also check any prescriptions on the subject of fire-prevention.
- The Manufacturer declares compliance with the European Standards in force.
- Always work with the packaging machine disconnected from the mains.
- Do not pull the power cable to disconnect the packaging machine.

Attention! Handling of the machine must be performed using protective gloves and always by two persons.

All the components of the packaging must be disposed of according to the regulations in force in the country where the equipment is being used. In any case nothing must be disposed of into the environment.

ATTENTION! The components of the packaging may be potentially dangerous for children and pets. Make sure they cannot play with them.
Plate data
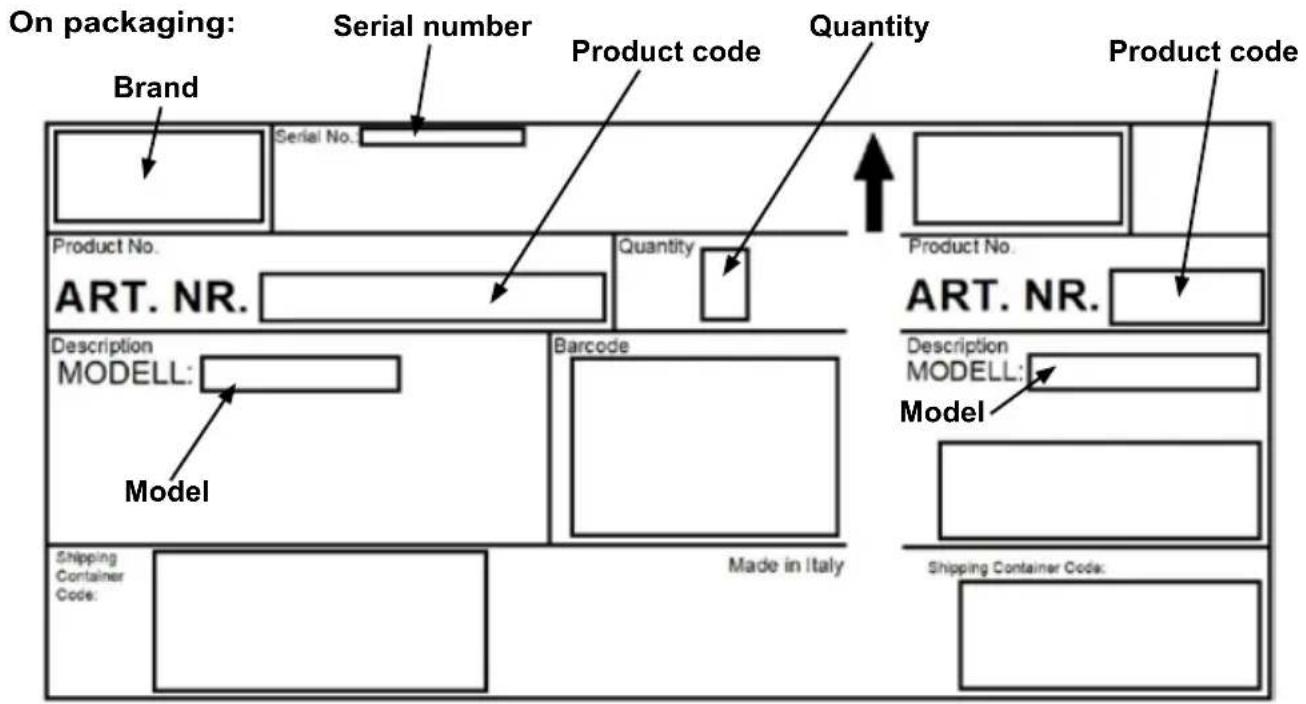
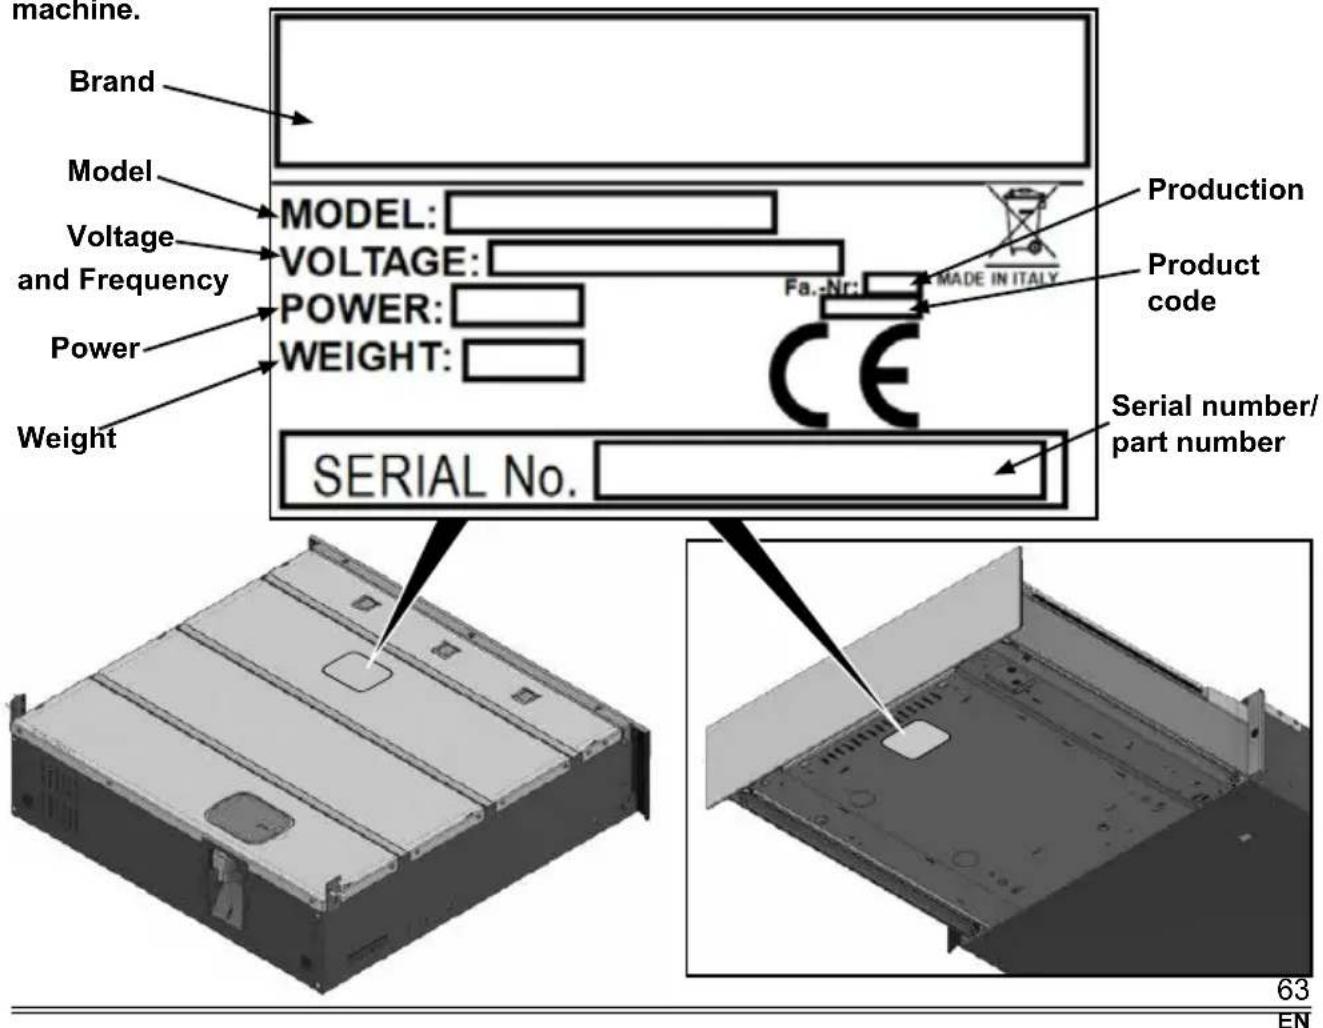
On the packaging machine: mounted on the recessed box and under the front of the packaging machine.
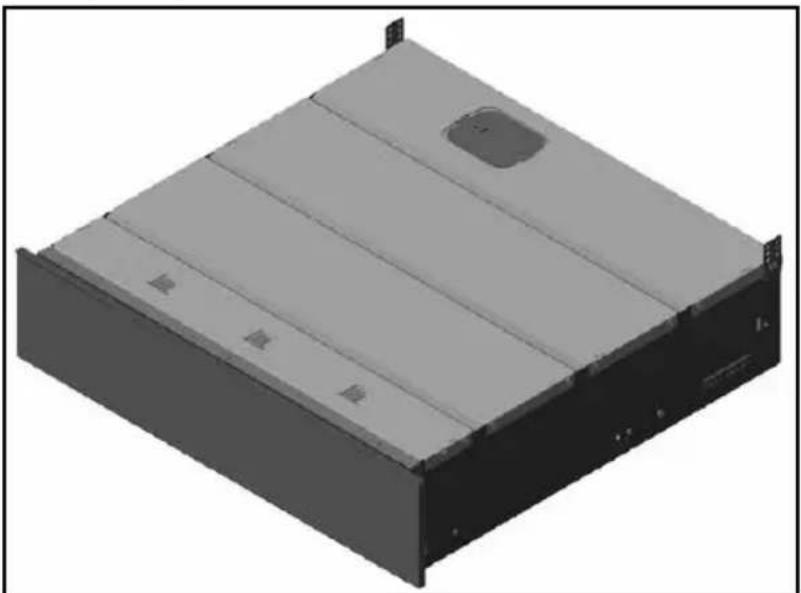
Packing list
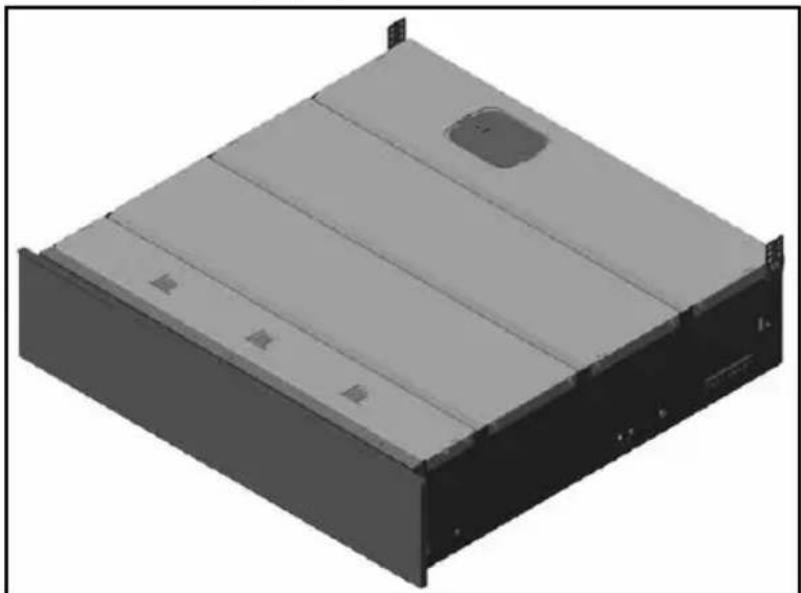
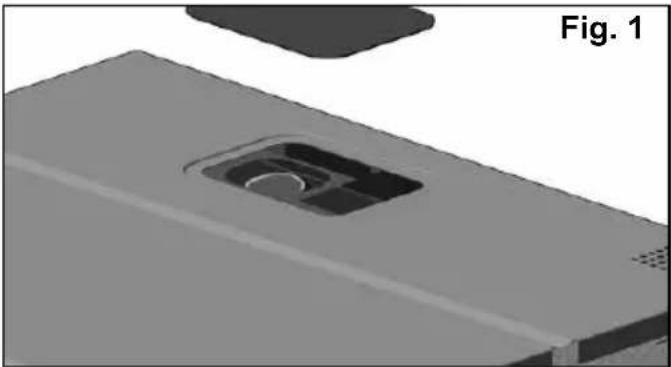
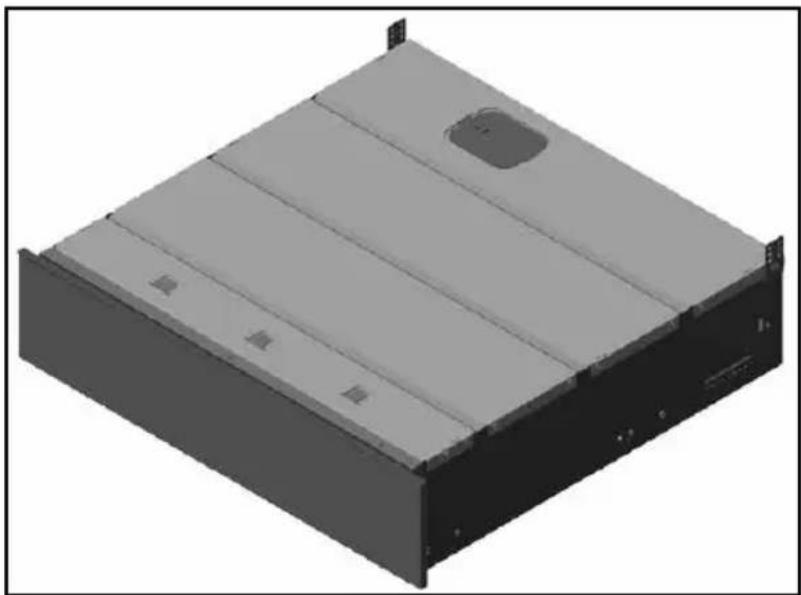
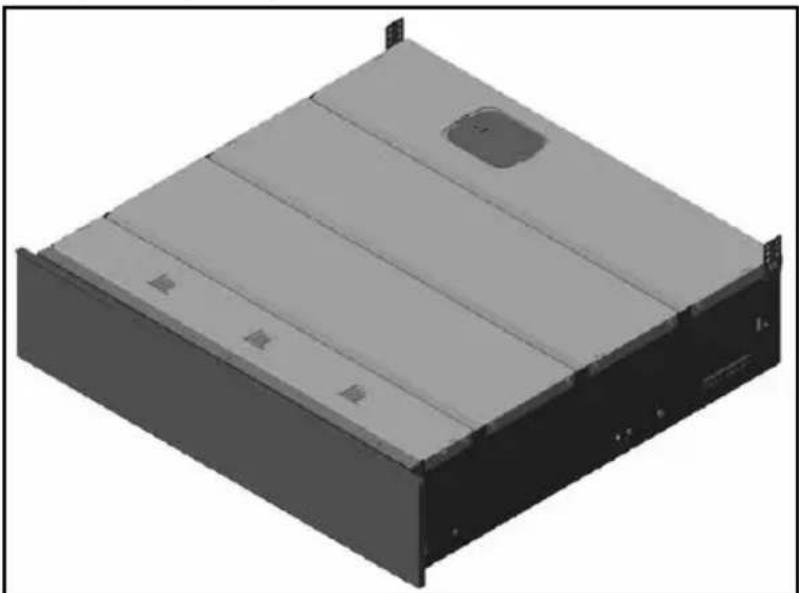
• No. 1 packaging machine (Fig. 1).
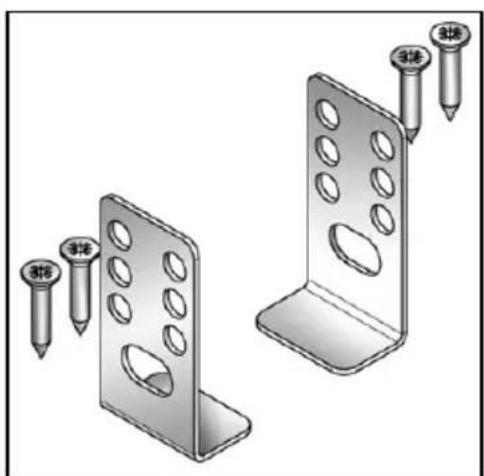
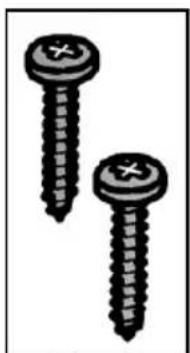
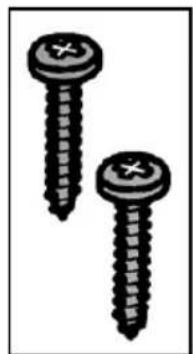
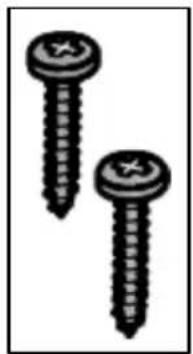
- No. 2 rear mounting brackets + no. 4 chipboard screws 4.5 × 16 ~mm (Fig. 2).
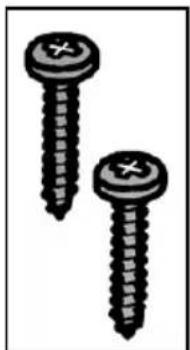
- No. 2 chipboard screws 4.5 × 16 mm for front mounting of the packaging machine to the unit (Fig. 3).
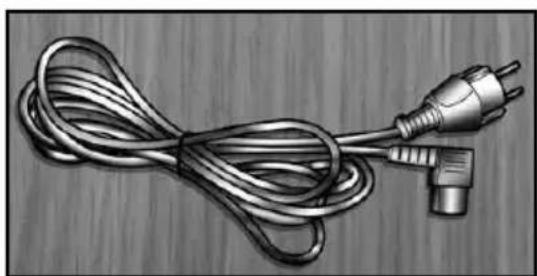
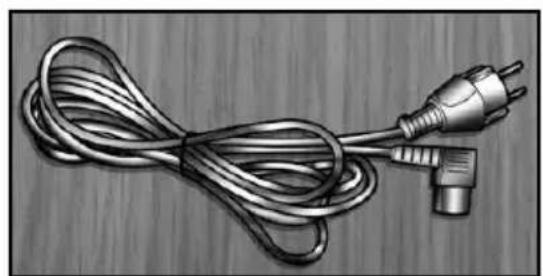
• No. 1 power cable (Fig. 4).
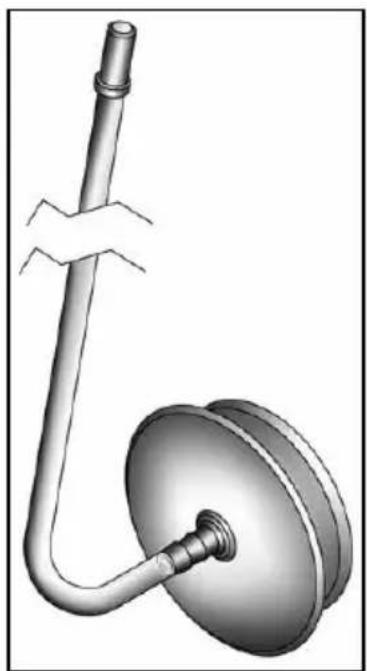
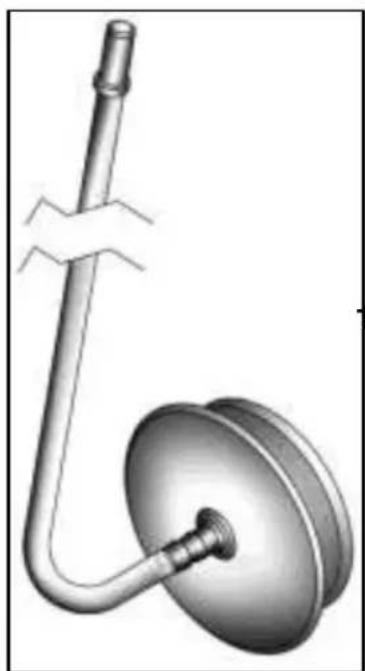
- No. 1 accessory for the external containers with adapter (Fig. 5).
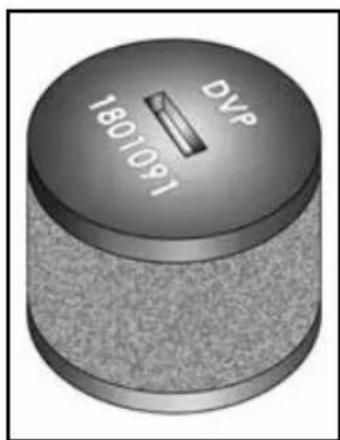
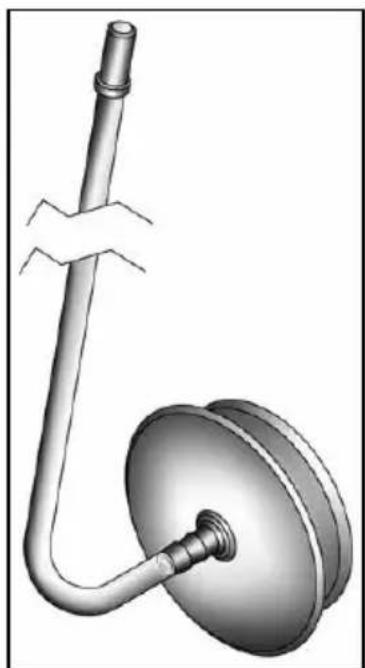
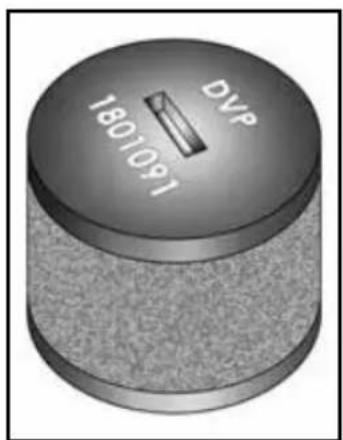
• No. 1 oil pump filter (Fig. 6).
natural_image
Two metal bracket components with screw holes and a pencil inserted, shown from different angles (no text or symbols)Fig. 2

natural_image
3D rendering of a gray server rack unit with mounting holes and ventilation slots (no text or symbols)Fig. 1

natural_image
Two identical screwdrivers with cross marks on their caps (no text or symbols)Fig. 3

natural_image
Illustration of a coiled electrical plug with two terminal pins, lying on a wooden surface (no text or symbols)Fig. 4
natural_image
3D rendering of a mechanical device with a curved pipe and flanged housing (no text or symbols visible)Fig. 5 Fig. 6

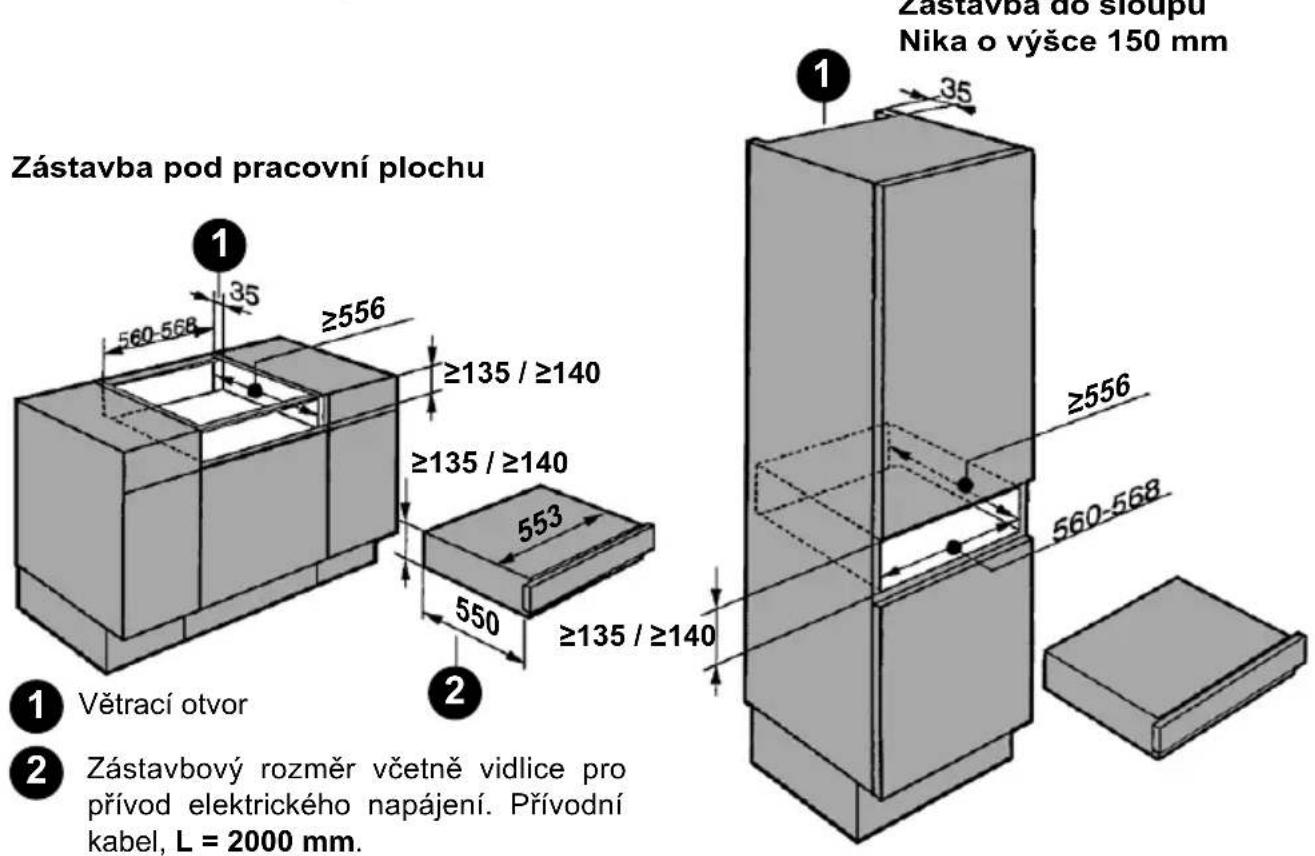
Built-in measurements
Column-integrated
Recess height 750 mm
Unpacking
- Open the packaging.
• Extract the filler volumes. - Remove the packaging machine.
- Remove the accessories.
- Check the integrity of the accessories and of the packaging machine. In the case of missing or damaged parts, suspend assembly and contact the dealer.
natural_image
Illustration of an open cardboard box with arrows indicating movement or force (no text or symbols)
natural_image
Illustration of two people exchanging a cardboard box, with stacked boxes and arrows indicating movement (no text or symbols)Assembly and installation
| Step | Description Image | ||
| 1 | Remove the upper lid (A). | 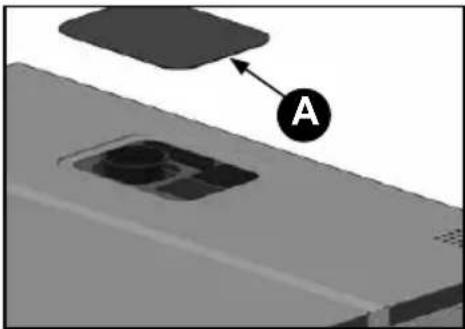 | 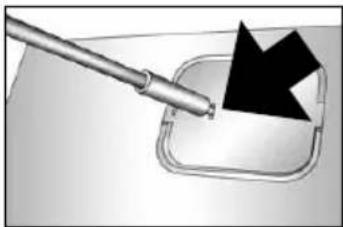 |
| 2 | Remove the oil filter plug (B) (Fig. 1). | 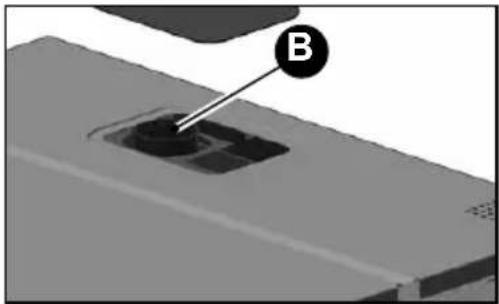 | |
 |  | ||
 | |||
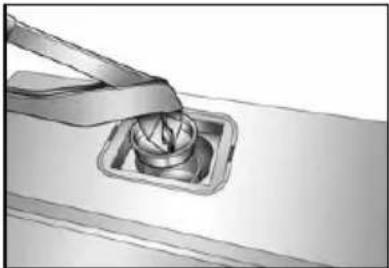
| 3 | Screw the filter (C) on the pump. | 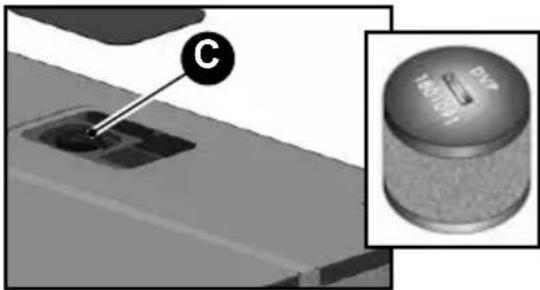 | 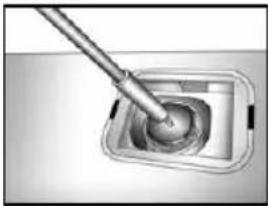 |
| 4 | Install the upper lid (Fig. 2). |  | 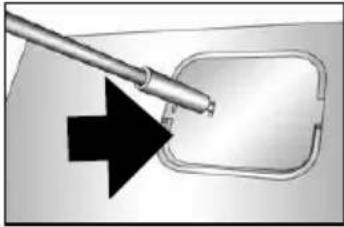 |
| 5 | Insert the plug (D) into the socket on the back of the recessed box. | 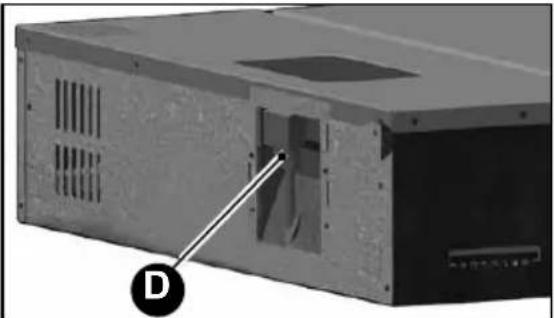 | 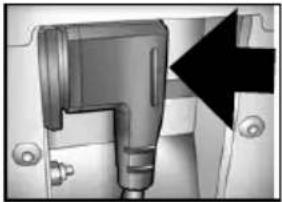 |
| 6 | Install the rear retaining brackets (E). | 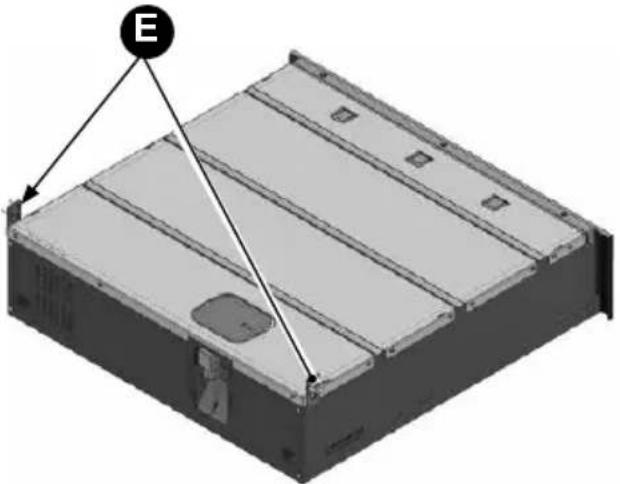 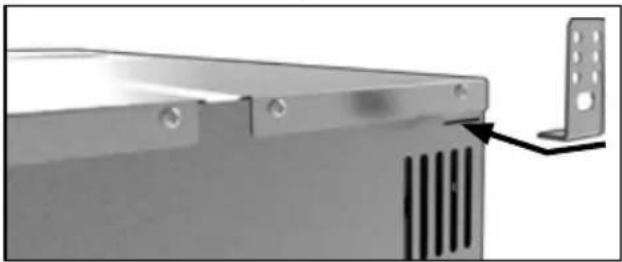 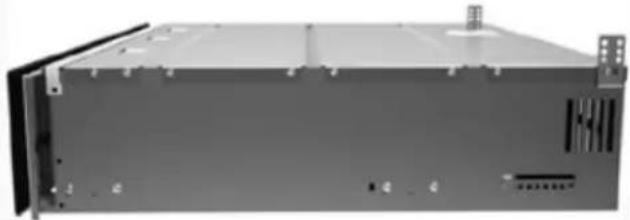 | |
| 7 | Lift the packaging machine and insert it into the unit, resting it on the floor of the unit. | 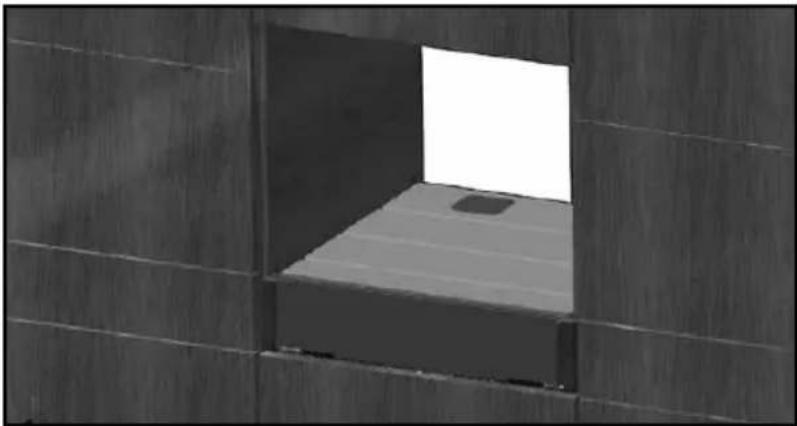 | |
| 8 | Using the chipboard screws 4.5×16mm, secure the rear retaining brackets (G) to the side walls of the unit.. | 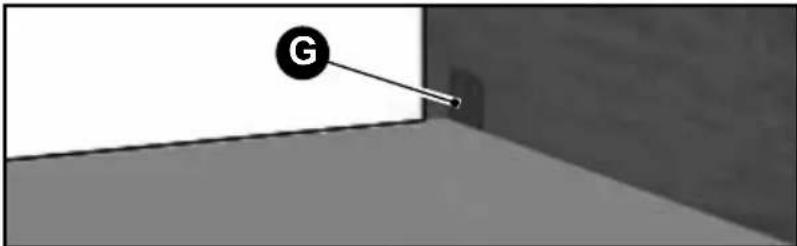 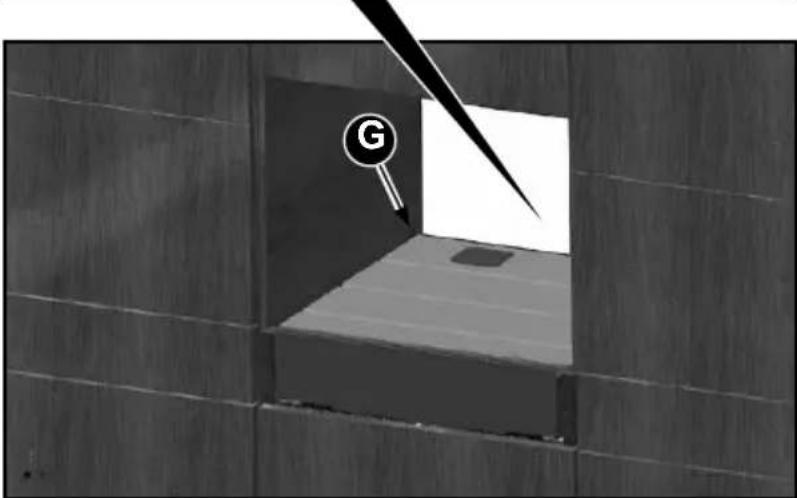 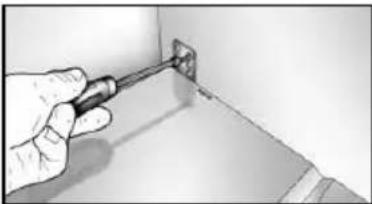 | 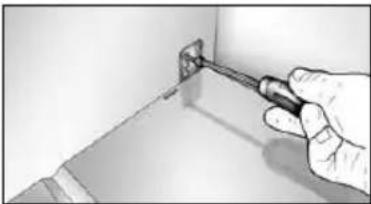 |
| 9 | Run the power cord towards the wall socket provided. | 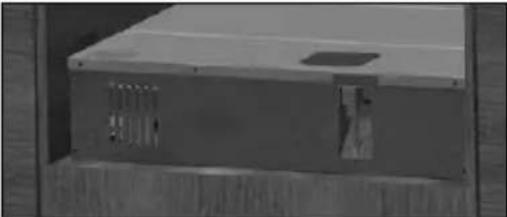 | |
| 10 | Remove the safety bands. | 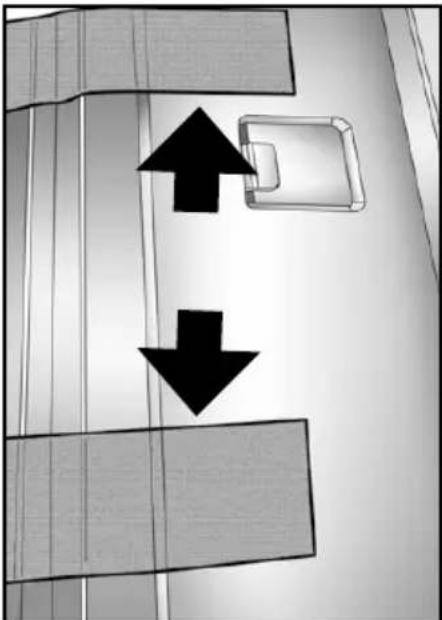 | |
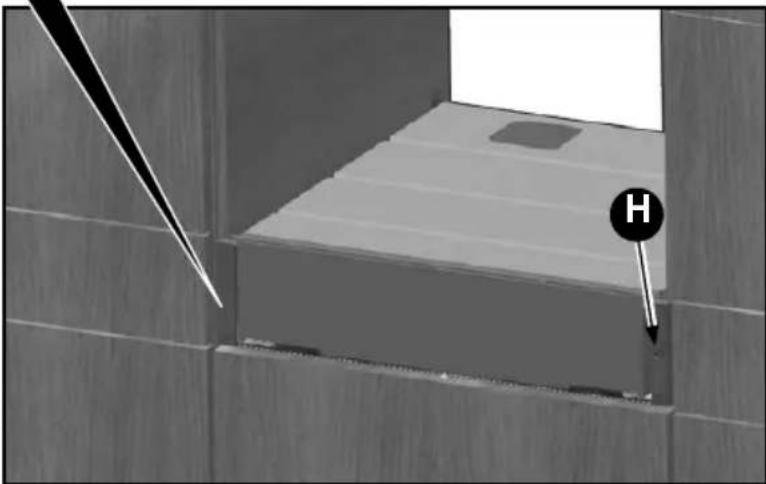
| 11 | Attach the front of the packaging machine to the unit with the chipboard screws (H) 4.5×16mm.. | 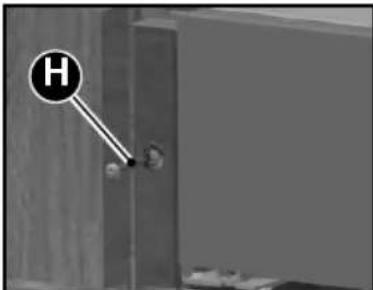 | 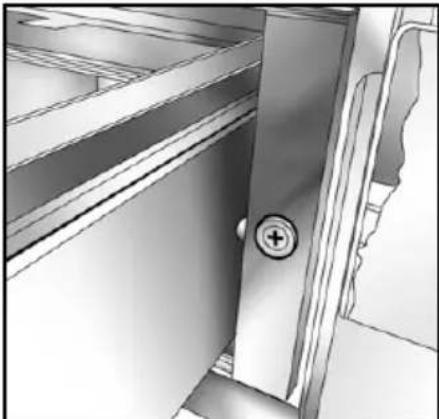 |
 | |||
| 12 | Ensure central alignment of the packaging machine. | ||
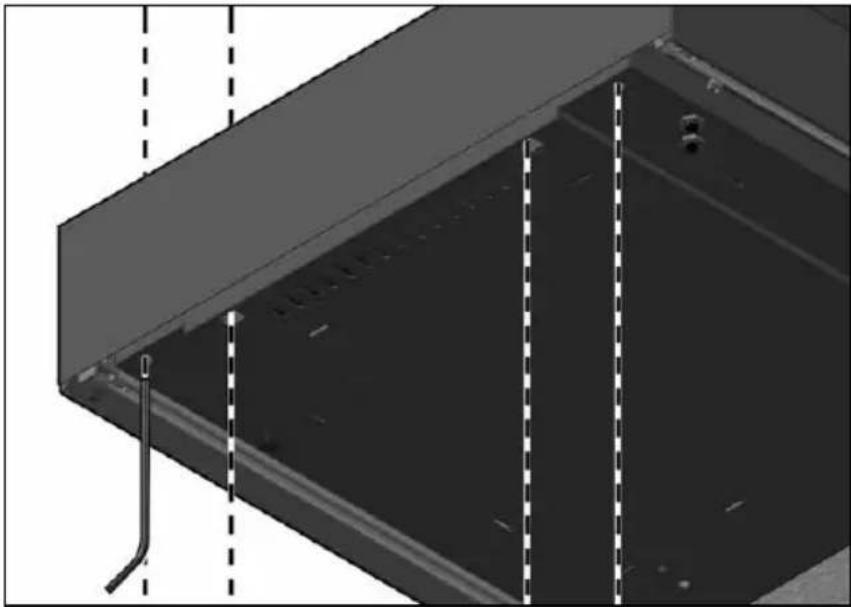
Front panel adjustment
- Remove the packaging machine by lightly pressing the front part. - In the lower part of the front panel there are 2 adjustment screws on the right and 2 on the left
(Fig. 5).
- Act on the adjustment screws to adjust the front panel. - Insert the packaging machine by pushing it inwardly.
natural_image
3D architectural detail of a structural beam with dashed vertical and horizontal lines indicating hidden edges (no text or symbols)Fig. 5
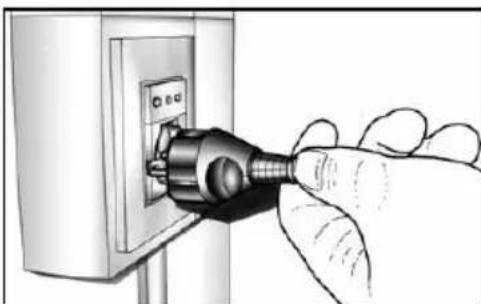
Electrical connection
- Check again that the characteristics of the electrical system correspond with the plate data of the packaging machine.
- Insert the plug into the socket of the electrical system.
natural_image
Hand inserting a plug into a wall socket (no text or symbols visible)Technical data
| Recessed box sizes Width: 548 mm; | Height: 135 mm; Depth: 556 mm |
| Weight Kg | |
| Power supply voltage 220-240 V | |
| Frequency 50/60 Hz | |
| Power 240 W | |
| Current consumption 1 A | |
| Installation Recessed | |
| Vacuum chamber volume 6.4 l | |
| Sealing beam 250 mm | |
| Maximum size of the bags 250×350 mm | |
Useful notes
Date of purchase:
Dealer Data:
Name:
Address:
Telephone: ____ Fax: ____
CANDY HOOVER GROUP SRL, Via Comolli 16, 20861 Brugherio (MB), Italy
Nearest recommended After-sales Centre:
The appliance is guaranteed, in addition to legal provisions, according to the conditions and terms shown in the standard guarantee certificate supplied with the appliance. The certificate should be kept and shown to our Authorised Service Centre, in case of need, along with the receipt proving the purchase of the appliance.
You can read the guarantee conditions also in our web site.
To get our service, fill in the suitable form online or contact us calling the number shown in the service page of our web site.
Spare parts
FOR SPARE PARTS: Contact the Service Centre Gias Service
SOMMAIRE
natural_image
3D illustration of a hand cleaning a metal tray with a lid, showing the interior and exterior (no text or symbols)
natural_image
Illustration of a hand cleaning a metal shelf with a cloth, no text or symbols presentnatural_image
3D technical diagram of a mechanical assembly with labeled component A, showing internal components and mounting features (no text or symbols beyond label)natural_image
Two metal bracket components with holes and screw tips, shown from different angles (no text or symbols)Fig. 2
natural_image
3D rendering of a gray server rack unit with mounting flanges and a small vent (no text or symbols visible)Fig. 1
natural_image
Two black-and-white screwdrivers with cross marks on their caps (no text or symbols)Fig. 3

natural_image
3D rendering of a mechanical device with a curved pipe and flanged housing (no text or symbols visible)Fig. 5 Fig. 6

natural_image
Coiled electrical plug with terminal connector, resting on wooden surface (no text or symbols)Fig. 4
natural_image
Illustration of an open cardboard box with arrows indicating movement or force (no text or symbols)
natural_image
Illustration of two people exchanging a cardboard box, with stacked boxes and arrows indicating movement (no text or symbols)natural_image
3D architectural detail of a structural beam with dashed vertical lines indicating hidden edges (no text or symbols)Fig. 5
natural_image
Hand inserting a plug into a wall socket (no text or symbols visible)Données techniques
Bedienblende

flowchart
graph TD
    A["●"] --> B["1"]
    C["●"] --> D["2"]
    E["●"] --> F["3"]
    G["●"] --> H["4"]
    I["●"] --> J["5"]
    K["●"] --> L["6"]
    M["●"] --> N["7"]
    O["●"] --> P["8"]
    Q["●"] --> R["9"]
    S["●"] --> T["10"]
    U["●"] --> V["11"]
    W["●"] --> X["start stop"]
    Y["●"] --> Z["①"]
natural_image
Illustration of a hand cleaning a metal tray with a lid, showing the interior and exterior (no text or symbols)
natural_image
Illustration of a hand cleaning a metal shelf with a cloth (no text or symbols)natural_image
3D CAD model of a mechanical assembly with labeled component A, showing internal components and mounting brackets (no text or symbols beyond label)natural_image
Two metal bracket components with screw holes and pin tips, shown from different angles (no text or symbols)Abb. 2

natural_image
3D rendering of a gray server rack unit with mounting holes and ventilation slots (no text or symbols)Abb. 1
natural_image
Two black screwdrivers with metal fasteners, shown from different angles (no text or symbols)Abb. 3

natural_image
3D rendering of a mechanical device with a curved pipe and flanged base (no text or symbols visible)Abb. 5 Abb. 6
natural_image
Coiled metallic electrical plug with terminal connector, no text or symbols visibleAbb. 4
natural_image
Illustration of an open cardboard box with arrows indicating movement or force (no text or symbols)
natural_image
Illustration of two people exchanging a cardboard box, with stacked boxes and arrows indicating movement (no text or symbols)natural_image
3D architectural detail of a structural beam with dashed vertical and horizontal lines indicating hidden edges (no text or symbols)Abb. 5
Elektroanschluss
natural_image
Hand inserting a plug into a wall socket (no text or symbols visible)Technische Daten
Ovládací panel
flowchart
graph TD
    A["●"] --> B["..."]
    C["●"] --> D["..."]
    E["●"] --> F["..."]
    G["●"] --> H["..."]
    I["●"] --> J["..."]
    K["●"] --> L["..."]
    M["●"] --> N["..."]
    O["●"] --> P["..."]
    Q["●"] --> R["..."]
    S["●"] --> T["..."]
    U["●"] --> V["..."]
    W["●"] --> X["..."]
    Y["●"] --> Z["..."]
    AA["●"] --> AB["..."]
    AC["●"] --> AD["..."]
    AE["●"] --> AF["..."]
    AG["●"] --> AH["..."]
    AI["●"] --> AJ["..."]
    AK["●"] --> AL["..."]
    AM["●"] --> AN["..."]
    AO["●"] --> AP["..."]
    AQ["●"] --> AR["..."]
    AS["●"] --> AT["..."]
    AU["●"] --> AV["..."]
    AW["●"] --> AX["..."]
    AY["●"] --> ZA["●"]
    AZ["●"] --> BA["●"]
    BB["●"] --> BC["●"]
natural_image
Illustration of a hand cleaning a metal tray with a lid, showing the interior and exterior (no text or symbols)
natural_image
Illustration of a hand cleaning a metal tray with a cloth (no text or symbols)natural_image
3D technical diagram of a mechanical assembly with labeled component A, showing internal components and mounting holes (no text or symbols beyond label)Instalace
Bezpečnostní pokyny
natural_image
Two metal bracket panels with holes and screw tips, shown from different angles (no text or symbols)Obr. 2
natural_image
3D rendering of a gray server rack unit with mounting holes and ventilation slots (no text or symbols)Obr. 1
natural_image
Two identical screwdrivers with metal fasteners (no text or symbols)Obr. 3

natural_image
3D rendering of a mechanical device with a curved pipe and flanged housing (no text or symbols visible)Obr. 5 Obr. 6

natural_image
Illustration of a coiled electrical plug with two terminal pins, lying on a wooden surface (no text or symbols)Obr. 4
Zástavbové rozměry
natural_image
Illustration of an open cardboard box with arrows indicating movement or force (no text or symbols)
natural_image
Illustration of two people exchanging a cardboard box, with stacked boxes and arrows indicating movement (no text or symbols)Montáž a instalace
natural_image
3D architectural detail of a structural beam with dashed vertical lines indicating hidden edges (no text or symbols)Obr. 5
natural_image
Hand inserting a plug into a wall socket (no text or symbols visible)Technické údaje
Ovládací panel
flowchart
graph TD
    A["●"] --> B["..."] --> C["□"] --> D["•"] --> E["×"] --> F["←"] --> G["●"] --> H["9"] --> I["11"]
    J["●"] --> K["..."] --> L["→"] --> M["→"] --> N["→"] --> O["→"] --> P["→"] --> Q["→"] --> R["→"] --> S["→"] --> T["→"] --> U["→"] --> V["→"] --> W["→"] --> X["→"] --> Y["→"] --> Z["→"] --> AA["→"] --> AB["→"] --> AC["→"] --> AD["→"] --> AE["→"] --> AF["→"] --> AG["→"] --> AH["→"] --> AI["→"] --> AJ["→"] --> AK["→"] --> AL["→"] --> AM["→"] --> AN["→"] --> AO["→"] --> AP["→"] --> AQ["→"] --> AR["→"] --> AS["→"] --> AT["→"] --> AU["→"] --> AV["→"] --> AW["→"] --> AX["→"] --> AY["2"]
    AZ["10"] --> BA["←"] --> BB["←"] --> BC["←"] --> BD["←"] --> BE["←"] --> BF["←"] --> BG["←"] --> BH["←"] --> BI["←"] --> BJ["←"] --> BK["←"] --> BL["←"] --> BM["←"] --> BN["←"] --> BO["←"] --> BP["←"] --> BQ["←"] --> BR["←"] --> BS["←"] --> BT["←"] --> BU["←"] --> BV["←"] --> BW["←"] --> BX["←"] --> BY["←"] --> BZ["←"] --> CA["←"] --> CB["←"] --> CC["←"] --> CD["←"] --> CE["←"] --> CF["←"] --> CG["←"] --> CH["←"] --> CI["←"] --> CJ["←"] --> CK["←"] --> CZ["←"] --> DA["←"] --> DB["←"] --> DC["←"] --> DD["←"] --> DE["←"] --> DF["←"] --> DG["←"] --> DH["←"] --> DI["←"] --> DJ["←"] --> DK["←"] --> DL["←"] --> DV["←"] --> DW["←"] --> DX["←"] --> DXB["←"] --> DXC["←"] --> DXD["←"] --> DXE["←"] --> DXF["←"] --> DXG["←"] --> DXH["←"] --> DXI["←"] --> DXJ["←"] --> DXK["←"] --> DXL["←"] --> DXM["←"] --> DXN["←"] --> DXO["←"] --> DXP["←"] --> DXQ["←"] --> DXR["←"] --> DXS["←"] --> DXT["←"] --> DXU["←"] --> DXV["←"] --> DXW["←"] --> DXX["←"] --> DXY["←"] --> DXZ["←"] --> DXZB["←"]
natural_image
Illustration of a hand cleaning a metal tray with a lid, showing the interior and exterior (no text or symbols)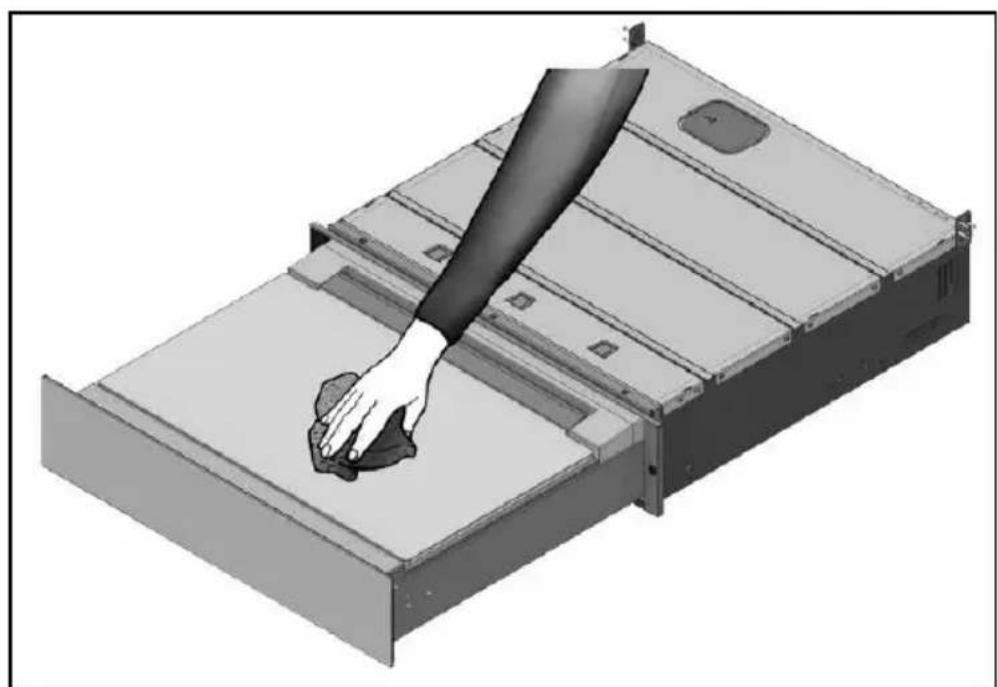
natural_image
Illustration of a hand cleaning a metal tray with a cloth (no text or symbols)natural_image
3D technical diagram of a mechanical assembly with labeled component A, showing internal components and mounting features (no text or symbols beyond label)Inštalácia
Bezpečnostné pokyny
natural_image
Two metal bracket panels with holes and screw tips, shown from different angles (no text or symbols)Obr. 2
natural_image
3D rendering of a gray server rack unit with mounting holes and ventilation slots (no text or symbols visible)Obr. 1

natural_image
Two identical screwdrivers with cross marks on their caps (no text or symbols)Obr. 3
natural_image
3D rendering of a mechanical device with a curved pipe and flanged base (no text or symbols visible)Obr. 5 Obr. 6


natural_image
Illustration of a coiled electrical plug with two terminal pins, lying on a wooden surface (no text or symbols)Obr. 4
Rozmery na vstavanie
natural_image
Illustration of an open cardboard box with a rising arrow and directional arrows indicating movement (no text or symbols)
natural_image
Illustration of two people loading a cardboard box into an open box, with no visible text or symbols.Montáž a inštalácia
natural_image
3D architectural detail of a structural beam with dashed vertical and horizontal lines indicating hidden edges (no text or symbols)Obr. 5
natural_image
Hand inserting a plug into a wall socket (no text or symbols visible)Technické údaje
Bedieningspaneel

flowchart
graph TD
    A["●"] --> B["..."]
    C["●"] --> D["..."]
    E["●"] --> F["..."]
    G["●"] --> H["..."]
    I["●"] --> J["..."]
    K["●"] --> L["..."]
    M["●"] --> N["..."]
    O["●"] --> P["..."]
    Q["●"] --> R["..."]
    S["●"] --> T["..."]
    U["●"] --> V["..."]
    W["●"] --> X["..."]
    Y["●"] --> Z["..."]
    AA["●"] --> AB["..."]
    AC["●"] --> AD["..."]
    AE["●"] --> AF["..."]
    AG["●"] --> AH["..."]
    AI["●"] --> AJ["..."]
    AK["●"] --> AL["..."]
    AM["●"] --> AN["..."]
    AO["●"] --> AP["..."]
    AQ["●"] --> AR["..."]
    AS["●"] --> AT["..."]
    AU["●"] --> AV["..."]
    AW["●"] --> AX["..."]
    AY["●"] --> ZA["●"]
    AZ["●"] --> BA["●"]
    BB["●"] --> BC["●"]
natural_image
Illustration of a hand cleaning a clean, empty drawer with a lid (no text or symbols)
natural_image
Illustration of a hand cleaning a metal shelf with a cloth, no text or symbols presentVacumeren in zakken
natural_image
3D technical diagram of a mechanical assembly with labeled component A, showing internal components and mounting brackets (no text or symbols beyond label)Installatie
natural_image
Two metal bracket components with holes and screw tips, shown from different angles (no text or symbols)Afb. 2

natural_image
3D rendering of a gray server rack unit with mounting holes and ventilation slots (no text or symbols)Afb. 1

natural_image
Two black-and-white screwdrivers with cross marks on their caps (no text or symbols)Afb. 3

natural_image
3D rendering of a mechanical device with a curved pipe and flanged base (no text or symbols visible)Afb. 5 Afb. 6


natural_image
Illustration of a coiled electrical plug with two terminal pins, lying on a wooden surface (no text or symbols)Afb. 4
natural_image
Illustration of an open cardboard box with arrows indicating upward movement (no text or symbols)
natural_image
Illustration of two people exchanging a cardboard box, with stacked boxes and arrows indicating movement (no text or symbols)natural_image
3D architectural detail of a structural beam with dashed vertical and horizontal lines indicating hidden edges (no text or symbols)Afb. 5
natural_image
Hand inserting a plug into a wall socket (no text or symbols visible)Technische gegevens
Painel de controlo
flowchart
graph TD
    A["1"] --> B["2"]
    C["3"] --> D["4"]
    E["5"] --> F["6"]
    G["7"] --> H["8"]
    I["●"] --> J["●"]
    K["●"] --> L["●"]
    M["●"] --> N["●"]
    O["●"] --> P["●"]
    Q["●"] --> R["●"]
    S["●"] --> T["●"]
    U["●"] --> V["●"]
    W["●"] --> X["●"]
    Y["●"] --> Z["●"]
    AA["●"] --> AB["●"]
    AC["●"] --> AD["●"]
    AE["●"] --> AF["●"]
    AG["●"] --> AH["●"]
    AI["●"] --> AJ["●"]
    AK["●"] --> AL["●"]
    AM["●"] --> AN["●"]
    AO["●"] --> AP["●"]
    AQ["●"] --> AR["●"]
    AS["●"] --> AT["●"]
    AU["●"] --> AV["●"]
    AW["●"] --> AX["●"]
    AY["9"] --> AZ["10"]
    BA["11"] --> BB["12"]
    BC["13"] --> BD["13"]
natural_image
Illustration of a hand cleaning a metal tray with a lid, showing the interior and exterior (no text or symbols)
natural_image
Illustration of a hand cleaning a rectangular electronic device with a cloth (no text or symbols)natural_image
3D diagram of a mechanical assembly with labeled component A, showing internal components and mounting brackets (no text or symbols beyond label)natural_image
Two metal bracket components with screw fasteners, no text or symbols presentFig. 2
natural_image
3D rendering of a gray rectangular electronic device casing with mounting holes and a small inset slot (no text or symbols)Fig. 1
natural_image
Two screws with cross marks, shown in grayscale (no text or symbols)Fig. 3
natural_image
Technical illustration of a mechanical device with a curved pipe and flanged base (no text or symbols)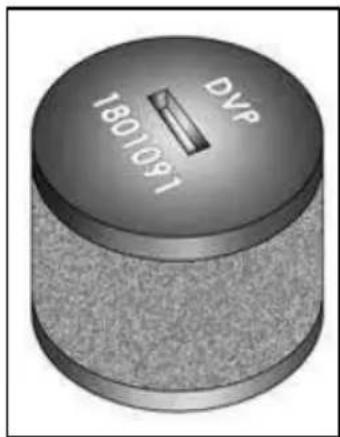

natural_image
Coiled metallic cable with a terminal plug, resting on a wooden surface (no text or symbols visible)natural_image
Illustration of an open box with a rising arrow and directional arrows inside, no text or symbols present.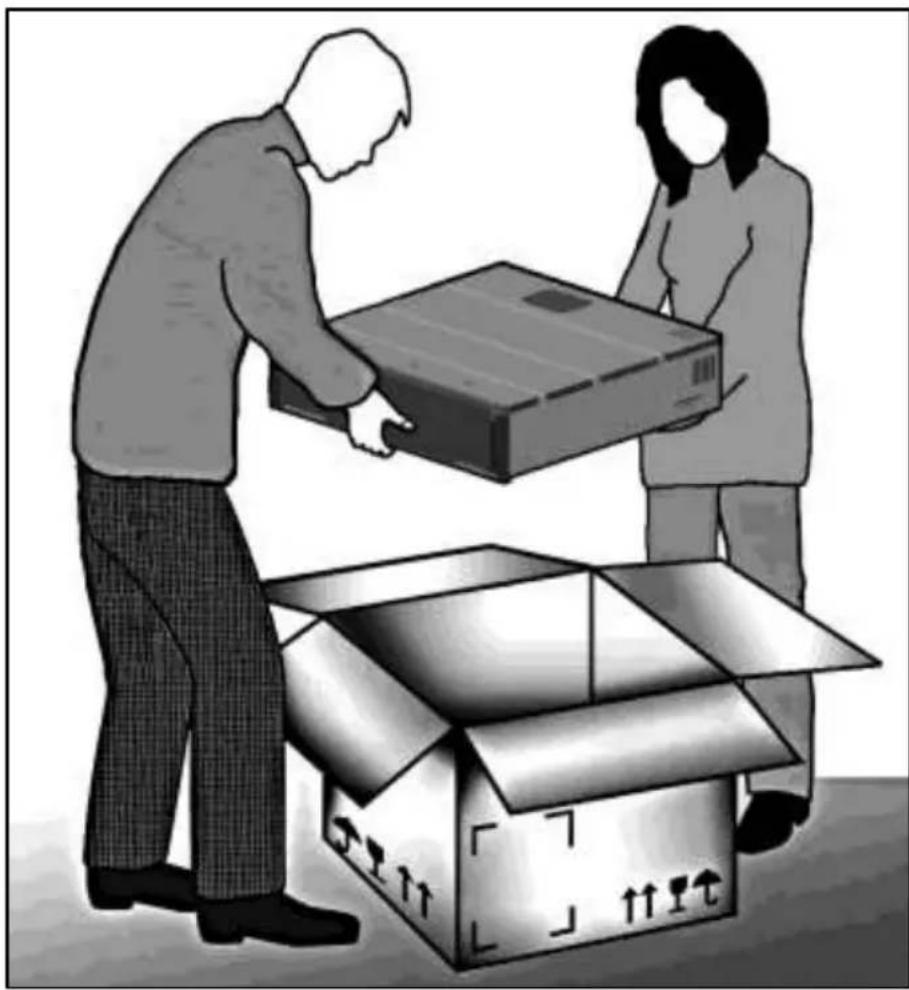
natural_image
Illustration of two people loading a cardboard box into an open box, with no visible text or symbols.natural_image
Close-up of a structural steel beam with dashed vertical supports and a pipe connection (no text or symbols visible)Ligação elétrica
natural_image
Hand inserting a plug into an electrical outlet (no text or symbols visible)Dados técnicos
Candy Hoover Group srl
Via Comolli, 16
20861 Brugherio (MB)
Italy