USER MANUAL Air Mist Create
natural_image
Line drawing of a standard outdoor air conditioner with a circular fan and base mount (no text or symbols)
MISTING FAN
Security instructions 3
Features 5
Parts list 5
Installation 6
How to use 6
Control panel 6
Remote control 7
Filling the water tank 8
Cleaning and maintenance 8
Troubleshooting 9
PORTUGUÊS
Thank you for choosing our misting fan. Before using the appliance, and to ensure the best use, carefully read these instructions.
The safety precautions enclosed herein reduce the risk of death, injury and electrical shock when correctly adhered to. Keep the manual in a safe place for future reference, along with the completed warranty card, purchase receipt and package. If applicable, pass these instructions on to the next owner of the appliance. Always follow basic safety precautions and accident-prevention measures when using an electrical appliance. We assume no liability for customer failing to comply with these requirements.
SECURITY INSTRUCTIONS
Before using this electrical appliance, the following basic precautions should always be followed:
- Do not touch / pull out / put back the water tank when the unit is plugged into a power source. Make sure it is physically disconnected from the mains before doing anything with the water tank.
- When the water level is too low, the safety switch will cut out operation of the mist function. Unplug the unit and refill the water tank for further operation.
- Do not let dust or other particles collect on the mist plate - if the mist outlets are blocked, the mist function could malfunction.
- Before cleaning the unit, make sure it is completely disconnected from the power source. Make sure your hands are not wet when unplugging the unit.
- Do not use very hot water in the water tank - use water under 40 degrees Celsius.
- Use only water in the water tank. Do not add chemicals or oils or any other additive.
- Children, disabled people and the elderly should not be in the direct airflow from the fan for long periods of time.
- Young children should be supervised to ensure that they do not play with the appliance.
- If the supply cord is damaged, it must be replaced by the manufacturer, its service agent or similarly qualified person in order to avoid a hazard.
Warning: Unplug from electrical supply source before cleaning. After servicing, any safety device (including grilles and blades) must be reinstalled or remounted as previously installed. Use soft damp cloth then wipe with dry cloth. Do not use harmful cleaners. Do not bend the blades.
- This appliance is not intended for use by persons (including children) with reduced physical, sensory or mental capabilities, or lack of expe-
rience and knowledge, unless they have been given supervision or instruction concerning use of the appliance by a person responsible for their safety.
- Children should be supervised to ensure that they do not play with the appliance.
- Please note that high humidity levels can support the growth of biological organisms in the environment.
- Do not allow the area around the humidifier to become damp or wet. If moisture occurs, turn the outlet of the humidifier below.
- If the humidifier output volume cannot be lowered, use the humidifier intermittently.
- Do not allow absorbent materials, such as rugs, curtains, or tablecloths, to get wet.
- Unplug the appliance during filling and cleaning.
- Never leave water in the tank when the appliance is not in use.
- Empty and clean the humidifier before storing it. Clean the humidifier before next use.
- Clean the water tank every 3 days.
Warning: Microorganisms that may be present in the water or in the environment where the appliance is used or stored can grow in the water tank and be carried away by the air, causing very serious health risks when the water is not renewed and the tank is not cleaned properly every 3 days.
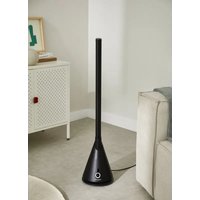
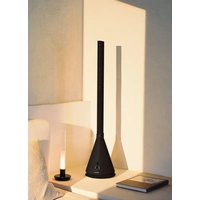
FEATURES
This product has both fan and humidifier functions, which can be used together or separately. The humidifier is especially useful on very hot days, when the extra mist in the air helps not only to cool you down, but also to increase the humidity in the dry heat.
How does it work?
This Mist Fan uses ultrasonic vibration to atomize water into 1-5 micron particles, which can then be blown through the room with the fan.
Why is it useful?
Not only does this fan help to cool you down with air containing micro water droplets, it also helps to avoid dry skin and eyes which are common in dry heat. A relative humidity of 45% - 65% is recommended for comfortable living, and this fan can help maintain that balance in the hot summer months.
PARTS LIST

-
Motor
-
Rear guard
-
Guard mounting nut
-
Blades
-
Front guard
-
Front mist plate and turbo
-
Blades cap
-
Control panel
-
Fan body
-
Base and caster wheels
-
Water tank
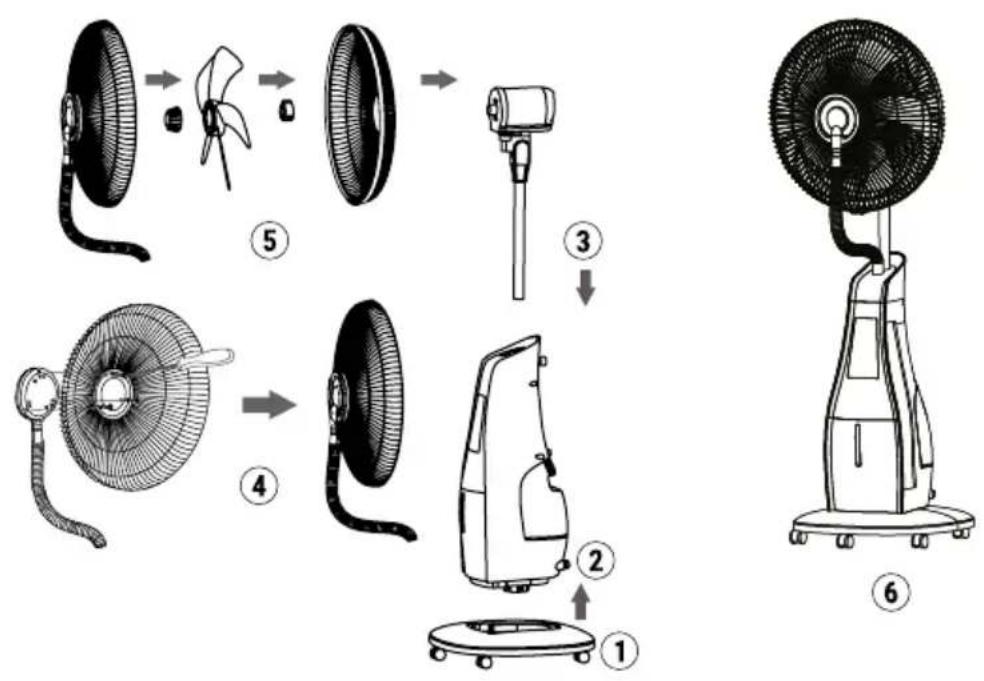
INSTALLATION
- Firstly install caster wheels into the holes of base.
- Install the base into the main fan body.
- Fix the fan motor parts into the bearing hole of fan body.
- Install the front mist plate onto the front guard.
- Install the rear guard and blade, using the blade cap to fasten the blade.
- Fix the front guard onto the rear guard.
HOW TO USE
CONTROL PANEL
- Nature indicator light
- Mist level indicator light
- Timer light
- Power indicator light
- Power button
- Mode button
- Oscillation button
- Sleep indicator light
- Oscillation indicator light
- Speeds button
- Timer button
- Mist button
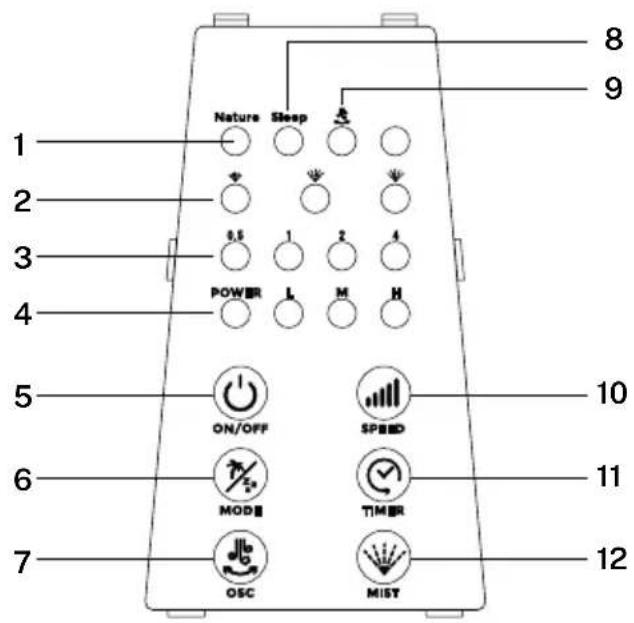
- Press “MIST” to start the mist function. Mist comes out of the front plate if there is water in the tank. The MIST function can be used on its own or along with the fan function to blow the mist into the room.
- The Remote Control must be pointed towards the Remote Sensor on the main unit for best results. If the remote control doesn't operate as expected, replace the batteries (1pc, CR2025 3V Lithium Cell).
REMOTE CONTROL
- Power button
- Speed
- Mist
- OSC
- Timer
- Mode
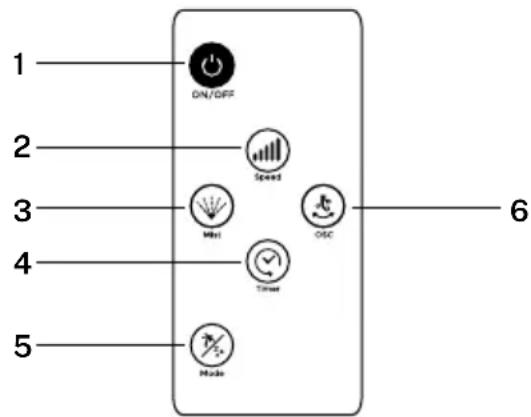
- Power button: To switch on and off the device.
• Speed: To set the wind flow as High, Mid or Low.
- Mist: To turn on or off the misting function. It can work without turning the fan on.
- OSC: To turn on or off the oscillation function.
- Timer: To set the working time of the unit.
- Mode: to choose the air flow type as Nature or Sleep.
FILLING THE WATER TANK
Place the fan on a flat, stable floor, then add water for the humidifying function as follows:
-
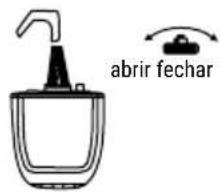
Open the water tank cover.
-
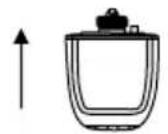
Lift the water tank straight up to disengage
-
Carefully remove the water tank from the unit (watch for spills).
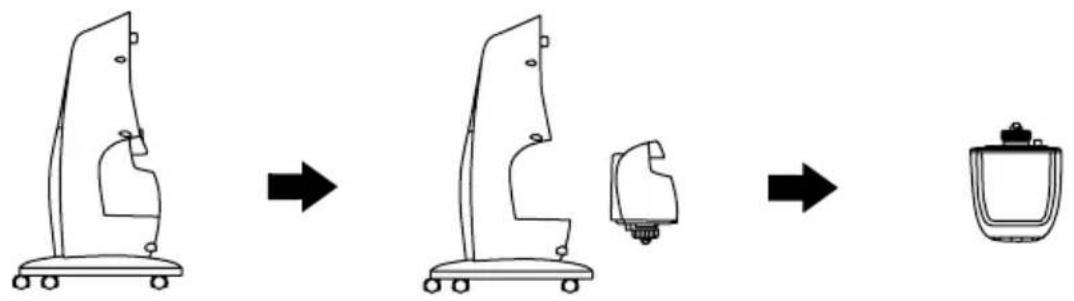
-
Over a sink, turn the water tank upside-down.
-
Unscrew the lid and fill the tank with clean water. Replace the lid and tighten it securely.
-
Carefully put the water tank back into the unit. Make sure it is seated properly to avoid leaks.

natural_image
Line drawing of a mechanical device with wheels and a curved top (no text or symbols)
CLEANING AND MAINTENANCE
- Make sure power is disconnected before any cleaning or maintenance is performed.
- It is recommended that you clean the water tank every 2-3 weeks of use, and clean the flume every week.
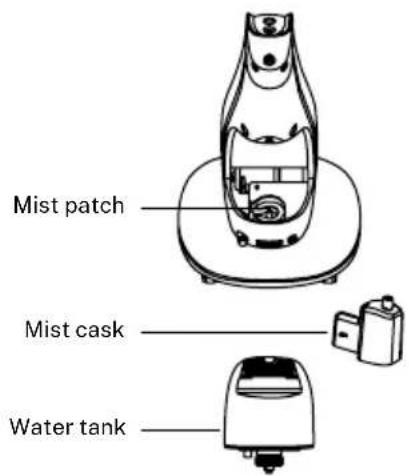
- Pull out the water tank before cleaning it - pull the plastic tube out of the mist cask properly, then take out the mist cask and water tank.
- Use a dry cloth to clean the mist cask. If there are stubborn stains on the mist cask, use a cloth lightly dampened with mild detergent.
- If the mist feature will not be used for a long time, empty the water tank and leave it to dry before recapping it.
PROBLEM POSSIBLE CAUSE SOLUTION
| Mist projector works normally, but without mist spray. | ·Water could be contaminated with other substances or chemicals.·Water tank could be cracked.·Water tank could be empty. | ·Clean out the water tank and replace with clean water.·Pour out the water and check for cracks.·Refill the water tank. A full tank of water will last approximately 8 hours. |
| Mist projector doesn’t work. | ·Bobber doesn’t float.·Water tank could be empty. | ·Free the bobber and allow it to float freely.·Refill the water tank. A full tank of water will last approximately 8 hours. |
| No indicator light, no wind, no mist. | ·Power cord is unplugged, and electric power is power off. | ·Plug the power cord, and turn on the electric power. |
| Peculiar smell from the mist. | ·When new, there might be residue in the water tank/mist plate.·The water in the water tank many be contaminated. | ·The smell should disappear after further use.·Clean out the water tank and refill with fresh water. |
| The fan doesn’t work as normal. | ·The plug and supply cord are damaged.·The blades are bend.·Don’t safety device. | ·Find service agent or a suitable qualified person to change or service.·Don’t play the blades. Use soft damp cloth then wipe with dry cloth.·Installed correctly in accordance with the manual. Can not be installed until there is no electricity. |
In compliance with directives: 2012/19/eu and 2015/863/eu on the restriction of the use of dangerous substances in electric and electronic equipment as well as their waste disposal. The symbol with the crossed dustbin shown on the package indicates that the product at the end of its service life shall be collected as separate waste. Therefore, any products that have reached the end of their useful life must be given to waste disposal centres specialising in separate collection of waste electrical and electronic equipment, or given back to the retailer at the time of purchasing new similar equipment, on a one for one basis. The adequate separate collection for the subsequent start-up of the equipment sent to be recycled, treated and disposed of in an environmentally compatible way contributes to preventing possible negative effects on the environment and health and optimises the recycling and reuse of components making up the apparatus. Abusive disposal of the product by the user involves application of the administrative sanctions according to the laws.
flowchart
graph LR
    A["Container with upward arrow"] --> B["Heater with handbag and labeled 'abrir fechar'"]
    B --> C[Vacuum cleaner with label and arrow indicating 'abrir fechar'
LIMPIEZA Y MANTENIMIENTO
natural_image
Line drawing of a portable air conditioner fan with a handle and base, labeled with number 6 (no text or symbols on the device itself)
MODO DE USO
PAINEL DE CONTROLE
flowchart
graph LR
    A["Top-down: Top-Box HVAC System"] --> B["Right Arrow"]
    B --> C["Top-Box with Cover/Adjustment"]
    C --> D["Right Arrow"]
    D --> E["Product: Top-Box with Cover"]
flowchart
graph LR
    A["Left Arrow: Upward"] --> B["Right Arrow: Downward"]
    B --> C["Right Arrow: Rear Button with 'abrir fechar' label"]
NETTOYAGE ET ENTRETIEN
PROBLÈME CAUSE POSSIBLE LA SOLUTION