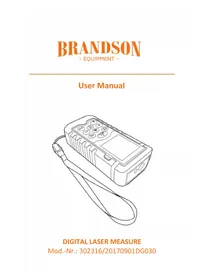
USER MANUAL 302316 Brandson
natural_image
Line drawing of a handheld electronic device with control buttons and a strap (no text or symbols)
DIGITAL LASER MEASURE
1 Lieferumfang
natural_image
Two mobile phones with upward arrows indicating signal or connection (no text or symbols present)
7 Funktionen
Plus/Minus
Distanzmessung
natural_image
Diagram showing a mobile phone projecting an image onto a window, with no text or symbols present.
natural_image
Diagram showing a mobile phone and a screen with light rays, no text or symbols present
natural_image
Two mobile phones with upward arrows indicating signal or data flow (no text or symbols present)
7 Funzioni
Più/meno
natural_image
Diagram showing a mobile phone projecting an image onto a door, with no text or symbols present.
natural_image
Diagram showing a mobile phone and a screen with light rays, no text or symbols present
flowchart
graph TD
    MEAS["MEAS"] --> 1
    MEAS --> 2
    MEAS --> 3
    MEAS --> 4
    MEAS --> 5
    MEAS --> 6
    MEAS --> 7
    MEAS --> 8
    MEAS --> 9
    cube[" cube "] --> 9
    triangle[" △ "] --> 2
    rectangle[" ▲ "] --> 3
    plus[" + "] --> 8
    CLR["CLR (●)"] --> 7
    Unit[" Unit "] --> 5
natural_image
Two mobile phones with upward arrows indicating orientation (no text or symbols)
7 Propiedades
Más/Menos
natural_image
Diagram showing a mobile phone projecting an image onto a wall, with no text or symbols present.
natural_image
Diagram showing a mobile phone and a screen with light rays, no text or symbols present
Thank you for choosing a Brandon product. Please read the following user manual carefully to have an enjoyable experience with your purchased product.

Important safety guidelines for this product
Laser
- While using laser equipment it must be ensured that the laser beam of the device is guided such that there are no people in the projection area. Ensure that no reflected rays reach the areas where people are present.
- Before using this device, inform yourself about the legal requirements and preventive measures for operating such a laser device.
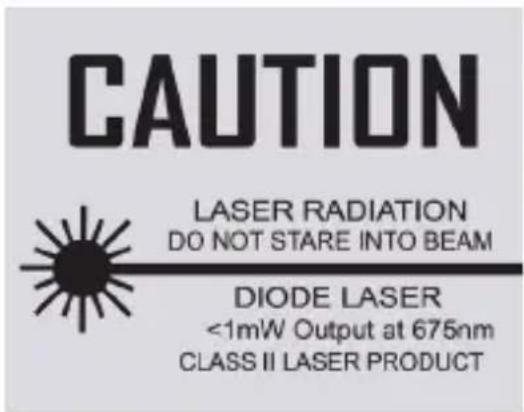
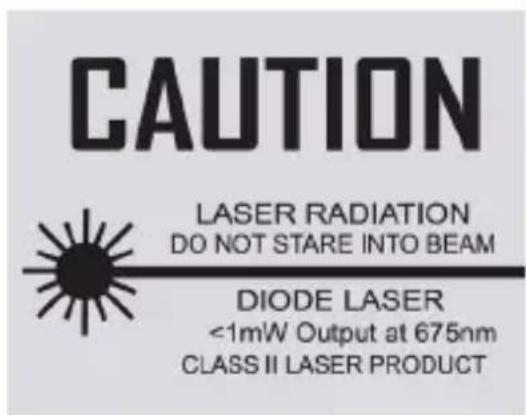
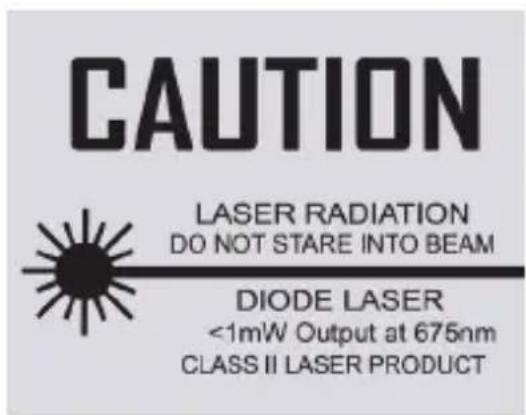
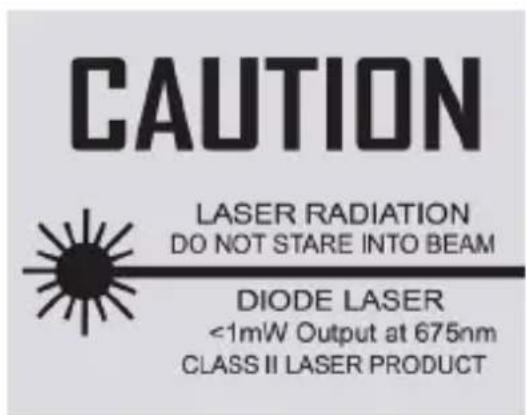
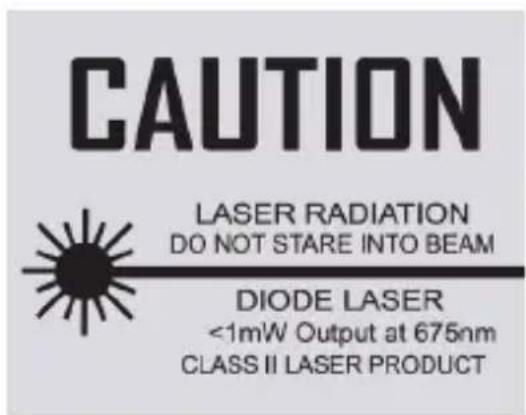
- Never look into the laser beam and never point it at people or animals. Such laser radiation can cause eye injuries!
- As soon as laser radiation impinges on the eye, the eyes must be closed immediately and the head must be moved away from the laser beam immediately.
- Never point the laser beam at a mirror or other reflective surfaces. The uncontrolled beam may hit persons or animals!
- Manipulations (modifications) to the laser equipment are not permitted.
- This user manual should be kept carefully, and if you give the laser equipment away, it should be handed over along with it.
• This product is equipped with a laser of Class 2.

1 Scope of supply
- Laser rangefinder
- Transport bag
- User manual
2 Technical data
| Operating voltage 2x 1.5V DC AAA batteries |
| Measurement range 0.15m - 40m |
| Precision ± 1.5mm | |
| Laser class II | |
| Laser type 635nm, <1mW | |
| Stored measured values 20 | |
| Features • Surface measurement• Volume measurement• Indirect measurement (Pythagoras)• Add/Subtract• Min/Max measurement• Backlight• Standby function |
3 Product details
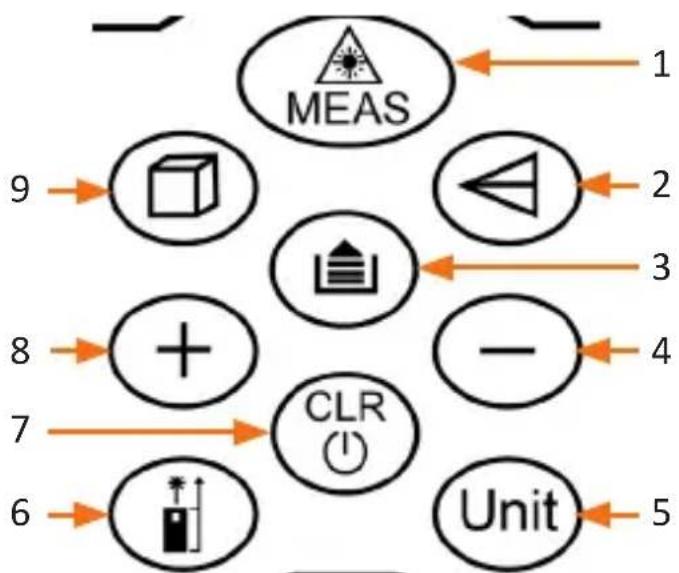
flowchart
graph TD
    MEAS["MEAS"] --> 1
    MEAS --> 2
    MEAS --> 3
    MEAS --> 4
    MEAS --> 5
    MEAS --> 6
    MEAS --> 7
    MEAS --> 8
    MEAS --> 9
    + --> +
    CLR["CLR"]
    Unit["Unit"]
| 1 "MEAS" button |
| 2 "Indirect measurement" button |
| 3 "Memory" button |
| 4 "-" button |
| 5 "UNIT" button |
| 6 "Measurement reference" button |
| 7 "Clear/Power Off" button |
| 8 "+" button |
| 9 "Area/Volume" button |
Display description
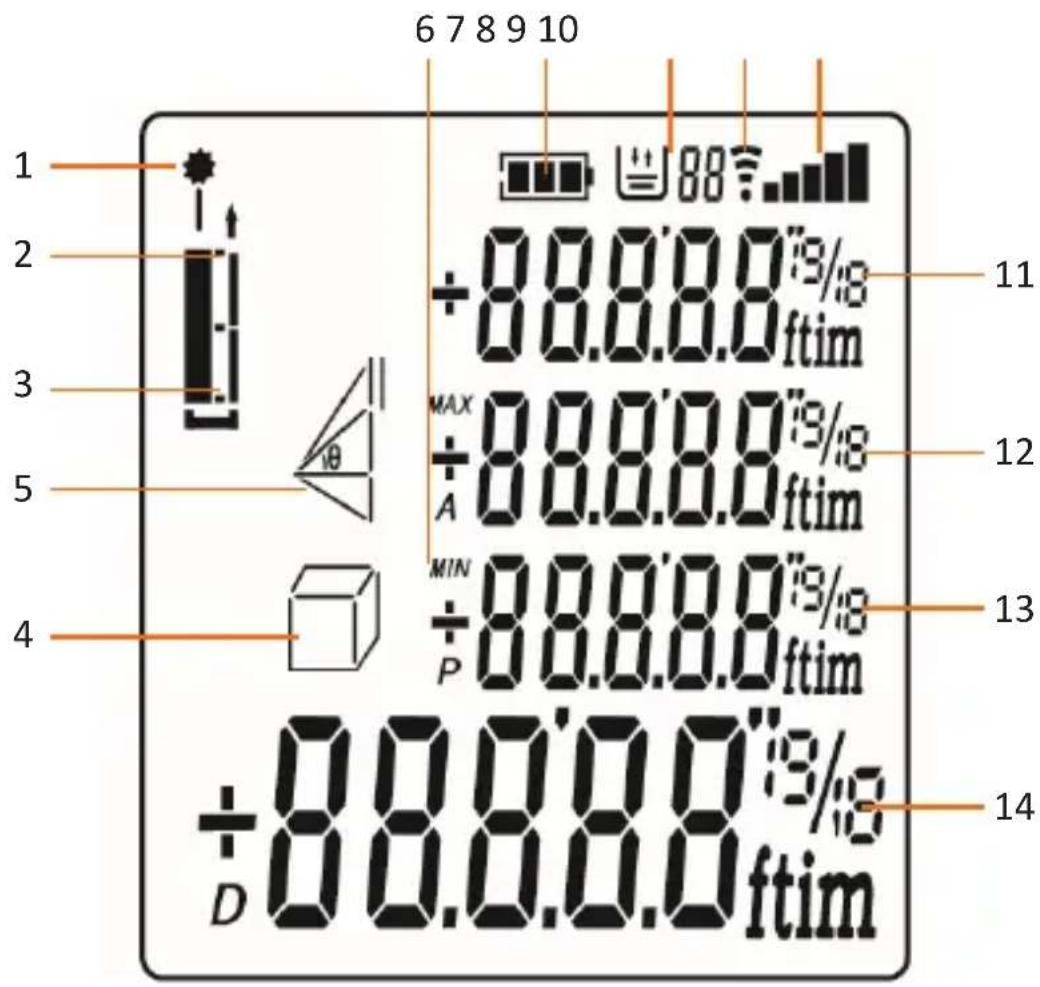
| 1 Laser Status LED |
| 2 Measurement reference point 1 |
| 3 Measurement reference point 2 |
| 4 Surface and volume measurement |
| 5 Indirect measurement (Pythagoras theorem) |
| 6 Continuous measurement |
| 7 Battery indicator |
| 8 Storage tank |
| 9 Emission signal display |
| 10 Signal strength |
| 11 Third display line |
| 12 Second display line |
| 13 First display line |
| 14 Result |
4 Commissioning
Take the device out of the package and remove all the packaging material. Open the battery cover at the back of the device and insert two AAA 1.5V batteries. Then close the battery compartment.
Note: It is recommended not to use rechargeable batteries as it may lead to malfunctions.
5 Commissioning and Initial Settings

Switching on the device and the laser
CLR Press for a long time to switch off the device. Alternatively, the device switches to the standby mode if it is not used for 3 minutes.
CLR "Clear/Power Off" button, stops the last action or empties the current display content.
5.1 Measurement reference
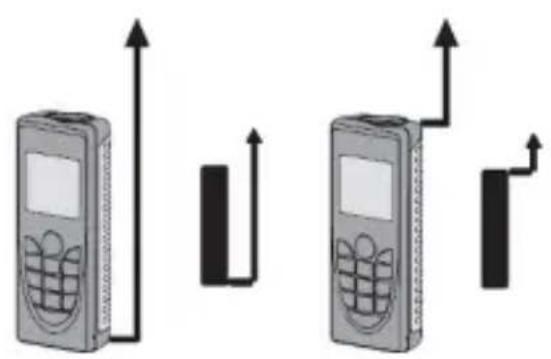
The position of the measurement reference edge of the device (see figure below) can be adjusted as desired. You can set the desired reference point using the
"Measurement reference" button ()
natural_image
Two mobile phones with upward arrows indicating signal or data flow (no text or symbols present)
Two different beeps indicate the corresponding set measurement point. Restarting the device resets the set measurement reference point to the standard setting.
5.2 Backlight
The backlight is automatically switched on when the device is switched on. If the device is not used for about 30 seconds, the backlight switches off. You can press any button to switch it on again. Alternatively, the backlight can be switched on or off with a long press of the “measurement reference” button.
5.3 Select measurement unit
Press the "UNIT" button to select the desired measurement unit.
The following measurement units are available: m (metre), in (inch) and ft (foot).
6 Measurement
6.1 Single distance measurement
Press the “ ” button to switch on the laser. Press the button once again to start the measurement. The measured data is subsequently shown on the display.
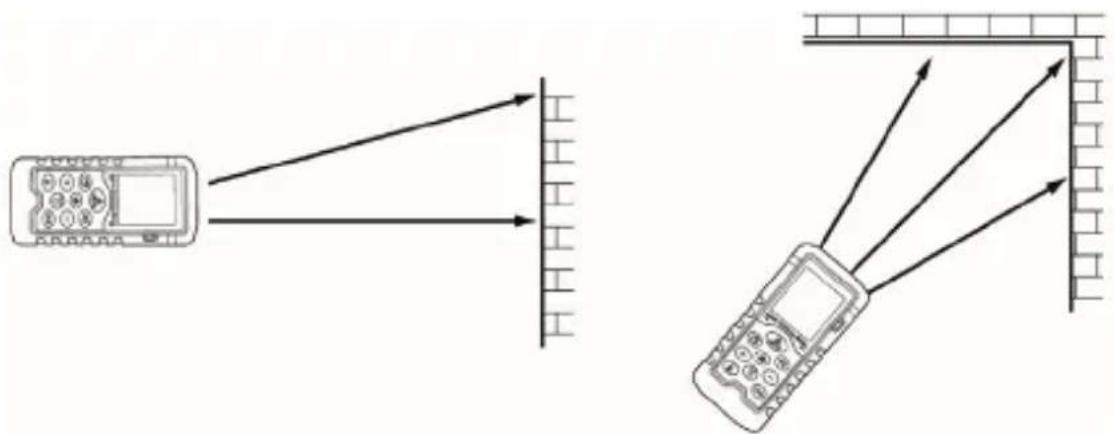
6.2 Continuous measurement
To perform a continuous measurement, press the “ ” button to switch on the laser. Press and hold the button once again to start the continuous measurement. The display now shows a maximum and a minimum measurement value.
To complete the continuous measurement, press either the "MEAS" or the "CLR" button.
The following figure shows examples for continuous measurements.
7 Functions
Plus/Minus
Distance measurement
- Press the "PLUS" button in the individual measurement in order to add the next measurement value to the previous measurement value.
— Press the “MINUS” button in the individual measurement in order to subtract the next measurement value from the previous measurement value.
If you press the "CLR" button once during these steps, then the last measured value is deleted. If you then press the "CLR" button again, then the "PLUS/MINUS" function is cancelled.
Surface measurement
Press the “” button to activate surface measurement. The “” symbol is shown in the display. Press the "MEAS" button to measure the length of the desired object.
Press the "MEAS" button again to subsequently measure the height of the object. Now the corresponding measured surface is shown in the display.
Volume measurement
Press the “button twice till the” symbol is shown in the display.
Press the "MEAS" button to measure the length of the desired object. Then press the "MEAS" button again to measure the width of the same object. Then you must again press the "MEAS" button to measure the height of the object.
Once you have measured the 3 values, the volume of the object is displayed in the display of the laser rangefinder.
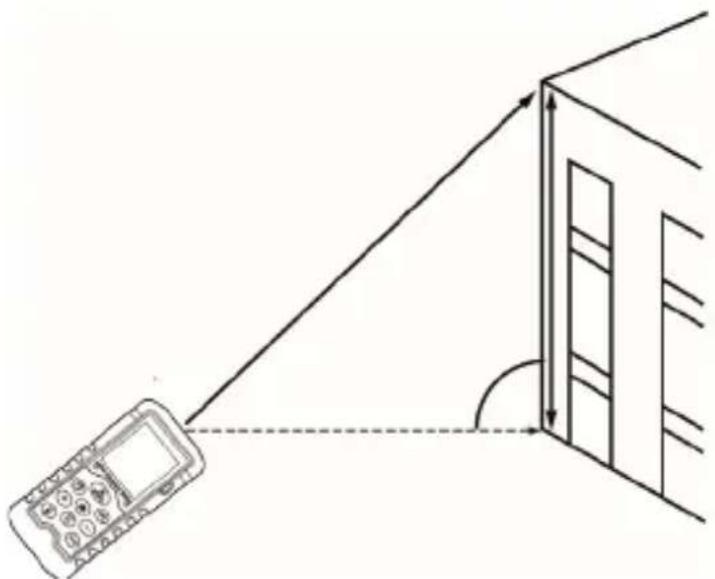
Indirect measurement
This mode is meant for automatic calculation of the Pythagoras theorem.
Press the “” button once till the “” symbol is shown in the display. Press the "MEAS" button to perform the first measurement. Then measure the second desired point of the object.
natural_image
Diagram showing a mobile phone projecting an image from a window, with no text or symbols present.
If the measurement result satisfies the requirements of the Pythagoras theorem, the height of the indirect measurement is calculated automatically and shown on the display. The average measurements are shown separately on the second and third line.
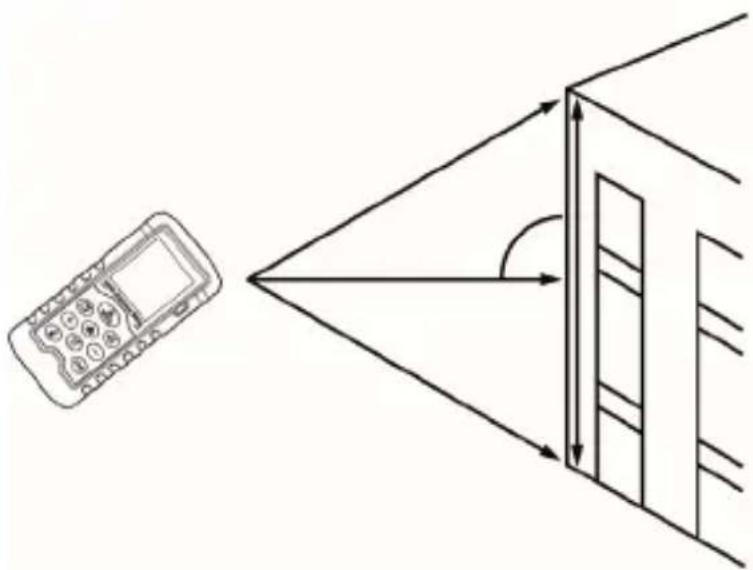
Indirect measurement II
In this mode, the Pythagoras theorem is used twice.
Press twice on the “ ” button. The “ ” symbol is shown in the display.
To measure the first hypotenuse, set up the rangefinder accordingly and press the "MEAS" button. To subsequently measure the horizontal distance and the right angle for both triangles, set up the rangefinder and measure using the "MEAS" button.
Now it is necessary to measure the second hypotenuse. Set up the device accordingly and press the "MEAS" button to measure the value.
If the values correspond to the Pythagoras theorem, the height is calculated automatically and the values measured earlier are shown on the display.
natural_image
Diagram showing a mobile phone and a screen with light rays reflecting off a screen (no text or symbols)
Stored measured values
"Memory" button: Using this button you can view the last 20 saved measurements. You can scroll through the values using the "+" and "-" values.
Notes for measurements
If the upper surface of the object to be measured is a liquid or a clear and transparent substance, then the measurement may result in an error.
If the object to be measured is highly reflective, then the laser may also be reflected and errors may occur in the measurement.
If the object to be measured is very dark or hardly reflective, then the time required for measurement may increase.
8 Error messages and Correction
| Error code Cause of failure | |
| Er.dE Calculation error | Repeat the measurement. Ensure that the measurement points are chosen correctly |
| Er. SL | The receiving signal is too weakThe measurement time is too longThe measurement point is more than 40 metres away and cannot be measured. |
| Er. HF Hardware error | Restart the device. If the error occurs again, please contact our customer service. |
9 Safety instructions and liability disclaimer
Never try to open the device to carry out repairs or conversions. Avoid contact with mains voltages. Do not short-circuit the product. The device is not certified for use in the open air; only use it in dry conditions. Protect it from high humidity, water and snow. Keep it away from high temperatures. Do not subject the device to sudden changes in temperature or heavy vibration as this might damage electronic components.
Examine the device for damage before using it. The unit should not be used if it has received an impact or has been damaged in any other way. Please observe national regulations and restrictions. Do not use the device for purposes other than those described in the instructions. This product is not a toy. Keep it out of the reach of children or mentally impaired persons. Any repair or alteration to the device not carried out by the original supplier, will invalidate the warranty or guarantee. The product may only be used by persons who have read and understood these instructions.
The device specifications may change without any separate prior notice to this effect. Never aim this device at the sun. Also, do not use it on a ladder. Always ensure that you are standing on firm ground. Do not immerse the device in water. Use only a soft dry cloth for cleaning. Never use aggressive cleaning agents.
10 Disposal instructions
Electrical and electronic devices may only be disposed of in accordance with the European WEEE Directive and not with household rubbish. Components must be disposed of or recycled separately as dangerous, toxic elements can inflict sustained damage on the environment if they are disposed of incorrectly. As a consumer, you are bound by the Electrical and Electronic Devices Act (ElektroG) to return electrical and electronic goods free of charge at the end of their useful life to the manufacturer, the place of purchase or to specially set up, public collection points. The details in each case are governed by national law. The symbol on the product, the operating instructions and/or the packaging refers to these regulations. By separating materials in this way, recycling and disposing of old devices, you are making an important contribution towards protecting our environment.

WEEE guideline: 2012/19/EU
WEEE register number: DE 67896761
WD Plus GmbH, herewith declares that this product 302316/20170901DG030 conforms to the principle requirements and other relevant stipulations. The complete Declaration of Conformity can be obtained from: WD Plus GmbH, Wohlenbergstraße 16, 30179 Hanover
flowchart
graph TD
    MEAS["MEAS"] --> 1
    MEAS --> 2
    MEAS --> 3
    MEAS --> 4
    MEAS --> 5
    Unit["Unit"] --> 6
    Unit --> 7
    Unit --> 8
    Unit --> 9
    CLR["CLR"] --> 7
    CLR --> 8
    CLR --> 9
natural_image
Two identical mobile phones with upward arrows indicating signal or data flow (no text or symbols present)
52 Français
7 Fonctions
Mesure de distance
Plus/Moins
natural_image
Diagram showing a mobile phone projecting an image onto a wall, with no text or symbols present.
natural_image
Diagram showing a mobile phone and a screen with light rays, no text or symbols present