
304329 - Rangefinder Brandson - Free user manual and instructions
Find the device manual for free 304329 Brandson in PDF.


| Product type | Laser distance meter |
| Brand | Brandson |
| Model | 304329 |
| Power supply | 200 mAh lithium-ion battery, rechargeable via miniUSB cable |
| Measuring range | 0.03 m to 35 m |
| Accuracy | ± 3 mm |
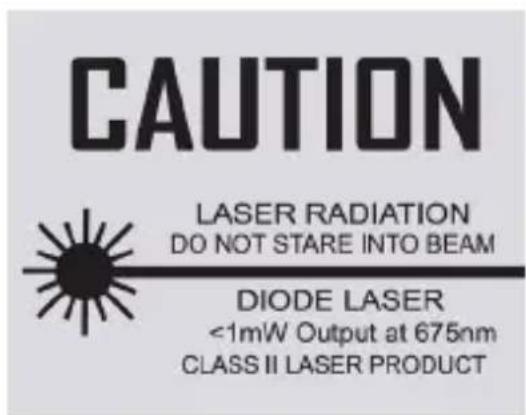
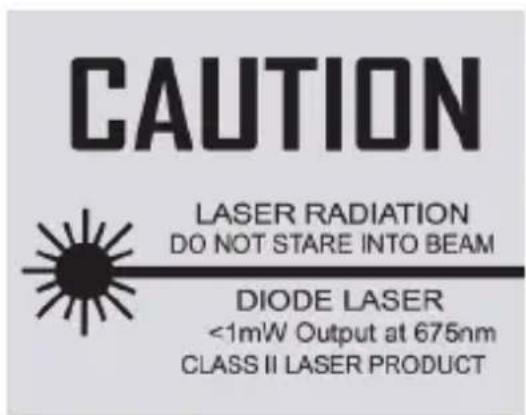
| Laser class | II |
| Wavelength | 620-670 nm, < 1 mW |
| Operating temperature | 0 °C to 40 °C |
| Storage temperature | -20 °C to 60 °C |
| Measurement functions | Distance, area, volume, Pythagoras I/II/III |
| Display units | Meters and feet |
| Backlight | Yes, adjustable |
| Sound beep | Enable/disable |
| Measurement reference | Top or bottom of device (switchable) |
| Auto power off | 45 seconds of inactivity |
| Display | LCD screen with auxiliary and main areas |
| Package contents | Distance meter, miniUSB charging cable, user manual |
| Care and cleaning | Soft dry cloth, no harsh chemicals |
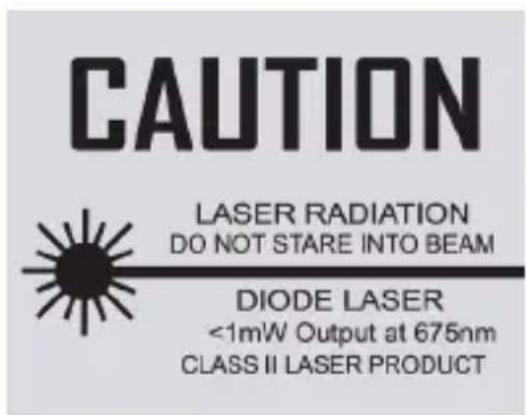
| Safety | Class II laser, do not stare into beam, avoid reflective surfaces |
| Repairability | No user repair, warranty void if modified |
| General information | Follow national regulations, do not use outdoors |
Frequently Asked Questions - 304329 Brandson
User questions about 304329 Brandson
0 question about this device. Answer the ones you know or ask your own.
Ask a new question about this device
Download the instructions for your Rangefinder in PDF format for free! Find your manual 304329 - Brandson and take your electronic device back in hand. On this page are published all the documents necessary for the use of your device. 304329 by Brandson.
USER MANUAL 304329 Brandson
1. Lieferumfang
Thank you for choosing a Brandon product. Please read the following user manual carefully so that you can enjoy the purchased product for a long time. Before using the product, first check that the delivered item is complete, accurate and undamaged.

Important safety guidelines for this product
Laser
- When using laser equipment, it should be ensured that people are not present in the projection range of the laser beam of the device. Ensure that the beam is not reflected to areas where people are present.
- Before using this device, inform yourself about the legal requirements and preventive measures for operating such a laser device.
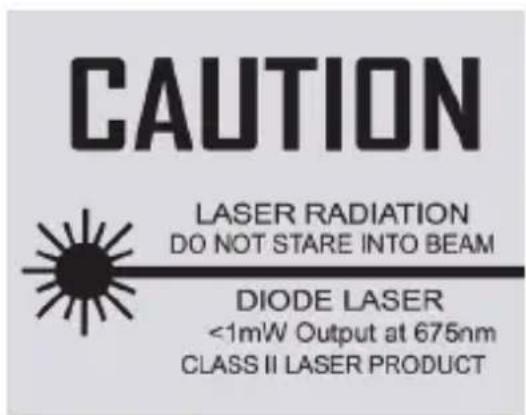
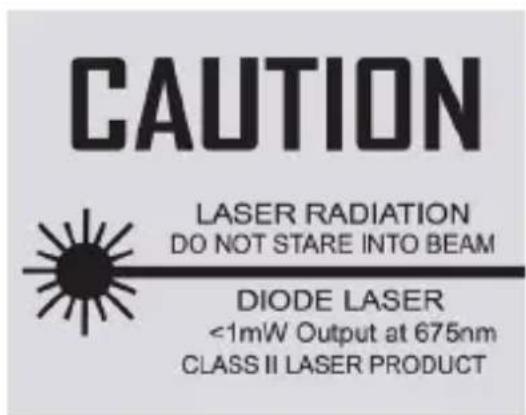
- Never look into the laser beam and never point it at people or animals. Such laser radiation can cause eye injuries!
- As soon as laser radiation impinges on the eye, the eyes must be closed immediately and the head must be moved away from the laser beam immediately.
- Never point the laser beam at a mirror or other reflective surfaces. The uncontrolled beam may hit persons or animals!
- Manipulations (modifications) to the laser equipment are not permitted.
- This user manual should be kept carefully, and if you give the laser equipment away, it should be handed over along with it.
• This product is equipped with a laser of Class 2.
1. Scope of delivery
• Digital Laser Measure
- microUSB charging cable
- User manual
2. Technical data
| Battery 200mAh Li-Ion battery | |
| Measurement range 0.03m - 35m | |
| Accuracy ± 3mm | |
| Laser class II | |
| Laser type 620-670nm, <1mw | |
| Operating temperature 0°C to 40°C | |
| Storage temperature -20°C to 60°C | |
| Features • 3 measurement functions (area, Pythagoras, volume)• Backlight• 3 different units (feet, inches, meters) |
3. Product details
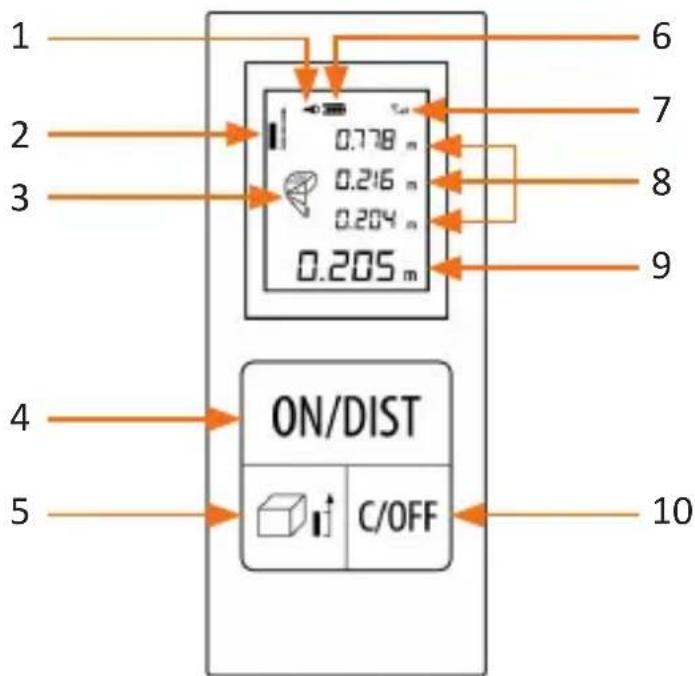
| 1 Sound On/Off display | |
| 2 Reference point display | |
| 3 Measurement functions (area, Pythagoras, volume) | |
| 4 "ON/DIST" button | |
| 5 "Mode/Reference point" button | |
| 6 Battery indicator | |
| 7 Signal strength | |
| 8 Auxiliary display area | |
| 9 Main display area | |
| 10 "C/OFF" button |
4. Key functions
| Switching on/Measuring | "ON/DIST" button |
| Changing the mode/reference point | "Mode/Reference point" button ( |
| Setting the measurements to 0/Switching off | "C/OFF" button |
5. Initial use
Take the device out of the package and remove all the packaging material. Connect the supplied USB charging cable to a 5V DC power adapter (for example, the charger of your smartphone) and the charging port at the bottom of the digital laser measure. Charge the device completely before using it. The battery indicator (6) on the display shows the current battery level. Check that the product and the components are intact and that the device is working properly when using it for the first time.
6. Operating/Measuring
Switching on: Press the "ON/DIST" button for about 1 second to switch on the device when it is switched off. The backlight is automatically switched off after 15 seconds if the device is not operated.
Switching off: In the switched-on state, please press the "C/OFF" button for 1 second to switch off the device. It switches off automatically after 45 seconds if there is no operation.
Laser on/Measuring: Press the "ON/DIST" button briefly in the switched-on state. The laser beam is switched on. Press once again to carry out the measurement. The laser is automatically switched off after the measurement. Pressing the button longer puts the device in continuous measurement mode.

Note: The screen shows the intensity of the measured reflection signal (7). A reduction in the number of displayed segments indicates a relative reduction in the intensity of the measured reflection signal.
6.1 Measurement reference
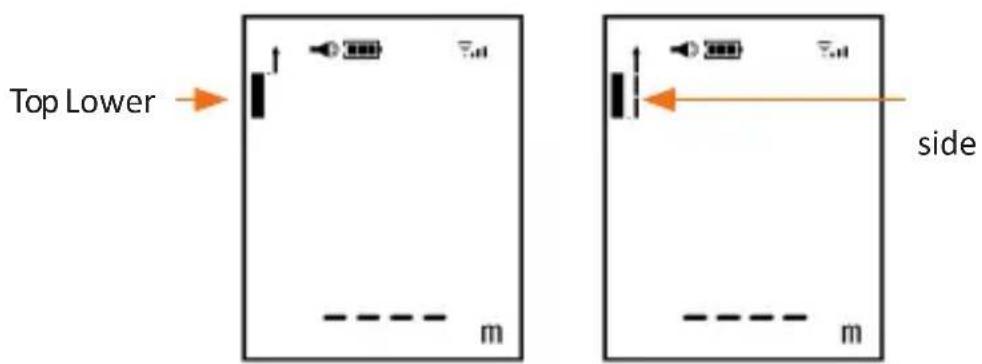
Press the "Mode/Reference point" button (5) for about 2 seconds in the switched-on state to change the reference point. The default setting is restored when you restart the device.
- Top of the device: The date mark can be found at the top of the instrument. The measured distance does not include the length of the instrument itself.
Bottom of the device: The reference mark is the bottom of the instrument. The measured distance includes the length of the instrument itself.
7. Settings
Press the "ON/DIST" button for about 5 seconds in the switched-off state to go to settings. In the settings, press the button for about 1 second to go to the next setting. The display shows the following:

- In this setting, the measured value can be corrected in the range of +/- 7mm. The setting can be changed by pressing the "ON/DIST" button. Press the "ON/DIST" button for about 1 second to go to the next setting.
- You can select the displayed unit in this setting menu. Pressing the "ON/DIST" button briefly changes the unit. Press the "ON/DIST" button for about 1 second to go to the next setting.
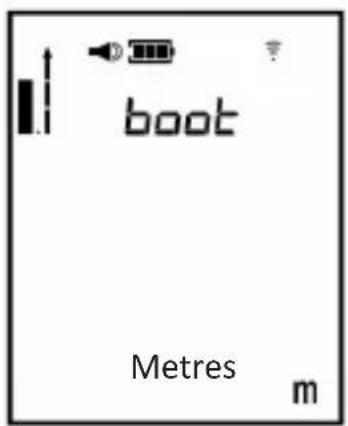
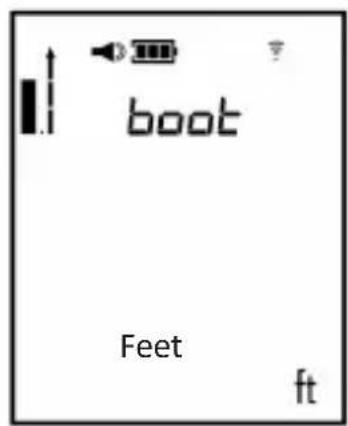
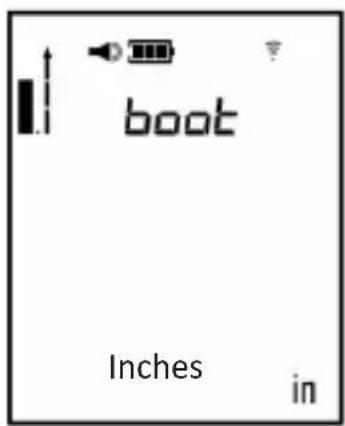
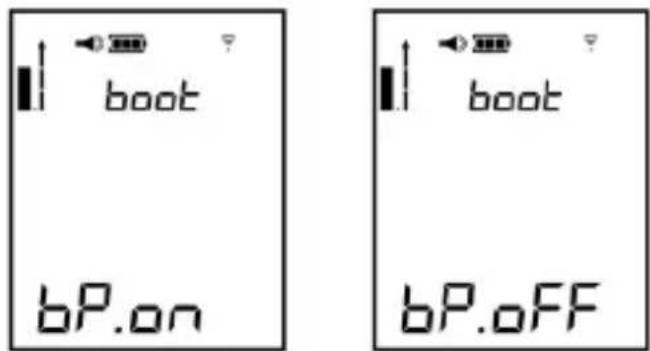
- You can here activate and deactivate the buzzer. Press the "ON/DIST" button briefly to turn the buzzer on or off. In this case, "bP.on" means that the buzzer is activated and "bP.OFF" means that the buzzer is deactivated. Press the "ON/DIST" button for about 1 second to go to the next setting.
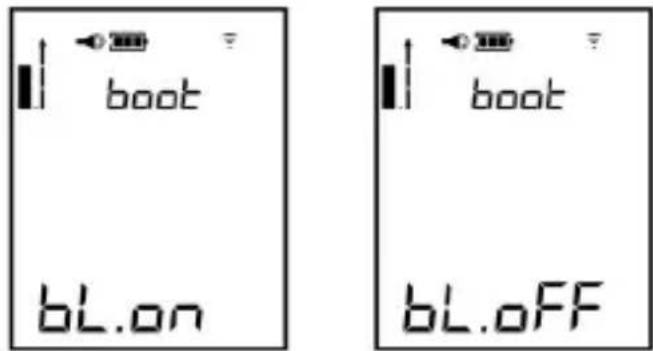
- You can here activate and deactivate the backlight. Press the "ON/DIST" button briefly to turn the backlight on or off. In this case, "bL.on" means that the backlight is activated and "bL.OFF" means that the backlight is deactivated.
9. Measurement functions
| Area measurement | 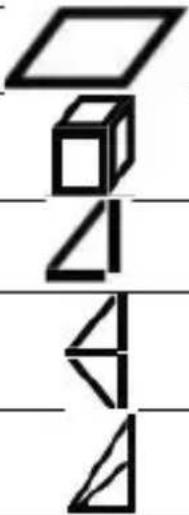 | ||
| Volume measurement | |||
| Pythagorean measurement I | |||
| Pythagorean measurement II (plus) | |||
| Pythagorean measurement III (minus) |
Area measurement
Press the "Mode/Reference point" button briefly ( ) in the switched-on state until the area measurement symbol ( ) appears in the display.
The symbol of the side to be measured flashes on the display. Now aim at the desired point and press the "ON/DIST" button to measure the length of the first side. The square symbol of the second side then starts flashing. Measure the second point as described above. The device automatically calculates the area and shows the result on the display. The measurement results of the lengths of the first and second sides are displayed in the auxiliary display area.
Volume measurement
Press the "Mode/Reference point" button briefly ( ) in the switched-on state until the volume measurement symbol ( ) appears in the display.
The symbol of the side to be measured flashes on the display. Now aim at the desired point and press the "ON/DIST" button to measure the length of the first side. The symbol of the second side then starts flashing. Measure the second point as described above. The device automatically calculates the area and shows the result on the display. The measurement results of the lengths of the first and second sides are displayed in the auxiliary display area.
Special functions (Pythagoras)
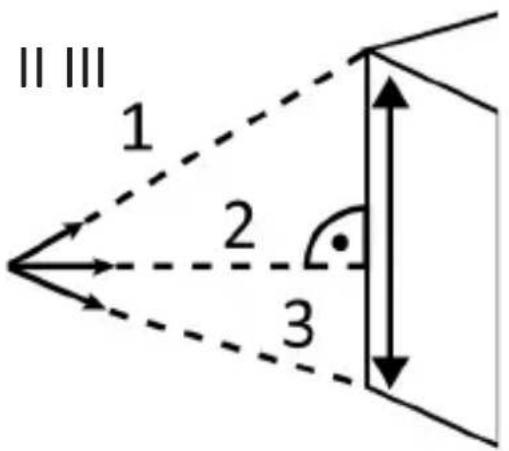
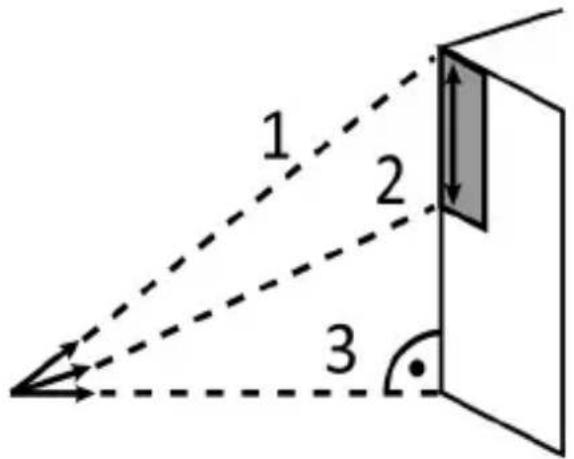
This mode is meant for the automatic calculation of the Pythagorean theorem. There are three different Pythagorean measurements. Select the desired measurement and then carry out the measurement.
Press the "Mode/Reference point" button briefly ( ) in the switched-on state until the desired Pythagoras function ("", "", "") appears in the display. The symbol of the side to be measured flashes on the display. Now aim at the desired point and press the "ON/DIST" button to measure the length of the first side. The symbol of the second side then starts flashing. Measure the second point as described above. The device automatically calculates the area and shows the result on the display. The measurement results of the lengths of the first and second sides are displayed in the auxiliary display area.

Note: In the Pythagoras measurement mode, the right side must be smaller than the hypotenuse. Otherwise, the device displays an error message "D.E".
Notes for measurements
- If the upper surface of the object to be measured is a liquid or a clear and transparent substance, then the measurement may result in an error.
- If the object to be measured is highly reflective, then the laser may also be reflected and errors may occur in the measurement.
- If the object to be measured is very dark or hardly reflective, then the time required for measurement may increase.
- Sunlight adversely affects the range of the device!
10. Error display and troubleshooting
| Error Cause of error Troubleshooting | ||
| B.L Battery capacity is too low Replace the batteries | ||
| T.L The temperature is too low | Warm up the device a little. Always note the approved working temperature range of the device | |
| T.H The temperature is too high | Cool down the device a little. Always note the approved working temperature range of the device | |
| D.E | Data error during measurement | Carry out the measurement properly once again |
11. Safety instructions and disclaimer
Never try to repair or modify the device by yourself. Avoid contact with the mains supply. The device does not carry current only when disconnected. The device is not approved for outdoor use. Therefore, please use it only in dry surroundings. Protect it from high humidity, water and snow. Do not expose the device to high temperatures.
Do not expose the device to sudden changes in temperature or strong vibrations, as this could damage the electronic components. Check the device for any damage before using it. The device should not be used if it has been subject to impact or has been damaged in any other way.
Please follow the national regulations and restrictions. Do not use the device for purposes other than those described in this manual. This product is not a toy.
Keep it out of the reach of children or mentally disabled persons. Any repair or modification to the device, which is not carried out by the original supplier, will void any warranty and guarantee claims. The specifications of the device may be changed without any special prior notice.
Never aim this device at the sun. Never use this device on a ladder. Always ensure that you are standing on firm ground. Do not immerse the device in water. Use only a soft dry cloth for cleaning. Never use aggressive cleaning agents.
12. Disposal instructions
In line with the European WEEE directive, electrical and electronic devices should not be disposed of along with domestic waste. Their components must be sent separately for recycling or disposal, as improper disposal of toxic and dangerous components may permanently damage the environment.
According to the electrical and electronic equipment act (ElektroG), you are obliged (as a consumer) to return (free of charge) all electrical and electronic devices to the manufacturer, the point of sale or public collection points at the end of their service life. The relevant local laws regulate the details in this regard. The symbol displayed on the product, in the user manual or/and on the packaging refers to these regulations. With this manner of sorting, recycling and disposal of used devices, you make an important contribution towards protecting our environment.

13. Instructions for battery disposal
In conjunction with the sale of batteries along with the supply of devices that include batteries, the supplier is obliged to point out the following to the customer:
The customer is legally obliged to return used batteries. He can return used batteries which the supplier offers or has offered as new batteries in his assortment free of charge to the supplier's dispatch warehouse (shipping address). The symbols shown on the batteries indicate the following: Pb = battery contains more than 0.004 percent lead by weight, Cd = battery contains more than 0.002 percent cadmium by weight, Hg = battery contains more than 0.0005 percent mercury by weight.

The symbol of the crossed-out dustbin means that the battery may not be disposed of in household waste.

WEEE directive: 2012/19/EU WEEE Register no.: DE 67896761
The company WD Plus GmbH hereby certifies that the device 304329/20200206NB102 complies with the fundamental requirements and all other relevant stipulations. A complete conformity statement can be obtained from: WD Plus GmbH, Wohlenbergstraße 16, 30179 Hanover
Pythagoras,, "
Pythagoras ,,
Pythagoras measurement function
The Pythagorean theorem (a2 + b2 = c2) can indirectly determine the height of an object.
Pythagoras measurements I, II and III
Measure the necessary distances in the correct order (refer to the figures below). The height is calculated automatically and appears in the display.
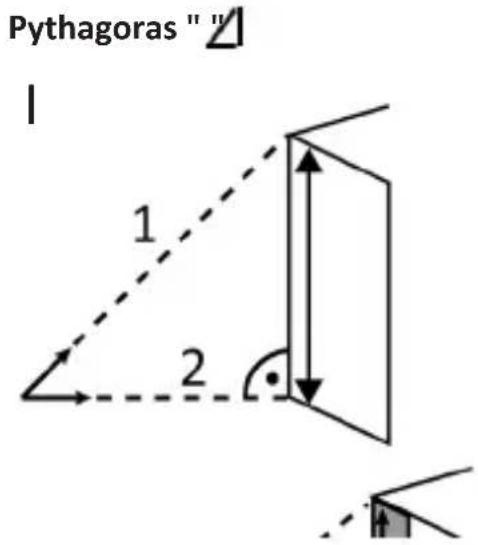
Pythagoras " "
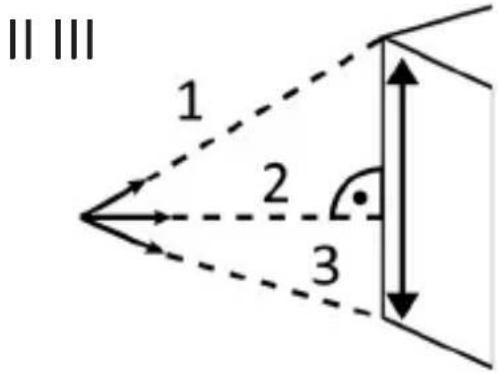
Pythagoras "
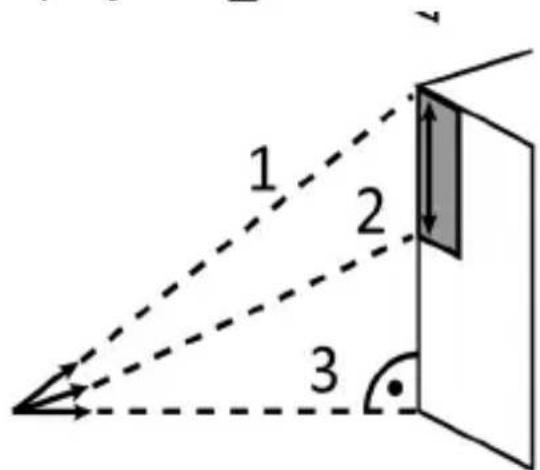
Fonction de mesure de Pythagore (Pythagoras measurement function)


- Lieferumfang
- Important safety guidelines for this product
- Laser
- Scope of delivery
- Technical data
- Product details
- Key functions
- Initial use
- Operating/Measuring
- Measurement reference
- Settings
- Measurement functions
- Area measurement
- Volume measurement
- Special functions (Pythagoras)
- Notes for measurements
- Error display and troubleshooting
- Safety instructions and disclaimer
- Disposal instructions
- Instructions for battery disposal
- Pythagoras measurement function
- Pythagoras measurements I, II and III
- Fonction de mesure de Pythagore (Pythagoras measurement function)
Brand : Brandson
Model : 304329
Category : Rangefinder