Pro Plus - Massage device THERAGUN - Free user manual and instructions
Find the device manual for free Pro Plus THERAGUN in PDF.

| Product Type | Multi-therapy Massage Device |
| Model | Theragun Pro Plus |
| Brand | Theragun (Therabody) |
| Power | Rechargeable lithium-ion battery, USB-C charging (adapter not included) |
| Battery Life | Approximately 120 minutes |
| Main Functions | Percussion massage, infrared LED light therapy, heat therapy, vibration therapy, biometric sensor (heart rate), guided breathing with haptic vibrations |
| Included Attachments | 5 percussion attachments: dampener, standard ball, thumb, micro-point, triangle; heat attachment, vibration attachment |
| Sold Separately Attachment | Cold therapy attachment |
| Connectivity | Bluetooth, compatible with Therabody app (iOS and Android) |
| Display | High-resolution TFT LCD screen |
| Biometric Sensor | Integrated, measures heart rate via finger |
| Percussion Speeds | 5 speed levels |
| Heat Temperatures | 3 settings: low, medium, high |
| Cold Temperatures | 3 settings: low, medium, high (attachment sold separately) |
| Care and Cleaning | Wipe with a disinfectant wipe; do not immerse in water; keep biometric sensor clean for accurate reading |
| Safety | Do not use directly on bones (spine, kneecap); do not pinch between attachment and arm; turn off before changing attachment |
| Box Contents | Theragun Pro Plus device, 5 percussion attachments, heat attachment, vibration attachment, USB-C cable, quick start guide |
| Warranty | See Therabody website for details |
Frequently Asked Questions - Pro Plus THERAGUN
User questions about Pro Plus THERAGUN
0 question about this device. Answer the ones you know or ask your own.
Ask a new question about this device
Download the instructions for your Massage device in PDF format for free! Find your manual Pro Plus - THERAGUN and take your electronic device back in hand. On this page are published all the documents necessary for the use of your device. Pro Plus by THERAGUN.
USER MANUAL Pro Plus THERAGUN
| 1. Product Overview | EN | 3-9 |
| 2. Download the Therabody app | ES | 10-17 |
| 3. Connect to the Therabody app | FR | 18-25 |
| 4. What's in the Box | IT | 26-33 |
| 5. Getting to Know Your Device | DE | 34-41 |
| 6. Getting Started | RU 42-49 | |
| 7. Using the Device | ESMX | 50-57 |
| 8. Therapy Benefits | FRCA | 58-65 |
| 9. Using the Device's Biometric Sensor | SC | 66-73 |
| 10. Connecting the Attachments | TC | 74-81 |
| 11. Using the Attachments | KR | 82-89 |
| 12. Device After Care and Cleaning | JP | 90-97 |
| 13. Charging |
1. Product Overview
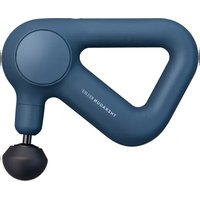
THERAGUN PRO Plus
Your partner for mind & body wellness.
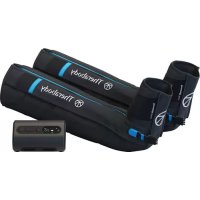
Elevate your performance with the Theragun PRO Plus device, our innovative new multi-therapy device that combines our strongest deep muscle massage with LED light therapy, vibration therapy, heat therapy and cold therapy for faster, more effective recovery.
Use each therapy individually or combine therapies to more efficiently treat your body. The Theragun PRO device is trusted by the pros and scientifically proven to relieve pain, treat joints, improve mobility, optimize recovery, enhance physical and mental performance. Equipped with a built-in biometric sensor, guided breathwork, and step-by-step routines, the Theragun PRO Plus device goes where no massage device has gone before.
2. Download the Therabody app to get the most out of your device.
Connect your Theragun PRO Plus device to the Therabody app to access onboarding and educational content to help you get familiar with your device. With step-by-step guided routines and recommendations, the Therabody app shows you how to get the most out of your Theragun PRO Plus device.

Scan the QR code to get started.
3. Connect Your Theragun PRO Plus Device to the Therabody app
Start here if you're a new Therabody app user
- Download the Therabody app from the App Store or Play Store.
- Follow the in-app instructions to create a new Therabody app account and verify your email.
- Press and hold the center button to turn on your Theragun PRO Plus device. Your Theragun PRO Plus device must be powered on to locate and pair to the Therabody app.
- Log in and follow the onboarding steps to connect your Theragun PRO Plus device to the app. Ensure that your phone's Bluetooth settings are enabled.
- Select "Theragun PRO Plus" as your Therabody device when prompted.
- Once connected, you can learn how to use your device, browse a catalog of science-backed step-by-step routines, and download customized routines to your Theragun PRO Plus.
Start here if you've previously used the Therabody app
- Open the Therabody app and navigate to the Home screen.
- Press and hold the center button to turn on your Theragun PRO Plus device. Your Theragun PRO Plus device must be powered on to locate and pair to the Therabody app.
- Tap the Home screen header to add a new device. Ensure your phone's Bluetooth settings are enabled.
- Select "Theragun PRO Plus" as your Therabody device when prompted.
- Once connected, you can learn how to use your device, browse a catalog of science-backed step-by-step routines, and download customized routines to your Theragun PRO Plus device.
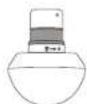
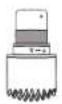
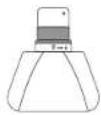
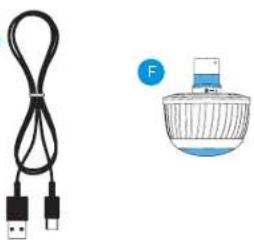
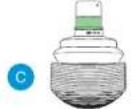
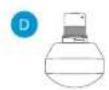
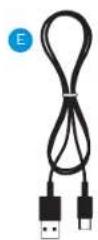
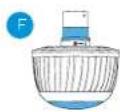
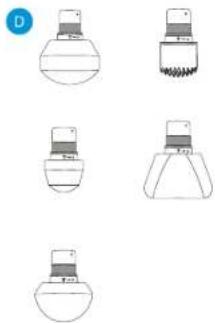
4. What's in the box
A Theragun PRO Plus device
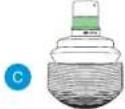
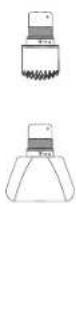
B Heat attachment
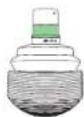
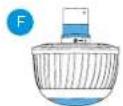
C Vibration attachment
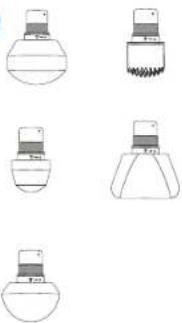
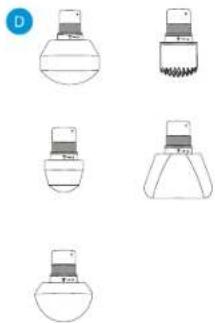
Five percussive attachments (Dampener, Thumb, Standard Ball, Micro-point, Wedge)
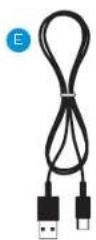
E USB-C charging cable
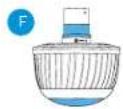
F (*Cold sold separately)
natural_image
Line drawing of a handheld device with a spherical base and circular dial (no text or symbols)
©

D

natural_image
Five simple line drawings of laboratory glassware or test tube setups, no text or symbols presentE

natural_image
Illustration of a USB cable and a perfume bottle (no text or symbols)5. Getting To Know Your Theragun Device
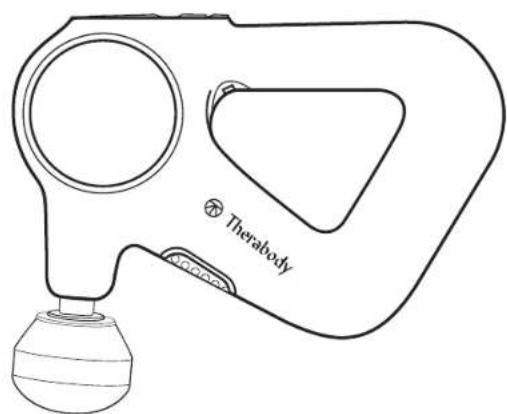
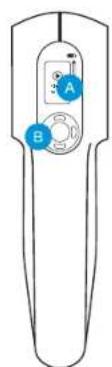
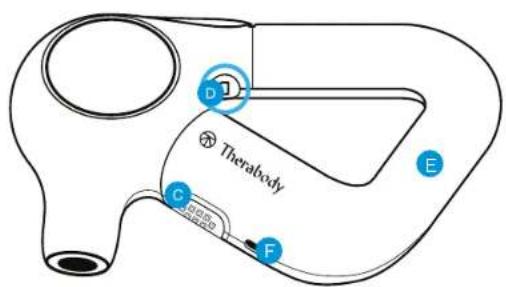
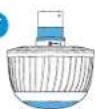
A High-resolution display TFT LCD screen
B Button pad
C Infrared LED Light Therapy
D Biometric sensor
E Patented triangle multi-grip handle
F USB-C Port
6. Getting started
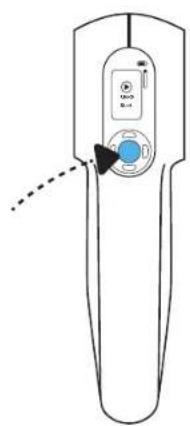
Powering The Theragun Device On and Off.
To power on your Theragun PRO Plus device, firmly press the center button on the device. Firmly press the same button to power off the device.
Step 1
Pick up and hold the device.
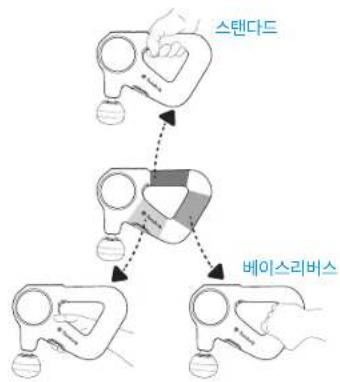
Slide your hand into the ergonomically designed Theragun triangle handle. Our patented Theragun triangle multi-grip handle design is three-sided, so you can hold the Theragun PRO Plus device from any side in a variety of ways, making it easier than ever to treat hard-to-reach areas like your back without strain on your hands, wrists, and forearms.
Step 2
Turn on and try the device.
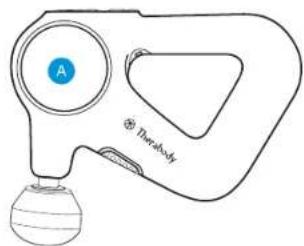
Firmly press the center button to turn on the device. The device's TFT LCD screen will light up when the device is on. You can select Quick Start or toggle through a variety of treatment routines using the up and down buttons. Press the center button to select your treatment. Move the Theragun PRO Plus device back and forth over the area you're treating and experiment with different amounts of light-to-moderate pressure on your body. Do not start by putting pressure directly on an area of discomfort. Instead, work slowly around the area to reduce tension.
Step 3
Use the Therabody app
Connect your Theragun PRO Plus to the Therabody app to learn more about how to use the device, access step-by-step guided routines that span all therapy types, and receive recommendations based on your personal wellness goals, activities, and concerns. Using the Therabody app, you can also download the guided routines directly to your Theragun PRO Plus device for quick, on-the-go access.
natural_image
Line drawing of a handheld device with a control panel and indicator lights (no text or symbols)
flowchart
graph TD
    A["Standard"] --> B["Intermediate"]
    B --> C["BaseReverse"]
7. Using the Theragun PRO Plus Device
- Select a percussive therapy attachment and connect it to your device.
- Slide your hand into the ergonomically designed Theragun Triangle handle. Firmly press the center button on the front of the device to power on the Theragun PRO Plus device. The device's TFT LCD screen will light up when the device is on.
- Select "Quick Start" to begin using the device without a guided routine, or toggle through preset guided treatment routines and press the center button to select a treatment routine.
- Once your desired treatment is selected, toggle through the five speed options to increase or decrease treatment speed, respectively.
- Move the device across the areas in need of treatment, gradually applying light to moderate pressure as needed. The Force Meter will appear on the TFT LCD display momentarily when pressure is applied from the device to your body.
- Follow the preset treatment as the device guides you to move between muscle groups.
- To pause, skip, exit, or resume your treatment, toggle to the respective indicator and short press the button.

-
Infrared LED light therapy. The Theragun PRO Plus device is equipped with 13 LED lights to provide infrared LED light therapy. To add infrared LED light therapy to your routine, toggle to the infrared LED light indicator. Short press to turn the infrared LED light therapy on and short press to turn it off. Infrared LED light therapy is most effective when applied directly to the skin. Infrared LED light therapy will be applied to the treatment area simultaneously with percussive, vibration, and heat therapy. To maximize your treatment benefits, use for approximately 90 seconds on each treatment area. Infrared LED light therapy will not turn on during cold treatments.
-
Vibration therapy. To add Vibration Therapy to your routine, connect the Vibration attachment to your device. Proceed to step 2 to use the device with the Vibration attachment.
-
Heat therapy. To add Heat Therapy to your routine, connect the Heat Therapy attachment to your device. Short press the right button to toggle to the heat indicator. Short press the up button to increase the heat temperature and short press the down button to increase the heat temperature. There are three hot temperature settings, low, medium, and high.
a. Low: Use the low temperature setting if you are new to heat therapy.
b. Medium: Use the medium temperature setting for performance.
c. High: Use the high temperature setting over light clothing or while moving quickly across a treatment area.
- Cold therapy. *Cold therapy attachment sold separately. To add Cold Therapy to your routine, connect the Cold Therapy attachment to your device. Short press the right button to toggle to the cold indicator. Short press the up button to make the temperature colder and vice versa. There are three cold temperature settings, low, medium, and high.
a. Low: Use the low temperature setting on sensitive areas and if you are new to cold therapy.
b. Medium: Use the medium temperature setting for full-body recovery and general discomfort.
c. High: Use the high temperature setting for targeted pain relief.
-
Press and hold the center power button to power off the device.
-
Therapy Benefits
| Therapy Mode Therapy Area | Recommended useWhen and where to use | |
| Percussive Therapy Only Muscles | Use as a daily massage for up to two minutes per muscle to reduce tension and improve flexibility. | |
| Percussive Therapy + Infrared LED Light Therapy | Muscles | Use for up to 60 seconds per muscle to maximize your warm-up by loosening up stiff muscles and helping prevent soreness, allowing you to perform your best. |
| Percussive Therapy + Heat Therapy | Muscles | Use for up to 60 seconds per muscle to accelerate your recovery by reducing soreness, boosting circulation, and stimulating healing. |
| Percussive Therapy + Heat Therapy + Infrared LED Light Therapy | Muscles | Use this highest-intensity massage treatment for up to 60 seconds per muscle to stimulate circulation and reduce pain. |
| Vibration Therapy Only Joints + Muscles | Use for up to 5 minutes on sore and sensitive muscles and joints to increase circulation and reduce pain and stiffness. | |
| Vibration Therapy + Infrared LED Light Therapy | Joints + Muscles | Use for up to 3 minutes on sore and sensitive muscles and joints to stimulate healing, boost circulation, and improve recovery. |
| Cold Therapy (Cold attachment sold separately) | Joints + Muscles Use for 2-5 minutes on muscles and joints to reduce swelling, inflammation, and pain. | |
9. Using The Theragun PRO Plus Device's Biometric Sensor
Access Routines with Biometric Sensor in the Therabody App
Use the Therabody app to access a catalog of breathing routines that utilize a biometric sensor to measure and display your heart rate. Routines that connect to the biometric sensor are labeled with the heart rate icon.
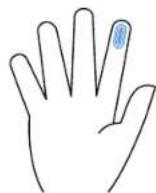
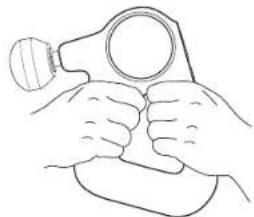
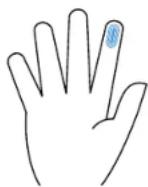
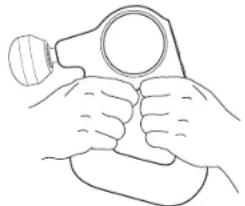
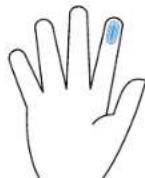
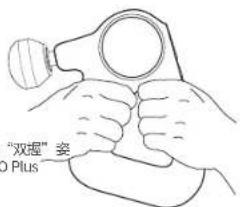
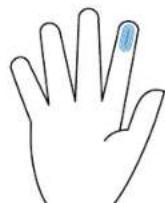
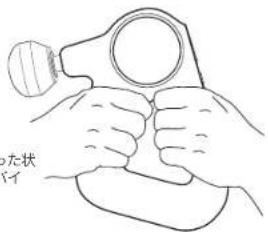
To use the device's biometric sensor, hold the device in the "double-grip" position while keeping the tip of your pointer (index) finger placed on the biometric sensor. Cover the entire sensor with the tip of your finger.

Do not squeeze or firmly press the biometric sensor, as this may lead to inaccurate readings. Support the device's weight with your free hand or rest the device against your body to reduce pressure on the biometric sensor.
Preset Guided Breathing Routine
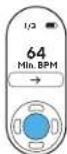
The Theragun PRO Plus device provides a preset science-backed guided breathing routine to help you relax. On the main menu, press the down button to toggle through preset options, landing on the Breathing preset. Hold the device in the "double-grip" position while keeping the tip of your pointer (index) finger placed on the biometric sensor. The device will vibrate at a specific rate to guide you through a calming inhaling and exhaling routine. During this routine, the Theragun PRO Plus device measures your heart rate. Your lowest (minimum) heart rate will be displayed following the treatment as feedback on your level of relaxation during the treatment. The goal is to lower your heart rate.

natural_image
Simple line drawing of a human hand with a blue circular mark on the index finger (no text or symbols)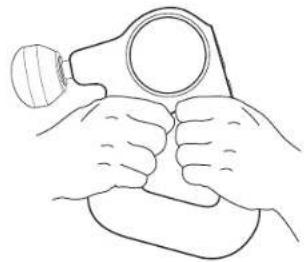
natural_image
Line drawing of two hands holding a magnifying glass (no text or symbols)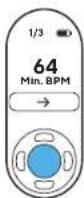
Scanning Your Heart Rate and Displaying on Device
Determine your current heart rate with the tap of your finger. Turn the device on and double tap the biometric sensor with one finger. Find a comfortable position where the tip of your pointer (index) finger completely covers the biometric sensor. Minimize movement until your current heart rate is displayed on the screen—approximately 15-30 seconds. Minimize movement and do not squeeze or firmly press the biometric sensor, as this may lead to inaccurate readings.
Your biometric information will not be accessible by or otherwise used by Therabody or its affiliates unless you expressly opt-in to share this data with us via the Therabody App, and will only be used in accordance with Therabody's Privacy Policy.

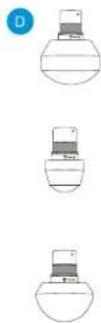
10. Connecting the Attachments
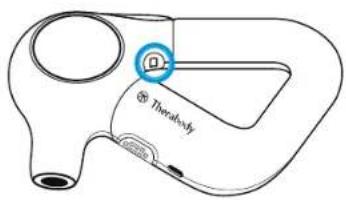
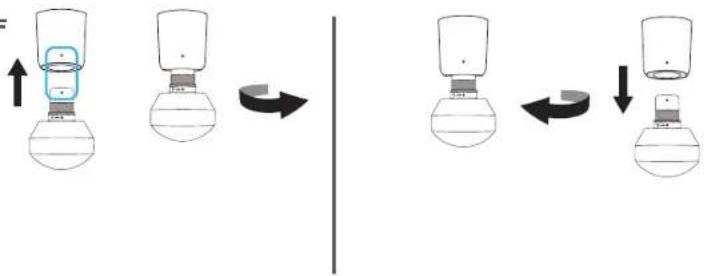
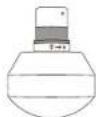
- Ensure that the device is powered off before connecting or removing any attachments.
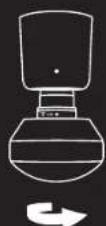
- Line up the white dot on the device with the white dot on the attachment. Insert the attachment into the device arm, twist and lock into place.
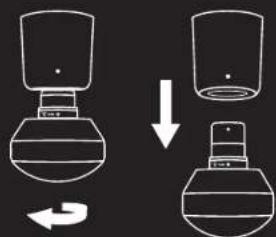
- To unlock and remove the attachment, twist in the reverse direction and pull it off.
*Only connect attachments that are included with the Theragun PRO Plus device or the cold attachment that is sold separately. Attachments from other Theragun devices are not compatible with your Theragun PRO Plus device.
Warning: Do not place your finger between the attachment and the end of the arm, as this may cause pinching or injury.
ON OFF
flowchart
graph LR
    A["Top: Internal component with blue box"] --> B["Step 1: Change to left"]
    B --> C["Step 2: Change to right"]
    C --> D["Step 3: Change to left"]
    D --> E["Step 4: Change to right"]
11. Using the Attachments
The Theragun PRO Plus device has eight high-quality attachments designed for a more personalized treatment. The five percussive attachments, the Dampener, Standard Ball, Thumb, Micro-point, and Wedge, and the Vibration, Heat, and *Cold attachments are comfortable and hygienic without absorbing sweat, lotion, or oils.
*Cold attachment sold separately
Dampener - For tender or sensitive areas and overall use.
Use the Dampener attachment for a firm yet softer, soothing full-body massage. The Dampener attachment is specifically designed for general use and a low-impact treatment around tender, sensitive or bony areas. Do not directly contact bones (i.e., spine, knee cap) using this device. Its wide base maximizes surface area for greater, more efficient contact with the body.
Standard Ball - For large and small muscle groups
Use the Standard Ball attachment for a full-body massage. The Standard Ball attachment is specifically designed for overall use on both large and small muscle groups. With a smaller shape and higher impact level than the Dampener, it is a firmer option for overall use and is your go-to attachment for tension.

Thumb - For trigger points and the lower back.
Relieve pain with the high pressure point Thumb attachment. Specifically designed to mimic a human thumb, use this attachment for point therapy on the lower back. Use the Thumb anywhere you may have otherwise used your thumb for pain relief.
Vibration - For joints and and boney areas
Relieve joint pain and treat sensitive areas. Use the Vibration attachment to target joint pain and treat boney areas. The vibration attachment increases circulation to treat sensitive areas.
Heat - For muscles
Loosen up stiff muscles and accelerate recovery. Use the Heat attachment to loosen up stiff muscles before a workout, or after a workout to accelerate muscle recovery.
Cold (Sold separately) - For joints and muscles
Reduce inflammation, pain, and swelling. Use the Cold attachment to relieve swelling and reduce inflammation.
Micro-point - For increased stimulation.
Increase circulation with the Micro-point attachment. The Micro-point attachment delivers a highly targeted treatment and increases stimulation and circulation to each treatment area.
Wedge - For shoulder blades and IT bands.
Warm up muscles and improve flexibility with the Wedge attachment. Uniquely designed for use on shoulder blades and IT bands, the Wedge attachment is used for "scraping" and "flushing" motions, mirroring techniques commonly used in sports massages.
12. The Theragun PRO Plus Device After Care & Cleaning
Device Maintenance
The following maintenance instructions are important to ensure that your device continues to work as it was designed. Failure to follow these instructions may cause your device to stop working.
Care and Cleaning
- The Theragun PRO Plus device is NOT waterproof or machine washable. Do not allow any liquid or water to enter the device or charging port.
- Ensure that the device is powered off before cleaning.
- To clean, wipe the device surface with a disinfectant wipe to remove any residue. Ensure that the biometric sensor is clean for optimal scanning precision.
- Once the device is residue-free, use a clean disinfectant wipe to thoroughly clean the device surface and attachments, wiping in a circular motion.
13. Charging
- The device's battery level is continuously displayed on the TFT LCD screen in the top right corner when the device is powered on.
- Ensure that the device is powered off before charging; the device will not power on while charging.
- The Theragun PRO Plus device is USB-C enabled. To charge the Theragun PRO Plus device, plug one end of the included USB-C cable into the device and the other end into your adapter (not sold with the device).
- When the device is powered off and charging, the device's battery percentage level will be displayed on the TFT LCD screen.
- Once the device is fully charged, the battery icon will turn solid green and display a charge level of 100%.
- Unplug the USB-C cable from the Theragun PRO Plus device when charging is complete.
• The battery life of the Theragun PRO Plus device is approximately 120 minutes.
**Note: If using an alternative USB-C cable, ensure that it is from a trusted source and has not suffered any structural damage. Do not try to use the device while charging.
Intended Use
Percussive Massage Therapy
Relieve aches and pains, improve performance, enhance recovery, and improve flexibility.
Infrared LED Light Therapy
Stimulate circulation to boost healing. Combine with other therapies for a more effective treatment.
See Worings insert for important safety instructions
Vibration Therapy
Relieve joint pain and treat sensitive areas.
Heat Therapy
Loosen up stiff muscles and accelerate recovery.
Biometric Sensor
Built-in biometric sensor for personalized insights.
Guided Breathwork
Haptic-lead breathing routines to reduce stress and improve relaxation.
Cold Therapy (sold separately)
Reduce inflammation, pain, and swelling.

Conectar tu cabezal Desconectar tu cabezal
ES
natural_image
Line drawing of a handheld electronic device with a digital display and control knob (no text or symbols)
flowchart
graph TD
    A["Estándar"] --> B["BásicoReverso"]
    B --> C["End"]
natural_image
Line drawing of two hands holding a magnifying glass (no text or symbols)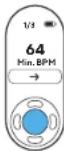
natural_image
Line drawing of a handheld device with a control panel and 'Quick Start' button (no text or symbols beyond the label)FR

natural_image
Line drawing of a handheld device with a spherical base and circular dial (no text or symbols)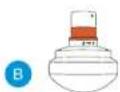
C


natural_image
Line drawing of a handheld electronic device with a control knob and indicator lights (no text or symbols)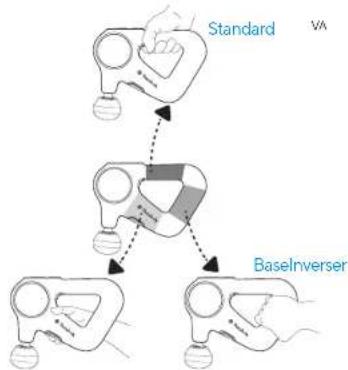
flowchart
graph TD
    A["Standard"] --> B["BaselInverser"]
    B --> C["VA"]
natural_image
Line drawing of two hands holding a tool, no text or symbols present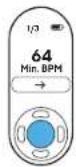
Scopri Theragun PRO Plus
natural_image
Line drawing of a therabody device with handle and bulb (no text or symbols)natural_image
Line drawing of a handheld device with a spherical base and circular head (no text or symbols)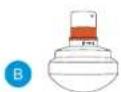
D


E

F
6. Per iniziare
natural_image
Line drawing of two hands holding a helmet and a gumbbell (no text or symbols)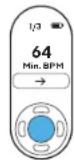
natural_image
Line drawing of a handheld device with a spherical base and circular dial (no text or symbols)
©

D
natural_image
Five simple line drawings of laboratory glassware or test tubes, no text or symbols presentE
natural_image
Illustration of a USB cable and a perfume bottle (no text or symbols)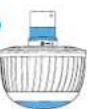
natural_image
Line drawing of two hands holding a magnifying glass (no text or symbols)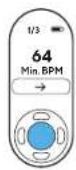
natural_image
Line drawing of a handheld device with a digital display and control buttons (no text or symbols)RU
1. Обзор продукта
THERAGUN PRO Plus
natural_image
Line drawing of a therabody device with handle and bulb (no text or symbols)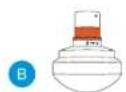
©

6. Начало работы
natural_image
Line drawing of two hands holding a magnifying glass (no text or symbols)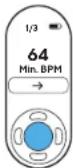
natural_image
Line drawing of a therabody device with handle and bulb (no text or symbols)
natural_image
Line drawing of two hands holding a magnifying glass (no text or symbols)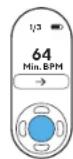
natural_image
Line drawing of a handheld device with a digital display and control buttons (no text or symbols)natural_image
Line drawing of a handheld device with a spherical base and circular dial (no text or symbols)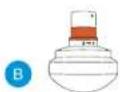
C

natural_image
Line drawing of two hands holding a magnifying glass (no text or symbols)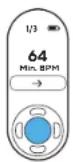
natural_image
Three technical line drawings of laboratory glassware or test tubes, showing different shapes and colors (no text or symbols present)natural_image
Line drawing of a handheld device with a control panel and 'Quick Start' button (no text or symbols beyond the label)
1. 产品概述
THERAGUN PRO Plus
身心健康好伴侣。

natural_image
Line drawing of a handheld medical device with a spherical base and circular dial (no text or symbols)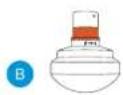


5. 了解 Theragun 设备
6. 使用方法
开启和关闭 Theragun 设备。
natural_image
Line drawing of two hands holding a magnifying glass (no text or symbols)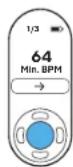
10. 连接按摩头
natural_image
Line drawing of a handheld device with a control panel and 'Quick Start' button (no text or symbols beyond the label)
1. 产品概述
THERAGUN PRO Plus
身心健康伴侣。
natural_image
Line drawing of a handheld device with a spherical base and circular dial (no text or symbols)
©
D

natural_image
Five simple line drawings of laboratory glassware or test tube components, no text or symbols presentF

natural_image
Illustration of a USB cable and a perfume bottle (no text or symbols)
5. 了解 Theragun 设备
6. 使用方法
开启和关闭 Theragun 设备。
10. 连接按摩头
natural_image
Line drawing of a handheld device with a control panel and 'Quick Start' button (no text or symbols beyond the label)KR
1. 제품 개요
THERAGUN PRO Plus
natural_image
Line drawing of a therabody device with handle and bulb (no text or symbols)
flowchart
graph TD
    A["스텐다드"] --> B["Robot"]
    B --> C["베이스리버스"]
    C --> D["Robot"]
7.테라건 프로 플러스 사용하기
natural_image
Line drawing of two hands holding a magnifying glass (no text or symbols)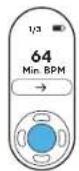
natural_image
Diagram showing two mechanical components with an upward arrow and a curved arrow indicating rotation (no text or symbols)팀 분리

natural_image
Diagram showing a mechanical device with two views of a container, one rotating and the other holding a small object (no text or symbols present)
natural_image
Six schematic diagrams of a mechanical component or housing, showing progressive assembly from top to bottom (no text or symbols present)natural_image
Line drawing of a handheld device with a control panel and 'Quick Start' button (no text or symbols beyond the label)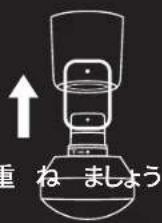
flowchart
graph TD
    A["Device with lid"] --> B["Container with lid"]
    B --> C["Arrow indicating rotation or change"]
    C --> D["Return arrow"]
natural_image
Line drawing of a handheld device with a spherical base and circular dial (no text or symbols)
C


natural_image
Line drawing of two hands holding a magnifying glass, with no text or symbols present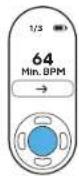
心拍数をスキャンしてデバイスに表示する
Born in Los Angeles, CA.
Designed for everybody.


@Therabody