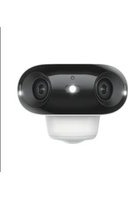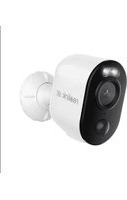
Argus 3 Ultra - Surveillance Camera REOLINK - Free user manual and instructions
Find the device manual for free Argus 3 Ultra REOLINK in PDF.


User questions about Argus 3 Ultra REOLINK
0 question about this device. Answer the ones you know or ask your own.
Ask a new question about this device
Download the instructions for your Surveillance Camera in PDF format for free! Find your manual Argus 3 Ultra - REOLINK and take your electronic device back in hand. On this page are published all the documents necessary for the use of your device. Argus 3 Ultra by REOLINK.
USER MANUAL Argus 3 Ultra REOLINK
If you need any technical help, please visit our official support site and contact our support team before returning the products, https://support.reolink.com.
EC REP CET PRODUCT SERVICE SP. Z O.O.
Ul. Dluga 33 102 Zgierz, Polen
UK REP CET PRODUCT SERVICE LTD.
Beacon House Stokenchurch Business Park, Ibstone Rd.
Stokenchurch High Wycombe, HP14 3FE, UK
Mou 2023
QSG1_A
58.03.006.0006

Be Prepared, Be Realink
EN/DE/FR/IT/ES
Operational Instruction
Apply to: Argus 3 Ultra, Argus 3 Pro, Argus 3 Plus, Argus 3 Plus 4K
@ReolinkTech https://reolink.com
EN
Content
What's in the Box....2
Camera Introduction 3
Set up the Camera 4
Charge the Camera 6
Install the Camera 7
Safety Instructions of Battery Usage 11
Troubleshooting....12
Specification 13
Notification of Compliance 13
What's in the Box

Camera


StrapSecurity Bracket USB-C Cable


Reset NeedleMountingQuickState Guide Surveillance Sign

Pack of Screws
Camera Introduction
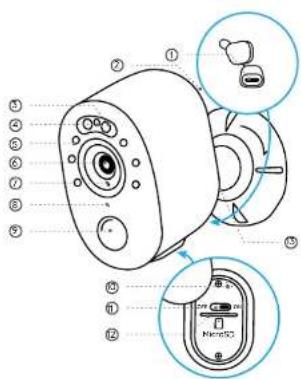
text_image
Diagram of a device with numbered parts and labeled ports, including a microPCI component① USB-C Port
⑦ Speaker
⑤ Spotlight
④ Status LED
⑤ 6 IR Leds
⑥ Lens
⑦ Daylight Sensor
⑧ Built-in Mic
⑨ PIR Motion Sensor
⑩ Reset Button
* Press for more than five seconds to reset the device to factory settings.
⑪ Power Switch
⑫ Micro SD Card Slot
⑬ Battery Status LED
Different states of the status LED:
• Red Light: WiFi connection failed Blinking: Standby status
- Blue Light: WIFI connection succeeded On: Working status
EnglishEnglish3 4
Set up the Camera
Set up the Camera Using a Smartphone
Step 1 Scan to download the Reolink App from the App Store or Google Play store.

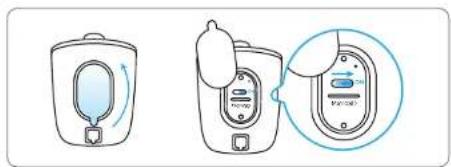
Step 2 Turn on the power switch to power on the camera.
text_image
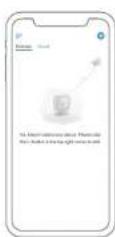
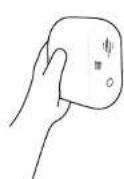
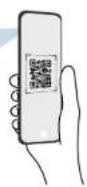
Diagram showing two devices with a dial and a close-up of the dial, labeled in Chinese.Step 3 Launch the Reolink App, click the " + " button in the top right corner to add the camera. Scan the QR code on the device and follow the onscreen instructions to finish initial setup.
NOTE: This device supports 2.4 GHz and 5 GHz Wi-Fi networks. It is recommended to connect the device to 5 GHz Wi-Fi for a better network experience.
Set up the Camera on PC (Optional)
Step 1 Download and install the Reolink Client: Go to https://reolink.com > Support > App&Client. Step 2 Launch the Reolink Client, click the * + * button, input the UID code of the camera to add it and follow the onscreen instructions to finish initial setup.
EnglishEnglish5 6
Charge the Camera
It's recommended to fully charge the camera before installing it.
Charging Indicator:
• Orange LED: Charging Green LED: Fully charged
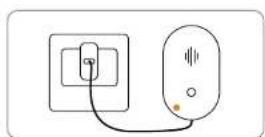
Charge the camera with a 5V power adapter (not included).
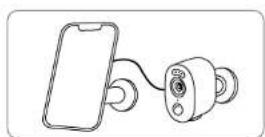
Charge the camera with the Reolink Solar Panel (not included if you only purchase the camera).
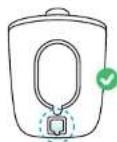
For better weatherproof performance, please always cover the charging port with the rubber plug after charging the camera.
Install the Camera
Notes on Camera Installation Position
• Install the camera 2-3 meters (7-10 ft) above ground. This height maximizes the detection range of the PIR motion sensor.
- For effective detection, please install the camera angularly.
NOTE: If a moving object approaches the PIR sensor vertically, the camera may fail to detect motion.
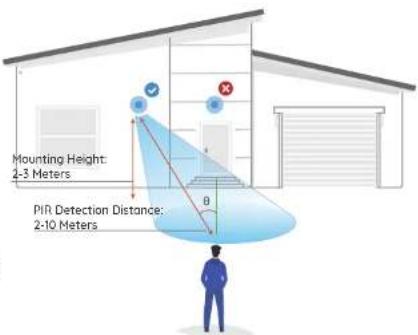
text_image
Mounting Height: 2-3 Meters PIR Detection Distance: 2-10 Meters θMount the Camera
natural_image
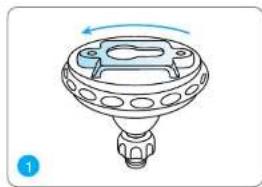
Line drawing of a mechanical component with a rotating arrow and circular features (no text or symbols)Rotate to separate the base from the bracket.
text_image
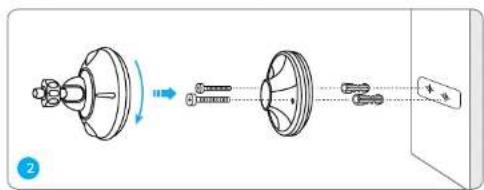
Diagram illustrating a mechanical assembly or motion sequence with labeled components and directional arrowsDrill holes in accordance with the mounting template and screw the base of the bracket to the wall. Next, attach the other part of the bracket to the base.
NOTE Use the drywall anchors included in the package if needed.
natural_image
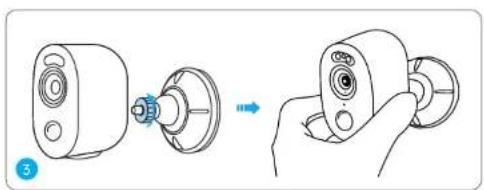
Illustration of a mechanical component being inserted into a housing, showing the shaft and housing (no text or symbols)Screw the camera to the bracket. Adjust the camera angle to get the best field of view.
natural_image
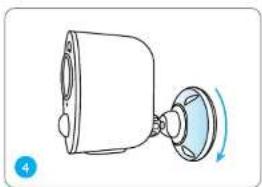
Simple line drawing of a mechanical component with a rotating shaft and housing (no text or symbols)Secure the camera by turning the part on the bracket identified in the chart clockwise.
NOTE: To adjust the camera angle later, please loosen the bracket by turning the upper part anticlockwise.
EnglishEnglish9 10
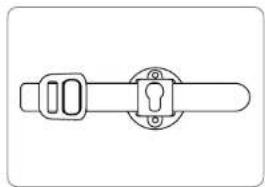
Install the Camera with Loop Strap
natural_image
Simple line drawing of a door handle with two buttons and a keyhole (no text or symbols)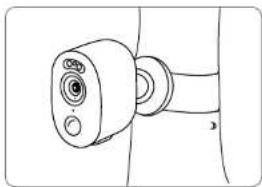
natural_image
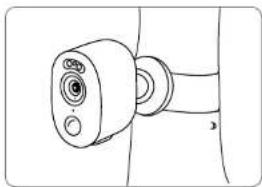
Line drawing of a mechanical component with no visible text or symbolsThread the loop strap through the slots and fasten the strap. It is the most recommended installation method if you plan to mount the camera to the tree.
Safety Instructions of Battery Usage
The camera is not designed for running 24/7 at full capacity or around the clock live streaming. It's designed to record motion events and to live view remotely only when you need it. Learn useful tips on how to extend the battery life in this post: https://support.reolink.com/hc/en-us/articles/360006991893
- Do not remove a built-in battery from the camera.
- Charge the battery with a standard and high-quality DC 5V battery charger or Realink solar panel. It's not compatible with solar panels from any other brands.
- Charge the battery only if in temperatures between 0°C and 45°C. The battery is intended for use only in temperatures between -10°C and 55°C.
- Keep the charging port dry, clean and free of any debris. Cover it with the rubber plug after the battery is fully charged.
- Do not charge, use or store the battery next to areas that may become hot. Examples include, but are not limited to, on or near a space heater, cooking surface, cooking appliance, iron, radiator, or fireplace.
- Do not use the battery if its case appears damaged, swollen, or compromised. Examples include, but are not limited to, leaking, odors, dents, corrosion, rust, cracks, swelling, melting, and scratches.
- Always follow the local waste and recycling laws to dispose of used batteries.
Troubleshooting
Camera is Not Powering On
If your camera is not powering on, please try the following solutions:
• Make sure the power switch is turned on.
- Charge the battery with a DC 5V/2A power adapter. When the green light is on, the battery is fully charged
If these won't work, contact Reolink Support.
Failed to Scan QR Code on the Phone
If you cannot scan the QR code on your phone, please try the following solutions:
- Remove the protective film from the camera lens.
- Wipe the camera lens with a dry paper/towel/tissue.
- Vary the distance between your camera and the mobile phone so that the camera can focus better.
- Try to scan the QR code under sufficient lighting.
If these won't work, contact Reolink Support.
Failed to Connect to WiFi During Initial Setup Process
If the camera fails to connect to WiFi, please try the following solutions:
- Ensure that you have entered the correct WiFi password.
- Put the camera closer to your router to ensure a strong WiFi signal.
- Change the encryption method of the WiFi network to WPA2-PSK/WPA-PSK
(safer encryption) on your router interface. - Change your WIFI SSID or password and make sure that SSID is within 31 characters and password is within 64 characters.
If these won't work, contact Reolink Support.
Specification
Operating Temperature:
-10°C to 55°C (14°F to 131°F)
Size: 127 x 90 x 56 mm
Weight: 335g
For more specifications, visit https://reolink.com
Notification of Compliance

CE Declaration of Conformity
Reolink declares that this device is in compliance with the essential requirements and other relevant provisions of Directive 2014/53/EU and Directive 2014/30/EU.
UKCA Declaration of Conformity
Reolink declares that this product is in compliance with Radio Equipment Regulations 2017 and Electromagnetic Compatibility Regulations 2016.
EnglishEnglish13 14
FCC Compliance Statements
This device complies with Part 15 of the FCC Rules. Operation is subject to the following two conditions: (1) this device may not cause harmful interference, and (2) this device must accept any interference received, including interference that may cause undesired operation.
Note: This equipment has been tested and found to comply with the limits for a Class B digital device, pursuant to Part 15 of the FCC Rules. These limits are designed to provide reasonable protection against harmful interference in a residential installation. This equipment generates, uses and can radiate radio frequency energy and, if not installed and used in accordance with the instructions, may cause harmful interference to radio communications. However, there is no guarantee that interference will not occur in a particular installation. If this equipment does cause harmful interference to radio or television reception, which can be determined by turning the equipment off and on, the user is encouraged to try to correct the interference by one or more of the following measures:
- Reorient or relocate the receiving antenna.
- Increase the separation between the equipment and receiver.
- Connect the equipment into an outlet on a circuit different from that to which the receiver is connected.
- Consult the dealer or an experienced radio/TV technician for help.
Caution: Changes or modifications not expressly approved by the party responsible for compliance could void the user's authority to operate the equipment.
FCC Radiation Exposure statement
This equipment complies with FCC radiation exposure limits set forth for an uncontrolled environment. This equipment should be installed and operated with minimum distance 20cm between the radiator end your body.
ISED Compliance Statements
This device contains licence-exempt transmitter(s)/receiver(s) that comply with Innovation, Science and Economic Development Canada's licence-exempt RSS(s). Operation is subject to the following two conditions:
(1) This device may not cause interference. (2) This device must accept any interference, including interference that may cause undesired operation of the device.
ISED Radiation Exposure statement
This equipment complies with IC RSS-102 radiation exposure limits set forth for an uncontrolled environment. This equipment should be installed and operated with minimum distance 20 cm between the radiator and your body.
Correct Disposal of This Product
This marking indicates that this product should not be disposed with other household wastes, throughout the EU. To prevent possible harm to the environment or human health from uncontrolled waste disposal, recycle it responsibly to promote the sustainable reuse of material resources. To return your used device, please use the return and collection systems or contact the retailer where the product was purchased. They can take this product for environmentally safe recycling.
Limited Warranty
This product comes with a 2-year limited warranty that is valid only if purchased from Reolink Official Store or a Reolink authorized reseller. Learn more: https://reolink.com/warranty-and-return/.
Terms and Privacy
Use of the product is subject to your agreement to the Terms of Service and Privacy Policy at reolink.com. Keep out of reach of children.
WiFi Operating Frequency
OPERATING FREQUENCY: (the maximum transmitted power) 2.4GHz (For 2.4GHz camera only): 2412MHz --- 2472MHz (EIRP < 20 dBm) 5GHz: 5150MHz --- 5250MHz (EIRP < 23 dBm) 5745MHz --- 5825MHz (EIRP < 14 dBm)

The functions of Wireless Access Systems including Radio Local
Ared Networks(WAS)/PLANs) within the band 5150-5350 MHz for this device are restricted to indoor use only within all European Union countries (BE/BG/CZ/DK/DE/EE/IE/EL/ES/FR/HR/IT/CY/LV/LT/LU/HU/MT/NL/AT/PL/PT/RO/SI/SK/FI/SE/TR/N O/CH/IS/LI/UK(N))
DE
Überblick
Lieferumfang 18
Über die Kamera 19
text_image
Diagram of a device with numbered parts and labeled ports, including a microSCO componenttext_image
Diagram showing three steps of a digital device with a knob, connected to a display panel and a zoomed-in view of the screen.natural_image
Line drawing of a mechanical component with a rotating arrow and circular features (no text or symbols)text_image
Diagram illustrating a mechanical assembly or motion sequence with labeled components and directional arrowsnatural_image
Illustration of a mechanical component being inserted into a housing, showing the shaft and housing (no text or symbols)natural_image
Simple line drawing of a mechanical component with a rotating shaft and housing (no text or symbols)natural_image
Simple line drawing of a door handle with two buttons and a keyhole (no text or symbols)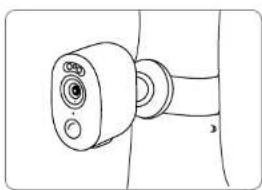
natural_image
Line drawing of a camera lens assembly (no text or symbols)text_image
Technical diagram of a device with numbered components and labeled parts, including a connector and control panel.text_image
Diagram showing two devices with a dial and a close-up of the dial, one labeled 'P-100' and the other 'P-100'.natural_image
Line drawing of a mechanical component with a rotating arrow and base (no text or symbols)text_image
Diagram illustrating a mechanical assembly or motion sequence with labeled components and directional arrowsnatural_image
Illustration of a mechanical component being inserted into a housing, showing the shaft and housing (no text or symbols present)natural_image
Simple line drawing of a mechanical component with a rotating shaft and housing (no text or symbols)natural_image
Simple line drawing of a door handle with two buttons and a keyhole (no text or symbols)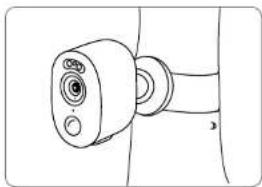
natural_image
Line drawing of a mechanical component with no visible text or symbolshttps://reolink.com/warranty-and-return/.
text_image
Diagram of a device with numbered parts and labeled ports, including a microPCI component① Porta ricarica USB-C
⑦ Altoparlante
⑤ Faretto
④ LED di Stato
⑤ 6 Led IR
⑥ Obiettivo
text_image
Diagram showing three device setups with labeled buttons and a magnified view of the second setup.natural_image
Line drawing of a mechanical component with a rotating arrow and circular features (no text or symbols)text_image
Diagram illustrating a mechanical assembly or motion sequence with labeled components and directional arrowsnatural_image
Illustration of a mechanical component being inserted into a housing, showing the shaft and housing (no text or symbols)natural_image
Simple line drawing of a mechanical component with a rotating shaft and housing (no text or symbols)natural_image
Simple line drawing of a door handle with two buttons and a keyhole (no text or symbols)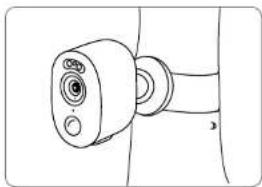
natural_image
Line drawing of a mechanical component with no visible text or symbols5745MHz --- 5825MHz (EIRP < 14 dBm)

Europea (BE/BG/CZ/DK/DE/EE/IE/EL/ES/
FR/FR/11/LY/LV/LT/LU/HU/MT/NL/AI/
PL/PT/RO/SI/SK/HI/SE/TR/N-O/CH/IS/LI/UK(NI)

Índices
text_image
Diagram of a device with numbered parts and labeled ports, including a microPCI componenttext_image
Diagram showing two devices with a dial and a close-up of the dial, one labeled 'POT (100%)'natural_image
Line drawing of a mechanical component with a rotating arrow and circular features (no text or symbols)text_image
Diagram illustrating a mechanical assembly or motion sequence with labeled components and directional arrowsnatural_image
Illustration of a mechanical component being inserted into a housing, showing the shaft and housing (no text or symbols)natural_image
Simple line drawing of a mechanical component with a rotating shaft and housing (no text or symbols)natural_image
Simple line drawing of a door handle with two buttons and a keyhole (no text or symbols)