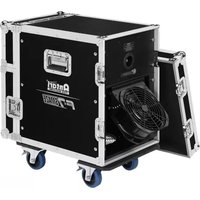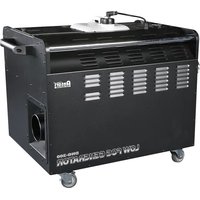
DNG-200 - Effect machine Antari - Free user manual and instructions
Find the device manual for free DNG-200 Antari in PDF.


User questions about DNG-200 Antari
0 question about this device. Answer the ones you know or ask your own.
Ask a new question about this device
Download the instructions for your Effect machine in PDF format for free! Find your manual DNG-200 - Antari and take your electronic device back in hand. On this page are published all the documents necessary for the use of your device. DNG-200 by Antari.
USER MANUAL DNG-200 Antari
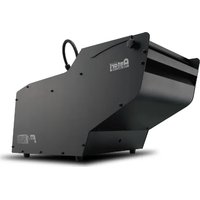
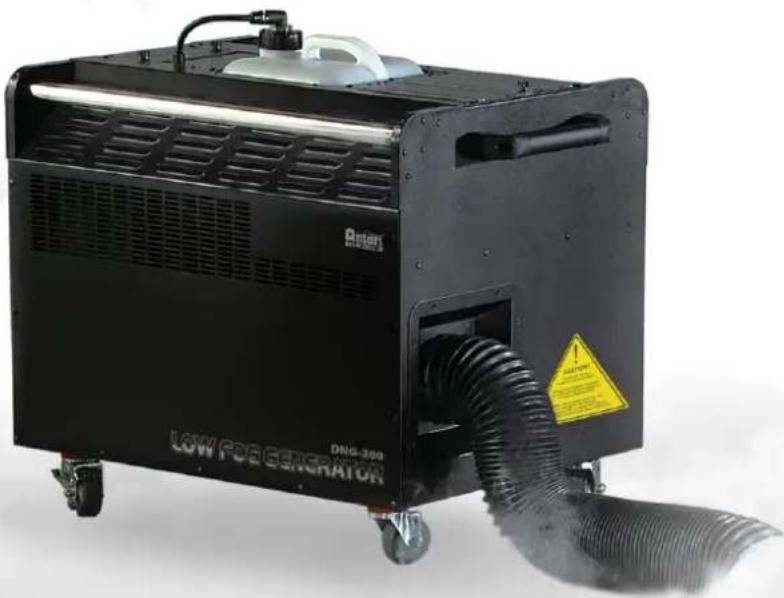
DNG-200 Low Fog Generator
User Manual
MODE D'EMPLOI
BEDIENUNGSANLEITUNG
中文說明書
natural_image
Black low PDG GENERATOR device with visible exhaust pipe and warning label (no readable text beyond branding)English 01\~07
Français 08\~15
German 16\~22
中文 23\~29
User Manual
Antari DNG-200 Low Fog Generator
Congratulations on the purchase of your new ANTARI DNG-200 Low Fog Generator
-Introduction
Thank you for choosing the Antari DNG-200 Low Fog Generator! The machine has some terrific new features on top of the fog cooling provided by the DNG-100 originally. The fog generator is integrated into this new machine to make sure the machine will not take too much space in order to maximize the usage of the entire stage.
Different from others, Antari's fog machines do not use carbon dioxide, and do not pollute environment and and are not harmful for human health. The DNG-200 is a great machine that offers low fog special effects as well as environmental-friendly features, a true green machine.
Please follow these operation, safety and maintenance instructions to ensure a long and safe life for your low fog machine.
Pay attention to all warning labels and instructions printed on the exterior of
-Safety Instructions
- Keep this device dry.
- For indoor use only. Not designed for outdoor use.
- The ideal operating temperature is between 10^ and 30^ Celsius.
- Two sets of professional power cords are used by this machine. It is important to confirm the electrical voltage before plugging the power cord into the power outlet. Use a three-plug grounded power outlet.
- If the machine is moved or transported, it shall be stationed for one hour to allow the coolant in the cooler to stabilize before using it again.
- If the machine is moved horizontally, please station it for 5 minutes before starting the operation again.
- Please unplug the power cord or turn off the machine if it is not in use.
- This machine is not water-proof. If moisture, water, or fog fluid gets inside the housing, immediately unplug the unit and clean it. If the machine cannot be cleaned, please contact a service technician or your Antari dealer before using it again.
- No user serviceable parts inside. Refer to your Antari dealer or other qualified service personnel.
- For adult use only. The fog machine must be installed out of the reach of children. Never leave the unit running unattended.
- Operate the machine in a well-ventilated area. Never cover the unit's vents. The fog machine is best installed 1 meter away from all objects.
-
It is important to place the machine on a flat surface instead of a surface with slope to prevent any moving of the machine.
-
If your Antari DNG-200 Low Fog Generator fails to work properly, please turn off the power for five minutes and turn it on again. If the problem still exists, contact your Antari dealer for service.
- Always allow the machine to cool down before attempting to clean or service it.
- Please use Antari FLR Light Fog Fluid only. Please do not fill in any other fluid into the tank to ensure the quality of the fog and the life of the machine.
-Unpacking and Inspection
Open the shipping carton and verify that all equipment necessary to operate the system has arrived intact. The shipping carton should contain the following items:
1 DNG-200 Low Fog Generator
2 D-20 LCD controller (preinstalled in the machine)
3 Two power cords for connecting to Neutrik PowerCon connectors.
4 3 m fog conducting hose
5 User's manual (item 3-5 placed in the storage box on the top of the machine)
6 Water collection tray (preinstalled in the machine)
7 3 m PU tube, 6 mm ∅
-Setup
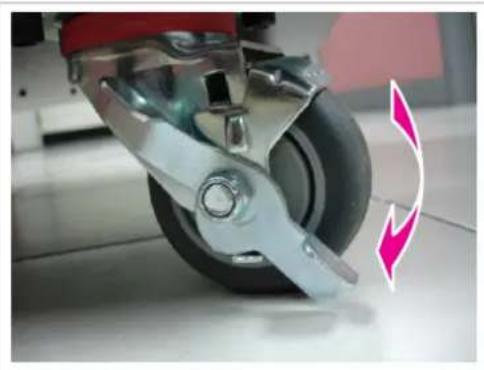
- The wheels at the bottom of the DNG-200 help to move the machine; wheel fixing mechanisms are located at the diagonal line. Position the machine at a spot, press down the fixing mechanism to prevent it from moving. To move the machine, press the opposite side of the fixing mechanism to release it. Please note that the machine is not allowed to place on a slope due to its big size. (refer to figure 1)
natural_image
Close-up of a metallic aircraft wheel with a black head and blue gasket, showing a curved arrow indicating rotation (no text or symbols)Figure 1
- Please aim the key on the PowerCon terminal of the power cord to the slot of the connector on the machine, plug it in and turn it about 10° clockwise until the power cord is completely fixed. The upper power cord is for the fog generator and the bottom one is for the compressor. (refer to figure 2 and 3)

text_image
BREAKER 250VAC / 15A CIRCUIT-BREAKER PRESS TO REST ON OFF BREAKER 250VAC / 10A COMP 250VAC / 10AFigure 2 Figure
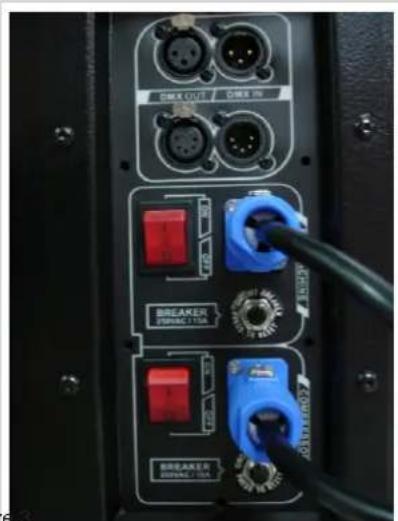
text_image
BREAK OUT BREAK IN BREAKER RESPONSE BREAKER RESPONSE- Connect the machine with the black fog conducting hose; it is a three-meter pipe. The length of the pipe can be adjusted to fit the actual need. (refer to figure 4)
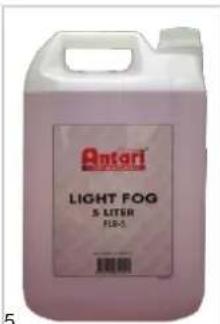
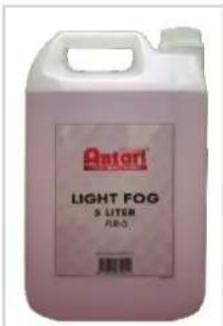
- Fill Antari FLR light fog fluid to the tank, tighten the tank cap. (refer to figure 5)
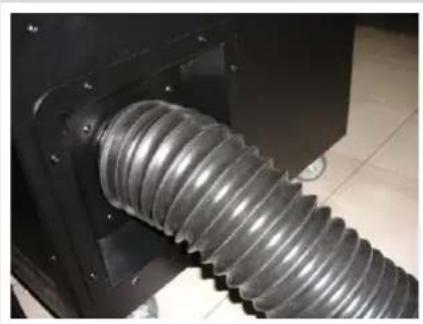
natural_image
Close-up of a metallic corrugated pipe or duct assembly mounted on a black frame, with tiled floor visible (no text or symbols)Figure 4 Figure 5
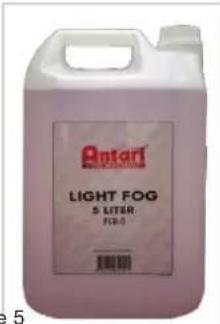
text_image
Antari LIGHT FOG 5 LITER FLU-5-Operation
- Connect the power cord to a grounded outlet, press down two sets of power switches located at the back side of the machine. Please press the power switch of the compressor below first and then the power switch of the fog machine. The warm-up process is started. The LCD screen on the D-20 controller will show "Warming up".
- While the unit is warming up, fog output will not be possible yet. Please wait till the LCD screen shows "Ready To Fog".
- Program the necessary menu settings with the control panel of the D-20 controller. (refer to chapter D-20 controller).
- The DNG-200 is equipped with a DMX512 system. 3-pin and 5-pin DMX connectors each are located at the back panel of the machine for optional use. (refer to chapter DMX512 settings)
- When operating the machine for the first time, wait until the controller's LCD screen shows "Ready To Fog". Actuate the button Manual for a few seconds to initiate fog output from the machine. Thus the air in the liquid pipe is drained out. Once the fog comes out smoothly, the D-20 controller can be set. If the machine is used infrequently, please follow this procedure every time it is used to drain out the air.
- The heater average temperature of the DNG-200 is 220°C.
-D-20 LCD Screen Controller
The D-20 controller is equipped with a 2-meter line, a 5-pin XLR connector, and an LCD screen displaying all operation statuses of the fog machine. The interface allows the operator to customize fog machine functions by adjusting the fogging duration, interval, and volume as well as the DMX address. There are six buttons on the control board. All current operating parameters are automatically stored in non-volatile memory, allowing the machine to be powered down without losing function settings.
-Configuration of the buttons
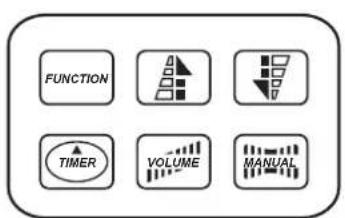
text_image
FUNCTION TIMER VOLUME MANUAL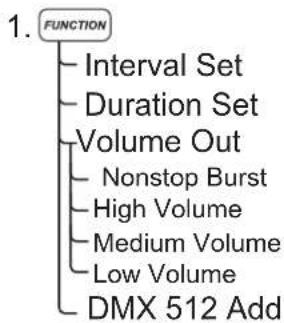
flowchart
graph TD
    A["FUNCTION"] --> B["Interval Set"]
    A --> C["Duration Set"]
    A --> D["Volume Out"]
    D --> E["Nonstop Burst"]
    D --> F["High Volume"]
    D --> G["Medium Volume"]
    D --> H["Low Volume"]
    D --> I["DMX 512 Add"]
- UP and DOWN
- TIMER
- VOLUME
- MANUAL
-Menu settings with the button FUNCTION
-Setting time intervals for timer operation
Press the button FUNCTION until the display indicates "Interval Set". Use the buttons UP and DOWN to adjust the intervals between the individual fog outputs in timer mode within the range of 10 and 300 seconds.
-Setting the output duration for timer operation
Press the button FUNCTION until the display indicates "Duration Set". Use the buttons UP and DOWN to adjust the duration of the fog outputs in timer mode within the range of 10 and 100 seconds.
-Setting the fog output volume
Press the button FUNCTION until the display indicates "Volume Out". Use the buttons UP and DOWN to select one of four default settings for the fog output volume:
- Nonstop Burst -- The machine will continuously produce low fog. The output volume is automatically adjusted by the machine based on the operating temperature.
• High Volume -- about 60 % output volume
• Medium Volume -- about 52 % output volume
• Low Volume -- about 35 % output volume
| Output volume Output duration Pause | between fog outputs | |
| Nonstop Burst Continuous output* -- | ||
| High Volume 1 minute 1 minute | ||
| Medium Volume | 2 Minute | 1 minute |
| Low Volume | Continuous output* -- |
* When set to "Nonstop Burst" or "Low Volume", the machine will continuously produce low fog. However, the setting "Nonstop Burst" will produce the higher output volume.
* Please suspend the operation for 5 minutes before switching from the setting "Nonstop Burst" to the setting "High Volume" or "Medium Volume".
-Setting the DMX512 address
Press the button FUNCTION until the display indicates "DMX 512 Add." Use the buttons UP and DOWN, to set the machine to the same address as on your DMX controller. Please refer to the chapter DMX512 settings for more information on DMX operation.
-Timer operation
In the time mode, the machine will automatically emit fog. The time intervals, duration, and fog volume depend on the corresponding menu settings. Press the button TIMER, to activate the timer mode. The display indicates the set time interval. The unit counts down to 0 seconds and emits fog. To deactivate the timer mode, press the button TIMER again.
-Continuous operation
Press the button VOLUME, to activate continuous fog output. The display indicates the value that was set in menu item "Volume Out" i.e. Nonstop Burst, High, Medium or Low. To stop the fog output, press the button VOLUME once again.
-Manual operation
For immediate fog output at the maximum volume of fog, keep the button MANUAL pressed. The display indicates "Manual Output". As soon as you release the button, the fog output will stop. The manual operation will take priority over the continuous operation and the timer operation. Even if one of these operating modes is activated, the fog machine will always emit the maximum volume of fog when the button MANUAL is pressed.
-Important Notes
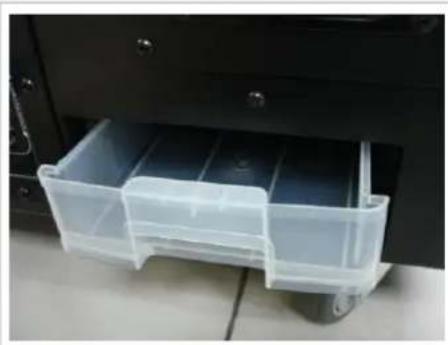
- A water collection tray is equipped at the rear of DNG-200. When the compressor is running for condensed fog, some water drops will flow into the tray. Please check the water level of the tray routinely and drain it on time to prevent overflow. (refer to figure 6).
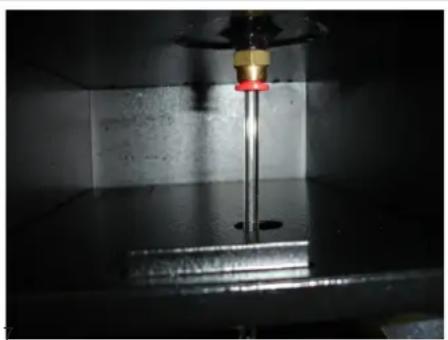
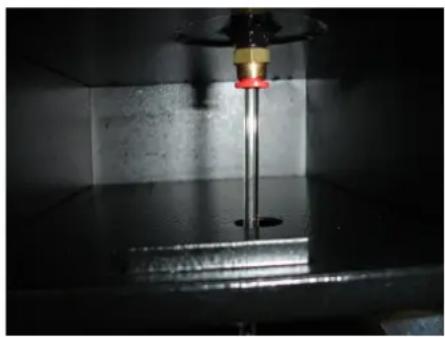
- If the machine is to be used for a long time or the water drops cannot be checked momentarily, the water collection tray can be removed and a 6 mm PU hose can be connected to the water draining hole located at the top of the water collection tank to directly drain out the water drops. After completing the draining, push up the upper red button to remove the hose. (refer to figure 7)
natural_image
Transparent plastic drawer with internal compartments, placed on a surface with a black drawer and wheels (no text or symbols visible)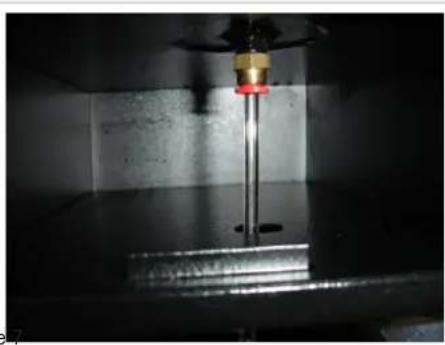
natural_image
Close-up of a precision testing setup with a tool and metallic components (no visible text or symbols)Figure 6 Figure
- The DNG-200 is equipped with a pump temperature sensor. When the fog fluid is used up in the tank, the pump will stop running due to the rising of the temperature. When the machine temperature drops down, the pump will resume to run. Please check to see if the fog fluid is sufficient in the fluid tank.
- A black square metal mesh is located at the back of the machine. This is the air inlet of the fan. Please do not block the inlet and clean it routinely to keep the cleanness.
- If the fog volume is too low, the machine generates noise during operation or the fog cannot be smoothly sprayed, please turn off the power immediately and check if the fog fluid is sufficient, whether the external fuse, controller connection or power supply has any problem. If none of the above shows any problem, insert the power plug again. If the machine still cannot normally operate, please check whether the hose connecting to the fog fluid tank is blocked, and if any fluid is flowing. If the cause cannot be identified, please do not allow the machine to operate to avoid damage. Turn off the machine immediately and let it cool down. Please contact an Antari dealer or a designated service center. Do not disassemble the machine by yourself.
- After using the DNG-200 for a long time, there may be residue on the floor which could be a possible cause of danger. Please note the material of the floor and pay special attention to the safety of persons walking on it.
- The DNG-200 Low Fog Generator does not use dry ice. It is very environmental friendly and safe. However, the output fog is easily to be blown away by wind. Please pay
-Maintenance of the Machine
- Cleaning your fog machine regularly will help reduce costly replacement and repair charges.
- Do not allow the fog fluid to become contaminated. The cap should be on the tank at all times.
- Prior to storing the machine for a longer period, clean it and drain all fog fluid from the tank. Disconnect and store the fog pipe and power cord. Store the machine and all parts into the parts tank located at front of the machine. Warm up the machine once a month, to protect it from moisture.
• Store the machine cool and dry.
-Technical Specifications
| Power | 100~120 V AC, 50~60 Hz | 220~240 V AC, 50~60 Hz |
| Power consumption (compressor) | 750 W | 600 W |
| Refrigerant | R-404A, 1.75 lb | R-404A, 1.75 lb |
| Rated current | 6.7 A | 3.2 A |
| Start current | 61 A | 21 A |
| Capacity | 3200 BTU/ hr | 2745 BTU/ hr |
| Compressor's breaker | 15 A, 250 V | 10 A, 250 V |
| Heater | 1450 W | 2500 W |
| Output | 12,000 cu.ft/min. (340 m3/min.) | 12,000 cu.ft/min. (340 m3/min.) |
| First heat-Up time | 24 min. | 12 min. |
| Fog machine's breaker | 15 A, 250V | 15 A, 250V |
| Tank capacity | 10 liters | 10 liters |
| Fluid consumption rate | 11 min./liter (high output) | 11 min./liter (high output) |
| Remote included | D-20 (timer controller with LCD, 2 m cable) | |
| Accessory included | 3 m fog conducting hose | |
| Weight | 120 kg | |
| Dimensions (LxWxH) | 780 x 608 x 686 (mm) | |
| Liquid used | Antari FLR (Light Fog Liquid) only | |
| Number of DMX channels | 1 | |
| Additional information | Self contained unit -- no CO2/dry ice required | |
| Floor-mount installations (4 wheels) | ||
- DMX Connector Pin Assignment
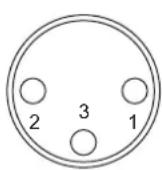
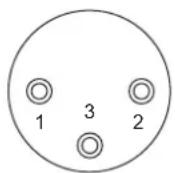
The machine provide 3 or 5 pin XLR connector for DMX connection. Diagram below indicate pin assignment information
3 pin XLR
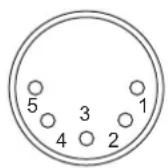
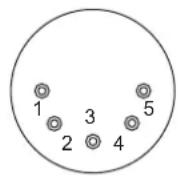
5 pin XLR
| Pin | Function |
| 1 | Ground |
| 2 | Data - |
| 3 | Data + |
-DMX512 Settings
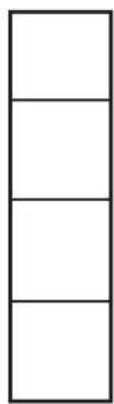
The DNG-200 is equipped with a DMX512 system. For connecting a DMX controller, 3-pin and 5-pin male-female XLR connections are provided at the back of the machine. The machine uses one control channel for adjusting the output volume. The channel has a DMX value range of 0 to 255. After connecting a DMX controller, timer functions such as output duration and interval can be programmed using the DMX controller or the DMX control software. The machine cannot be controlled via the D-20 control anymore. By using the DMX protocol, fog machines, lighting effects, and other special effects machines can be interconnected and easily controlled.
natural_image
Simple vertical line diagram with three empty rectangular sections (no text or symbols)192 - 255 = high volume (60 % output)
127 - 191 = medium volume (52 % output)
32 - 126 = low volume (35 % output)
0 - 31 = off (no fog output)
Between the values 0 to 31 the machine does not have sufficient output volume and is off. Between the values 31 to 126 the machine has a minimal output volume of 35% . Between the values 127 to 191 the machine has a medium output volume of 52% . Between the values 191 to 255 the machine has a maximum output volume of 60% .
-Operation Notice
● After operation, please wait 15 minutes before turning off the machine.
- Please do not turn the power on and off continuously. There must be at least a one-minute interval between each power on and off.
- Operate the machine in a well-ventilated area.
- Do not position two or more DNG-200 machines side by side to prevent poor hot air ventilation.
- Do not operate the machine under direct sunlight.
- It is strongly suggested not to have the machine produce continuous fog output over 20 minutes. Overtime usage might reduce the efficiency and lifespan of the compressor.
Mode d'emploi
natural_image
Close-up of a metallic industrial control wheel with a pink arrow indicating rotation (no text or symbols visible)Photo 1
natural_image
Close-up of a black industrial component with coiled metallic tubing, placed on tiled floor (no visible text or symbols)Photo 4 Photo 5
text_image
Antari LIGHT FOG 5 LITER FLR-3-Fonctionnement
text_image
FUNCTION TIMER VOLUME MANUAL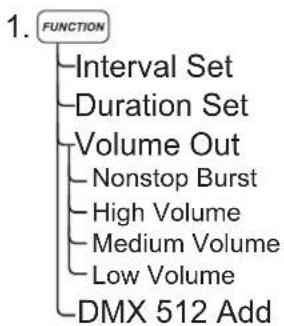
flowchart
graph TD
    A["FUNCTION"] --> B["Interval Set"]
    A --> C["Duration Set"]
    A --> D["Volume Out"]
    D --> E["Nonstop Burst"]
    D --> F["High Volume"]
    D --> G["Medium Volume"]
    D --> H["Low Volume"]
    D --> I["DMX 512 Add"]
- UP et DOWN
- TIMER
- VOLUME
- MANUAL
natural_image
Transparent plastic drawer with a black tray, placed on a surface with a small wheel (no text or symbols visible)Photo 6 Photo
natural_image
Close-up of a precision tool tip dispensing liquid into a metal block (no visible text or symbols)-Maintenance of the Machine
natural_image
Close-up of a metallic aircraft wheel with a red arrow indicating clockwise motion (no text or symbols)Abbildung 1
natural_image
Close-up of a black industrial air duct with coiled metallic insulation, mounted on a tiled floor (no text or symbols visible)text_image
FUNCTION TIMER VOLUME MANUAL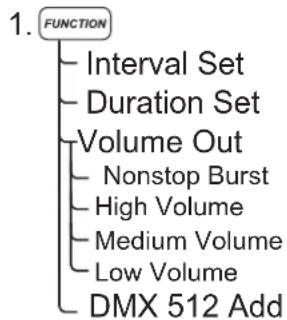
flowchart
graph TD
    A["FUNCTION"] --> B["Interval Set"]
    A --> C["Duration Set"]
    A --> D["Volume Out"]
    D --> E["Nonstop Burst"]
    D --> F["High Volume"]
    D --> G["Medium Volume"]
    D --> H["Low Volume"]
    D --> I["DMX 512 Add"]
-
UP und DOWN
-
TIMER
-
VOLUME
-
MANUAL
natural_image
White plastic multi-compartment drawer with black tray and wheels, no visible text or symbolsAbbildung 6
natural_image
Close-up of a precision measurement tool in operation, showing a probe inserted into a workpiece (no visible text or symbols)Abbildung 7
natural_image
Close-up of a metallic aircraft wheel with a pink arrow indicating clockwise motion (no text or symbols)圖一
natural_image
Close-up of a metallic industrial pipe fitting with threaded ends, mounted on a black frame (no visible text or symbols)圖四 圖五
text_image
FUNCTION TIMER VOLUME MANUAL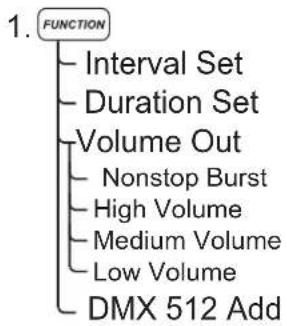
flowchart
graph TD
    A["FUNCTION"] --> B["Interval Set"]
    A --> C["Duration Set"]
    A --> D["Volume Out"]
    D --> E["Nonstop Burst"]
    D --> F["High Volume"]
    D --> G["Medium Volume"]
    D --> H["Low Volume"]
    D --> I["DMX 512 Add"]
- UP und DOWN
- TIMER
- VOLUME
- MANUAL
5-1. Function 功能键
natural_image
Transparent plastic drawer with four compartments, placed on a dark surface (no text or symbols visible)圖六 圖七

natural_image
Close-up of a precision testing machine needle striking a metallic component (no visible text or symbols)natural_image
Simple vertical line diagram with four empty rectangular sections (no text or symbols)High Volume
192-255 = 大輸出量
192-255 = High Volume 大輸出量(60%)
Medium Volume
127-191= 中輸出量
127 - 191 = Medium Volume 中輸出量(52%)
Low Volume
32-126 = 小輸出量
32-126 = Low Volume 小輸出量(35%)
Off
0-31 = 關
0 - 31 = Off / 關
natural_image
Exterior view of a black industrial machine labeled 'LOW PSC GENERATION' with visible ductwork and warning symbol (no readable text beyond label)