Run Fit Everest PRO RF300 - Massage device Prixton - Free user manual and instructions
Find the device manual for free Run Fit Everest PRO RF300 Prixton in PDF.

User questions about Run Fit Everest PRO RF300 Prixton
0 question about this device. Answer the ones you know or ask your own.
Ask a new question about this device
Download the instructions for your Massage device in PDF format for free! Find your manual Run Fit Everest PRO RF300 - Prixton and take your electronic device back in hand. On this page are published all the documents necessary for the use of your device. Run Fit Everest PRO RF300 by Prixton.
USER MANUAL Run Fit Everest PRO RF300 Prixton
natural_image
Line drawing of a standard treadmill with adjustable arms and wheels (no text or symbols)CINTA DE CORRER TREADMILL
natural_image
Two identical types of bolts with striped ends and a flat head (no text or symbols)natural_image
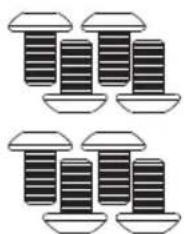
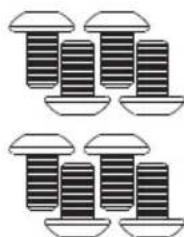
Pure diagram of four identical mechanical components with no text or symbolsTornillo Allen M8x16 X 8
S4
natural_image
Line drawing of a mechanical device with two components connected by a coiled cable (no text or symbols)text_image
QR code image containing encoded data, no visible human-readable textKinomap

text_image
K
text_image
QR code image containing encoded data, no visible human-readable texttext_image
QR code with central red 'FS' logo, likely linking to a digital service or website.FIT&SHOW


text_image
QR code with central red logo containing the letters 'FS'natural_image
Simple line drawing of a mechanical component with no text or symbols
natural_image
Diagram of a mechanical device with wheels and a curved arrow indicating motion (no text or symbols)AJUSTANDO UNA BANDA PARA CORRER SUELTA
natural_image
Pure mechanical component diagram without any text, numbers, or symbolsMANTENIMIENTO
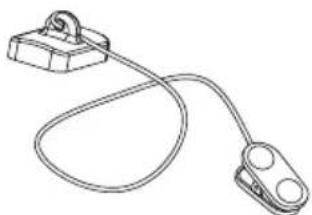
Turn on Bluetooth capability on your device and make it discoverable, choose the shown device "BTMP3" to pair it. Once the device is paired you can start using the application on your device to play, pause and adjust the volume, etc.
HARDWARE LIST & ASSEMBLY COMPONENT
S1S2
natural_image
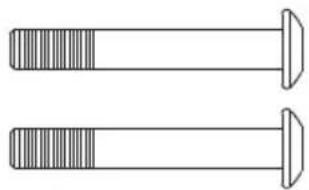
Two identical screw-like objects with striped ends and a pointed tip, no text or symbols present.Hexagon Socket Oval Head Bolt M8x55 X2
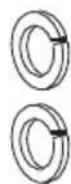
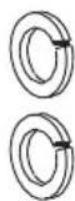
Spring Washer
M8 X2
S3
natural_image
Illustration of four identical screwdrivers with different mounting points (no text or symbols)M8x16 Allen Bolt X 8
S4
natural_image
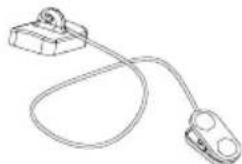
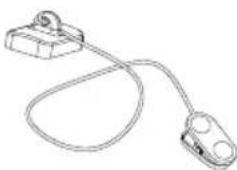
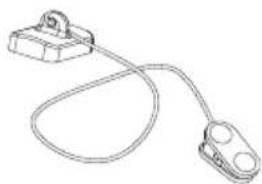
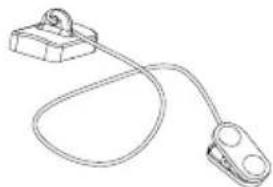
Line drawing of a cable with two connectors and a terminal block (no text or symbols)Safety Tether Key X 1
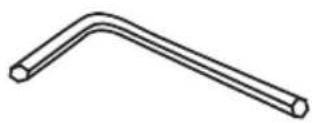
TOOLS

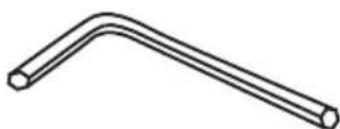
Allen Wrench
X 1
SAFETY INSTRUCTIONS
Please read carefully prior to using this product.
You should consult a physician before beginning any exercise program this is especially important if you are pregnant, sick injured or have a pre-existing medical condition. If whilst using the treadmill you feel dizzy, faint, short of breath or any pain STOP using the treadmill immediately and consult a physician.
When using electrical products, you should follow normal safety procedures, especially if there are children or pets around.
- Place the treadmill flat on the ground away from water and heat.
- Avoid placing the treadmill on thick carpet – it should be placed on a flat clean surface allowing air to circulate around it freely to avoid over heating the motor.
-
To fold and unfold the treadmill, refer to the Folding Instructions section below.
-
To turn on the treadmill, connect the power cord to the wall and turn on the red On/Off switch at the back of the treadmill and avoid sharing the power outlet with other electrical products.
-
Grounding electrical equipment is important and reduces the risk of electrical shock. The electrical cord and plug provided with the tread- mill are grounded therefore a grounded power outlet must be used to avoid injury.
-
Always check the running belt alignment each time you use the treadmill - the running belt will move to one side with use - to align the running belt correctly and tighten it when it becomes sticky under foot and loose, refer to the Belt Alignment section in page10 . It's important you do this correctly to avoid injury.
-
To start the treadmill, place the safety key on the yellow circle on the Control Pad and attach the clip to your clothing. Note, the treadmill will not start unless you place the safety key on the yellow circle.
-
START the treadmill at the lowest speed and hold onto the handrests. Note, there should be a 3 second countdown before the running belt begins to move.
-
In the event the treadmill malfunctions, PULL the safety key from the Control Pad – the treadmill will stop immediately, turn OFF the red power switch at the back of the treadmill, disconnect the power, and contact the customer care team for further instructions.
-
Regular maintenance will prolong the life of your treadmill and prevent injury – refer to the Troubleshooting section in page12.
-
Always use proper lifting techniques and/or assistance when lifting or moving the treadmill to avoid injury.
-
Never leave the treadmill unattended or plugged in especially if there are young children around.
-
Always turn the treadmill OFF at the wall and remove the plug when it's not in use – this applies when you are cleaning or moving the treadmill.
-
The treadmill is not suitable for children under 14 years of age or for people with physical conditions unless supervised by an adult.
-
The treadmill is designed for home use only and should only be used indoors in a clean dry area.
ASSEMBLY INSTRUCTIONS
text_image
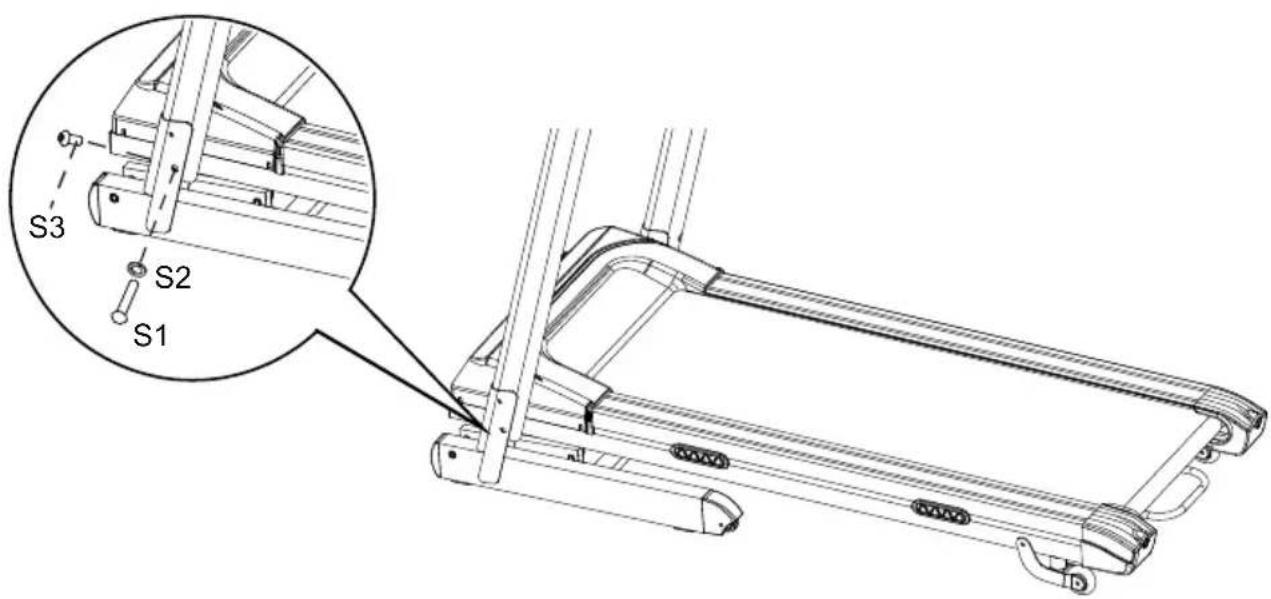
S3 S2 S1STEP 1
It is recommended to have a second person assist with this step. Lift both Right and Left Handlebar Support Tubes up. One person should hold the both Right and Left Handlebar Support Tubes in place while the other person tightens the bolts. Lift both Right and Left Handlebar Support Tubes up and align bolt holes. Use two M8x55 Hexagon Socket Oval Head Bolts (S1) and two M8 Spring Washers (S2) to secure both Right and Left Handlebar Support Tubes onto the Base Frame.
Use two M8x16 Hexagon Socket Oval Head Bolts (S3) to secure both Right and Left Handlebar Support Tubes onto the Base Frame.
Semi-tighten all bolts with the Allen Wrench provided.
NOTE: DO NOT FULLY TIGHTEN BOLTS IN STEP 1 UNTIL STEP 2 IS COMPLETED.
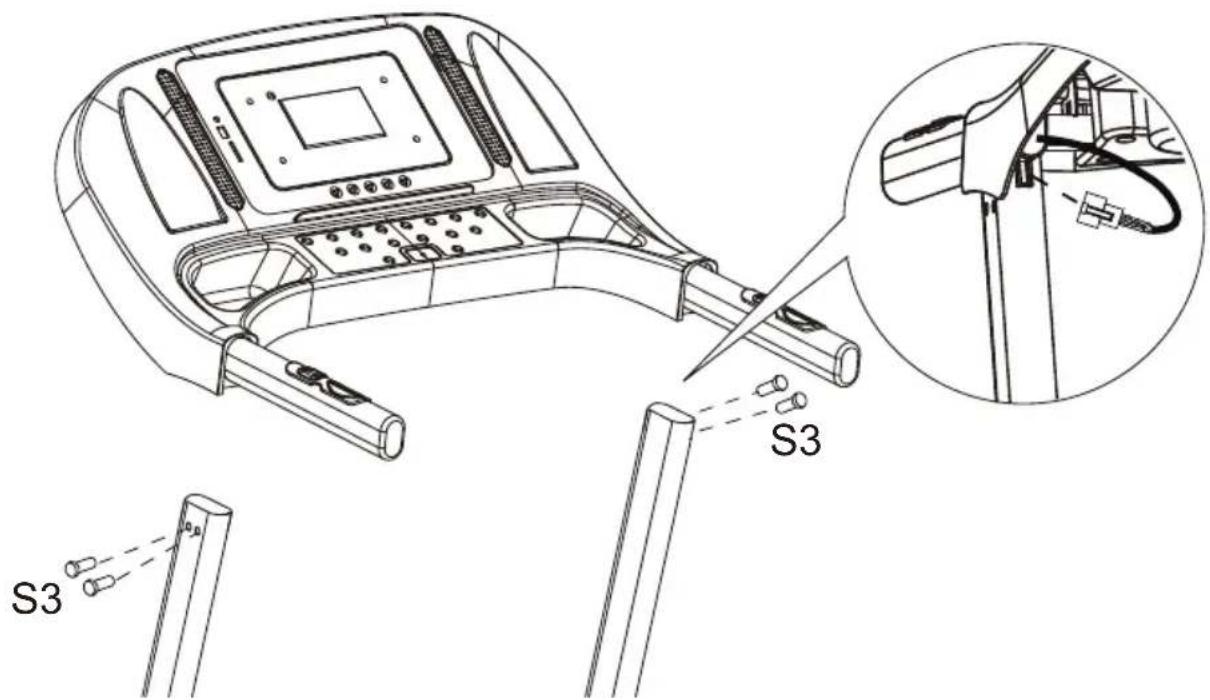
text_image
S3 S3STEP 2
It is recommended to have a second person assist with this step. One person should hold the Computer Console in place while the other person connects the cables. Connect the Main Control Cable from the Right Handlebar Support Tube to the cable that comes from the Computer Console.
Install the Handlebar Bracket onto the Right and Left Handlebar Support Tubes, using two M8x16 Hexagon Socket Oval Head Bolts (S3).
IMPORTANT: While sliding the Handlebar Bracket onto the Right and Left Handlebar Support Tubes make sure the cables are installed inside the Right Handlebar Support Tube and pay attention not to pinch the cables.
NOWPLEASE FULLY TIGHTENALL BOLTS INSTALLED IN STEP 1.
NOTE: Always stand on the side rails when you start the treadmill, never start the treadmill while you are standing on the running belt.
QUICK START:
Press the START button on the computer to start exercise, the LCD window will countdown 5 seconds with the LCD showing "5-4-3-2-1" before the running belt starts moving. The running belt starts moving with an initial speed of 1.0 KPH. Always allow the
treadmill to reach a speed of 1.0 KPH before stepping on to the running belt. You may press the SPEED + or SPEED - button on the computer console or handlebar to increase or decrease the running speed during exercise. The split window of SPEED will display your current running speed. The speed range is from the minimum 1.0 KPH to the maximum 16.0 KPH. You may also press one of the INSTANT SPEED buttons (3/6/9/12) on the computer console and the split window of SPEED will display the speed that you have pressed and the running speed will change to 3 KPH, 6 KPH, 9 KPH, or 12 KPH respectively. The split window of TIME will display your elapsed workout time in minutes and seconds. The split window of DISTANCE will display the accumulative distance travelled during workout. The split window of CALORIES will display the total accumulated calories burned during workout. The split window of PULSE will display your current heart rate in beats per minute (BPM). To activate, grip the hand pulse sensors on both handlebars during exercise and the pulse will display after 4-5 seconds. For a more accurate reading, grip pulse sensors with both hands. During training, you may press the STOP button on the computer console to stop the treadmill running at any time, or pull out the safety tether key to stop the treadmill running.
FUNCTION BUTTONS:
START:
Press the START button to start training on different training mode.
STOP:
Press the STOP button to stop training on different training mode.
PROG (PROGRAM):
Press the PROG button to select the pre-set training program (P01-P12) mode before training.
MODE:
Press the MODE button to select different functions (time, distance, or calories) for setting exercise goals in manual program mode before training.
SPEED + (SPEED UP):
Press the SPEED + button to make upward adjustments for pre-setting target training time, distance, or calorie in manual program mode before training. Press the SPEED + button to make upward adjustments for pre-setting target training time in pre-set training program (P01-P12) mode before training.
SPEED — (SPEED DOWN):
Press the SPEED - button to make backward adjustments for pre-setting target training time, distance, or calorie in manual program mode before training. Press the SPEED - button to make backward adjustments for pre-setting target training time in pre-set training program (P01-P12) mode before training.
INSTANT SPEED (3 / 6 / 9 / 12):
Used to reach desired speed more quickly.
INCLINE ∧ / ∨: To increase / decrease the incline level settings during all training periods in different training modes.
INSTANT INCLINE (2/4/8/12):Used to reach the desired incline level more quickly.
DISPLAY FUNCTIONS:
TIME: Displays your elapsed workout time in minutes and seconds. Press the START button on the computer to begin exercising, the LCD window will count -down 5 seconds with the LCD showing "5-4-3-2-1" before the running belt starts moving. The running belt starts moving with an initial speed of 1.0 KPH. You may press the SPEED + or SPEED - button on the computer console or handlebar to increase or decrease the running speed during exercise. Time starts counting up from 0:00 to 99:59 per 1 second increment.
SPEED: Displays the current speed from the minimum 1.0 KPH to the maximum 16.0 KPH. You may increase or decrease the speed by pressing the SPEED + or SPEED - button on the computer console or handlebar.
(DISTANCE: Displays the accumulative distance travelled during workout. Press the START button on the computer to begin exercising, the LCD window will countdown 5 seconds with the LCD showing "5-4-3-2-1" before the running belt starts moving. The running belt starts moving with an initial speed of 1.0 KPH. You may press the SPEED + or SPEED - button on the computer console or handlebar to increase or decrease the running speed during exercise. Distance starts counting up.
CALORIES: Displays the total calories burned during your workout. Press the START button on the computer to begin exercising, the LCD window will countdown 5 seconds with the LCD showing "5-4-3-2-1" before the running belt starts moving. The running belt starts moving with an initial speed of 1.0 KPH. You may press the SPEED + or SPEED - button on the computer console or handlebar to increase or decrease the running speed during exercise. Calorie starts counting up. (This data is a rough guide for comparison of different exercise sessions and should not be used in medical treatment).
PULSE: Displays your current heart rate in beats per minute (BPM). To activate, grip the hand pulse sensors during exercise and the pulse will display after 2-5 seconds. For a more accurate reading, grip pulse sensors with both hands.
TRAINING IN MANUAL PROGRAM MODE:
You may pre-set target TIME, DISTANCE, or CALORIES in STOP mode before training. Only one of the functions can be pre-set.
To set TIME press the MODE button on the computer console unitl you see the split window of TIME begin blinking. Press the SPEED + or SPEED - button on the computer console or handlebar to change the setting. Each increment is 1 minute. The pre-set target time range is from 5:00 to 99:00 minutes. Once you pre-set target time, press the START button on the computer to begin exercising. The running belt starts moving with an initial speed of 1.0 KPH. You may press the SPEED + or SPEED - button on the computer console or handlebar to increase or decrease the running speed during exercise. Time starts counting down from pre-set target time to 0:00 per 1 second backward. When the pre-set target time counts down to 0:00, the computer will beep to alert you and the treadmill will stop automatically.
To set DISTANCE press the MODE button on the computer console until you see the window of DISTANCE begin blinking. Press the SPEED + or SPEED - button on the computer console to change the setting. The pre-set target distance range is from 0.5 to 65.0 kilometers, the default distance is 1 kilometer. Once you pre-set target distance, press the START button on the computer to begin exercising. The running belt starts moving with an initial speed of 1.0 KPH. You may press the SPEED + or SPEED - button on the computer console or handlebar to increase or decrease the running speed during exercise. Distance starts counting down from pre-set target distance to 0.00. When the pre-set target distance counts down to 0.00, the computer will beep to alert you and the treadmill will stop automatically.
To set CALORIES press the MODE button on the computer console until you see the window of CALORIES begin blinking. Press the SPEED + or SPEED - button on the computer console to change the setting. The pre-set target calorie range is from 10 to 995 calories. Once you pre-set target calories, press the START button on the computer to begin exercising. The running belt starts moving with an initial speed of 1.0 KPH. You may press the SPEED + or SPEED - button on the computer console or handlebar to increase or decrease the running speed during exercise. calories start counting down from pre-set target calories to 0. When the pre-set target calories counts down to 0, the computer will beep to alert you and the treadmill will stop automatically.
| Program | Speed (km/h) per segment | |||||||||||||||||||
| P1 | 2 | 3 | 3 | 4 | 5 | 3 | 4 | 5 | 5 | 3 | 4 | 5 | 4 | 4 | 4 | 2 | 3 | 3 | 5 | 3 |
| P2 | 2 | 4 | 4 | 5 | 6 | 4 | 6 | 6 | 6 | 4 | 5 | 6 | 4 | 4 | 4 | 2 | 2 | 5 | 4 | 2 |
| P3 | 2 | 4 | 4 | 6 | 6 | 4 | 7 | 7 | 7 | 4 | 7 | 7 | 4 | 4 | 4 | 2 | 4 | 5 | 3 | 2 |
| P4 | 3 | 5 | 5 | 6 | 7 | 7 | 5 | 7 | 7 | 8 | 8 | 5 | 9 | 5 | 5 | 6 | 6 | 4 | 4 | 3 |
| P5 | 2 | 4 | 4 | 5 | 6 | 7 | 7 | 5 | 6 | 7 | 8 | 8 | 5 | 4 | 4 | 6 | 5 | 5 | 4 | 2 |
| P6 | 2 | 4 | 3 | 4 | 5 | 4 | 8 | 7 | 5 | 7 | 8 | 3 | 6 | 4 | 4 | 2 | 5 | 4 | 3 | 2 |
| P7 | 2 | 3 | 3 | 3 | 4 | 5 | 3 | 4 | 5 | 3 | 4 | 5 | 3 | 3 | 3 | 6 | 6 | 5 | 3 | 3 |
| P8 | 2 | 3 | 3 | 6 | 7 | 7 | 4 | 6 | 7 | 4 | 4 | 4 | 6 | 7 | 4 | 4 | 4 | 2 | 3 | 2 |
| P9 | 2 | 4 | 4 | 7 | 7 | 4 | 7 | 8 | 4 | 8 | 9 | 9 | 4 | 4 | 4 | 5 | 6 | 3 | 3 | 2 |
| P10 | 2 | 4 | 5 | 6 | 7 | 5 | 4 | 6 | 8 | 8 | 6 | 6 | 5 | 4 | 4 | 2 | 4 | 4 | 3 | 3 |
| P11 | 3 | 4 | 5 | 9 | 5 | 9 | 5 | 5 | 5 | 9 | 9 | 5 | 5 | 5 | 9 | 9 | 8 | 7 | 6 | 3 |
| P12 | 2 | 5 | 8 | 10 | 7 | 7 | 10 | 10 | 7 | 7 | 10 | 10 | 6 | 6 | 9 | 9 | 5 | 5 | 4 | 3 |
Application Software (APP)
Check if your mobile device confirms the requirements for the application. The requirements of each application are shown in the Google PlayStore or AppStore.
Check out Kinomap for free with payment option or choose the free FIT&HOME app.
Android iOS

text_image
QR code image containing encoded data, no visible human-readable textKinomap

text_image
K
text_image
QR code image containing encoded data, no visible human-readable textPlease remember to turn on the Bluetooth feature on your device.
Android iOS

text_image
QR code with central red 'FS' logo, likely linking to a digital service or website.FIT&SHOW


text_image
QR code with central red 'FS' logo, likely linking to a digital service or website.Please understand that we are not able to offer you a complete operation guide of the application inside this manual, as the app will be updated from time to time.
This process can make changes to the operation or the design of the application. Please refer to the instructions inside the specific app download store or contact us.
RUNNING BOARD/BELT MAINTENANCE
The treadmill running belt has been pre-lubricated prior to leaving the factory.
With use the running belt will move to the left or right and become loose. In order to protect your investment and prolong the life of your treadmill it's important to know how to lubricate, tighten and align the running belt correctly.
For this reason, refer to the instructions below.
RUNNING BOARD/BELT LUBRICATION
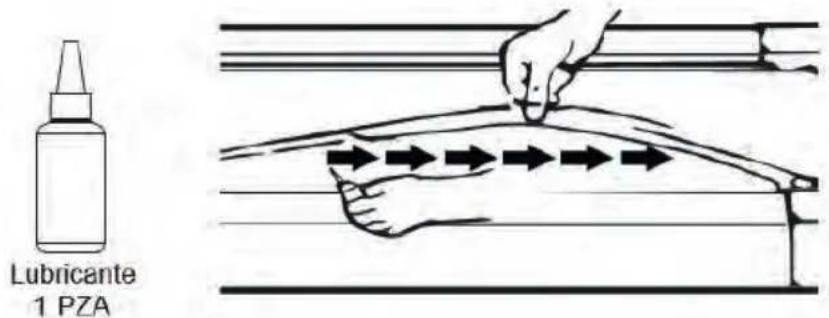
Lubricating under the running belt will ensure superior performance and extend its life expectancy. After the first 25 hours of use (or 2-3 months) apply some lubricant, and repeat for every following 50 hours of use (or 5-8 months).
How to check running belt for proper lubrication
Lift one side of the running belt and feel the top surface of the running deck. If the surface is slick to the touch, then no further lubrication is required.
If the surface is dry to the touch, apply some lubricant.
How to apply lubricant
Lift one side of running belt.
Pour some lubricant under the centre of the running belt on the top surface of the running deck.
Run on the treadmill at a slow speed for 3 to 5 minutes to evenly distribute lubricant. NOTE: DO NOT over lubricate running deck. Any excess lubricant that comes out should be wiped off.
text_image
Lubricante 1 PZARUNNING BELT ALIGNMENT
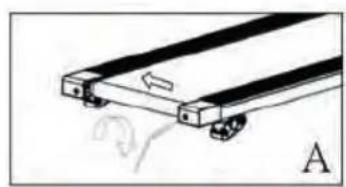
We strongly recommend you check the alignment of the running belt when you take it out from the box to ensure it hasn't moved during transit and before or after each workout to avoid injury. If the running belt is not centered, use allen key to turn left and right end cap's screws clockwise until it is centered.
natural_image
Diagram of a mechanical component with labeled section A (no text or symbols on the diagram itself)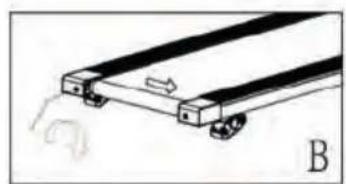
natural_image
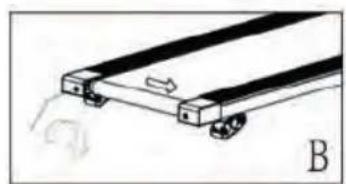
Diagram of a mechanical device with a lever and base, labeled B (no text or symbols on the diagram itself)ADJUST A LOOSE RUNNING BELT
With use, the running belt will become loose. A simple way to check if the running belt is loose is it will bunch up in the middle of the belt. If you are running on the belt and it feels unstable (wobbly) or your feet are sticking to the belt, STOP the treadmill immediately and tighten the belt to avoid injury.
natural_image
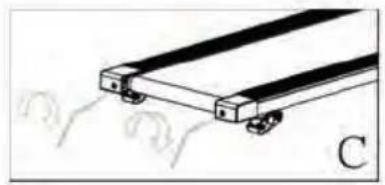
Pure mechanical assembly diagram showing two parallel plates with wheels, no text or symbols presentPlace the treadmill on a flat level surface.
To adjust the tightness of the belt, STOP the treadmill.
Use the Allen key provided and turn both two end caps screw a 14 turn clockwise – see illustration C.
START the treadmill on a medium speed - check the belt is centered, if not keep turning the screw a 14 turn clockwise at a time until the belt is centered.
MAINTENANCE
Regular maintenance will prolong the life of your treadmill and prevent injury. We strongly recommend that you do the following on a regular basis –
Remove the power cord from the wall after use, especially if children are around.
It is especially important to keep the running belt, safety side rails ant the floor under the belt clean and free of dust and dirt to avoid increased wear and tear and possible damage to the treadmill.
Clean the treadmill after use with a dry cloth to clean the Control Pad and areas around the Power Switch use a soft cloth and cleanser to remove stubborn stains and dirt off the Running Belt.
Check the running belt alignment each time before you use the treadmill (it will move with use) - refer to the Adjusting the Running Belt section above.
Keep the running belt lubricated – refer to the Running Belt Maintenance section.
Keep the treadmill in a safe dry place away from heat and water.
TROUBLESHOOTING
| REF | PROBLEM | SOLUTION |
| 1 | THERE IS NO DISPLAY ON THE CONTROL PAD. | Check the power outlet and the switch at the back of the treadmill are turned ON.Check the Control Pad sensor wires are connected to the frame (A) and (B) – refer to the Assembly instructions step5 in page5.Place the Safety Key magnet on the yellow circle on the Control Pad and attach the safety cord to your clothing.Press the START key on the Control Pad – the running belt should move after 3 seconds.If there is no change, try a different power outlet.Note, the Control Pad will automatically turn off when not in use.Failing above, call Customer Care. |
| 2 | THE CONTROL PAD IS ON AND THE MOTOR IS NOT FUNCTIONING. | Check the voltage – it could be too low.Try a different power outlet.Check theSafety Keyis attached to the Control Pad.If there is no change, call Customer Care. |
| 3 | THE RUNNING BELT IS LOOSE. | Refer to theRunning Belt Maintenancesection above.Refer to the how to video on the Salus Sports website.If there is no change, call Customer Care. |
| 4 | THE RUNNING BELT HAS MOVED TO THE RIGHT OR LEFT. | Refer to theRunning Belt Maintenancesection above.Refer to the how to video on the Salus Sports website.If there is no change, call Customer Care. |
| 5 | THE ANTI-STATIC AGENT HAS WORN OFF | Lubricate the treadmill after approximately 80 hours of use or try the test of rubbing your hand between the board and the belt to see if it is dry.Refer to theRunning Belt Maintenancesection above.Refer to the how to video on the Salus Sports website.If there is no change, call Customer Care. |
Warranty Policy
This product is guaranteed for 2 years from the date of purchase. When you have a problem that you can not solve, you must access the web www.prixton.com and click on the contact option to send us your assistance form.
These technical and electrical specifications are those of typical units and may be changed without prior notice in order to provide improved equipment.
Simplified EU Declaration of Conformity
We, La Trastienda Digital located in Avenida Cervantes 49, módulo 25, Basauri 48970, Bizkaia hereby declare that the following goods, imported and selling at European market:
| BRAND | MODEL DESCRIPTION | CATEGORY | |
| PRIXTON | RUN FIT EVEREST PRO RF300 | TREADMILL | FITNESS |
Are in compliance with the EC Council Directive of 2014/53/EU (EM DIRECTIVE) and harmonized standards and with the board of the 16th of April 2014.
The complete text of the UE Declaration of conformity is available anytime at this website address: www.prixton.com
LA TRASTIENDA DIGITAL
natural_image
Two identical cylindrical objects with segmented ends, no text or symbols presentnatural_image
Illustration of four different types of screw spools arranged in a grid (no text or symbols)natural_image
Simple line drawing of a cable with two connectors and a handle (no text or symbols)Clé de sécurité X 1
OUTILS
natural_image
Simple line drawing of a bent pipe or rod (no text or symbols)Clé hexagonale X 1
INSTRUCTIONS DE SÉCURITÉ
text_image
QR code image containing encoded data, no visible human-readable textKinomap

text_image
K
text_image
QR code image containing encoded data, no visible human-readable texttext_image
QR code with central red 'FS' logo, likely linking to a digital service or website.FIT&SHOW


text_image
QR code with central red 'FS' logo, likely linking to a digital service or website.natural_image
Simple line drawing of a mechanical component with no text or symbols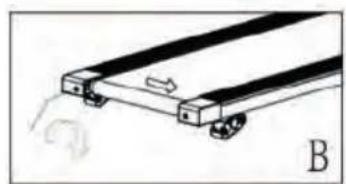
natural_image
Diagram of a mechanical device with wheels and a curved arrow indicating motion (no text or symbols)AJUSTER UNE COURROIE LÂCHE
natural_image
Pure mechanical assembly diagram showing two parallel plates with wheels, no text or symbols presentENTRETIEN
natural_image
Two identical types of bolt or screw with striped ends and a flat head (no text or symbols)natural_image
Pure diagram of four identical mechanical components with no text or symbolsM8x16 Bulloni a brugola X 8
S4
natural_image
Line drawing of a cable with two connectors and a handle, no text or symbols presentnatural_image
Simple line drawing of a bent pipe or rod (no text or symbols)Chiave a brugola X 1
text_image
Control panel interface with numbered buttons and function labels like READ, CHECK, and STARTtext_image
QR code image containing encoded data, no visible human-readable textKinomap

text_image
K
text_image
QR code image containing encoded data, no visible human-readable texttext_image
QR code with central red 'FS' logo, likely linking to a digital service or website.FIT&SHOW


text_image
QR code with central red 'FS' logo, likely linking to a digital service or website.natural_image
Simple line drawing of a mechanical component with a labeled section A (no text or symbols on the diagram itself)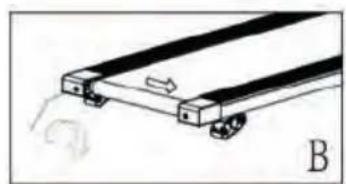
natural_image
Simple line drawing of a mechanical device with wheels and a scroll, labeled B (no text or symbols on the diagram itself)FISSARE LA BANDA
natural_image
Pure mechanical component diagram without any text, numbers, or symbolsnatural_image
Two identical screw-like objects with striped ends and a flat head (no text or symbols)natural_image
Illustration of six identical screwdrivers arranged in two rows (no text or symbols)natural_image
Line drawing of a cable with two connectors and a clip, no text or symbols presentSicherheitsgurt X 1
WERKZEUGE
Innensechskant
-schlüssel
X 1
SICHERHEITSHINWEISE
text_image
Control panel interface with numbered buttons and function labels like 'START', 'OK', and 'FIND'text_image
QR code image containing encoded data, no visible human-readable textKinomap

text_image
K
text_image
QR code image containing encoded data, no visible human-readable texttext_image
QR code with central red 'FS' logo, likely linking to a digital service or website.FIT&SHOW


text_image
QR code with central red 'FS' logo, likely linking to a digital service or website.natural_image
Diagram of a mechanical component with labeled section A, showing layered structure and motion indicators (no text or symbols)
natural_image
Diagram of a mechanical device with wheels and a curved arrow indicating motion (no text or symbols)EIN LOSES LAUFBAND JUSTIEREN
natural_image
Diagram of a mechanical or electrical component with two parallel plates and a base, no visible text or symbolsnatural_image
Two identical screw-like components with striped ends and a flat head (no text or symbols)Parafuso de Cabeça Oval com Ranhura Sextavada M8x55 X2
Anilha Plana
M8 X2
natural_image
Illustration of four different types of screwdrivers with no text or symbolsParafuso Allen M8x16 X 8
S4
natural_image
Line drawing of a cable with two connectors and a handle (no text or symbols)Chave de Tirante de segurança X 1
FERRAMENTAS

natural_image
Simple line drawing of a bent pipe or rod (no text or symbols)Chave Allen X 1
INSTRUÇÕES DE SEGURANÇA
text_image
QR code image containing encoded data, no visible human-readable textKinomap

text_image
K
text_image
QR code image containing encoded data, no visible human-readable texttext_image
QR code with central red 'FS' logo, likely linking to a digital service or website.FIT&SHOW


text_image
QR code with central red 'FS' logo, likely linking to a digital service or website.natural_image
Illustration of a hand pressing down on a curved surface with directional arrows indicating motion (no text or symbols)natural_image
Simple line drawing of a mechanical component with a handle and wheels, labeled 'A' (no text or symbols on the diagram itself)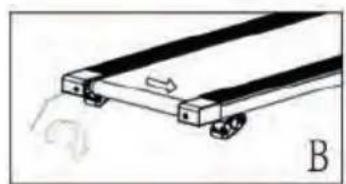
natural_image
Diagram of a mechanical device with wheels and a sliding mechanism, labeled B (no text or symbols on the diagram itself)AJUSTAR UMA ESTEIRA DE CORRIDA SOLTA
natural_image
Diagram of two parallel mechanical components with wheels, no text or symbols presentnatural_image
Two identical cylindrical objects with segmented ends, no text or symbols presentnatural_image
Two identical diagrams of screwdrivers with different mounting points, no text or symbols presentInbusbout M8x16 X8
S4
natural_image
Line drawing of a cable with two connectors and a handle (no text or symbols)natural_image
Simple line drawing of a bent pipe or rod (no text or symbols)Inbussleutel X1
VELIGHEIDSINSTRUCTI
text_image
Control panel interface with numbered buttons and function labels like 'START', 'OK', and 'EOR'SPEED + (HOGERE SNELHEID):
text_image
QR code image containing encoded data, no visible human-readable textKinomap

text_image
K
text_image
QR code image containing encoded data, no visible human-readable texttext_image
QR code with central red 'FS' logo, likely linking to a digital service or website.FIT&SHOW


text_image
QR code with central red 'FS' logo, likely linking to a digital service or website.natural_image
Diagram of a mechanical component with labeled section A (no text or symbols on the diagram itself)