BF200 - Massage device Prixton - Free user manual and instructions
Find the device manual for free BF200 Prixton in PDF.

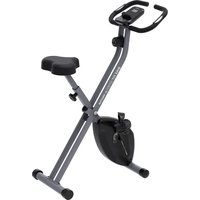
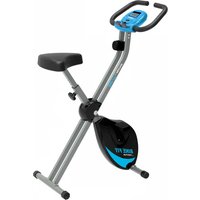
| Product Type | Folding Exercise Bike (Bike Fit) |
| Brand | Prixton |
| Model | BF200 |
| Power Supply | 2 AA batteries (not included) |
| Display | LCD screen with SCAN, TIMER, SPEED, DISTANCE, CALORIE, PULSE, ODO, RPM modes |
| Resistance Type | Adjustable Magnetic |
| Resistance Range | Levels 1 to 8 |
| Seat Adjustment | Adjustable height (loosen knob, adjust, tighten) |
| Foldability | Folding frame via main axle bolt |
| Pulse Sensors | Integrated in handlebars |
| Functions | Timer, speed, distance, calories, pulse, odometer, RPM |
| Reset | Hold Mode button for 3 seconds |
| Assembly Required | Yes: frame, handlebars, control panel, pedals, seat |
| Intended Use | Home cardio training |
| Maintenance | Store in a dry place, out of reach of children |
| Safety | Do not adjust seat above STOP mark; check stability after folding |
| Warranty | Conforms to legal warranty in the country of purchase |
| Declaration of Conformity | Directive 2014/53/EU; full text at www.prixton.com |
Frequently Asked Questions - BF200 Prixton
User questions about BF200 Prixton
0 question about this device. Answer the ones you know or ask your own.
Ask a new question about this device
Download the instructions for your Massage device in PDF format for free! Find your manual BF200 - Prixton and take your electronic device back in hand. On this page are published all the documents necessary for the use of your device. BF200 by Prixton.
USER MANUAL BF200 Prixton
natural_image
Line drawing of a stationary exercise bike with adjustable arms and legs (no text or symbols)BICICLETA ESTÁTICA
EXERCISE BIKE
natural_image
Technical line drawing of a bolt with threaded shaft (no text or symbols)natural_image
Simple line drawing of a hammer and sickle (no text or symbols)Llave
C.
natural_image
Simple line drawing of an L-shaped metal angle (no text or symbols)Llave Allen
INSTRUCCIONES DE MONTAJE
natural_image
Technical line drawing of a mechanical device with curved and linear components (no text or symbols)natural_image
Technical line drawing of a stationary exercise machine with wheels and armrest (no text or symbols)natural_image
Line drawing of a stationary exercise bike with attached sensor and control panel (no text or symbols)natural_image
Line drawing of a stationary exercise bike with adjustable arms and legs (no text or symbols)natural_image
Technical line drawing of a bicycle seat assembly (no text or labels)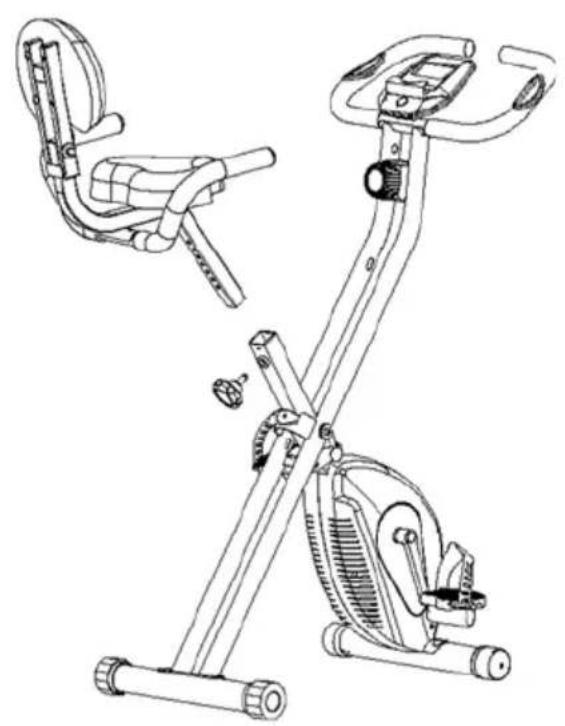
natural_image
Line drawing of a stationary exercise bike with side and front views (no text or symbols)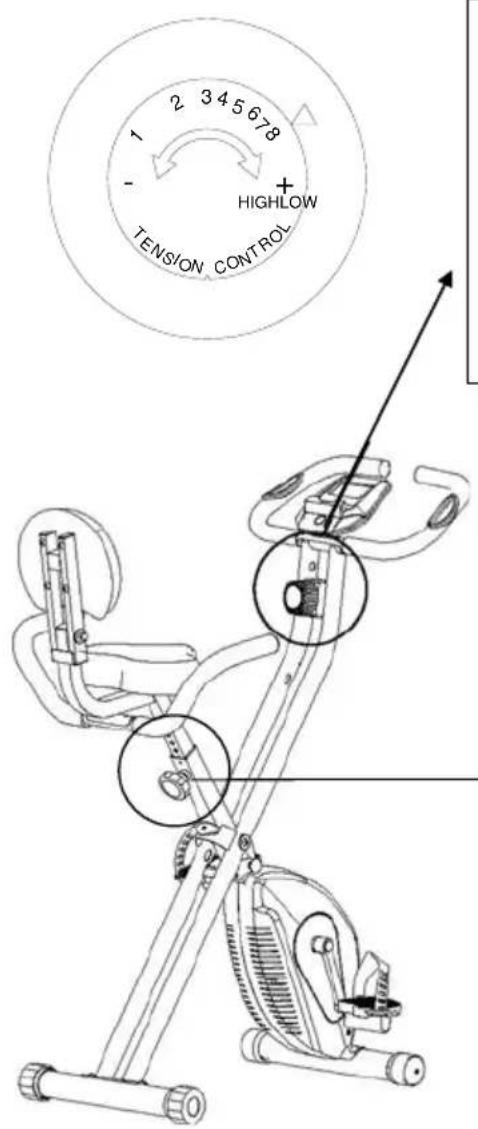
natural_image
Technical line drawing of a mechanical bracket with circular holes and a base (no text or symbols)CUIDADO
natural_image
Line drawing of a stationary exercise bike with adjustable arms and seat (no text or symbols)
natural_image
Line drawing of a stationary exercise bike with adjustable arms and wheels (no text or symbols)natural_image
Line drawing of a person performing a seated stretch or exercise (no text or symbols)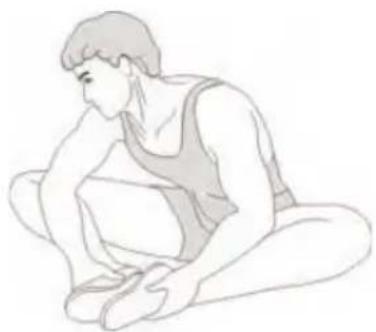
natural_image
Line drawing of a person sitting cross-legged, holding their head in thought (no text or symbols)natural_image
Line drawing of a person wearing a tank top and shorts (no text or symbols)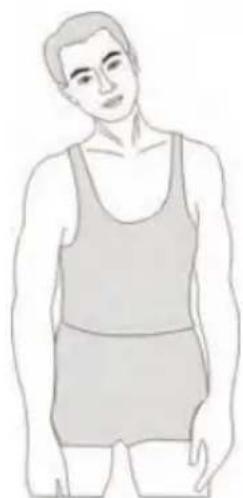
natural_image
Line drawing of a person wearing a tank top and shorts (no text or symbols)Rotación de cuello
natural_image
Silhouette of a person in motion, viewed from behind with arms raised (no text or symbols)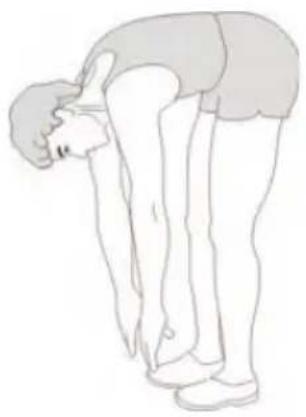
natural_image
Line drawing of a person bending forward with hands on hips (no text or symbols)natural_image
Illustration of a person performing a stretching exercise with arms raised (no text or symbols)Basic precautions should always be followed, including the following safety instructions when using this equipment: Read all instructions before using this equipment.
-
Read all the instructions in this manual and do warm up exercises before using this equipment.
-
Before exercise, in order to avoid injuring the muscle, warm-up exercise of every position of the body is necessary. Refer to Warm Up and Cool Down Routine page. After exercise, relaxation of the body is suggested for cool-down.
-
Please make sure all parts are not damaged and fixed well before use. This equipment should be placed on a flat surface when using. Using a mat or other covering material on the ground is recommended.
-
Please wear proper clothes and shoes when using this equipment; do not wear clothes that might catch any part of the equipment.
-
Do not attempt any maintenance or adjustments other than those described in this manual. Should any problems arise, discontinue use and consult an Authorized Service Representative.
6.Do not use the equipment outdoors.
-
This equipment is for household use only.
-
Only one person should be on the equipment while in use.
-
Keep children and pets away from the equipment while in use. This machine is designed for adults only. The minimum free space required for safe operation is not less than two meters.
-
If you feel any chest pains, nausea, dizziness, or short of breath, you should stop exercising immediately and consult your physician before continuing.
-
The maximum weight capacity for this product is 110kgs.
WARNING:
Before beginning any exercise program consult your physician.
This is especially important for the persons who are over 35 years old or who have pre-existing health problems. Read all instructions before using any fitness equipment.
CAUTION:
Read all instructions carefully before operating this product. Retain this Owner's Manual for future reference.
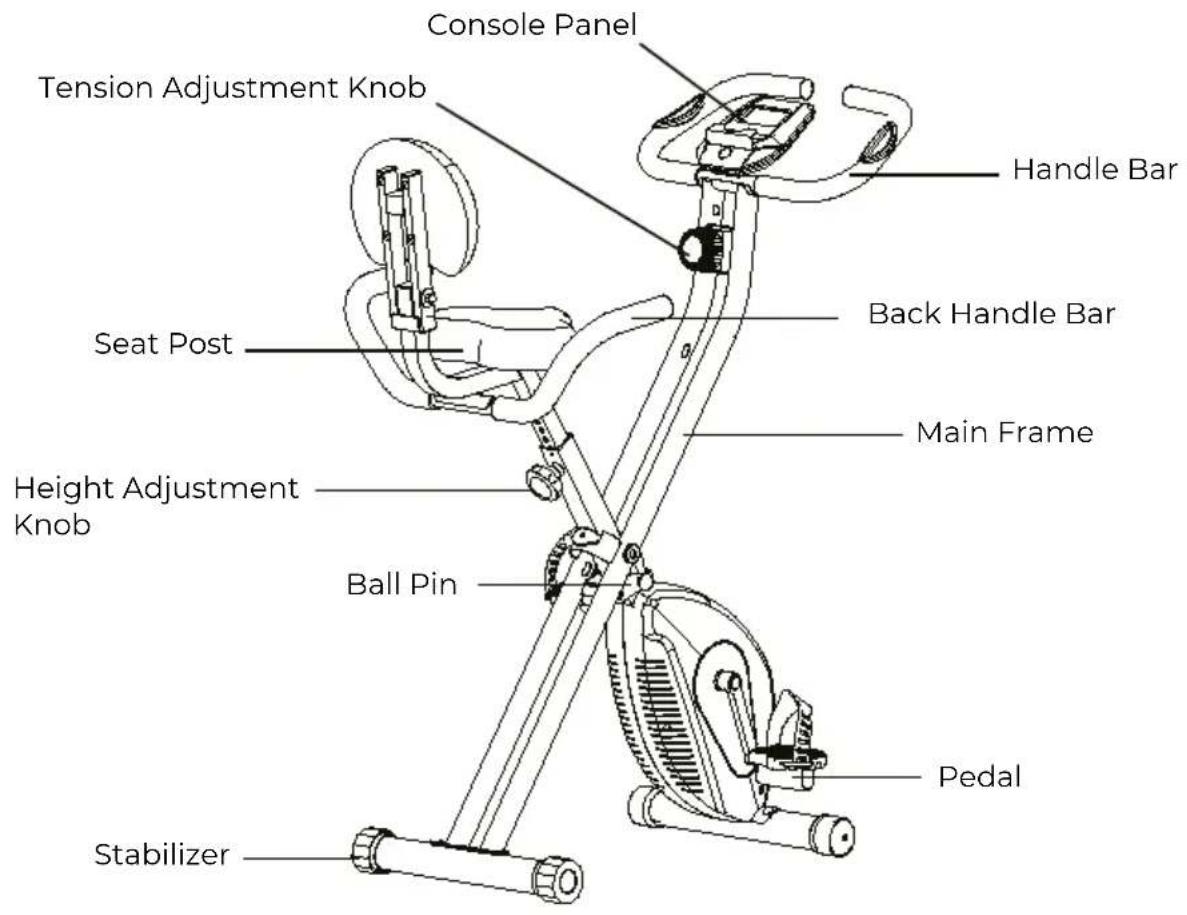
MAIN PARTS LIST
HARDWARE PACKING LIST
A.
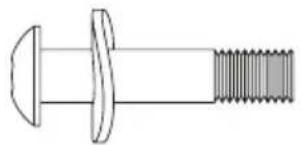
natural_image
Technical line drawing of a bolt with threaded shaft and flange (no text or symbols)- Socket head cap screw
- Curved gasket
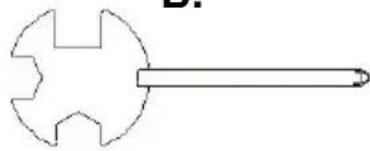
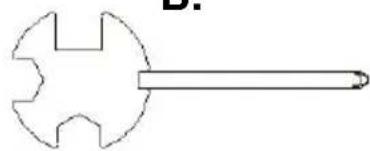
B.
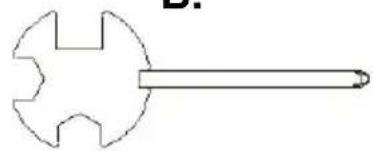
natural_image
Simple line drawing of a hammer with a handle and serrated blade (no text or symbols)Spanner
C.
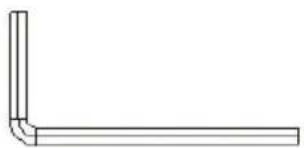
natural_image
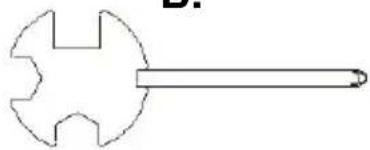
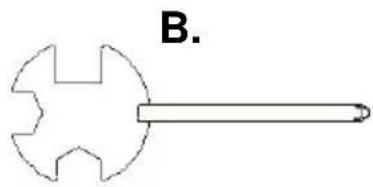
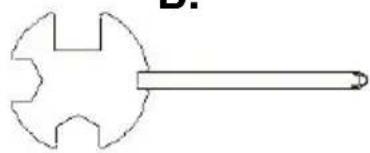
Simple line drawing of a right-angle corner bracket (no text or symbols)Allen wrench
ASSEMBLY INSTRUCTIONS
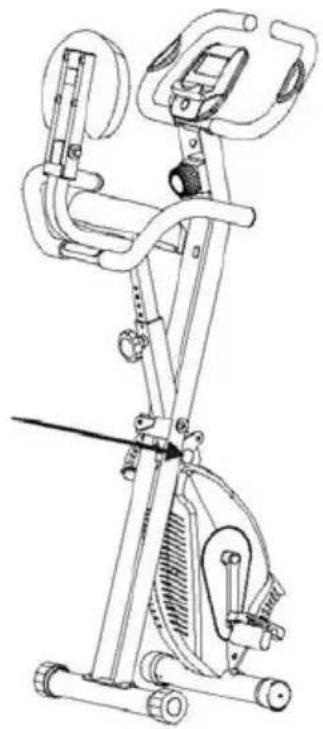
1. Install the Ball Pin
Pull the ball pin out to expand the main frame.
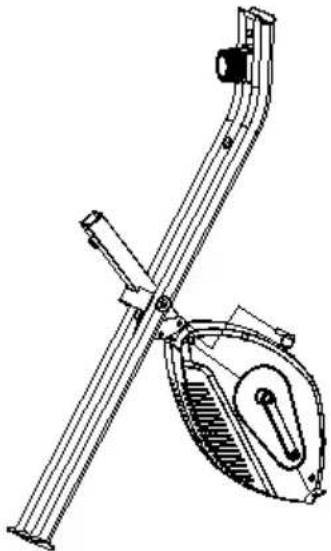
natural_image
Technical line drawing of a mechanical clamp or lever assembly (no text or symbols)2. Install the Front and Rear Stabilizers
Loose the screws in the stabilizer, and insert them into the corresponding grooves and tighten in each stabilizer.

natural_image
Technical line drawing of a mechanical exercise machine (no text or symbols)3. Install the Handlebar and control Panel
Place the handlebar onto the corresponding grooves in the main frame, tighten it with bolts and gaskets. Connect the cords with the corresponding slots, and then place the control panel onto the main frame and tighten.
natural_image
Line drawing of a stationary exercise bike with attached sensor and control panel (no text or symbols)4. Install the Left and Right Pedals
Attach the left/right pedal onto corresponding axles (left pedal with left-hand thread, right pedal with right-hand thread).
natural_image
Line drawing of a stationary exercise bike with adjustable arms and legs (no text or symbols)5. Install the Back Handlebar and Seat Cushion
a) Loose the nylon nut and washer, place the back handlebar onto the triangle plate and tighten.
b) Place the seat cushion onto the late and tighten.
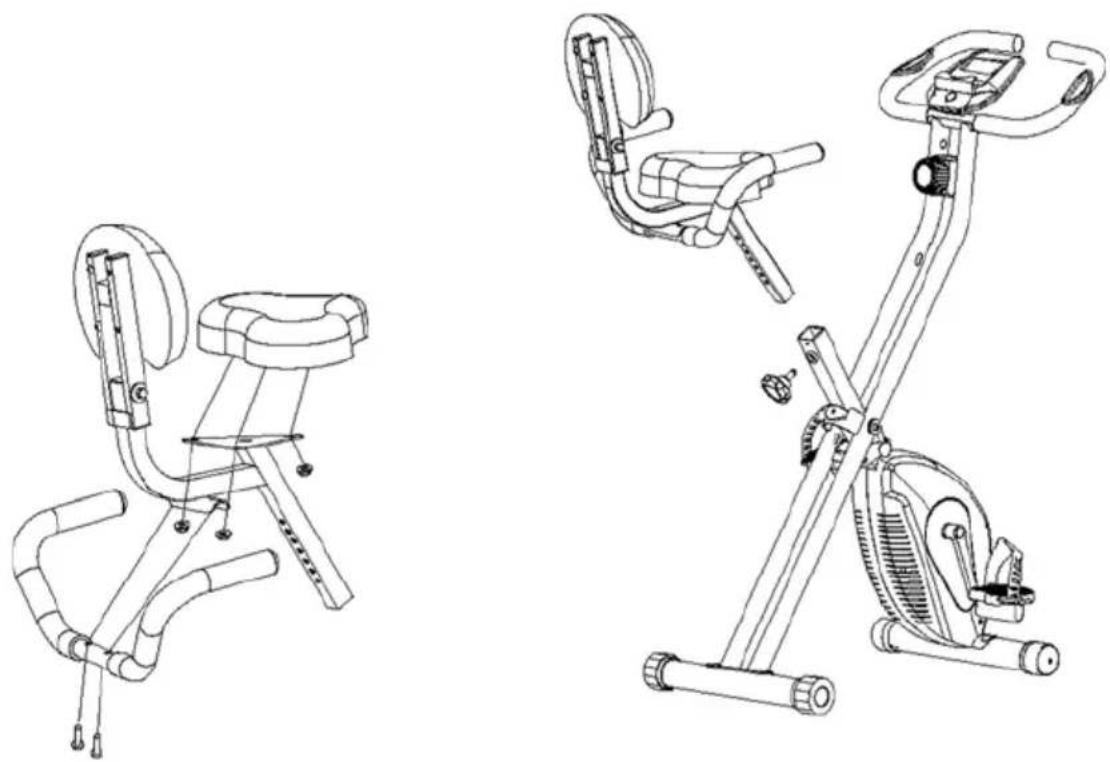
natural_image
Line drawings of two stationary exercise bikes with adjustable arm and seat (no text or symbols)OPERATING INSTRUCTIONS
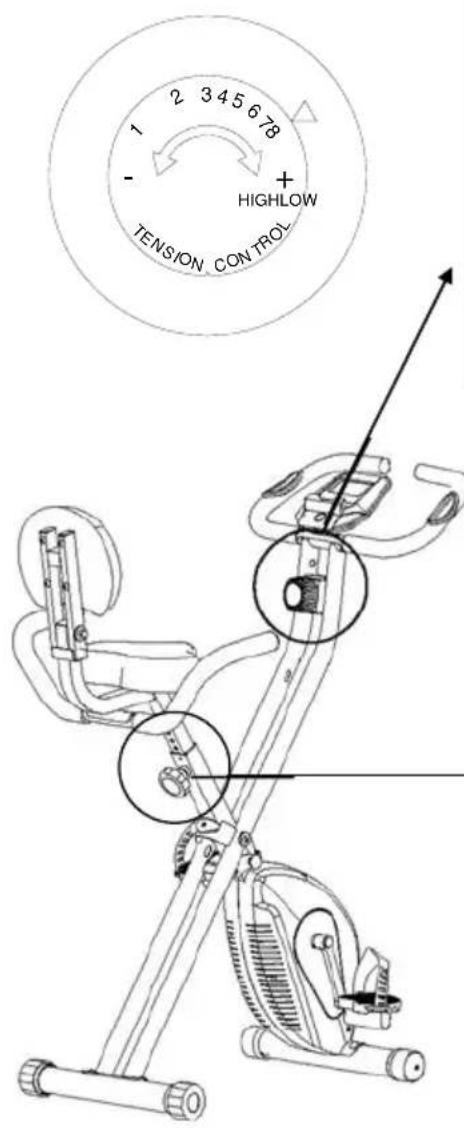
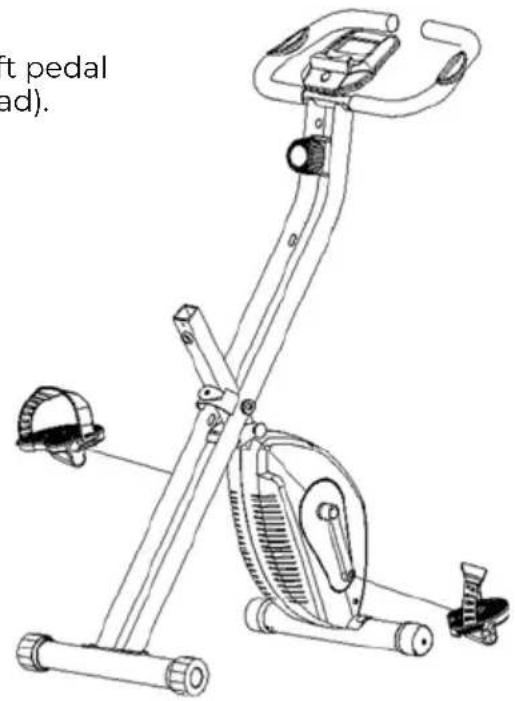
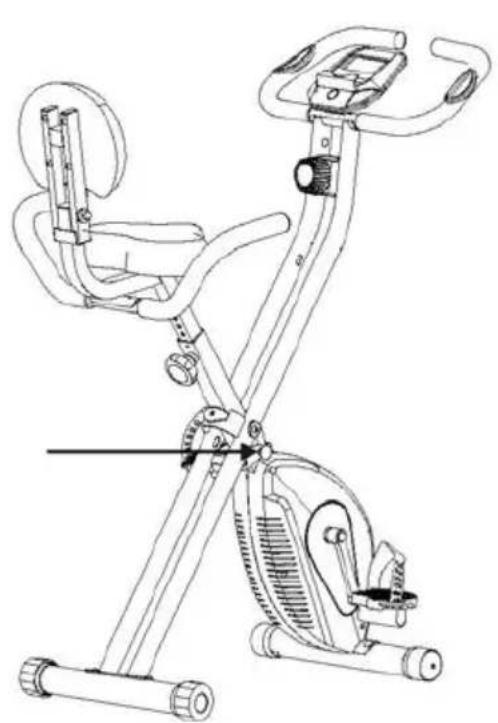
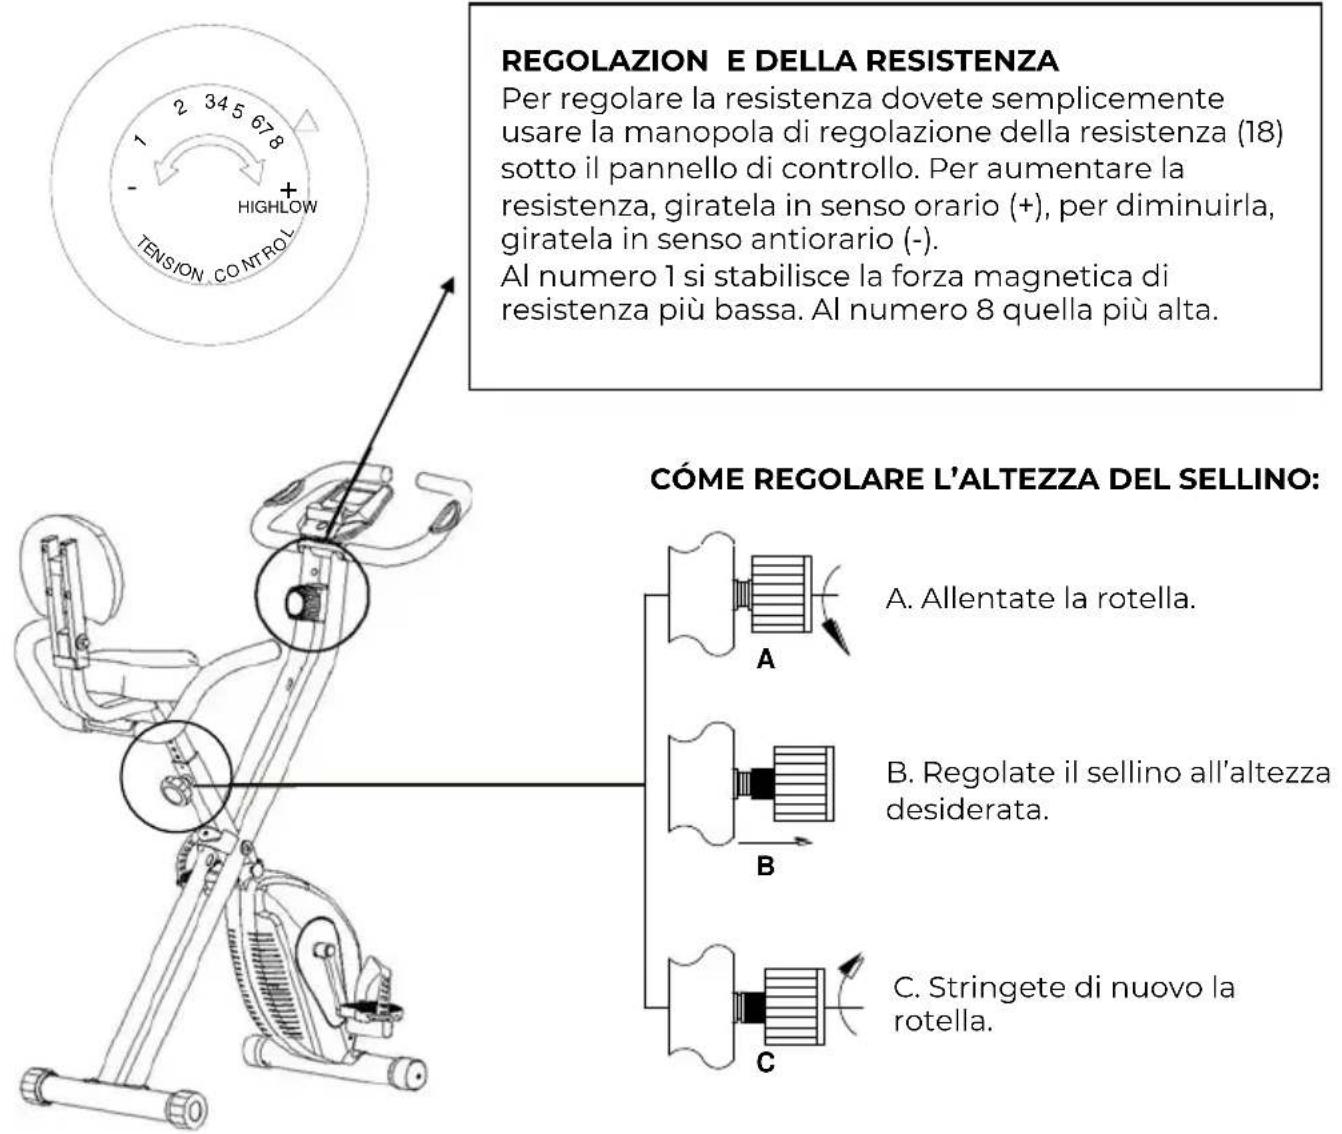
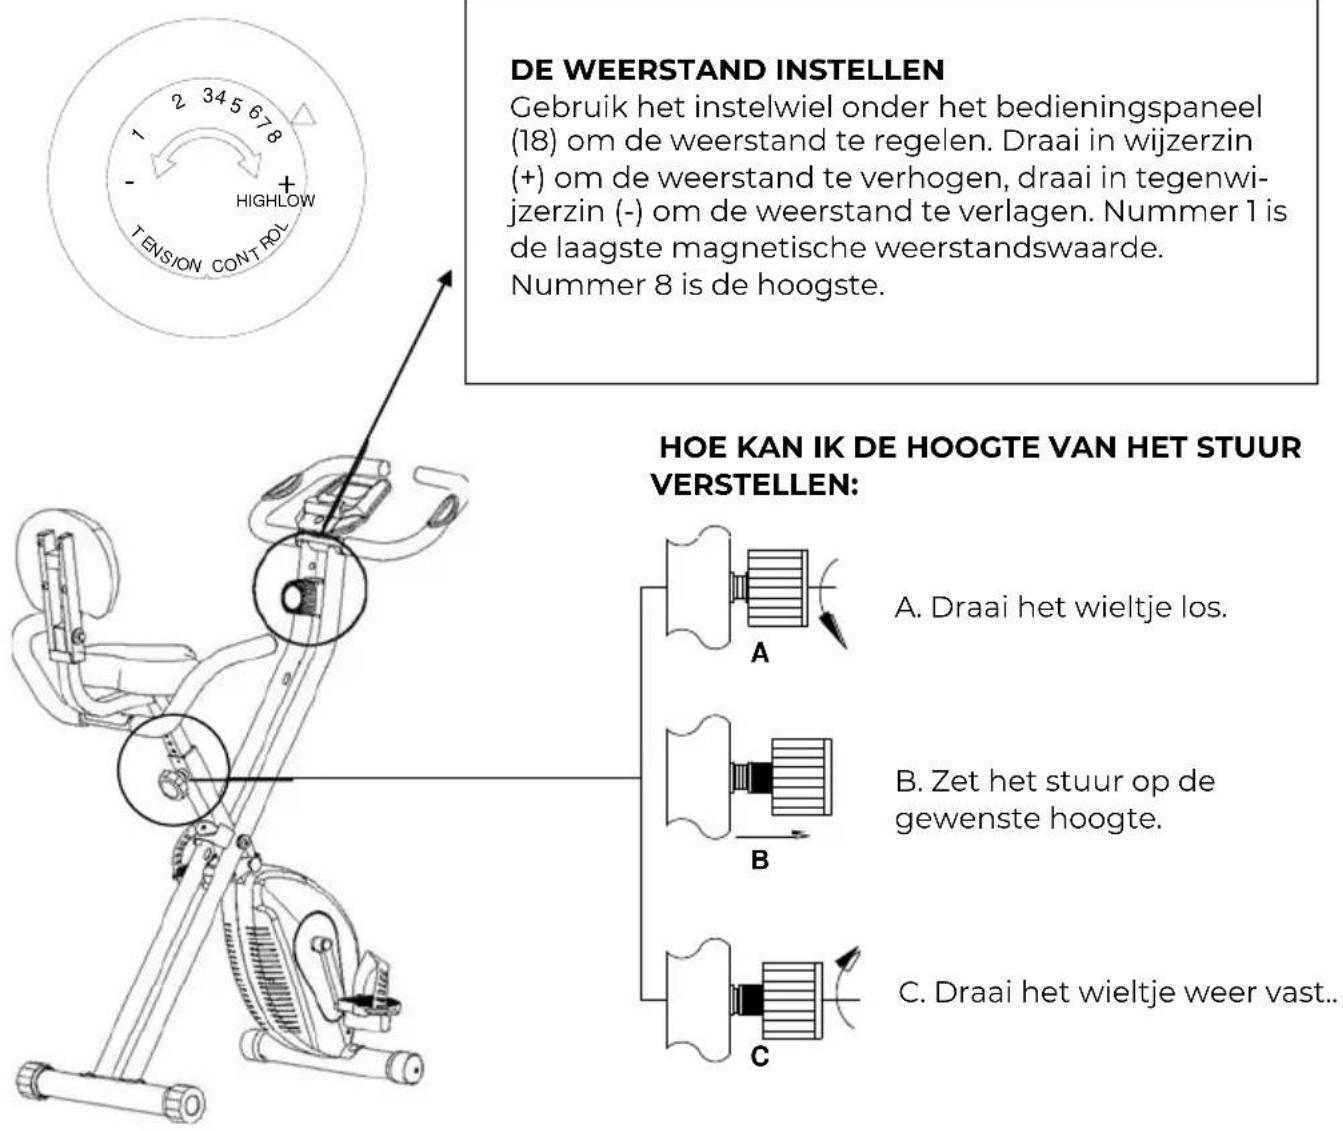
TENSION ADJUSTMENT
For tension adjustment, simply use the tension adjustment knob (18) found beneath the Computer. To increase tension, turn clockwise (+), to decrease tension, turn anti-clockwise (-). It sets the lowest magnetic force on the level 1 It sets the highest magnetic force on the level
HOW TO ADJUST THE SEAT'S HEIGHT:
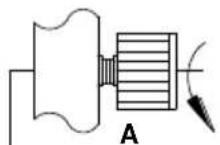
A. Loose the knob off
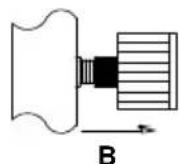
B. Adjust to the required height
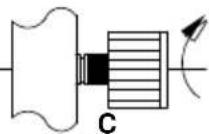
C. Finally tighten the knob
SAFE Storage Instructions
Store your Bike Fit in a dry area away from children and high traffic areas. be sure it is secure and cannot fall forward onto small animals or children.
natural_image
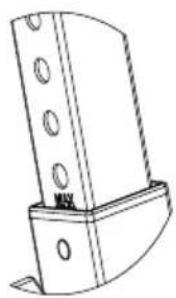
Technical line drawing of a mechanical bracket with circular holes and a base (no text or symbols)CAUTION:
Don't adjust the height of the seat post over the "STOP" marking shown on the seat post. Or it is dangerous.
HOW TO FOLD THE BIKE FIT
natural_image
Line drawing of a stationary exercise bike with adjustable arms and legs (no text or symbols)
natural_image
Line drawing of a stationary exercise machine with adjustable arms and wheels (no text or symbols)Pull out the ball pin, and insert it back after folded.
SPECIFICATIONS:
Press the Mode Button to switch between modes.
Press and hold the Mode Button for 3 seconds to reset all data back to zero.
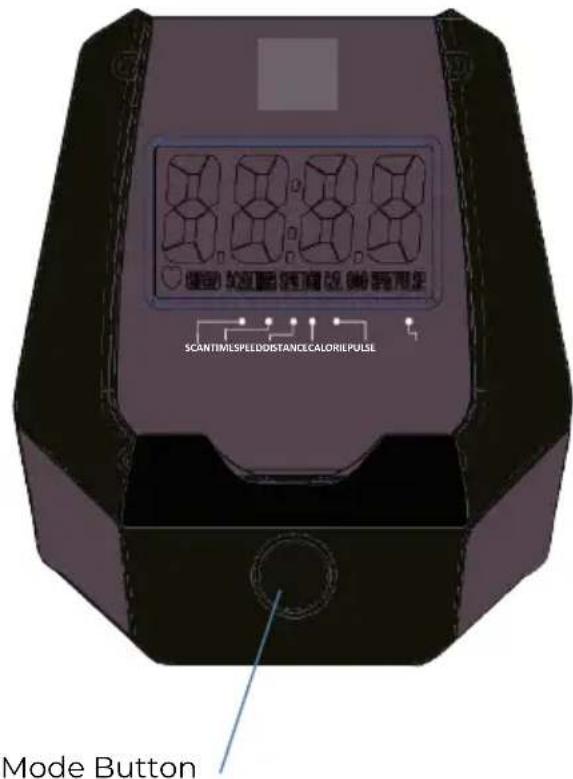
BUTTON FUNCTIONS
| SCAN | Cycles through each mode and displays the value for a few seconds. |
| TIMER | Displays the total length of the current workout. |
| SPEED | Displays the current pedal speed. |
| DISTANCE | Displays the total distance of the current workout. |
| CALORIE | Displays the total estimated calorie burn for the current workout. |
| PULSE | Measures and Displays heartrate during the current workout when hands are res ng on the handlebar sensors. |
| ODO | Displays the total distance |
| RPM | Displays number of repetitions per minute |
BATTERY REPLACEMENT
The Monitor uses two AA batteries. Replace the batteries when the display begins to fade or the values become very inaccurate.
To replace the batteries: Remove the battery cover on the back of the Monitor, install new batteries, ensuring the polarity is in the correct direction, and replace battery cover. When the batteries are removed, all data will be cleared to zero.
Warm Up Exercises
A successful exercise program consists of a warm-up, aerobic exercise, and a cool-down. Do the entire program at least two and preferably three times a week, resting for a day between workouts. After several months, you can increase your workouts to four or five times per week.
Warming up is an important part of your workout, and should begin every session. It prepares your body for more strenuous exercise by heating up and stretching out your muscles, increasing your circulation and pulse rate, and delivering more oxygen to your muscles. At the end of your workout, repeat these exercises to reduce sore muscle problems. We suggest the following warm-up and cool-down exercises:
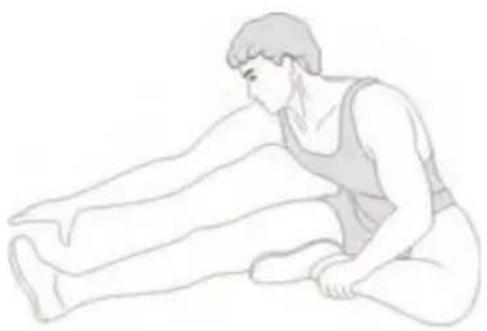
Inner Thigh Stretch
Sit with the soles of your feet together with your knees pointing outward. Pull your feet as close into your groin as possible. Gently push your knees towards the floor. Hold for 15 counts.
natural_image
Line drawing of a person performing a seated stretch or exercise (no text or symbols)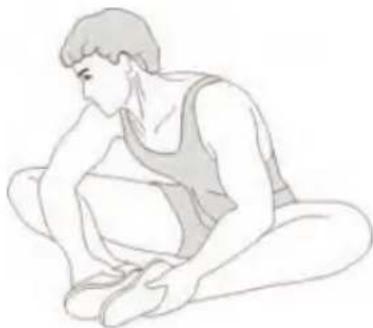
natural_image
Line drawing of a person sitting cross-legged, holding their feet (no text or symbols)Hamstring Stretch
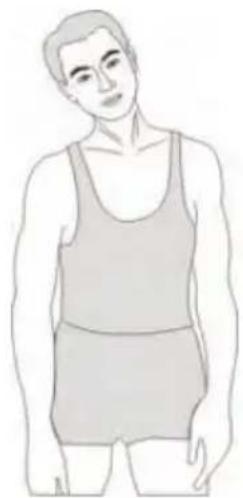
Sit with your right leg extended. Rest the sole of your left foot against your right inner thigh. Stretch toward your toe as far as possible. Hold for 15 counts. Relax and then repeat with left leg extended.
natural_image
Line drawing of a person wearing a tank top and shorts (no text or symbols)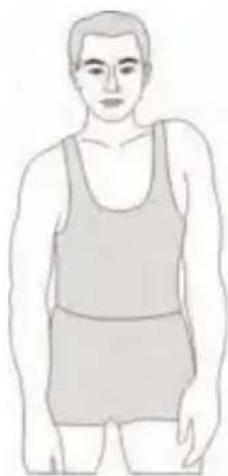
natural_image
Line drawing of a person wearing a tank top and shorts (no text or symbols)Shoulder Lift
Lift your right shoulder up toward your ear for one count. Then lift your left shoulder up for one count as you lower your right shoulder.
Calf-Achilles Stretch
Lean against a wall with your left leg in front of the right and your arms forward. Keep your right leg straight and the left foot on the floor; then bend the left leg and lean forward by moving your hips toward the wall. Hold, then repeat on the other side for 15 counts.

natural_image
Line drawing of a person in motion, viewed from the side (no text or symbols)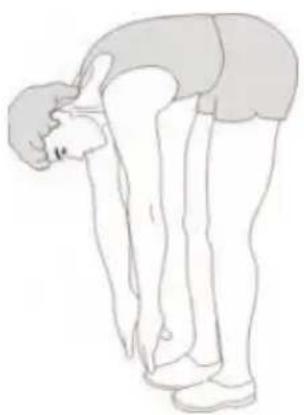
natural_image
Line drawing of a person bending forward with hands on hips (no text or symbols)Toe Touch
Slowly bend forward from your waist, letting your back and shoulders relax as you stretch toward your toes. Reach down as far as you can and hold for 15 counts.
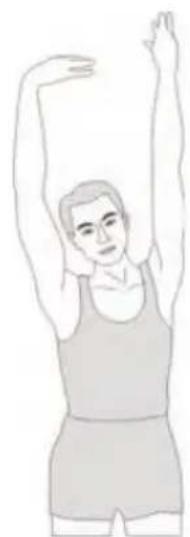
Side Stretch
Open your arms to the side and continue lifting them until they are over your head. Reach your right arm as far upward toward the ceiling as you can for one count. Feel the stretch up your right side. Repeat this action with your left arm.
natural_image
Illustration of a person performing a stretching exercise with arms raised (no text or symbols)TROUBLE SHOOTING GUIDE
- Verify that all the bolts and nuts are locked properly and the turning parts should be turned freely without damaged parts.
- Clean the equipment with soap and slightly damp cloth only. Please do not use any solvent to clean the equipment.
| Problem | Potential Cause | Corrections |
| Base is unstable. | 1.Floor is not flat or there is small object under the front or rear stabilizer.2.The rear stabilizer end caps have not been leveled when adjusting. | 1.Remove the object.2.Adjust the rear stabilizer end caps. |
| Handlebar is shaking. | The Bolts are loose. | Tighten the Bolts. |
| Loud noise from the moving parts. | The interval of the parts is improper tighten. | Open the covers to adjust. |
| No resistance when riding the bike. | 1.The interval of the magnetic resistance increases.2.Tension control knob is damaged.3.Belt slips.4.The bearing set is damaged. | 1.Open the covers to adjust.2.Change the tension control knob.3.Open the covers to adjust.4.Change the bearing set. |
PRODUCT SPECIFICATION
N.W/G.W:17/19.5KG
Max User Weight: 110KGS

This exercise device is designed only for use at home. EXERCISE DEVICES CLASS HC ARE NOT SUITABLE FOR THERAPEUTIC PURPOSES! Your physician should perform a general health examination prior to starting your exercise program and discuss any possible hurt, circulatory or orthopedic issues.
Warranty Policy
This product complies with the warranty law in force in the country of purchase. When you have a problem that you can not solve, you must access the web www.prixton.com and click on the contact option to send us your assistance form.
These technical and electrical specifications are those of typical units and may be changed without prior notice in order to provide improved equipment.
Simplified EU Declaration of Conformity
We, La Trastienda Digital located in Avenida Cervantes 49, módulo 25, Basauri 48970, Bizkaia hereby declare that the following goods, imported and selling at European market:
| BRAND | MODEL DESCRIPTION | CATEGORY | |
| PRIXTON | BIKE FITBF200 | EXERCISE BIKE | FITNESS |
Are in compliance with the EC Council Directive of 2014/53/EU (EM DIRECTIVE) and harmonized standards and with the board of the 16th of April 2014.
The complete text of the UE Declaration of conformity is available anytime at this website address: www.prixton.com
LA TRASTIENDA DIGITAL
PARTES PRINCIPALES

natural_image
Technical line drawing of a bolt with threaded end (no text or symbols)natural_image
Simple line drawing of an L-shaped metal angle (no text or symbols)Clé Allen
B.
natural_image
Simple line drawing of a hammer-like tool with no text or symbolsClé
INSTRUCTIONS DE MONTAGE
natural_image
Technical line drawing of a mechanical device with lever and handle (no text or symbols)natural_image
Technical line drawing of a mechanical device with labeled parts (no text or symbols present)natural_image
Line drawing of a stationary exercise bike with adjustable arms and a small device on top (no text or symbols)natural_image
Line drawing of a stationary exercise bike with adjustable arms and legs (no text or symbols)natural_image
Line drawing of a mechanical device with attached limbs and connectors (no text or symbols)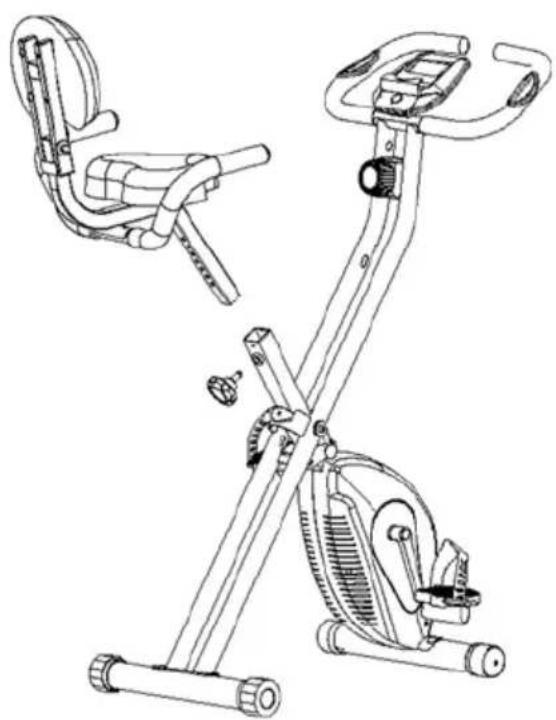
natural_image
Line drawing of a stationary exercise bike with side and front views (no text or symbols)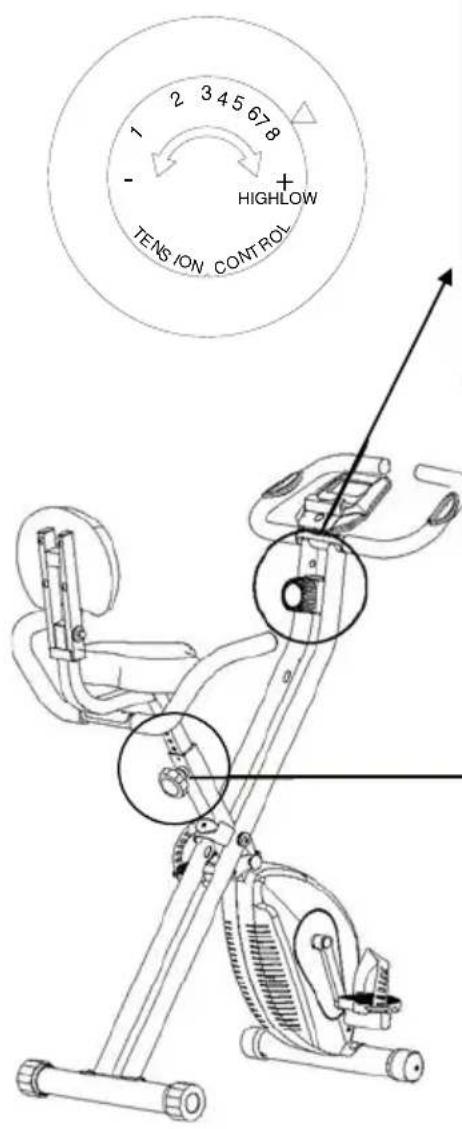
RÉGLAGE DE LA RÉSISTANCE
natural_image
Technical line drawing of a mechanical bracket with circular holes and a base (no text or symbols)ATTENTION:
natural_image
Line drawing of a stationary exercise bike with adjustable arms and legs (no text or symbols)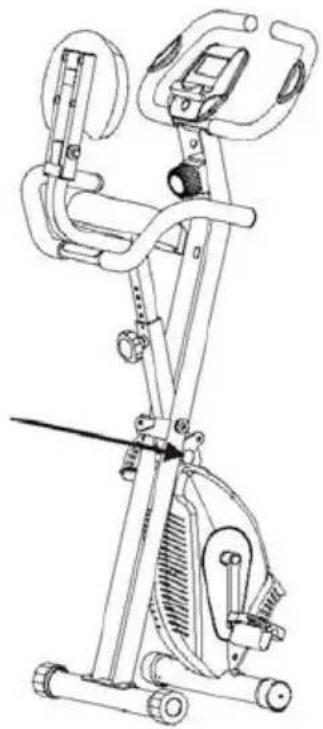
natural_image
Line drawing of a stationary exercise machine with adjustable arms and wheels (no text or symbols)natural_image
Technical line drawing of a bolt and nut assembly (no text or symbols)natural_image
Simple line drawing of an L-shaped metal angle (no text or symbols)Chiave a brugola
natural_image
Simple line drawing of a hammer and sickle (no text or symbols)Chiave
natural_image
Technical line drawing of a mechanical device with curved and linear components (no text or symbols)natural_image
Technical line drawing of a stationary exercise machine (no text or symbols)natural_image
Line drawing of a stationary exercise bike with attached device and control panel (no text or symbols)natural_image
Line drawing of a stationary exercise bike with adjustable arms and legs (no text or symbols)natural_image
Line drawings of two exercise bikes with adjustable arm and seat (no text or symbols)ISTRUZIONI PER L'USO
natural_image
Technical line drawing of a mechanical bracket with mounting holes and a base (no text or symbols)ATTENZIONE:
natural_image
Line drawing of a stationary exercise bike with adjustable arms and legs (no text or symbols)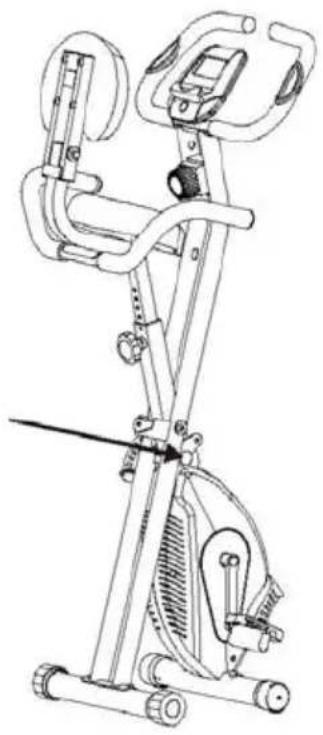
natural_image
Line drawing of a stationary exercise machine with adjustable arms and wheels (no text or symbols)natural_image
Technical line drawing of a bolt and nut assembly (no text or symbols)natural_image
Simple line drawing of an L-shaped metal bracket (no text or symbols)Inbusschlüssel
B.
natural_image
Simple line drawing of a hammer and sickle (no text or symbols)Schlüssel
MONTAGEANWEISUNGEN
natural_image
Technical line drawing of a mechanical device with lever and handle (no text or symbols)natural_image
Technical line drawing of a mechanical device with articulated arms and a central housing (no text or symbols)natural_image
Line drawing of a stationary exercise bike with attached sensor and control panel (no text or symbols)natural_image
Line drawing of a stationary exercise bike with adjustable arms and legs (no text or symbols)natural_image
Technical line drawing of a mechanical device with no visible text or symbols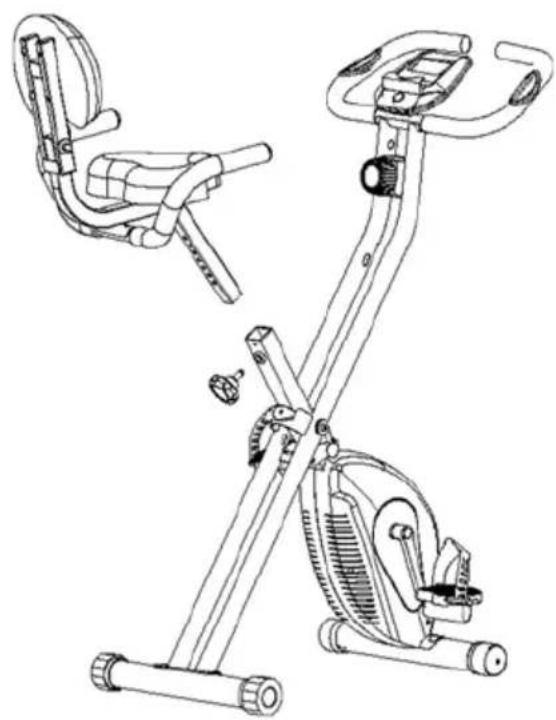
natural_image
Line drawing of a stationary exercise bike with side arm seat and body frame (no text or labels)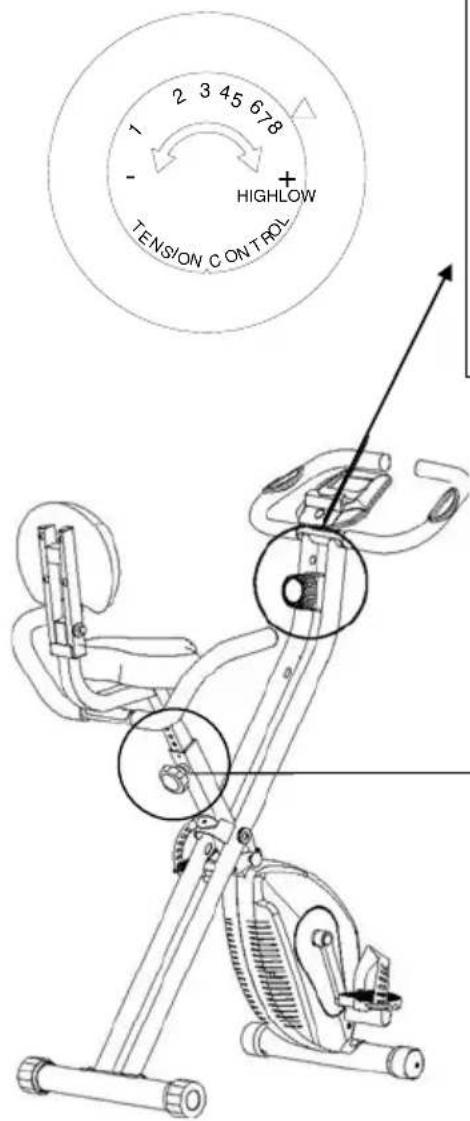
natural_image
Technical line drawing of a mechanical bracket or bracket with circular cutouts (no text or symbols)ACHTUNG:
natural_image
Line drawing of a stationary exercise bike with adjustable arms and legs (no text or symbols)
natural_image
Line drawing of a stationary exercise machine with adjustable arms and legs (no text or symbols)natural_image
Technical line drawing of a bolt with threaded end (no text or symbols)natural_image
Simple line drawing of an L-shaped metal bracket (no text or symbols)Chave Sextavada
B.
natural_image
Simple line drawing of a hammer with a handle and gear (no text or symbols)Schlüssel
INSTRUÇÕES DE MONTAGEM
natural_image
Technical line drawing of a mechanical clamp or lever assembly (no text or symbols)natural_image
Technical line drawing of a mechanical exercise machine (no text or symbols)natural_image
Line drawing of a stationary exercise bike with attached sensor and control panel (no text or symbols)natural_image
Line drawing of a stationary exercise bike with adjustable arms and wheels (no text or symbols)natural_image
Line drawing of a mechanical exercise chair with adjustable arms and legs (no text or symbols)
natural_image
Line drawing of a stationary exercise bike with side and front views (no text or symbols)natural_image
Technical line drawing of a mechanical bracket with circular holes and a base (no text or symbols)CUIDADO:
natural_image
Line drawing of a stationary exercise bike with adjustable arms and legs (no text or symbols)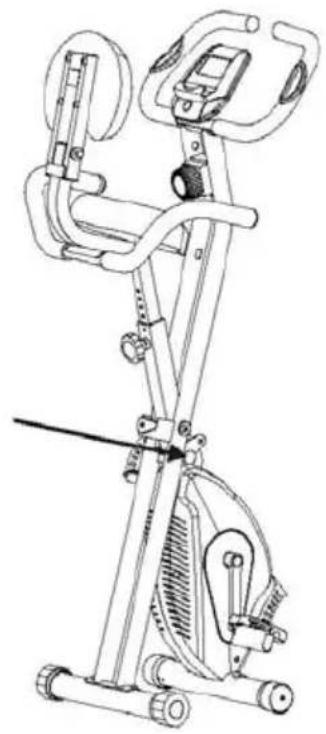
natural_image
Line drawing of a stationary exercise bike with adjustable arms and legs (no text or symbols)natural_image
Technical line drawing of a bolt with threaded shaft (no text or symbols)natural_image
Simple line drawing of an L-shaped metal bracket (no text or symbols)Inbussleutel
B.
natural_image
Simple line drawing of a hammer with a handle and spout (no text or symbols)Sleutel
MONTAGE-INSTRUCTIES
natural_image
Technical line drawing of a mechanical device with lever and handle (no text or symbols)natural_image
Technical line drawing of a mechanical exercise machine (no text or symbols)natural_image
Line drawing of a stationary exercise bike with attached seat and control panel (no text or symbols)natural_image
Line drawing of a stationary exercise bike with adjustable arms and legs (no text or symbols)natural_image
Line drawing of a mechanical device with curved arms and mounting feet (no text or symbols)
natural_image
Line drawing of a stationary exercise bike with side arm seat and backrest (no text or labels)GEBRUIKSINSTRUCTIES
natural_image
Technical line drawing of a mechanical bracket with circular holes and a base (no text or symbols)OPGELET:
natural_image
Line drawing of a stationary exercise bike with adjustable arms and legs (no text or symbols)