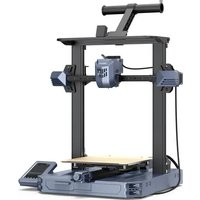
CR-10 Smart - 3D Printer CREALITY - Free user manual and instructions
Find the device manual for free CR-10 Smart CREALITY in PDF.


User questions about CR-10 Smart CREALITY
0 question about this device. Answer the ones you know or ask your own.
Ask a new question about this device
Download the instructions for your 3D Printer in PDF format for free! Find your manual CR-10 Smart - CREALITY and take your electronic device back in hand. On this page are published all the documents necessary for the use of your device. CR-10 Smart by CREALITY.
USER MANUAL CR-10 Smart CREALITY
text_image
CREALITY Create reality, achieve dreams CR-10 Smart CR-10 Smart3D Printer User Manual
FR SET NEED
V1.0
Impression Creality Cloud 43-43
text_image
Technical diagram of a 3D printer with numbered components for identification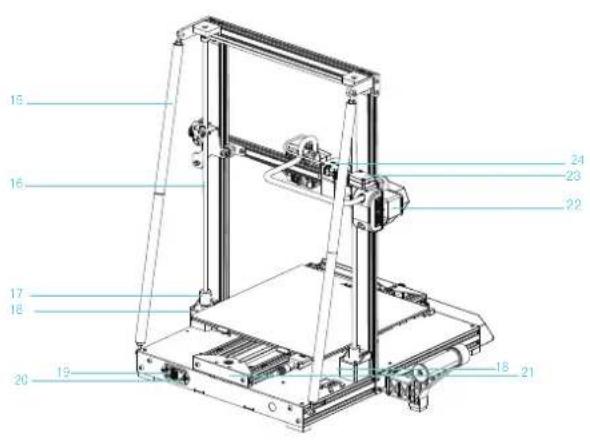
text_image
Technical diagram of a 3D printer with numbered parts labeled for identification.
12 Joint plat large M5 ×2
text_image
Technical diagram of a 3D printer with numbered components for identification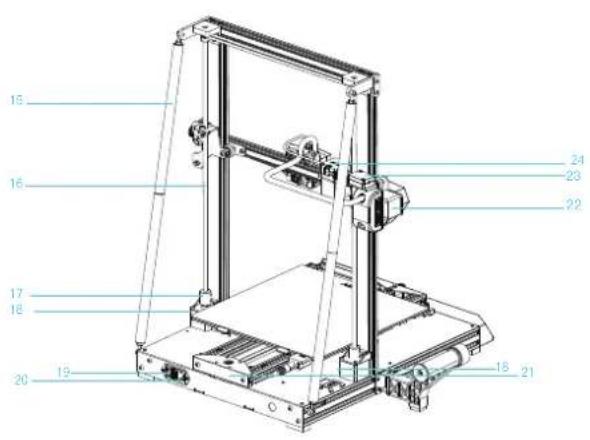
text_image
Technical diagram of a 3D printer with numbered parts labeled for identification.
14 Schraubenschlüssel x 1
text_image
Technical diagram of a 3D printer with numbered components for identification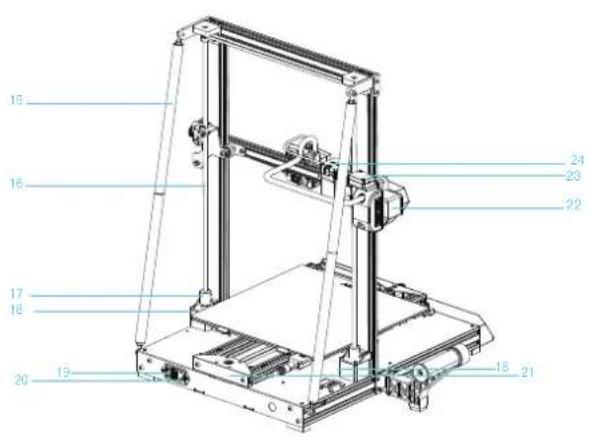
text_image
Technical diagram of a 3D printer with numbered parts labeled for identification.text_image
Technical diagram of a 3D printer with numbered components for identification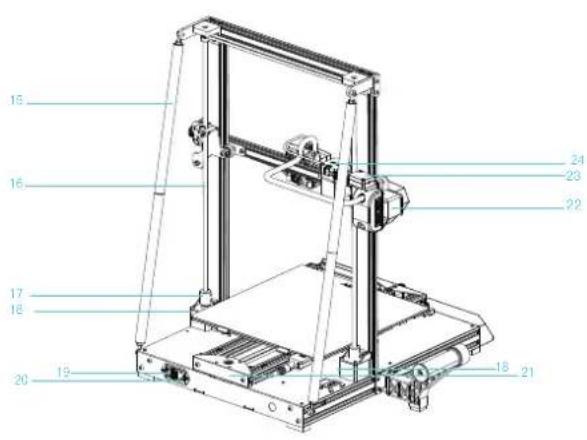
text_image
Technical diagram of a 3D printer with numbered parts labeled for identification.Thank you for choosing our products. For the best experience, please read the instructions before operating the Printer.
Our teams will always be ready to render you the best services. Please contact us via the phone number or e-mail address provided at the end when you encounter any problem with the Printer. For a better experience in using our product, you can also learn how to use the printer in the following ways:
View the accompanied instructions and videos in the storage card.
Visit our official website www.creality.com to find relevant software/hardware information, contact details and operation and maintenance instructions.
Firmware Upgrade
Please login the official website https://www.creality.com/download, switch the language and select the relevant printer and model and download the required firmware, you can use it after the installation is finished.
NOTES
Do not use the printer any way other than described here in order to avoid personal injury or property damage.
Do not place the printer near any heat source or flammable or explosive objects. We suggest placing it in a well-ventilated, low-dust environment.
Do not expose the printer to violent vibration or any unstable environment, as this may cause poor print quality.
4 Before using experimental or exotic filaments, we suggest using standard filaments such as ABS or PLA to calibrate and test the machine.
Do not use any other power cable except the one supplied. Always use a grounded three-prong power outlet.
6 Do not touch the nozzle, printing surface or motor during operation as they may be hot. Keep hands away from machine while in use to avoid burns or personal injury.
7 Do not wear gloves or loose clothing when operating the printer. Such cloths may become tangled in the printers moving parts leading to burns, possible bodily injury, or printer damage.
When cleaning debris from the printer hotend, always use the provided tools. Do not touch the nozzle directly when heated. This can cause personal injury.
Clean the printer frequently. Always turn the power off when cleaning, and wipe with a dry cloth to remove dust, adhered printing plastics or any other material off the frame, guide rails, or wheels. Use glass cleaner or isopropyl alcohol to clean the print surface.
10 Children under 10 years old should not use the printer without supervision.
This machine is equipped with a security protection mechanism. Do not manually move the nozzle or printing platform mechanism manually while booting up, otherwise the device will automatically power off for safety.
Users should comply with the laws and regulations of the corresponding countries and regions where the equipment is located (used), abide by professional ethics, pay attention to safety obligations, and strictly prohibit the use of our products or equipment for any illegal purposes. Creality will not be responsible for any violators' legal liability under any circumstance.
Contents
Introduction 28-28.
Parameters 29-29
Parts List 30-30
Assemble the 3D Printer 31-35
Use the 3D Printer 36-41
Pairing via Bluetooth 42-42
Creality Cloud print 43-43
Off-line print 44-45
Start print 46-46
Network reset 47-47
Printer maintenance 48-48
Wiring Connection 49-49
Troubleshooting 50-50
1. Introduction
text_image
Technical diagram of a 3D printer with numbered components for identification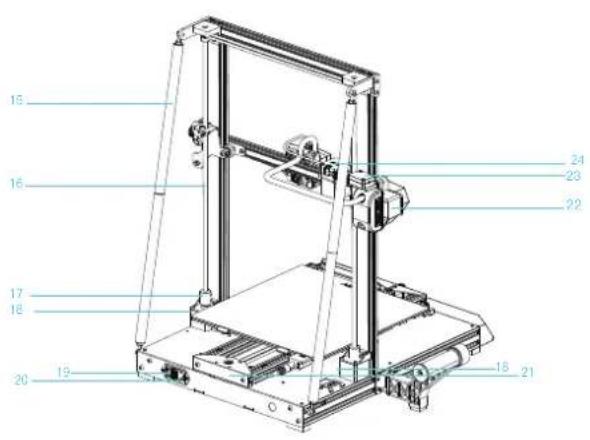
text_image
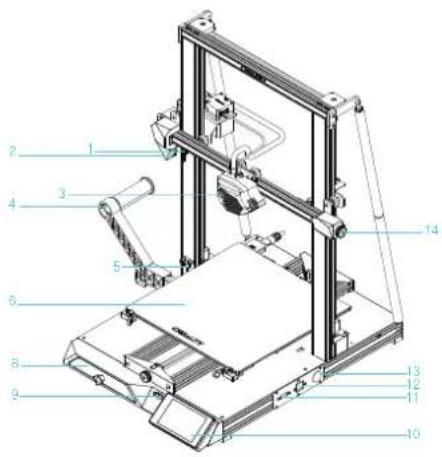
Technical diagram of a 3D printer with numbered parts labeled for identification.1 X Limit Switch
2 Spotlight
3 Nozzle Kit
4 Feeding holder components
5 Z-axis photoelectric switch
6 Printing Platform
7 Y-axis belt adjusting knob
8 Tool Box
9 Storage Card Slot
10 Touch screen
11 USB interface
12 Network Interface
13 Power-on button
14 X-axis belt adjusting knob
15 Pull rod
16 Screw rod
17 Coupling
18 Z-axis motor
19 Power switch
20 AC power supply
21 Y-axis Motor
22 X-axis Motor
23 Filament Detector
24 Extruder Motor
- Equipment parameters
| Basic Parameters | |
| Model CR-10 Smart | |
| Printing Size | 300*300*400mm |
| Molding Tech | FDM |
| Nozzle Number | 1 |
| Slice Thickness | 0.1mm-0.4mm |
| Nozzle Diameter | Standard 0.4mm |
| Precision | ±0.1mm |
| Filament | 1.75mm PLA/ABS/TPU/PETG/Wood |
| File Format | STL/OBJ/AMF |
| File Transfer | Wifi/Storage card |
| Slice Software | Creality Slicer/Cura/Repetier-Host/Simplify3D |
| Power Supply | Input: AC100-240V 50/60Hz Output: DC 24V |
| Total Power | 350W |
| Bed Temp | ≤100°C |
| Nozzle Temp | ≤260°C |
| Resume Printing | Yes |
| Filament Detector | Yes |
| Dual Z-axis | Yes |
| Auto Leveling | Yes |
| Language | English |
| Printing Speed | 80-100mm/s |
3. Package Content
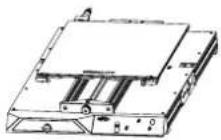
1 Base Frame x 1
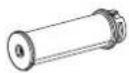
6 Spool x 1

11 M5x20 Hexagon flat round head screws x2
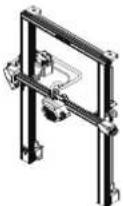
2 Gantry Frame x 1

7 Filament x 1

12 M5 Large Flat gasket×2
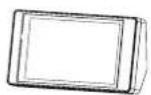
3
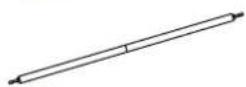
8 Pull rods x 2
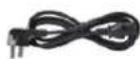
4 Power Cord × 1

9 M5x45 Sems Screw ×4
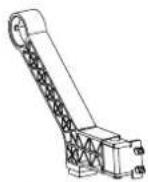
5 Rack x 1

10 M5×12 Hexagon flat round head screw x2

13 Spade x 1

14 Wrench x 1

Tool list

15 Socker Spanner x 1

16 Nozzle Cleaner x 1

17 Diagonal Pliers x 1

18 Allen wrench x 1

19 Storage Card &x 1 Card Reader

20 Quick Connect Buckles x 2

21 Quick Release Claw x 2

22 Nozzles x 2

23 Threading fixture x 1
4. Install the Gantry Frame
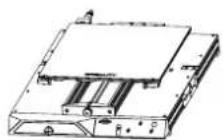
1
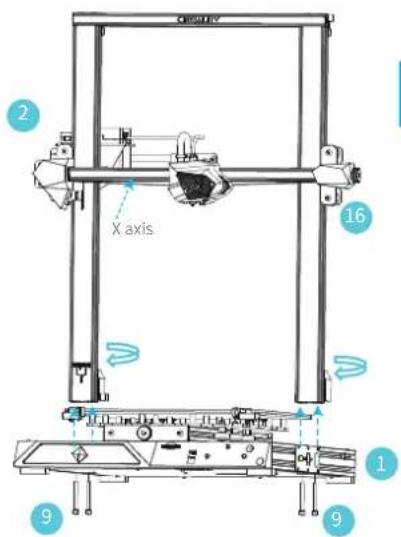
Base Frame x 1
2
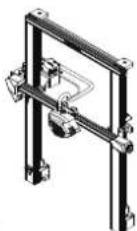
Gantry Frame x 1

9
M5x45 Sems Screw ×4
text_image
CHSALCY X axis 16 2 9 1 9
Twist the coupling to raise the X axis to the position shown in Figure 16.
natural_image
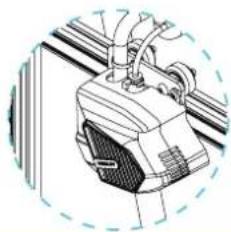
Technical line drawing of a mechanical device with no visible text or symbolsFix the lines on the nozzle kit with a black rolling belt as shown in the figure and re-fix it if any re-assembly before operation.
natural_image
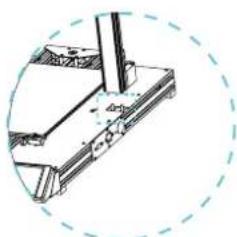
Technical line drawing of a mechanical component with a circular dashed outline (no text or symbols)Two Z-axis profiles, installed on the inner step of the Y-axis bottom profile.
5. Pull Rod Installation
Adjust the proper length of assembled pull rod and install in the position shown in the figure

10 M5×12 Hexagon flat round head screw x2

11 M5x20 Hexagon flat round head screws x2

12 M5 Large Flat gasket×2
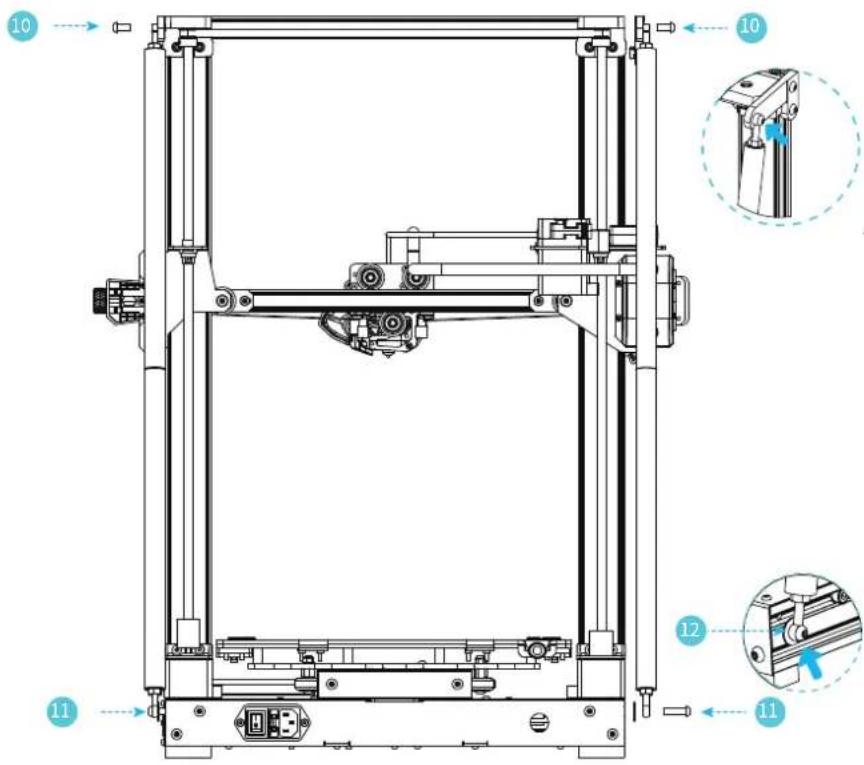
text_image
Technical diagram of a mechanical assembly with numbered components and an inset close-up view highlighting a specific component.6. Install the Rack
Follow the installation diagram to assemble the rack on the left of the machine.
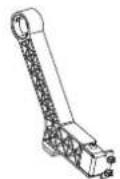
5 Rack × 1
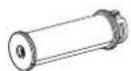
6 Spool x 1
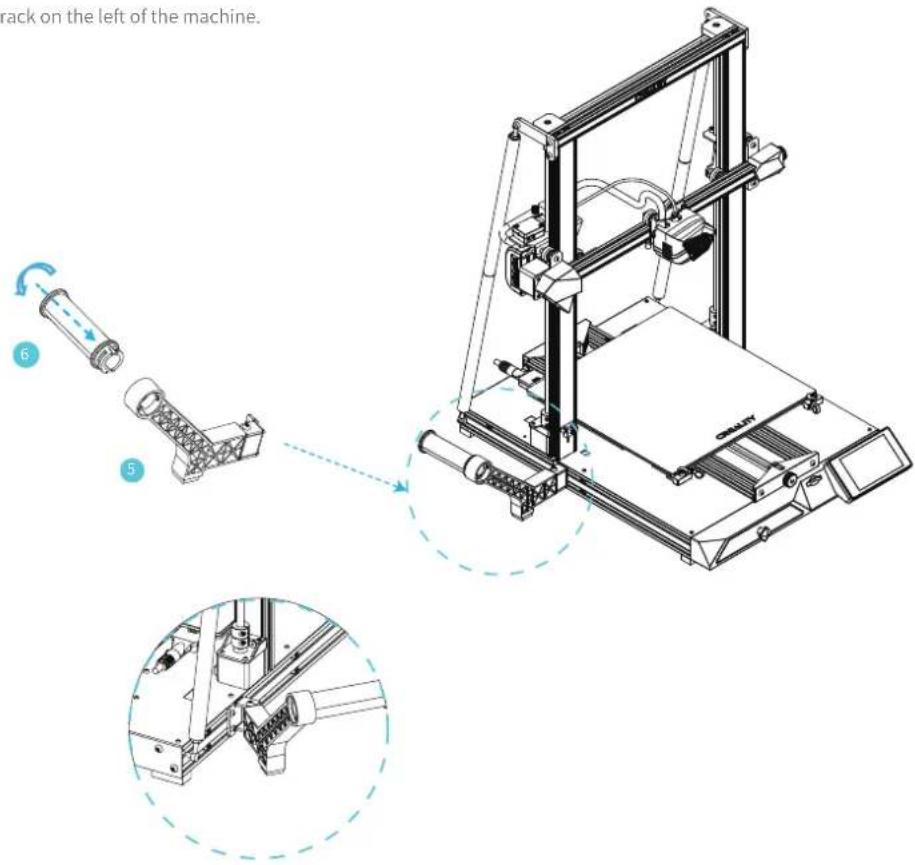
text_image
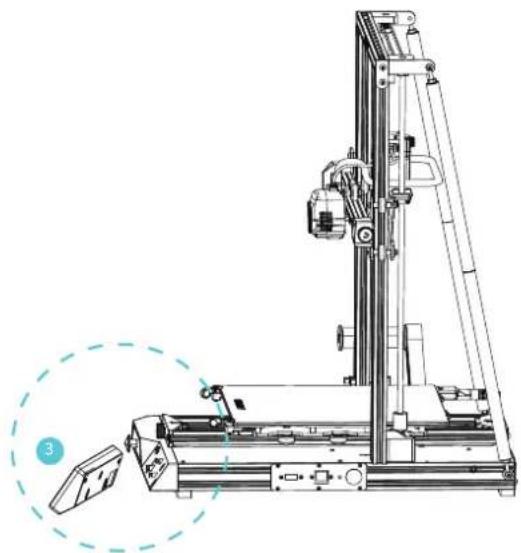
rack on the left of the machine.7. Install the touch screen
3
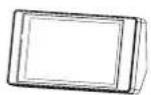
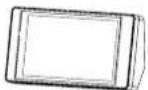
Touch screen
- Connect the FFC on the base with the touch screen.
- Fix the three screen locks on the touch screen to the studs of the base and press them into place.
natural_image
Technical line drawing of a mechanical device with a highlighted section (no text or symbols)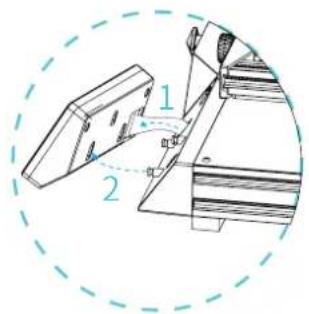
text_image
Technical diagram showing a mechanical assembly with labeled components and dimension annotations
Caution
- Do not connect or disconnect the cables when the machine is powered on.
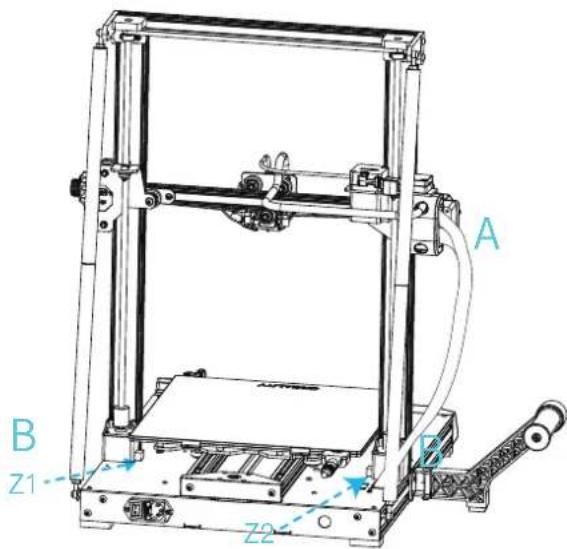
8. Cable Connection
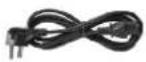

Power Cord x 1
text_image
A B Z1 Z2C
natural_image
Pure mechanical assembly diagram without any text, numbers, or symbolsD
natural_image
Technical diagram of a mechanical assembly with no visible text or symbolsE
natural_image
Technical line drawing of a mechanical assembly with conveyor belts and a vertical support (no text or symbols)A. Connect the 15pin port to the nozzle adapter board as shown in the figure
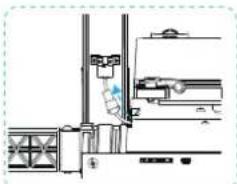
B、Connect Z-axis motor cable
C. Connect the photoelectric switch wire
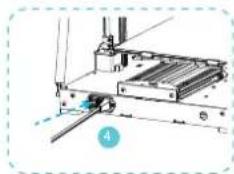
D、Connect it to the power cord and turn on the power
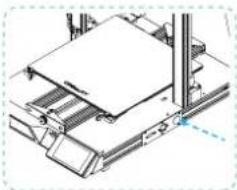
E. Long press the power button and wait the display screen to start

Caution
- Do not connect or disconnect the cables when the machine is powered on.
9. Bed Leveling
- Slelet "Level" to automatically level
- After the leveling is completed, adjust the Z-axis compensation value according to the adhesion of the printing consumables and the glass
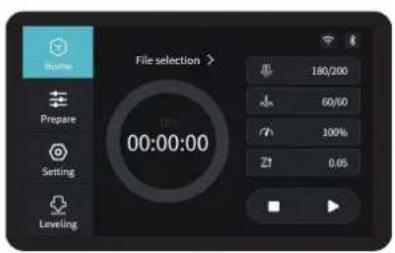
text_image
File selection > Prepare Setting Leveling 180/200 60/60 100% 21 0.05
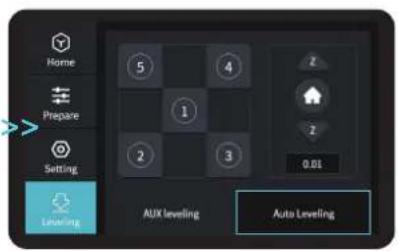
text_image
Home Prepare Setting Leveling AUX leveling Auto leveling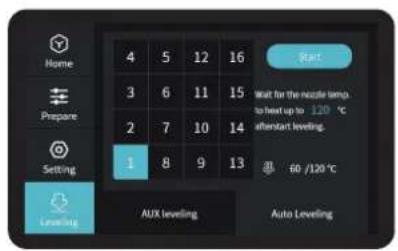
text_image
Home Prepare Setting Leveling 4 5 12 16 3 6 11 15 2 7 10 14 1 8 9 13 Aux leveling Auto Leveling Start Wait for the nozzle temp. to heat up to 120 °C afterstart leveling. 60 /120°C
During the leveling process, please do not touch the Teflon tube and nozzle cable.
10. Preheating Method
Method 1
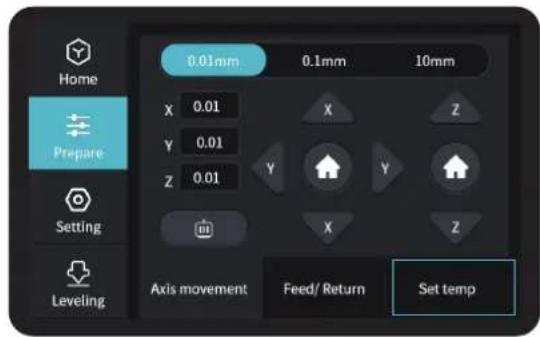
text_image
Home Prepare Setting Leveling 0.01mm 0.1mm 10mm X 0.01 X Z Y 0.01 Z 0.01 Y Y m X Z Axis movement Feed/ Return Set temp
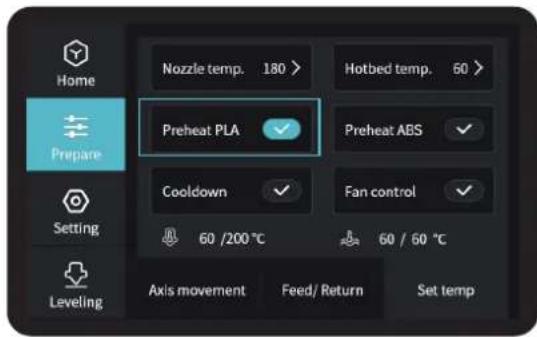
text_image
Home Nozzle temp. 180 > Hotbed temp. 60 > Preheat Preheat PLA ✓ Preheat ABS ✓ Cooldown ✓ Fan control ✓ Setting 60 /200 °C 60 / 50 °C Leveling Axis movement Feed/ Return Set temp
Notes: The interface of the manual of instruction is only for reference, and the actual interface shall be subject to the display of the machine.
10. Preheating Method
Method 2
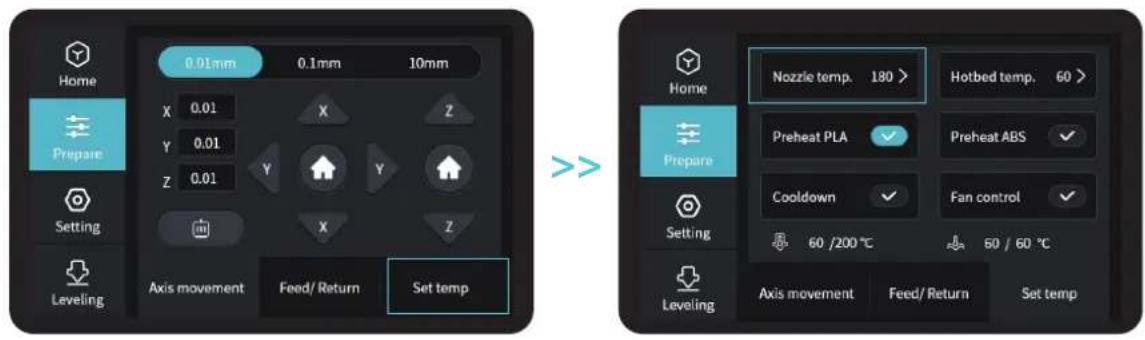
text_image
Home 0.01mm 0.1mm 10mm Prepare X 0.01 X Z Y 0.01 Z 0.01 Y Y Setting Leveling Axis movement Feed/ Return Set temp Home Nozzle temp. 180 > Hotbed temp. 60 > Preheat PLA Preheat ABS Cooldown Fan control 60 /200 °C 50 / 60 °C Leveling Axis movement Feed/ Return Set temp
Notes: The print preheating standard is adjusted at the factory, PLA preheating standard: nozzle temperature 200°, hot bed temperature 60°, ABS preheating standard: nozzle temperature 240°, hot bed temperature 70°. If you need to adjust it due to printing materials or other reasons, you can adjust the parameters on the interface home page control → temperature → PLA / ABS preheat setting.
11. Load Filament
When you wait for the temperature to rise, hang the filament over the Filament Holder.
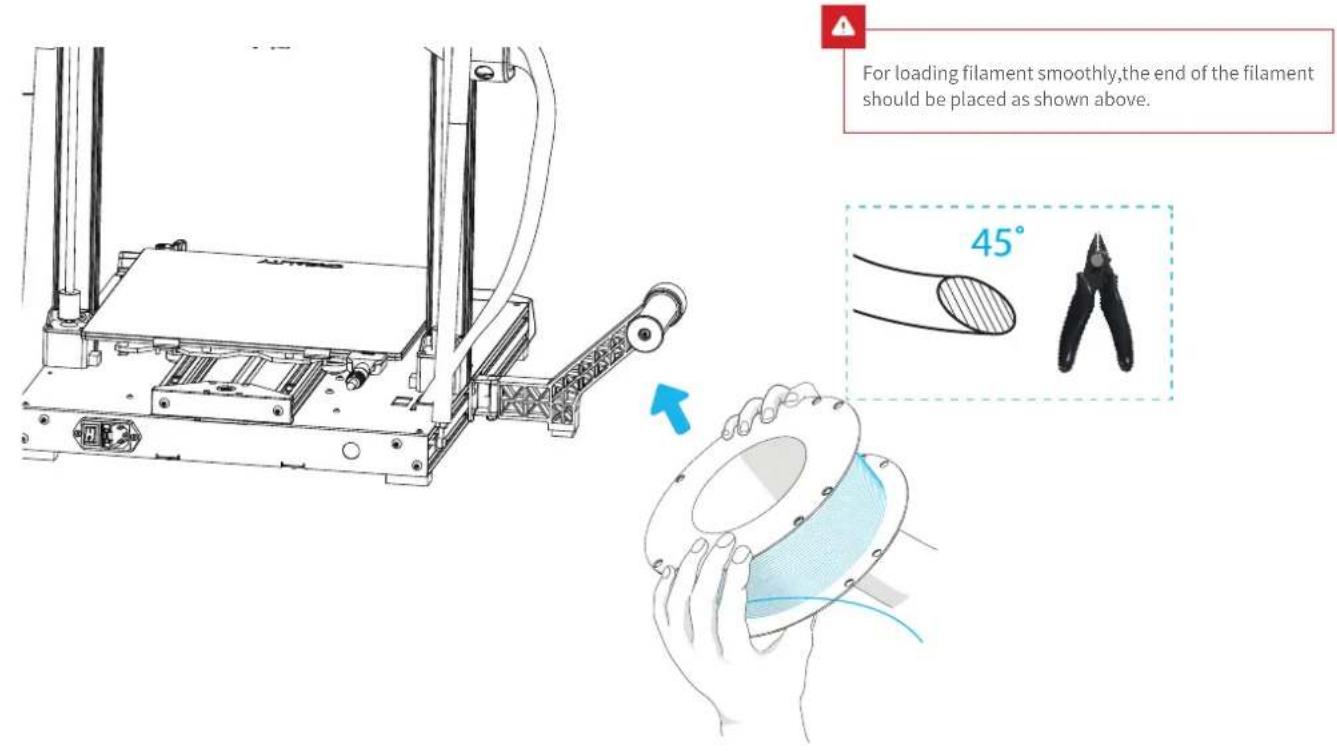
text_image
For loading filament smoothly, the end of the filament should be placed as shown above. 45°11. Load Filament
Installation method of threading fixture:

23 Threading fixture x 1
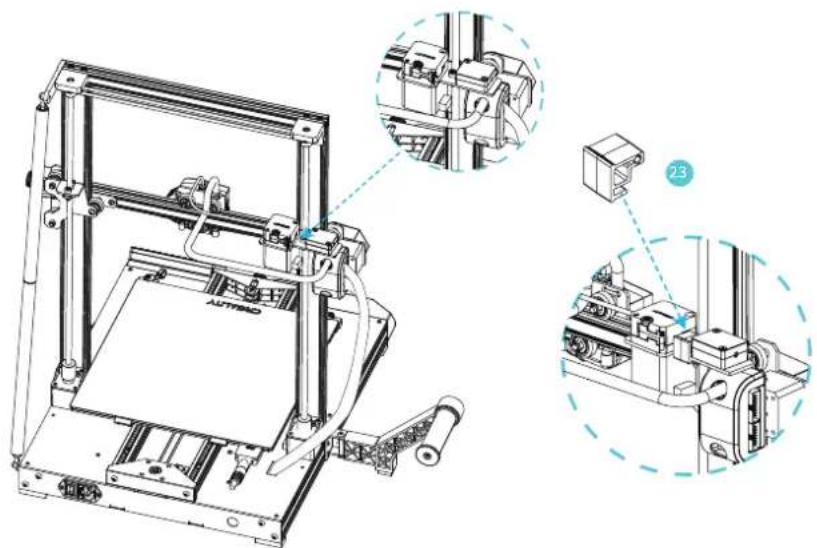
natural_image
Technical line drawing of a 3D printer assembly with mechanical components and exploded views (no text or symbols)-
Clamp the threading fixture to the position shown in the figure as the figure shows.
-
Thread the consumable through the consumable run-out detection box, then the threading fixture and finally into the extruder.
11. Load Filament
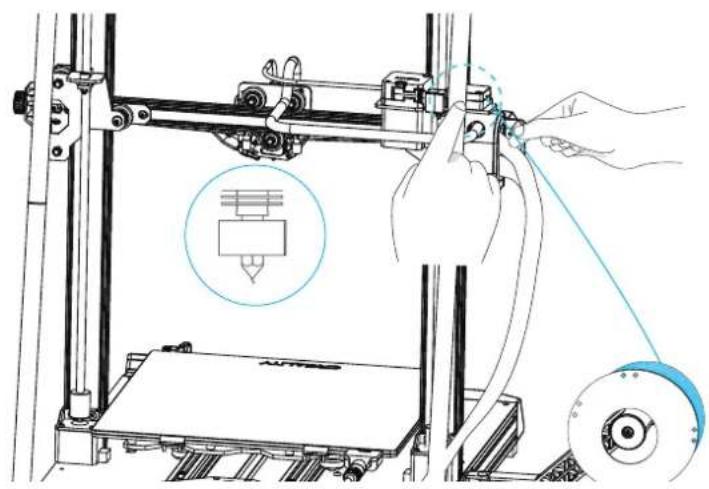
When it reaches the target temperature, insert the filament into the small hole of the Extruder until it reaches the nozzle through the filament cutting detection module. If the filament flows out from the nozzle, it presents that the filament is properly loaded.
The method of extrusion spring adjustment: turn right to loosen turn left to tighten (as shown in Fig. A)
natural_image
Illustration of a 3D printer with hands operating the frame and a magnified inset showing a mechanical component (no text or symbols present)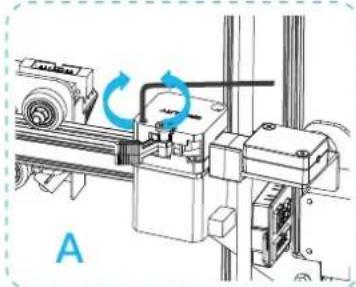
natural_image
Mechanical assembly diagram showing a rotating component with blue arrows indicating motion (no text or symbols)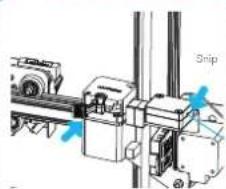
text_image
SnipBefore loading the filament

Complete loading the filament

Tips: How to replace the filament?
- Cutting filament near the Extruder and slowly feed new filament until they are fed into the new filament.
- Withdrawing the filament quickly and feeding the new faliment after nozzle preheated and filament pushed a little forward.
12. Pairing via Bluetooth
text_image
Create Cloud Create Cloud Create Cloud Create Cloud- Download Creality Cloud

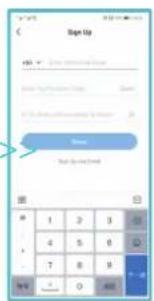
text_image
Begin Up +/- None Sign Up or Sign Up Enter My Phone to Check Enter My Phone to Print Cancel Cancel Next Call 1 2 3 4 5 6 7 8 9 OK Cancel- Register 3. Log in 5. Add equipment

text_image
Hi, there. Welcome to Creality Cloud.
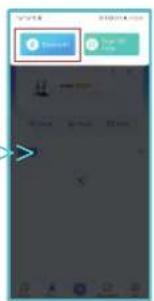
text_image
Mobile app interface screenshot showing a login button and navigation icons- Scan QR Code
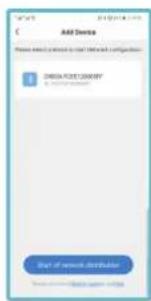
text_image
ADD Devices Please add a new device to your network and configuration. ADD DOOR FREE OFF & 100% access Add of new devices Add of new devices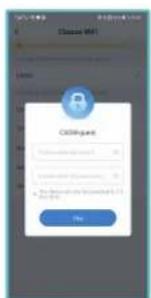
text_image
Crossing COSING Accessing Access to Crossing Access to Crossing Access to Crossing File- Connect to local WiFi 8. Select in Schiont model

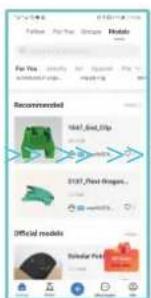
text_image
Follow For You Recommended $147,500 $137,000 Official models Singular Pack
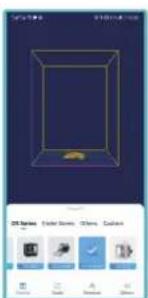
text_image
Mobile app interface screenshot showing a 3D model selection panel with icons and status bar at bottom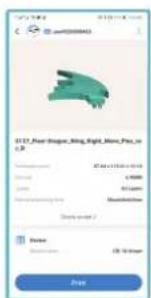
text_image
3D1_Fuel-Grape_Ming Right_Mine_Pie_in_0.0 Name: 3D1_Fuel-Grape_Ming Right_Mine_Pie_in_0.0 File Edit View Help Name: 3D1_Fuel-Grape_Ming Right_Mine_Pie_in_0.0 File Edit View Help Name: 3D1_Fuel-Grape_Ming Right_Mine_Pie_in_0.0 File Edit View Help Name: 3D1_Fuel-Grape_Ming Right_Mine_Pie_in_0.0 File Edit View Help Name: 3D1_Fuel-Grape-Ming Right_Mine_Pie_in_0.0 File Edit View Help Name: 3D1_Fuel-Grape-Ming Right_Mine_Pie_in_0.0 File Edit View Help Name: 3D1_Fuel-Grape-Ming Right_Mine_Pie_in_0.0 File Edit View Help Name: 3D1_Fuel-Grape-Ming Right_Mine_Pie_in_0.0 Fruit- Printing

text_image
Close Screen Please make sure that the check the mask can be put on your phone, after making print you first. Do you miss what printing? Cancel Cancel- Select device 11. Start printing
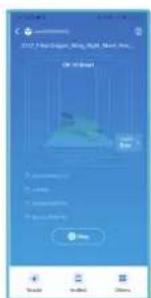
text_image
2017 New York, New York, New York, New York OK NEW!! • Weathering • Air Quality • Air Quality • Air Quality OK Cancel Help Finish Finish Finish13. Creality Cloud print
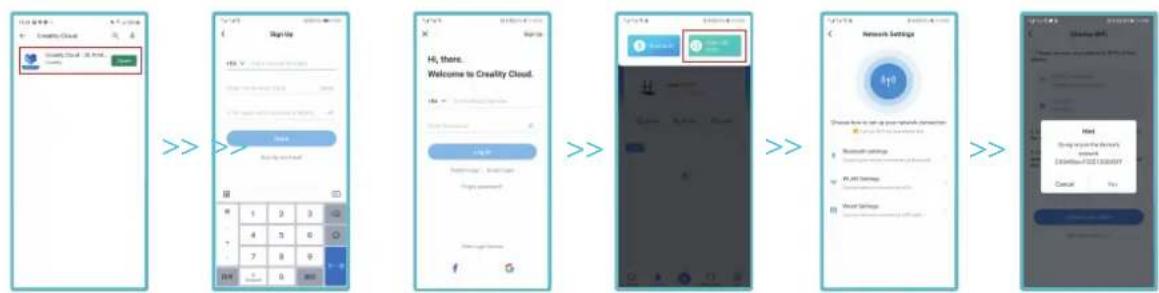
1. Download Creality Cloud 2. Register 3. Log in 5. Network settings 6. Connect machine WiFi 4. Scan QR Code
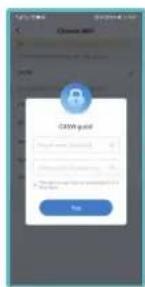
text_image
CATEW paid Yes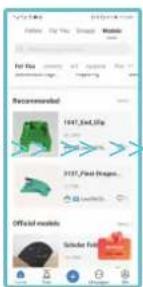
text_image
For You Recommended 1047.Sat.5Up 3137.Final Engines... Official Models Schulder Futs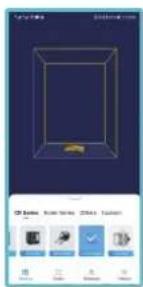
text_image
Top 10 2023/06/17 CY Tools Balance Balance Sheet Balance Sheet 15 20 30 40 50 60 70 80 90 100- Select machine 10. Printing 11. Select device 12. Start printing 7. Connect to local WiFi 8. Select model

text_image
2017: Wind-Grup, Wing, Right, Main, Flat, in GB File Path: 1.0 GB Name: 45888 Location: 9670000 Status: Normal OK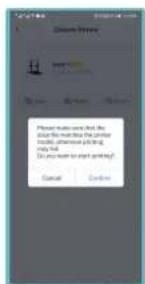
text_image
Please make sure that the button will have the other model, if answered to this only call. Do you want to start your job? Cancel Cancel
text_image
10:32 PM/8:00, 10:00 AM, 10:15 PM, 10:30 AM 1 Month 2 Month 3 Month 4 Month 5 Month 6 Month 7 Month 8 Month 9 Month 10 Month 11 Month 12 Month 13 Month 14 Month 15 Month 16 Month 17 Month 18 Month 19 Month 20 Month 21 Month 22 Month 23 Month 24 Month 25 Month 26 Month 27 Month 28 Month 29 Month 30 Month 31 Month 32 Month 33 Month 34 Month 35 Month 36 Month 37 Month 38 Month 39 Month 40 Month 41 Month 42 Month 43 Month 44 Month 45 Month 46 Month 47 Month 48 Month 49 Month 50 Month 51 Month 52 Month 53 Month 54 Month 55 Month 56 Month 57 Month 58 Month 59 Month 60 Month 61 Month 62 Month 63 Month 64 Month 65 Month 66 Month 67 Month 68 Month 69 Month 70 Month 71 Month 72 Month 73 Month 74 Month 75 Month 76 Month 77 Month 78 Month 79 Month 80 Month 81 Month 82 Month 83 Month 84 Month 85 Month 86 Month 87 Month 88 Month 89 Month 90 Month 91 Month 92 Month 93 Month 94 Month 95 Month 96 Month 97 Month 98 Month 99 Month 100 Month14. Off-line print
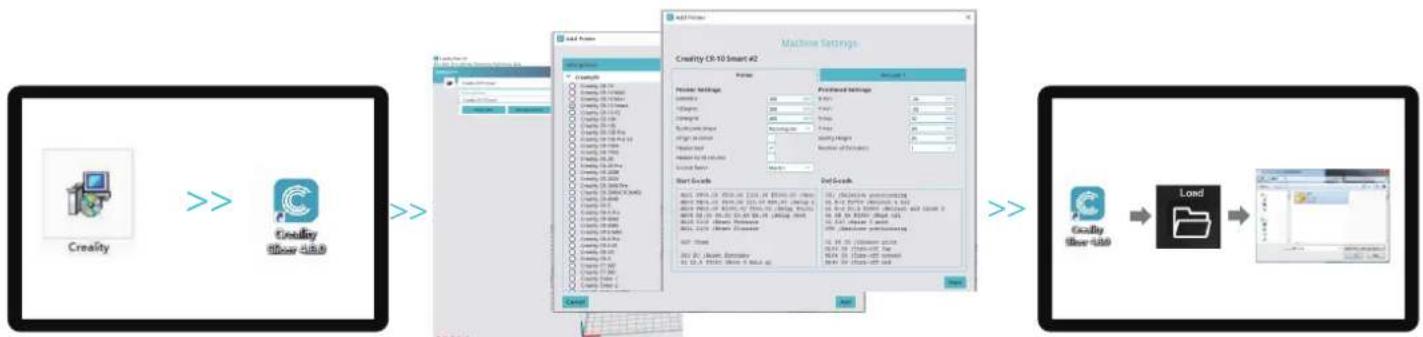
1. Download the software from official website (www.cxsw3d.com) or find the software in storage card for installation.
2. Double click to open the software.
3. Select language→Next→Select your machine→Next→Finish.
4.Open Creality 3D slicer → Load (Read file) → Select file.
14. Off-line print
natural_image
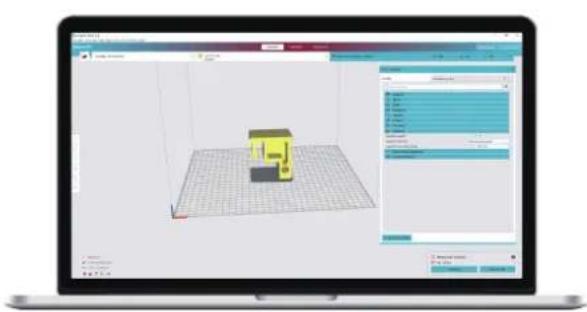
3D modeling software interface showing a yellow object on a grid plane with tool panels (no readable text or symbols)- Generate G-code, and save the gcode file to storage card.

natural_image
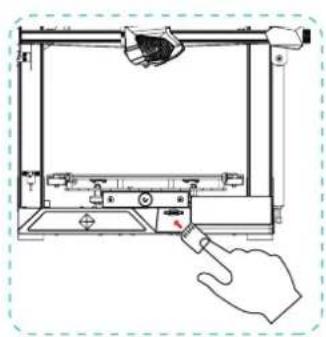
Line drawing of a 3D printer with a hand pointing to the front panel (no text or symbols)- Insert the storage card

File names must be Latin letters or numbers, not Chinese characters or other special symbols

Notes: For details on the software instructions, please refer to the slicing software manual in the storage card!

Warning: Please don't insert or remove the storage card during printing.
15. Start Printing
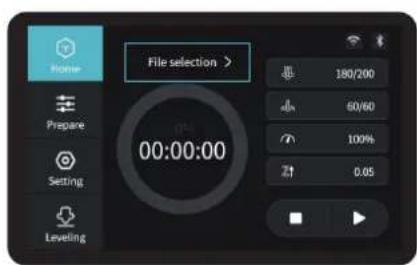
text_image
File selection > 180/200 60/60 100% 0.05 00:00:00 Prepare Setting LevelingClick print control
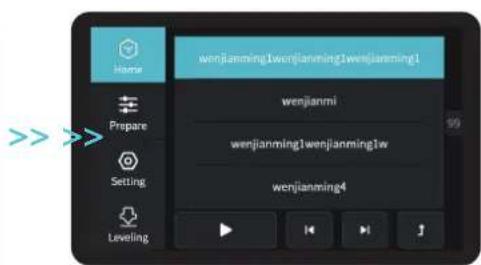
text_image
wenjianming1wenjianming1wenjianming1 wenjianmi wenjianming1wenjianming1w wenjianming4 LevelingSelect the file to be printed
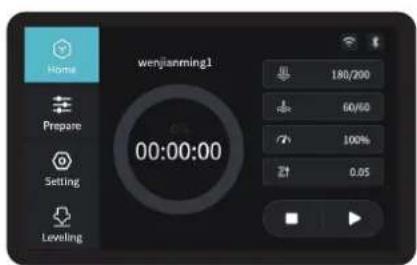
text_image
wenjianming1 00:00:00 180/200 60/50 100% 0.0511. Start Printing 开始
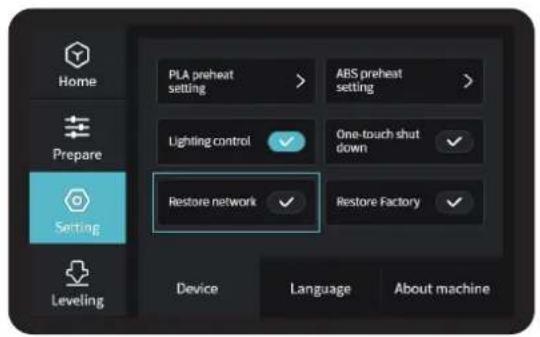
text_image
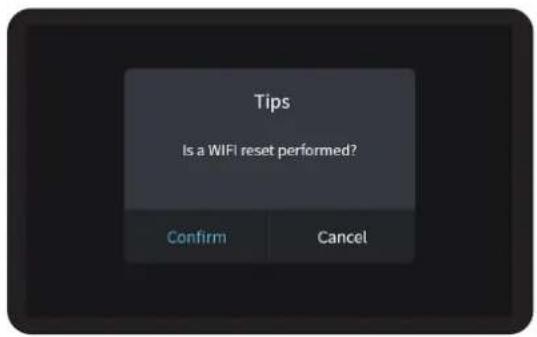
Home Prepare Setting Leveling PLA preheat setting > ABS preheat setting > Lighting control ✓ One-touch shut down ✓ Restore network ✓ Restore Factory ✓ Device Language About machine
text_image
Tips Is a WIFI reset performed? Confirm Cancel
Note:
- In the first use or if you need to clear the owner information, you can click "Restore network" button on the screen, wait for 1-2 minutes and then try to scan the code again or connect the network via Bluetooth.
17. Printer maintenance

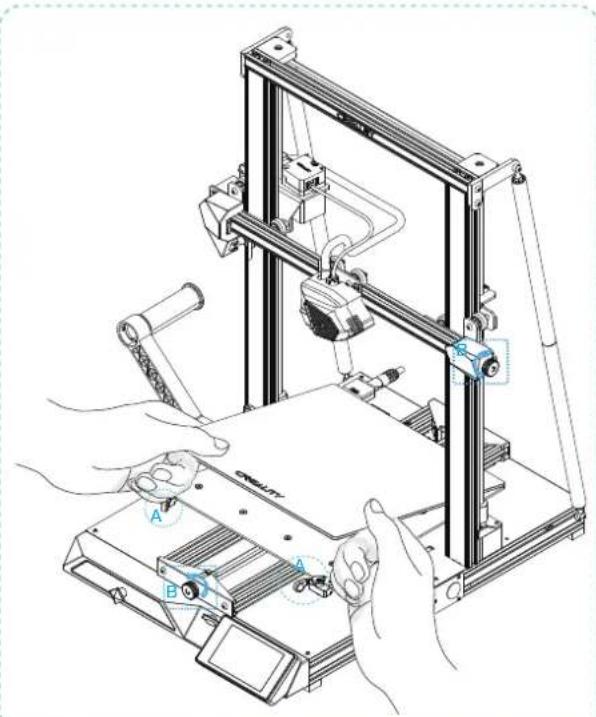
- Rotate the glass pick-and-place handleplate for platform replacement. (as shown in figure A)
- Then manually turn the knob to the appropriate tightness to avoid belt breakage. (as shown in figure B)
- Please use clean water to clean the dirt on the flat pallet.
- The machine will restart after power interruption and pop out the "resume printing" button. Please clear the redundant filament between the nozzle and model before resumption to avoid printing failure.
natural_image
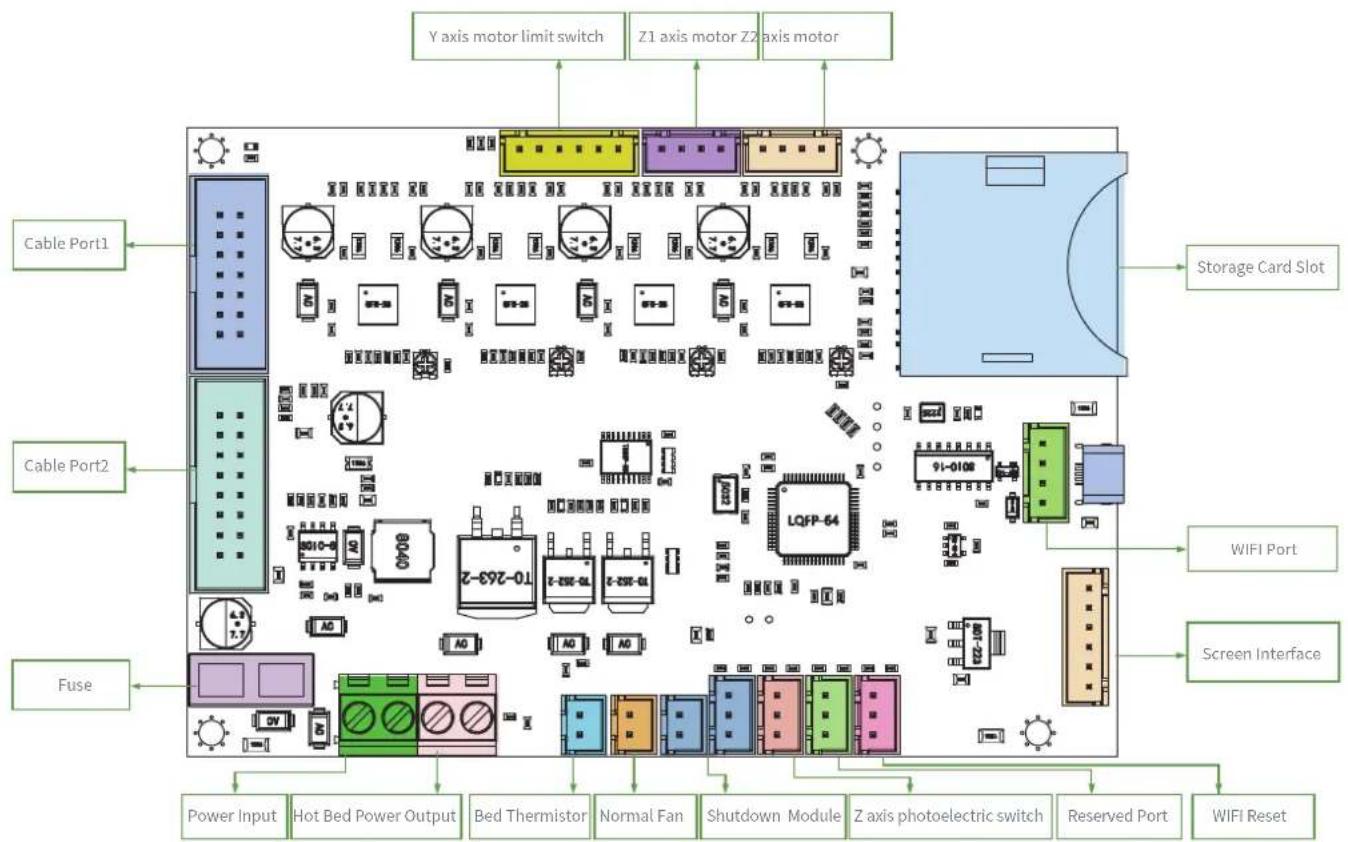
Line drawing of a 3D printer assembly with hands operating it (no text or symbols present)- Circuit Wiring
text_image
Y axis motor limit switch Z1 axis motor Z2 axis motor Cable Port1 Storage Card Slot Cable Port2 WIFI Port Screen Interface Fuse Power Input Hot Bed Power Output Bed Thermistor Normal Fan Shutdown Module Z axis photoelectric switch Reserved Port WIFI Reset19. Trouble-shooting

flowchart
graph TD
    A["Start"] --> B["Play by memory storage card"]
    B --> C{Y/N}
    C -->|N| D["Storage-card"]
    C -->|Y| E{File is identified?}
    E -->|N| F["File name"]
    E -->|Y| G{Any random code?}
    G -->|N| H["Slice"]
    G -->|Y| I["Cube files are normally pressed?"]
    I --> J["Slice"]
    J --> K["1. Rename the file with alphabet and numbers"]
    K --> L["Home"]
    L --> M{Y/N}
    M -->|N| N["KYZ Stepper"]
    M -->|Y| O["Pass motor"]
    O --> P["limit switch"]
    O -->|Y| Q["1. Reconnect the cables 2. Check via the replacement method"]
    Q --> R["Heat bed"]
    R --> S{Y/N}
    S -->|N| T["Hot bed"]
    S -->|Y| U["Thermistor"]
    U --> V["1. Reconnect the cables"]
    V --> W{Results}
    W --> X["Resolved"]
    W --> Y["damaged & contact for replacement"]
    W --> Z["The fault cannot be identified, contact to resolved"]
    S --> AA["heat nozzle"]
    AA --> AB{Y/N}
    AB -->|N| AC["Nozzle is heated?"]
    AB -->|Y| AD{Temperature is normal?}
    AD -->|N| AE["Thermistor"]
    AE --> AF["1. Reconnect the cables"]
    AF --> AG["Slice/Timing belt"]
    AG --> AH["1. Restart the slicing 2. Adjust the tension of the synchronous belt"]
    AH --> AI["Extrusion gear loose"]
    AI --> AJ["1. Fasten the coupling"]
    AG --> AK["Print"]
    AK --> AL{Misaligned?}
    AL -->|N| AM["Spray?"]
    AL -->|Y| AN{E stepper rotated?}
    AN -->|N| AO["Ficking roller rotated?"]
    AN -->|Y| AP{Filament is normal?}
    AP -->|N| AQ["Other"]
    AQ --> AR["Filament"]
    AR --> AS["Clean the filament 2. Replace filament"]
    AS --> AT["E motor"]
    AT --> AU["Reconnect the cables 2. Check via the replacement method"]
Due to the differences between different machine models, the physical objects and the final images can differ. The final explanation rights shall be reserved by Shenzhen Creality 3D Technology Co., Ltd.
SHENZHEN CREALITY 3D TECHNOLOGY CO., LTD.
Etage 18, Immeuble JinXiuHongDu, Blvd de Meilong, District Longhua, Shenzhen, Chine, 518131
SHENZHEN CREALITY 3D TECHNOLOGY CO., LTD
Official Website: www.creality.com
Tel: +86 755-8523 4565
E-mail: info@creality.com cs@creality.com


R 210-163161