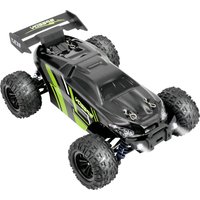
Speedy - Remote control toy Reely - Free user manual and instructions
Find the device manual for free Speedy Reely in PDF.


User questions about Speedy Reely
0 question about this device. Answer the ones you know or ask your own.
Ask a new question about this device
Download the instructions for your Remote control toy in PDF format for free! Find your manual Speedy - Reely and take your electronic device back in hand. On this page are published all the documents necessary for the use of your device. Speedy by Reely.
USER MANUAL Speedy Reely
GB Operating Instructions
1:18 Electric Vehicle "Speedy" RtR
Item no. 2473641 (Truggy)
Item no. 2473642 (Monstertruck) Page 22 - 41
F Notice d'emploi
natural_image
Close-up of a mechanical vehicle chassis with labeled components A and B, showing suspension and wiring (no text or symbols beyond labels)natural_image
Close-up of an internal mechanical assembly with visible wiring and components (no text or symbols)natural_image
Close-up of a black mechanical component with curved lines, possibly a tool or bracket (no visible text or symbols)natural_image
Close-up of a mechanical component with a curved arrow pointing to it (no visible text or symbols)natural_image
Close-up of a car tire with a curved tire and arrow pointing to it (no visible text or symbols)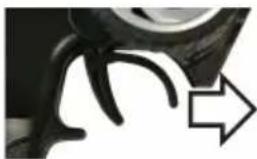
natural_image
Close-up of a car wheel with a black curved handle and an arrow pointing to it (no text or symbols visible)natural_image
Close-up of a black mechanical component with a white arrow pointing to it (no visible text or symbols)Vorwärts fahren
natural_image
Close-up of a black mechanical component with a curved arrow pointing to it (no text or symbols visible)natural_image
Close-up of a black mechanical component with curved blades (no visible text or symbols)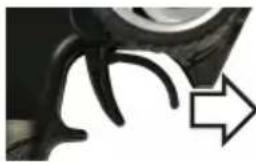
natural_image
Close-up of a car wheel with a curved handle and an arrow pointing to it (no text or symbols visible)Rückwärts fahren
www.conrad.com/downloads
- Introduction......23
- Description of symbols....23
- Intended use....24
- Delivery content....24
- Required accessories....25
- Safety information....26
a) General information....26
b) Getting started....27
c) Driving the vehicle 27
- Battery safety information....28
a) General information....28
b) Additional information about lithium rechargeable batteries....30
- Charging the drive battery ....31
- Transmitter controls 32
- Getting started 33
a) Removing the body....33
b) Inserting batteries/rechargeable batteries into the transmitter 33
c) Configuring the transmitter 33
d) Inserting and connecting the drive battery....33
e) Switching on the vehicle 34
f) Attaching and securing the body 34
g) Controlling the vehicle 35
h) Setting the maximum speed....36
i) Stopping the vehicle 37
- Cleaning and maintenance....37
a) General information....37
b) Before and after each use 37
- Disposal....38
a) Product 38
b) (Rechargeable) batteries 38
- Declaration of Conformity (DOC)....39
- Troubleshooting 39
- Technical data....41
a) Vehicle....41
b) Transmitter....41
c) USB charger 41
d) Li-ion drive battery 41
1. Introduction
Dear customer,
Thank you for purchasing this product.
This product complies with statutory, national and European regulations.
To ensure that the product remains in this state and to guarantee safe operation, always follow the instructions in this manual.

These operating instructions are part of this product. They contain important information on setting up and using the product. Do not give this product to a third party without the operating instructions.
Therefore, retain these operating instructions for reference!
All company and product names contained herein are trademarks of their respective owners. All rights reserved.
If there are any technical questions, please contact: www.conrad.com/contact
2. Description of symbols

The symbol with an exclamation mark in a triangle is used to highlight important information in these operating instructions. Always read this information carefully.

The arrow symbol indicates special information and tips on how to use the product.
3. Intended use
This product is a four-wheel-drive model vehicle that can be controlled wirelessly using the remote control included. The control functions are forwards/backwards/left/right (each one continuous).
The built-in electric motor is controlled by an electronic speed controller and the steering is controlled by a servo.
The vehicle (chassis and body) is shipped ready to use. A matching Li-ion drive battery and a USB charger are also included.
The transmitter is powered by 3 AA/Mignon batteries (to be ordered separately, not included).
This product is not a toy and is not suitable for children under 14 years of age.

Always follow the safety information in these operating instructions. They contain important information on how to use the product safely. Read the operating instructions carefully before using the vehicle for the first time.
Failure to observe the instructions can result in numerous hazards (e.g. injury).
4. Delivery content
• Fully assembled ready-to-drive vehicle
• Transmitter (remote control)
• 2-cell Li-ion drive battery (nominal voltage 7.4 V)
- USB charger
- Screwdriver
- Wrench
• 8 replacement clips (for body attachment)
- Operating instructions
Up-to-date operating instructions
Download the latest operating instructions at www.conrad.com/downloads or scan the QR code shown. Follow the instructions on the website.

5. Required accessories
The package includes a matching 2-cell Li-ion drive battery and a USB charger.
For vehicle operation, you will also need 3 AA/Mignon batteries for the transmitter (to be ordered separately, not included).

Using rechargeable batteries in the transmitter results in shorter battery life due to the lower voltage (nominal voltage: battery = 1.5 V, rechargeable battery = 1.2 V). If you still wish to use rechargeable batteries, we recommend using NiMH rechargeable batteries with lower self-discharge.
For reasons of operational safety and service life, we recommend using batteries for the transmitter and not rechargeable batteries.
For optimal use of the vehicle, we also recommend the following components:
- One or more additional drive batteries (to resume vehicle operation after a short pause to cool the motor and the speed controller)
- Replacement batteries for the transmitter (if the transmitter batteries run out during operation of the vehicle)
- Spare tyres (to quickly change worn/damaged tyres)
• Assembly stand (for test runs and easier maintenance)
• Various tools (e.g. screwdriver, needle-nose pliers)
• Compressed air spray (for cleaning)
• Thread-locking fluid (to fix loose screw connections) - Carry bag

To view the replacement parts lists for this product, visit www.conrad.com and go to the Downloads section for your product.

Damage caused due to failure to observe these operating instructions will void the warranty. We shall not be liable for any consequential damage!
We shall not be liable for damage to property or personal injury caused by incorrect handling or failure to observe the safety information! Such cases will void the warranty/guarantee.
Normal wear and tear (e.g. worn tyres, worn-out gear wheels) and accidental damage (e.g. broken suspension arms and a damaged chassis) are excluded from the guarantee and warranty.
Dear customer, these safety instructions are provided to ensure the safe operation of the product, your safety and the safety of others. Read this chapter very carefully before using the product!
a) General information
Caution, safety hazard!
This model has the potential to cause damage to property and/or individuals. Ensure that you are sufficiently insured, e.g. by taking out private liability insurance. If you already have a policy, check with your insurance company that use of this model is covered by the policy.
- The unauthorised conversion and/or modification of the product is prohibited for safety and approval reasons.
• This product is not a toy and is not suitable for children under 14 years of age. - Do not leave packaging material lying around carelessly, as it could become a dangerous plaything for children.
- If you have any questions that are not answered by these operating instructions, contact us (see chapter 1 for contact information) or an experienced technician.
- You must learn how to operate and handle remote-controlled model vehicles before actually using them! If you have never steered such a vehicle, operate it with special care and get used to the responses of the vehicle to the remote control commands first. Be patient!
- Do not take any risks when using the product! Always use the model responsibly; otherwise, you may endanger yourself and your surroundings.
- Occasional maintenance work and repairs are required to ensure safe use. For example, the tyres may become worn, or some parts may be damaged due to driver error.
Only use original spare parts for maintenance and repair work!

b) Getting started
- Only use the 2-cell Li-ion drive battery (nominal voltage 7.4V ) supplied with the vehicle or an identical replacement drive battery. Never power the vehicle with a power adaptor, even for test purposes.
- When putting the device into operation, always switch on the transmitter first. Only then can the drive battery be connected to the vehicle and the vehicle switched on. Otherwise, the vehicle might respond unpredictably.
Proceed as follows:
- Before connecting the drive battery, place the vehicle on a suitable surface so that all wheels can move freely.
- Switch on the transmitter, if you have not already done so. Check that it functions correctly (e.g. transmitter's power indicator).
- Set the trim control for the steering function on the transmitter to the middle position. Move the rotary control for the drive speed to the middle position.
- Insert a fully charged drive battery into the vehicle, observing the correct polarity. The plug is protected from reverse polarity, do not use force when connecting.
- Now turn on the vehicle.
- Check that the vehicle responds to the remote control commands as expected (steering and drive) before removing it from the support and placing the wheels on the ground.
- If the drive does not perform as expected, follow the instructions in chapter 14.
c) Driving the vehicle
- Improper use can cause serious injury and damage to property! Only use the vehicle when it is within your sight. Do not use the vehicle at night.
- Only use the vehicle when you are fully alert and able to respond. As is the case when driving a real vehicle, fatigue, alcohol, or medications can affect your ability to react.
- This model vehicle must not be used on public roads, spaces or paths. Do not use the vehicle on private land without the landowner's permission.
• Do not drive towards people or animals! - Avoid driving at very low outdoor temperatures. Plastic parts lose their elasticity at cold temperatures. This can result in serious damage even after a minor accident.
- Do not use the vehicle during thunderstorms, under high-voltage power lines or next to radio masts.
- Do not drive the vehicle in the rain or through wet grass, water, mud or snow. The model is not waterproof or watertight. Moisture not only causes corrosion but also damages the electronics.
• Always leave the transmitter turned on when the vehicle is in use. - To stop the vehicle, always turn off the vehicle first and then disconnect the drive battery from the vehicle by removing the plug. Then turn off the transmitter.
- The transmitter range decreases as the batteries get weaker. Replace the batteries with new ones.

- When the drive battery is nearly empty, the vehicle will slow down and may not respond properly to the transmitter.
The drive battery in the vehicle powers not only the motor via the speed controller, but also the receiver and the steering servo. A BEC ("Battery Eliminator Circuit", an electronic circuit for direct power supply of the receiver without an additional receiver battery) is used for this purpose.
If the drive battery voltage is too low, the receiver voltage may drop and the vehicle may not respond to transmitter commands. In this case, stop the vehicle immediately (turn off the vehicle, disconnect the drive battery from the vehicle, and switch off the transmitter). Replace/recharge the drive battery as necessary.
- The motor, drive, speed controller and drive battery heat up during use. Take a break of at least 5–10 minutes before changing the rechargeable battery.
- Allow the drive battery to cool down completely before charging.
- Do not touch the motor, the speed controller or the rechargeable battery until they have cooled down. Burn hazard!
7. Battery safety information

Although batteries and rechargeable batteries are very useful in our everyday life, nevertheless they present numerous safety hazards. Compared with conventional NiMH rechargeable batteries, lithium rechargeable batteries have a high energy content. For this reason, it is essential to comply with safety regulations to prevent the risk of fire or explosion.
Always observe the following safety information when handling batteries and rechargeable batteries.
a) General information
- Keep batteries/rechargeable batteries out of reach of children. Batteries/rechargeable batteries must be kept out of the reach of children.
- Do not leave batteries/rechargeable batteries lying around, as they present a choking hazard for children and pets. Seek immediate medical advice if a battery is swallowed!
- Batteries/rechargeable batteries must never be short-circuited, disassembled or thrown into the fire. This may cause an explosion!
- When handling leaking or damaged batteries/rechargeable batteries, always use suitable protective gloves to avoid burning your skin.
- Liquids leaking from batteries/rechargeable batteries are highly aggressive chemicals. Objects or surfaces coming into contact with these liquids could be severely damaged. Therefore, keep batteries/rechargeable batteries in a suitable location.
- Do not attempt to recharge disposable, non-rechargeable batteries. This may cause a fire or explosion! Non-rechargeable batteries are only designed to be used once and must be disposed of properly when they are empty. Only recharge compatible rechargeable batteries and ensure that you use a suitable battery charger.
- If you do not plan to use the model for an extended period (e.g. during storage), remove the batteries/rechargeable batteries from the transmitter to prevent them from leaking and causing damage. Disconnect the drive battery and remove it from the model. Keep the batteries and drive battery in a cool, clean, dry place out of the reach of children.
Install a smoke detector in the room. Batteries present a fire hazard and may generate toxic fumes. This applies in particular to model batteries, which are subjected to high charging/discharge currents and vibrations.
- Always exchange the entire set of batteries or rechargeable batteries in the transmitter. Do not mix full batteries/rechargeable batteries with half-full ones. Always use batteries or rechargeable batteries of the same type and from the same manufacturer. Never mix batteries with rechargeable batteries!
- When inserting batteries/rechargeable batteries into the transmitter or connecting the drive battery to the model, pay attention to the polarity markings (plus/+ and minus/-) to ensure that the batteries are connected in the correct polarity. Should you connect the rechargeable battery incorrectly, not only will the model be damaged but also the battery. This may cause a fire or explosion!
- Do not expose the charger or drive battery to extremely high/low temperatures or direct sunlight.
- Batteries/rechargeable batteries must not become moist or wet. The same applies to the included USB charger. The charger must only be used in dry, enclosed indoor areas.
Especially rechargeable batteries with lithium technology (e.g. LiPo rechargeable batteries) are fire and explosion hazardous due to the high moisture sensitivity of the chemicals they contain.
- Before connecting the drive battery to the charger, completely disconnect it from the vehicle. Always remove the drive battery from the model before charging it.
- Place the drive battery on a non-flammable, heat-resistant surface (e.g. a stone tile). Keep the charger and drive battery away from flammable objects. Ensure sufficient space between the charger and the drive battery; do not place the drive battery on or near the charger.
- Do not charge batteries when they are still hot (e.g. due to a high discharge current in the model). Allow the battery to cool down to room temperature before charging it.
- Ensure that there is sufficient ventilation, as the drive battery and charger may heat up during the charging process. Never cover the charger and the drive battery!
- Never leave rechargeable batteries unattended when they are charging. Inspect the charger regularly to ensure that the rechargeable battery is not overheating or expanding. This indicates an imminent risk of fire or explosion! If the battery overheats or starts to expand, disconnect it from the charger immediately and take it to a location where it will not cause any additional damage if it explodes or catches fire (e.g. outdoors).
- Disconnect the drive battery from the charger when it is fully charged.
• Never damage the casing of a rechargeable battery. - Never charge damaged, leaking or deformed rechargeable batteries. This may cause a fire or explosion! Discontinue use immediately and dispose of such unusable rechargeable batteries in an environmentally friendly manner.
- Rechargeable batteries should be charged regularly (approx. once every 2–3 months) to prevent deep discharge due to self-discharge. This may render the rechargeable batteries useless!
Lithium rechargeable batteries usually retain their charge for several months. However, if the batteries overdischarge, this will result in permanent damage and render them useless.

b) Additional information about lithium rechargeable batteries
Modern lithium rechargeable batteries have a significantly higher capacity than NiMH and NiCd rechargeable batteries and are more lightweight. These factors make this type of rechargeable battery highly interesting for use in, for example, model construction.
However, lithium rechargeable batteries require particular care to ensure safe charging/discharging, operation and handling.
The following section provides an overview of the potential hazards associated with lithium rechargeable batteries and explains how these hazards can be avoided to ensure a long lifespan.
- The casing of many lithium rechargeable batteries is made of a thick film, which is very sensitive. Do not dismantle, damage, drop or insert any objects into lithium rechargeable batteries! Do not apply mechanical loads or pull on the rechargeable battery's connection cables. This may cause a fire or explosion! Pay attention to this when the rechargeable battery is attached to or removed from the model.
- Ensure that the rechargeable battery does not overheat during use, recharging, discharging, transport, or storage. Do not place the rechargeable battery next to heat sources (e.g. a speed controller or motor) or expose it to direct sunlight. Overheating of the rechargeable battery may cause a fire or explosion! The temperature of the rechargeable battery must not exceed +60 °C. (If necessary, follow additional manufacturer specifications for the rechargeable battery!).
- If there are any signs of damage or the outer casing starts to swell or bloat, discontinue use immediately. Do not continue to charge it. This may cause a fire or explosion!
Exercise caution when handling the damaged rechargeable battery and use suitable protective gloves. Dispose of the rechargeable battery in an environmentally friendly manner.
Never store damaged rechargeable batteries in an apartment or a house/garage. Damaged or swollen lithium rechargeable batteries may catch fire.
- The included Li-ion drive battery is a perfect match for the USB charger. Therefore, only use the included USB charger to charge the Li-ion drive battery. Do not use NiCd, NiMH or lead battery chargers, as these may cause a fire or explosion!
- Always use a so-called balancer when charging a lithium rechargeable battery with more than one cell (the charger comes with a built-in balancer).
8. Charging the drive battery
The drive battery is typically empty upon delivery and must be charged. Several complete discharge and charge cycles are required to ensure that the drive battery reaches its maximum performance.
The drive battery is charged using the supplied USB charger.

Attention!
Do not connect the USB cable to the USB port of a computer/laptop or USB hub because their current is not high enough for charging.
Use, for example, a commercially available USB power adaptor that provides an output current of at least 2 A.
Only use the included USB charger to charge the Li-ion drive battery as the USB charger is a perfect match for the Li-ion drive battery.
Never recharge the drive battery unattended.
Insert the drive battery for charging on a fixed base, e.g. a flagstone.
Proceed as follows:
- Disconnect the drive battery from the vehicle, completely disconnect the plug. Remove the drive battery from the vehicle.
- The drive battery has a special reverse polarity protected plug. Connect the drive battery to the matching socket on the charging cable of the USB charger. Do not use any force. The plug engages with a clip.
- Connect the USB charger with a suitable USB power adaptor (output 5 V/DC, min. 2 A), then plug it into a mains socket.
• A red LED on the USB charger indicates the function:
LED glows steadily: Battery is charging
LED goes off: Charging is complete
→ It takes about 2 hours to charge the empty battery.
- When the Li-ion drive battery is completely charged, disconnect it from the USB charger by pressing the locking clip and removing the plug. Disconnect the USB charger from the power supply.
9. Transmitter controls
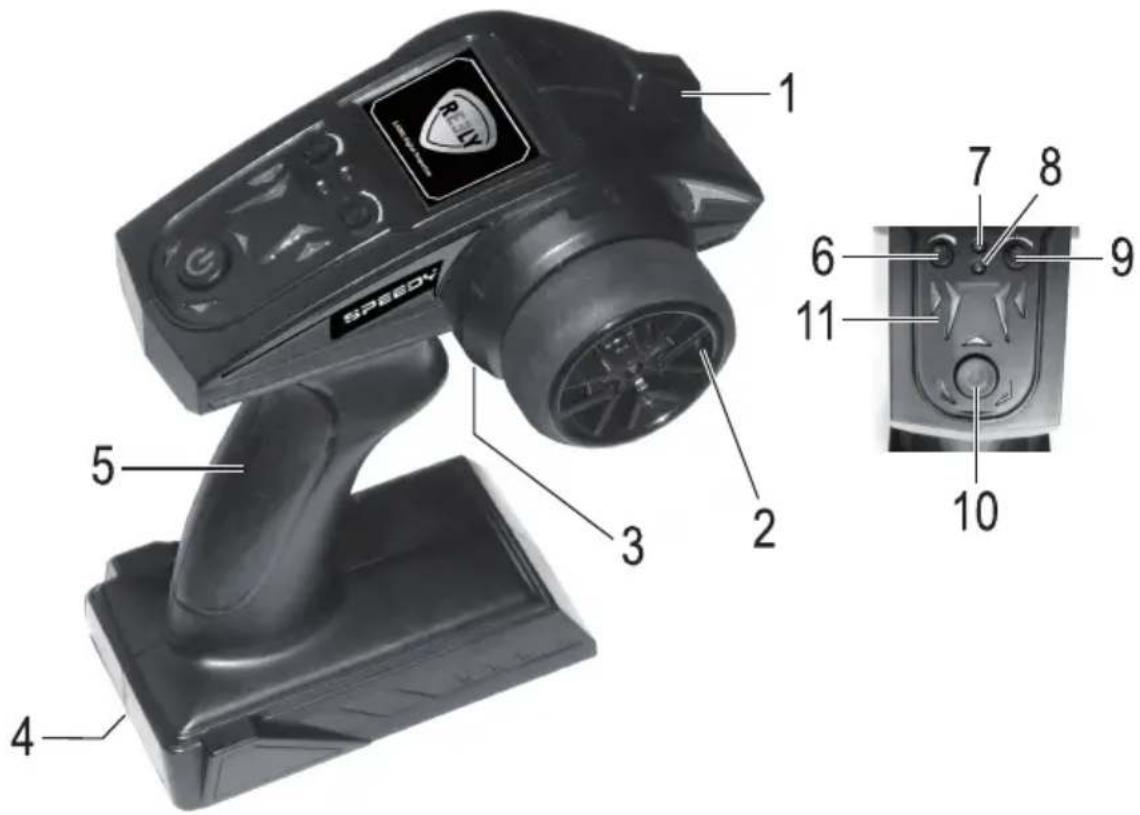
text_image
1 2 3 4 5 6 7 8 9 10 11 SPEEDY Rally1 Antenna
2 Rotary control for the steering function
3 Throttle/brake lever
4 Battery compartment
5 Handle
6 Rotary control for setting the maximum speed
7 Green power LED
8 Red LED indicator for vehicle connection ("pairing" LED) and "empty battery" warning
9 Rotary control for the trim steering function
10 On/off switch
11 Blue LEDs (light up when the vehicle receives an active wireless signal)
10. Getting started
a) Removing the body
Remove the four locking clips on the upper side of the vehicle and lift the body off upwards.
b) Inserting batteries/rechargeable batteries into the transmitter
Open the battery compartment on the underside of the transmitter and slide the battery compartment cover out towards the rear.
Insert 3 AA/Mignon batteries. Ensure that the batteries are inserted with the correct polarity (observe the positive/+ and negative/- markings on the battery compartment). Close the battery compartment again.

Using rechargeable batteries in the transmitter results in a shorter battery life due to the lower voltage (nominal voltage: battery = 1.5 V, rechargeable battery = 1.2 V). If you still wish to use rechargeable batteries, we recommend using NiMH rechargeable batteries with lower self-discharge.
For the sake of operational safety and service life, you should use batteries for the transmitter and not rechargeable batteries.
c) Configuring the transmitter
Set the two rotary controls to the middle position and switch on the transmitter. The green power LED will light up, and the red "pairing" LED will flash.
d) Inserting and connecting the drive battery

Attention!
give battery must not yet be connected to the speed controller. First power up the transmitter as described in chapter 10. b) and 10. c).
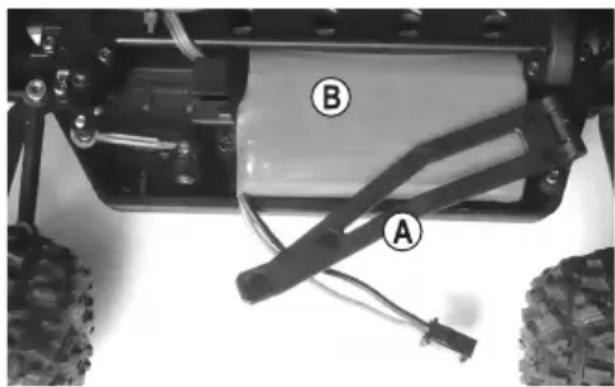
Swing the retaining clamp (A) outwards to unlock the battery holder (you can easily release the safety lock by gently twisting the retaining clamp a bit before swinging it outwards).
Insert the drive battery (B) into the battery holder (the battery cable should be positioned as shown in the picture), and then lock the retaining clamp back in place.
Finally, connect the rechargeable battery to the vehicle. The plug is protected from reverse polarity; do not use force when connecting.
natural_image
Close-up of a mechanical vehicle showing labeled components (A and B) with visible wiring and tires, no readable text or symbols beyond labels.e) Switching on the vehicle
- Release the throttle/brake lever on the transmitter so that it is in the middle position. Release the steering wheel.
- If you have not already done so, switch on the transmitter using the on/off switch; the green power LED will light up, and the red "pairing" LED will flash.
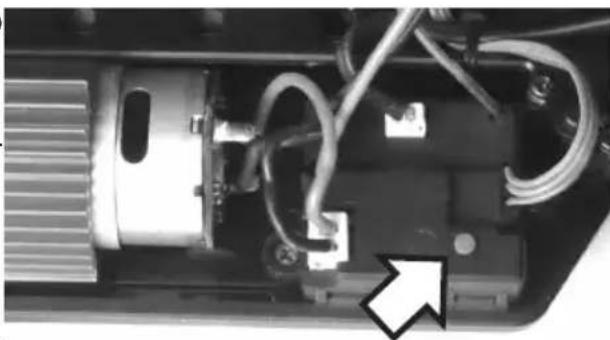
- Briefly pressing the button on the speed controller (see arrow in the right picture) turns on the vehicle.
- The red "pairing" LED on the transmitter will now glow steadily, and some blue LEDs will go on.
• The vehicle is now ready to ride.
natural_image
Close-up of an internal mechanical assembly with visible wiring and components (no text or symbols)If the red LED flashes slowly, the transmitter batteries are empty and must be replaced with new ones.
f) Attaching and securing the body
Now put the body on the brackets and fasten it with the locking clips that were removed at the start.
g) Controlling the vehicle
Place the ready-to-ride vehicle on the ground. Do not reach into the motor or hold the vehicle by the wheels.

Operate the control lever for the drive function on the transmitter very carefully and do not drive too fast until you get used to the responses of the vehicle. Do not move the transmitter controls quickly or jerkily.
If the vehicle tends to move to one side, adjust the steering trim on the transmitter accordingly.

The following images are for reference purposes only and do not necessarily correspond to the design of the transmitter included with the product!
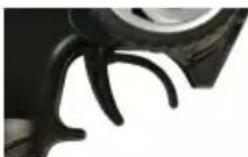
- Release the throttle/brake lever (neutral position); the vehicle coasts to a stop or does not move.

natural_image
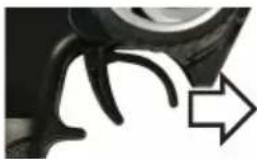
Close-up of a black mechanical component with curved lines, possibly a tool or bracket (no visible text or symbols)- Slowly pull the throttle/brake lever towards the handle to make the vehicle move forwards.
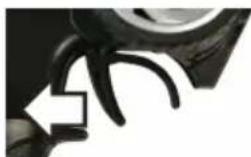
natural_image
Close-up of a car tire with a curved tire and arrow pointing to it (no visible text or symbols)- Move the throttle/brake lever away from the handle without a pause to make the vehicle move forwards and brake (the vehicle decelerates quickly rather than coming slowly to a standstill).
natural_image
Close-up of a car tire with a curved handle and an arrow pointing to it (no visible text or symbols)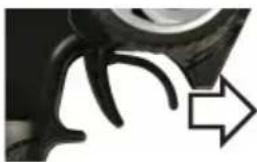
natural_image
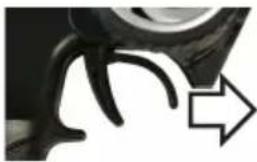
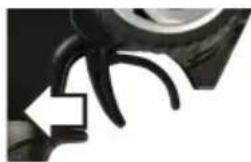
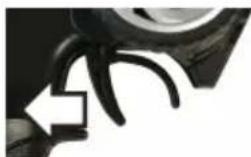
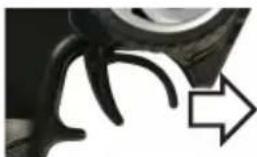
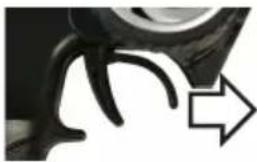
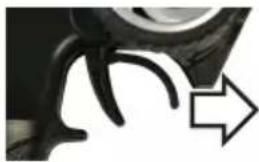
Close-up of a car wheel with a curved handle and an arrow pointing to it (no text or symbols visible)- Move forwards, brake and then drive in reverse: Push the throttle/brake lever away from the handle (braking) without pausing; if the vehicle remains stationary, move the throttle/brake lever to the neutral position briefly (approx. 1 second), then push the throttle/brake lever away from the handle (vehicle will now reverse)
natural_image
Close-up of a car wheel with a curved cable and arrow pointing to it (no text or symbols visible)Move forwards
natural_image
Close-up of a car wheel handle with a black arrow pointing to it (no text or symbols visible)Brake If the vehicle is
natural_image
Close-up of a black mechanical component with curved arms (no visible text or symbols)stationary, wait for a moment (1 second)

natural_image
Close-up of a black mechanical component with a curved handle and an arrow pointing to it (no text or symbols visible)Reverse
If the throttle/brake lever is pulled directly from forwards to reverse at one stroke, the brake function of the drive will be activated (the vehicle does not travel backwards).
In the event of an immediate switch from forwards to reverse, the throttle/brake lever must first be pushed away from the handle and then moved to the neutral position (if the vehicle moves forwards during this phase, braking is also activated as a result). If the throttle/brake lever is pushed away from the handle a second time, the vehicle drives in reverse.

After driving forwards, the vehicle only drives in reverse if the throttle/brake lever is pushed away from the handle a second time. This is required by the brake function; in addition, it protects the drive mechanism from overload due to an immediate switch from forwards to reverse.
If the vehicle shows a tendency to move to one side, adjust the steering trim on the transmitter accordingly.
Discontinue use immediately if the vehicle does not respond as expected, or if the vehicle stops responding to the transmitter commands. If this occurs, the drive battery, transmitter batteries/rechargeable batteries may be nearly empty, or the vehicle may be too far from the transmitter.
A damaged receiver antenna, interference on the wireless channel (e.g. from other devices, Bluetooth ^® or Wi-Fi) or poor reception/transmission conditions may cause the vehicle to respond incorrectly.
The receiver is powered by the speed controller/drive battery; therefore, the vehicle may not move correctly when the drive battery is nearly empty (e.g. the steering servo may not work properly).
For example, the drive battery voltage may drop momentarily at full throttle, and therefore the receiver may not receive the required voltage. If this occurs, the vehicle will accelerate, but the steering servo will not respond correctly. Discontinue use immediately and use a new, fully charged drive battery.
If the drive battery is empty, wait for at least 5–10 minutes until the motor and speed controller have cooled down. You can then use the vehicle again with a fully charged drive battery.
h) Setting the maximum speed
Use the left rotary control (6) on the transmitter to set the maximum speed of the vehicle.
• Turn the rotary control to the right (clockwise): increase maximum speed
• Turn the rotary control to the left (counter-clockwise): decrease maximum speed

For example, beginners can use this option to decrease speed.
If you turn the rotary control to the left, the vehicle may not move. In this case, turn the rotary control a bit to the right (clockwise).
i) Stopping the vehicle
To stop the vehicle, proceed as follows:
- Release the throttle/brake lever on the transmitter so that it is in the neutral position, and then let the vehicle coast to a standstill.
- When the vehicle is stationary, pressing and holding the button on the speed controller for approx. 1 second turns it off.

Do not reach into the wheels or drive or move the throttle/brake lever on the transmitter! Do not hold the vehicle by the wheels!
The motor, speed controller and drive battery become very hot during use! Do not touch these parts immediately after use – burn hazard!
- Disconnect the drive battery from the vehicle. Unscrew the plug completely.
• Then turn off the transmitter.
11. Cleaning and maintenance
a) General information
Before cleaning or maintenance, turn off the vehicle and completely disconnect the drive battery from it. Then switch off the transmitter. Allow all parts to cool down completely (e.g. motor and speed controller).
After you have finished using the vehicle, remove all dust and dirt (e.g. using a clean long-haired brush and a vacuum cleaner). Compressed air sprays can also help to remove dirt.
Do not use cleaning sprays or conventional household cleaning chemicals. These may damage the electronic components and discolour the plastic parts or body.
Never wash the vehicle with a pressure washer.
A soft, slightly dampened cloth can be used to wipe the body. Do not rub too hard, as this may result in scratch marks.
b) Before and after each use
Motor vibrations and impacts during vehicle operation may cause certain parts and screw fittings to become loose. Before and after every operation of the vehicle, always check that all screw connections on the vehicle are secure and that tyres are in sound condition.

Check the vehicle for any signs of damage before and after each use. If there are any signs of damage, discontinue use immediately.
Only use original spare parts when replacing worn vehicle parts (e.g. tyres) or defective vehicle parts (e.g. a broken suspension arm).
12. Disposal
a) Product
This symbol must appear on any electrical and electronic equipment placed on the EU market. This symbol indicates that this device should not be disposed of as unsorted municipal waste at the end of its service life.
Owners of WEEE (Waste from Electrical and Electronic Equipment) shall dispose of it separately from unsorted municipal waste. Spent batteries and accumulators, which are not enclosed by the WEEE, as well as lamps that can be removed from the WEEE in a non-destructive manner, must be removed by end users from the WEEE in a non-destructive manner before it is handed over to a collection point.
Distributors of electrical and electronic equipment are legally obliged to provide free take-back of waste. Conrad provides the following return options free of charge (more details on our website):
• in our Conrad offices
• at the Conrad collection points
- at the collection points of public waste management authorities or the collection points set up by manufacturers or distributors within the meaning of the ElektroG
End users are responsible for deleting personal data from the WEEE to be disposed of.
It should be noted that different obligations about the return or recycling of WEEE may apply in countries outside of Germany.
b) (Rechargeable) batteries
Remove batteries/rechargeable batteries, if any, and dispose of them separately from the product. According to the Battery Directive, end users are legally obliged to return all spent batteries/rechargeable batteries; they must not be disposed of in the normal household waste.
Contaminated (rechargeable) batteries are labelled with this symbol to indicate that disposal in the domestic waste is forbidden. The abbreviations for heavy metals in batteries are: Cd = Cadmium, Hg = Mercury, Pb = Lead (name on batteries/rechargeable batteries, e.g. below the trash icon on the left).
Used batteries/rechargeable batteries can be returned free of charge to local collection points, our stores or battery retailers. You thus fulfil your statutory obligations and contribute to environmental protection.
Batteries/rechargeable batteries that are disposed of should be protected against short circuit and their exposed terminals should be covered completely with insulating tape before disposal. Even empty batteries/rechargeable batteries can contain residual energy that may cause them to swell, burst, catch fire or explode in the event of a short circuit.
13. Declaration of Conformity (DOC)
Conrad Electronic SE, Klaus-Conrad-Straße 1, D-92240 Hirschau, hereby declares that this product conforms to Directive 2014/53/EU.
→ Click on the following link to read the full text of the EU Declaration of Conformity:
www.conrad.com/downloads
Select a language by clicking on the corresponding flag symbol, and then enter the product order number in the search box. The EU Declaration of Conformity is available for download in PDF format.
14. Troubleshooting
The model does not respond or responds incorrectly
- In the case of 2.4 GHz remote controls, the receiver must be connected to the transmitter. This process is known as "binding" or "pairing". "Pairing" takes place automatically each time you switch on the transmitter and then the vehicle.
- Release the throttle/brake lever and the steering wheel on the transmitter. Only then you can turn on the vehicle.
- Is the vehicle drive battery or the transmitter batteries/rechargeable batteries empty? If so, replace the drive battery or transmitter batteries/rechargeable batteries.
- Is the drive battery correctly connected to the vehicle? Check the plug for soiling or oxidisation; the plug must fully engage with its clip.
- Is the vehicle too far away? With a fully charged drive battery and batteries/rechargeable batteries in the transmitter, a 30-metre range should be possible. However, it can be reduced by outside influences, such as interference on the radio frequency or the proximity of other transmitters (not only remote control transmitters but also Wi-Fi/Bluetooth® devices that also use a transmission frequency of 2.4 GHz), metal parts, buildings, etc.
Vehicle only drives relatively slowly
- Use the left rotary control on the transmitter to set the maximum speed, as described in chapter 10. h).
The vehicle travels slowly or the steering servo does not respond properly to remote control commands; the range between the transmitter and the vehicle is very short
• The drive battery is nearly empty.
The receiver and the steering servo are powered by the BEC of the integrated speed controller. As a result, the receiver will not function properly when the drive battery is nearly empty. Replace the drive battery with a fully charged drive battery (before changing the battery, wait for at least 5–10 minutes for the motor and speed controller to cool down).
- Check the batteries/rechargeable batteries in the transmitter.
The vehicle does not travel in a straight line
- Set the steering trim on the transmitter.
- Did the vehicle have an accident? If so, check the vehicle for any defective or broken parts and replace them if necessary.
The vehicle doesn't move
- The drive battery is empty; the undervoltage detection function has powered off the motor to protect the drive battery from detrimental deep discharge.
• The vehicle is too far away from the transmitter and can no longer recognise a valid radio signal.
The two white front LEDs on the vehicle flash
• The drive battery is nearly empty.
15. Technical data
a) Vehicle
Scale....1:18
Suitable drive battery....2-cell Li-ion rechargeable battery (7.4 V nominal voltage)
Drive.....electric motor; all-wheel drive via cardan shaft; differential in the front and rear axles
Chassis....independent front/rear suspension; shock absorbers with spiral springs
Dimensions (L x W x H)....Item no. 2473641: 272 x 184 x 98 mm
Item no. 2473642: 275 x 185 x 105 mm
Tyre dimensions (W x ∅)....36 x 68.5 mm
Wheelbase....165 mm
Ground clearance....21 mm
Weight (without drive battery)....Item no. 2473641: approx. 567 g
Item no. 2473642: approx. 550 g
→ The product dimensions and weight may vary slightly.
b) Transmitter
Voltage/power supply ....3 AA/Mignon batteries
Frequency band....2405 - 2475 MHz
Transmission power....<20 dBm
Range.....approx. 30 m (open area)
c) USB charger
Operating voltage 5 V/DC
Input current 2 A
Output (max.) 8.4 V, 1 A
Suitable rechargeable battery type....Li-ion, 2 cells (nominal voltage 7.4 V)
d) Li-ion drive battery
Type....Li-ion, 2 cells (nominal voltage 7.4 V)
Capacity....1300 mAh (9.62 Wh)
Discharge rate 5C
Page
France (email) : technique@conrad-france.fr
natural_image
Close-up of a mechanical vehicle chassis with labeled components (A and B), showing suspension and wiring (no readable text beyond labels)natural_image
Close-up of an internal mechanical or electronic component with visible wiring and a directional arrow (no text or symbols)natural_image
Close-up of a black mechanical component with curved arms (no visible text or symbols)natural_image
Close-up of a mechanical component with a curved arrow pointing to it (no visible text or symbols)natural_image
Close-up of a mechanical component with a curved black line and an arrow pointing to it (no visible text or symbols)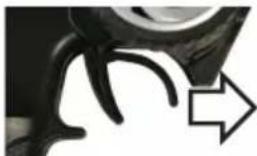
natural_image
Close-up of a black mechanical component with a curved arrow pointing to it (no text or symbols visible)natural_image
Close-up of a car wheel and curved pipe with an arrow pointing left (no text or symbols)Marche avant
natural_image
Close-up of a mechanical component with a curved arrow pointing to it (no visible text or symbols)natural_image
Close-up of a black mechanical component with curved ends, possibly a tool or bracket (no visible text or symbols)natural_image
Close-up of a mechanical component with curved lines and an arrow indicating direction (no text or symbols)Marche arrière
www.conrad.com/downloads
natural_image
Close-up of a mechanical vehicle's base with labeled components (A and B), showing suspension and tire tracks (no text or symbols beyond labels)natural_image
Close-up of an internal mechanical or electronic component with visible wiring and a directional arrow (no text or symbols)natural_image
Close-up of a black mechanical component with curved arms (no visible text or symbols)natural_image
Close-up of a mechanical component with a curved arrow pointing to it (no visible text or symbols)natural_image
Close-up of a car tire with a curved tire and arrow pointing to it (no visible text or symbols)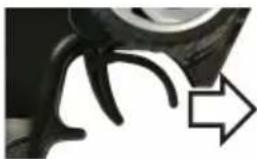
natural_image
Close-up of a car tire with a curved handle and an arrow pointing to it (no text or symbols visible)natural_image
Close-up of a mechanical component with curved lines and a rectangular arrow (no visible text or symbols)Vooruitrijden
natural_image
Close-up of a mechanical component with curved lines and an arrow pointing to it (no visible text or symbols)natural_image
Close-up of a black mechanical component with curved blades (no visible text or symbols)stilstaat, even wachten (1 seconde)
natural_image
Close-up of a car wheel with a curved handle and an arrow pointing to it (no text or symbols visible)Achteruitrijden
www.conrad.com/downloads