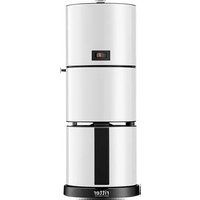
Cafena 5 - Coffee machine Ritter - Free user manual and instructions
Find the device manual for free Cafena 5 Ritter in PDF.


User questions about Cafena 5 Ritter
0 question about this device. Answer the ones you know or ask your own.
Ask a new question about this device
Download the instructions for your Coffee machine in PDF format for free! Find your manual Cafena 5 - Ritter and take your electronic device back in hand. On this page are published all the documents necessary for the use of your device. Cafena 5 by Ritter.
USER MANUAL Cafena 5 Ritter
text_image
Technical diagram of a rice cooker with numbered parts for identification and assembly reference.natural_image
Technical diagram of a mechanical device with a circular component and a labeled inset showing a coffee cup (no text or symbols present)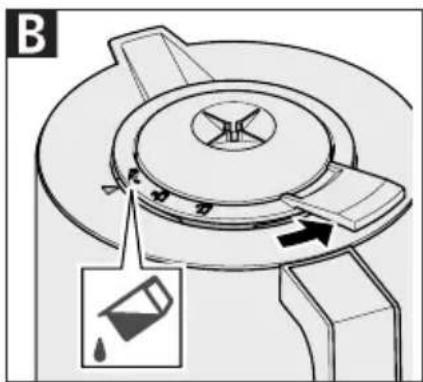
text_image
B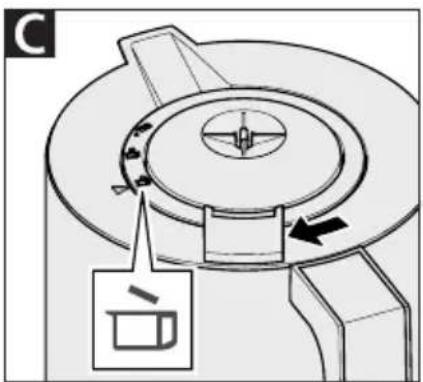
natural_image
Mechanical component diagram showing a rotating disk with directional arrows and a small inset image of a mug (no text or symbols)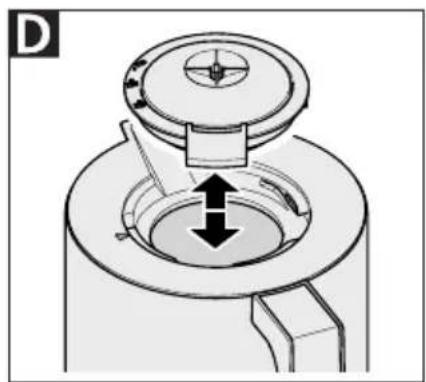
natural_image
Mechanical component diagram showing a piston and lever assembly (no text or symbols)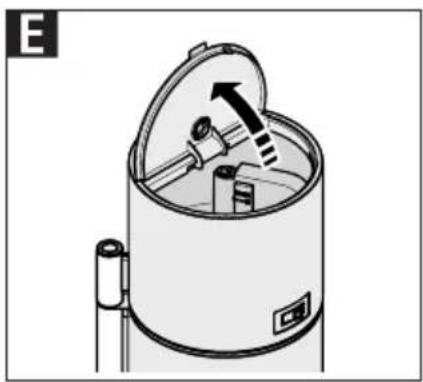
natural_image
Diagram of a cylindrical device with an open lid and internal components, showing a directional arrow (no text or symbols)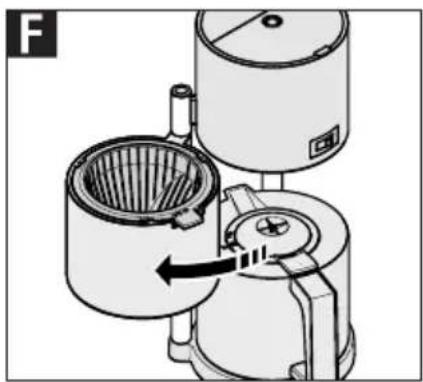
natural_image
Mechanical device diagram showing a rotating fan or impeller assembly with a central knob (no text or symbols)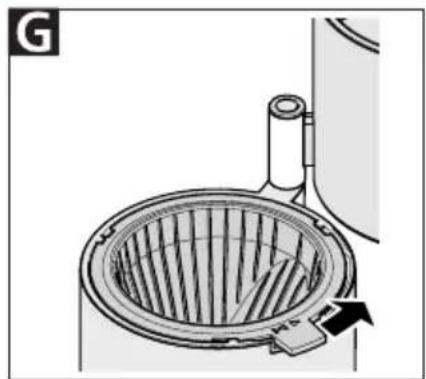
natural_image
Diagram of a circular mechanical device with internal blades and a handle, showing no text or symbols.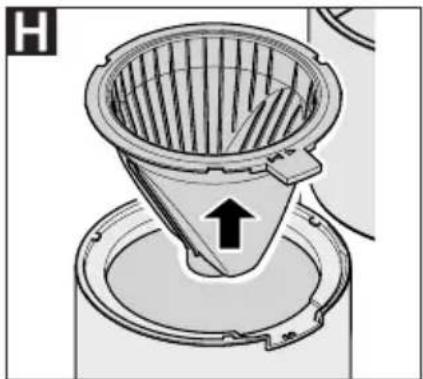
natural_image
Diagram of a funnel-shaped filter or filter device with an arrow indicating upward motion (no text or symbols present)I
ritterwerk Made in Germany
xxxV-xxxV\~ xx/xxHz xxxW-xxxW

de Gebrauchsanleitung......3
en Operating instructions....9
fr Mode d'emploi 14
CS Návod k obsluze....19
es Instrucciones de uso.... 24
hu Használati utasítás 29
it Istruzioni d'uso 34
nl Gebruiksaanwijzing....39
no Bruksanvisning...... 44
pl Instrukcja obsługi....49
ru Руководство по использованию....54
sk Návod na použitie....59
sl Navodilo za uporabo 64
GENERAL SAFETY INSTRUCTIONS
To avoid personal injury or damage to the coffee machine, please observe the following safety instructions:
- The appliance is to be used for domestic purposes only and must not be used commercially.
- Never set the appliance down on hot surfaces or close to a naked flame.
- Use the accessories included in the delivery specification only.
- Do not bend the mains cable. Never wrap the cable around the appliance.
- Route the mains cable so that it does not come into contact with hot or sharp-edged objects. Do not allow the mains cable to hang down over the edge of the worktop.
- Only start to use the appliance after it has been securely set up.
- This appliance may be used by children over 8 years of age as well as by persons with reduced physical, sensory or intellectual capabilities or persons lacking in relevant
experience and/or knowledge provided that they do so under supervision or have been instructed in the safe use of the appliance and understand the potential risks associated with its use.
- Do not allow children to play with the appliance.
- Keep the appliance and its connection cable out of reach of children under the age of 8.
- Children must not be permitted to clean or perform user maintenance on the appliance unless they are over 8 years of age and supervised.
- The appliance must not be operated using a timer or tele-control system.
- Only connect the appliance to a suitable AC power source that complies with the specifications on the type label.
- The appliance must only be filled with cold water up to the maximum number of cups (marked "max").
– Never leave the appli- ance unattended while it is operating.
- Always use the handles provided when touching any of the components.
- Steam flowing out of the steam outlet presents a scalding hazard. This outlet must not be covered. Never swivel out the filter or open the water tank lid while the appliance is operating.
– Never put water into the appliance if it is still operating or is still hot.
- Do not heat the thermal jug over a gas flame, on an electric hob, in a microwave or using other similar heating methods.
Risk of electric shock
- Always remove the mains plug from the socket in the event of a malfunction, before cleaning, when the appliance is not in use, and when it is left unsupervised. When doing so, pull on the plug and not on the cable.
– Never immerse the appliance in water or any other liquid. Never expose the appliance to rain or any other form of moisture.
If the appliance falls into water, unplug the cable from the mains socket before removing the appliance from the water.
Have it inspected at an authorized service location before using it again.
- Always ensure that your hands are completely dry before using the appliance. Do not use the appliance if it is wet or damp or while you are standing on a damp surface. Do not use the appliance outdoors.
- Stop using the appliance immediately if any parts are damaged and contact the ritter after-sales service.
- If the mains cable is damaged, it must be replaced by the manufacturer, the manufacturer's after-sales service or a similarly qualified person to eliminate risk of personal injury.
Unfold the illustrations at the front and back of this manual.
Please read these instructions thoroughly before you start to use the appliance. Keep these operating instructions in a safe place and ensure that they are included with the appliance if passing it on to a third party.
Alternatively, the current operating instructions are available at www.ritterwerk.de.
INTENDED USE
The coffee machine is intended to be used to prepare filter coffee.
The appliance is to be used for domestic purposes only and must not be used commercially.
If the appliance is used for a purpose other than this, or if it is operated incorrectly, severe injuries may occur or the appliance may be damaged. All warranty and liability claims will be rendered null and void in this case.
FUNCTIONS
The coffee machine can make up to 8 cups of 125 ml of filter coffee. The water level indicator on the water tank indicates the number of cups that can be made.
The appliance's water tank and brewing system are located above the filter. Having the water tank located this close to the filter reduces heat loss and therefore also energy loss.
The thermal jug is lined with a stainless steel vacuum cylinder, which means it can be used both to keep the coffee warm and as a serving jug. The thermal jug holds up to 1 litre of coffee.
The coffee machine automatically switches off shortly after the brewing process is complete. Standby power consumption is 0 watt.
The appliance's automatic lime-scale detection feature prevents premature wear and tear as well as increased energy consumption due to the build-up of limescale deposits on the appliance's components.
BEFORE USING THE APPLIANCE FOR THE FIRST TIME
Preparation
Remove the appliance carefully from the packaging. Remove all packaging parts and keep these together with the packaging in a safe place.
When disposing of the packaging parts later, please observe the statutory regulations governing proper disposal.
Using the thermal jug
CAUTION: Risk of damage to the appliance:
- Do not heat the thermal jug over a gas flame, on an electric hob, in the microwave or using other similar heating methods.
- Do not dismantle the thermal jug.
Note:
Do not put any milk products or carbonated (fizzy) drinks into the thermal jug (9).
The thermal jug lid (8) has three positions. Each of these is indicated by a different picture:

Make coffee

Pour coffee

Remove lid
The current position is indicated by an arrow (7) on the thermal jug.
Making coffee:
A The coffee machine comes shipped with the thermal jug lid (8) in the "Make coffee" position.
Pouring coffee:
B Twist the thermal jug lid (8) into the "Pour coffee" position. The lid becomes looser and is slightly raised.
- You can now pour the coffee out.
C and D Removing/closing the lid:
- To remove the lid, twist the thermal jug lid (8) into the "Remove lid" position.
- To close the lid, place the lid on thermal jug (9) in the "Remove lid" position.
Then twist the lid into the "Make coffee" position.
Setting up the appliance
- Place the coffee machine on an even, non-skid, dry surface close to a mains socket.
- Plug the mains cable (12) into the socket.
Cleaning the appliance
Rinse out the coffee machine with water twice before using it for the first time.
- Place the thermal jug (9) on the centre of the base (10). Ensure that the arrow (7) is pointing to "Make coffee".
- Fill a clean container with cold, clean water.
E Flip the water tank lid (1) upwards.
Note:
The appliance must only be filled with cold water up to the maximum number of cups (marked "max").
- Fill the water tank (3) with water up to the "max" level shown on the water level indicator (5).
- Close the water tank lid.
- Switch the appliance on using the power switch (6). The light on the switch lights up red.
CAUTION: Risk of scalding
-
Steam flowing out of the steam outlet (2) presents a scalding hazard. The outlet must not be covered. Never swivel out the filter or open the water tank lid while the appliance is operating.
– Never put water into the appliance if it is still operating or is still hot. -
Wait until the coffee machine switches off automatically after the brewing process is complete. The power switch then goes back to its initial position.
• Empty the thermal jug. - Repeat the steps using fresh water.
MAKING COFFEE
- Plug the mains cable (12) into the socket.
Notes:
The coffee will stay warm for longer if you follow the instructions below:
- Before making coffee, rinse out the thermal jug (9) with hot water.
-
Remove the thermal jug from the base (10) when the coffee brewing process is complete.
-
Place the jug on the centre of the base. Ensure that the arrow (7) is pointing to "Make coffee".
- Fill a clean container with cold, clean water.
E Flip the water tank lid (1) upwards.
Note:
The appliance must only be filled with cold water up to the maximum number of cups (marked "max").
- Fill the water tank (3) up to the desired number of cups. The water level indicator (5) indicates the number of cups that can be made.
- Close the water tank lid.
F Swivel the filter (13) to the left out of the appliance until it locks into position.
- Insert a paper filter (filter size 4) directly into the filter holder (14). Fold the paper along the crimped edges so that it fits into the filter holder without protruding.
- Place a sufficient amount of ground coffee for the number of cups you want to make in the paper filter.
- Swivel the filter back into the appliance.
- Switch the appliance on using the power switch (6). The light on the switch lights up red.
CAUTION: Risk of scalding
- Steam flowing out of the steam outlet (2) presents a scalding hazard. The outlet must not be covered. Never swivel out the filter or open the water tank lid while the appliance is operating.
– Never put water into the appliance if it is still operating or is still hot.
- Wait until the coffee machine switches off automatically after the brewing process is complete. The power switch then goes back to its initial position.
- Remove the thermal jug when the coffee brewing process is complete.
- Twist the thermal jug lid (8) into the "Pour coffee" position and serve the coffee.
Note:
Do not set the thermal jug down because it is not completely leak-proof.
Removing the coffee filter
F Swivel the filter (13) to the left out of the appliance until it locks into position.
G Unlock the filter holder (14) by sliding the lever to the right.
H Lift out the filter holder and remove the coffee dregs and paper filter for disposal with your other biodegradable waste.
- Put the filter holder back into the appliance.
- To secure it, slide the lever to the left until it locks into place.
CLEANING
Clean your coffee machine regularly to avoid lime-scale build-up. Lime-scale build-up may affect the performance of your appliance.
Notes:
- The appliance's components are not suitable for washing in the dishwasher.
-
Never immerse the thermal jug (9) in water or any other fluid, as it may permeate the space between the thermal jug's walls.
-
If necessary, clean the thermal jug and the thermal jug lid (8) with a little detergent and a soft brush.
- Wipe down the outer parts of the coffee machine with a damp cloth.
- If the drip stop of the filter holder (14) is not leak-proof, rinse it under running water.
De-scaling
De-scale your coffee machine regularly. Regular de-scaling saves energy. The frequency with which you need to de-scale
depends on the hardness of the water in your local area.
The following signs indicate that your coffee machine needs to be de-scaled:
- The appliance switches off automatically, even though there is still some water in the water tank (3) (automatic lime-scale detection feature).
– There is visible lime-scale build-up in the water tank and in the riser tube (4)
– The brewing process is noticeably longer.
– The brewing process is noisier than usual.
– A significant amount of steam escapes during the brewing process.
To de-scale the appliance, follow the steps below:
- Insert an empty paper filter into the filter holder (14) to catch the limescale.
- Mix 1.1 litres of de-scaling solution following the manufacturer's instructions (if using vinegar or lemon essence, mix 1 part essence and 2 parts water).
- Fill the water tank with de-scaling solution up to the "max" level shown on the water level indicator (5).
- Switch the appliance on using the power switch (6).
- Allow approx. two cupfuls to run through the appliance before switching it off. Leave the de-scaling solution to take effect for 20 to 30 minutes.
- Switch the appliance on again and allow the remaining de-scaling solution to run through it. Note:
The appliance may switch off automatically, even though there is still some de-scaling solution in the water tank. If this happens, leave the solution to take effect again and then switch the appliance back on.
- Rinse twice with fresh water (see “Cleaning the appliance” under “Before using the appliance for the first time”).
- Repeat the de-scaling process if necessary.
STORAGE
Keep the appliance out of the reach of children.
DISPOSAL
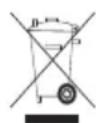
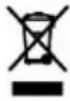
At the end of its service life this product may not be disposed of as part of normal domestic waste.
It must be taken to a dedicated collection point for recycling electrical and electronic devices. This is referred to by the symbol on the product, the operating instructions or the packaging.
The materials can be used again in accordance with their identification. The reuse, material-sensitive recycling or other forms of recycling of old appliances enables you to make a vital contribution to protecting our environment.
Please consult with the disposal office at your local authority.
REACH DIRECTIVE
SERVICE, REPAIRS AND SPARE PARTS
Please contact your local after-sales service for all service, repairs and spare parts matters! See www.ritterwerk.de
TECHNICAL DATA
This appliance complies with the following regulations and directives:
- 2014/30/EU
- 2014/35/EU
- 1935/2004/EC
- ErP 2009/125/EC
- 2011/65/EU
The appliance thus complies with the CE specifications.
Mains voltage/power consumption: Refer to the type label on the underside of the appliance.
Safety class: 1
WARRANTY
This ritter appliance comes with a two-year manufacturer's warranty, starting with the date of purchase and in accordance with the EU warranty directives. In the event of a warranty claim or for servicing, the appliance must always be sent to the appropriate national customer service centre.