VDV526-054 - Measuring equipment Klein Tools - Free user manual and instructions
Find the device manual for free VDV526-054 Klein Tools in PDF.


User questions about VDV526-054 Klein Tools
0 question about this device. Answer the ones you know or ask your own.
Ask a new question about this device
Download the instructions for your Measuring equipment in PDF format for free! Find your manual VDV526-054 - Klein Tools and take your electronic device back in hand. On this page are published all the documents necessary for the use of your device. VDV526-054 by Klein Tools.
USER MANUAL VDV526-054 Klein Tools
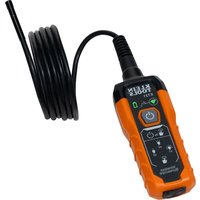
The Klein Tools TraceAll™ Tone & Probe is a portable device that assists in tracing. It includes a tone generator that places a low voltage signal on the line, and a tracer that detects and amplifies the signal.
Dimensions: 8.9'' × 1.7'' × 1.2'' (22.6 × 4.3 × 3.0 cm)
Weight5.0 oz. (140 grams) with battery and remote
Operating Temperature: 0^ to 50^ / 32^ to 122^
Storage Temperature: -20 °C to 60 °C / -4°F to 140°F
Humidity: 10% to 90% , non-condensing
- Externally Applied Voltage without damage:
DC:250V
AC:175VRMS
Battery Life (typical):
- Tracer: 10 hours, 6V - 4 x LR44 alkaline batteries
-
Generator: 50 hours, 6V - 4 x LR44 alkaline batteries
-
Tone Voltage: 12 volts peak-to-peak no load, new battery
- Tone Power: 8.9 dbm into 600 ohms, new battery
- Tone Frequencies116Hz and 919Hz ±5%
Probe Replacement Tip: Cat No. VDV999-059
WARNINGS
To ensure safe operation and service of the tester, follow these instructions. Failure to observe these warnings can result in severe injury or death.
- Connecting the TraceAll™ to live AC power may damage it and pose a safety hazard for the user.
- Poorly terminated RJ plugs have the potential to damage the jack on the TraceAll™. Visually inspect a RJ plug before inserting it into the generator. The contacts should always be recessed into the plastic housing of the plug.
AttRIButES
TRACING A TONE
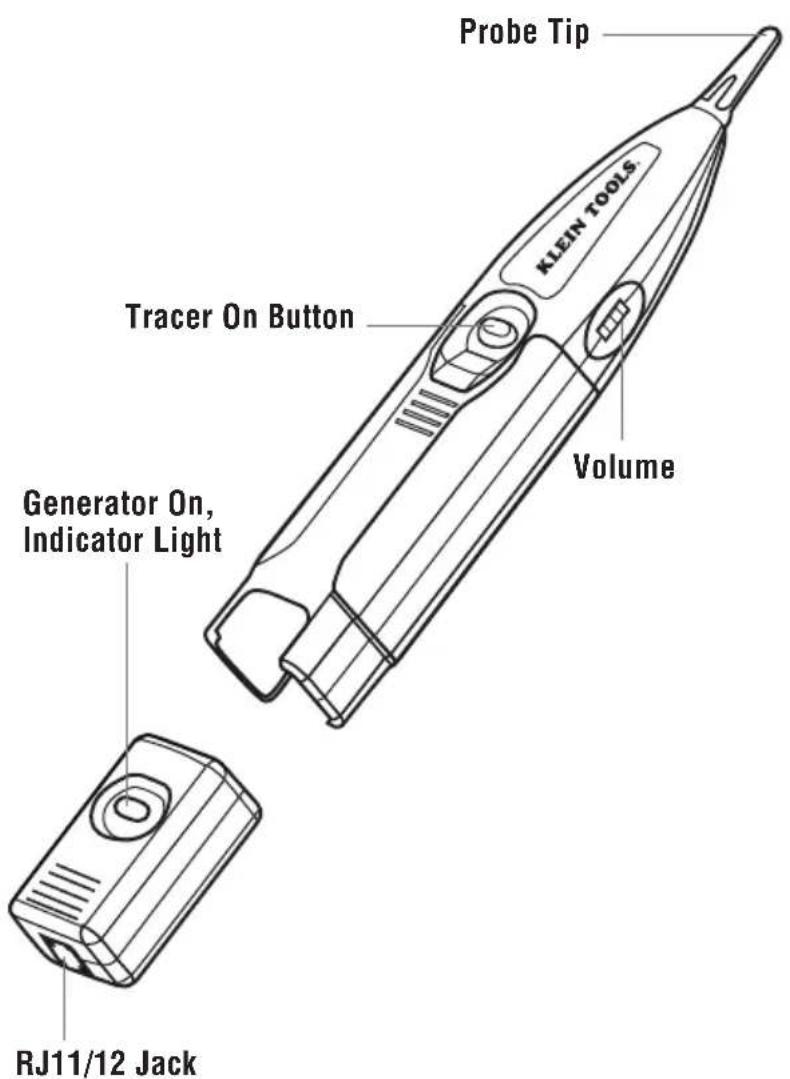
- Remove generator from tracer by squeezing finger grips at rear of the tracer and pulling out the generator.
- Connect the TraceAll™ generator to the cable being traced using the RJ11/12 jack on the generator. Connect an RJ11/12 terminated cable directly or connect any other cable type using the included alligator clips adapter.
- Press the button on top of the generator. The button will flash to indicate the tone generator is powered on. A long press will toggle the tone cadence. Another short press will turn off the generator. The flash rate is different between the two cadences.
- Turn on the probe by pressing and holding the black button.
- Adjust the volume on the probe to a comfortable level by turning the dial on the side (clockwise raises the volume). If the signal is very loud when near the cable, reduce the volume to avoid overloading the TraceAll™. When the probe is overloaded, small increases or decreases of the signal at the tip cannot be heard.
- Hold the tip of the probe near the cable to be identified. The signal will be loudest on the wire or cable attached to the generator. Separating the wires or cables may help in isolating the correct cable.
APPLICATION HINTS
When tracing wires terminated to a terminal block such as a "66 block", attach both generator leads to the cable or pair tends to contain the signal within the cable or pair. This causes cancellation of the radiated signal. The tracer must nearly touch the end of the cable to detect the signal, which is helpful when the wires are close together or when terminated.
Connecting one lead of the generator to a wire is normally sufficient to trace the cable. The more wires in a cable connected in parallel to the generator, the stronger the radiated signal.
When necessary to maximize radiated signal, connect one lead of the generator to the wire or cable and the other end to ground (case of an electrical box, electrical conduit, metallic water pipe or ground rod).
Connect the generator to the ungrounded shield of a coax cable for the strongest signal. If the generator is connected to the center lead, the shield will do its job and shield the signal from being radiated.
REPLACING THE PROBE TIP
The probe tip can be replaced if it is worn out or damaged with TraceAllTM Probe Replacement Tip (Cat. No. VDV999-059.)
- Remove the screw on the back of the probe nearest to the probe tip using a #1 Phillips screwdriver.
- Pull the tip out of the probe.
- Push the new tip into the probe. The probe body has a keying slot so the probe can only be inserted completely in one orientation.
- Replace the screw and tighten, being careful not to over-tighten.
Make sure the probe tip is firmly held in place by pulling gently on it.
If not, tighten the screw slightly.
BATTERY REPLACEMENT
To check the tone generator for low batteries, watch its flashing LED for dimming.
To check the tracer for low batteries, connect the alligator clips adapter to the tone unit and turn it on. Turn the volume down to the minimum on the tracer and place it near the adapter. If there is a quiet, distorted tone or no tone at all from the tracer, you should replace the batteries.
- Remove the screw in the middle of the back of the probe with a #0 Phillips screwdriver. Remove the battery door.
- Recycle exhausted batteries. Hitting the palm of your cupped hand with the back of the probe will usually dislodge the batteries from the compartment.
- Acquire 4 × IEC LR44 1.5 volt alkaline batteries (Energizer A76, Duracell LR44).
- Insert batteries into battery compartment with the battery plus sign (+) in the direction of the plus sign on the case (the spring contact is negative and the button contact is positive). Inserting the last battery in the middle of the stack is the easiest.
- Replace battery door and screw, taking care not to over-tighten it.
WARRANTY
Turn instrument off and disconnect test leads. Clean the instrument by using a damp cloth. Do not use abrasive cleaners or solvents.
StoRAGE
Remove the batteries when instrument is not in use for a prolonged period of time. Do not expose to high temperatures or humidity. After a period of storage in extreme conditions exceeding the limits mentioned in the Specifications section, allow the instrument to return to normal operating conditions before using it.
DISPOSAL/RECYCLE

Do not place equipment and its accessories in the trash. Items must be properly disposed of in accordance with local regulations.
CUSTOMER SERVICE
KLEIN TOOLS, INC.
450 Bond Street
Lincolnshire, IL 60069
1-800-553-4676
www.kleintools.com
NotES
CONSEILS D'APPLICATION
For Professionals... Since 1857
KLEIN TOOLS, INC.
450 Bond Street
Lincolnshire, IL 60069
1-800-553-4676
www.kleintools.com