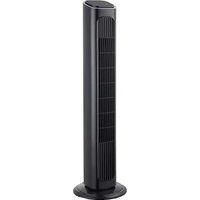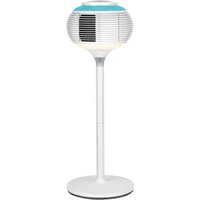
Dubai - Fan Sonnenkönig - Free user manual and instructions
Find the device manual for free Dubai Sonnenkönig in PDF.


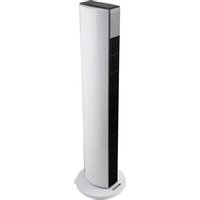
| Product type | Pedestal fan |
| Brand | Sonnenkönig |
| Model | Dubai |
| Supply voltage | 220-240 V~, 50/60 Hz |
| Power | 50 W |
| Number of speeds | 3 (Low, Medium, High) |
| Operating modes | Normal, Natural, Sleep, Auto |
| Timer | 0.5 to 24 hours |
| Oscillation | Yes, controlled by OSC button |
| Remote control | Yes, included (batteries not supplied) |
| Control panel | Touch with LED display |
| Filter type | Washable, clean every 2 weeks |
| Warranty | 24 months |
| Usage | Indoor only |
| Auto mode | Automatic shutdown if temperature < 25 °C, startup if > 25 °C |
| Repairability | No user serviceable parts, contact customer service |
| Included accessories | Base, screws, screwdriver, remote control |
| Certifications | CE (standards EN 55014, EN 60335, etc.) |
| Disposal | Do not dispose with household waste, recycling center |
Frequently Asked Questions - Dubai Sonnenkönig
User questions about Dubai Sonnenkönig
0 question about this device. Answer the ones you know or ask your own.
Ask a new question about this device
Download the instructions for your Fan in PDF format for free! Find your manual Dubai - Sonnenkönig and take your electronic device back in hand. On this page are published all the documents necessary for the use of your device. Dubai by Sonnenkönig.
USER MANUAL Dubai Sonnenkönig
natural_image
Exterior view of a modern vertical white and black industrial tower (no visible text or symbols)INDEX
text_image
FE FE FE FE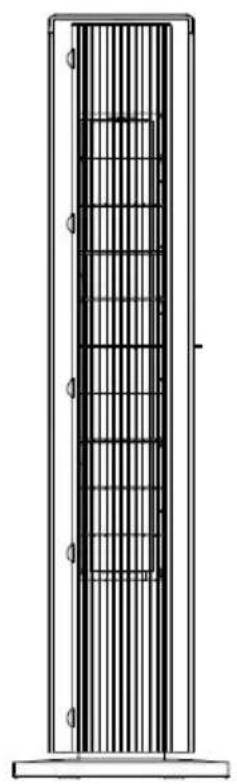
natural_image
Technical line drawing of a vertical structural component with internal grid pattern (no text or symbols)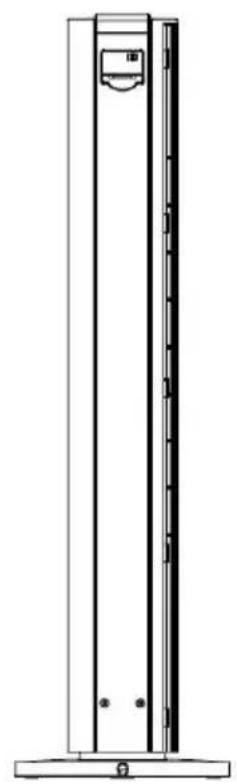
natural_image
Technical line drawing of a vertical cylindrical structure with mounting base (no text or symbols)natural_image
Technical line drawing of a mechanical component with threaded fasteners and internal grid structure (no text or symbols)Festnetz 14 Cent/Minute
natural_image
Exterior view of a tall white and black industrial tower with ventilation grilles (no text or symbols visible)SOMMAIRE
natural_image
Diagram of a vertical graduated cylinder with measurement markings (no text or symbols)natural_image
Technical line drawing of a vertical structural component with internal ribs and mounting holes (no text or symbols)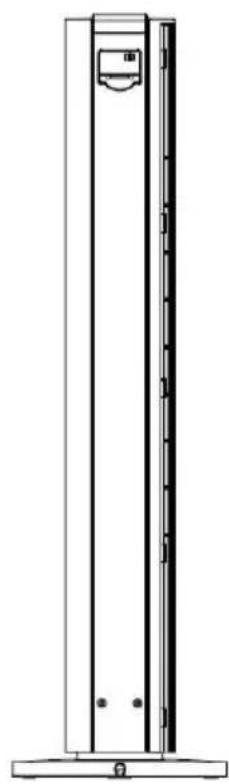
natural_image
Technical line drawing of a vertical cylindrical structure with a small inset component, mounted on a base (no text or symbols)3 Installation
natural_image
Technical line drawing of a mechanical component with internal structure and mounting holes (no text or symbols)FR
Mode: Normal, Naturel ( ♪ ), Veille ( ), Auto ( ) Auto

TIMER
Modifications techniques
Festnetz 14 Cent/Minute
natural_image
Exterior view of a modern white and black vertical tower with ventilation grilles (no visible text or symbols)IT
INDICE
natural_image
Technical line drawing of a vertical structural component with internal grid pattern (no text or symbols)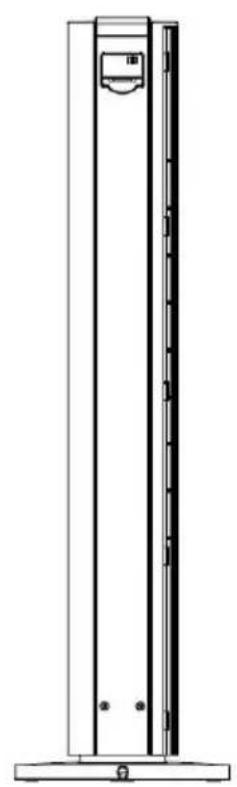
natural_image
Technical line drawing of a vertical cylindrical device with mounting base (no text or symbols)Vista anteriore Vista laterale Vista posteriore
IT
3 Installazione
natural_image
Technical line drawing of a mechanical component with threaded fasteners and internal grid structure (no text or symbols)natural_image
Exterior view of a modern vertical white and black tower (no visible text or symbols)INDEX
1 Safety instructions....36
2 Product specifications....37
3 Installation ....38
4 Replacing the battery ....39
5 Keys of control panel and remote control 40
6 Operation instructions ....41
7 Cleaning and maintenance....41
8 Warranty / Disposal / Technical change 42
1 Safety instructions
EN
Please read before first commissioning the safety instructions carefully and observe the safety instructions to prevent damage due to misuse, improper operation, and improper environmental conditions to be avoided. Keep these for later reference.
Check the device after removing the packaging for damage. Do not put the unit in case of suspected corruption in operation and consult a specialist. The recyclable packaging material must not be stored or disposed accessible for young children, but must be disposed of properly.
This appliance is only for the purpose for which it was explicitly developed. Any other use is regarded as improper and therefore dangerous. The supplier is not liable for damage to persons and / or property damage due to an improper or incorrect use.
This appliance can be used by children aged from 8 years and above and persons with reduced physical, sensory or mental capabilities or lack of experience and knowledge if they have been given supervision or instruction concerning use of the appliance in a safe way and understand the hazards involved. Children shall not play with the appliance. Cleaning and user maintenance shall not be made by children without supervision. Please make sure to place the device on a suitable and waterproof surfaces, so that spilled liquids can not cause harm.
Repairs to electrical appliances must only be carried out by trained personnel only. Improperly performed repairs and alterations to the equipment can have dangerous consequences for the user according to what the warranty will be rejected.
- Read all instructions carefully before using the product.
- Check the voltage indicated on the rating plate. This product is designed for a 220-240V\~ / 50-60 Hz electric supply.
- Do not place the electrical cord under any kind of cover. Do not overlay the cord with small covers or similar elements. Place the cord in an area where there is no risk of tripping over it.
- Place the fan on a flat, firm and safe surface before use.
- Disconnect the plug from the socket when not in use by holding the plug and pulling it out. Do not pull the cord to remove the plug.
- Please make sure the fan cannot touch any obstructions while in operation.
- Do not put your fingers or any other object into the front grill while the fan is operating. Please pay special attention when in use near children, and prevent children playing with the fan.
-
Do not let hair, net curtains, tablecloths, clothes or curtains near the openings of the fan. These could be entangled into the fan, causing damage or injury.
-
Do not use the fan if the cord or plug is damaged, the fan blade has disconnected or the unit is damaged in any other way.
- Periodically check the power cord of the fan. If the power cord is damaged, it must be replaced by the manufacturer, its after-sales service division or a suitably qualified person to avoid danger.
- Do not use this fan outside; it is for indoor use only.
- Do not use this fan in a damp area such as bathroom.
- Do not use this fan near a window or in direct sunlight.
- Do not use this fan with any semi-conductor speed control.
- The fan should not be operated without a base, nor when tipped over.
- Do not operate the fan in areas where gasoline, paints or similar flammable liquids are used or stocked.
- Unplug the unit before servicing or moving, including for cleaning purposes.
• Always unplug the unit when not in use. - Use this fan only as described in this manual.
- Do not try to disassemble this fan; there are no parts that could be repaired by a general user. If maintenance is required, please send the fan back to the agent.
- Keep the fan clean and maintain in good condition (through an authorised service agent).
- Do not use an extension cord.
• Children should be supervised to ensure they do not play with the appliance.
2 Product specifications
Model: DUBAI
Voltage: 220-240V\~
Frequency: 50-60 Hz
Power: 50 Watt
EN
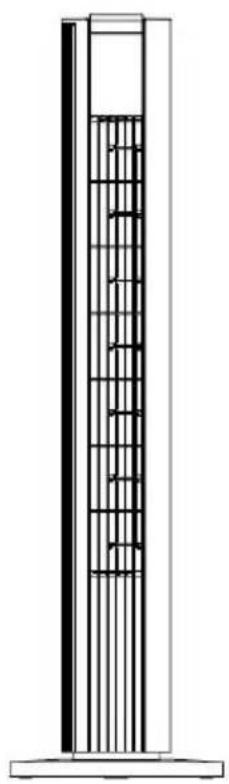
natural_image
Diagram of a vertical cylindrical structure with internal vertical bars, no text or symbols presentFront view Side view Rear view
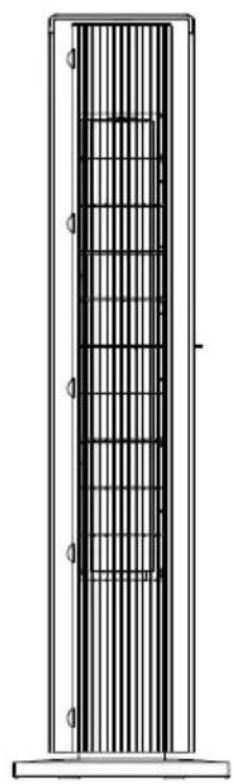
natural_image
Technical line drawing of a vertical structural component with internal ribs and mounting holes (no text or symbols)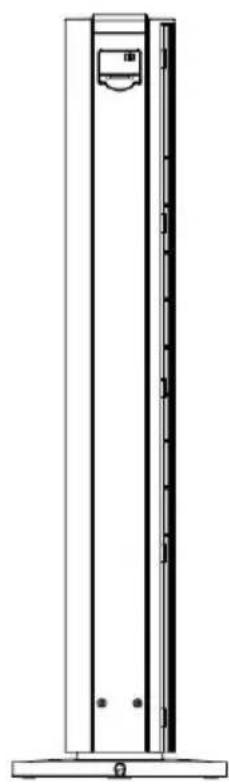
natural_image
Technical line drawing of a vertical cylindrical structure with a small inset component, mounted on a base (no text or symbols)3 Installation
- Remove all packaging materials from the box
- Pass the power cord through the base hole
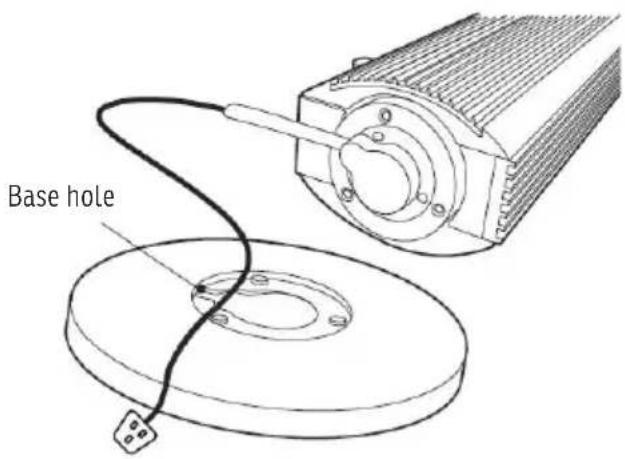
text_image
Base hole- Insert the main body into the base and tighten the screws with a screwdriver
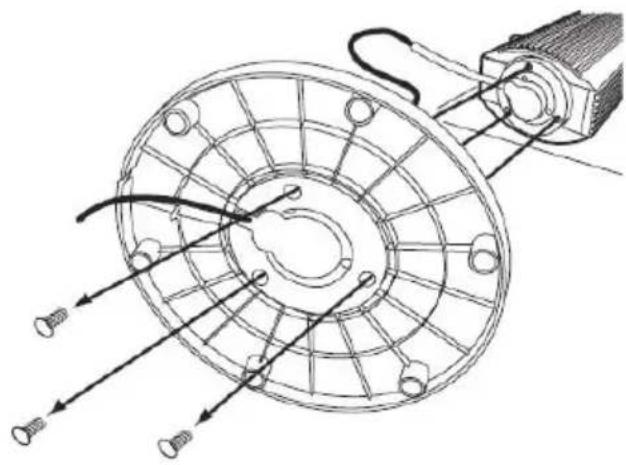
natural_image
Technical line drawing of a mechanical component with threaded fasteners and a central hub (no text or symbols)EN
- Place the power cord into the notch
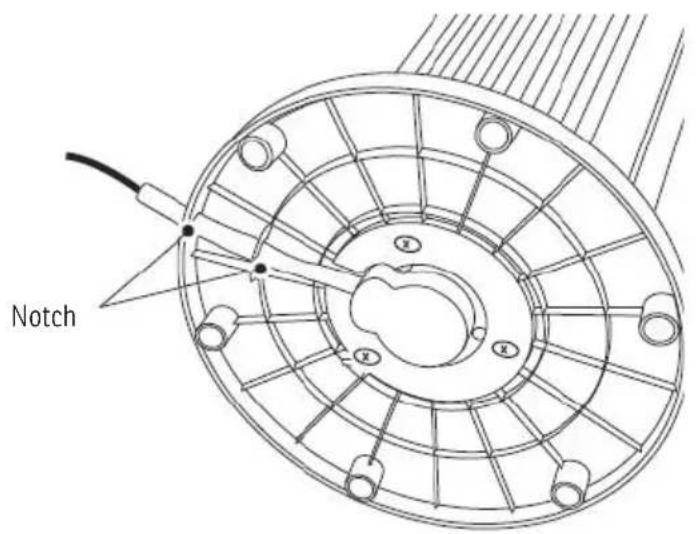
text_image
Notch4 Replacing the battery
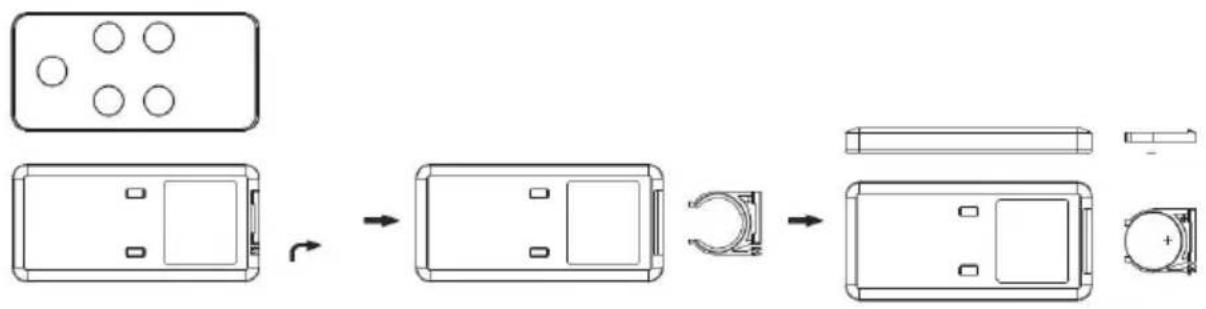
Press the tab lock and slide the battery compartment open. Insert the new battery, then gently push the battery compartment cover back into the remote control.
flowchart
graph LR
    A["Front Panel"] --> B["Internal Component 1"]
    B --> C["Internal Component 2"]
    C --> D["Internal Component 3"]
    D --> E["External Display Unit"]
    style A fill:#f9f,stroke:#333
    style B fill:#ccf,stroke:#333
    style C fill:#cfc,stroke:#333
    style D fill:#fcc,stroke:#333
    style E fill:#cff,stroke:#333
5 Keys of control panel and remote control
EN

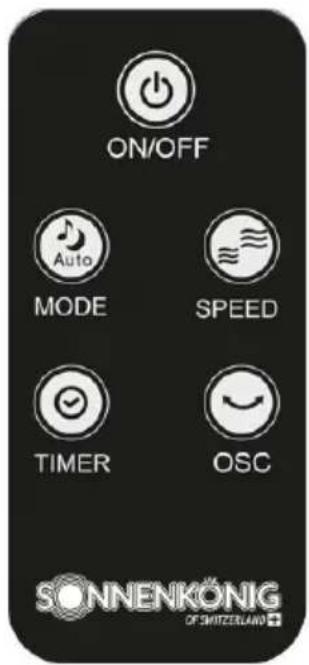
OSC

MODE

TIMER

SPEED

ON/OFF
Top panel Remote control
text_image
ON/OFF Auto MODE SPEED TIMER OSC SONNENKÖNIG OF SWITZERLAND
OSC
Smooth oscillation

MODE
Mode: Normal, Natural ( musical), Sleep ( ) , Auto ( ) Auto

TIMER
Timer control: Up to 24 hours

SPEED
Speed setting: HI (≡), MID (≠, LOW ( ) ≈
ON/OFF
On and off control
6 Operating instructions
- Insert the plug into a 220-240V\~ / 50-60Hz electrical power supply outlet.
-
Press the function keys on the touch control panel as follows:
-
POWER: Turn the fan on by pressing the ON/OFF key; pressing this key again turns it off and puts the fan into standby mode. Unplug the power cord to turn off the fan completely. We recommend unplugging the power cord when the machine is not in use to prolong its lifetime.
- SPEED: Adjust the fan speed to the desired level: HI, MID or LOW. The LED indicator will change accordingly: HI (≈), MID (≈), LOW ( ) ≈
- MODE: Press this key to set the fan mode: Normal, Natural, Sleep and Auto. The LED indicator will change accordingly: Natural ( ♪ ), Sleep ( ♦ ), Auto ( ). Auto
- NATURAL MODE: Fan speed will fluctuate automatically in a set time interval to simulate natural breeze.
- SLEEP MODE: Fan speed will fluctuate automatically in a set time interval to provide a comfortable sleeping environment.
- AUTO MODE: When the room temperature is 25^ or below, the fan will stop automatically. When the room temperature is higher than 25^ , the fan will run automatically.
- TIMER: Press the Timer key to choose a timer setting between 30 minutes and 24 hours. The blue LED display will show the time selected. Then the fan will automatically shut off when the selected time has elapsed.
-
SWING: Press the OSC key to turn on the oscillation function. Press again to turn it off.
-
Whether you use the remote control or the control panel, the functions are identical.
7 Cleaning and maintenance
• Always unplug the unit before moving or servicing.
- Unplug the unit and wait until the fan stops running before cleaning.
- Never immerse the power cord, plug or the appliance as a whole in water or rinse under the tap.
- To avoid damaging the appliance, do not use detergent, gasoline, benzene, thinner or any other solvents to clean the unit.
- Use a damp cloth to clean the surfaces of the fan.
- We recommend checking and cleaning the filter every 2 weeks. Remove the filter cover carefully and take out the filter. Clean the filter with a vacuum cleaner or damp cloth. Dry the filter before replacing it. To avoid any damage, we suggest placing the fan on a flat surface before removing the filter cover.
• After cleaning, ensure the unit is completely dry before connecting to the power supply.
- The fan must not be disassembled, except by an authorised service agent or other person qualified to undertake electrical repairs.
- If the fan will not be used for a long time, store it in a cool, dry and safe place well away from children. Do not store the appliance in hot places or in direct sunlight.
8 Warranty / Disposal / Technical change
EN
Warranty
The Products are controlled just before delivery. If despite a lack of your product, try trustfully your seller. Please bring your receipt, as this is to be submitted for each warranty. The guarantee period is 24 months from date of purchase.
Disposal
The device must be disposed of properly. The device can be distributed free of charge for disposal at each dealer.
Technical changes
Reserving technical changes in technology and design
CE Declaration of Conformity
This device complies with the following standards
EN 55014-1:2017
EN 55014-2:2015
EN 60335-1:2012 + A11:2014
EN 60335-2-80:2003 + A1:2004 + A2:2009
EN 61000-3-2:2014
EN 61000-3-3:2013
EN 62233:2008
2014/35/EU
2014/30/EU
2015/863/EU
In accordance with Article 26 of the Decree-Law of 31 March 2015 implementing Directive 2012/19/EC, and the Law of 4 March 2014 implementing Directive 2015/863/EC on the reduction of the use of hazardous substances in electrical and electronic equipment and on waste management.
The crossed-out dustbin symbol on the machine or packaging indicates that the waste generated at the end of its useful life must be collected separately from other waste. The user must therefore take the device to the appropriate collection points at the end of its service life. Sort electronic and electrical waste or send back to the retailer when purchasing new, equivalent devices in a one-to-one process. Appropriate separate collection for subsequent commissioning of the equipment to be recycled, treatment and environmentally sound disposal helps to avoid possible adverse effects on the environment and health, and promote the reuse and/or recycling of the materials to which they belong. Misuse of this product by the user will result in the application of the administrative penalties provided for in the applicable legislation. Batteries contained in the device must be disposed of separately in the appropriate containers for the collection of used batteries.
DISPOSAL OF BATTERIES AND ACCUMULATORS
In accordance with Legislative Decree 188 of 20 November 2008 implementing Directive 2006/66/EC on batteries, accumulators and related waste, the symbol of the crossed-out waste bin on the battery indicates that the disposal of used batteries is prohibited in household waste.
Single-use and rechargeable batteries contain substances that are highly polluting for the environment. The user is obliged to dispose of used batteries at collection points in the municipality or in appropriate containers. This service is free. In this way, legal requirements are adhered to and the environment protected.
The symbols identifying hazardous materials that may be present in single-use and rechargeable batteries are as follows: Hg = Mercury, Cd = Cadmium, Pb = Lead.
Company
Armin Schmid
Festnetz 14 Cent/Minute