X21R.2 - Lamp Ledlenser - Free user manual and instructions
Find the device manual for free X21R.2 Ledlenser in PDF.


User questions about X21R.2 Ledlenser
0 question about this device. Answer the ones you know or ask your own.
Ask a new question about this device
Download the instructions for your Lamp in PDF format for free! Find your manual X21R.2 - Ledlenser and take your electronic device back in hand. On this page are published all the documents necessary for the use of your device. X21R.2 by Ledlenser.
USER MANUAL X21R.2 Ledlenser
natural_image
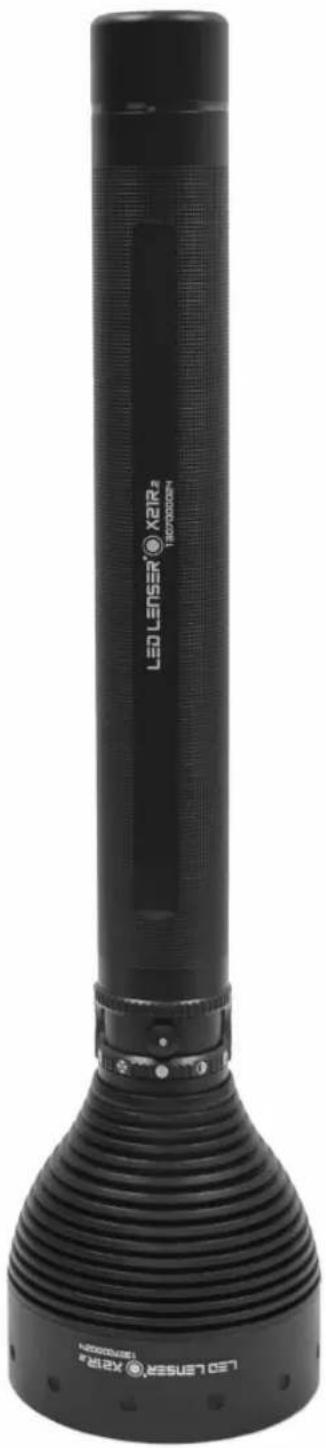
Black LED Lenser X21R2 160mm flashlight with threaded body and neck (no visible text or symbols on device body)English 03-05
Deutsch....06-09
Español....10-13
Français....14-17
Nederlands 18-20
Italian....21-23
Suomi 24-26
Svenska 27-29
Русский....30-33
한국어 34-36
日本語 37-39
中文....40-41
natural_image
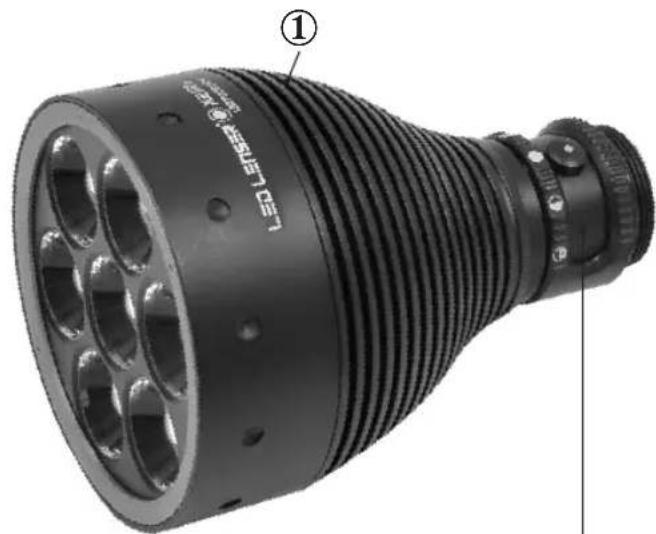
Close-up of a black conical flash source with threaded shaft and hexagonal holes (no text or symbols visible)⑤
text_image
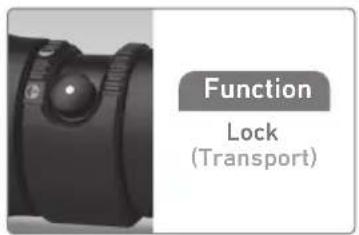
Function Lock (Transport)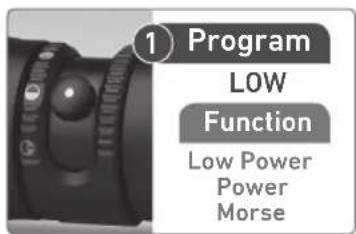
text_image
1 Program LOW Function Low Power Power Morse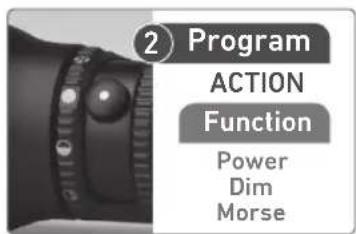
text_image
2 Program ACTION Function Power Dim Morse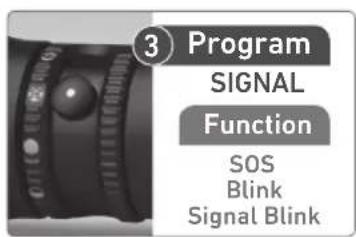
text_image
3 Program SIGNAL Function SOS Blink Signal Blink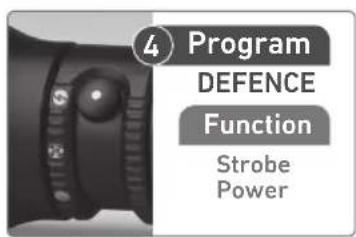
text_image
4 Program DEFENCE Function Strobe Power⑥
natural_image
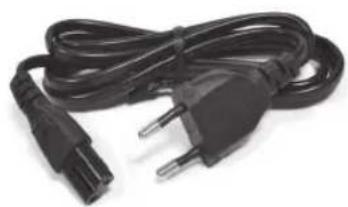
Coiled black electrical plug with two terminal leads (no text or symbols visible)a.
natural_image
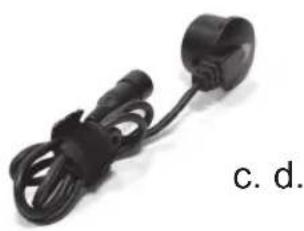
Black cable with a terminal connector, labeled 'c. d.' (no other text or symbols visible)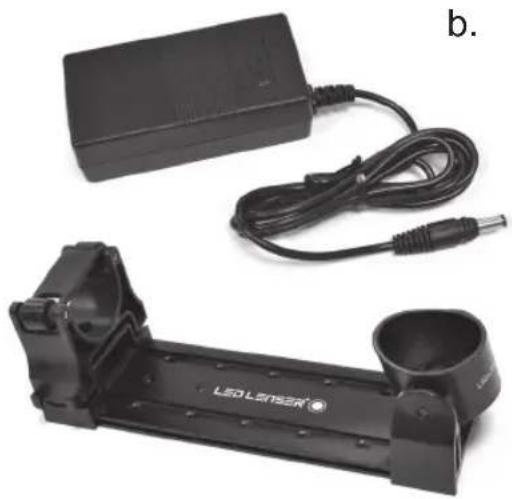
natural_image
Product photo of a black LED Lenser brand light fixture with attached charger and cable (no visible text or symbols)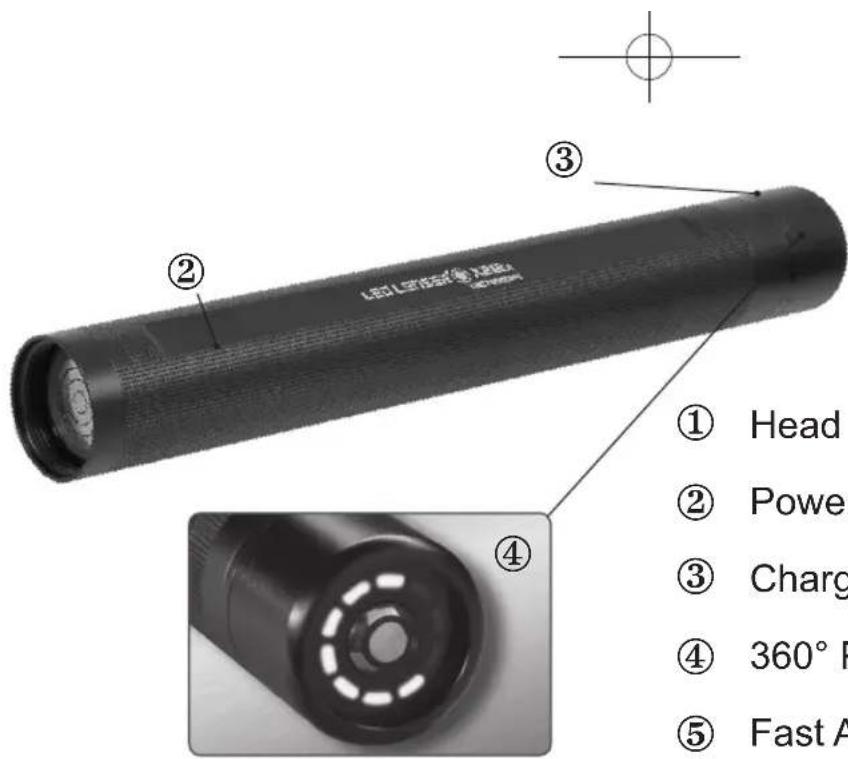
text_image
LED Laser ② ③ ① Head ② Power ③ Charge ④ 360° F ⑤ Fast A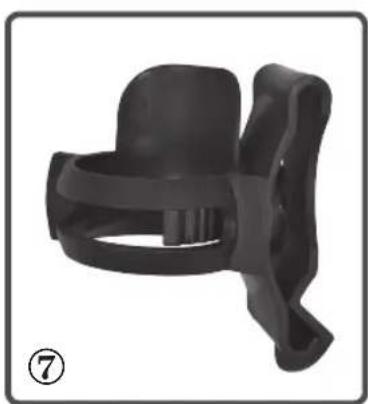
natural_image
Black plastic clip device with curved handle and mounting bracket (no text or symbols visible)① Head Module
② Power Module
③ Charge indicator
④ 360° Power Indicator
⑤ Fast Action Switch
⑥ Floating Charge System ^Pro a. mains plug b. charger with extension cable c. magnetic charging socket d. charger bracket
⑦ Intelligent Clip
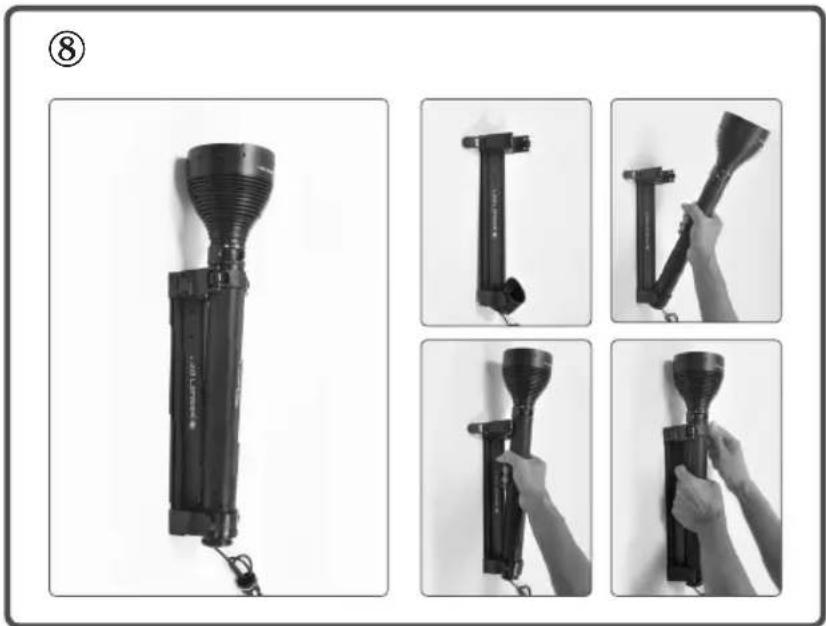
⑧ Connect X21R to the Floating Charge System ^Pro
CE
natural_image
Four-panel sequence showing a black handheld device with a flame, being handled by hands (no text or symbols visible)LED LENSER® X21R.2
We are delighted that you have purchased one of our products.
These are usage instructions to help you familiarize yourself with your new purchase. All the documents accompanying the product must be read attentively before using the product, stored for future use and if the product is transferred to a third party, the documents must be handed over as well. This ensures that maximum benefit is drawn from the product and questions from users can be resolved when they arise. Above all, comply with the warnings and safety instructions and dispose of the packaging material properly.
Under point 13 and 14 it is explained how the lamp head is separated from the Power Module and how the rear part of the shaft of the lamp is unscrewed. Both actions described under point 13 and 14 must be carried out before initial use of the lamp; they are necessary in order to remove and dispose of the two insulating films (one on each side). These two films serve as protection during transport of the "Safety Ytrion Cell" battery pack.
After taking off the insulating films, you must screw the rear part to the middle part first before pushing the switch button; otherwise the lamp might not work properly. Now, you can screw the Power Module (rear part plus middle part) to the lamp head.
Product
LED LENSER
9421-R Led Lenser X21R.2
Version of the operating manual: 1.3
1. Battery set:
1 x Power Module (shaft including "Safety Ytrion Cell" battery pack); no other batteries or accumulators are permitted
2. Turning on and off
The "Fast Action Switch" is a selection ring located on the X21R.2 shaft directly behind the lamp head. It is used to quickly select and use various Light Programs and Light Functions (see Point 7). Rotating selection ring lines up the switch button with one of 5 different symbols on the ring. Thereby selecting different settings when the switch button is pressed. This feature is called "Fast Action Switch" and is further described under Point 7 along with the various Light Programs and Light Functions that can be selected in this manner.
In the extreme left position of the switch button, which is marked on the selection ring by a lock symbol (☐ - Lock Function), the X21R.2 is protected against accidentally getting switched on. In all the other positions, it can be switched on and the various Light Functions can be used.
Please note, that there are three ways of actuating the switch button:
a )Switching
When the switch button is pressed beyond the pressure point, (deep enough so that the switch clicks into position) a small clicking sound can be heard when the button locks into position.
b) Brief tapping
When the switch button is only tapped briefly and not pushed as deeply as in explained above. As a result, the switch does not lock into position, there is no audible click and the switch returns to its untouched starting position when it is released.
c) Prolonged tapping
This is when the switch button is pressed as hard as what is described under b), but held in the unlocked position for a longer time. Here too, the button is not pressed as hard as under a). As a result, the switch does not lock into position, there is no audible click and the switch returns to its untouched starting position when it is released.
This prolonged tapping is required to be able to select various settings (see Point 7 and 8).
The descriptions above apply to the switch button of the "Fast Action Switch" in the front section of the X21R.2. Please do not confuse it with the switch button (see Point 10), which consists of the two concentric charging circles at the end of the torch.
3. Focus
The focus of the X21R.2 can be quickly adjusted with the so-called Speed Focus feature. For this purpose, hold the torch on the serrated middle section firmly with one hand and, with the other hand, pull the reflector lens lamp head forwards or backwards. By doing this, you can adjust the light beam continuously to suit your needs.
4. Smart Light Technology (SLT)
The X21R.2 is equipped with our Smart Light Technology (SLT). Thanks to the use of a microcontroller, the light output of the LED can be controlled and various Light Programs and Light Functions can be utilized. By using a single switch in conjunction with the selection ring, the "Fast Action Switch", it was possible to keep the interface simple and user-friendly. The torch can provide the user with light in various intensities and in various different ways. There are two Energy Modes, four Light Programs and a number of Light Functions available. To switch the pocket torch
on and off and to select the various Light Functions, the switch in the front section has to be used. Here, the switch is used in the three ways described above in Point 2.
The brightness of the X21R.2 is additionally controlled by the built-in temperature control unit.
5. Energy Modes
By selecting one of the two Energy Modes (Energy Saving or Constant Current), you make a decision on how the energy contained in the rechargeable batteries are used.
5.1 Energy Saving: The light output is controlled by the integrated Smart Light Technology (SLT). The brightness is matched to the real conditions that occur during normal use of the lamp, thus providing a longer burn time.
5.2 Constant Current: This Energy Mode allows the continuous use of all the Light Functions with a more or less constant light output. This Energy Mode is ideal when a high brightness level is more important than a long burn time.
6. Changing of the Energy Modes
To change the Energy Mode, the lamp has to be off and the switch button has to line up with the second position (☐) of the "Fast Action Switch". Tap the button near the head of the lamp lightly 8 times. On the 9th tap, press the button so you can hear it click. If the brightness first increases and then gradually reduces to zero, this indicates that the X21R.2 is now in the Energy Mode 'Energy Saving'. If after the button is pressed and the brightness of the X21R.2 quickly increases, remains constant for approx. 2 seconds, then suddenly drops to zero, the X21R.2 is now in the Energy Mode 'Constant Current'.
With this procedure, you can switch between the two Energy Modes however, it is not possible to determine in which Energy Mode the X21R.2 currently is. To find this out you must carry out the procedure again. If the X21R.2 is thereafter not in the desired Energy Mode any more, you must repeat the procedure again.
7. Light Programs and Light Functions
As already described in Point 2, by turning the black selection ring (with its 5 marks) below the lamp head, you can select from 5 different settings and activate them with the switch button. The 5 positions represent the various Light Programs or the Lock Function. The ring uses embedded permanent magnets and thus ensures contact-less transmission of the selection to the microcontroller in the lamp housing. (see figure 5 on page 1)
7.1 Lock function (☐)
In the first position from the left (the selection ring has been turned to the right till it comes to a stop), the X21R.2 cannot be switched on, either intentionally or unintentionally. Thus, the lock function is handy for when the X21R.2 is transported. Also, there could be situations in which the X21R.2 should not be switched on unintentionally.
7.2 Light Program Low (○)
If the switch button of the "Fast Action Switch" is in the second position from the left of the selection ring, you can use the Light Function Low Power with its reduced brightness. When the lamp is switched on, it will be initially in the Light Function Low Power. By tapping the switch when the lamp is on, the Light Function can be switched from Low Power to Full Power and back, thus providing light output at 10% or 100% of the output power, respectively. Pressing the button a second time will turn the lamp off again.
When the X21R.2 is off, tapping can be employed, e.g. to send signals of various length in Morse code with reduced brightness.
7.3 Light Program Action (●)
If the selection ring is in the third position from the left and the lamp is switched off, pressing the button will turn on the lamp at full brightness level (Light Function Power).
If the lamp is switched off but the button is tapped, Morse signals can be transmitted with full brightness. If the tapping lasts for more than 3 seconds, the boost mode (130% of full brightness) will be entered. This mode will stay on as long as the switch is held in the tapped position.
If the lamp is switched on, tapping will switch between the 100% output level and a stored dimming level. The dimming level can be set (Light Function Dim) tapping and holding the switch for more than 3 seconds when the lamp is on and in dim. While holding the switch, the brightness level will cycle through all possible dimming settings. It will slowly increase to the maximum output level, then slowly decrease to the minimum level and finally restart the cycle and increase again. The maximum and minimum levels in the cycle are marked by a short blink. When the desired dimming level is reached, the switch can be released. The lamp will continue to output light at the chosen dimming level; in addition, the dimming level will be saved and is available the next time the Light Function Dim is activated. The setting of the dimming remains stored until a new level is stored by the user or when the Power Module (shaft with „Safety Ytrion Cell" battery pack) is unscrewed at the head (also see the Reset function under Point 9).
Pressing the button once more will turn the lamp off.
7.4 Light Program Signal (⊕)
In the fourth position from the left, by switching or tapping, the Light Function SOS (3 short, followed by 3 long, followed again by 3 short flashes) can be invoked immediately.
When the Light Function SOS is activated, tapping the switch will cycle through two additional functions. The first tap will activate the Light Function Blink (slow, continuous blinking). Tapping once again will activate the Light Function Signal Blink (double flash at short intervals). Tapping a third time will activate the Light Function SOS again. Pressing the button one more time will turn the lamp off.
7.5 Light Program Defence (●)
The Light Mode Defence is the one on the extreme right on the selection ring; it can be selected by turning the selection ring completely to the left till it comes to a stop.
After operating the switch the Light Function Strobe is set. Afterwards, by tapping briefly it is possible to toggle between the Strobe and the Power Mode.
Pressing the button once more when the lamp is on will turn the lamp off.
Like in the other Light Modes 2 to 4, the Light Functions can be cycled through by successively tapping the switch: this means, for example, that in Light Mode 5, tapping the switch when in the Light Function Power will enable the Light Function Defence and vice versa.
When the X21R.2 is operating in one of the Light Functions (2, 3, 4 or 5), turning the "Fast Action Switch" will immediately switch over to the corresponding Light Function. After such a changeover, the X21R.2 will have the same Light Function enabled that it would have when first turning the "Fast Action Switch" and then switching on the lamp, e.g. with the Light Program Signal, the Light Function SOS would be activated.
8. Emergency Mode / Emergency Light Function
When the Emergency Mode is activated, the X21R.2 has an emergency light function. To use this function, the mode has to be activated and the X21R.2 has to be connected to the charger (position light at the charger glows blue, see Point 10). In this case, the torch automatically goes on when the electric supply that is providing energy to the charger fails. If positioned meaningfully, the X21R.2 can facilitate finding quickly an escape route in an emergency, or the lamp can be quickly found and picked up, already switched on. If this function is active, the X21R.2 shines automatically even if the charging process is interrupted by removing the X21R.2. Therefore, the function can also be used when the X21R.2 has to be ready for immediate use.
To set the Emergency Mode, set the „Fast Action Switch" to (the second position) Light Program Low and tap prolonged for about 10 seconds. The X21R.2 glows for these 10 seconds and then blinks. After blinking, the light turns off. When it flashes 4 times, Emergency Mode is activated; if it flashes twice, Emergency Mode is disabled. If this procedure is carried out again, the setting toggles between activated and disabled and signals this by a corresponding blinking.
9. Reset function
Unscrewing the Power Module (shaft with "Safety Ytrion Cell" battery pack) from the lamp head and reassembling the two parts again after a while will reset the X21R.2. This resets the following functions:
The Energy Mode, Energy Saving is active (see Point 6).
The Emergency Mode (see Point 8) is active.
The lamp function Dim (see Point 7.2) is set to the lowest brightness.
10. Charging
The Power Module (shaft without lamp head) contains the "Safety Ytrion Cell" battery pack, the rechargeable batteries.
Charge your X21R.2 only in a dry place.
For charging, connect the main cable on one side to the charger provided (Input: 100 V to 240 V / 50 Hz to 60 Hz) and one the other side to a mains power socket. Then connect the extension cable of the charger to the cable of the magnetic charging socket, whose blue position light will start to glow. You can now connect the concentric charging contacts at the end of the X21R.2 to the magnetic charging socket. When the lamp has been correctly attached, the charging display glows red (see Point 11) and the charging starts. The Power Module (shaft with the "Safety Ytrion Cell" battery pack) with the unscrewed lamp head can also be charged by itself.
See the following section on the subject of the charging indicators (see Point 11) for more information.
Note – Please ensure that there is no short-circuit at the charging contacts. The charging contacts must not be touched with moist or metallic objects.
The magnetic charging socket can also be inserted in the cylindrical part of the charger bracket, which is part of the supplied kit, and then locked into place by turning a couple of times in the counter-clockwise direction like a bayonet lock. The lock is released by rotating in the other direction. The bracket can be fastened on the wall with dowels (not supplied with the lamp) in such a way that the blue position lamp of the magnetic charging socket, for example, glows downwards. Please use a sufficient number (min. 4 pieces) of suitable dowels, depending on the material of
the wall.
The orientation described suggests itself that when you wish to use the Emergency Module / Emergency Light function (see point 8) the X21R.2 will shine upwards in case of a power failure. On the other side of the bracket, the X21R.2 can be joined to the bracket with 2 rubber rollers and fixed permanently by using the rubber gusset that is located at the level of the two rubber rollers. The latter suggests itself if there are acceleration forces acting on the X21R.2. In this manner, the X21R.2 can be fixed in the bracket inside the vehicle if the charger bracket is fixed permanently to a vehicle.
Using an optionally available car charger (needs to be purchased separately), the X21R.2 can also be charged at the cigarette lighter and power sockets in the vehicle. These accessory units adjust themselves automatically to the respective input voltage (from nominal 12 V to 24 V). When the car is off, the charger doesn't provide output if the voltage of the battery in the car is lower than 13.0V, in order to protect your car; you cannot charge the torch in this condition.
11. Charge indicator
Approx. 2 cm before the end of the shaft of the X21R.2 is a narrow ring which, during the charging process, indicates the charge status of the battery through lamps of different colours.
Red: (glowing continuously) charging on going.
Green: (glowing continuously) charging completed, the X21R.2 is ready for use with the full capacity of the battery. It generally takes 2 to 3 hours for an empty X21R.2 to get fully charged.
No light: The cause of this can be that the Floating Charge System ^Pro is not getting adequate electrical power. But it can also be that there is a loose contact. Therefore, check whether (magnetic) objects or dirt are preventing a good contact between the charging contacts at the end of the X21R.2 and the magnetic charging socket. If required, remove them. If required, also correct the position or the angle of the X21R.2 in the charging socket. If, given an adequate electric power supply, the charge indicators still do not glow, immediately unplug the transformer or the optional car charger of the X21R.2 from the present power supply system and get in touch with your dealer.
12. 360° Power Indicator
The 360° Power Indicator consists of 10 blue-glowing elements, which are arranged in a circle around the two concentric charging contacts at the end of the shaft of the X21R.2.
During use the number of blue-glowing elements reduces further and just before the Power Module is empty, the last element will glow in red. Depending on when the charging contacts are pressed, the following can be determined from the number of elements glowing.
12.1 Battery status indication
If the charging contacts are pressed while the X21R.2 is off, the elements serve as a battery status indication. If, for example, all the 10 elements briefly glow blue, the X21R.2 is fully charged.
12.2 Operating time indication
If the charging contacts of the X21R.2 are pressed while the X21R.2 is being operated with a Light Function, the number of glowing elements provides an indication of the remaining relative lighting duration of the current Light Function.
The X21R.2 also shows this information for a brief moment when a Light Function has been selected by tapping or switching at the "Fast Action Switch", i.e. even without the 360^ Power Indicator having been actuated.
13. Changing the Power Module
Please charge the rechargeable battery in time. If the Power Module exhibits any atypical behaviour, please change it. For changing the rechargeable battery, please first switch off the torch and unscrew the part behind the "Fast Action Switch". You have thus separated the lamp head from the Power Module (shaft including "Safety Ytrion Cell" battery pack). For the disposal of the used Power Module, please read Point 14. Screw on a new Power Module onto the lamp head till it cannot be turned any further. Thanks to the innovative new contact system and the fixed connection between the lamp shaft and the "Safety Ytrion Cell" battery pack (Power Module), reversing the polarity is not possible.
14. Rechargeable batteries
Only the correspondingly approved LED LENSER Power Module consisting of the "Safety Ytrion Cell" battery pack and shaft may be used in this pocket torch. The Power Module was developed to ensure the highest level of safety and convenience.
If you have separated the used Power Module from the lamp head as described in Point 13, please unscrew the rear part of the shaft at the level of the charging display. When inspecting the tube, a PCB on the end of the "Safety Ytrion Cell" battery pack should be there. The PCB is held in place on this side in the shaft by a narrow plastic ring with thread. When removing the "Safety Ytrion Cell" battery pack from the shaft, unscrew this plastic ring from the shaft. For doing so, use the two grooves in the plastic ring that are displaced 180^ from one another, but make sure that you do not short-circuit the contacts of the „Safety Ytrion Cell" battery pack. The „Safety Ytrion Cell" battery pack can now be easily removed and disposed of by observing the national laws. The shaft can
LED LENSER® X21R.2
be disposed of in the domestic trash.
In contrast to the Power Module (shaft with "Safety Ytrion Cell" battery pack), a replacement of a "Safety Ytrion Cell" battery pack in a Power Module may not be carried out. Neither is it permitted, after removal of the "Safety Ytrion Cell" battery pack, to charge it in any other manner or instead, to use different rechargeable or standard batteries in the Power Module. The Power Module may only be opened once, for separation and subsequent disposal of the Ytrion Cell battery pack and the shaft; any other separation will render the manufacturer's warranty null and void.
In general, for the disposal of batteries as well as particularly for Lithium batteries, accumulators and accumulator packs, the applicable rule is that they may only be disposed of in a discharged state and in a technically correct manner. If they are not discharged it has to be ensured that short-circuits are not possible. This can be accomplished by sticking non-conducting adhesive tape over the contacts before disposal. Basically, the possibility of short-circuits with rechargeable and alkaline batteries must be eliminated, therefore they may neither be opened, entered into the human body in any way, or be thrown into a fire.
15. Cleaning
For cleaning, please use a dry, clean and lint-free cloth. If salt water is spilled on the lamp, it must be removed immediately. If it is not possible to rotate the selection ring of the "Fast Action Switch" smoothly any more, it must be separated from the X21R.2, and the underside of both the ring and the lamp tube underneath the ring should be cleaned of dirt. To do so unscrew and separate the lamp head from the Power Module. Carefully remove the black O-ring of rubber that is located above the lamp head thread. When the switch button is now pressed deep, the selection ring can be removed over the switch button in the direction of the thread. Please ensure that the small spring-loaded ball including its casing above the switch button is not lost. Both surfaces can now be cleaned and the parts can be assembled again in the opposite sequence.
If the reflector lens has gotten loose in the lamp head or, e.g. dirt has been deposited on its inner side, you can apply the following remedial measures.
The front ring of the X21 lens head, indicated by the 12 dents along the periphery, can be unscrewed. There is a plastic ring inside that fixes the reflector lens which can be tightened or removed for cleaning. You can clean the reflector lens, if required, with a dry, lint-free clean cloth. Afterwards, please assemble everything in the opposite sequence.
16. Scope of delivery
The X21R.2 is supplied in a hard case with the following accessories: 1 Floating Charge System ^Pro
1 main plug
1 charger with extension cable (Input: 100 V to 240 V / 50 Hz to 60 Hz)
1 magnetic charging socket (magnetic charger) with cable and blue position light as connection between the charger and the X21R.2
1 charger bracket – for fastening the charger components, e.g. to a wall
1 x operating manual
1 x front cap rubber cover
1 x end cap rubber cover
1 x carry belt
1 x rechargeable battery
Additional accessories for the X21R.2 are available (colour filter etc.). You can get information on these additional accessories on our website www.ledlenser.com.
17. Caution:
Do not swallow any small parts or batteries that are present. The product or parts thereof (including batteries) must be stored outside the reach of children.
For reasons of safety and approval (CE), the product must not be modified and/or changed. The product is to be used exclusively as a pocket torch. If the X21R.2 is used for any other purpose or used incorrectly, it can get damaged and a hazard-free use can no longer be guaranteed (danger from fire, short-circuit, electric shock etc.). There is no liability for harm to individuals or damage to property and the warranty of the manufacturer will be rendered null and void when the product is used in an unintended manner.
The X21R.2 can be operated between the temperatures of -20C^ and +50C^ (or -4F^ and 122F^ ). Ensure that the X21R.2 is not subjected to extreme temperatures, intense vibrations, explosive atmosphere, solvents and/or vapours. Also continuous exposure to direct sunlight, high humidity and/or moisture must be avoided.
Changes, repairs and maintenance other than those described in the documents accompanying the product may only be carried out by authorised technical personnel.
If it is found that the product – despite having been properly charged and correctly assembled- cannot be operated in a safe and normal manner, or the product shows damage, it must be rendered inoperative and must not be used any further. In this case, contact your dealer for warranty and/or repair.
18. Safety instructions
This product is not a children's toy.
Since it has small parts that can be swallowed, it is especially not suitable for those under the age of 5.
The article must not be used for examinations of the eyes (e.g. for the so-called pupil test).
During the use of the product, proper heat dissipation should be ensured, e.g. coverage of the lamp is to be avoided.
If the product does not work correctly, the user should first ensure that the battery is charged and the lamp is properly assembled, i.e. the shaft and the lamp head are screwed tightly together.
If using in traffic, please follow the respective legal regulations. Because of t the permanent magnets in the selection ring of the "Fast Action Switch" and in the magnetic charging socket of the Floating Charge System ^FRC , both the parts must always be a safe distance away from items such as heart pacemakers or other magnetic storage medias. The main hazard of this product is from the optical radiation in the blue-light range (400 nm to 500 nm). Thermal hazard threshold values have not been clearly determined.
The risk for the viewer depends on the use or on how the product is installed. However, there is no optical hazard as long as the aversion responses limit the time of exposure and as long as the information contained in this instruction manual is read.
The aversion reactions triggered by the exposure are natural reactions that protect the eye from the hazards of optical radiation. This includes in particular conscious aversion reactions such as eye or head movement (e.g. turning away).
When using the product it is of particular importance to bear in mind that the aversion reactions of persons at whom the light is directed at may be weakened or completely suspended as a result of medication, drugs or illness.
Because of the blinding effect of the product, improper use may lead to reversible, i.e. temporary impairment of sight (physiological blinding) or afterimages, or it may trigger feelings of queasiness and tiredness (physiological blinding). The intensity of the temporary feeling of being unwell or the time until it subsides depend primarily on the difference in brightness between the blinding-light source and the surrounding area. Photosensitive people in particular should consult a medical consultant prior to using this product.
Generally speaking, high-intensity light sources carry a high secondary hazard potential due to their blinding effect. Just like looking into other bright light sources (e.g. headlights of a car), the temporary limited impairment of vision and afterimages may lead to irritation, inconveniences, impairments and even accidents, depending on the situation.
This information provided applies only to the use of this single product. If more light-emitting products of the same type or of a different type are used together, the intensity of the optical radiation may increase.
Any prolonged eye exposure with the source of radiation of this product and the use of additional beam-focussing devices, must be avoided! When exposure to the light beam occurs, eyes should be deliberately closed and the head should be turned to avoid further exposure.
In case of a commercial use or the product's use by public bodies, the user must be instructed as to all applicable laws and regulations that correspond to the individual case of usage.
Important rules of conduct:
Do not aim the light beam directly into the eyes of a person. The user or any other person should not look directly into the light beam. In the event of optical radiation hitting the eye, one must shut their eyes and turn their head away from the beam.
The instruction manual and this information must be stored safely and must be passed on together with the product.
It is prohibited to look straight into the light that is being emitted by this product.
1 x Floating Charge System ^Pro
1 x Netzsteckerkabel
1 x Floating Charge System ^Pro
1 x câble de réseau
1x Floating Charge System ^P
1x primaire stekker
7.2 Light Program Low
7.4 Light Program Signal
7.5 Light Program Defence
16. Scope of delivery / Accessori
1 x Floating Charge System ^Pro
1 x Floating Charge System
1 x väggkontakt
Version of the operating manual: 1.3
1. バッテリーセット:
Hersteller - Manufactured by
ZWEIBRÜDER® OPTOELECTRONICS GMBH & CO. KG
Kronenstr. 5-7 • 42699 Solingen • Germany
Tel. +49 (0)212/5948-0 • Fax +49 (0)212/5948-200
info@zweibrueder.com • www.zweibrueder.com
LED LENSER® X21R.2