STELLO - Baby bed Kindercraft - Free user manual and instructions
Find the device manual for free STELLO Kindercraft in PDF.

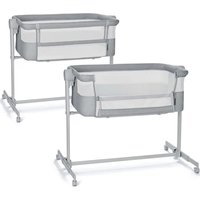
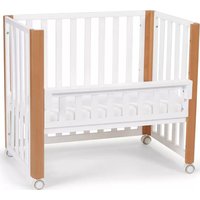
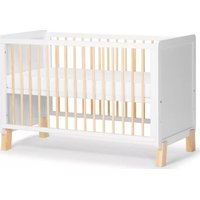
| Product type | Baby cot |
| Brand | Kindercraft |
| Model | STELLO |
| Nominal dimensions of the base | 120 x 60 cm |
| Maximum mattress thickness | 9 cm |
| Minimum interior height (base in highest position) | 200 mm |
| Minimum interior height (base in lowest position) | 500 mm |
| Number of adjustable height positions | 3 |
| Max gap between mattress and sides | 30 mm |
| Main materials | Wood and fibreboard |
| Fasteners and accessories | Screws, nuts, eccentrics, brackets |
| Assembly type | To be done by two people |
| Required tools | Phillips and flathead screwdrivers |
| Anti-slip pads | 4 felt pads included |
| Care and cleaning | Soft, clean, dry cloth |
| Safety precautions | Do not place near heat sources, windows, cords; use only one mattress |
| Warranty | 24 months, extendable to 120 months (10 years) upon registration |
| Countries where warranty is valid | France, Spain, Germany, Poland, United Kingdom, Italy |
| Recommended age | From birth until the child can climb out independently |
| Use | Indoor use only |
Frequently Asked Questions - STELLO Kindercraft
User questions about STELLO Kindercraft
0 question about this device. Answer the ones you know or ask your own.
Ask a new question about this device
Download the instructions for your Baby bed in PDF format for free! Find your manual STELLO - Kindercraft and take your electronic device back in hand. On this page are published all the documents necessary for the use of your device. STELLO by Kindercraft.
USER MANUAL STELLO Kindercraft
natural_image
Black and white play button icon inside a circle (no text or symbols)Watch manual
VIDEO!

youtube.com/kinderkraftofficial

kinderkraft.com
STELLO
CZ DĚTSKÁ POSTÝLKA
DE KINDERBETT
EN BABY COT
ES CAMA INFANTIL
FR LIT BÉBÉ
HU GYEREKÁGY
IT LETTINO PER BAMBINI
NL BABY BED
PL ŁÓŻECZKO DZIECIĘCE
PT BERÇO INFANTIL
RO PĂTUT PENTRU BABELUŞ ŞI COPII
RU СКАЯ КРОВАТКА
SK DETSKÁ POSTIELKA
CZ NÁVOD K OBSLUZE
natural_image
Line drawing of a multi-tiered rack with multiple test tubes (no text or symbols)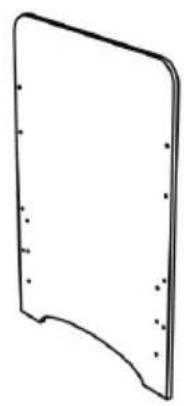
natural_image
Simple line drawing of a rectangular panel with rounded edges and corner markers (no text or symbols)A x2

natural_image
Simple line drawing of a rectangular panel with vertical slots (no text or symbols)(B)x2
natural_image
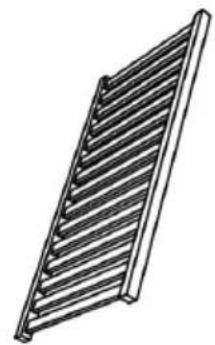
Line drawing of a corrugated metal grate with slats (no text or symbols)©x1
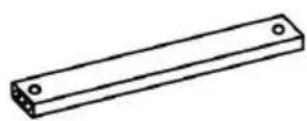
Dx1
 |  |  |  |  |  |  | [2887] |
| 1x12 | 2x8 | 3x8 | 4x8 | 5x4 | 6x2 | 7x2 | 8x4 |
①x12 ②x8
③x8 ④x8
⑤x4 ⑥x2
⑦x2 | ⑧x4
I


IV
V
CZ
Vážený zákazníku!
Thank you for purchasing this product from Kinderkraft.
While designing our products we aim at your children's safety and comfort by ensuring the highest quality of our products and thus providing you with the comfort of the best choice.
IMPORTANT, KEEP FOR FUTURE USE, READ CAREFULLY
THE SAFETY INSTRUCTIONS AND PRECAUTIONS CAREFULLY WARNING
- Be aware of the risk of open fire and other sources of strong heat, such as electric bar fires, gas fires, etc. in the near vicinity of the cot;
- Do not place this child's bed near heat sources, windows and other furniture.
- Do not use the cot if any part is broken, torn or missing and use only spare parts approved by the manufacturer;
- Do not leave anything in the cot or place the cot close to another product, which could provide a foothold or present a danger of suffocation or strangulation, e.g. strings, blind/curtain cords. Another products should be placed either tight to any wall or have a gap of 300 mm between the wall and the side of the bed;
- Do not use more than one mattress in the cot.
- Thickness of the mattress shall be such that the internal height (measured from the top of mattress to the upper edge of the cot frame) was at least 500 mm in the lowest position of the cot base and at least 200 mm in the highest position of the cot base.
• Maximum thickness of the mattress: 9 cm.
- The length and width of the mattress should be such that the gap between the mattress and the sides and tops does not exceed 30 mm. The nominal size for the STELLO cot is 120 x 60 cm.
- All assembly elements and fittings should be tightened properly and checked regularly and retightened as necessary.
- To prevent injury from falls, if the child is able to climb out of the cot, the cot shall no longer be used for that child.
- The lowest position of the base is the safest. When a child starts to sit down without the assistance – use only this level.
1. List of parts of the cot
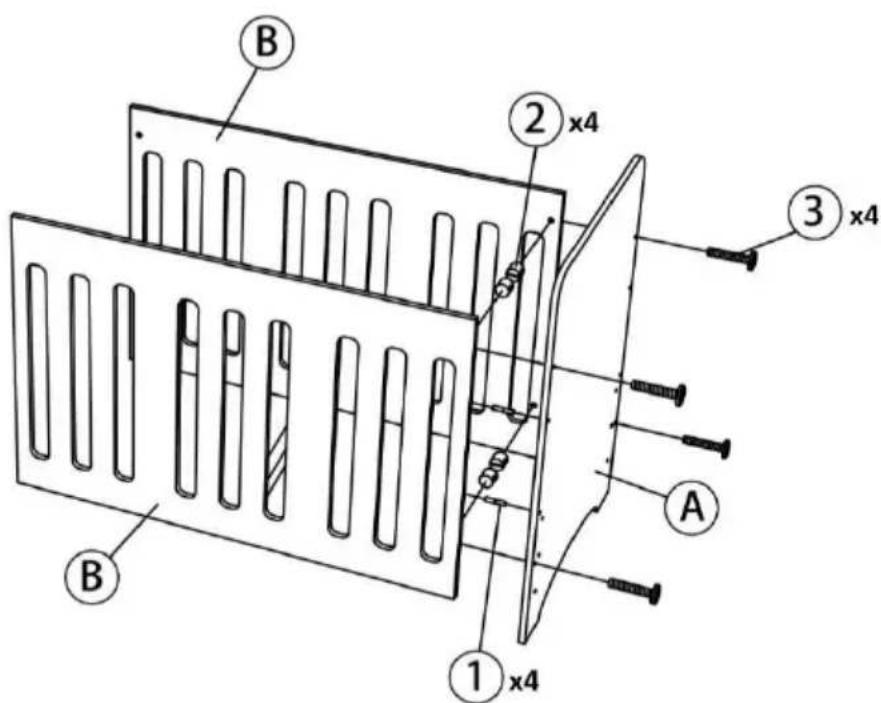
| A | Front | 3 | Screw M6 x 45 |
| B | Side wall | 4 | Screw M6 x 30 |
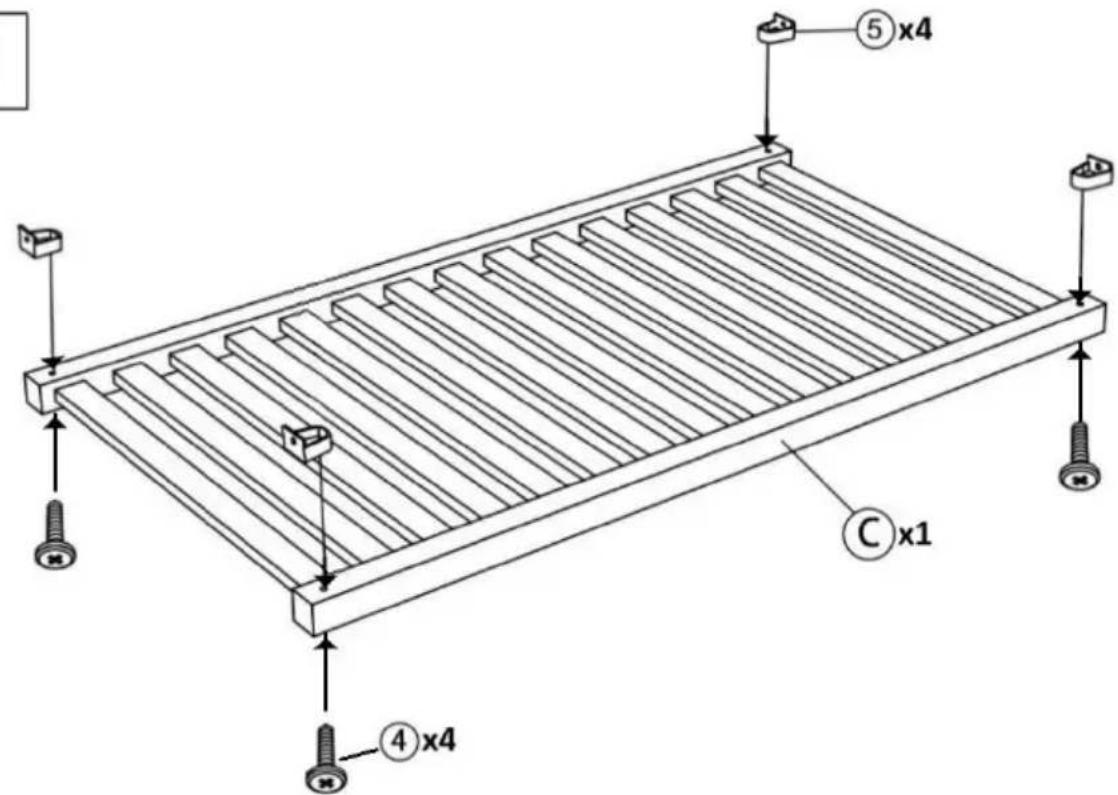
| C | Bottom | 5 | Bracket |
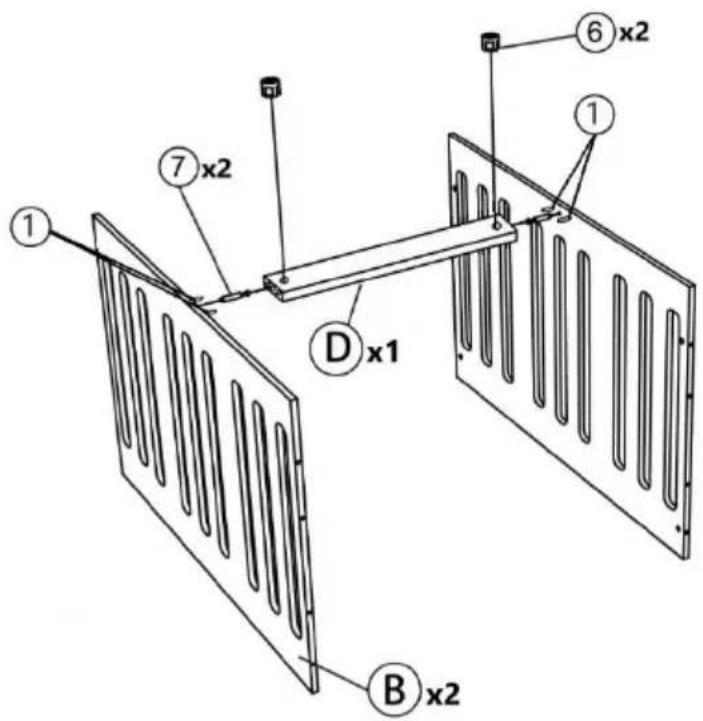
| D | Beam | 6 | Eccentric connector 15 mm |
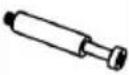
| 1 | Wooden pin 8x15 mm | 7 | Eccentric pin |
| 2 | Roller nut M6 x 10 mm | 8 | Plastic pad |
2. Assembly of the cot:
A Phillips screwdriver and a flatbed screwdriver are required for assembly. The assembly should be carried out on a soft surface that will not damage the surface of the elements. The cot should be mounted by two people.
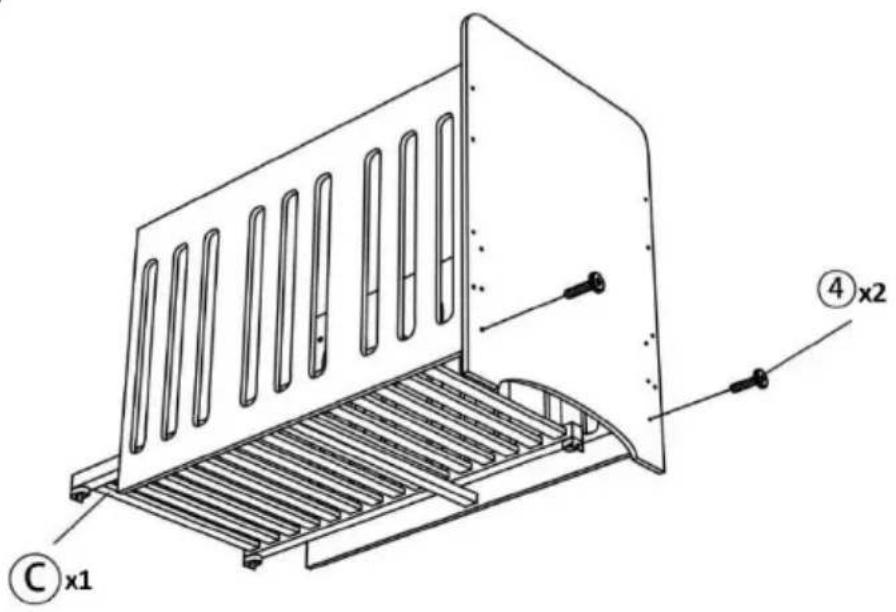
I. Lay the bottom of the crib (C) on a soft surface. Attach fixing brackets (5) to each corner of the bottom with screws (4). Make sure that the holes on the side walls of the brackets are facing outwards.

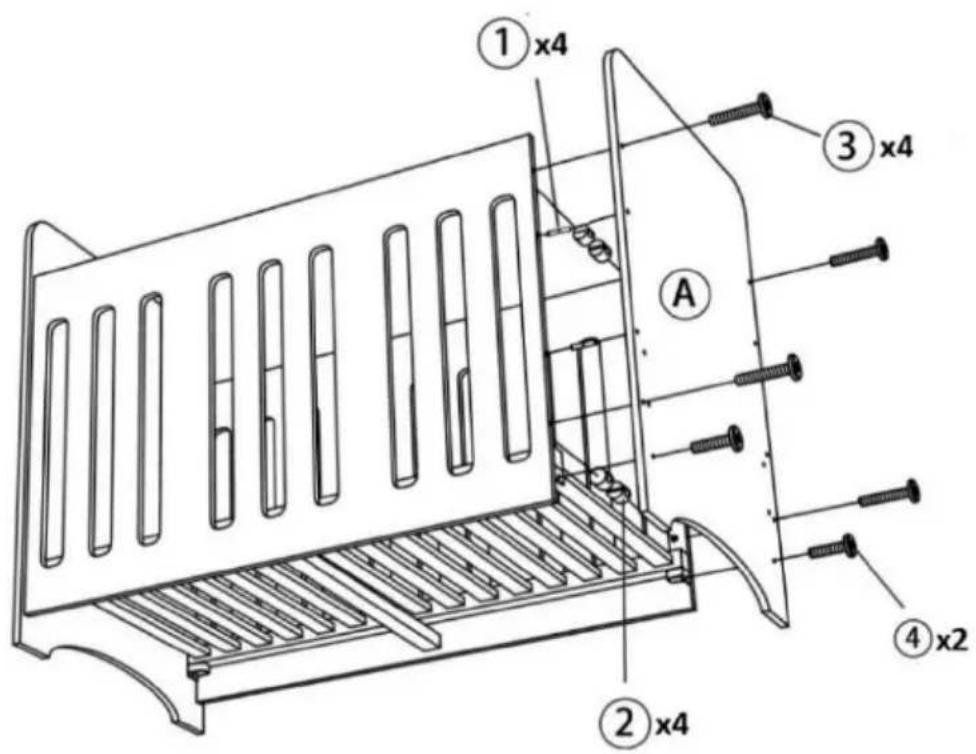
II. Place the two side walls (B) parallel to each other. The inside planes of the side walls must be set up facing each other and positioned 180 degrees to the floor. Then screw the eccentric pins (7) into both walls in the appropriate holes in the center. On both sides of the pins, push the wooden pins (1) in. Install the eccentric connectors (6) into the beam (D) so that the holes in the sides of the connectors are compatible with the holes in the ends of the beam. Carefully push the beam into the protruding parts of the pins, one after the other. After insertion, turn the connectors by at least 90 degrees to secure the construction.
III. Caution, very carefully rotate the structure assembled in step II. From the inside of the side walls, insert the nuts (2) into the appropriate holes so that the threaded holes are parallel with the holes in the tops of the walls. Then carefully press the four pins (1) into the corresponding holes as shown in Figure III. Attach the front part (A) to the protruding pins. Screw the front part to the structure using the screws (3).
IV. Turn the bottom part of the cot so that the brackets are at the underside and slide them into the structure finished in step III. The beam (D) should be below the bottom plane of the cot. The holes in the brackets (5) should be aligned with the holes in the front part of the cot (A). Fix the bottom of the cot to the front of the cot using the screws (4).
V. On the inside of the side walls, insert nuts (2) into the corresponding holes so that the threaded holes are parallel with the holes in the top edges of the walls. Then carefully press the four pins (1) into the corresponding holes as shown in Figure V. Attach the front part of the cot (A) to the protruding pins. Fix the front part of the cot with the screws (3) to the structure. Fix the bottom of the cot to the front with the screws (4). Make sure that the whole structure is properly screwed together and no connection remains loose.
The set includes felt pads (8) that protect the floor from scratches. To mount the pads, lay the cot on one of the sides on a soft floor that will not damage the surface of the cot. Then clean the feet. Peel off the felt pad and stick it to a rectangular, cleaned foot. Put the cot back on legs.
The cot's height can be adjusted. To change the position of the cot, select one of the three sets of holes that are located in the front and then screw the bottom with the screws (4).
3. Maintenance and cleaning
Frame - clean with a soft, clean and dry cloth.
4. Warranty
A. All Kinderkraft products are covered by a 24-month warranty. The warranty period begins on the date of releasing the product to the Buyer.
B. The warranty is valid for products sold in the following countries: France, Spain, Germany, Poland, United Kingdom, Italy.
C. In countries not listed above warranty terms and conditions are determined by the Seller.
D. It is possible to extend the warranty period to 120 months (10 years). Full text of the terms and conditions and warranty extension registration form are available at WWW.KINDERKRAFT.COM
E. The warranty is valid only in the country where the purchase was made.
F. Complaints should be submitted by completing the form available at WWW.RMA.KINDERKRAFT.COM
G. The warranty shall not cover:
a. claims arising from product specifications, as long as they comply with those specified by the manufacturer in the instruction manual or other documents of a legislative nature;
b. product damage caused by improper maintenance or use of inadequate chemicals;
c. colour change (discolouration) when the product has been exposed to direct sunlight against the instructions provided in the instruction manual;
d. tear, wear, crack of fabric/plastic that is the fault of the Customer;
e. reduction in the quality of the product and consumables due to normal wear and tear;
f. products which have not been used according to specifications;
H. The warranty period for accessories attached to the device is 6 months from the date of sale, with the exception of mechanical damage.
I. These guarantee terms and conditions are complementary to the Customer's rights in relation to 4KRAFT sp. z o.o. The warranty shall not exclude, limit or suspend the rights of the Customer arising from the provisions on the warranty for defects in the goods sold.
J. Full text of Warranty Terms and Conditions is available at WWW.KINDERKRAFT.COM
All rights to this data are entirely reserved to 4Kraft Sp. z o.o. Any unauthorized use or misuse, including usufruct, copying, duplication and sharing, wholly or partially, without consent of 4Kraft Sp. z o.o. may result in legal consequences.
ES
¡Estimado cliente!
In the interests of our Clients - we are at your disposal! If you have a problem with the product you received, contact us in the most convenient way for you!