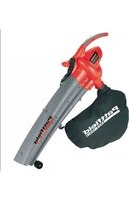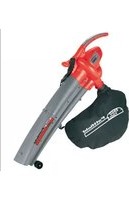
E-LS 2545 E - Blower Ergotools Pattfield - Free user manual and instructions
Find the device manual for free E-LS 2545 E Ergotools Pattfield in PDF.


User questions about E-LS 2545 E Ergotools Pattfield
0 question about this device. Answer the ones you know or ask your own.
Ask a new question about this device
Download the instructions for your Blower in PDF format for free! Find your manual E-LS 2545 E - Ergotools Pattfield and take your electronic device back in hand. On this page are published all the documents necessary for the use of your device. E-LS 2545 E by Ergotools Pattfield.
USER MANUAL E-LS 2545 E Ergotools Pattfield
- Front suction tube
- Rear suction tube
- Locking screw
- Carrying strap
- ON/OFF switch
- Power cord
7.Debris bag - Selector switch for vacuum/blower
- Guide rollers
- Speed controller
- Plug-on rake
- Connectable vacuum nozzle
2.0 Proper use
The garden blower vac is designed to handle only foliage and garden refuse such as grass and small branches. Any other use is prohibited.
This tool is only intended for use around the home and should only be operated within its design limitations. Tools of this category which are designed for home and garden use should only be operated in such settings. Tools of this category are not suitable for use in public facilities, parks and sports centers, on farms or in the forestry sector.
Please note that our equipment has not been designed for use in commercial, trade or industrial applications. Our warranty will be voided if the machine is used in commercial, trade or industrial businesses or for equivalent purposes.
3.0 Important information
Please read the directions for use carefully and observe the information provided. It is important to consult those instructions in order to acquaint yourself with the tool, its proper use and safety precautions.
Please observe the general maximum operating times as well as local regulations for tool operation.
Keep these instructions in a safe place.
Safety information
This equipment is not designed to be used by people (including children) with limited physical, sensory or mental capacities or those with no experience and/or
knowledge unless they are supervised by a person who is responsible for their safety or they have received instructions from such a person in how to use the equipment safely. Children must always be supervised in order to ensure that they do not play with the equipment.
General instructions
- Read the complete operating manual with due care. Acquaint yourself with the controls and how to use the tool.
- Never allow children to use the tool.
- Never allow other persons who are not familiar with the operating instructions to use the tool. Contact your local government offices for information regarding minimum age requirements for operating the tool.
- Never use the tool when there are people -
particularly children -or pets nearby
The user is responsible for any accidents or hazards suffered by third parties or their property.
Preparation
Always wear sturdy footwear and long trousers when using the tool.
- Never wear loose fitting clothes or jewelry. They may get drawn into the suction opening. Rubber gloves and non-slip shoes are recommended when working outdoors. Wear a hair net if you have long hair.
Wear safety goggles while you work
Use a dust mask when working on dusty jobs
Always check the tool, the power cable and the extension cable before using the tool. Only operate the tool when it is in good working order and is not damaged in any way. Damaged parts have to be replaced immediately by a qualified electrician.
- Never use the tool if any of its safety devices or guards are damaged or if any safety
attaches such as deflectors and/or grass catching devices are missing.
- When working outdoors, use only extension cables which are approved for outdoor use. Extension cables must have a minimum cross-section of 1.5mm^2 . Plug connections must have earthing contacts and be protected from rainwater.
Operation
Always trail the power cable behind the tool.
- If the power cable or extension cable is damaged, pull the plug out of the socket.
Do not carry the tool by its power cable.
GB
Always pull out the power plug:
- when the tool is not being used, when it is being transported or when you leave it unsupervised.
- when you are checking the tool, cleaning it or removing blockages.
- when you want to carry out cleaning or maintenance work on the tool or replace accessories.
- after the tool impacts with foreign bo you notice unusual vibrations.
- Use the tool only in broad daylight or in well- lit conditions.
- Do not underestimate the forces involved. Make sure you stand squarely and keep your balance at all times.
If possible, avoid using the tool on wet grass.
Ensure that you maintain a steady foothold particularly while working on slopes.
Always walk. Never run
Always keep the ventilation opening clean. - Never direct the vacuum/blow hole at persons or animals.
The machine may only be used at reasonable times of the day, i.e. not in the early morning or late evening when it will be a nuisance to other people. Permitted times of use specified by local authorities must be observed. - The machine must be run at the lowest possible motor speed required to carry out the work.
- Remove all foreign objects with a rake and brush before starting any blowing work.
Where conditions are dusty, dampen the surface a little or use a sprinkler attachment. - Use the full-length blower nozzle extension so that the air current can work near to the ground.
- Watch out for children, pets, open windows etc. and blow the foreign objects safely away from them.
Maintenance and storage
- Check that all nuts, bolts and screws are securely tightened in order to be sure that the machine is in a safe working condition.
Frequently check the grass catching devices for signs of wear and deformation. - Only use replacement cutters of the correct type.
For your own safety, replace worn or damaged parts without delay.
Electric tools should be kept in a dry place when not in use.
The tool can be plugged into any socket-outlet (with 230 V AC) that is equipped with a 10A fuse or higher. The socket-outlet has to be safeguarded by an earthquake circuit breaker (e.l.c.b.). The operating current must not exceed 30 mA.
Safety pictograms on the tool (Fig. 8)
- Read the directions for use before operating the tool.
- Do not use the tool in rain or snow. Do not expose the tool to wet conditions.
- Keep all other persons away from the danger zone.
- Wear goggles and ear muffs.
- Switch off the tool and pull out the power plug before carrying out any cleaning or maintenance work.
4.0 Technical data
AC motor 230V /50Hz
| Power rating of the 2500 W | |
| Idle speed of the 6000-13.000 min | |
| Air velocity 270 km/h | |
| Suction rate 780 m | r/h |
| Volume of debris bag approx. 45 l | |
| Sound volume level LWA | 100,1 dB (A) |
| Sound pressure level Lsa | 88,2 dB (A) |
| Vibration atLw | <2,5 m/s |
5.0 Assembly
5.1 Mounting the vacuum tube (Fig. 2, 3, 3a) First plug together the front suction tube (1) and the rear suction tube (2). When the two parts engage correctly they make an audible click. Then affix the two tubes using the special screws size 4.2 × 18 ~mm (see arrows in Fig. 2).
With the locking screw in horizontal position, plug the vacuum tube into the motor housing. Then use the supplied open-ended wrench to turn the lever catch (3) 90^ to the right (see Fig. 3a). The vacuum tube is now locked in place.
Important: Please note that the two suction tubes must always be joined together before they are mounted on the motor housing, and that they must never be taken apart when mounted!
GB
Important: The garden blower vac is equipped with a safety lock-off switch which only works when the suction tube is mounted on the motor housing.
5.2. Flting the rake and vacuum nozzle (Fig. 3b) The rake attachment (11) is connected to the vacuum tube. The vacuum nozzle (12) is used for vacuuming on level ground (e.g. tarmac or paving stones).
When using the rake attachment or vacuum nozzle, the guide rollers (9) do not come into operation.
5.3. Mounting the debris bag (Fig. 4)
Slip the debris bag (7) over the socket on the motor housing. It engages correctly when it makes an audible click. Then hang the hook on the suction tube.
6.0 Prior to starting up
- Start up the tool only after it is fully assembled. Always inspect the tool power cord for damage before starting up. The tool may only be used if the cord is in flawless condition.
7.0 Starting up
7.1. Sizing the strap (Fig. 1)
- Size the length of the carrying strap (4) so that the vacuum tube just clears the ground. The guide rollers (9) at the bottom end of the suction tube will help you to maneuver the suction tube on the ground.
7.2. Connecting the tool to the power supply and switching on (Fig. 5, 6)
- Insert the tool plug into the power cord coupling (extension).
- Secure the power cord (6) with the sleeve provided on the tool as shown.
- To switch on, push the ON/OFF switch (5) toward ON. To switch off, push the ON/OFF switch toward OFF.
7.3 Selecting the mode of operation
7.3.1 Vacuum (Abb. 7)
- Turn the lever (B) all the way left to "Vacuum". You can do this regardless of whether the tool is running or not.
7.3.2 Blowing (Fig. 7)
- Turn the lever (8) all the way right to "Blower". You can do this regardless of whether the tool is running or not.
- Channel the air stream forward and walk slowly to blow foliage or garden refuse into a pile or to clear out hard-to-reach places.
Important!
Empty the debris bag before blowing. Otherwise, the material that has been vacuumed up could drop out.
7.3.3 Emptying the debris bag and pre-screen (Fig. 1)
Empty the debris bag (7) in good time. When the bag is heavily loaded with material, vacuum power is considerably reduced. Deposit organic refuse at a compost site.
- Switch off the tool and pull out the plug.
- Open the zipper on the debris bag (7) and shake out the material.
8.0 Maintenance and cleaning
IMPORTANT!
All maintenance, service and cleaning work must be performed after the power cord has been pulled out.
- Do not use high-pressure cleaners or running water to clean the tool.
Do not use any aggressive cleaning agents.
After shaking out the debris bag, turn it inside out and thoroughly clean it in order to prevent mould and unpleasant odors from forming.
You can use soap and water to clean out a heavily soiled debris bag. - Pub a bar of dry soap across the zipper teeth if the zipper becomes difficult to pull.
Always keep the tool and ventilation slats clean. - Use a damp rag to wipe dirt marks off of the tool. Clean the vacuum/blower tube with a brush upon evidence of dirt and grime.
- Dirt and grime can make the switch (blower/vacuum) more difficult to operate as a result of the material that swirls up off the ground. When this occurs, simply flip the switch back and forth a few times, which should bring it back to the normal feel.
GB
9.0 Repair
Should the tool experience problems beyond those mentioned above, let only an authorized professional or a customer service shop perform an inspection.
10.0 Disposal
The tool, accessories and packaging should be disposed of in an environmentally-friendly fashion. Plastic parts are coded for purposes of separation when recycling.
11. Ordering replacement parts
Please quote the following data when ordering replacement parts:
Type of machine
Article number of the machine
- Identification number of the machine
- Replacement part number of the part required
For our latest prices and information please go to www.isc-gmbh.info
12.0 Troubleshooting guide
| Fault | Possible cause Remedy | |
| Motor does not start No electricity at the plug Check the cord and fuses | ||
| Power cord defective Check the power cord | ||
| Motor terminals disconnected Have the unit checked by a customer service workshop | ||
| Suction tube not mounted correctly Mount the tube correctly |
F
declares conformity with the EU Directive
and standards marked below for the article
3AABNHTO COOTBETCTBNI TOBAPA
eHcyIOUMMdApEHTBAMNHOHPMAEC
1izjavijue sjebedecu uskliadjenost odredbama 10000000000000000000000000000000000000000000
normama EO 2a artiki.declare urmatoarea co
toare CE si norme valabilepentua
in hortman 23 strike
Eeikrue zgdoa Wmienonego ponzej
aryknd 2 hastepujcym nodatessdchekbnw WF
paatae ayekwyw LE. ydava nasledujuc prehlasenie o zhode podfa
(6) smernice EU a noriem pre virobok.
Aeknapnpa cneHHOTo cbotetCTBn
DMPeKTHBNTe HOpMTe Ha EC 3a npOdykTa.
3aBnepnoBnOblHCTb 3rIdHO 3MpeKTHBOO
ECaTnDAPAMHNNMIDJNDAHOROBAPy
dekareehb vastavse jargnevatele EC direktiv date is normidate
For EU countries only
Never place any electric tools in your household refuse.
To comply with European Directive 2002/96/EC concerning old electric and electronic equipment and its implementation in national laws, old electric tools have to be separated from other waste and disposed of in an environment-friendly fashion, e.g. by taking to a recycling depot.
Recycling alternative to the demand to return electrical devices:
As an alternative to returning the electrical device, the owner is obliged to cooperate in ensuring that the device is properly recycled if ownership is relinquished. This can also be done by handing over the used device to a returns center, which will dispose of it in accordance with national commercial and industrial waste management legislation. This does not apply to the accessories and auxiliary equipment without any electrical components which are included with the used device.
Endast for EU-lander
Kastainte elverkdyihushaassoporna.
The reprinting or reproduction by any other means, in whole or in part, of documentation and papers accompanying products is permitted only with the express consent of ISC GmbH.
F
All of our products undergo strict quality checks to ensure that they reach you in perfect condition. In the unlikely event that your device develops a fault, please contact our service department at the address shown on this guarantee card. Of course, if you would prefer to call us then we are also happy to offer our assistance under the service number printed below. Please note the following terms under which guarantee claims can be made:
- These guarantee terms cover additional guarantee rights and do not affect your statutory warranty rights. We do not charge you for this guarantee.
- Our guarantee only covers problems caused by material or manufacturing defects, and it is restricted to the rectification of these defects or replacement of the device. Please note that our devices have not been designed for use in commercial, trade or industrial applications. Consequently, the guarantee is invalidated if the equipment is used in commercial, trade or industrial applications or for other equivalent activities. The following are also excluded from our guarantee: compensation for transport damage, damage caused by failure to comply with the installation/assembly instructions or damage caused by unprofessional installation, failure to comply with the operating instructions (e.g. connection to the wrong mains voltage or current type), misuse or inappropriate use (such as overloading of the device or use of non-approved tools or accessories), failure to comply with the maintenance and safety regulations, ingress of foreign bodies into the device (e.g. sand, stones or dust), effects of force or external influences (e.g. damage caused by the device being dropped) and normal wear resulting from proper operation of the device.
The guarantee is rendered null and void if any attempt is made to tamper with the device.
- The guarantee is valid for a period of 2 years starting from the purchase date of the device, Guarantee claims should be submitted before the end of the guarantee period within two weeks of the defect being noticed. No guarantee claims will be accepted after the end of the guarantee period. The original guarantee period remains applicable to the device even if repairs are carried out or parts are replaced. In such cases, the work performed or parts fitted will not result in an extension of the guarantee period, and no new guarantee will become active for the work performed or parts fitted. This also applies when an on-site service is used.
- In order to assert your guarantee claim, please send your defective device postage-free to the address shown below. Please enclose either the original or a copy of your sales receipt or another dated proof of purchase. Please keep your sales receipt in a safe place, as it is your proof of purchase. It would help us if you could describe the nature of the problem in as much detail as possible. If the defect is covered by our guarantee then your device will either be repaired immediately and returned to you, or we will send you a new device.
Of course, we are also happy offer a chargeable repair service for any defects which are not covered by the scope of this guarantee or for units which are no longer covered. To take advantage of this service, please send the device to our service address.
BULLETIN DE GARANTIE
Chere Cilente, Cher Client
Stimate clienta, stimate client,
produsele noastre sunt supuse unui control de calitate riguros. Dacà totuvi vreodata acest aparut nu va functiona irreprogabile ne pare foarte rau vi rugam s vi adresati la certui service indicatla finali acestui certificat de garantie. Bineinteles ca vā stam s i la Telefon cu placere la dispositiz, la numeroile de service mentionate mai jos. Pentru revendicerca pretenjilor de garantie trebue tini rot con derumatoarele:
- Aceste instructiuni di garantie reglementaazia prestabilite de garantie supplementare. Pretontiile dumneavoastre de garantie legale nu sunt atinse de aceastla garantie. Prestautia noastrde garantie este gratuata pentru dumneavoastra.
- Statistica de garantie se existe in exclusivitate asupra defecetior care provin din erori de material sau de fabricatie si leimiteazla remedierea acostor defecct respectiv la schimbarea aparatului. Va rugam s tinei cont de faplul c a aparatele noastre, in conformitate cu scopul lor de folosire, nu sunt prevzade pntru Interventil mestegugaresti sau Industria. Din acest motnu ne se va Inchela un contract de garantie atunc cand aparatulat vo falosi in intreprenderi meestegugaresti sau industriale precum gi pntru activiti similare. De la garantie sunt exclude deasementea prestatiile poro detiorarile intervenite pe timpul transportulai, deteriorari datorate nelurari in considerare a instructunilior de montare sau datorita instaeri necompetente, nelurari ln considerare a instructunilior de folosire (cum ar fi de exemplu racordarea la o tensione de reeta falsa saa la un current fals),utilizarea abuziva sau impropre (cum ar fi suprasolicitarea aparatulai saut folosire unelletor altasaseble sau auilliaridne mirdisj),nelurari in considerare a prescriptior referitoare la lucrari di introtinore siguranta, intrarea corporur straine in aparat (cum ar fi nisip, pietro sau praf), recurgerea la violenta sau infiente straine (cum ar fi de exemplu detelorari datoritta caederii), precum si datorità uzurii normale, conforma utilizari.
Pretentia de garantie se pierde atunci cand s-au efectuat interventi la aparat.