
AirFit N20 Classic - Respiratory medical device ResMed - Free user manual and instructions
Find the device manual for free AirFit N20 Classic ResMed in PDF.

| Product Type | Nasal mask for CPAP |
| Brand | ResMed |
| Model | AirFit N20 Classic |
| Dimensions (without headgear) | 141 mm (H) x 73 mm (W) x 90 mm (D) |
| Weight | Approximately 100 g (with standard headgear) |
| Intended Use | Non-invasive delivery of airflow from a positive pressure device (CPAP or bi-level) |
| Patients | Weight > 30 kg; single-patient multiple use at home or multi-patient use in healthcare settings |
| Treatment Pressure | 4 to 30 cm H2O |
| Dead space (large size) | 55.8 ml |
| Sound level (acoustic power) | 26 dBA (±3 dBA) |
| Sound level (pressure at 1 m) | 18 dBA (±3 dBA) |
| Operating temperature | 5°C to 40°C |
| Operating humidity | 15% to 95% (non-condensing) |
| Storage temperature | -20°C to 60°C |
| Storage humidity | 95% maximum (non-condensing) |
| Resistance at 50 L/min | 0.4 cm H2O |
| Resistance at 100 L/min | 1.5 cm H2O |
| Material | Latex-free natural rubber |
| Routine maintenance | Daily cleaning with mild detergent (warm water ~30°C); weekly washing of headgear |
| Supplied accessories | Cushion (fabric), rigid frame, elbow, headgear (upper and lower straps) |
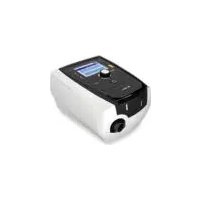
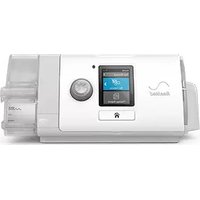
| Device compatibility | ResMed AirSense, AirCurve, S9 and other CPAP/bi-level devices (consult ResMed list) |
| Device setting (ResMed) | Select "Nasal pillows" or "SWIFT" if available, otherwise "MIRAGE" |
| Warranty | Compliant with European Directive 1999/44/EC |
Frequently Asked Questions - AirFit N20 Classic ResMed
User questions about AirFit N20 Classic ResMed
0 question about this device. Answer the ones you know or ask your own.
Ask a new question about this device
Download the instructions for your Respiratory medical device in PDF format for free! Find your manual AirFit N20 Classic - ResMed and take your electronic device back in hand. On this page are published all the documents necessary for the use of your device. AirFit N20 Classic by ResMed.
USER MANUAL AirFit N20 Classic ResMed
natural_image
Abstract curved dotted line pattern with no text or symbolsResMed
AirFit™
Nasal mask

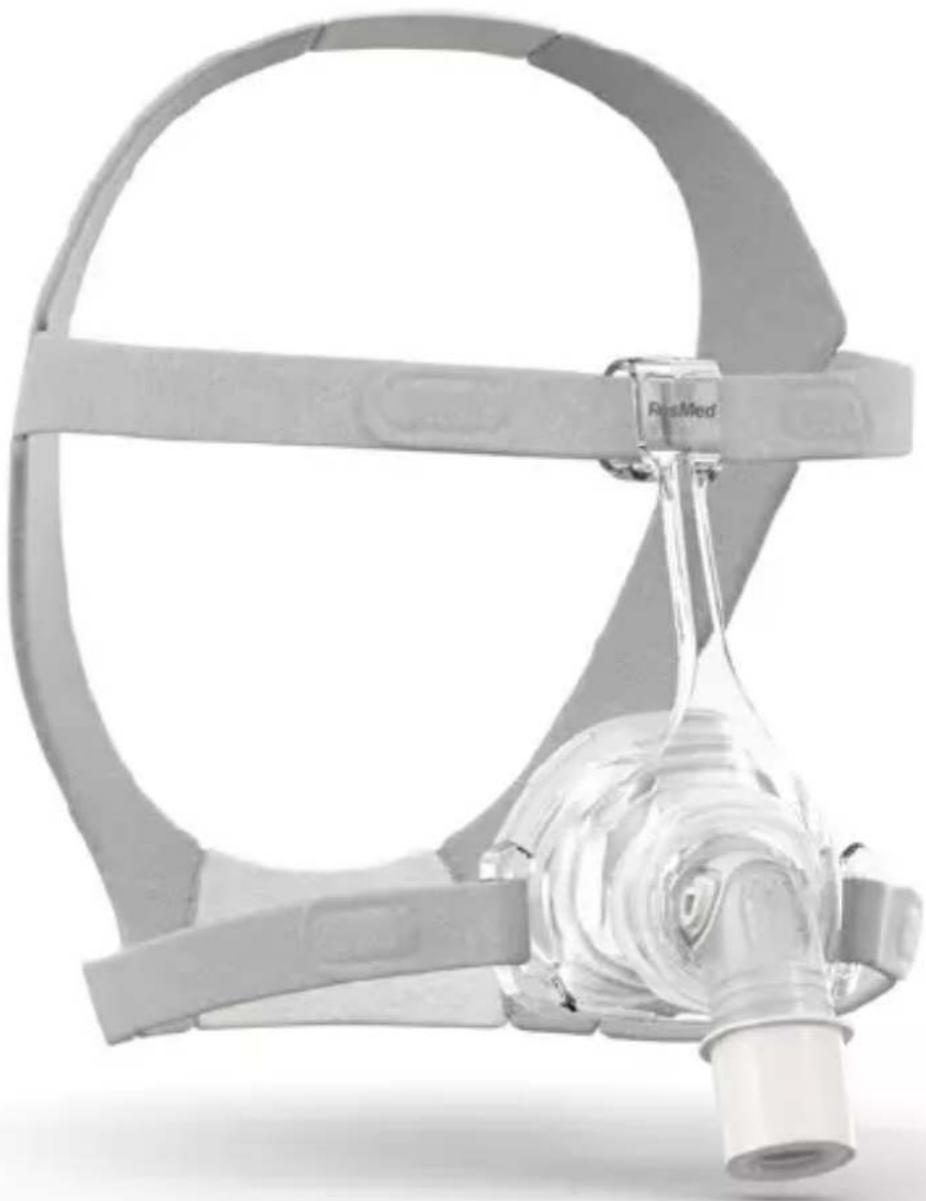
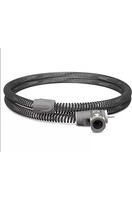
natural_image
Medical device with a transparent head strap and plastic cap, no visible text or symbolsUser guide
English | Deutsch
Français | Italiano
Nederlands | العربية
Fitting / Anlegen / Ajustement / Applicazione / Opzetten /
الارتداء
Adjustment Adjustment / Anpassen / Ajustement / Regolazione Afstellen / الطلب
natural_image
Illustration of a person adjusting a medical device with arrows indicating motion (no text or symbols)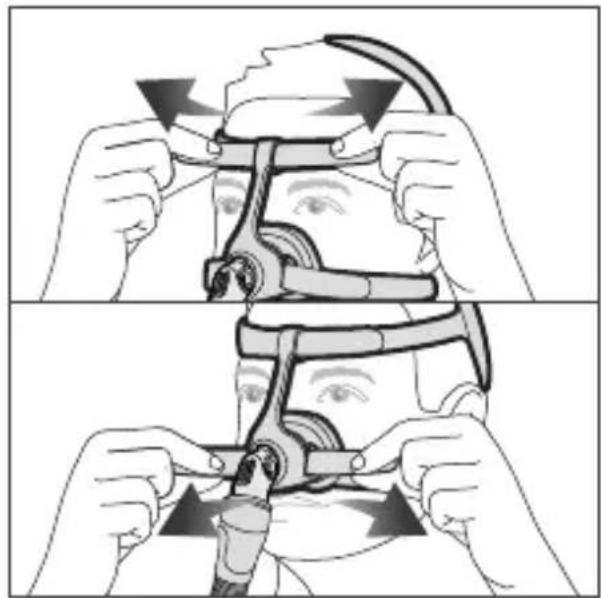
natural_image
Illustration of a person adjusting a mechanical device with directional arrows indicating motion (no text or symbols)natural_image
Illustration of a person using a handheld device to interact with another person's face (no text or symbols present)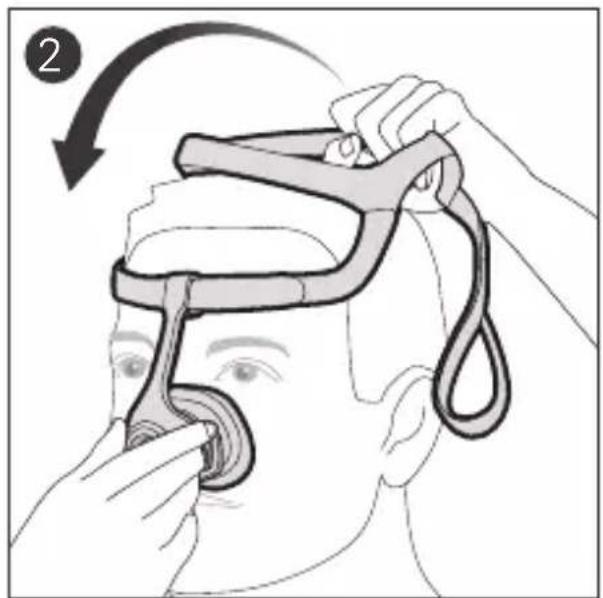
Disassembly / Auseinanderbau / Démontage / Smontaggio / Demonteren / التفكيك
Reassembly / Zusammenbau / Remontage / Riassemblaggio / Opnieuw monteren / إ Goalée التج Michigan

natural_image
Illustration of hands assembling a mechanical component with an arrow indicating rotation (no text or symbols present)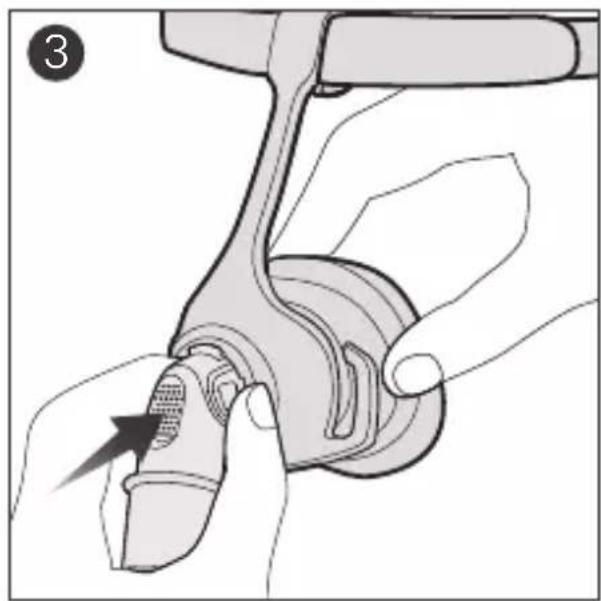
natural_image
Illustration of a hand holding a mechanical component with a tool, showing a finger pressing a button (no text or symbols present)Nasal Mask
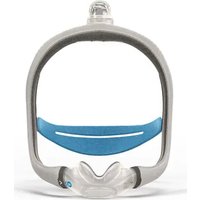
Thank you for choosing the AirFit N20 Classic. This document provides the user instructions for the AirFit N20 Classic.
Using this guide
Please read the entire guide before use. When following instructions, refer to the images at the front of the guide.
Intended use
The AirFit N20 Classic channels airflow non-invasively to a patient from a positive airway pressure (PAP) device such as a continuous positive airway pressure (CPAP) or bilevel device.
The AirFit N20 Classic is:
- to be used by patients weighing more than 30 kg for whom positive airway pressure has been prescribed
- intended for single-patient re-use in the home environment and multi-patient re-use in the hospital/institutional environment.
Intended patient population/medical conditions
Obstructive pulmonary diseases (eg, chronic obstructive pulmonary disease), restrictive pulmonary diseases (eg, diseases of the lung parenchyma, diseases of the chest wall, neuromuscular diseases), central respiratory regulation diseases, obstructive sleep apnoea (OSA), and obesity hypoventilation syndrome (OHS).
Clinical benefits
The clinical benefit of vented masks is the provision of effective therapy delivery from a therapy device to the patient.

GENERAL WARNINGS
• The vent holes must be kept clear.
- The mask should only be used with CPAP or bilevel devices recommended by a physician or respiratory therapist.
- The mask should not be used unless the device is turned on. Once the mask is fitted, ensure the device is blowing air. Explanation: CPAP and bilevel devices are intended to be used with special masks (or connectors) which have vent holes to allow continuous flow of air out of the mask. When the device is turned on and functioning properly, new air from the device flushes the exhaled air out through the mask vent holes. However, when the device is not operating, insufficient fresh air will be provided through the mask, and the exhaled air may be rebreathed. Rebreathing of exhaled air for longer than several minutes can, in some circumstances, lead to suffocation. This applies to most models of CPAP or bilevel devices.
- Follow all precautions when using supplemental oxygen.
- Oxygen flow must be turned off when the CPAP or bilevel device is not operating, so that unused oxygen does not accumulate within the device enclosure and create a risk of fire.
- Oxygen supports combustion. Oxygen must not be used while smoking or in the presence of an open flame. Only use oxygen in well ventilated rooms.
- At a fixed rate of supplemental oxygen flow, the inhaled oxygen concentration varies, depending on the pressure settings, patient breathing pattern, mask, point of application and leak rate. This warning applies to most types of CPAP or bilevel devices.
- The technical specifications of the mask are provided for your clinician to check that they are compatible with the CPAP or bilevel device. If used outside specification or if used with incompatible devices, the seal and comfort of the mask may not be effective, optimum therapy may not be achieved, and leak, or variation in the rate of leak, may affect the CPAP or bilevel device function.
- Discontinue using this mask if you have ANY adverse reaction to the use of the mask, and consult your physician or sleep therapist.
- Using a mask may cause tooth, gum or jaw soreness or aggravate an existing dental condition. If symptoms occur, consult your physician or dentist.
- As with all masks, some rebreathing may occur at low CPAP pressures.
- Refer to your CPAP or bilevel device manual for details on settings and operational information.
-
Remove all packaging before using the mask.
-
The mask must be used under qualified supervision for users who are unable to remove the mask by themselves. The mask may not be suitable for those predisposed to aspiration.
- Avoid connecting flexible PVC products (eg, PVC tubing) directly to any part of the mask. Flexible PVC contains elements that can be damaging to the materials of the mask, and may cause the components to crack or break.
- The N20 line of nasal CPAP masks are not intended to be used simultaneously with nebuliser medications that are in the air path of the mask/tube.
- The mask contains an exhaust port safety feature to enable normal breathing. The mask should not be worn if this safety feature is damaged or missing.
Note: For any serious incidents that occur in relation to this device should be reported to ResMed and the competent authority in your country.
Using your mask
When using your mask with ResMed CPAP or bilevel devices that have mask setting options, refer to the Technical specifications section in this user guide for the correct setting.
For a full list of compatible devices for this mask, see the Mask/Device Compatibility List on www.resmed.com/downloads/masks. If you do not have internet access, please contact your ResMed representative.
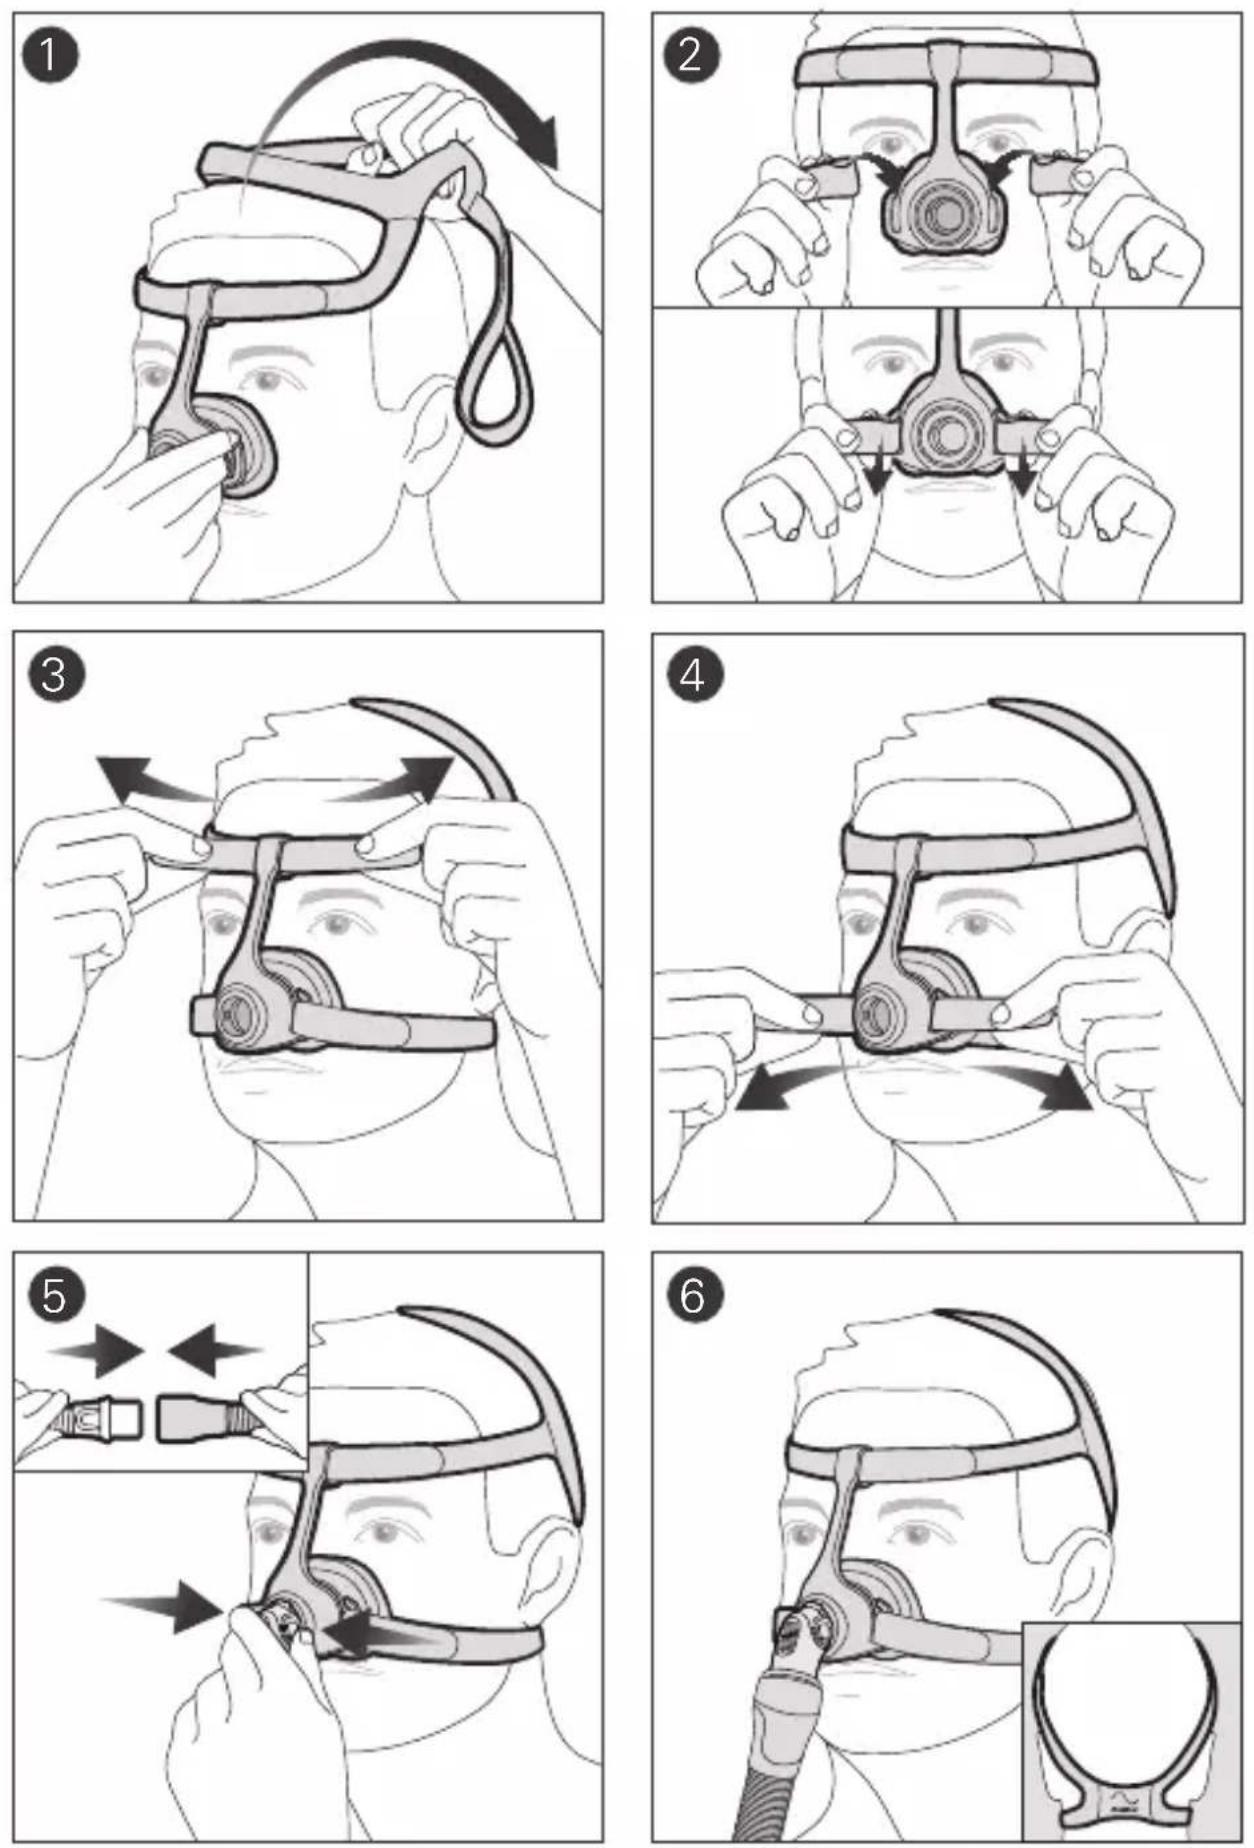
Fitting
- With both lower headgear straps released, hold the mask against your face and pull the headgear over your head.
- Bringing the lower straps below your ears, loop the headgear into the lower hooks on the mask frame.
- Undo the Velcro® tabs on the upper headgear straps. Adjust the straps evenly until the mask sits comfortably just over the nose. Reattach the Velcro tabs.
- Undo the Velcro tabs on the lower headgear straps. Adjust the straps evenly until the mask is stable. Reattach the Velcro tabs.
- Connect the device air tubing to the elbow. Attach the elbow to the mask by pressing the side buttons and pushing the elbow into the mask, ensuring it clicks in on both sides.
- Your mask and headgear should be positioned as shown in the illustration.
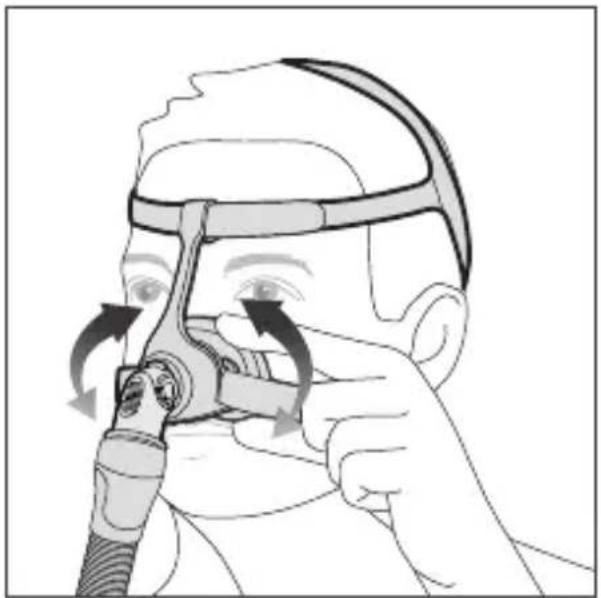
Adjustment
If necessary, slightly adjust the position of the mask for the most comfortable fit. Ensure that the cushion is not creased and the headgear is not twisted.
- Turn on your device so that it is blowing air.
Adjustment tips:
√ To resolve any leaks at the upper part of the mask, adjust the upper headgear straps. For the lower part, adjust the lower headgear straps. Adjust only enough for a comfortable seal.
√ Ensure the headgear straps are not overtightened or too loose.
Removal
- Unloop the lower headgear straps from the lower hooks of the frame.
- With both lower straps released, pull the headgear back over your head.
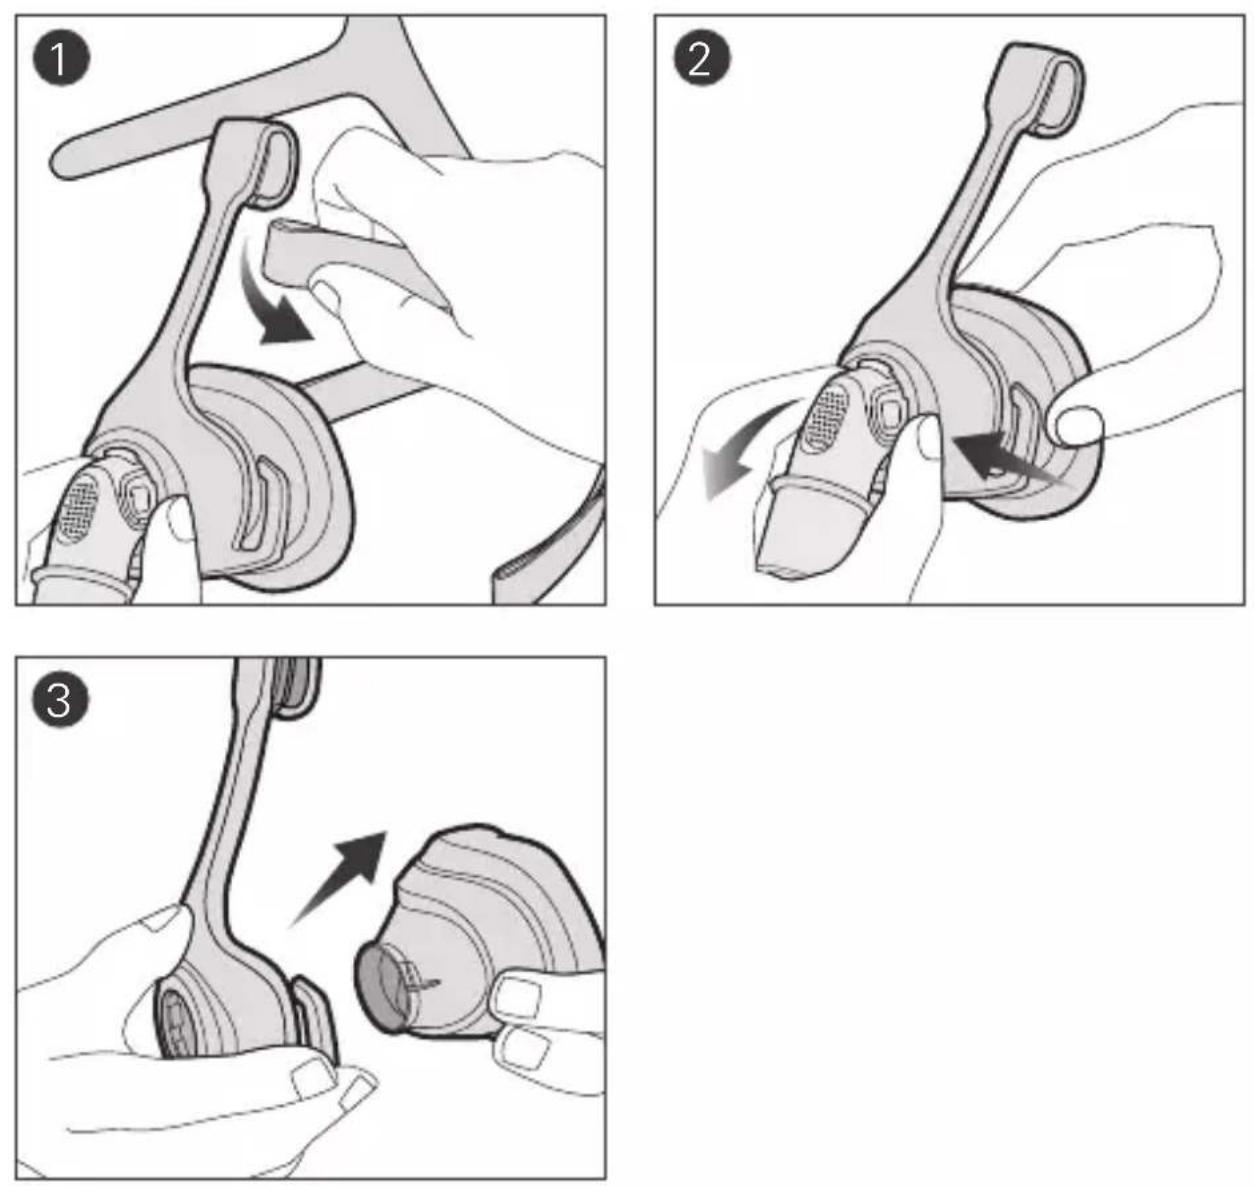
Disassembly
If the mask is connected to your device, disconnect the device air tubing from the elbow.
- Pull the straps out of the frame.
- Remove the elbow from the mask by pressing the side button and pulling the elbow away.
- Pull the cushion away from the frame.
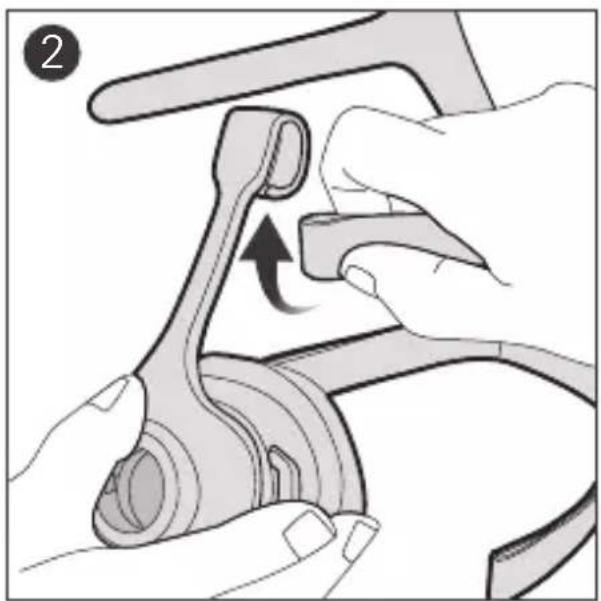
Reassembly
- Push the cushion into the frame.
Note: Ensure the cushion mask size indicator is facing downwards. - Attach the top headgear straps to the mask frame by looping onto each of the upper headgear hooks.
- Attach the elbow by pressing the side buttons and pushing into the mask.
Cleaning your mask at home
It is important to follow the steps below to get the best performance out of your mask.

WARNING
- As part of good hygiene, always follow cleaning instructions and use a mild liquid detergent. Some cleaning products may damage the mask, its parts and their function, or leave harmful residual vapours that could be inhaled if not rinsed thoroughly.
- Regularly clean your mask and its components to maintain the quality of your mask and to prevent the growth of germs that can adversely affect your health.

CAUTION
If any visible deterioration of a system component is apparent (cracking, crazing, tears etc), the component should be discarded and replaced.
Daily/After each use:
Before cleaning, take the mask components apart according to the disassembly instructions.
- Soak and agitate the cushion and elbow in warm water (approximately 30^ C) using a mild liquid detergent for up to 10 minutes.
- Clean the components with a soft bristle brush, paying particular attention to the small vent holes on the elbow.
- Rinse the components under warm flowing drinking quality water.
- Inspect each component to ensure that they are visually clean and free of detergent residue. If required, repeat washing.
- Allow the components to dry out of direct sunlight before assembling.
Weekly:
- Soak and agitate the separated headgear and frame in warm water (approximately 30^ C) using a mild liquid detergent for up to 10 minutes.
- Rinse the components under warm flowing drinking quality water until they are free of detergent residue.
- Squeeze the headgear to remove excess water.
- Allow the components to dry out of direct sunlight before assembling.
Reprocessing the mask between patients
Reprocess this mask when using between patients. Cleaning, disinfection and sterilisation instructions are available on
www.resmed.com/downloads/masks. If you do not have internet access, please contact your ResMed representative.
Troubleshooting
| Problem/possible cause | Solution |
| Mask is too noisy. | |
| Vent is dirty. | Clean the vent according to the instructions. |
| Mask is incorrectly assembled. | Disassemble the mask, then reassemble according to the instructions. |
| Mask is leaking. | Refit or reposition your mask. Readjust the headgear straps to bring the mask closer to the face and improve your seal. Check that your mask is assembled correctly. |
| Mask leaks around face. | |
| Mask may have been fitted incorrectly. | Pull the mask away from your face and reposition, ensuring that the lower corners of the mask fully enclose your nose. If necessary, readjust the headgear straps to keep the mask in the right place. |
| Cushion may be dirty. | Clean the cushion according to the instructions. |
| Cushion membrane is creased or folded. | Remove and refit your mask according to the fitting instructions. Ensure that you position the cushion correctly over your nose before pulling the headgear over your head. Do not slide the mask down your face during fitting as this may lead to folding or curling of the cushion. |
| Mask is not tightened correctly. | Ensure that the headgear straps are not overtightened or too loose. You may find that this mask does not need to be tightened as much as other nasal masks. Check that the headgear is not twisted. |
| Mask may be the wrong size. | Talk to your clinician. |
| Mask does not fit properly. | |
| Mask is not positioned correctly. | Check that the mask size indicator on the bottom of the cushion is facing downward. |
| Mask is incorrectly assembled. | Disassemble the mask, then reassemble according to the instructions. |
| Mask may be the wrong size. Talk to your clinician. | |
Technical specifications
| Pressure-flow curve | The mask contains passive venting to protect against rebreathing. As a result of manufacturing variations, the vent flow rate may vary. | |
| Pressure (cm H2O) | Flow (L/min) | |
| 4 | 20 | |
| 7 | 27 | |
| 11 | 35 | |
| 14 | 40 | |
| 17 | 44 | |
| 20 | 49 | |
| 24 | 54 | |
| 27 | 58 | |
| 30 | 61 | |
| Dead space information | Physical dead space is the empty volume of the mask to the end of the swivel. Using the large cushions it is 55.8 mL. | |
| Therapy pressure | 4 to 30 cm H2O | |
| Resistance | Drop in pressure measured (nominal) at 50 L/min: 0.4 cm H2O at 100 L/min: 1.5 cm H2O | |
| Environmental conditions | Operating temperature: 5°C to 40°C Operating humidity: 15% to 95% non-condensing Storage and transport temperature: -20°C to +60°C Storage and transport humidity: up to 95% non-condensing | |
| Sound | DECLARED DUAL-NUMBER NOISE EMISSION VALUES in accordance with ISO 4871. The A-weighted sound power level of the mask is 26 dBA, with uncertainty of 3 dBA. The A-weighted sound pressure level of the mask at a distance of 1 m is 18 dBA, with uncertainty of 3 dBA. | |
| Gross dimensions | 141 mm (H) x 73 mm (W) x 90 mm (D)Mask fully assembled with elbow assembly (no headgear) | |
| Service life | The service life of the AirFit N20 Classic mask system is dependent on the intensity of usage, maintenance, and environmental conditions to which the mask is used or stored. As this mask system and its components are modular in nature, it is recommended that the user maintain and inspect it on a regular basis, and replace the mask system or any components if deemed necessary or according to the 'visual criteria for product inspection' in the 'Cleaning your mask at home' section of this guide. Refer to the 'Mask components' section of this guide for information of how to order replacement parts. | |
| Mask setting options | For AirSense, AirCurve and S9: Select 'Pillows'.For other devices: Select 'SWIFT' (if available), otherwise select 'MIRAGE' as the mask option. | |
 | ||
| Device Setting Pillows | ||
Note: The manufacturer reserves the right to change these specifications without notice.
Storage
Ensure that the mask is thoroughly clean and dry before storing it for any length of time. Store the mask in a dry place out of direct sunlight.
Disposal
This product and packaging do not contain any hazardous substances and may be disposed of with your normal household refuse.
Symbols
The following symbols may appear on your product or packaging:
| LATEX? | Not made with natural rubber latex | MD | Medical device |
 | Importer |  | Classic nasal mask |
 | Device setting - Pillows |  | Size - small |
 | Size - medium |  | Size - large |
See symbols glossary at ResMed.com/symbols.
Consumer Warranty
ResMed acknowledges all consumer rights granted under the EU Directive 1999/44/EC and the respective national laws within the EU for products sold within the European Union.
Nasenmaske
De AirFit N20 Classic:
ALGEMENE WAARSCHUWINGEN
See ResMed.com for other ResMed locations worldwide. AirFit is a trademark and/or registered trademark of the ResMed family of companies. For patent and other intellectual property information, see ResMed.com/ip. Velcro is a trademark of Velcro Industries B.V. © 2020 ResMed. 638205/1 2020-06

- ResMed
- Using this guide
- Intended use
- Intended patient population/medical conditions
- Clinical benefits
- GENERAL WARNINGS
- Using your mask
- Fitting
- Adjustment
- Adjustment tips:
- Removal
- Disassembly
- Reassembly
- Cleaning your mask at home
- WARNING
- CAUTION
- Daily/After each use:
- Weekly:
- Reprocessing the mask between patients
- Storage
- Disposal
- Symbols
- Consumer Warranty
- ALGEMENE WAARSCHUWINGEN
Brand : ResMed
Model : AirFit N20 Classic
Category : Respiratory medical device