
Roomie Smart - Vacuum Cleaner Prixton - Free user manual and instructions
Find the device manual for free Roomie Smart Prixton in PDF.

| Product type | Robot vacuum cleaner |
| Brand | Prixton |
| Model | Roomie Smart |
| Power supply | 14.8 V (Li-ion battery 2600 mAh) |
| Nominal power | 20 W |
| Battery capacity | 2600 mAh |
| Station input voltage | 19 V DC, 0.6 A |
| Station output voltage | 19 V DC, 0.6 A |
| Filter | HEPA |
| Connectivity | Wi-Fi 2.4 GHz (Tuya app) |
| Remote control | Yes |
| Functions | Automatic cleaning, edge cleaning, spiral cleaning, adjustable suction, auto recharging, scheduled cleaning, mopping function |
| Safety | Drop sensors, bumper |
| Maintenance | Main brush, side brushes, HEPA filter, water tank, dust compartment, sensors, caster wheel, signal window, charging contacts |
| Warranty | 2 years |
| Compliance | EU (Directive 2014/53/EU) |
Frequently Asked Questions - Roomie Smart Prixton
User questions about Roomie Smart Prixton
0 question about this device. Answer the ones you know or ask your own.
Ask a new question about this device
Download the instructions for your Vacuum Cleaner in PDF format for free! Find your manual Roomie Smart - Prixton and take your electronic device back in hand. On this page are published all the documents necessary for the use of your device. Roomie Smart by Prixton.
USER MANUAL Roomie Smart Prixton
natural_image
Simple line drawing of a circular object with a central hole and side brackets (no text or symbols)ROBOT ASPIRADOR
VACCUM CLEANER
natural_image
Technical line drawing of a circular mechanical component with internal features and a central hole (no text or symbols)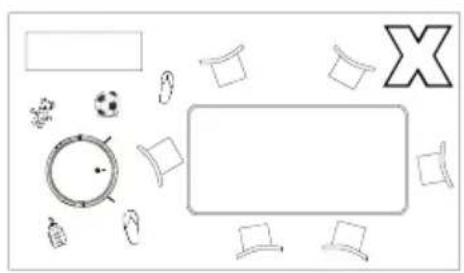
natural_image
Top-down view of a table layout with items like a clock, soccer ball, and X-shaped symbol (no text or labels)natural_image
Simple line drawing of a person walking through a hallway with a robot vacuum cleaner nearby (no text or symbols)natural_image
Simple line drawing of a circular object with a handle and base, no text or symbols present
3.Configure y guarde

natural_image
Diagram showing a mechanical component before and after assembly, with no visible text or symbols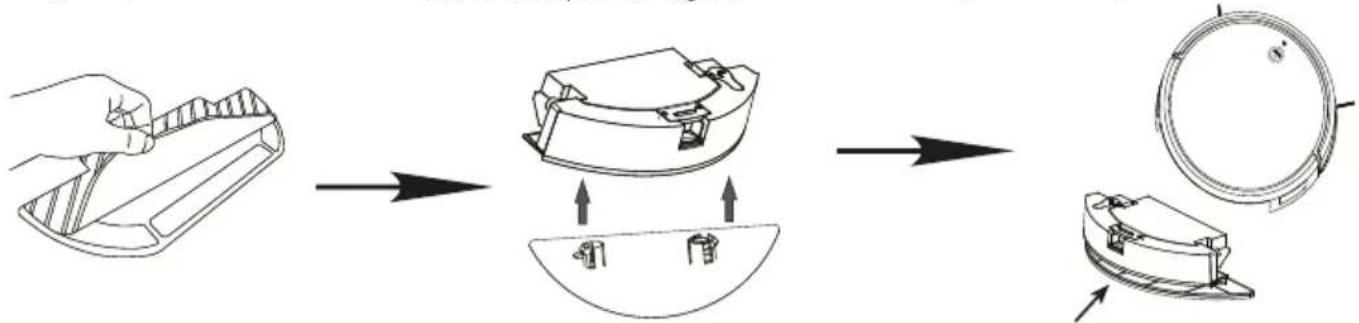
flowchart
graph LR
    A["Hand Tool"] --> B["Exploring"]
    B --> C["Internal Component 1"]
    C --> D["Exploring"]
    D --> E["Final Product"]
Nota:
natural_image
Line drawing of a hand interacting with a circular device, showing a finger pointing at the center (no text or symbols)Nota:
5.1 Cepillo principal
natural_image
Line drawing of a hand holding a device with a small electronic device (no text or symbols)3.Paño limpio
natural_image
Line drawing of a faucet dispensing liquid into a slatted surface (no text or symbols)natural_image
Line drawing of a curved mechanical component with a faucet and base mount (no text or symbols)Límpielo y séquelo
natural_image
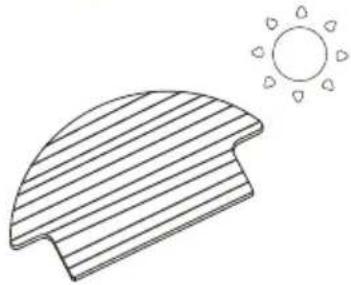
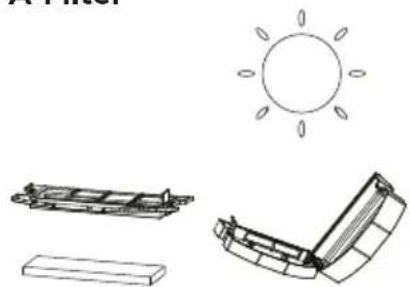
Simple line drawing of a sun partially covered by a striped curved shape (no text or symbols)Limpie y séquelo
natural_image
Line drawing of a hand gripping a mechanical component (no text or symbols)natural_image
Technical diagram of a mechanical component with circular and curved features, showing directional arrows (no text or symbols)natural_image
Simple line drawing of a spray gun pouring liquid into a plastic cup (no text or symbols)natural_image
Technical line drawing of a mechanical component with three views (top, front, side), no text or symbols present.natural_image
Illustration of household cleaning and cleaning process with faucet, toilet, door panel, hand, sun, and tools (no text or symbols)5.4 Batería
1. Important Safety Instructions
The safety specification is intended to prevent users' personal or property damage. Please read the following notes carefully.
The following symbols represent the following meanings:
Warning
Violation of safety instructions will lead to personal injury
Attention
Violation of safety instructions may result in minor personal injury or product damage

Except the maintenance technician, no one can disassembly repair or modify the product, otherwise it may catch fire or electric shock.

Please do not use other adapters, otherwise it may cause damage fire or electric shock.

Do not touch the charger with wet hand when charging, other wise it may cause damage or electric shock.

Do not over bend the power cord of the adapter or place heavy objects on it otherwise it may damage the power cord, causing a fire or electric shock.

Do not let clothes or baby parts (hair, fingers etc.) get involved in machine hair brush or wheel, may cause damage to machine and personal injury

Do not get close to lights, matches or other heat sources and explosive goods Do not flush the machine, otherwise it may damage the machine and cause fire.


Turn off power when transport or long placement of machines.

The adapter needs connected to the socket, machine and adapter plug when the machine is charged.

Please do not allow children to use the machine. Do not use machine in baby house. The machine should be in places where children cannot touch

Do not place the machine in high place in order to avoid damage.

Do not stand or seat in the machine. Do not put heavy object in the machine.

Please do not use the machine in small place, Move the vulnerable goods before using (Luminous objects, fabrics, glass products, etc.)

Outdoor use is prohibited to prevent mechanical failure

Do not use a commercial space, otherwise the machine maybe damaged by overuse.

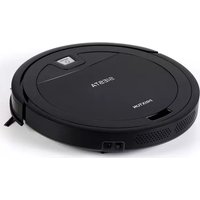
2. Package Contents / Structure introduction
2.1 Package Contents
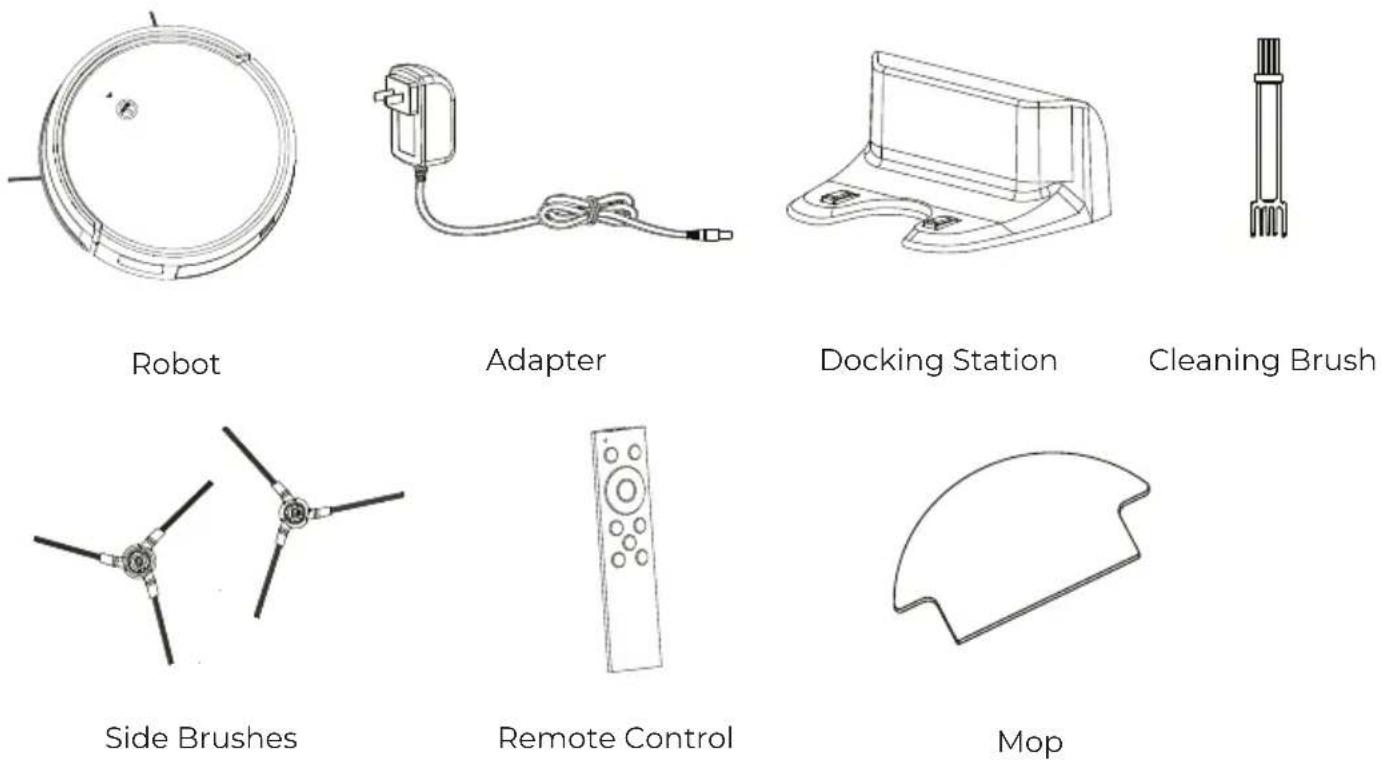
Note: Figures and illustrations are for reference only and may differ from actual product appearance
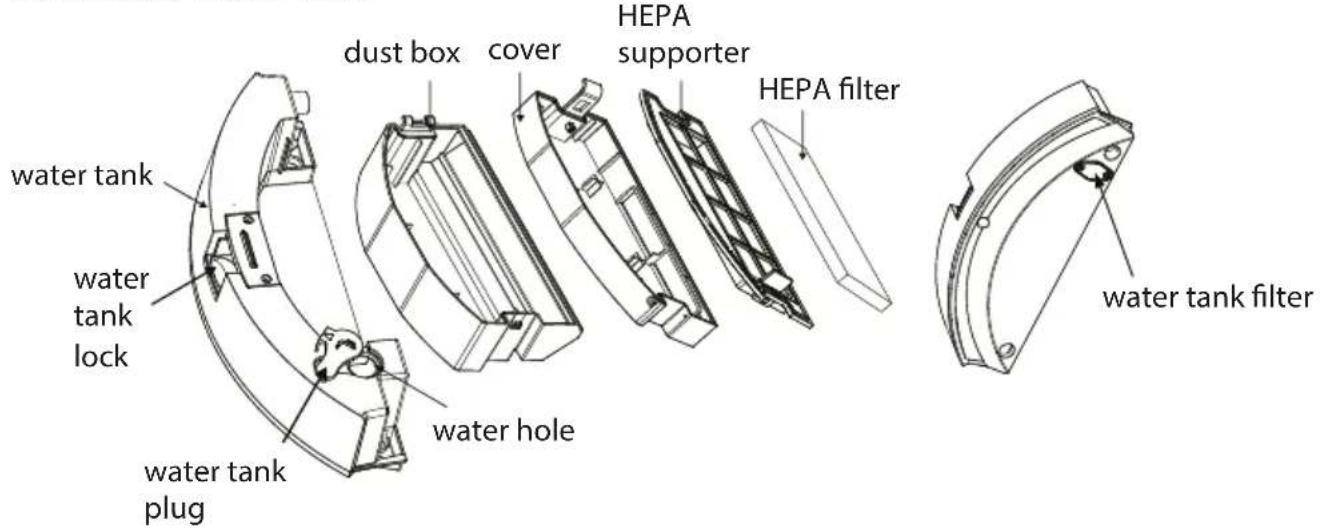
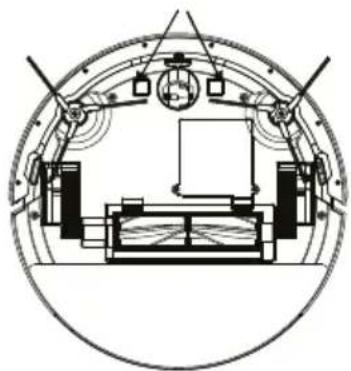
2.2 Structure introduction
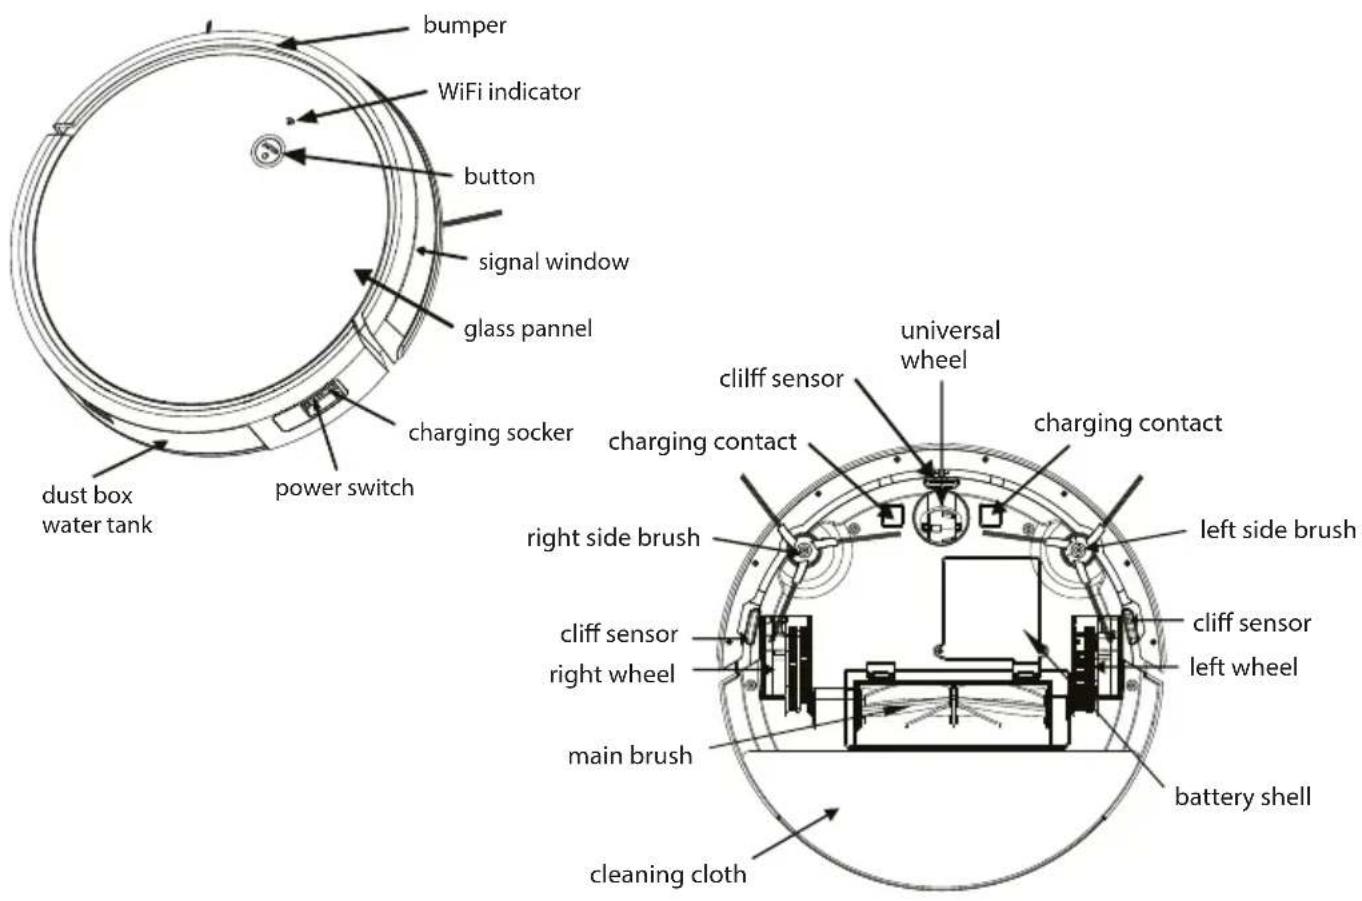
Dust Box & Water Tank
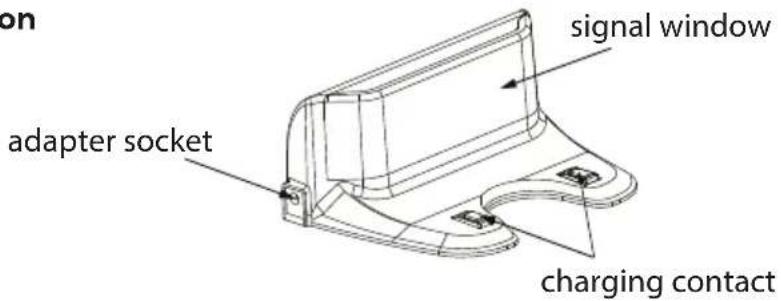
Docking Station
3.Technical Specifications
3.1 Specification
| Model | ROOMIE SMART | ||
| Working Voltage | 14.8V | ||
| Docking Station Model | KCH217 | ||
| Input | 19V DC, 0.6A | Output | 19V DC, 0.6A |
| Battery | 2600mAh Li-ion | ||
| Rated Power | 20W | ||
natural_image
Technical line drawing of a circular mechanical component with internal features and a central hole (no text or symbols)Note: Technical and design specifications may be changed for continuous product improvement
4. Instruction for Use
4.1 Notes Before Cleaning
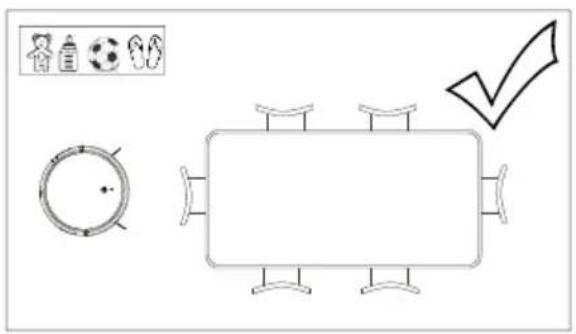
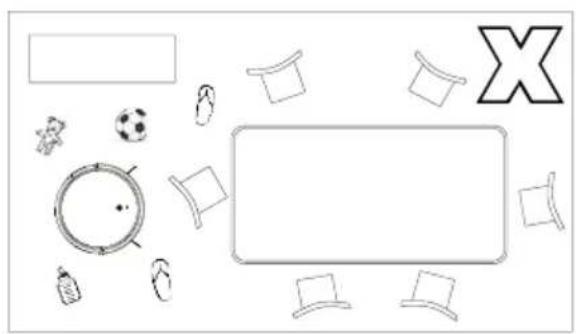
1. Arrange the furniture neatly
Please arrange chair table and other objects neatly to leave the biggest space before cleaning
natural_image
Top-down view of a table with various items including a soccer ball, football caps, and a large X symbol (no text or labels)2. Remove unfriendly obstacles
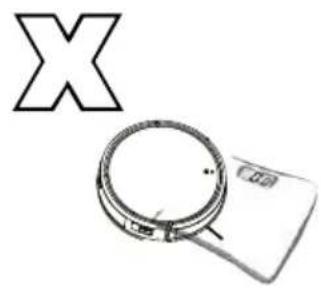
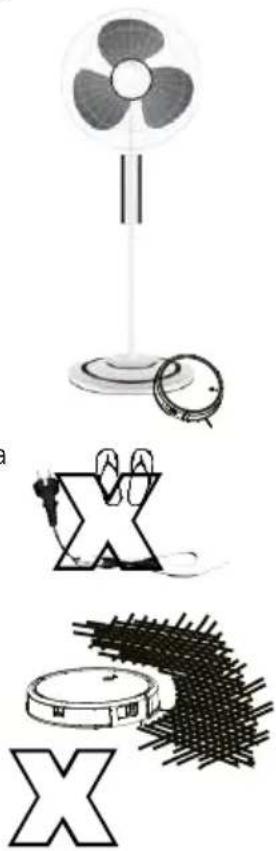
Remove the weight scale ,fan base and other low objects that may affect the robot clean
natural_image
Simple line drawing of a magnifying glass with a circular lens and a rectangular base, no text or symbols present.Before using the product on a rug with tasseled edges, please fold the rug edges under.
Please do not use mop function on the rug.
natural_image
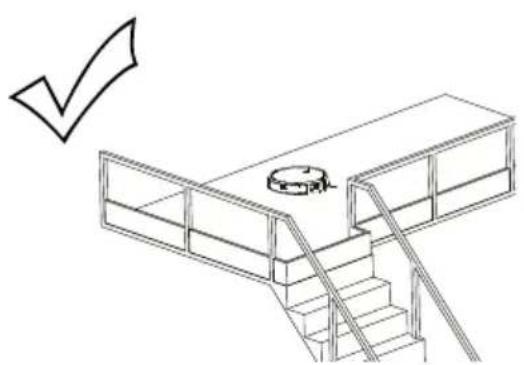
Illustration of a fan with three blades, a circular object, a stylized 'X' symbol, and a spiky brushstroke base (no text or symbols)3. Prevent robot from falling
It may be necessary to place a physical barrier at the edge of a drop to stop the unit from falling over the edge.
natural_image
Line drawing of a multi-level building structure with stairs and a central circular object, no text or symbols present.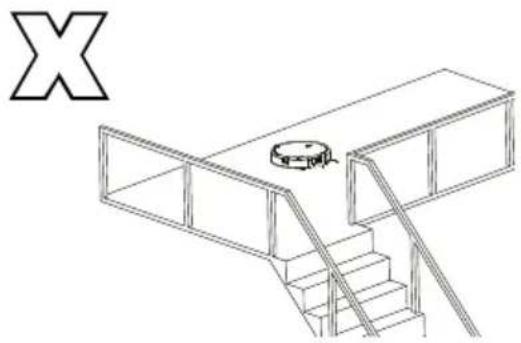
natural_image
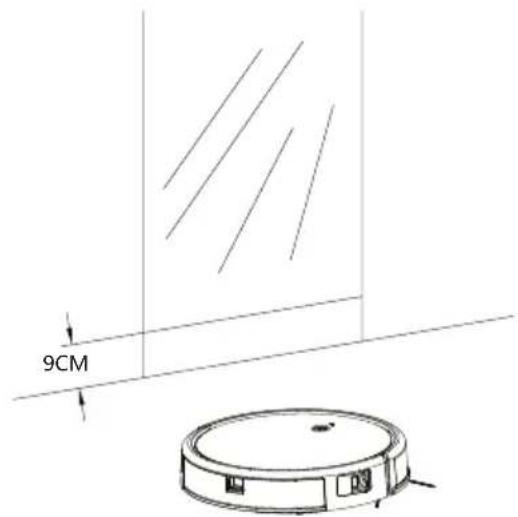
Isometric line drawing of a multi-level building structure with stairs and a central circular component (no text or symbols)4. Block out objects with strong reflective surfaces
Please ensure height 9cm from floor without strong reflective surface, such as mirror or glass, or oclude it otherwise it will influence the robot cleaning.
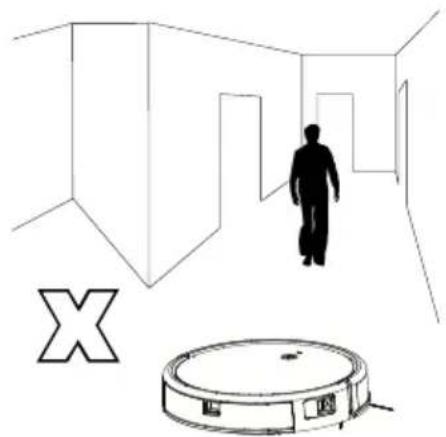
5. Please stay away from the robot when it's working
Please do not stand in narrow places such as thresholds or aisles, otherwise the robot can not identifying the area that needs to be cleaned.
natural_image
Simple line drawing of a person walking through a hallway with a robot nearby (no text or symbols)6. Avoid touching the water tank release button
Please do not touch the water tank button when pick up robot, otherwise, the robot will fall.

natural_image
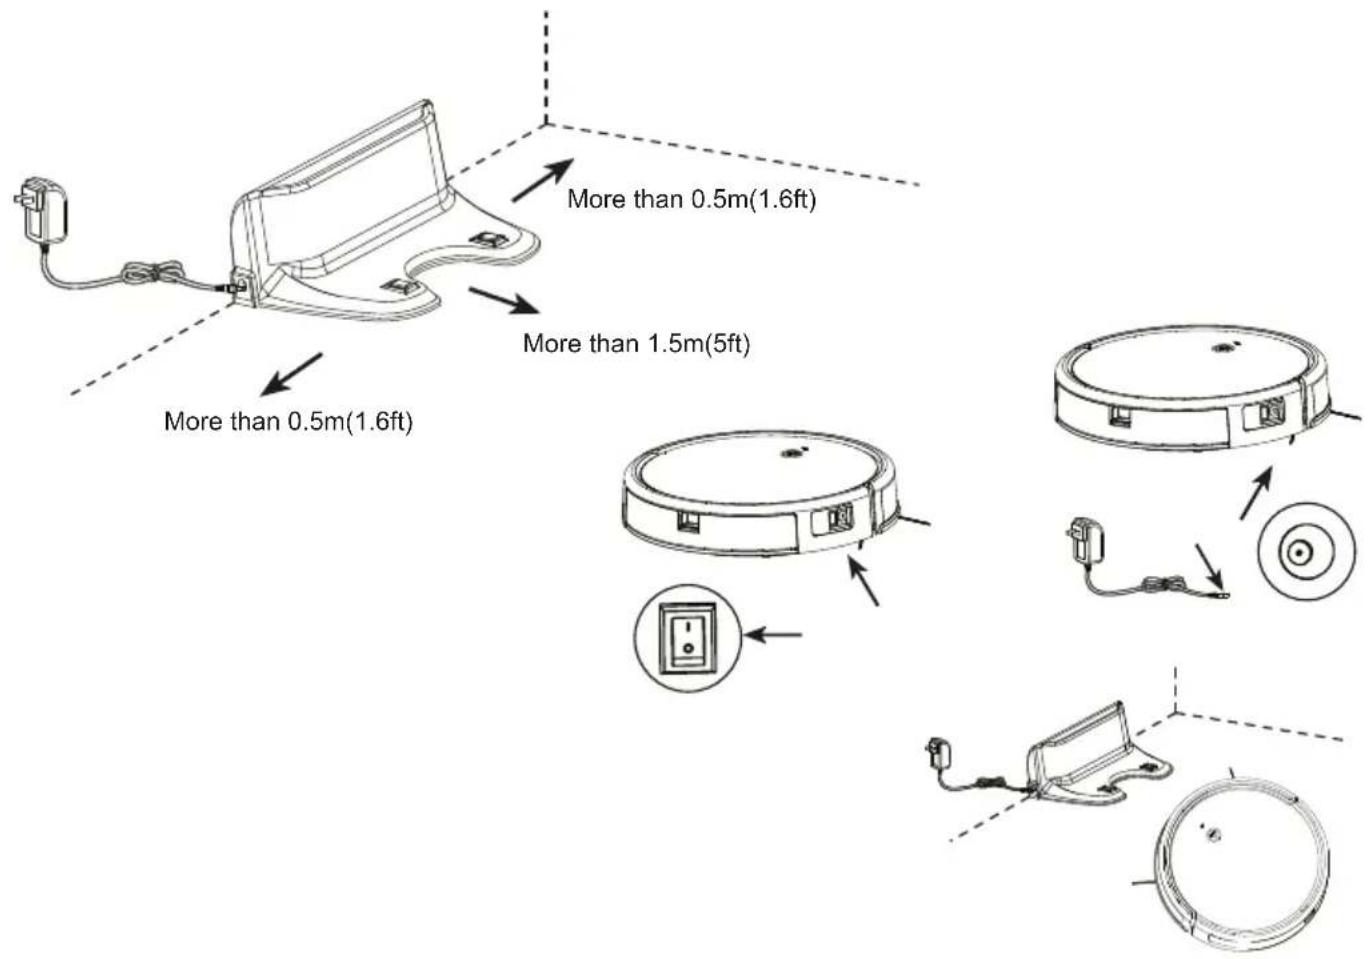
Simple line drawing of a circular object with a handle and base, no text or symbols present4.2 Docking Station Installation
- Place the docking station against the wall edge on a flat surface and connect adapter with mains power.
Note:
a. The docking station should have more than 0.5m(1.6ft) of clearance on each side, and more than 1.5m(5ft) in the front.
b. If the power cable is vertical to ground, it may be caught by the machine, causing the docking station to be disconnected.
- Power on and charge
Press power switch to turn on the robot.
Robot power indicator lights up with a voice prompt, place the robot onto the docking station to beging charging or charging directly with adapter.
Note:
a. Please charging more than 8 hours for first time using.
b. The robot will not turn on when battery is too low, please manual charging the robot.
c. Users can control auto charging function through remote control or APP.
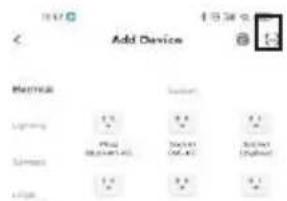
4.3 APP Connection
- Download the Tuya APP Search "TUYA" in the App Store or Google Play, or scan the QR code below, then download and install the app. Follow the app step to register and login.


Step 1
Download APP and register
Step 2
Log in
Step 3
Choose Add device
Step 4
Choose above marks Scan QR code to follow the connect step on APP
Note:
a. Due to ongoing app development, the actual process may differ slightly from the above description Always follow the instruction given in APP.
b. Only support 2.4GHz WiFi.
c. If you can't connect your phone to the robot, reset the WiFi, and add your robot as a new device.
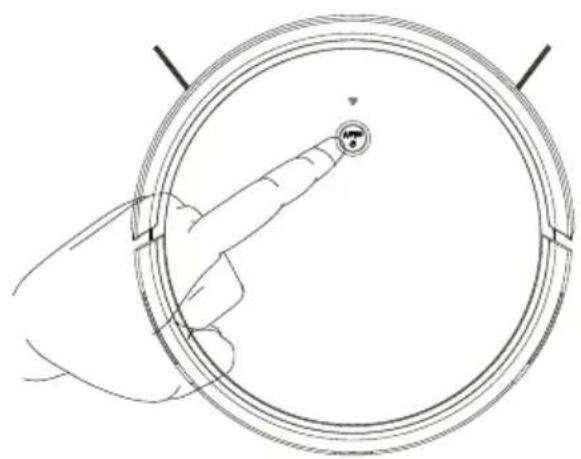
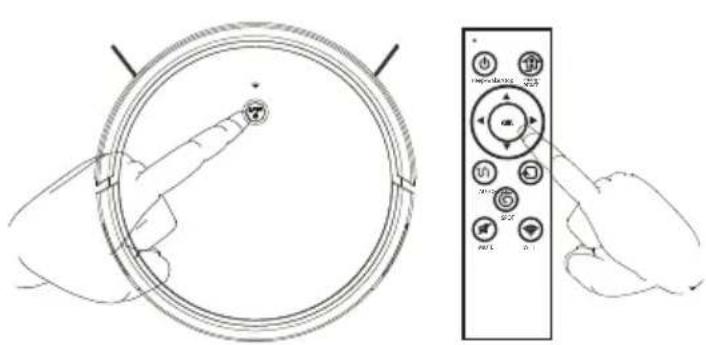
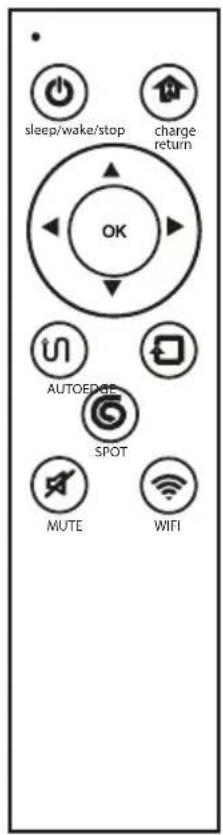
4.4 Function Use
1. Auto Clean Mode
Turn on robot, press robot button or remote control OK button or auto button in APP, the robot will start auto clean mode. Please close the door if only clean one room, robot will back to start place after cleaning finish.
natural_image
Line drawing of hands holding a circular device with a scroll wheel and a remote control panel (no text or symbols)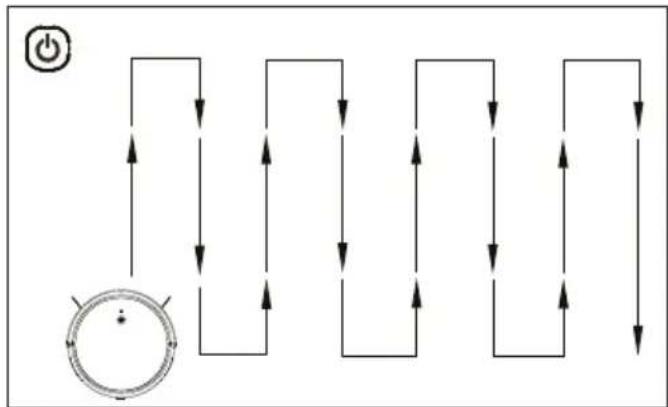
flowchart
graph TD
    A["Power Input"] --> B{Switch}
    B --> C["Node 1"]
    B --> D["Node 2"]
    B --> E["Node 3"]
    B --> F["Node 4"]
    B --> G["Node 5"]
    B --> H["Node 6"]
    B --> I["Node 7"]
    B --> J["Node 8"]
    B --> K["Node 9"]
    B --> L["Node 10"]
    B --> M["Node 11"]
    B --> N["Node 12"]
    B --> O["Node 13"]
    B --> P["Node 14"]
    B --> Q["Node 15"]
    B --> R["Node 16"]
    B --> S["Node 17"]
    B --> T["Node 18"]
    B --> U["Node 19"]
    B --> V["Node 20"]
Note:
In auto mode, robot start with smart zigzag cleaning route, please do not move or control the robot , otherwise, robot will restart cleaning route and repeat clean the area. Robot may stop when working for thinking and judging the missing area or planning clean routeThe number of pauses and time depends on the complexity of the home environment
2. Edge Clean Mode
Press edge button in app or remote control Machine along the object edge to cleaning

flowchart
graph TD
    A["Circle Node"] --> B["Process Step"]
    B --> C["Return Arrow"]
    C --> D["End Point"]
    style A fill:#f9f,stroke:#333
    style D fill:#bbf,stroke:#333
4.Suction Option Mode
Adjust suction through APP setting
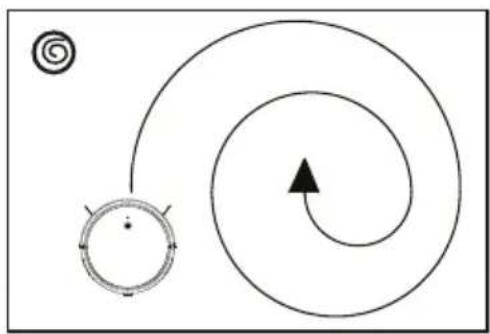
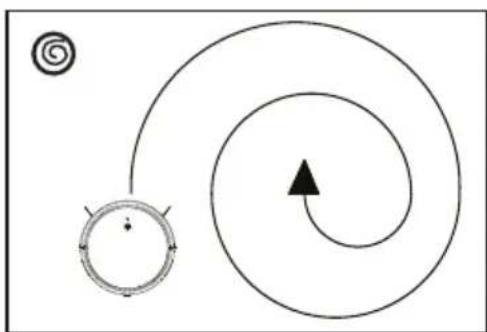
3.Sprial Clean Mode
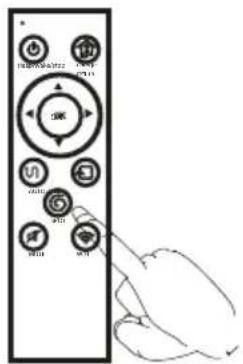
Press remote control spot button or spiral in app. Focus on specific areas, cleaning more thorough, it is recommended use in the living room or other area with less obstacles.
natural_image
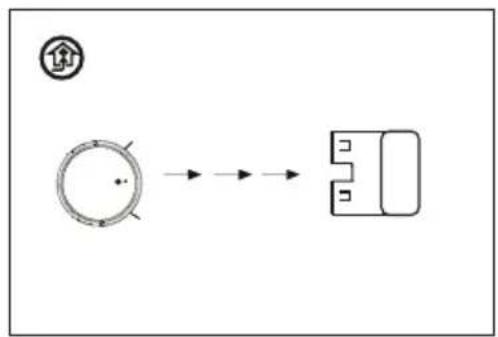
Diagram showing a spiral path with an arrow and a circular symbol (no text or labels)5. Auto charge Mode
Robot will find docking station automatically when battery power is low
flowchart
graph LR
    A["圆形处理"] --> B["输出框"]
    style A fill:#f9f,stroke:#333
    style B fill:#ccf,stroke:#333
Note : If the battery power below 10%, robot will shut down. Please manual charging the robot.
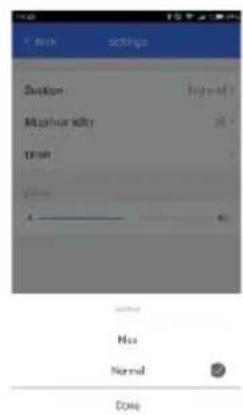
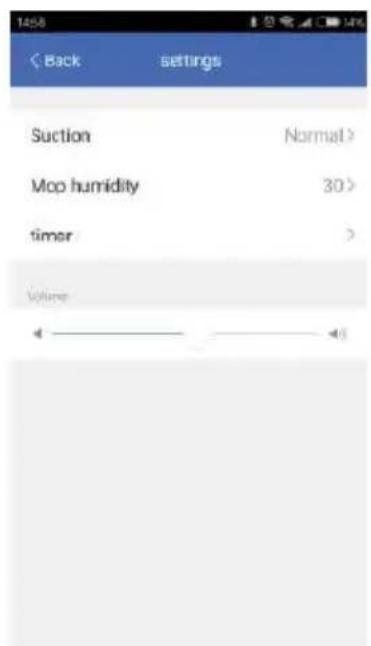
6. Schedule Clean (set in APP)
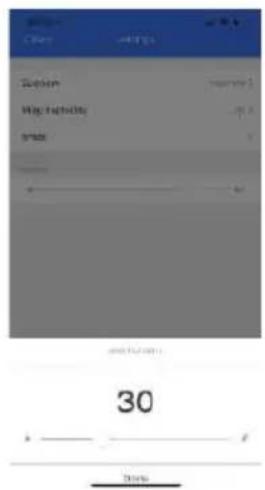
1. Enter setting

2.Choose timer
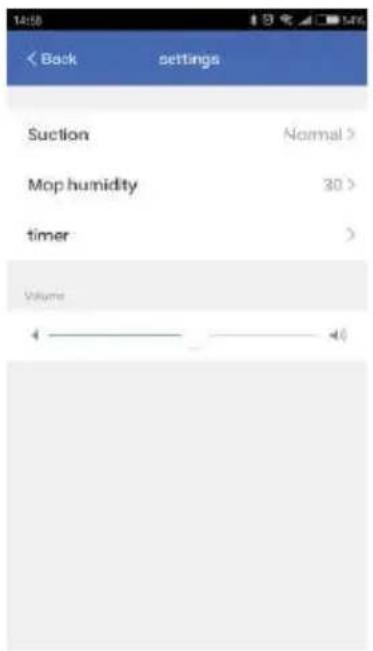
3.Set and save

Note:
Due to ongoing app development, the actual process may differ slightly from the above description. Always follow the instruction given in APP.
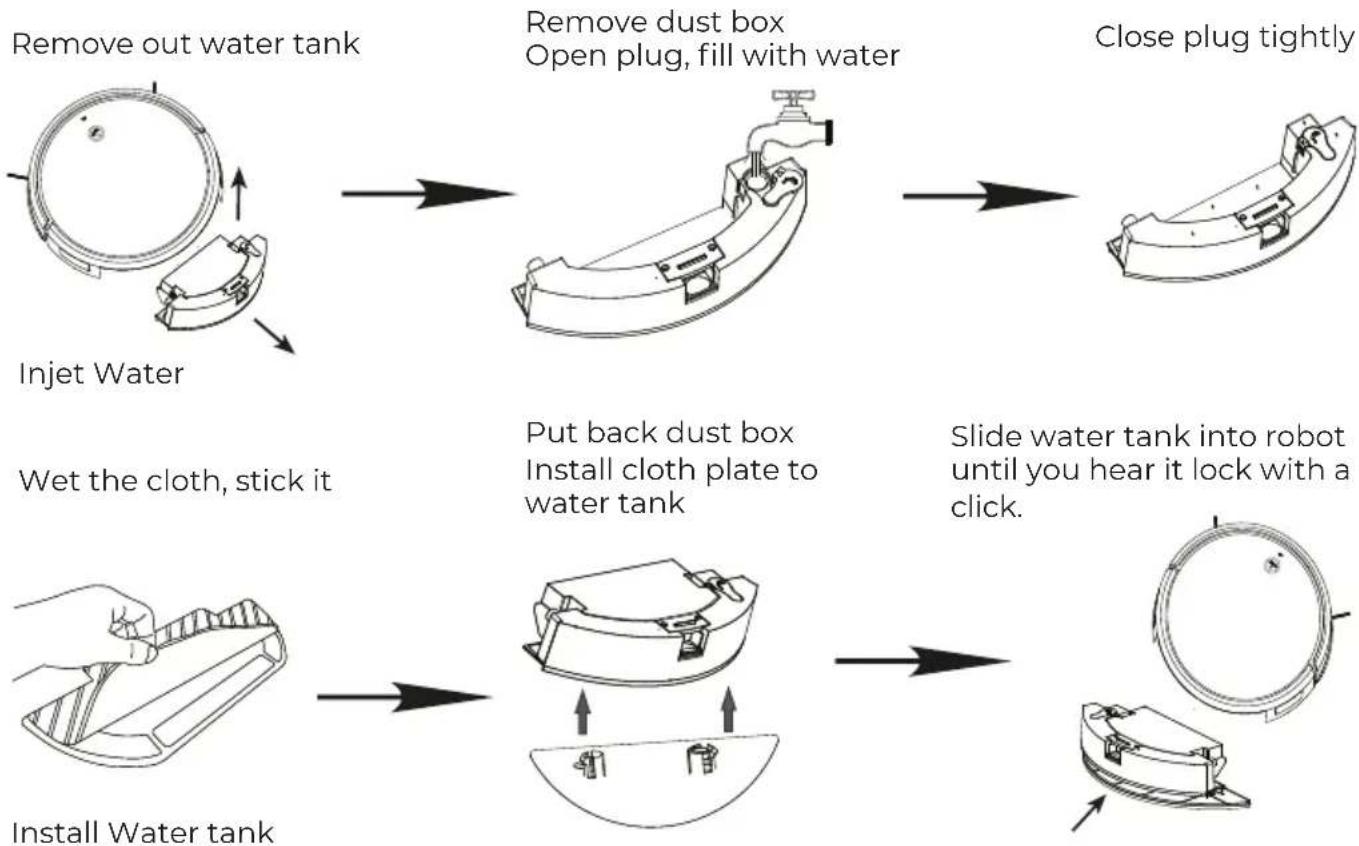
7.Mopping Function
flowchart
graph TD
    A["Remove out water tank"] --> B["Remove dust box Open plug, fill with water"]
    B --> C["Close plug tightly"]
    D["Inject Water"] --> E["Wet the cloth, stick it"]
    E --> F["Put back dust box Install cloth plate to water tank"]
    F --> G["Slide water tank into robot until you hear it lock with a click."]
    H["Install Water tank"] --> I["Install Water tank"]
    I --> J["Shrinker with plastic bag"]
Note:
a. It is recommended that all floors are vacuumed at least three times before the first mopping session to reduce excessive dirt buildup on the mop.
b. To prevent corrosion or damage, do not use cleaning fluid or disinfectant in the water tank.
c. Do not use hot water, which may cause the tank to deform.
Adjust mop humidity in the APP as required
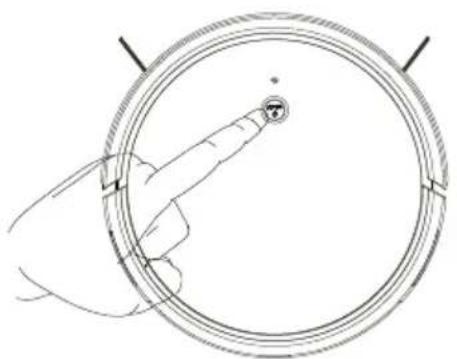
Start mopping cleaning
Ensure the robot is fully with power and turn on it, press auto button or use the app to start cleanup.
natural_image
Diagram of a hand interacting with a circular device, showing a pointer and a numbered circle (no text or symbols present)Note:
a. Remove cloth plate and washing the cloth, then empty the water tank frequently is recommended if not use it to prevent odors or mildew.
b. Remove the mop cloth plate if not mopping.
c. Cleaning the mop cloth after 60 minutes of mopping is recommended to ensure water flow and cleaning quality
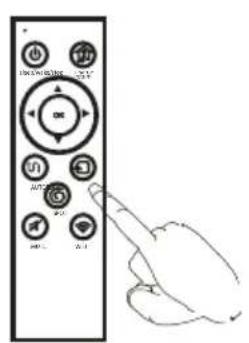
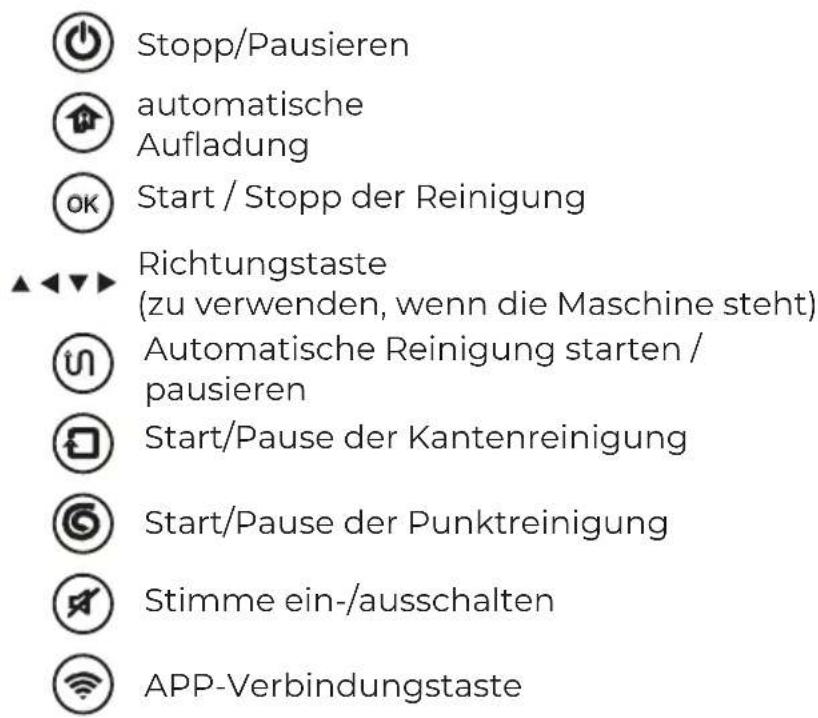
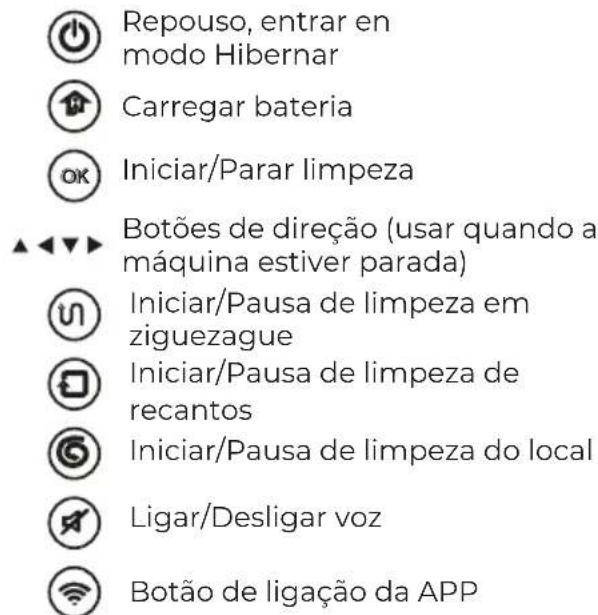
8.Remote Controller
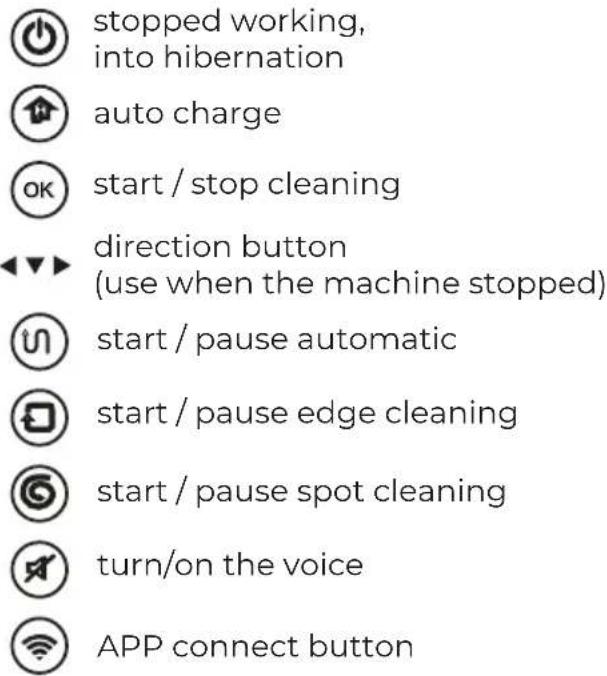
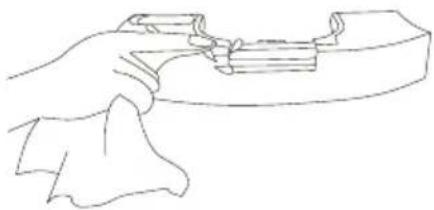
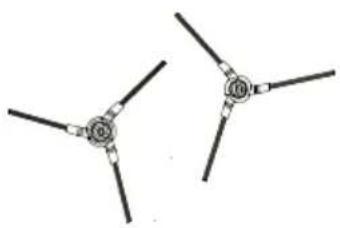
9. Usage of Side Brushes
Note:
- Right and left side brush are not interchangeable.
- Please clean the brush after using.
- Must base on above icon to change brush.
- Assembly: directly pull brush out and press in.
- Please use carefully in the area with much hair.
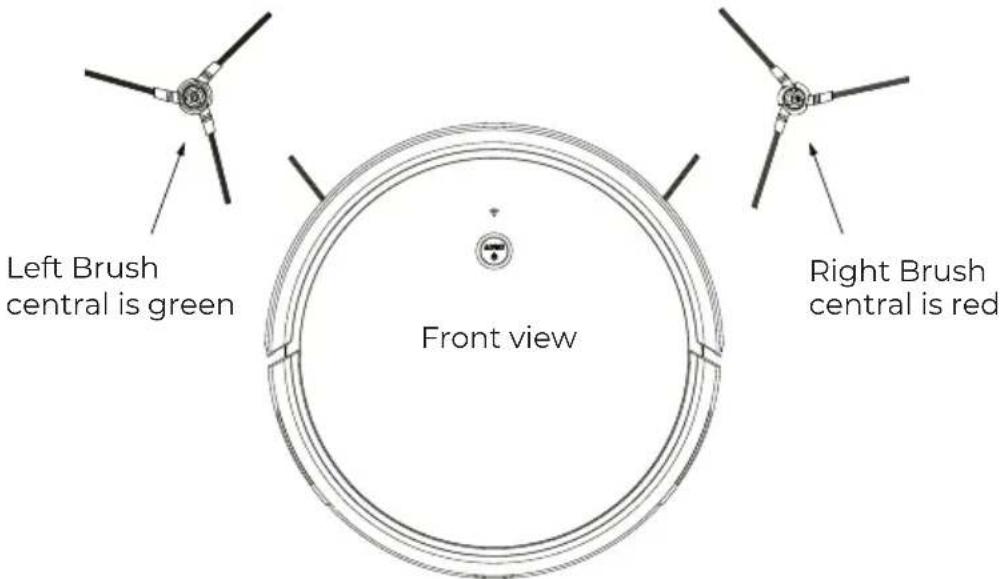
5. Routine Maintenance
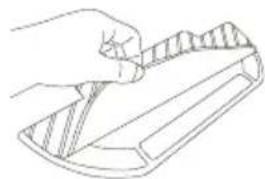
5.1 Main Brush
- Turn the robot over unlatch and remove the main brush cover.
- Take out the main brush, remove and clean its bearings.
- Use the supplied cleaning brush tool to remove any dust or entangled hair.
- Re-install the cap and bearings following the lock direction
- Re-insert the main brush and replace the brush cover.
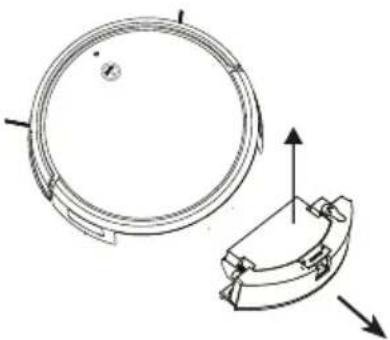
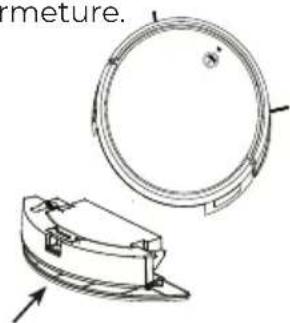
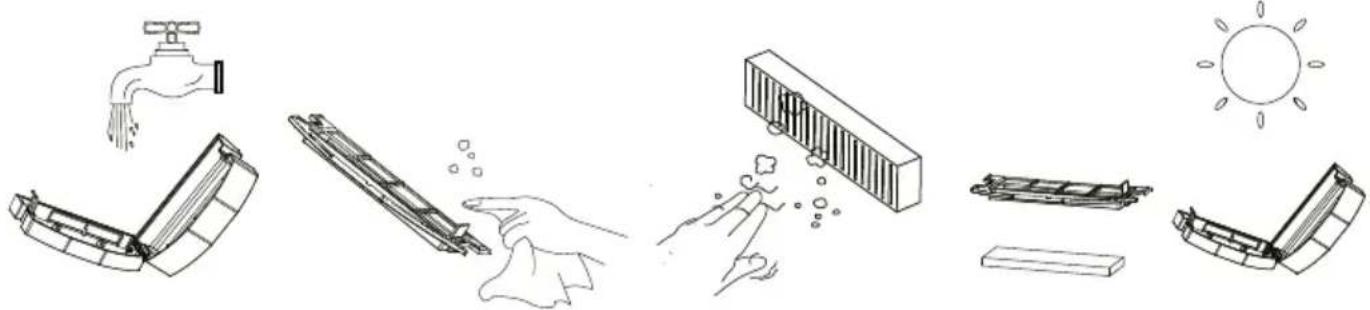
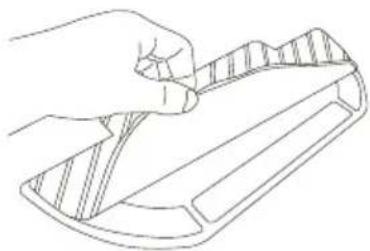
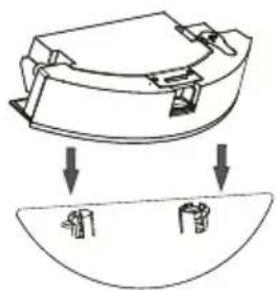
5.2 Water Tank and Cloth 1.Disassemble Water Tank
Remove out water tank
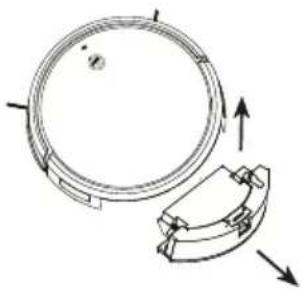
natural_image
Technical diagram of a mechanical component with circular and segmented parts, showing directional arrows (no text or symbols)Remove out cloth part
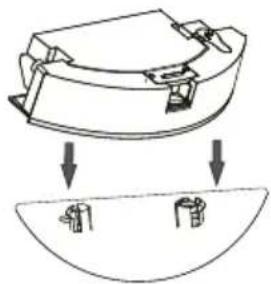
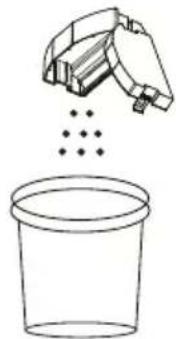
natural_image
Diagram showing a mechanical component with downward arrows indicating motion or assembly (no text or symbols present)Remove cloth
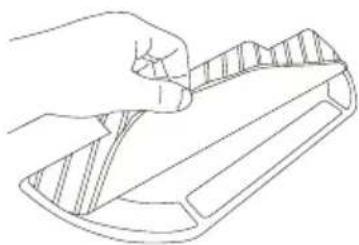
natural_image
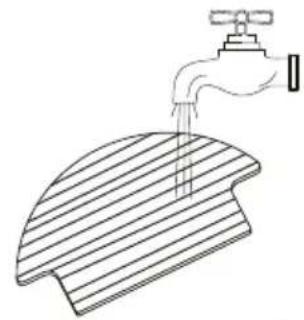
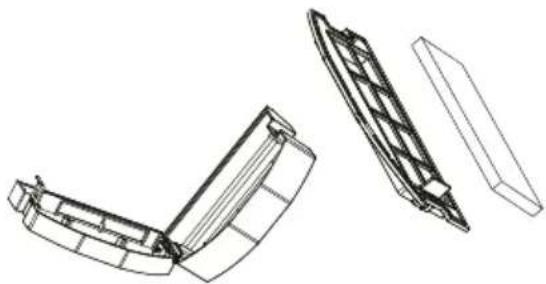
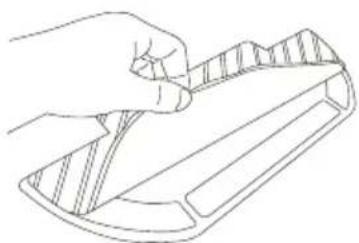
Line drawing of a hand holding a tool over a tray (no text or symbols)5.2 Water Tank and Cloth
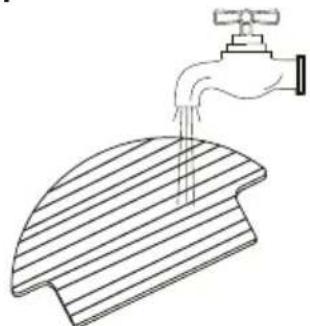
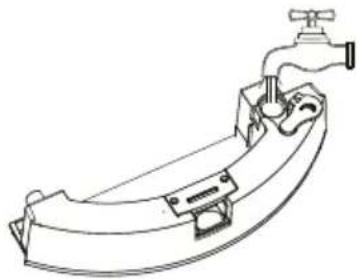
2.Clean Water Tank
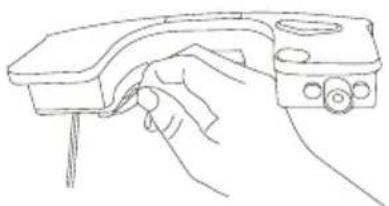
natural_image
Line drawing of a hand holding a handheld device (no text or symbols)Pour out water
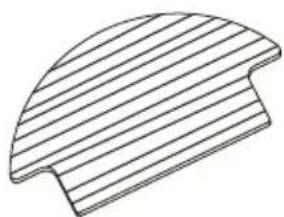
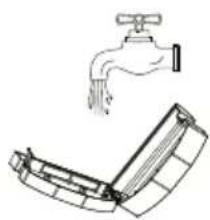
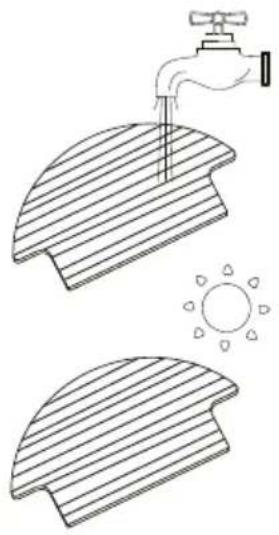
Clean and dry it
natural_image
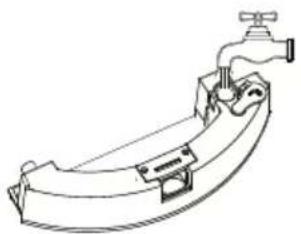
Line drawing of a hand pouring liquid into a slatted surface (no text or symbols)Clean water tank
natural_image
Line drawing of a mechanical component with a faucet and handle (no text or symbols)Wipe and dry it
natural_image
Pure geometric shape with diagonal lines, no text or symbols present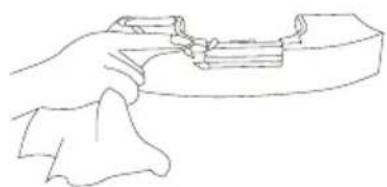
natural_image
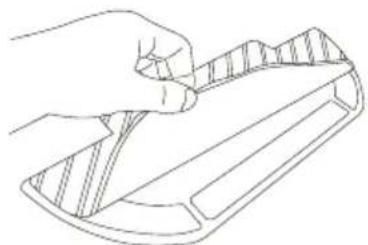
Line drawing of a hand holding a tool or device (no text or symbols present)3.Clean Cloth
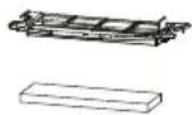
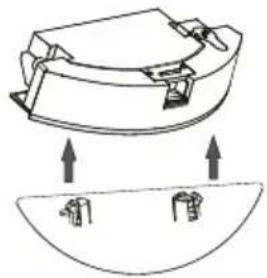
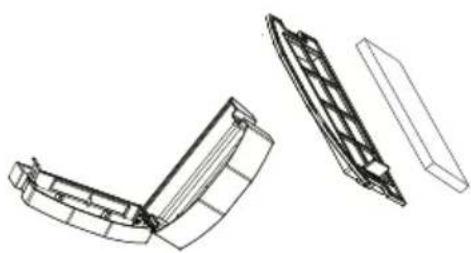
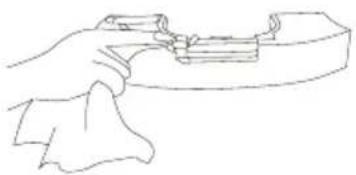
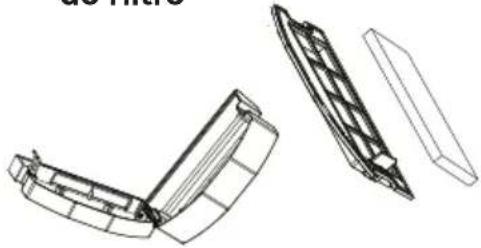
5.3 Dust Box and Filter Part
- Disassembly dust box
natural_image
Technical line drawing of a mechanical component with circular and curved features, showing directional arrows (no text or symbols)2.Clean dust box
natural_image
Simple line drawing of a spray bottle pouring liquid into a container (no text or symbols)3.Disassembly filter parts
natural_image
Technical line drawing of a mechanical component with three views (top, front, side), no text or symbols present.- Rinse the dust box with water gently tap the HEPA
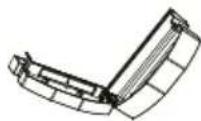
4.Clean dust box cover
natural_image
Simple line drawing of a faucet and a folded garment (no text or symbols)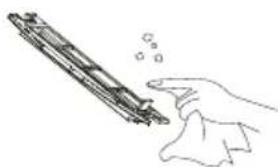
natural_image
Hand holding a cylindrical object with bubbles, possibly a mechanical component or tool (no text or symbols visible)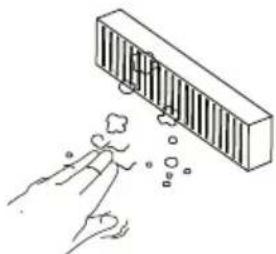
natural_image
Illustration of a hand reaching toward a bar magnet above a ball, with no text or symbols present.6.Dry these parts
5.4 Battery
The robot is equipped with a high-performance lithium-ion rechargeable battery pack. To maintain battery performance, keep the robot charged.
Note:
If the robot is to be left unused for an extended period, turn it off before storage and charge it at least once every three months to avoid battery damage resulting from over-discharging.
5.5 Firmware Update
Update the robot using the app.
Place the robot on the dock station and ensure that the battery level is higher than 20% before updating.
The power indicator will flash quickly during a firmware update.
Environmental protection description Removing the battery
* The following information applies only when disposing of the robot and should not be followed for day-to-day operations
The chemical substances contained in the built-in lithium-ion battery of this product can cause environmental pollution. Remove the battery before disposing of this product and hand it to a professional battery recycling facility for centralized disposal.
- Operate the robot until it has low battery and is unable to clean, ensuring it does not connect to the charging dock.
- Turn off the robot.
- Unscrew the battery cover.
- Remove the battery cover.
- Pull out the battery connector and remove the battery.
Note:
- Before removing the battery, make sure it is fully drained. Do not attempt to remove the battery if the robot is connected to the charging dock.
- Remove the entire battery pack. Avoid damaging the battery pack casing to avoid short-circuits or leakage of hazardous substances.
• In the event of accidental contact with battery fluid, rinse thoroughly with water and seek immediate medical care.
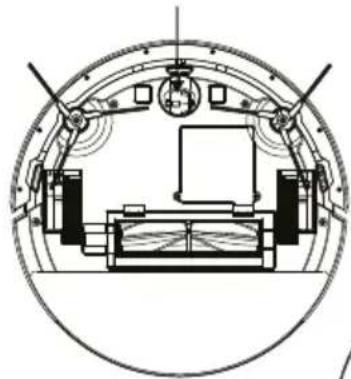
5.6 Other Parts
- Clean cliff sensors
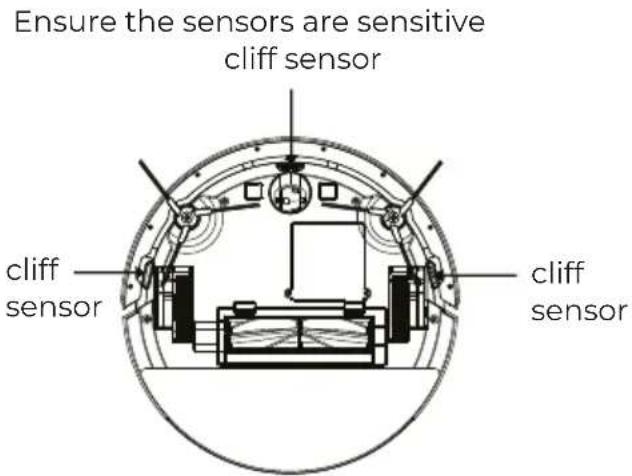
- Clean universal wheel
Reduce abnormal noise and hair entanglement universal wheel
natural_image
Technical line drawing of a circular mechanical or architectural component with internal structural elements (no text or symbols)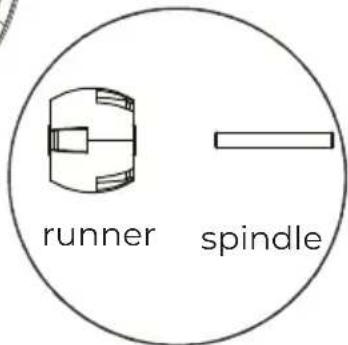
3. Clean signal window
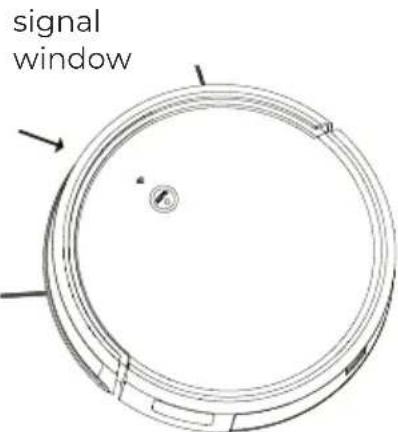
4. Clean charging contact and signal window
charging contact
natural_image
Cross-sectional diagram of a circular mechanical or architectural structure with internal components and no visible text or symbols.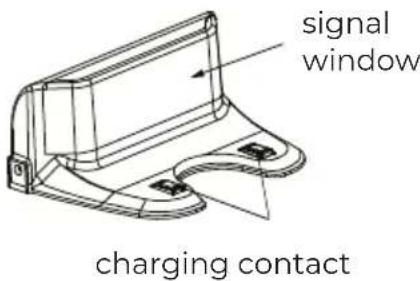
- Troubleshooting
| Situation | Possible Cause Solution | |
| Machine not work | Machine not turn on | Turn on the machine |
| Battery run out | Charging the machine | |
| Machine cannot charge | Charging contact is unreliable | Make sure the adapter is reliable |
| Wipe charging contact on machine and charging dock | ||
| The machine is backing away | The anti-drop sensors are dirty | Use dry cloth wipe the sensors |
| The machine is in circles | Signal window is dirty | Use dry cloth wipe the signal window |
| Left/right wheel error | The wheels were wound by something | Clean the wheel |
| Left/right brushes abnormal | Left/right side brushes setup error | Install the side brushes properly |
| Left/right side brushes were wound by | Clean the side brushes | |
| Dust box abnormal | The dust box was not put in place | Put the dust box in place |
| Universal wheel abnormal | Universal wheel stuck with something | Clean the universal wheel |
| Robot is not able to connect to the home Wi-Fi network | Incorrect home Wi-Fi username or password | Enter the correct home Wi-Fi username and password |
| Robot is not within range of your home Wi-Fi signal | Make sure robot is within range of your home Wi-Fi signal | |
| Network setup started before robot was ready | Turn ON power switch. Press robot button for more than 3 seconds. Robot is ready for network setup when it plays a music tune and its button light flash slowly | |
| Your smartphone's operating system needs to be updated | Update your smartphone's operating system. The Robot APP runs on iOS 9.0 and Android 4.0 and above | |
| Remote control is not sensitive | Too far away from the robot during operation | Please aim the machine to operate within effective range |
| Other problems | unknown reason | Restart the robot. turn off power switch turn on again |
Attention: if above investigation fails to solve the problem, please contact after-sales service for help. Do not disassemble the machine by yourself
Warranty Policy
This product is guaranteed for 2 years from the date of purchase. When you have a problem that you can not solve, you must access the web www.prixton.com and click on the contact option to send us your assistance form.
These technical and electrical specifications are those of typical units and may be changed without prior notice in order to provide improved equipment.
Simplified EU Declaration of Conformity
We, La Trastienda Digital located in Avenida Cervantes 49, módulo 25, Basauri 48970, Bizkaia hereby declare that the following goods, imported and selling at European market:
| BRAND | MODEL DESCRIPTION | CATEGORY | |
| PRIXTON | ROOMIE SMART | VACCUM CLEANER | HOME |
Are in compliance with the EC Council Directive of 2014/53/EU (EM DIRECTIVE) and harmonized standards and with the board of the 16th of April 2014.
The complete text of the UE Declaration of conformity is available anytime at this website address: www.prixton.com
LA TRASTIENDA DIGITAL
natural_image
Technical line drawing of a circular mechanical component with mounting holes and a central hole (no text or symbols)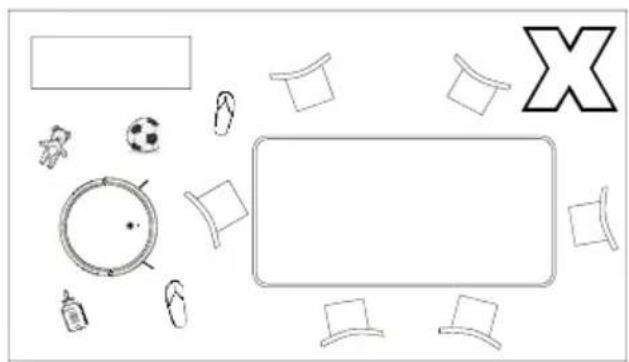
natural_image
Top-down diagram of a table with items including a soccer ball, a red rectangle, and a letter X (no text or symbols)2. Retirez les obstacles gênants
natural_image
Two technical line drawings of a staircase structure, one with a checkmark and the other with an 'X' symbol (no text or labels present)
Note:
natural_image
Diagram showing a spiral path with an arrow and a small circular symbol (no text or labels)

Note:
natural_image
Line drawing of a hand holding a tool over a curved object (no text or symbols)
natural_image
Diagram of a mechanical component with two downward arrows indicating force or movement (no text or symbols)
natural_image
Technical line drawing of a mechanical component with a circular top and side view showing internal features (no text or symbols)natural_image
Line drawing of a hand interacting with a circular device, showing a pointer and screen (no text or symbols)Note:

natural_image
Technical diagram of a mechanical component with circular and segmented parts, showing directional arrows (no text or symbols)natural_image
Diagram showing a mechanical component with downward arrows indicating assembly or disassembly (no text or symbols present)Retirez le tissu
natural_image
Line drawing of a hand holding a tool over a curved object (no text or symbols)natural_image
Line drawing of a hand holding a device with a small inset component (no text or symbols)natural_image
Line drawing of a mechanical component with a faucet and lever (no text or symbols)natural_image
Line drawing of a hand gripping a mechanical component (no text or symbols)3.Nettoyer le tissu
natural_image
Simple line drawing of a faucet spraying water onto a curved surface, with sun symbol below (no text or labels)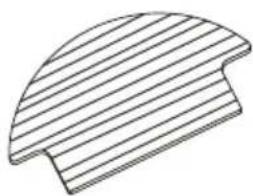
natural_image
Pure geometric diagram of a curved, segmented shape with parallel lines (no text or symbols)natural_image
Technical line drawing of a mechanical component with circular and curved features, showing directional arrows (no text or symbols)natural_image
Technical line drawing of a mechanical component with three views (top, front, side), no text or symbols present.- Séchez ces parties
natural_image
Illustration of household cleaning and cleaning process with faucet, toilet, door panel, hand, and sun (no text or symbols)5.6 Autres parties
natural_image
Technical line drawing of a circular mechanical component with no visible text or symbolscontact de charge

natural_image
Circular diagram with concentric rings and a small circle at center, no text or symbols presentRobot
natural_image
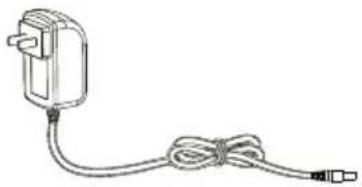
Line drawing of a cable-winding electrical plug with a terminal connector (no text or symbols)Adattatore
natural_image
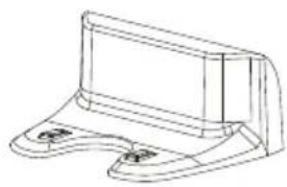
Technical line drawing of a mechanical bracket or support structure (no text or symbols)Base di ricarica
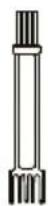
Spazzola di
pulizia
natural_image
Two identical mechanical components with three arms and a central hub, no text or symbols visibleSpazzole laterali
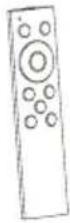
Telecomando
Panno
natural_image
Circular mechanical component diagram with no visible text or symbols
natural_image
Top-down view of a table with various items including a soccer ball, star, clock, and X-shaped letter (no text or symbols present)natural_image
Illustration of various household appliances including a fan, washing machine, and vacuum cleaner (no text or symbols)natural_image
Simple line drawing of a person walking through a hallway with a robot vacuum cleaner nearby (no text or symbols)4.3 APP Connection

Step 1 scarica l'APP e registra

Step 2 Accedi

Step 3 Scegli Add device

Nota:
- Scegliere il timer
- Impostare e salvare

flowchart
graph LR
    A["Pinning Pin"] --> B["Assembly"]
    B --> C["Refinal Package"]
    C --> D["Product Packaging"]
Nota:
natural_image
Line drawing of a hand interacting with a circular device, showing a finger pointing at the center (no text or symbols)Nota:
natural_image
Technical diagram of a circular mechanical component with directional arrows indicating motion (no text or symbols)natural_image
Diagram showing a mechanical component with downward arrows indicating assembly or disassembly (no text or symbols present)Rimuovere il panno
natural_image
Line drawing of a hand holding a tool over a curved object (no text or symbols)natural_image
Line drawing of a hand holding a device with a small component (no text or symbols)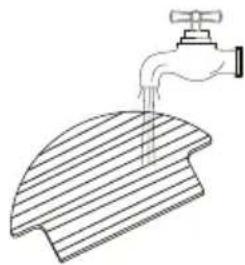
natural_image
Line drawing of a faucet dispensing liquid into a slatted surface (no text or symbols)dell'acqua
natural_image
Line drawing of a mechanical component with a faucet and handle (no text or symbols)natural_image
Line drawing of a hand gripping a mechanical component (no text or symbols)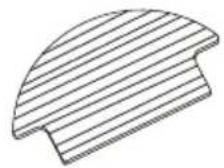
natural_image
Technical line drawing of a mechanical component with circular and curved features, showing directional arrows (no text or symbols)natural_image
Simple line drawing of a container with particles above it and a lid above it (no text or symbols)- Smontare le parti del filtro
natural_image
Technical line drawing of a boat hull with side and top views (no text or symbols)natural_image
Illustration of three hand-drawn diagrams showing a faucet, a device with a handle, and a battery pack being handled (no text or symbols)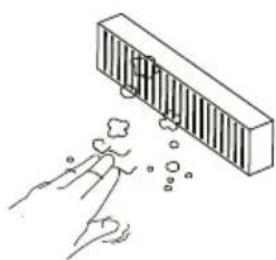
natural_image
Illustration of a hand reaching toward a rectangular object with bubbles, no text or symbols present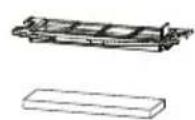

5.4 Batteria
natural_image
Technical line drawing of a circular mechanical component with a central hole and side brackets (no text or symbols)
natural_image
Top-down view of a room layout with furniture and objects (no text or symbols)natural_image
Two technical line drawings of a building interior with stairs and a circular component, marked with check and X symbols (no text or labels)natural_image
Simple line drawing of a person walking through a hallway with a robot on the floor, no text or symbols present.4.2 Installation der Dockingstation
4.3 APP-Verbindung

Schritt 2 Einloggen


4.4 Verwendung
natural_image
Line drawing of a hand holding a circular object with a pointer, no text or symbols present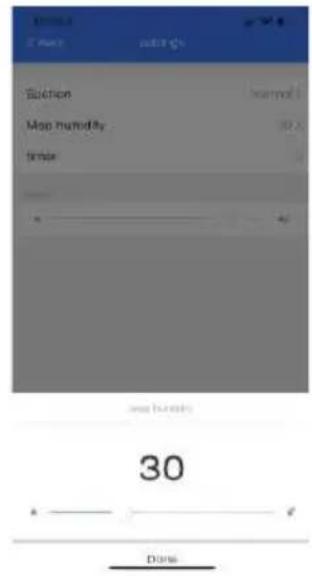
Anmerkung:
natural_image
Technical line drawing of a mechanical component with circular and segmented parts (no text or symbols)Tuch entfernen
natural_image
Line drawing of a hand holding a tool over a curved object (no text or symbols)natural_image
Technical line drawing of a mechanical component with circular and curved features, showing directional arrows (no text or symbols)2. Staubbox reinigen

natural_image
Simple line drawing of a container with particles above it, no text or symbols present.natural_image
Technical line drawing of a mechanical component with three views (top, front, side), no text or symbols present.natural_image
Line drawings showing three different cleaning or cleaning methods: a faucet, a cleaning device, and a hand holding a tool (no text or symbols present)natural_image
Illustration of a hand reaching toward a barrier with bubbles, no text or symbols present6. Teile trocknen
natural_image
Simple line drawings of a sun, boat, and folded boat (no text or symbols)5.4 Batterie
natural_image
Technical line drawing of a circular mechanical component with a central hole and mounting brackets (no text or symbols)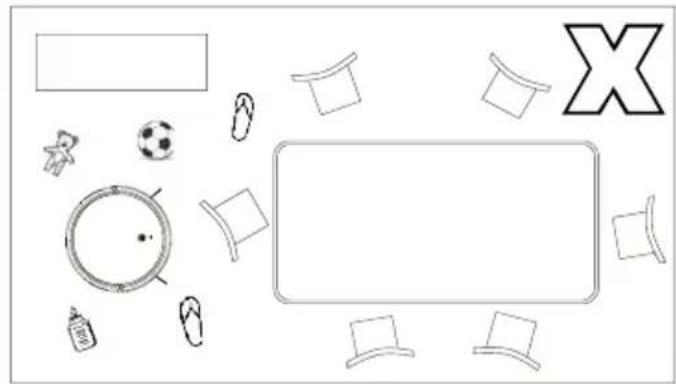
natural_image
Top-down view of a table with items including a soccer ball, football, and a large X symbol (no text or labels)2. Remova os obstáculos
natural_image
Line drawing of a multi-level building structure with stairs and a small robot on top (no text or symbols)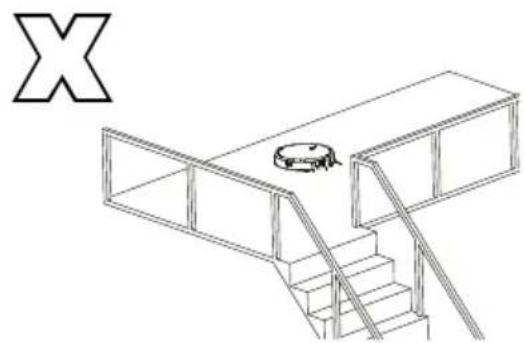
natural_image
Isometric line drawing of a multi-level building structure with stairs and a circular object on the roof (no text or symbols)4. Bloquear objetos com forte superfície refletora
natural_image
Simple line drawing of a person walking through a corridor with a robot nearby (no text or symbols)natural_image
Simple line drawing of a circular object with a hand holding it, no text or symbols present

Passo 1
Passo 2
Iniciar sessão

Passo 3
Escolher opção
3.Sprial Clean Mode
natural_image
Diagram showing a spiral path with an arrow and a circular symbol (no text or labels)3.Configure e guarde

flowchart
graph LR
    A["Circular Component"] --> B["Processed Component"]
    B --> C["Final Assembly"]
flowchart
graph LR
    A["Hand Tool Application"] --> B["Product with Internal Components"]
    B --> C["Assembly to Product with Internal Components"]
    C --> D["Final Product with Internal Components"]
Nota:
natural_image
Line drawing of a hand interacting with a circular device, showing a finger pointing at a small screen (no text or symbols present)Nota:
natural_image
Technical diagram of a mechanical component with circular and curved parts, showing directional arrows (no text or symbols)Retire a base do pano
natural_image
Diagram showing a mechanical component with downward arrows indicating motion or force, and two small components below (no text or symbols)Retire o pano
natural_image
Line drawing of a hand holding a tool over a curved object (no text or symbols)natural_image
Line drawing of a hand holding a handheld device (no text or symbols)3. Limpar o pano
Lavar e secar o pano
natural_image
Illustration of a faucet spraying water onto a curved surface, with sunlight symbolizing the sun (no text or symbols present)natural_image
Line drawing of a curved mechanical component with a faucet and handle (no text or symbols)Limpar e secar o depósito
natural_image
Line drawing of a hand gripping a mechanical component (no text or symbols)natural_image
Technical line drawing of a circular mechanical component with an attached curved bracket and directional arrows (no text or symbols)natural_image
Simple line drawing of a container with liquid and a spray bottle above it (no text or symbols)3.Desmonte as partes do filtro
natural_image
Technical line drawing of a mechanical component with three views (top, front, side), no text or symbols present.natural_image
Technical line drawing of a circular mechanical or architectural component with internal structural elements (no text or symbols)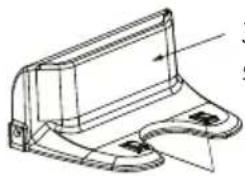
natural_image
Technical line drawing of a mechanical component with no visible text or symbolsJanela de sinal


- Nota:
- Cepillo principal
- Batería
- Important Safety Instructions
- Package Contents / Structure introduction
- Package Contents
- Structure introduction
- 3.Technical Specifications
- Instruction for Use
- Notes Before Cleaning
- Arrange the furniture neatly
- Remove unfriendly obstacles
- Prevent robot from falling
- Block out objects with strong reflective surfaces
- Please stay away from the robot when it's working
- Avoid touching the water tank release button
- Docking Station Installation
- APP Connection
- Note:
- Function Use
- Auto Clean Mode
- Edge Clean Mode
- 4.Suction Option Mode
- 3.Sprial Clean Mode
- Auto charge Mode
- Schedule Clean (set in APP)
- Enter setting
- 2.Choose timer
- 3.Set and save
- 7.Mopping Function
- 8.Remote Controller
- Usage of Side Brushes
- Routine Maintenance
- Main Brush
- Water Tank and Cloth
- 2.Clean Water Tank
- Dust Box and Filter Part
- Battery
- Firmware Update
- Environmental protection description Removing the battery
- Other Parts
- Clean signal window
- Clean charging contact and signal window
- Warranty Policy
- Simplified EU Declaration of Conformity
- Retirez les obstacles gênants
- 3.Nettoyer le tissu
- Autres parties
- Batteria
- Installation der Dockingstation
- APP-Verbindung
- Verwendung
- Anmerkung:
- Staubbox reinigen
- Teile trocknen
- Batterie
- Remova os obstáculos
- Bloquear objetos com forte superfície refletora
- Limpar o pano
Brand : Prixton
Model : Roomie Smart
Category : Vacuum Cleaner