Oceanus - Rowing Machine Capital Sports - Free user manual and instructions
Find the device manual for free Oceanus Capital Sports in PDF.

User questions about Oceanus Capital Sports
0 question about this device. Answer the ones you know or ask your own.
Ask a new question about this device
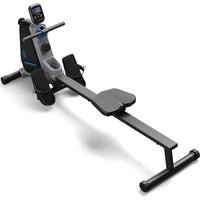
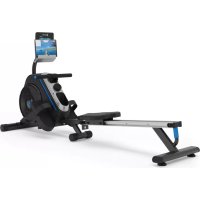
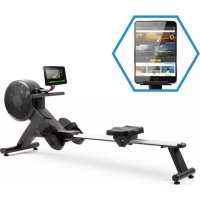
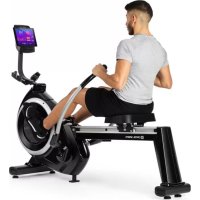
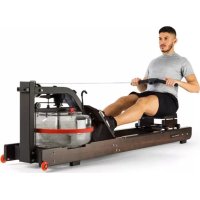
Download the instructions for your Rowing Machine in PDF format for free! Find your manual Oceanus - Capital Sports and take your electronic device back in hand. On this page are published all the documents necessary for the use of your device. Oceanus by Capital Sports.
USER MANUAL Oceanus Capital Sports
text_image
QR code image containing encoded data, no visible human-readable textINHALTSVERZEICHNIS
Training per Kinomap App 15
A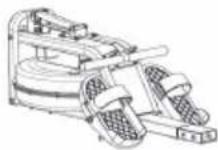 | B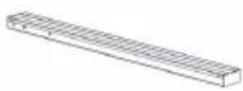 | C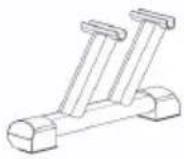 |
D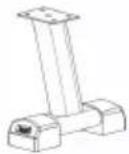 | E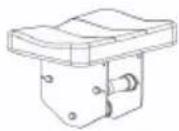 | F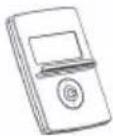 |
G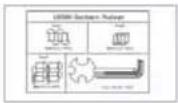 | H | I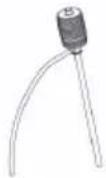 |
J | K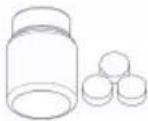 |
text_image
A M8*15(3) E (3) (3) Hnatural_image
Line drawing of a humanoid robot pulling a mechanical device, no text or symbols presentDownload on the App Store

GET IT ON Google Play

2. Cardio-Trainingsphase
natural_image
Person performing a seated forward stretch exercise (no text or symbols visible)Member of Berlin Brands Group
Handwerkerstr. 11
15366 Dahlwitz-Hoppegarten
Deutschland
natural_image
Symbol of a trash bin crossed with a diagonal line, no text or numbers presentBerlin Brands Group UK Ltd
PO Box 1145
Oxford, OX1 9UW
United Kingdom
Congratulations on the purchase of your device. Please read the following instructions carefully and follow them to prevent potential damage. We accept no liability for damage caused by disregarding the instructions or improper use. Please scan the QR code to access the latest operating instructions and for further information about the product.

text_image
QR code image containing encoded data, no visible human-readable textCONTENTS
Safety instructions 28
Scope of delivery 30
Assembly 31
Moving the machine 35
Operating the console 36
Training via Kinomap app 39
Overview of cardio training 40
Warming up before training 43
Care and maintenance 46
Disposal considerations 47
Declaration of conformity 47
TECHNICAL DATA
| Article number 10041195 | |
| Power supply (computer) 2 AA or UM-3 batteries |

WARNING
This stationary training device is not suitable for high accuracy purposes. The heart rate monitoring system may be faulty. Excessive exercise can lead to dangerous injury or death. Should your performance decrease unusually, stop training immediately.
SAFETY INSTRUCTIONS
Read the operating instructions carefully before using the device and keep them for future use. Product features may differ slightly from those shown in the illustrations. Changes can be made by the manufacturer without notification.
- Keep the operating instructions in a safe place so that you can access them at any time.
- Do not assemble the device until you have read the operating instructions completely. The safety and efficiency of the device can only be guaranteed if the device has been correctly assembled and is properly maintained and used. It is your own responsibility to ensure that all users of the device are informed of warnings and precautions.
- The device must be placed on a stable and straight surface to be used safely. Protect the floor with a mat. Do not use the device in humid environments, such as pools, etc. The safety distance around the device must be at least 0.6 metres.
- Before using the exercise programmes, it is essential that you consult a doctor to determine whether you have any physical or health problems that could pose a risk to your health and safety by using the machine or prevent you from using the machine properly. Your doctor's advice is vital if you are taking medication that affects your pulse, blood pressure or cholesterol levels.
- Pay attention to your body's signals. Exercising incorrectly or excessively can be detrimental to your health. Stop exercising if any of the following symptoms occur: pain, tightness in the chest, irregular heartbeat, extreme shortness of breath, dizziness or nausea. If you experience any of these conditions, you must consult a doctor before continuing your training.
- Do not exercise directly after meals.
- The device may only be assembled by adults. Keep children and pets away from the device.
- The device may only be used in domestic areas.
- The device is not suitable for therapeutic use. It can only be used for the exercises shown in the instructions.
- Wear adequate exercise clothing and exercise shoes when using the machine. Avoid loose clothing as it may get caught in the device or clothing that may restrict your movement.
-
Keep your back straight during exercise.
-
Before each use of the unit, always check that the handles, saddle, nuts and bolts have been properly tightened.
- Observe the maximum position for adjustable parts of the device and never go beyond the "Stop" mark as this would pose a risk.
- Only use the device as shown. If you notice any defective parts during assembly or inspection, or if you hear strange noises coming from the device during use, stop use immediately. Do not use the machine again until the problem has been corrected.
• Take care when lifting or moving the unit so that you do not injure your back. Always use back-friendly lifting techniques and seek help from another person if necessary. - All moving parts of the device (e.g. pedals, handles, saddle... etc.) must be serviced weekly. Check these before each use. If something is broken or loose, repair or fix the relevant part immediately. Do not continue using the device until you have restored it to a good initial condition.
- Keep the power cord away from heat sources.
- Do not insert any objects into the machine openings.
- Switch off and unplug the device before moving or cleaning the device. To clean, rub the surfaces with a mild detergent and a damp cloth. Do not use solvents under any circumstances.
- Do not use the device in places that are not temperature-controlled, such as garages, verandas, bathrooms, carports or outdoors.
- Only use the device as described in the operating instructions.
- Incorrect repair and structural modifications (e.g. removal or replacement of original parts) may put the user of the device at risk.
- Children from the age of 8, mentally and physically impaired persons may only use the device if they have been familiarised in detail with the functions and safety precautions by a supervisor responsible for them beforehand.
- Make sure that children do not play with the device.
- Check the voltage on the product label before use. Ensure that you only connect the device to sockets with the appropriate voltage.
Note: Maximum user weight: 135 kg.
SCOPE OF DELIVERY
Individual parts
A | B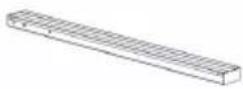 | C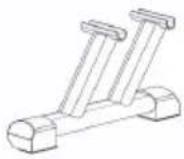 |
D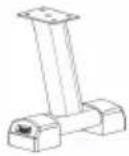 | E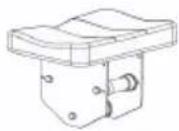 | F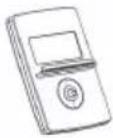 |
G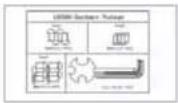 | H | I |
J | K |
| No. | DesignationPc. | No. | DesignationPc. | ||
| A | Main frame with water tank | 1 G | Accessories package 1 | ||
| B | Seat rail 1 H Cushion 2 | ||||
| C | Front standpipe 1 I Air pump 1 | ||||
| D | Rear standpipe 1 J Operating Instructions | 1 | |||
| E | Seat 1 | K Hydrostatic battery | 1 | ||
| F | Console 1 |
Accessories package (small parts)
text_image
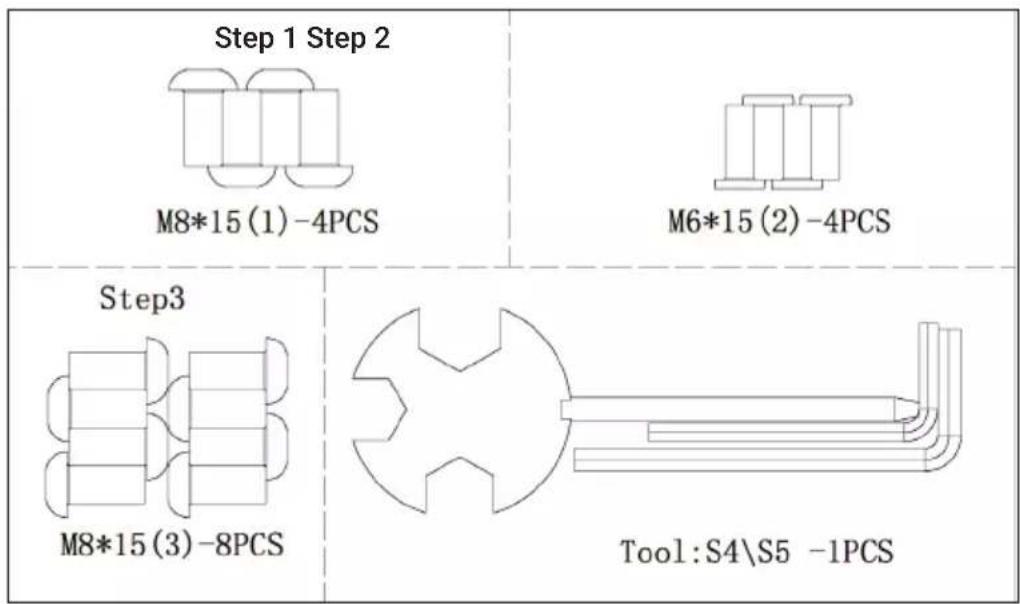
Step 1 Step 2 M8*15 (1) -4PCS M6*15 (2) -4PCS Step3 M8*15 (3) -8PCS Tool:S4\S5 -1PCSASSEMBLY
text_image
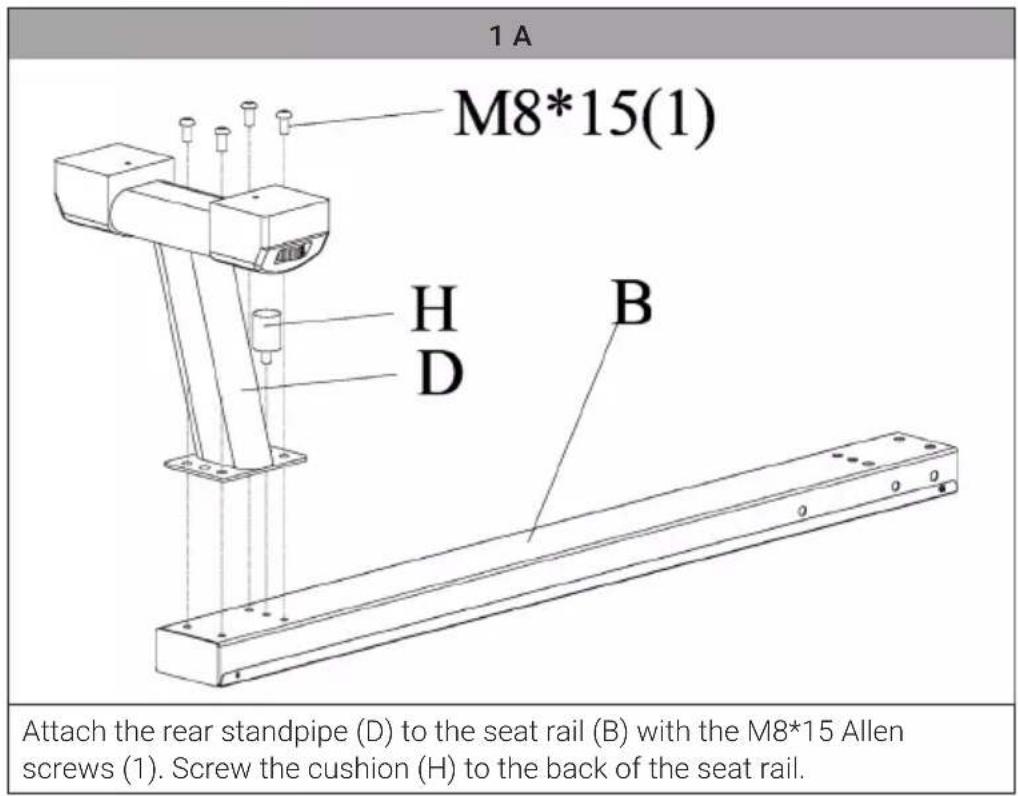
1 A M8*15(1) H D B Attach the rear standpipe (D) to the seat rail (B) with the M8*15 Allen screws (1). Screw the cushion (H) to the back of the seat rail.1 B
text_image
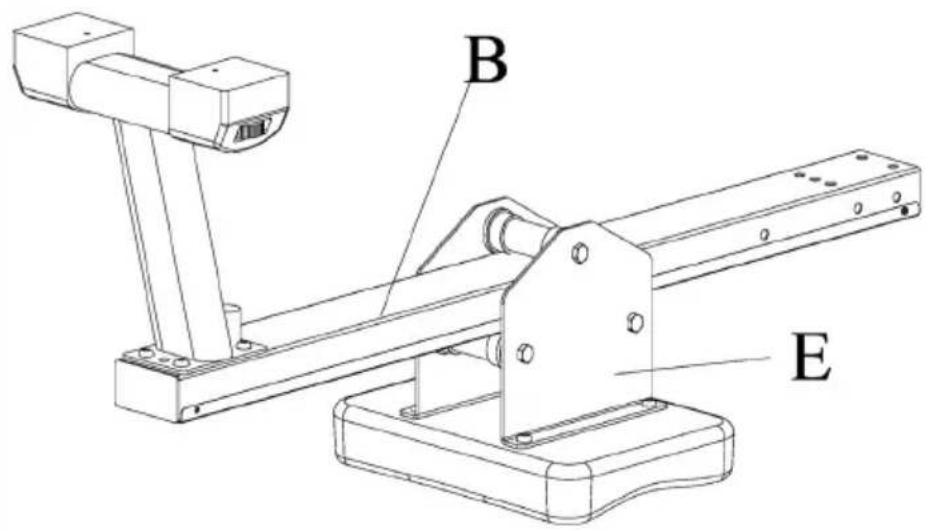
B ESlide the seat (E) onto the seat rail.
2
text_image
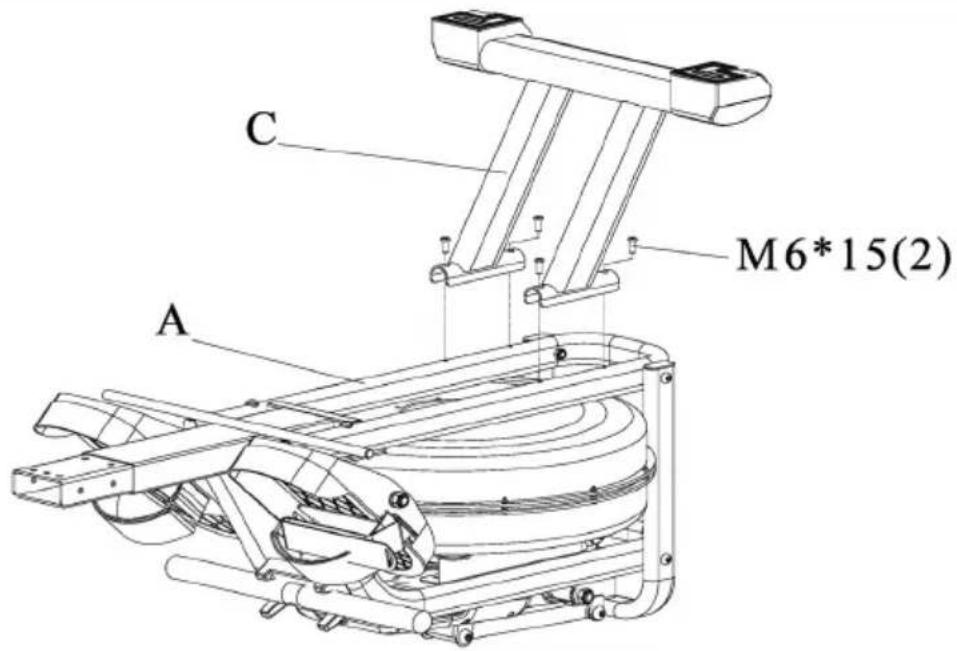
C M6*15(2) AFasten the front standpipe (C) to the main frame with tank (A) using bolts M8*45 (2) and nuts M8 (3).
3

text_image
A M8*15(3) E (3) (3) HSlide the seat rail (B) onto the main frame with container (A) and fix it with screws M8*15 (4). Screw the cushion (H) to the underside of the front seat rail.
4
text_image
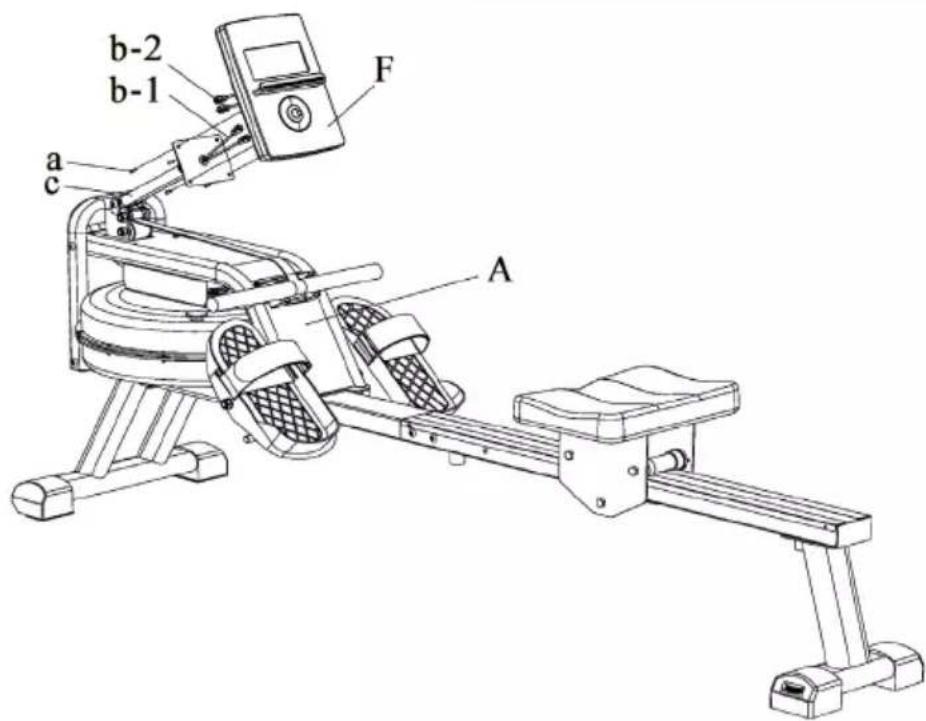
b-2 b-1 F a c ARemove the screws (a) from the main frame with the container (A). Connect the wiring (b-1) from the console holder (c) to the wiring (b-2). Attach the console (F) to the console bracket (c) with the screw (a) (Caution: Do not clamp the wiring). Make sure that the screws have been tightened.
| 5 | |
| I M | I M |
| Figure 1 Figure 2 | |
| Remove the cap (M) from the top of the container. | |
| To fill water into the tank (figure 1), insert the straight hose of the water pump (I) into a water tank and the flexible hose of the water pump into the tank of the steering device. Make sure that the water container is higher than the container of the rowing machine. Press the pump several times to fill water into the water tank of the rowing machine until the desired resistance value is reached according to the markings on the side of the tank. The more water there is in the container, the higher the resistance. Replace the container plug (M) as soon as the intended fill level is reached. | |
| To empty the rowing machine's water tank, you must reverse the filling procedure (figure 2). Insert the water tank plug into the water tank and then wipe off the water with a dry cloth. | |
MOVING THE MACHINE
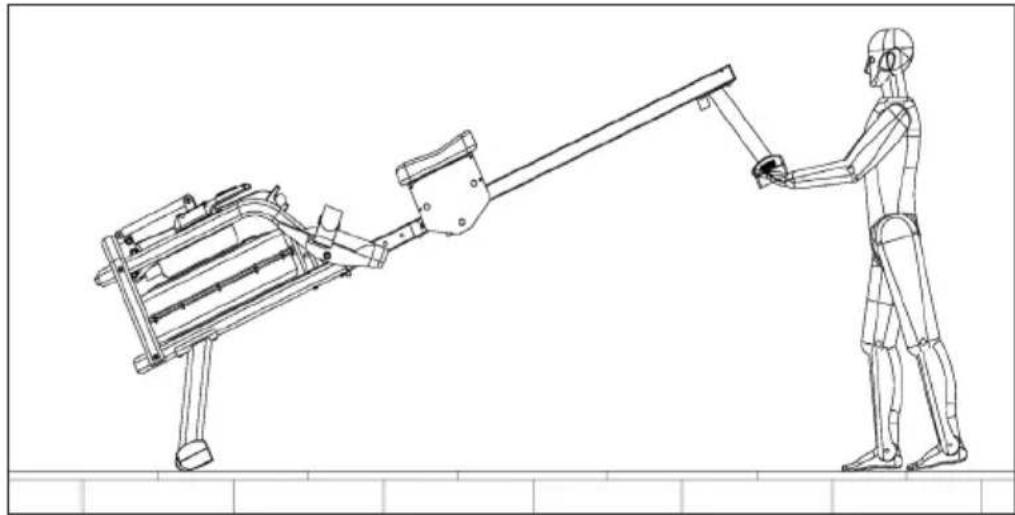
natural_image
Line drawing of a humanoid robot pulling a mechanical device, no text or symbols presentMove the seat to the front of the seat rail and lock the seat in the rail opening with the locking pin to secure the seat when moving the rower. Lift the rowing machine out of the rear standpipe until the wheels in the front standpipe touch the ground and allow movement.
EN
If you pull on the training device or press any button, the monitor switches on immediately. If you stop training for more than 4 minutes, the monitor switches off automatically.
Interval programmes
Press the INTERVAL PROGRAMS button; the interval is shown on the display. Use the UP and DOWN buttons to select the desired programme. Three modes are available:
| Interval 20/10 Training | interval with a length of 20 seconds followed by a rest interval of 10 seconds. |
| Interval 10/20 Training | interval with a length of 10 seconds followed by a rest interval of 20 seconds. |
| Interval 10/10 You can | set the training and rest interval according to your training plan. Press the enter button to enter this mode. The training time flashes. Press the UP AND DOWN buttons to set the training duration. Then press the enter button to confirm. The rest time starts flashing. Press the UP and DOWN buttons to set the rest time. Then press the enter button to confirm. |
Button functions and displays
| SCAN In training mode, the SCAN function is active.The main screen displays the following values in sequence for 6 seconds on the main screen: TIME > DISTANCE > CALORIE > TIME/500M > COUNT-STROKE/MIN > PULSE. If you want one of these values to remain displayed on the main screen, press the ENTER key. | |
| TIME Displays your elapsed exercise time in minutes and seconds. The computer automatically counts up in steps of seconds from 0:00 to 99:59, while you can set the value from 5:00 to 99:00. | |
| DISTANCE Displays the total distance covered during training up to a maximum of 99.99 km/mile and displays the metre unit under 1 km/mile on the screen. You can set a target distance from 1.00 to 99.00 km/miles. | |
| CALORIE The computer estimates the cumulative calories burned at a given time during your workout. It counts up from 0 to 9999. You can set the target calories from 10 to 9990. | |
| TIME/500M The time you need to reach a 500-metre distance, depending on your current train speed. | |
| COUNT The computer counts once when the bar comes back after your move. And the computer accumulates this count from 10 to 9990. | |
| STROKES/MIN Shows how many times you row per minute. The value range is between 15 and 999. If the value is above 999, "E" is displayed in the window. If there is no signal within 4 seconds, the value is reset to zero. | |
| PULSE The console displays your heart rate in beats per minute as you exercise. You can set the target value from 80 to 180. |
Button function
| UP Press the button during the setting mode to increase the value of time, distance, calories, number and pulse (heartbeats). |
| DOWN Press the button during the setting mode to decrease the value of time, distance, calories, number and pulse (heartbeats). |
| ENTER In the setting mode, press the button to accept the values for time, distance, calories, count and pulse (heartbeats). |
| RESET Press this button during the setting mode to delete your entries. If you press and hold this button for more than 3 seconds, the console is reset. |
| INTERVAL Press this button to enter the interval programme; the interval will be shown on the display. To exit this function, press this button again and the interval will disappear from the display. |
| PULSE RECOVERY Stop training and press the PULSE RECOVERY button. The time starts counting down from 01:00 - 00:59 - 00:58 ... until 00:00. Once 00:00 is reached, the computer displays your heart rate recovery status with the grades F1.0 to F6.0 and a message window displays your training situation. The details are as follows:F1.0 means SUFFICIENTF1.1 - F 1.9 means EXCELLENTF2.0 - F2.9 means GOODF3.0 - F 3.9 means AVERAGEF4.0 - F5.9 means BELOW AVERAGEF6.0 means BADNOTE: If you cannot receive your heartbeats during this function, the monitor will display [Err]. |
TRAINING VIA KINOMAP APP
Kinomap turns your bike trainer, exercise bike, treadmill or rowing machine into a powerful and fun fitness device.
Choose a video and train on the Kinomap app. Watch your icon progress on the map as you follow the video. The app will change incline or resistance on your equipment to follow each video you choose in real time.
Join for FREE and get started now!


How to connect to Kinomap
| 1 2 3 | ||
Zurück kinomap< Zurück kinomap< Zurück kinomapMein GerätWöhle den Maschinentyp, den du nutzen wirst:     | Meine RudermaschineBIOROWER BLUEFINFITNESSBIOROWER BLUEFIN FITNESSBODYCRAFT BODYTONEBODYCRAFT BODYTONESCAPITAL SPORTSCAPITAL SPORTSCARDIOSTRONGCARE CANDIARTOPEK | Meine RudermaschineCAPITAL SPORTSStream M2Wöhlen in unten stehender Lists dein Gerät:GEFUNDENE GERÄTE |
| Log in to the app and select the appropriate sports equipment. | Select the Capital Sports brand. | Select the model from the device list, and then press Bluetooth Smart 4.0. The Bluetooth search will start. Wait until the console is indicated and select it. The name is CS Oceanus. |
Regular cardio training stimulates the cardiovascular system (heart and respiration). You improve your fitness, lose weight and burn fat. So this is the recommended workout if you want to lose weight. During exercise, glucose is burnt first, then the fats stored in the body are burnt through the exercises.
Demanding cardio training (e.g. interval training, training with high resistance and over a longer period of time) requires more effort and also trains the muscles in addition to endurance. As a rule, the more regular the training, the more efficient it is (even for short 20-minute sessions).
During the training
The resistance during the cardio training phase decisively determines the training intensity and the related training results.
Optimal training includes a warm-up phase (1), a more intense cardio training phase (2) and the final recovery phase (3). If you want to make progress or burn calories, you should go through these 3 phases and train on the ergometer for at least 20 - 30 minutes.
1. Warm-up phase
Always start your workout with a low resistance. A warm-up of 5-10 minutes is important because your muscles need to be warmed up. Especially during the warm-up phase, you should give the circulation and muscle groups time to adjust to the subsequent workout. As a beginner, you can train for the first 3 minutes at the easiest level and increase gradually according to your personal well-being.
2. Cardio training phase
After about 10 minutes you can then switch to the cardio training phase. If you are using interval training programmes, the training computer controls the resistance according to the type of interval, simulating changing demands.
The cardio training phase is assigned to the aerobic or anaerobic training range depending on the energy consumption. These areas are defined as follows:
Aerobic training area
In this zone you improve your cardiovascular system and burn fat.
Despite the slight exertion with increased heart rate, deeper breathing, getting warm and light sweating, you do not feel very exerted, however, breathing is not significantly accelerated so that you could still have a good conversation with someone without getting out of breath, and you feel that you could sustain this exertion for a longer time without getting exhausted. It is like walking uphill at a leisurely pace.
The muscles and heart work more intensively and can obtain the majority of their energy requirements from aerobic energy production using oxygen. Anaerobic energy production is activated to a small amount, but only to the extent that all the lactic acid produced can be broken down again at the same time. You should do the majority of your training in this aerobic training zone.
If you continue to increase the load, then at some point you will reach a limit where oxygen-based energy production is no longer able to increase energy production, so anaerobic energy production has to join in to a greater extent. You are now entering the anaerobic training zone.
Anaerobic training area
In this zone you improve your performance and speed.
Once you increase your training again in this phase, the physical activity becomes much more strenuous because of the rising lactate level, you start to sweat more, your breathing speeds up, and after more or less time, depending on the training condition, the muscles get tired, you feel exhausted overall and can no longer continue at this level.
3. Recovery phase
Finally, remain in the recovery phase for at least 5 minutes and again use low resistance levels without high effort. The recovery or recuperation phase is also helpful in preventing possible muscle soreness after training. After an intensive training session, active regeneration is also highly advisable, such as a hot bath, a visit to the sauna or a massage.
Training progress
Your training can be increased monthly in this way, especially by extending the cardio training phase or performing a higher resistance level (or more challenging interval training).
Food and drink
- Drink before, during and after exercise.
- Drink at least 2 sips of water (10 to 20 cl) every 10-15 minutes during exercise.
- If your workout lasts longer than 1 hour, you should drink a sports drink to prevent the body from becoming dehydrated during exercise.
- For optimal cardio training, it is very important to have an aligned diet both before and after physical activity.
Before training, you should preferably eat carbohydrates, which can be found in rice and pasta, for example, as they provide the body with an important amount of energy.
After training, you need to "refuel" with proteins, which you can find in eggs, yoghurt and dried fruits. Even if you want to lose weight, it is absolutely necessary to eat after training so that your body regenerates.
WARMING UP BEFORE TRAINING
Perform the warm-up movements before each training session. In this way you mobilise your joints and activate the muscles.
If you feel discomfort or pain during individual movements, skip this exercise and consult your doctor or fitness trainer about specific warm-up training.
Each movement should have a few repetitions (right and left) allowing you to start your cardio workout feeling relaxed.
Set aside
about 5 minutes for the following Capital Sports workout routine:
| 1 | |
 |  |
| Tilt your head, slowly alternating back and forth and right to left. Then mobilise the shoulders (circular movements). | |
| 2 | 3 |
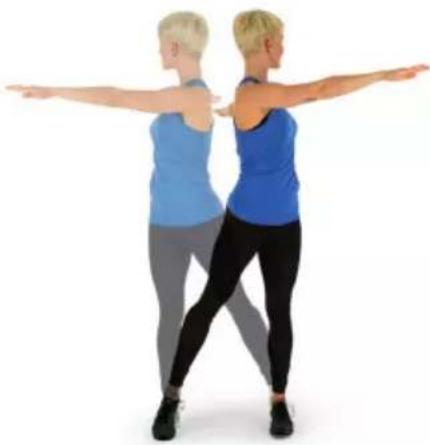 | 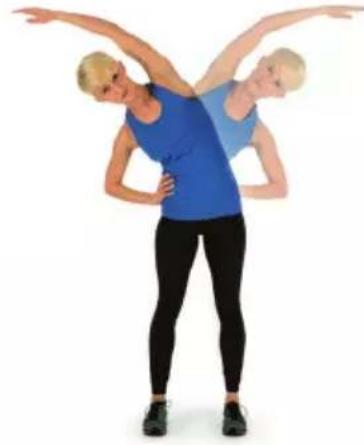 |
| Rotate the hips while the arms are extended. The feet are not firmly fixed to the floor (the ankles accompany the body rotation). | Bend hips, one arm stretched upwards. Remain in this position for a few seconds on each side. |
| 4 | |
 |  |
| Stand on one leg and hold the instep with your hand. Here you mobilise your ankle and stretch your thigh slightly. Support yourself if necessary to keep your balance. Remain on one leg and now rotate the ankle in a circular motion in both directions. | |
| 5 | 6 |
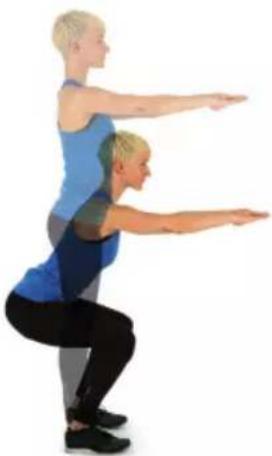 |  |
| When squatting, place your feet about shoulder-width apart and lower your hips with your arms straight. Try to keep your back straight while doing this. | Sit with your legs bent so that the soles of your feet touch. Bounce lightly with your knees. Here you mobilise not only the ankles but also the entire outer thigh. Hold the ankles with the back straight. |
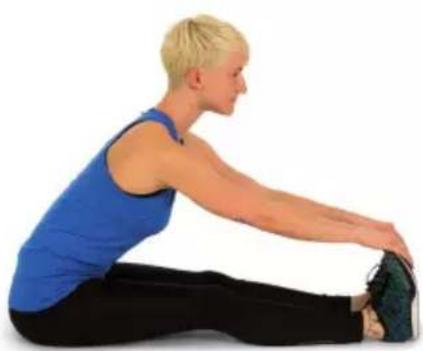
natural_image
Person performing a seated forward stretch exercise (no text or symbols visible)Bend forward in a seated position with your legs straight. Try to hold the ankles and continue to move towards the tips of the toes.
7
CARE AND MAINTENANCE
Note: As with all exercise equipment with mechanical, moving components, this product may have screws that loosen due to frequent use. We therefore recommend that you check them regularly and tighten them with a suitable key if necessary. Clean your exercise equipment regularly with a damp cloth to remove sweat and dust from the surfaces.
- Clean the unit regularly with a clean cloth to maintain its clean appearance.
- Safe use of the device can only be guaranteed if the device is regularly checked for damage and wear (for example on handles, pedals, saddle, etc.). It is essential that damaged parts of the appliance are replaced and that the appliance is not used again until it has been repaired.
- Check regularly that bolts and nuts are properly fixed.
- Grease moving parts of the appliance regularly.
- Pay particular attention to components that are especially susceptible to wear and tear, such as the brake system, footrest, etc.
- As sweat is very aggressive, it must not come into contact with the enamelled or chrome-plated parts of the appliance, especially the computer. Wipe the device immediately after use. The enamelled parts can be cleaned with a damp sponge. All aggressive or corrosive products must be avoided during cleaning.
- Store the appliance in a clean and dry environment out of the reach of children.
DISPOSAL CONSIDERATIONS
natural_image
Symbol of a trash bin crossed with a diagonal line, representing no waste or discharge (no text or labels)If there is a legal regulation for the disposal of electrical and electronic devices in your country, this symbol on the product or on the packaging indicates that this product must not be disposed of with household waste. Instead, it must be taken to a collection point for the recycling of electrical and electronic equipment. By disposing of it in accordance with the rules, you are protecting the environment and the health of your fellow human beings from negative consequences. For information about the recycling and disposal of this product, please contact your local authority or your household waste disposal service.
This product contains batteries. If there is a legal regulation for the disposal of batteries in your country, the batteries must not be disposed of with household waste. Find out about local regulations for disposing of batteries. By disposing of them in accordance with the rules, you are protecting the environment and the health of your fellow human beings from negative consequences.
DECLARATION OF CONFORMITY

text_image
CE UK CAManufacturer:
Chal-Tec GmbH, Wallstrasse 16, 10179 Berlin, Germany.
Importer for Great Britain:
Berlin Brands Group UK Ltd PO Box 1145 Oxford, OX1 9UW United Kingdom
Hereby, Chal-Tec GmbH declares that the radio equipment type Oceanus is in compliance with Directive 2014/53/EU. The full text of the EU declaration of conformity is available at the following internet address: use.berlin/10041195
For Great Britain: Hereby, Chal-Tec GmbH declares that the radio equipment type Oceanus is in compliance with the relevant statutory requirements. The full text of the declaration of conformity is available at the following internet address: use.berlin/10041195
Cher client, chère cliente,
text_image
QR code image containing encoded data, no visible human-readable textSOMMAIRE
| A | B | C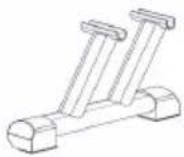 |
D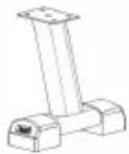 | E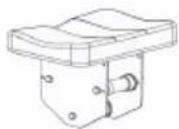 | F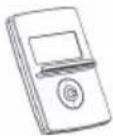 |
| G | H | I |
| J | K |
text_image
A M8*15(3) E (3) (3) Hnatural_image
Line drawing of a humanoid robot pulling a mechanical device, no text or symbols presentDownload on the App Store

GET IT ON Google Play

natural_image
Person performing a seated forward stretch exercise (no text or symbols visible)natural_image
Symbol of a trash bin crossed with a diagonal line, representing no waste or discharge (no text or labels)DÉCLARATION DE CONFORMITÉ

text_image
CE UK CAFabricant :
Chal-Tec GmbH, Wallstraße 16, 10179 Berlin, Allemagne.
Berlin Brands Group UK Ltd
PO Box 1145
Oxford, OX1 9UW
United Kingdom
text_image
QR code image containing encoded data, no visible human-readable textÍNDICE
| A | B | C |
| D | E | F |
| G | H[72WS] | I |
| J | K |
text_image
A M8*15(3) E (3) (3) Hnatural_image
Line drawing of a humanoid robot pulling a robotic arm, no text or symbols presentnatural_image
Woman performing a seated forward stretch exercise (no text or symbols visible)natural_image
Symbol of a trash bin crossed with a diagonal line, representing no waste or discharge (no text or labels)Berlin Brands Group UK Ltd
PO Box 1145
Oxford, OX1 9UW
Reino Unido
text_image
QR code image containing encoded data, no visible human-readable textINDICE
| A | B | C |
| D | E | F |
| G | H | I |
| J | K |
text_image
A M8*15(3) E (3) (3) Hnatural_image
Line drawing of a humanoid robot pulling a robotic arm, no text or symbols presentDownload on the App Store

GET IT ON Google Play

Connettersi a Kinomap
natural_image
Symbol of a trash bin crossed with a diagonal line, representing no waste or discharge (no text or labels)Berlin Brands Group UK Ltd
PO Box 1145
Oxford, OX1 9UW
Regno Unito