
SPA 9230 C - Iron BEKO - Free user manual and instructions
Find the device manual for free SPA 9230 C BEKO in PDF.
| Product type | Steam iron |
| Brand | Beko |
| Model | SPA 9230 C |
| Power supply | 220-240 V ~ 50-60 Hz |
| Power consumption | 2520-3000 W |
| Insulation class | I |
| Continuous steam output | 63 g/min |
| Maximum steam shot | 280 g |
| Main functions | LED display, water spray, steam shot, turbo steam, SMART/ECO/MAX modes, auto shut-off, anti-drip system, Calc Clean cleaning |
| Safety | Auto shut-off, anti-drip system, hot surface protection |
| Maintenance and cleaning | Automatic Calc Clean cleaning, do not use chemicals |
| Soleplate type | Not specified |
| Water tank capacity | Not specified |
| Weight | Not specified |
| Dimensions (L x W x H) | Not specified |
| Spare parts and repairability | Contact an authorized service center |
| General information | Manual available in multiple languages |
Frequently Asked Questions - SPA 9230 C BEKO
User questions about SPA 9230 C BEKO
0 question about this device. Answer the ones you know or ask your own.
Ask a new question about this device
Download the instructions for your Iron in PDF format for free! Find your manual SPA 9230 C - BEKO and take your electronic device back in hand. On this page are published all the documents necessary for the use of your device. SPA 9230 C by BEKO.
USER MANUAL SPA 9230 C BEKO
natural_image
Simple line icon of a shirt collar with dotted lines indicating measurement (no text or symbols)SPA 9130 B
SPA 9230 C
EN - FR - ES - RO - IT - PL - NL - RU
CONTENTS
| ENGLISH | 8-17 |
| FRANÇAIS | 18-28 |
| ESPAÑOL | 29-40 |
| ROMÂNĂ | 41-54 |
| ITALIANO | 55-66 |
| POLSKI | 67-79 |
| NEDERLANDS | 80-90 |
| РУССКИЙ | 91-108 |
 |  |  |  | |
| EN FIRST USE SHOCK STEAM DRY IRONING STEAM IRONING | ||||
| FR PREMIÈRE UTILISATION | FONCTION PRESSING REPASSAGE À SEC | REPASSAGE À LA VAPEUR | ||
| ES PRIMER USO DESCARGA DE VAPOR | PLANCHADO EN SECO | PLANCHADO CON VAPOR | ||
| RO PRIMA UTILIZARE | JET DE ABUR | CĂLCARE USCATA | CĂLCARE CU ABUR | |
| IT USO INIZIALE | PULIZIA E MANUTENZIONE | STIRATURA A SECCO | STIRATURA A VAPORE | |
| PL PIERWSZE UŽYCIE UDERZENIE PARY | PRASOWANIE NA SUCHO | PRASOWANIE PAROWE | ||
| NL EERSTE GEBRUIK | SCHOK STOOM | DROOG STRIJKEN | STOOM STRIJKEN | |
| RU ПЕРВОЕ ВКЛЮЧЕНИЕ | УДАР ПАРОМ | СУХАЯ ГЛАЖКА | ПАРОВАЯ ГЛАЖКА | |
 |  |  |  | |
| EN | TURBO STEAM | AUTOMATIC SHUTDOWN | CLEANING AND CARE | SELF-CLEAN |
| FR | VAPEUR TURBO | ARRÊT AUTOMATIQUE | NETTOYAGE ET ENTRETIEN | AUTO-NETTOYAGE |
| ES | TURBO VAPOR | APAGADO AUTOMÁTICO | LIMPIEZA Y CUIDADOS | AUTOLIMPIEZA |
| RO | JET DE ABUR | OPRIRE AUTOMATÃ | CURÃ AREA ŞI İNGRIJIREA | AUTOCURÃTARE |
| IT | TURBO VAPORE | SPEGNIMENTO AUTOMATICO | PULIZIA E CURA AUTO | PULITURA |
| PL | PARA TURBO | AUTOMATYCZNE WYLĄCZANIE | CZYSZCZENIE I KONSERWACJA | SAMOCZYSZCZENIE |
| NL | TURBOSTOOM | AUTOMATISCHE UITSCHAKELING | REINIGING EN ONDERHOUD | ZELFREINIGING |
| RU | ТУРБО ПАР | АВТОМАТИЧЕСКОЕ ОТКЛЮЧЕНИЕ | ОЧИСТКА И УХОД | САМООЧИСТКА |

natural_image
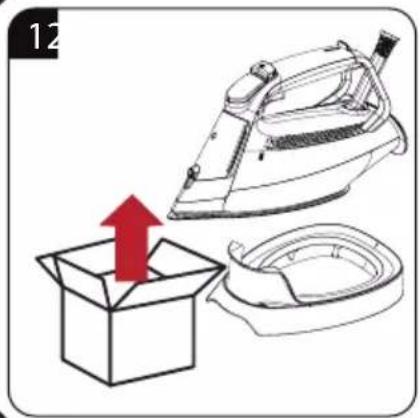
Illustration of an open box with a red upward arrow and a steam iron, next to a circular container (no text or symbols)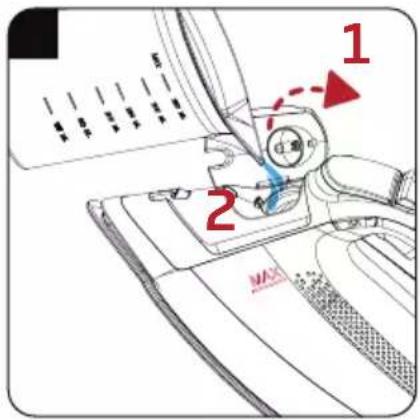
natural_image
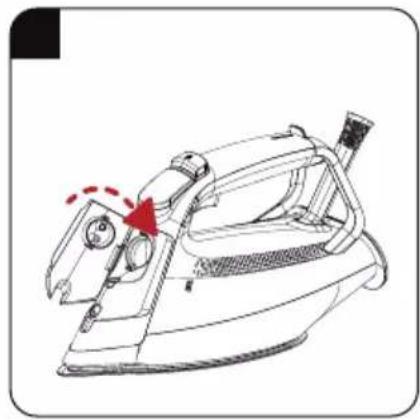
Line drawing of a steam iron with a red arrow indicating motion (no text or symbols)
natural_image
Line drawing of a steam iron on a bed (no text or symbols)


natural_image
Illustration of a steam iron on a bed with motion lines indicating speed (no text or symbols)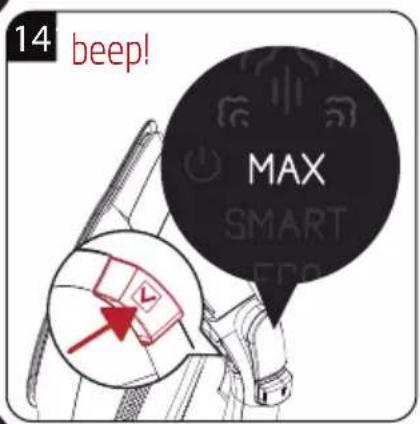


natural_image
Illustration of two different iron iron holders, one with a red arrow indicating force or adjustment, the other with a blue tool (no text or symbols)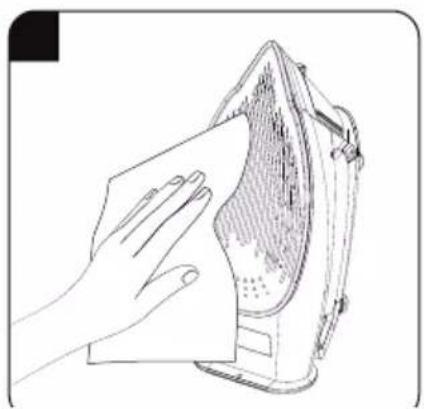
natural_image
Illustration of a hand using a cloth to clean or wash a textured surface inside a machine (no text or symbols)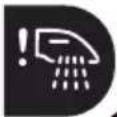
natural_image
Line drawing of a steam iron with a red arrow indicating motion (no text or symbols)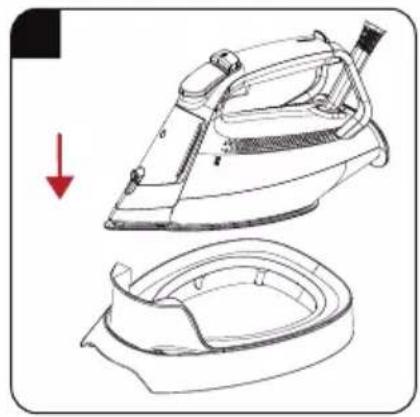
natural_image
Line drawing of a steam iron with a magnified inset showing its internal structure (no text or symbols)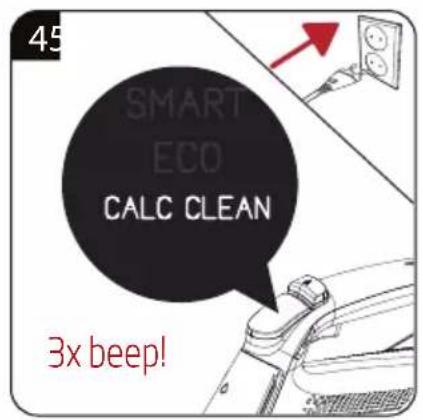
natural_image
Line drawing of two iron iron holders, one with a red-handled handle and the other with blue-coated handle (no text or symbols)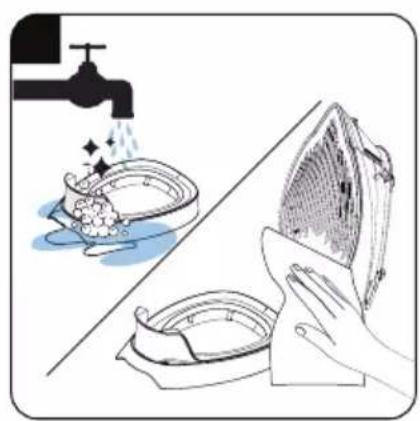
natural_image
Illustration of a kitchen scene with a faucet, a bowl of water, and a hand cleaning a net (no text or symbols)Please read this manual first!
Dear Customer,
Thank you for preferring this Beko product. We hope that you get the best results from your product which has been manufactured with high quality and state-of-the-art technology. Therefore, please read this user manual and all other accompanying documents carefully before using the product and keep it as a reference for future use. If you handover the product to someone else, give the user manual as well. Follow all warnings and information in the user manual.
Meanings of the symbols
Following symbols are used in the various sections of this manual:

Important information and useful hints about usage.

WARNING: Warnings against dangerous situations concerning the security of life and property.
WARNING: Warning for hot surfaces.
WARNING: Risk or burning and scalding due to steam.
This product has been manufactured in environmental friendly modern plants without giving any harm to the nature.
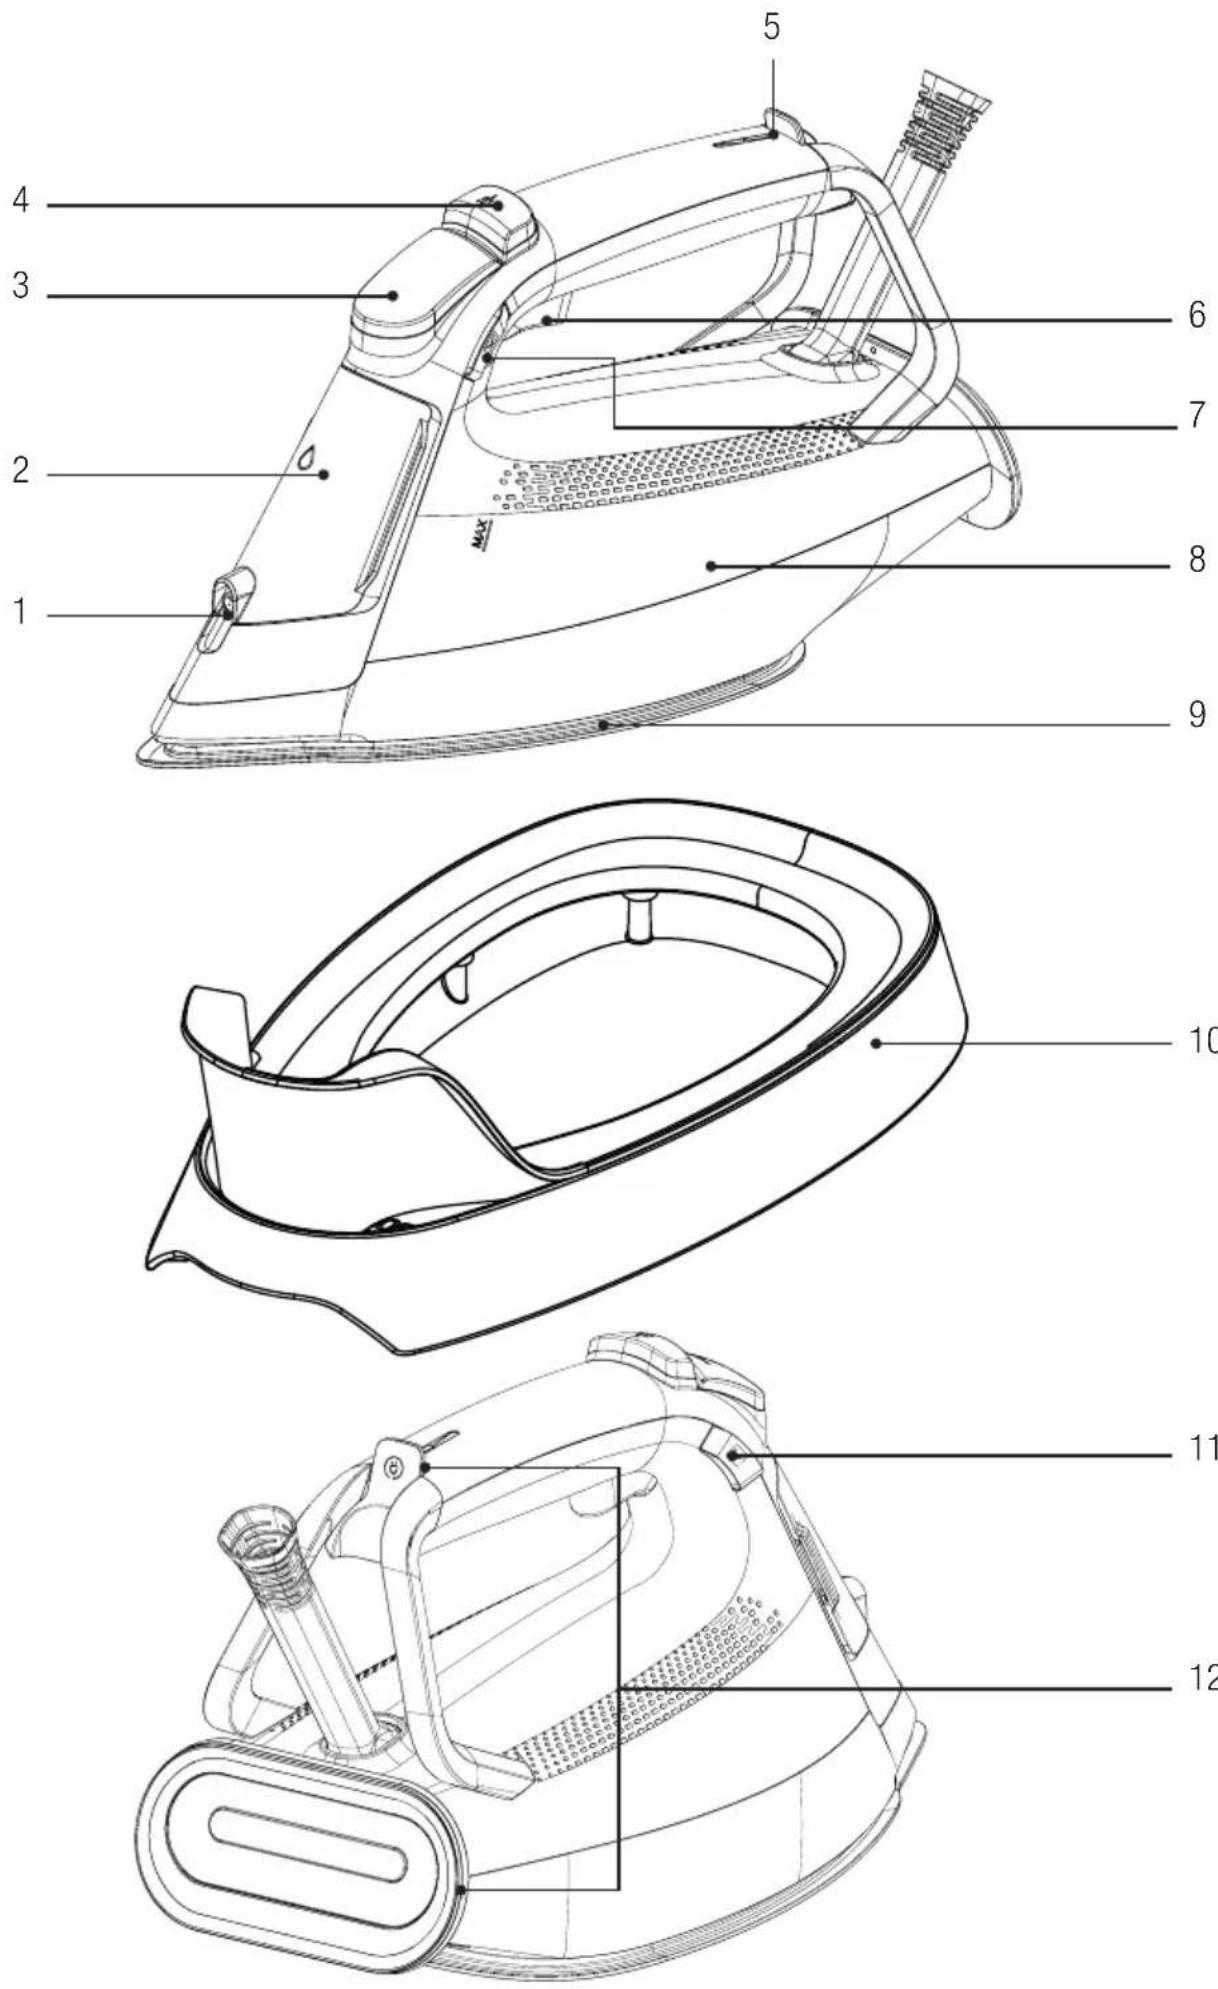
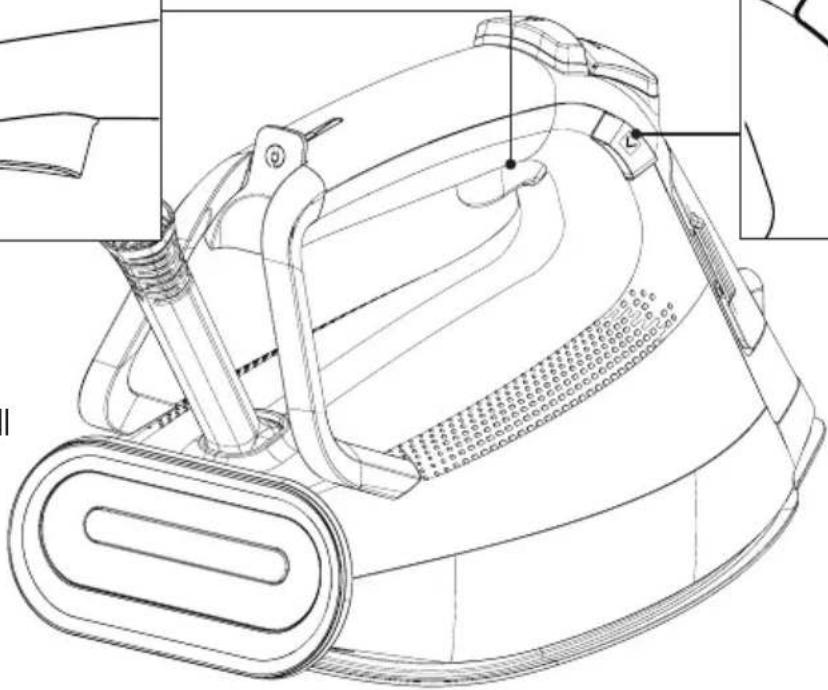
Control and parts
- Water spray nozzle
- Water refill lid
- LED display
- Water spray button
- Thermostat indicator and Auto-Off light
- Shock steam button
- Temperature setting button
- Water tank
- Soleplate
- Calc-clean reservoir
- Steam adjustment button
- Cable winding bay
Technical data
| Voltage 220-240V~50-60Hz | |
| Power consumption | 2520-3000W |
| Shock steam 280 g* | |
| Continuous steam 63 g/min | |
| Insulation class I | |

*Measured at maximum temperature level, when shock steam is applied with 3-second intervals for an operating period of 30 minutes.
Rights to make technical and design changes are reserved.
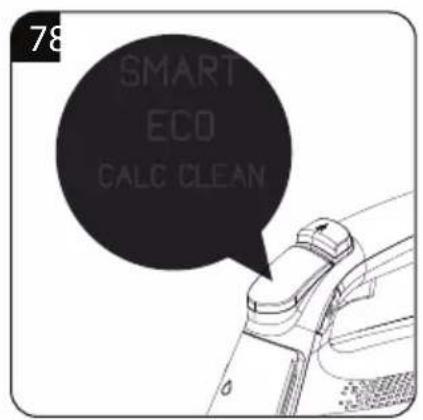
LED display;
| Control panel Symbols Remarks | ||
 | Steam mode | |
| Turbo-steam mode | ||
| Auto-Off indicator | ||
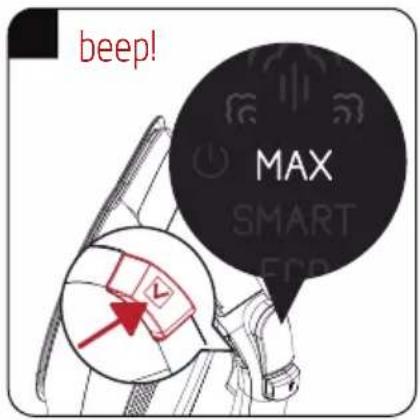
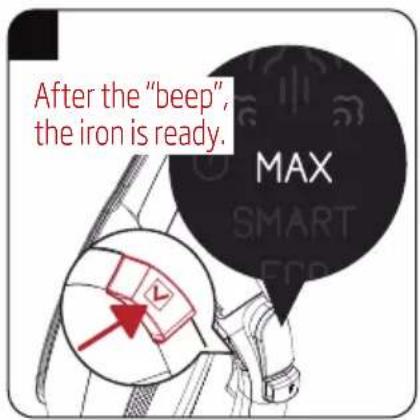
| MAX | Maximum temperature mode | |
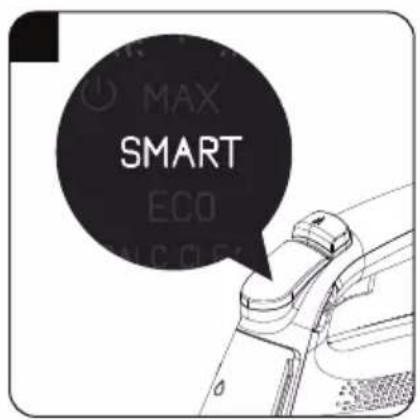
| SMART | Smart mode | |
| ECO | Eco mode | |
| CALC CLEAN | Calc-clean warning/mode |
The values which are declared in the markings affixed on your appliance or the other printed documents supplied with it represent the values which were obtained in the laboratories pursuant to the pertinent standards. These values may vary according to the usage of the appliance and ambient conditions.
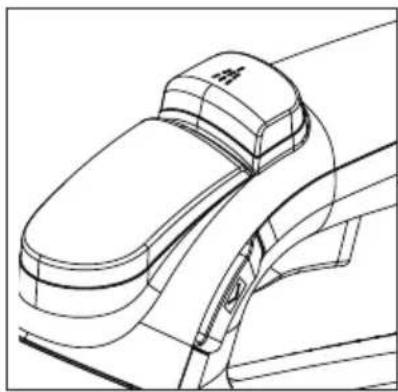
Button descriptions
natural_image
Line drawing of a mechanical component with no visible text or symbolsWater spray button (4);
You can remove tough wrinkles with ease.
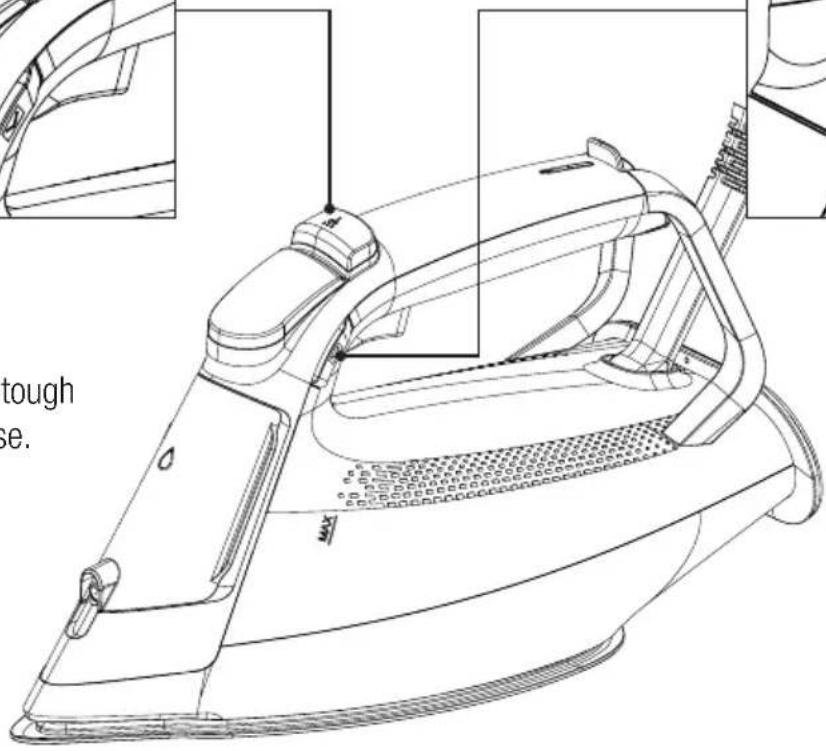
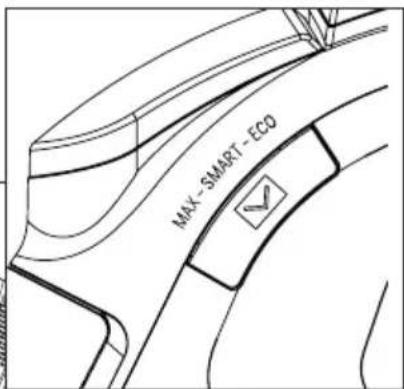
Temperature adjustment button (7);
Select the SMART mode applicable for each fabric type or ECO or MAX modes for professional use with temperature adjustment button.
natural_image
Technical line drawing of a car's side profile showing front and rear sections with no text or symbolsSteam boost button (6);
It provides steam boost feature in all modes.
natural_image
Technical line drawing of a vacuum cleaner device (no text or symbols)
natural_image
Technical line drawing of a mechanical component with no visible text or symbolsSteam setting button (11);
You can iron with or without steam.
1 Important safety and environmental instructions
This section contains safety instructions that will help protect from risk of personal injury or property damage.
Failure to follow these instructions invalidates the granted warranty.
1.1 General safety
- This appliance complies with the international safety standards.
- This appliance is intended to be used in household and similar applications such as:
- Staff kitchen areas in shops, offices and other working environments;
- Farm houses
- By clients in hotels, and other residential type environments;
- Bed and Breakfast type environments.
It is not fit for industrial use.
- This appliance may be used by children who are at the age of 8 or over and the people whose physical, perceptive or mental skills are impaired or who are inexperienced or not knowledgeable about the appliance as long as they are supervised or informed and made understood the safe use of the appliance and the encountered dangers. Children should not play with the appliance. Cleaning and user maintenance procedures should not be performed by children unless they are controlled by their elders.
- Do not leave the product unattended while it is plugged in.
- Unplug the product before filling the water reservoir with water.
- Operate and store the appliance on a stable surface.
- When the appliance is placed on its base plate, ensure that the surface beneath the plate is level.
1 Important safety and environmental instructions
- Do not use the appliance if the power cable or the appliance itself is damaged. Contact an authorised service.
- If the appliance is dropped or leaks water or has other failures, contact the authorised service. Do not use the appliance until it is repaired.
- When the appliance is not in use or left to cool down keep the appliance and power cable out of reach of children under 8 years old.
- The appliance is not suitable for using outdoors.
- Only use the original parts or parts recommended by the manufacturer.
- Do not attempt to dismantle the appliance.
- Your mains power supply should comply with the information supplied on the rating plate of the appliance.
-
The mains supply of the appliance must be secured with a minimum 16 A fuse.
-
Use the appliance with a grounded outlet only.
- Do not use the appliance with an extension cord.
- Do not pull the power cable when unplugging the appliance.
- Unplug the appliance before cleaning it.
- Do not wrap the cable around the appliance. Wrap the cable around the cable wrapping section provided at the rear of the appliance only.
- Do not touch the appliance or its plug with wet or damp hands when the appliance is plugged in.
- The soleplate and its surrounding area can be extremely hot. Contacting hot surfaces may cause burns. Therefore while or just after using the appliance, pay attention not to touch the hot surfaces.
- Never use the appliance in or near to combustible or inflammable places and materials.
1 Important safety and environmental instructions
- If you keep the packaging materials, store them out of the reach of children.
- Do not open the water filling cover during use.
1.2 Compliance with WEEE Directive and Disposing of the Waste Product
This product complies with EU WEEE Directive (2012/19/EU). This product bears a classification symbol for waste electrical and electronic equipment (WEEE).

This symbol indicates that this product shall not be disposed with other household wastes at the end of its service life. Used device must be returned to official collection point for recycling of electrical and electronic devices. To find these collection systems please contact to your local authorities or retailer where the product was purchased. Each household performs important role in recovering and recycling of old appliance.
Appropriate disposal of used appliance helps prevent potential negative consequences for the environment and human health.
1.3 Compliance with RoHS Directive
The product you have purchased complies with EU RoHS Directive (2011/65/EU). It does not contain harmful and prohibited materials specified in the Directive.
1.4 Package Information
Packaging materials of the product are manufactured from recyclable materials in accordance with our National Environment Regulations. Do not dispose of the packaging materials together with the domestic or other wastes. Take them to the packaging material collection points designated by the local authorities.
2 Operation
2.1 Intended use
This appliance is intended only for household use and ironing; it is not suitable for professional use.
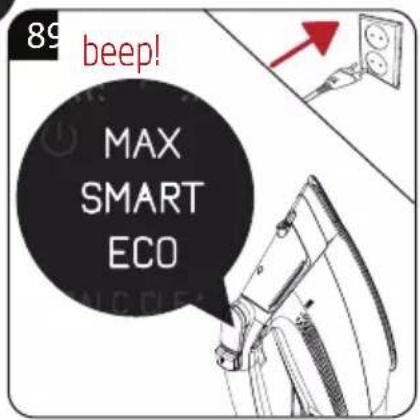
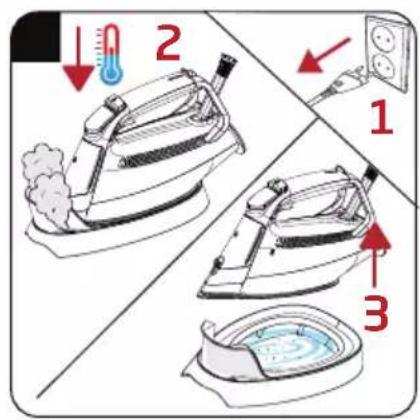
2.2 Initial use
Remove the protective film on the LED screen (3).
During initial use, fill the water reservoir and vaporize the water to remove the manufacturing residues. Meanwhile, use shock steam button (6) frequently.

You can smell a mild odour or see white sediments coming out of the soleplate holes during initial use. After performing vaporizing process twice, such odours and sediments will disappear. Also water droplets may form within the water reservoir; this is normal.
2.3 Refilling the water reservoir

WARNING: Do not fill the water reservoir (8) with perfume, vinegar, laundry starch, calc-cleaners or other products or chemicals which can facilitate the ironing process.

Your appliance is suitable for using with tap water. If your tap water is excessively hard, we recommend you to use a mixture of tap water and potable water.
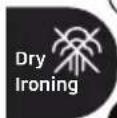
2.4 Temperature setting and dry ironing
When setting the temperature of the appliance, consider the following table.
| Fabric Type | Temperature Setting | Steam Setting |
| Silk ECO-SMART | With/Without Steam | |
| Wool SMART | With/Without Steam | |
| Cotton SMART-MAX | With/Without Steam | |
| Linen-Jean | SMART-MAX | With/Without Steam |

WARNING: Take the ironing instructions specified on the label of the fabric into consideration for ironing.

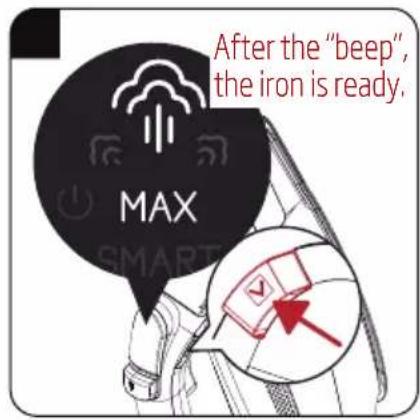
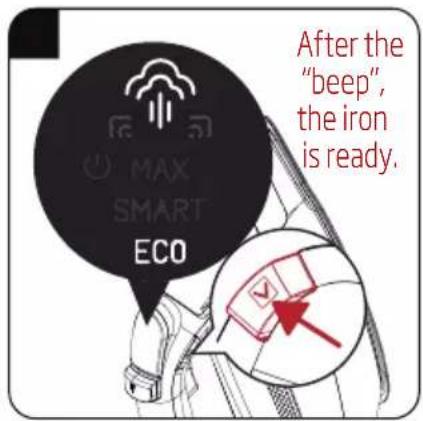
- Your appliance starts in "SMART" mode when it is switched on.
- You can safely iron all fabrics suitable for ironing in "SMART" mode.
- If you don't know the fabric of your garment, first iron an invisible part of your garment and determine a correct ironing temperature for it.
- In order to prevent the bright stains that may form on the synthetic fabrics such as silk, iron on the reverse side of the fabric. Do not use the water spraying feature in order to prevent the stain formation.
2 Operation
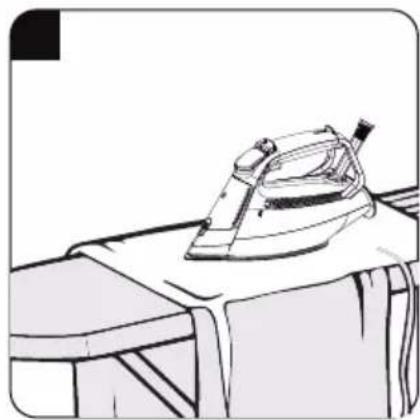
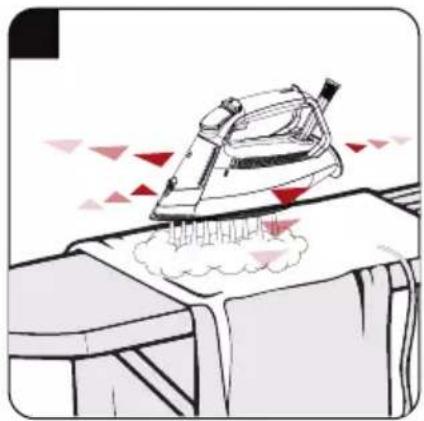
2.5 Steam ironing

WARNINGS
- When you set the appliance to steam mode, it will not give out steam unless you move it. The appliance will give out steam when you move it. Appliance is equipped with a movement sensor.
- Noise coming from the appliance may increase if the water level in the water tank decreases. In this case, fill the tank up to the “MAX” level.
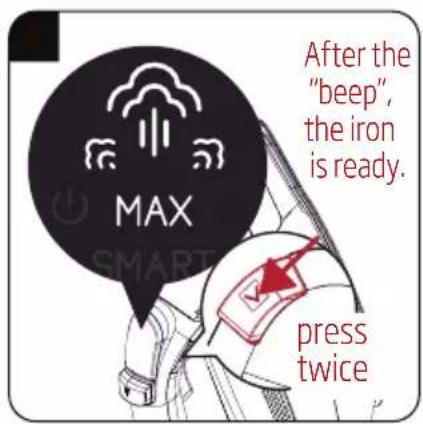
2.6 Turbo-steam
You can use the turbo steam function when the temperature is set to "MAX" position.

Use turbo steam function to obtain higher amounts of steam and for fast ironing on thick fabrics.

WARNING: When you set the appliance to steam mode, it will not give out steam unless you move it. The appliance will give out steam when you move it. Appliance is equipped with a movement sensor.
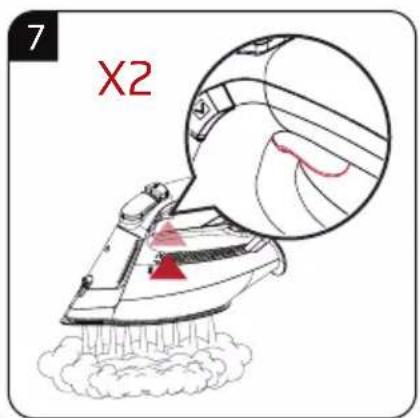
2.7 Shock steam
You may use the shock steam feature in all modes.

WARNINGS
- Wait for a few seconds before pressing the shock steam button (6) again. If you keep pressing the shock steam button (6) repeatedly, water may come through the sole-plate (9) together with steam. - At the beginning of ironing, iron may not produce shock-steam during first couple of trials.

WARNING: Thermostat indicator light (5) must go out in order to be able to use the shock steam function.

WARNING: Never direct the steam to people or pets.

WARNING: If the thermostat indicator light (5) turns on during ironing, wait for the light (5) to go out before proceeding with the shock steam process.
2.8 Spraying water

- Make sure that there is sufficient water in the reservoir (8) before spraying water.
- You can easily remove creases using the water spraying feature.
2.9 Anti-dripping system
The appliance is equipped with an anti-dripping system. Iron stops vaporization automatically when the temperature is too low in order to prevent water coming out of the soleplate (9).
Anti-dripping system allows for ironing even the most delicate fabrics.
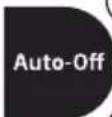
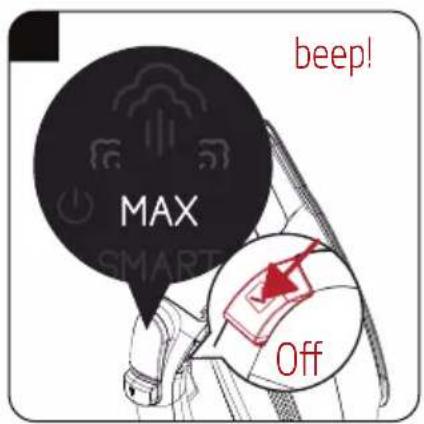
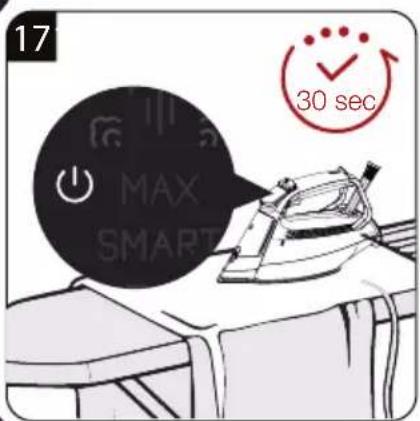
2.10 Auto-Off

- If the iron is switched off automatically, ⏻ symbol flashes.
- It may take around 60 seconds for the soleplate (9) to reach the previous temperature level.
- If the appliance is moved in horizontal position it will be switched on.
3.1 Cleaning

WARNINGS
- Do not use gasoline, solvent or abrasive cleaning agents or hard brushes to clean the appliance.
- Never put vinegar, descaling agent, laundry starch, perfume or other auxiliary products that help ironing into the appliance.
- Do not wash your appliance under running water or do not soak it in water or other liquids.
- Do not use abrasive cleaning agents to clean the soleplate (9).
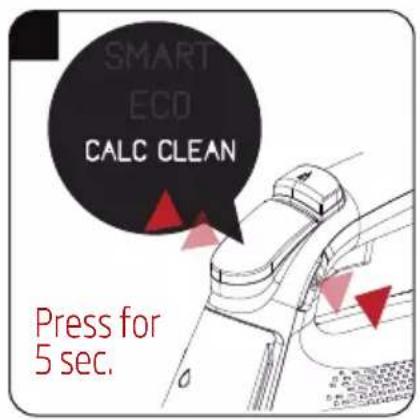
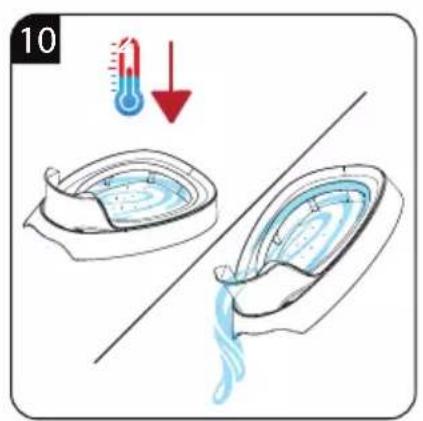
3.2 Auto calc-clean
- This process allows for cleaning the calc particles that accumulate in the appliance.
- Use this feature when "CALC-CLEAN" warning appears on the display.
- Fill the water reservoir until (8) MAX level.

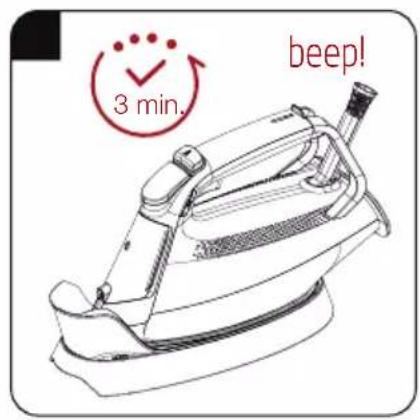
- Do not move the appliance during cleaning. In such a case, cleaning procedure must be repeated.
- You may perform this procedure by following the same steps without waiting for the “CALC-CLEAN” warning.
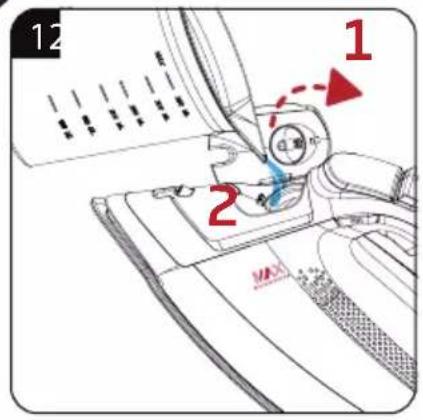
WARNINGS
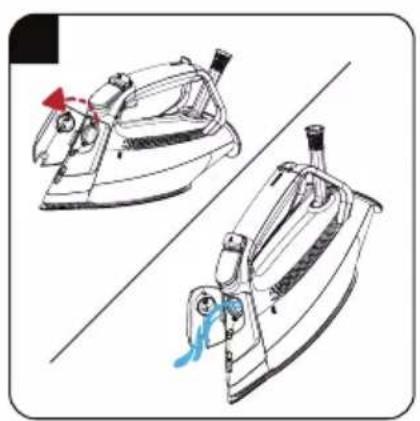
- As the descaling reservoir (10) shall heat up and as hot condensing water shall be collected during operation, do not touch the reservoir and the iron, and drain when it is cooled down.
- A high amount of steam shall come out the appliance and the descaling reservoir during the descaling procedure.

Self-cleaning function removes the dirt inside the soleplate. We recommend using this feature every 10-15 days.
3.3 Storage
- If you do not intend to use the appliance for a long time, store it carefully.
- Before lifting the appliance unplug it and then let it cool completely.
- Empty the water reservoir.
- Keep the appliance and its accessories in their original packages.
- Store it in a cool, dry place.
- Always keep the appliance out of the reach of children.
3.4 Handling and transportation
- During handling and transportation, carry the appliance in its original packaging. The packaging of the appliance protects it against physical damages.
- Do not place heavy items on the appliance or on the packaging. The appliance may get damaged.
Dropping the appliance may render it non-operational or cause permanent damage.

For commissioning, general use and cleaning, please observe the instructions on pages 5 - 6 and 7 of this operating manual.
4 Troubleshooting
| Problem Possible reason Solution | ||
| Although the appliance is plugged in, soleplate (9) does not heat up. | The plug or power cord of the appliance may be faulty. | Contact the authorized service if the appliance does not operate although the appliance is plugged in. |
| The appliance does not generate steam. | Amount of the water in the water reservoir (8) might be insufficient. | Fill the water reservoir (8) with water up to MAX level. |
| Operate the appliance in steam mode. | ||
| Sediments and residues fall of from the base (9) while ironing. | If the water you use for your appliance is too limy, such sediments may form. | Fill the water reservoir of the appliance by mixing the tap water and drinking water for your next ironing operations. |
| Use the auto descaling feature more frequently if the water in your area is hard. | ||
| There are stains at the soleplate (9). | Wet clothes are ironed / scale stains have occurred on the base (9). | Wipe the sediments and residues with a lightly dampened cloth after the appliance is cooled down adequately. |
| The “CALC CLEAN” symbol flashes on the LED display (3). | The time for descaling has been reached. | Perform the descaling procedure. |
| Icons on the led screen (3) are not clear. | Protective film on the led screen may be still on. | Remove the protective film on the led screen (3). |
| Noise from the appliance. Water level in the water tank (8) may be reduced. Noise occurrence due to decrease in the water tank is normal. | Fill the water up to MAX line in the water tank (8). | |
natural_image
Technical line drawing of a mechanical component or bracket (no text or symbols)natural_image
Technical line drawing of a car interior component (no text or symbols)natural_image
Technical line drawing of a vacuum cleaner device (no text or symbols present)
natural_image
Technical line drawing of a mechanical component with no visible text or symbolsPAPEL RECICLADO Y RECIBLABLE
natural_image
Technical line drawing of a mechanical component or bracket (no text or symbols)natural_image
Technical line drawing of a car's side profile showing front and rear sections with no text or symbolsnatural_image
Technical line drawing of a vacuum cleaner device (no text or symbols)
natural_image
Technical line drawing of a mechanical component with no visible text or symbolsnatural_image
Technical line drawing of a mechanical component or bracket (no text or symbols)Buton de pulverizare a apei (4):
natural_image
Technical line drawing of a car's side profile showing front and rear sections with no text or symbolsnatural_image
Technical line drawing of a vacuum cleaner device (no text or symbols present)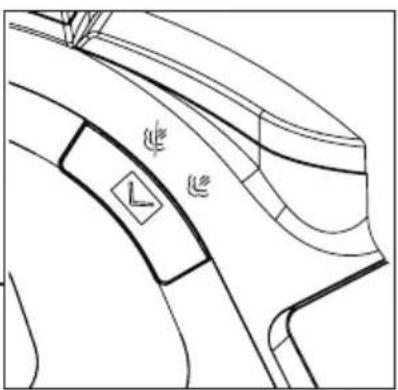
natural_image
Technical line drawing of a mechanical component with no visible text or symbols□ Convector electric
Model / Serie:
VÂNZĂTOR
Nr. factură:....Data:....
natural_image
Technical line drawing of a mechanical component or bracket (no text or symbols)natural_image
Technical line drawing of a car's side profile showing front and rear sections with no text or symbolsnatural_image
Technical line drawing of a vacuum cleaner device (no text or symbols present)
natural_image
Technical line drawing of a mechanical component with no visible text or symbolsnatural_image
Technical line drawing of a mechanical component or bracket (no text or symbols)Przycisk spryskiwania (4):
natural_image
Technical line drawing of a car's side profile with no visible text or symbolsnatural_image
Technical line drawing of a vacuum cleaner device (no text or symbols present)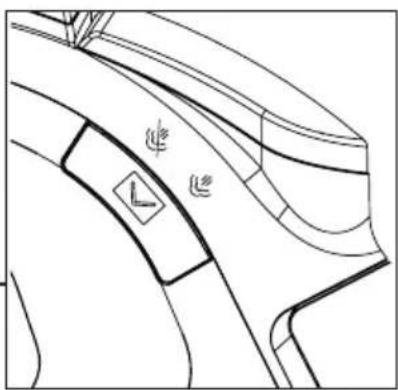
natural_image
Technical line drawing of a mechanical component with no visible text or symbolsnatural_image
Technical line drawing of a mechanical component or bracket (no text or symbols)natural_image
Technical line drawing of a car's side profile showing front and rear sections with no text or symbolsStoomboostknop (6):
natural_image
Technical line drawing of a vacuum cleaner device (no text or symbols present)
natural_image
Technical line drawing of a mechanical component with no visible text or symbolsnatural_image
Simple line icon of a shirt collar with dotted lines indicating measurement (no text or symbols)SPA9130B
RU

natural_image
Technical line drawing of a mechanical component or bracket (no text or symbols)natural_image
Technical line drawing of a car's side profile showing front and rear sections with no text or symbolsnatural_image
Technical line drawing of a vacuum cleaner device (no text or symbols present)
natural_image
Technical line drawing of a mechanical component with no visible text or symbols


- CONTENTS
- Please read this manual first!
- Meanings of the symbols
- Control and parts
- Button descriptions
- Water spray button (4);
- Temperature adjustment button (7);
- Steam boost button (6);
- Steam setting button (11);
- Important safety and environmental instructions
- General safety
- Compliance with WEEE Directive and Disposing of the Waste Product
- Compliance with RoHS Directive
- Package Information
- Operation
- Intended use
- Initial use
- Refilling the water reservoir
- Temperature setting and dry ironing
- Steam ironing
- WARNINGS
- Turbo-steam
- Shock steam
- Spraying water
- Anti-dripping system
- Auto-Off
- Cleaning
- Auto calc-clean
- Storage
- Handling and transportation
- Troubleshooting
- PAPEL RECICLADO Y RECIBLABLE
- Buton de pulverizare a apei (4):
- VÂNZĂTOR
- Przycisk spryskiwania (4):
- Stoomboostknop (6):
Brand : BEKO
Model : SPA 9230 C
Category : Iron