Keiler 35 Pro - Binoculars LIEMKE - Free user manual and instructions
Find the device manual for free Keiler 35 Pro LIEMKE in PDF.

| Product type | Thermal imaging binoculars |
| Brand | Liemke |
| Model | Keiler 35 Pro |
| Detector resolution | 384×288 px |
| Pixel size | 12 μm |
| NETD | ≤50 mK |
| Frame rate | 50 Hz |
| Objective lens | 35 mm |
| Field of view | 7.5×5.7° |
| Display | 1280×960 LCOS |
| Magnification | 3.5–14.0× |
| Digital zoom | 2×, 4× |
| Max battery life | ≤7 h |
| Weight | <450 g |
| Dimensions | 286×65×64 mm |
| Detection range | 1750 m |
| Power supply | Rechargeable internal battery, charging via micro-USB |
| Main features | Image modes (White Hot, Black Hot, Red Hot, false colors, Target Highlight), photo/video recording, WiFi, stadiametric rangefinder, hot spot tracking, digital compass, angle indicator, digital zoom, PIP |
| Maintenance and cleaning | Wipe with a cotton cloth, clean contacts with organic solvent, use special tools for glass surfaces |
| Safety | Do not point the lens at intense sources (laser, sun); operating temperature: -10 to +50°C; do not charge above 40°C |
| Package contents | 1x thermal imaging device, video cable, bag, power adapter, micro-USB cable, user manual |
Frequently Asked Questions - Keiler 35 Pro LIEMKE
User questions about Keiler 35 Pro LIEMKE
0 question about this device. Answer the ones you know or ask your own.
Ask a new question about this device
Download the instructions for your Binoculars in PDF format for free! Find your manual Keiler 35 Pro - LIEMKE and take your electronic device back in hand. On this page are published all the documents necessary for the use of your device. Keiler 35 Pro by LIEMKE.
USER MANUAL Keiler 35 Pro LIEMKE
natural_image
Illustration of a pig with warm orange-yellow coloring (no text or symbols)KEILER PRO
BEDIENUNGSANLEITUNG
OPERATING MANUAL
natural_image
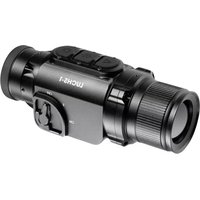
Black LLEAMKE 3D scanner with four circular buttons and lens (no visible text or symbols on body)natural_image
Thermal image of a pig standing in a field under warm orange and yellow sky (no text or symbols)Liebe Kunden,
natural_image
Four-panel image showing a figure in a doorway, a dark cave with a person walking, a lightning horse, and a glowing orange spot on a purple background (no text or symbols)natural_image
Dark, cloud-like terrain with a small red object in the center (no visible text or symbols)text_image
Screenshot of a social media post with Chinese text overlays and a photo of a rabbit holding a pink object.natural_image
Thermal imaging view of two mice in a room with purple background (no text or symbols)24. DIGITALER KOMPASS
natural_image
Black-and-white photo of a person in motion, possibly a warrior or athlete, with no visible text or symbols.26. AUTO-STANDBY
natural_image
Raccoon lying on dark ground with red thermal or heat map overlays (no text or symbols visible)28. DIGITALE KOMPASS-KALIBRIERUNG
natural_image
Black silhouette of a dark, irregularly shaped object on a textured surface (no text or symbols visible)natural_image
Thermal image of a cartoon character wearing a yellow helmet, with purple background and dark interior (no text or symbols)natural_image
Thermal image of a pig standing in a field under warm orange and yellow sky (no text or symbols)Dear Customer,
Based on our commitment to always offer you thermal imaging optics with leading performance and quality, you will find state-of-the-art products with outstanding performance parameters in our new range of products.
With our service promise to return your optic within ten working days if you send it in, as well as a warranty on our products of up to three years, we thank you for your trust and wish you a good hunting season!
Your LIEMKE team!
CONTENT
E N
* Technical parameters of the device may be improved without prior notice.
** Actual operation time depends on the temperature of the battery and the intensity of use of the WiFi function and the built-in video recorder.
02. PACKAGE CONTENTS
1x KEILER PRO
1x Video cable
1x Power adapter
1x Pouch
1x Micro-USB cable
1x Manual
1x Operating manual
03. COMPONENTS AND CONTROLS
-
Objective Lens
-
Photo button
-
Power button
-
LED indicator
-
Image Mode button
-
Dioptre adjustment
-
Zoom button
-
Eyeshade
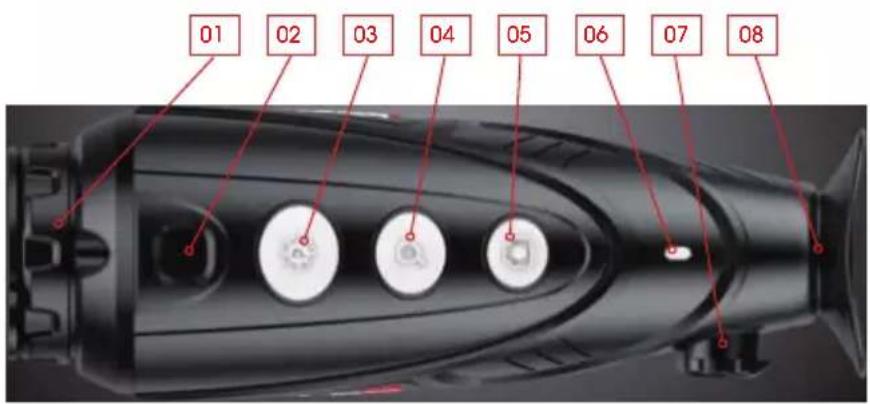
text_image
01 02 03 04 05 06 07 0804. SAFETY
E N
The rated charging voltage of this product is 5V.
Please charge in time when power is low, so as to avoid service life loss caused by battery over-discharge.
The thermal imager is not recommended to be used in high temperature environment for a long time, if the temperature is too high, the imager will enter the high-temperature protection state, and automatically shut down.
The recommended temperature for use -10^ to +50^ .
Make sure that the USB/MCX port cover on the bottom of the thermal imager is tightly closed when using in damp environments, e.g. rainy days.
When the device is not used for a long time, it should be charged at least every 2 months during storage and stored in a dry and ventilated environment.
The device should not be charged in an environment above 40°C.
Disposal of waste electrical equipment and batteries

Do not dispose of waste electrical equipment and batteries in the household waste. Please hand them in to your local recycling centre. Batteries should be fully discharged when disposed of.
interseroh

We are participating in INTERSEROH+ Verbund. The device components can be taken to plastic and metal recycling for disposal.

CE marking. The devices are in conformity with the EU directives:
RED Directive 2014/53/EU RoHS Directive 2011/65/EU EMV-Directive 2014/30/EU Low Voltage Directive 2014/35/EU

FCC-ID: 2AYGT-22X
05. TECHNICAL DATA - WI-FI FUNCTION
| Transmission power ≤ 20 dBm | |
| Signal range 5 m | |
| Range 2400 MHz – 2483.5 MHz |
Blaser Group GmbH hereby declares that radio system type Keiler-35 PRO / Keiler-36 PRO / Keiler-50 PRO complies with Directive 2014/53/EU. The complete text of the EU Declaration of
Conformity can be found at the following web addresses:
liemke.com/CE_Keiler_35
liemke.com/CE_Keiler_36
liemke.com/CE_Keiler_50
06. OPERATION

ATTENTION!
The lens of the device must not be pointed at any sources of intense energy, such as laser-emitting devices or the sun. This may damage the electronic components in the device. Damage caused by failure to comply with the operating guidelines is not covered under warranty.
07. SWITCH ON
Turn on the device by long pressing the Power button.
The start-up screen appears, the infrared image comes on after several seconds. The green LED indicator lights up continuously.
08. SWITCH OFF
Switch off the device by long pressing the Power button.
A count-down timer appears in the display, counting from 3 to 1 and then the device switches off.
If you release the Power button during the countdown, the device will remain switched on.
09. STANDBY MODE
To increase the battery life, the device can be put into standby mode.
When the device is on, short press the Power button to enter the standby mode.
The green indicator light will flash every 2 seconds.
Short press the Power button again to wake up the device from the standby mode.
Waking up the device is instant, there is no waiting time compared to switching on the device after it has been switched off completely.
10. DIOPTER ADJUSTMENT
The diopter adjustment adjusts the eyepiece of the device to the individual user's eyesight.
Close the lens cover and turn the eyepiece/diopter adjustment clockwise or counterclockwise until the symbols on the display appear clearest for your personal eyesight.
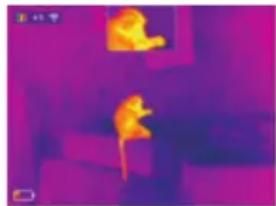
11. SWITCHING THE IMAGE MODE
Short press the Image Mode button to switch the image mode from white hot, black hot, red hot, false color and target highlight mode.

natural_image
Five-panel image showing a dark figure in a forest, a silhouette of a person walking, a dark cave with a flame, a light-colored deer photo, and a dark tree (no text or symbols)-
-
-
- 05.
-
-
-
White Hot - ideal for accurate identification
- Black Hot - ideal for quick spotting
- Red Hot - for fast detection of heat sources
- False Color - for detection at close range, for example thermal bridges
- Target Highlight - reduces the overall brightness and thus glare
12. DIGITAL ZOOM
Short press the Zoom button for image zooming from 1x to 2x, 4x and back to 1x.
13. CAPTURING IMAGES AND VIDEOS
In the normal display mode, short press the Photo button to take a photo and long-press to start video recording.
Photo capture is confirmed by a camera symbol in the display. During video recording, the recording time is displayed in the upper-right corner of the screen.
Long press the Photo button again to quit recording and save the video.
Photo capture by short-pressing the Photo button is also possible during video capture.
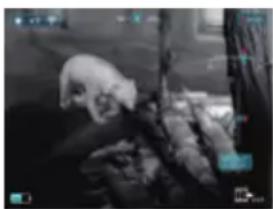
14. STADIAMETRIC RANGEFINDER
Long press the Zoom and Image Mode button to turn the stadiametric range-finder mode on/off.
Then short or long press the Image Mode button or the Photo button to adjust the ranging bracket to the height of the target.
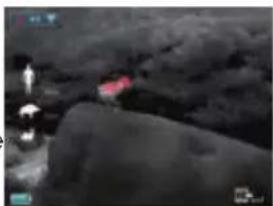
natural_image
Black and white photo of a dark, cloud-like landscape with a small red object in the center (no visible text or symbols)The number that is displayed next to the human (1.7m target), wild boar (0.9m target) or hare (0.2m target) icons is the distance in meters to the respective targets when they are fit properly into the ranging bracket.
15. HOT SPOT TRACKING
Long press the Image Mode button and Photo button simultaneously to switch hot spot tracking function on or off.
A red box will appear and track the hottest object on the screen.
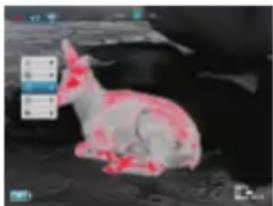
16. SETTING MENU
Long press the Zoom button to enter or exit the main menu.
In the main menu, short press the Image mode button or the Photo Button to toggle up and down in the menu.
Short press the Zoom button to perform
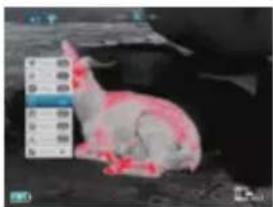
text_image
Photo of a rabbit with overlaid Chinese text labels, likely from a video or social media interface.following settings: WiFi / screen brightness / analog video / calibration mode / PIP / electronic compass / motion sensor and more.
| ICON Function | |
 | Image optimization |
 | WIFI |
 | Display brightness |
 | Warm / cold white display |
 | Calibration mode |
 | Video-Out |
 | Picture-in-Picture (PIP) |
 | More |
 | Digital compass |
 | Motion sensor |
 | Auto standby |
 | Compass calibration |
 | System information |
 | Factory reset |
 | Return to the Main Menu |
17. UC IMAGE OPTIMIZATION
Model KEILER-36 PRO and KEILER-50 PRO: Depending on the level of humidity, you can use the UC (Ultra Clear) mode to optimize the image. If the humidity is high, it is recommended to activate the UC mode.
In the submenu, activate the menu item as required by pressing the M button.
18. WIFI FUNCTION
Enable the WiFi function in the main menu, and connect the phone to the WiFi signal.
The name of the WiFi is "Keiler_xxxxxx", the password is 12345678. After the WiFi connection is successful, the APP installed on the phone can be used for real-time operations, such as taking photos and recording videos. For further information about the APP visit: https://liemke.shop/medien
19. BRIGHTNESS ADJUSTMENT
In the menu item "brightness setting", press the Zoom button to change the four brightness levels from 1 to 4 and back to 1.
20. WARM / COLD WHITE DISPLAY
Model KEILER-36 PRO and KEILER-50 PRO: Here you can choose between two options for displaying images. This option is not available in the false color mode.
21. VIDEO OUT
Turn on the analog video recording function in the main menu.
The video output icon will appear in the lower-right corner of the image. The analog video can be output to an external monitor with the supplied video transmission cable via the MCX interface.
22. SENSOR CALIBRATION MODE
Short press the Zoom button to change between S (shutter) and B (background) calibration mode.
During use, the image will deteriorate gradually because of changing background temperature of the sensor. This needs to be equalized by periodically calibrating the sensor.
In S mode, calibration is done automatically via an internal shutter that makes a faint clicking noise. The calibration can also be done manually by pressing the zoom and photo buttons simultaneously during viewing if a deterioration in image quality is detected during use.
In B mode, no automatic calibration is done. Pressing the zoom and photo buttons simultaneously during viewing performs a manual shutterless calibration. During calibration in B mode, the lens cover needs to be closed (this is also being prompted by an icon appearing in the display). Otherwise, an image of the scene viewed during calibration will be imparted on the sensor. This can be corrected by a proper calibration.
23. PICTURE IN PICTURE (PIP)
When the PIP function is turned on, a small window appears at the top center of the screen, showing a 2x enlargement of the center area of the image.
natural_image
Thermal imaging view of a mouse inside a room with purple background (no text or symbols)24. DIGITAL COMPASS
Turn on the digital compass function in the main menu. It will be displayed in the middle top of the screen, indicating the current direction.
25. ANGLE INDICATOR
Turn on the angle indicator function in the main menu.
It will be displayed on the right side of the screen, showing inclination angle and cant angle. Among them, the vertical scale (V) represents the inclination angle, while the horizontal scale (H) represents the cant ang
natural_image
Black-and-white photo of a person in profile with visible facial features and background foliage (no text or symbols)26. AUTO STANDBY
Model KEILER-36 PRO and KEILER-50 PRO: If this menu item is activated, the camera switches to standby mode after 15 minutes of inactivity (idle mode) and switches off automatically after a further 15 minutes.
27. FURTHER MENU ITEMS
Under the option, short press the zoom button to enter the secondary menu, which contains the functions of cursor calibration, compass calibration, system information, factory resets, return to the main menu, etc.
natural_image
Raccoon lying on a dark surface with red fluorescent markings (no text or symbols visible)28. DIGITAL COMPASS CALIBRATION
After selecting the Compass Calibration menu item, the triaxial coordinate system icon appears on the screen.
Successively rotate the device around the three coordinate system axes at least one complete rotation of 360^ each within 30 seconds to calibrate the compass.
29. SYSTEM INFORMATION
Short press the Zoom button to display the system information (version information and product code).

natural_image
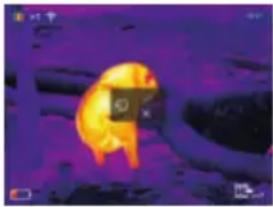
Black silhouette of a dark cat on a textured surface, with no visible text or symbols.30. FACTORY RESET
Attention! The image and video files stored in the device are deleted when the device is reset!
Short press the Zoom button for factory reset.
Short press the Image Mode button or Photo button to make a yes or no choice,
then short press the Zoom button for a confirmation.
natural_image
Thermal image of a cartoon character wearing a yellow helmet, set against a purple and black background (no text or symbols visible)After reset to factory settings, the image of the device will revert to white hot mode, brightness will be level 2, calibration mode will be S.
31. CHARGING THE BATTERY
The device is equipped with an internal rechargeable battery that can be charged via the micro-USB port on the bottom of the housing. The battery indicator in the lower left corner of the screen shows the charging level of the battery.
The red flashing LED and a fade-in in the display indicate that only 10% remaining energy is available.
Please recharge the battery no later than when a low battery charge (red battery symbol) is displayed.
You can charge the battery with the supplied AC adapter or a portable power supply such as a USB power bank. A Powerbank with 4000 mAh capacity can double the runtime. The LED indicator lights up red when charging and changes to green when the battery is fully charged. The device can be charged during use, charging is faster than discharge during use.
The devices Keiler 36 and 50 Pro have an automatic switch-off function to save energy. After 15 minutes in idle mode, the device switches to standby mode and switches off automatically after a further 15 minutes.
32. IMAGE AND VIDEO TRANSFER
After connecting the device to your computer via USB cable and with the device switched on, it functions as a mass storage device so you can view, copy or delete your images and videos on the computer.
33. TECHNICAL INSPECTION
A technical inspection of the device is recommended before use.
Check the external appearance of the device. There should be no cracks in the casing.
Check the condition of the lens and eyepiece: There should be no cracks, greasy spots, dirt or other deposits.
Check the condition of the rechargeable battery: This should be charged.
Check the electrical contracts: There should be no presence of salts or oxidation.
34. MAINTENANCE
Maintenance should be carried out at least twice a year and consist of the following actions.
Wipe the external surfaces of metal and plastic parts free of dust and dirt with a cotton cloth. Silicone grease may be used for this.
Clean the electrical contacts of the unit using a non-greasy organic solvent.
Check the glass surfaces of the eyepiece and the lens. If necessary, remove dust and sand from the lenses (preferably using a non-contact method). Cleaning of the external surfaces of the optics should be done with substances designed specially for this purpose.
35. TROUBLESHOOTING
This table lists all the problems that may arise when operating the device. Carry out the recommended checks and repairs in the order shown in the table.
If a defect should occur that is not listed in the table, or if it is impossible to repair the defect yourself, the device should be returned for repair.
| Malfunction Possible | reason Correction | |
| Thermal imager does not power up. | Battery completely discharged | Charge the battery |
| Does not operate from external power source. | USB cable damaged Replace USB cableExternal power source discharged | Charge external power source (if necessary). |
| Image is unclear, with vertical lines and uneven background | Calibration required Perform image calibration according to Section 21 „Sensor Calibration Mode" of the Manual. | |
| The image is too dark. Low brightness level set. | Adjust display brightness. | |
| Colored lines appear on display or the image has disappeared. | The device was exposed to static electricity during operation. | After exposure to static electricity, the device may either reboot automatically or require turning off and on again. |
| Poor image quality / reduced detection distance | These problems may occur during observation in difficult weather conditions (high humidity, snow, rain, fog, etc.). | |
| Smartphone or tablet cannot be connected to the device | The device password has been changed. | Delete the network and reconnect using the device password |
| The device is in an area wit a large number of Wi-Fi networks that may cause interference. | To ensure stable Wi-Fi operation, relocate the device to an area with fewer Wi-Fi networks, or into an area with none. | |
| Wi-Fi signal non existent or interrupted | The device is outside the area of Wi-Fi coverage. There are obstacles between the device and the receiver (e.g. concrete walls.) | Relocate the device into direct line of sight of the Wi-Fi signal. |
| When used in lowtemperature conditions, the image quality of the surroundings is worse than in positive temperature conditions. | In positive temperature conditions, objects being observed (surroundings and background) heat up differently because of thermal conductivity, thereby generating a high-temperature contrast. Accordingly, the image quality produced by the device will be higher. In low-temperature conditions, objects being observed (background) do, as a rule, cool down to roughly the same temperature because of which temperature contrast is substantially reduced and the image quality (detail) is poorer. This is a feature of thermal imaging devices. | |
natural_image
Thermal image of a pig standing in a field under warm orange and yellow sky (no text or symbols)Estimados clientes,
natural_image
Four-panel image showing a dark cave interior, a silhouette of a person walking, a rocky cliff with a red lantern, and a close-up of a horse's thermal imaging (no text or symbols)natural_image
Grayscale aerial view of a dark, cloud-like landscape with a small red object in the center (no visible text or symbols)15. SEGUIMIENTO DE PUNTOS CALIENTES
natural_image
A white rabbit lying on a dark surface with red fluorescent markings, no visible text or symbols.natural_image
Thermal imaging view of a mouse inside a room with purple lighting (no text or symbols visible)24. BRÚJULA DIGITAL
natural_image
Black-and-white photo of a person in profile with dark clothing, possibly a woman or man, against a dark background (no visible text or symbols)26. ESPERA AUTOMÁTICA
natural_image
Illustration of a white rabbit with red markings, sitting on dark ground (no text or symbols)natural_image
Black silhouette of a rabbit on a textured surface with scattered debris (no text or symbols visible)30. RESTABLECIMIENTO DE LOS AJUSTES DE FÁBRICA
natural_image
Thermal image of a yellow object with a black square on its surface, surrounded by dark background (no text or symbols visible)natural_image
Thermal image of a person walking through a field under warm heat (no text or symbols visible)Chers clients,
natural_image
Four-panel image showing a person walking, a dark jacket, a rabbit with orange skin, and a dark tree (no text or symbols)natural_image
Dark, textured surface with a small red object in the center (no visible text or symbols)natural_image
Rabbit with red fluorescent markings on its body, partially obscured by a blue grid overlay (no text or symbols visible)natural_image
Thermal imaging view of a person inside a room with purple background (no text or symbols)24. BOUSSOLE NUMÉRIQUE
natural_image
Black-and-white photo of a person in profile, possibly a woman or man, with no visible text or symbols.26. MODE VEILLE AUTOMATIQUE
natural_image
A white rabbit resting on dark ground, surrounded by blurred background (no visible text or symbols)28. ETALONNAGE DE LA BOUSSOLE NUMÉRIQUE
natural_image
Black silhouette of a dark, irregularly shaped object on a textured surface (no text or symbols visible)30. RÉTABLISSEMENT DES PARAMÈTRES D'USINE
natural_image
Thermal image of a cartoon character wearing a helmet, with no visible text or symbolsnatural_image
Thermal image of a pig standing in a field under warm orange and yellow sky (no text or symbols)Drodzy Klienci!
natural_image
Four-panel image showing a person walking through a tunnel, a dark cave with a deer silhouette, and a blurred natural scene (no text or symbols)natural_image
Black textured surface with a small red object in the center (no visible text or symbols)text_image
Screenshot of a social media interface showing a rabbit image with overlaid text labels and UI elementsnatural_image
Thermal imaging view of two mice in a room with purple background (no text or symbols)24. CYFROWY KOMPAS
natural_image
Black-and-white photo of a person in motion, possibly a character or athlete, with no visible text or symbols.natural_image
Illustration of a white animal with red markings, possibly a deer or creature, sitting on dark ground (no text or symbols visible)28. KALIBRACJA CYFROWEGO KOMPASU
natural_image
Silhouette of a fish on a snowy surface, with no visible text or symbols.30. PRZYWRACANIE USTAWIEN DOMYŚLNYCH
natural_image
Thermal imaging view of a yellow, helmet-like object against a purple background (no text or symbols visible)Please note the legal terms of purchase and use for
thermal imaging optics in your country or federal state.
Changes in design, technical implementation,
scope of delivery and prices reserved.
For the latest version of this operating manual visit:
https://liemke.com/medien
LIEMKE · KEILER PRO · Manual de instrucciones
Contact technical service
Contactez le service technique