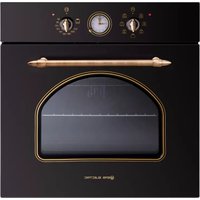
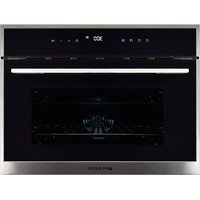
EMV72VAP - Oven EAS Electric - Free user manual and instructions
Find the device manual for free EMV72VAP EAS Electric in PDF.
User questions about EMV72VAP EAS Electric
0 question about this device. Answer the ones you know or ask your own.
Ask a new question about this device
Download the instructions for your Oven in PDF format for free! Find your manual EMV72VAP - EAS Electric and take your electronic device back in hand. On this page are published all the documents necessary for the use of your device. EMV72VAP by EAS Electric.
USER MANUAL EMV72VAP EAS Electric
CURE YOUR APPLIANCE WHEN NEEDED
Thank you for buying an EAS Electric Built-in Oven. Before unpacking it, please read these instructions carefully. Only then will you be able to operate your appliance safely and correctly. Warmly recommend retain the instruction manual and installation instructions for future use or for subsequent owners.
2. The appliance is only intended to be fitted in a kitchen.
Observe the special installation instructions.
3. Check the appliance if there is any damage after unpac-
4. Do not connect the appliance if it has been damaged.
5. Only a licensed professional may connect appliances
without plugs. Damage caused by incorrect connection is not covered under warranty.
6. Only use this appliance indoors. The appliance must only
be used for the preparation of food and drink. The appliance must be supervised during operation.
7. This appliance may be used by children over the age of 8
and by persons with reduced physical, sensory or mental capabilities or by persons with a lack of experience or knowledge if they are supervised or are instructed by a person responsible for their safety how to use the appliance safely and have understood the associated hazards.
8. Children must not play with, on, or around the appliance.
Children must not clean the appliance or carry out general maintenance unless they are at least 8 years old and are being supervised.
9. Keep children below the age of 8 years old at a safe
distance from the appliance and power cable.
10. Please always slide accessories into the cavity the right
V.2The appliance becomes very hot. Never touch the interior surfaces of the appliance or the heating elements. Always allow the appliance to cool down. Keep children at a safe distance. Accessories and ovenware become very hot. Always use oven gloves to remove accessories or ovenware from the cavity. Alcoholic vapors may catch fire in the hot cooking compartment. Never prepare food containing large quantities of drinks with high alcohol content. Only use small quantities of drinks with high alcohol content. Open the appliance door with care. Risk of burns! Risk of scalding! The accessible parts become hot during operation. Never touch the hot parts. Keep children at a safe distance. Risk of electric shock! Incorrect repairs are dangerous. Repairs may only be carried out and damaged power cables replaced by one of our trained after-sales technicians. If the appliance is defective, unplug the appliance from the mains or switch off the circuit breaker in the fuse box. Contact the after-sale service. The cable insulation on electrical appliances may melt when touching hot parts of the appliance. Never bring electrical appliance cables into contact with hot parts of the appliance. Do not use any high-pressure cleaners or steam cleaners, which can result in an electric shock. A defective appliance may cause electric shock. Never switch on a defective appliance. Unplug the appliance from the mains or switch off the circuit breaker in the fuse box. Contact the after-sales service.
V.2Risk of injury! Scratched glass in the appliance door may develop into a crack. Do not use a glass scraper, sharp or abrasive cleaning aids or detergents. The hinges on the appliance door move when opening and closing the door, and you may be trapped. Keep your hands away from the hinges. Combustible items stored in the cavity may catch fire. Never store combustible items in the cavity. Never open the appliance door if there is smoke inside. Switch off the appliance and unplug it from the mains or switch off the circuit breaker in the fuse box. A draught is created when the appliance door is opened. Greaseproof paper may come into contact with the heating element and catch fire. Do not place greaseproof paper loosely over accessories during preheating. Always weight down the greaseproof paper with a dish or a baking tin. Only cover the surface required with greaseproof paper. Greaseproof paper must not protrude over the accessories. Risk of fire! Hazard due to magnetism! Permanent magnets are used in the control panel or in the control elements. They may affect electronic implants, e.g. heart pacemakers or insulin pumps. Wearers of electronic implants must stay at least 10 cm away from the control panel. When you open the appliance door, hot steam can escape. Steam may not be visible, depending on its temperature. When opening, do not stand too close to the appliance. Open the appliance door carefully. Keep children away. Water in a hot cavity may create hot steam. Never pour water into the hot cavity.
1. Accessories, foil, greaseproof paper or ovenware on the cavity floor: do not
place accessories on the cavity floor. Do not cover the cavity floor with any sort of foil or greaseproof paper. Do not place ovenware on the cavity floor if a temperature of over 50 ºC has been set. This will cause heat to accumulate. The enamel will be damaged.
2. Aluminum foil: Aluminum foil in the cavity must not come into contact with the
door glass. This could cause permanent discoloration of the door glass.
3. Silicone pans: Do not use any silicone pans, or any mats, covers or accessories
that contain silicone. The oven sensor may be damaged.
4. Water in a hot cooking compartment: do not pour water into the cavity when it
is hot. This will cause steam. The temperature change can cause damage to the enamel.
5. Moisture in the cavity: Over an extended period of time, moisture in the cavity
may lead to corrosion. Allow the appliance to dry after use. Do not keep moist food in the closed cavity for extended periods of time. Do not store food in the cavity.
6. Cooling with the appliance door open: Following operation at high
temperatures, only allow the appliance to cool down with the door closed. Do not trap anything in the appliance door. Even if the door is only left open a crack, the front of nearby furniture may become damaged over time. Only leave the appliance to dry with the door open if a lot of moisture was produced while the oven was operating.
7. Fruit juice: when baking particularly juicy fruit pies, do not pack the baking tray
too generously. Fruit juice dripping from the baking tray leaves stains that cannot be removed. If possible, use the deeper universal pan.
8. Extremely dirty seal: If the seal is very dirty, the appliance door will no longer
close properly during operation. The fronts of adjacent units could be damaged. Always keep the seal clean.
9. Appliance door as a seat, shelf or worktop: Do not sit on the appliance door or
place or hang anything on it. Do not place any cookware or accessories on the appliance door.
10. Inserting accessories: depending on the appliance model, accessories can
scratch the door panel when closing the appliance door. Always insert the accessories into the cavity as far as they will go.
11. Carrying the appliance: do not carry or hold the appliance by the door handle.
The door handle cannot support the weight of the appliance and could break.
12. If you use the residual heat of the switched off oven to keep food warm, a high
moisture content inside the cavity can occur. This may lead to condensation and can cause corrosion damage of your high quality appliance as well as harm your kitchen. Avoid condensation by opening the door or use “Defrost” mode.
V.2INSTALLATION Tall cabinet diagram Side view of high cabinet Sideview of floor cabinet To operate this appliance safely, please be sure that it has been installed to a professional standard respecting the installation instructions. Damages occurred because of incorrect installation are not within the warranty. While doing the installation, please wear protective gloves to prevent yourself from getting cut by sharp edges. Check the appliance if there is any damage before installation and do not connect the appliance if there is. Before turning on the appliance, please clean up all the packaging materiais and adhesive film from the appliance The dimensions attached are in mm.
t is necessary to have the plug accessible or incorporate a switch in the fixed wiring, in order to disconnect the appliance from the supply after installation when necessary.
Warning: The appliance must not be installed behind a decorative door
in order to avoid overheating. Ventilation openingVentilation opening min
Map of ground cabinet
Machine MachineThe minimum area of the base vent is 250cm
To turn the oven on or off. 2.. Bake Click to select bake function. 3.. Pure steam Click to select pure steam function. 4.. Steaming roast Click to select the steam bake function. 5.. Automatic menu Select the Auto menu. 6.. Make an appointment Click to enter the appointment time setting.
Press key and key at the same time, the furnace light will be on or off. 8.. Quick preheat Click to preheat the oven chamber. Slide left and right to adjust cooking temperature and time. 9.. Slider 10.. Temperature/time/ steam adjustment Set the cooking temperature/time/steam. 11.. Start/stop/child lock Short press start/pause button, long press 3 seconds to enter or exit child lock Water box for steam function. The box will pop- up after you press it. 10.. Water box
First using for the first time Before using the appliance to prepare food for the first time, you must clean the cavity and accessories.
Remove all stickers, surface protection foils and transport protection parts.
Remove all accessories and the side-racks from the cavity.
Clean the accessories and the side-racks thoroughly using soapy water and a dish cloth or soft brush.
Ensure that the cavity does not contain any leftover packaging, such as polystyrene pellets or wooden piece which may cause risk of fire
Wipe the smooth surfaces in the cavity and the doar with a soft, wet cloth.
To remove the new-appliance smell, heat up the appliance when empty and with the oven doar closed.
Keep the kitchen highly ventilated while the appliance is heating up first time. Keep children and pets out of the kitchen during this time. Close the doar to the adjacent rooms.
Adjust the settings indicated. You can find out how to set the heating type and the temperature in the next section. Heating Mode Temperature 250ºC Settings Time
After the appliance has cooled down: Clean the smooth surfaces and the door with soapy water and a dish cloth. Dry all surfaces. Install the side-racks.
Setting the time Before the oven can be used, the time should be set.
Initi ally power on, the hour bit "00" flashes, and the hour bit of the clock is adjusted by " " or +/- key.
2. Press " " to confirm, the minute position "00" flashes, adjust the clock minute position by
or +/-, and press " " to complete the setting.NOTE:
1. If you need to modify the clock again, please hold the key for 3 seconds and refer to
steps 1 and 2 to complete the modification.2.The clock has a 24 hour display.
Your device has multiple modes of operation to make your device easier to use. To help you find the right way to heat them, we explain the differences and the range of applications here. Baking function General operation: select grill function, adjust time or temperature, start cooking. Types of Heating Temperature Use Conventional30~250ºCFor traditional baking and roasting on one level. Especially suitable for cakes with moist toppings. Convection50~250ºCFor baking and roasting on one or more levels. Heat comes from the ring heater surrounding the fan evenly. 140~240ºCFor energy-saved cooking.Conventional + Fan50~250ºCRadiant Heat150~250ºCFor baking and roasting on one or more levels. The fan distributes the heat from the heating elements evenly around the cavity. For grilling small amounts of food and for browning food. Please put the food in the center part under the grill heating element. Double Grill + Fan50~250ºCFor grilling flat items and for browning food. The fan distributes the heat evenly around the cavity. 30~45ºCFor making yeast dough and sourdough to prove and culturing yogurt.Bottom Heat30~200ºCFor adding extra browning to the bases of pizzas, pies, and pastries. Heating comes from the bottom heater. ECO Dough proving
Drying function It is used to dry th
furnace chamber and prevent bact eria from growing
V.2Conventional +steam 160-230°C For baking and r oasting on one or more levels. Heat comes from the ring heater surrounding the fan evenly. Con vec tion +steam 160 -250°C For baking and roasting on one or more levels. The fan distributes the heat from the heating elements evenly around the cavity. Conventional + Fan+steam 160-230°C For add extra browning t o the bases of pizzas, pies, and pastries. Heating come from the bottom heater. Bottom Heat +steam 160-200°C For grilli
ood and for browning food. Please put the food in the center part under the grill heating element. Radiant Heat +steam 160-235°C Note
1. Before using the steam baking function, please add pure water to the tank.
2. The steam levels are L1~L3, and the amount of steam increases accordingly.
3. When the steam grill function is activated, in addition to the barbecue icon
will displayed, steam icon will also be displayed. Use For traditional baking and roasting on one level. Esp
cially s uitable for cakes with moist toppings. Steaming roast function General operation: select the steaming function, adjust the cooking time/ temperature/steam amount, and start cooking. The steam grill function can make the food softer and the skin crispier. Types of Heating Temperature Caution! If you open the appliance door during an on-going operation, the operation will be paused. Please be especially careful with the risk of burns. Cooling fan The cooling fan switches on and off as required. The hot air escapes above the door.
V.2Caution! Do not cover the ventilation slots. Otherwise, the appliance may overheat. To make the appliance cool down more quickly after the operation, the cooling fan may continue to run for a period afterwards. Automatic menu General operation: Select automatic menu function, select menu, start cooking. Bake menu Menu
Crab in a salt crust 200°C 23 min Yes
Fillet of sole fish with fresh herbs 220°C 10 min Yes
Oven-roasted chicken with root vegetables and potatoes
Harissa chicken with olives and chickpeas 160°C 40 min Yes
Apple strudel with vanilla sauce 180°C 30 min Yes Display Function or Temperature Cooking time Preheating
Roasted pumpkin with goat's cheese and rocket 200°C 20 min Yes 100°C
Australian pumpkin soup 100°C 40 min
Fish curry with peaches 100°C 25 min
Sea bass with vegetables 100°C 30 min NO
Chicken breast with sundried tomatoes 100°C 40 min
To warm tableware, it is beneficial to remove the side-racks and the heating modes “Hot Air Grilling” and “Fan Heating” with temperature setting of 50°C are useful. “Hot Air Grilling” should be used, if more than half of the cavity floor is covered by the tableware. Due to an optimum evenness of heat distribution inside the cavity during “Fan Heating”, the fan will work at certain times of the heating process, to guarantee the best possible performance.
V.2USING YOUR APPLIANCE
After the oven has been electrically connected, touch the oven-function symbol to select function s, use the slider or “+/-“symbol to set cooking
ouch the symbol, the oven begin to work. If you don't, the oven will go back to clock after 5 minutes. During the cooking process, you can touch to cancel it. NOTE: After temperature setting, you can touch clock symbol to set the cooking duration time, you can set it by slider or “+/-“symbol. Quick preheat Quick preheating can be used to shorten cooking time. Please put the food into the oven after the preheating temperature is reached. Change during cooking To change the cooking time, temperature, or amount of steam in the cooking process, click the key and use the slider or the "+/-" key to adjust. When you want to cancel the cooking process, please touch . Notes Changing modes/temperature/rest cooking time may have some negative influences on the result of cooking, we warmly recommend you not to do so unless you are well experienced on cooking. Caution! After the appliance is switched on, it becomes very hot especially inside the cavity. Never touch the interior surfaces of the appliance or the heating elements. Use oven gloves to remove accessories or ovenware from the cavity, and allow the appliance to cool down. Keep children at a safe distance at the same time to avoid the injury of burns. Click the symbol. The sign on the screen will light up. Notes
V.2Childproof lock Your appliance has a childproof lock so that children cannot switch it on accidentally or change any settings. Long press for 3 seconds, the oven enters or exits the child lock function. Power saving mode ln standby mode, after 10 minutes without operation, it will automatically enter the powersaving state or press the power button for 3 seconds to enter the power-saving state. ln the state of power saving, press any key to go back to standby state. Drying function ln standby state, press for 8 times to enter the drying function, adjust the drying time through slider or +/- key, and press the start key to work. Descaling function
1. Take out the water box, add water and half a packet of citric acid to the
water box, stir well, and put the water box back to the tank seat.
2. ln standby mode, press the key once and then enter the desiccating
function through the slider and press +/-, and dE5 is displayed on the screen.
key to start the work. When the time is counted down to "08:00 min", water shortage is indicated.
4. Take out the tank, add water and put it back into the tank seat. Click
the key to restart work. Timer function
1. After the clock is set, press the
key to set the end time.
2. Please refer to the "Clock Setup" step to set the end of the timer.
3. Select the function (automatic menu and preheat function do not
support timer), adjust the cooking time/temperature/steam amount, and press the key to start the work.
key to query the appointment time.
1. When oven is under standby status, press steam key can add steam after
2. Steam can be manually add by pressing steam key during cooking.
3. When oven is under standby status, press steam key can set steam mode
and add steam for cooking. Steam level default setting as level 1. Notes Steam has three levels, the amount of steam increases with increase of level. Press steam key once and the level will be 1. Pressing twice will set level 2 and three times for level 3. Whatever level is chosen, light on screen right will show the level (Ll
L3). Pressing the steam key four times will cancel adding of steam and icon for steam and steam level will turn off . Due to vibration caused by transportation, water box may be popping out after opening the package. Remember to push it back when installing. Water box Adding water
1. Press water box and take it
out, then take out sealing gasket and add water Method 2
2. Press water box and take
out sealing gasket, then add Notes When the cooking is over, please pour out the rest of the water box and dry the water box.
ACCESSORIES Your app liance is accompanied by
range of accessories. Here, you can find an overview of the accessories included and information on how to use them correctly. Accessories included Your appliance is equipped with the following accessories: Wire Rack For ovenware, cake tins and ovenproof dishes. For roasts and grilled food 2 Baking Trays For tray bakes and small baked products. You can use the tray to place liquid or cooking food with juice. Only use original accessories. They are specially adapted for your appliance. You can buy accessories from the after-sales service, from specialist retailers or online. Meat probe Can be used to check the inner temperature of meat. To connect it, unscrew the nut located in the upper right side of the oven and insert the plug. When connected and inserted into the meat, a new function icon will light up in the oven display. This accessory can only be used in normal baking/roasting mode. First, select the desired program and the temperature you wish the meat to reach. The oven will automatically set a timer, and it will display END and sound an acoustic alert when it reaches the set temperature. Note The accessories may deform when they become hot. This does not affect their function. Once they have cooled down again, they regain their origi nal shape. Inserting accessories The cavity has five shelf positions. The shelf positions are counted from the bottom up. The accessories can be pulled out approximately halfway without tipping. Notes
1. Ensure that you always i
nsert the accessories into the cavity the right way round.
2. Always insert the accessories fully into the cavity so that they do not
touch the appliance door.
V.2 Meat probe Insert into the center of meat or poultry away from fat or bone.3
Locking function Accessories can be approximately pulled halfway out until they lock in place. The locking function prevents accessories from tilting with the gravity of food and accessories themselves while they get pulled out. Accessories should be inserted into cavity correctly for the tilt protection. When inserting the wire rack, ensure the wire rack is onto the right facing direction like the picture 1 and 3. When inserting the backing tray, ensure the backing tray is onto the right facing direction like the picture 1 and 4.
1. Remove all accessories, which are not necessary during the cooking &
2. Do not open the door during the cooking & baking process. If you open
the door during cooking & baking, switch the mode to "Lamp" (without changing the temperature setting)
3. Decrease the temperature setting in not fan assisted modes to 50°C at
5 min to 10 min before end of cooking & baking time. So you can use the cavity heat to complete the process.
4. Use "Fan Heating", whenever possible. You can reduce the temperature
5. You can cook and bake using “Fan Heating” on more than one level at
the same time. If it is not possible to cook and bake different dishes at the same time, you can heat one after the other to use the preheat status of the oven.
6. Do not preheat the empty oven, if it is not required.
7. If necessary put the food into the oven immediately after reaching the
temperature indicated by switching off the indicator light the first time.
8. Do not use reflective foil, like aluminum foil to cover the cavity floor.
9. Use the timer and/or a temperature probe whenever possible.
10. Use dark mat finish and light weighted baking moulds and containers.
11. Try not to use heavy accessories with shiny surfaces, like stainless
V.2HEALTH Acrylamide occurs mainly by heating up starchy food (i.e. potato, French fries, bread) to very high temperatures over long times. Tips
1. Use short cooking times.
to a golden yellow surface color, do not burn it to dark brown colors.
3. Bigger portions have less acrylamide.
4. Use “Fan Heating” mode if possible.
5. French fries: Use more than 450g per tray, place them evenly spread
and turn them time by time. Use the product information if available to get the best cooking result. ENVIRONMENT The european directive 2012/19/UE on wasted electrical and electronic equipments (WEEE), requires that household electrical appliances must not be disposed of in the normal unsorted municipal waste stream. appliances must be collected separately in order to optimize the recovery and recycling of the materials they contain, and reduce the impact on human health and the environment. The crossed out “wheeled bin” symbol on the product reminds you of your obligation, that when you disposed of the appliances, it must be separately collected. Consumers should contact their local authority or retailer for information concerning the correct disposal of their old appliance.
MAINTENANCE YOUR APPLIANCE
Cleaning Agent With good care and cleaning, your appliance will retain its appearance and remain fully functioning for a long time to come. We will explain here how you should correctly care for and clean your appliance. To ensure that the different surfaces are not damaged by using the wrong cleaning agent, observe the information in the table. Depending on the appliance model, not all of the areas listed may be on/in your appliance.
V.2Caution! Risk of surface damage Do not use: Harsh or abrasive cleaning agents. Cleaning agents with a high alcohol content. Hard scouring pads or cleaning sponges. High-pressure cleaners or steam cleaners. Special cleaners for cleaning the appliance while it is hot.
Wash new sponge cloths thoroughly before use. Tip
ighly recommended cleaning and care products can be purchased through specialized retailers. Observe the respective manufacturer's instructions. CleaningArea Appliance exterior Hot soapy water:
ean with a dish cloth and then dry with a soft cloth. Remove flecks of limescale, grease, starch and albumin (e.g. egg white) immediately. Corrosion can form under such flecks Special stainless steel cleaning products suitable for hot surfaces are available from our after-sales service or from specialist retailers. Apply a very thin layer of the cleaning product with a soft cloth. Hot soapy water: Clean with a dish cloth and then dry with a soft cloth. Do not use glass cleaner or a glass scraper. Hot soapy water: Clean with a dish cloth and then dry with a soft cloth. Hot soapy water: Clean with a dish cloth and then dry with a soft cloth. Do not use glass cleaner or a glass scraper. Appliance exterior Stainless steel front Plastic Painted surfaces Control panel Door panels Hot soapy water: Clean with a dish cloth and then dry with a soft cloth. Do not use a glas s scraper or a stainless steel scouring pad.
Cleaning Area Appliance exterior Door handle Hot soapy water: Clean with a dish cloth and then dry with a soft cloth. If descaler comes into contac t with the door handle, wipe it off immediately. Otherwise, any stains will not be able to be removed. Enamel surfaces and self-cleaning surfaces Observe the instructions for the surfaces of the cooking compartment that follow the table. Glass cover for the interior lighting Hot soapy water: Clean with a dish cloth and then dry with a soft cloth. If the cooking compartment is heavily soiled, use oven cleaner. Door seal Do not remove Hot soapy water: Clean with a dish cloth. Do not scour. Stainless steel door cover Stainless steel cleaner: Observe the manufacturer's instructions. Do not use stainless steel care products. Remove the door cover for cleaning. Accessories Hot soapy water: Soak and clean with a dish cloth or brush. If there are hea vy deposits of dirt, use a stainless steel scouring pad.
ails Hot soapy water: Soak and clean with a dish cloth or brush.
ull-out system Hot soapy water: Clean with a dish clo th or a brush.
o not remove the lubricant while the pull-out rails are pulled out. It is best to clean them when they are pushed in. Do not clean in the dishwasher. Meat thermometer Hot soapy water: Clean with a dish cloth or a brush. Do not clean in the dishwasher. Notes Slight differences in color on the front of the appliance are caused by the use of different materials, such as glass, plastic and metal. Shadows on the door panels, which look like streaks, are caused by reflections made by the interior lighting.
Enamel is baked on at very high temperatures. This can cause some slight color variation. This is normal and does not affect operation. The edges of thin trays cannot be completely enameled. As a result, these edges can be
ough. This does not impair the anti-corrosion protection. Always keep the appliance clean and remove dirt immediately so that stubborn deposits of dirt do not build up. Tips
1. Clean the cooking compartment after each use. This will ensure that dirt
2. Always remove flecks of lime scale, grease, starch and albumin (e.g. egg
3. Remove flecks of food with sugar content immediately, if possible, when
the fleck is still warm.
4. Use suitable ovenware for roasting, e.g. a roasting dish.
APPLIANCE DOOR With good care and cleaning, your appliance will retain its appearance and remain fully functional for a long time to come. This will tell you how to remove the appliance door and clean it. For cleaning purposes and to remove the door panels, you can detach the appliance door. The appliance door hinges each have a locking lever. When the locking levers are closed, the appliance door is secured in place. It cannot be detached. When the locking levers are open in order to detach the appliance door, the hinges are locked. They cannot snap shut. Warning – Risk of injury! If the hinges are not locked, they can snap shut with great force. Ensure that the locking levers are always fully closed or, when detaching the appliance door, fully open. The hinges on the appliance door move when opening and closing the door, and you may be trapped. Keep your hands away from the hinges.
V.2Removing the appliance door Open the appliance door fully. Fold open the two locking levers on the left and right Close the appliance door as far as the limit stop. With both hands, grip the door on the left- and right-hand side, and pull it out upwards.
Fitting the appliance door Reattach the appliance door in the opposite sequence to removal.
When attaching the appliance door, ensure that both hinges are placed right onto the installing holes of the front panel of the cavity. Ensure that the hinges are inserted into the correct position. You must be able to insert them easily and without resistance. If you can feel any resistance, check that the hinges are inserted into the holes right. Open the appliance door fully. While opening the appliance door, you can make another check if the hinges areonto the right position. If you make the fitting wrong, you will not be able to make the appliance door fully opened. Fold both locking levers closed again. Close the cooking compartment door. By the same time, we warmly recommend you to check one more time, if the door is onto the right position and if the ventilation slots are not half-sealed .
V.2Removing the door cover The plastic inlay in the door cover may become discolored. To carry out thorough cleaning, you can remove the cover. Remove the appliance door like instructed above. Press on the right and left side of the cover. Remove the cover. After removing the door cover, that rest parts of the appliance door can be easily taken off so that you can go on with the cleaning. When the cleaning of the appliance door has finished , put the cover back in place and press on it until it clicks audibly into place. Fitting the appliance door and close it.
V.2Caution! While the appliance door is well installed, the door cover can also be taken off, by this time. Removing the door cover means to set the inner glass of the appliance door free, the glass can be easily moved and cause damage or injury. As removing the door cover and inner glass means to reduce the overall weight of the appliance door. The hinges can be easier to be moved when closing the door and you may be trapped. Keep your hands away from the hinges.
Because of the 2 points above, we strongly recommend you not to remove the door cover unless the appliance door removed. Damage caused by incorrect operation is not covered under warranty. Rails When you want a good cleaning for the rails and cavity, you can remove the shelves and clean it. In this way your appliance will retain its appearance and remain fully functional for a long time to come. Detaching and refitting the rails Inserting the holders Attaching the rails
Change the power cord Position A show the terminal box position on the back of the back outer case and it’s closed. Steps: a. cut off the power, use small fat screwdriver to open the two snap s (1, 2). b. use Phillips screwdriver to take off screws 3, 4 , 5 and 6. c. change the new power cord, fix the yellow/green wire on 3, brown wire on 4, blue wire on 5. d. twist screw 6 to close the terminal box cover and finish the changing.
You can use the steam function of your oven to soften stubborn dirt that may remain inside the appliance for perfect cleaning. Select the Pure Steam programme , with a duration of 10 minutes and a maximum temperature of 100ºC and start the empty oven. After this time, use a cloth or sponge to carefully remove the residues. It is very important to dry the oven after each use of the steam functions for better maintenance of the appliance. You can do this with a cloth, or by using the Drying function included in the oven.Knobs can no longer be turned easily. There is dirt under knobs Knobs can be removed. To disengage knobs, simply remove them from the support. Alternatively, press on the outer edge of knobs so that they tip and can be picked up easily. Carefully clean the knobs using a cloth and soapy water. Dry with a soft cloth. Do not use any sharp or abrasive materials. Do not soak or clean in the dishwasher. Do not remove knobs too often so that the support remains stable Fan does not work all the time in the mode: “Fan Heating” This is a normal operation due to the best possible heat distribution and best possible performance of the oven. After a cooking process a noise can be heard and a air flow in the near of the control panel can be observed. The cooling fan is still working, to prevent high moisture conditions in the cavity and cool down the oven for your convenience. The cooling fan will switch off automatically.
CURE YOUR APPLIANCE WHEN NEEDED
If a fault occurs, before calling the after-sales service, please ensure that is not because of incorrect operations. R efer to the fault table and attempt to correct the fault yourself. You can often easily rectify technical faults on the appliance yourself. If a dish does not turn out exactly as you wanted, you can find many tips and instructions for preparation at the end of the operating manual. Fault The appliance does not work. Knobs have fallen out of the support in the control panel. Possible Cause Faulty fuse Power cut Notes/Remedy Check the circuit breaker in the fuse box. Check whether the kitchen light or other kitchen appliances are working. Knobs have been accidentally disengaged Knobs can be removed. Simply place knobs back in their support in the control panel and push them in so that they engage and can be turned as usual.
V.2Warning-Risk of electric shock! Incorrect repairs are dangerous. Repairs may only be carried out and damaged power cables replaced by one of our trained after-sales technicians. If the appliance is defective, unplug the appliance from the mains or switch off the circuit breaker in the fuse box. Contact the after-sales service. Maximum operating time The maximum operating time of this appliance is 9 hours, to prevent that you forget to turn off the power. Cooking compartment bulbs To light the interior of your cooking compartment, your appliance has one or more long-life LED bulbs. However, if ever an LED bulb or the bulb's glass cover is defective, call the after-sales service. The lamp cover must not be removed. The lamp doesn’t turn on The lamp needs to be replaced. The food is not sufficiently cooked in the time given by the recipe. Uneven browning A temperature different from the recipe is used. Double check the temperatures. The in- gredient quantities are different to the recipe. Double check the recipe. The food is not sufficiently cooked in the time given by the recipe. A temperature different from the recipe is used. Double check the temperatures. The ingredient quantities are different to the recipe. Double check the recipe. The temperature setting is too high, or the shelf level could be optimized. Double check the recipe and settings. The surface finish, color and/or material of the baking ware were not the best choice for the selected oven function. When using radiant heat, such as "Top & Bottom Heating" mode, use matt finished, dark colored and light weighted ovenware.
V.2Rated voltage: 220-240V Rated frequenc y: 50Hz-60Hz Electric power: 2.76 kW Company: EAS ELECTRIC SMART TECHNOLOGY S.L.U P.I. San Carlos, Camino de la Sierra S/N Parc. 11 03370 Redován (Alicante, SPAIN) CUSTOMER SERVICE Our after-sales service is there for you if your appliance needs to be repaired. We will always find an appropriate solution. Please contact the dealer where you bought this appliance. When calling us, please give the model number and S/N so that we can provide you with the correct advice. The rating plate bearing these numbers can be found when you open the appliance door. Model: EMV72VAP
To save time, you can make a note of the model of your appliance and the telephone number of the aftersales service in the space below, should it be required. MAINTENANCE CARD Model number Serial number Purchasing date Purchasing store Warning This appliance shall be installed in accordance with the regulations in force and only used in a well ventilated space. Read the instructions before installing or using this appliance. Note Please note that a visit from an after-sales service engineer is not free of charge, even during the warranty period. Rely on the professionalism of the manufacturer. You can therefore be sure that the repair is carried out by trained service technicians who carry original spare parts for your appliances. Above, thank you again for buying your EAS Electric Built-in Oven, and we wish that our appliance will bring you delicious food and happy life.
You want to cook your own recipe Try to use settings of similar recipes first and optimize the cooking process due to the result. Is the cake baked ready? Put a wooden stick inside the cake about 10 minutes before the given baking time is reached. If there is no raw dough at the stick after pulling out, the cake is ready. The cake loses massive volume during cooling down after baking Try to lower the temperature setting by 10°C and double check the food preparing instructions regarding the mechanical handling of the dough. The height of the cake is in the middle much higher than at the outer ring Do not grease the outer ring of the spring form The cake is too brown at the top Use a lower shelf level and or use a lower set temperature (this may lead to a longer cooking time) The cake is too dry Use a 10°C higher set temperature (this may lead to a shorter cooking time) The food is good looking but the humidity inside is too high Use a 10°C lower set temperature (this may lead to a longer cooking time) and double check the recipe The browning is uneven Use a 10°C lower set temperature (this may lead to a longer cooking time). Use the “Top & Bottom Heating” mode on one level. The cake is less browned on the bottom Choose a level down Baking on more than one level at the same time: One shelf is darker than the other. Use a fan assisted mode for baking at more than one level and take out the trays individually when ready. It is not necessary that all trays are ready at the same time. Condensing water during baking Steam is part of baking a nd cooking and moves normally out of the oven together with the cooling air flow. This steam may condensate at different surfaces at the oven or near to the oven and build water droplets. This is a physical process and cannot be avoid completely.
V.2Which kind of baking ware can be used? Every heat resistant baking ware can be used. It is recommended not to use aluminum in direct contact with food, especially when it is sour. Please ensure a good fitting between container and lid.
ow to use the grill function? Preheat the oven for 5 minutes and place the food in the level given by this manual. Close the oven door when you use any grilling mode. Do not use the oven when the door is open, except for load / remove / check the food.
ow to keep clean the oven during grilling ? Use the tray filled with 2 liter of water in at level 1. Nearly all fluids drip down from the food placed on the rack will captured by the tray. The heating element in all grilling modes are switching on and off over the time. It is a normal operation and depends on the temperature setting. How to calculate the oven settings, when the weight of a roast is not given by a recipe? Choose the settings next to the roast weight and change the time slightly. Use a meat probe if possible to detect the temperature inside the meat. Place the head of the meat probe carefully in the meat, due to the manufacturer instructions. Make sure, that the head of the probe is placed in the middle of the biggest part of the meat, but not in the near of a bone or hole. What happens if a fluid is poured to a food in the oven during the baking or cooking process? The fluid will boil and steam will arise as a normal physical process. Please be careful, because the steam is hot. See also “Condensing water during baking” for more information. If the fluid contains alcohol, the boiling process will be quicker and can lead to flames in the cavity. Make sure, that the oven door is closed during such kind of processes. Please control the baking or cooking process carefully. Open the door very gentle and only if necessary.
60350-1 Please note the following information: The measurement is carried out in the “ECO” mode to determine the data regarding the forced air mode and the label-class. The measurement is carried out in the “Top & Bottom Heating” mode to determine the data regarding the conventional mode. During the measurement only the necessary accessory is in the cavity. All other parts have to be removed. The oven is installed as described in the installation guide and placed in the middle of the cabinet. It is necessary for the measurement to close the door like in the household, even when the cable disturbs the sealing function of the gasket during the measurement. To make sure that there are no negative effects regarding the disturbed sealing due to the energy data, it is necessary to close the door carefully during the measurement. It is may be required to use a tool to guaranty the sealing of the gasket like in the household, where no cable disturbs the sealing function. For the determination of the cavity volume carried out for the usage “Defrost”, to ensure an efficient use of the oven, all accessories including sideracks are removed.
ECO mode is heat by bottom and ring heater, with this mode you can save energy during cooking. RECIPES Accessories
Level Time(min) Pre-heat Challah 1 tray 1 tray 1 tray
ck and glass plate Rack and glass plate Springform Φ20cm
ck and round plate Round form
Pork Roast Clafouti Cherry Cake Beef Roast 1.3kg Brownies Potato Gratin Lasagne Cheese Cake EAS Electric EMV72VAP Mass of the Oven No of Cavities Heat Source Usable Volume ECelectric, cavity (Conventional) ECelectric, cavity (Forced Air) EEICavity Energy Efficiency Class (A+++ to D)
Note All oven modes described on Page 8 and 15 are main functions of the oven. 45kg 1.06kWh/cycle 0.63kWh/cycle
V.235 V.2 WARRANTY CONDITIONS This appliance is guaranteed for three years from the date of sale against all manufacturing defects, including labour and spare parts. In order to justify the date of purchase, it will be compulsory to present the invoice or purchase receipt. The conditions of this warranty apply only to Spain and Portugal. If you have purchased this product in another country, please consult your distributor for the applicable conditions. WARRANTY EXCLUSIONS
1. Remote controls, drain intake rubbers, dockings and door seals, weather stripping.
2. Damage to enamels, paints, nickel plating, chrome plating, oxidation or other types of
aesthetic parts or components that do not affect the internal functioning of the appliance.
3. Damage to wear parts due to use, corrosion or oxidation, whether caused by normal use
of the appliance or accelerated deterioration due to unfavorable environmental or climatic circumstances. Not suitable for outdoor use.
4. Damage to fragile pieces of glass, glass ceramic, plastics, handles, baskets, doors or light
bulbs when their failure or breakage is not attributable to a manufacturing defect.
5. Faults produced by fortuitous causes or accidents of force majeure, or as a consequence
of abnormal, negligent or inappropriate use of the device.
6. Civil liabilities of any nature.
7. Consequential damage to the appliance as long as it has not been caused by an internal
8. Maintenance or upkeep of the appliance: periodic reviews, adjustments and greases.
9. Faults that accessories and complements, adapters, external cables, bags, spare parts of
all kinds, lamps, as well as any part considered consumable by the manufacturer, may suffer. 10.Faults caused by incorrect or illegal installation, inadequate ventilation, lack of groun-ding in the home, power disturbances, inappropriate modifications or use of non-original spare parts.
11. Appliances used in industrial applications or for commercial purposes.
12. Appliances with illegible or altered serial number.
13. Defects or breakdowns produced as a result of fixes, repairs, modifications, or disassembly
of the installation of the device by the user or by a technician not authorized by the manufacturer, or as a result of manifest non-compliance with the manufacturer's instructions for use and maintenance.
14. During the warranty period it is essential to keep all manuals together with the
equipment. If the equipment is sold, donated or given away, the manual and all related documents must be given to the new user. If any of these are lost, their replacement cannot be claimed.
15. Faults that have their origin or are a direct or indirect consequence of: contact with
liquids, chemicals and other substances, as well as conditions derived from the climate or the environment: earthquakes, fires, floods, excessive heat or any other external force , such as insects, rodents and other animals that may have access to the interior of the machine or its connection points.
16. Damages derived from terrorism, riot or popular tumult, legal or illegal demonstrations
and strikes; facts of actions of the Armed Forces or the State Security Forces in times of peace; armed conflicts and acts of war (declared or not); nuclear reaction or radiation or radioactive contamination; vice or defect of the goods; facts classified by the Government of the Nation as "national catastrophe or calamity". Design and specifications are subject to change without notice for product improvement. Any changes to the manual will be updated on our website, you can check the latest version. www.easelectric.esINSTRUCTIONS DE SÉCURITÉ Avertissement Causes de dommage