WU7092BM - Basket Atag - Free user manual and instructions
Find the device manual for free WU7092BM Atag in PDF.
User questions about WU7092BM Atag
0 question about this device. Answer the ones you know or ask your own.
Ask a new question about this device
Download the instructions for your Basket in PDF format for free! Find your manual WU7092BM - Atag and take your electronic device back in hand. On this page are published all the documents necessary for the use of your device. WU7092BM by Atag.
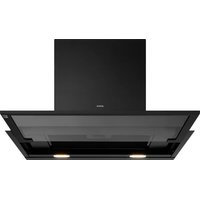
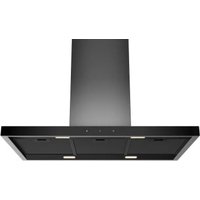
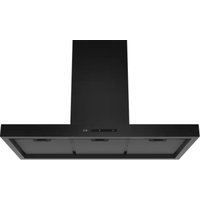
USER MANUAL WU7092BM Atag
Instructions for use 3 - 13
1. On/off button (speed 1)
3. Speed button 3 and intensive setting
USE Operation Switching cooker hood on/off
1. Touch the on/off key.
The on/off key lights up. The cooker hood switches on at speed setting 1.
2. Touch the on/off key again.
You will hear a double beep, and the cooker hood switches off. If speed setting 2 or 3 or the intensive setting is switched on, the controls switch on speed setting 1 first. Touch the on/off key again to switch the cooker hood off. Increasing speed
1. Touch speed setting key 2 or 3.
The speed setting key lights up. The cooker hood switches to the selected speed setting. Switching to intensive setting A timer function is automatically used for the intensive setting. The duration is 4 minutes, after which the cooker hood switches to speed setting 2.
1. Touch the on/off key.
The on/off key lights up. The cooker hood switches on at speed setting 1.
2. Touch speed setting key 3.
Speed setting key 3 lights up.
3. Touch speed setting key 3 again.
Speed setting key 3 flashes. The intensive setting is switched on. Touch the on/off key or any other key to stop the intensive setting at any time.EN 6 Switching the lighting on and off
1. Touch the lighting key.
The lighting key lights up. The lighting switches on.
2. Touch the lighting key again.
The lighting switches off. Switching on the timer
1. Switch on the cooker hood at speed 1, 2 or 3.
2. Touch the timer key.
The timer key flashes and a single beep sounds. The timer for the motor is activated; after 10 minutes the cooker hood switches off. Touch the timer key to stop the timer at any time. Switching on Clean Air function
1. Touch the on/off key and the desired speed setting key 2, 3 or the
timer key (for speed 1) at the same time. The corresponding key lights up.
2. Then, within 5 seconds, touch the on/off key again.
The Clean Air function is activated. The cooker hood will be switched on for 10 minutes every hour for the next 24 hours. The speed setting key flashes while the extraction is active. After 10 minutes, the cooker hood switches off automatically. The Clean Air function cannot be used when the intensive setting is selected. Grease filter cleaning indicator After 100 hours of use of the cooker hood, a beep sounds periodically during use. The on/off key flashes continuously when the cooker hood is switched off. The grease filter must be cleaned.
- To reset the cleaning indicator, touch the on/off key twice with the cooker hood switched off. You will hear a confirmation beep for 3 seconds. After 20 hours, the filter cleaning indicator automatically resets. USEEN 7 Carbon filter cleaning indicator After 200 hours of use of the cooker hood, a beep sounds periodically during use if the carbon filter contamination indicator is activated. The lighting key flashes continuously when the cooker hood is switched off. The carbon filter must be cleaned or replaced.
- To reset the cleaning indicator, touch the lighting key twice with the cooker hood switched off. You will hear a confirmation beep for 3 seconds. After 20 hours, the filter cleaning indicator automatically resets. Activation of the carbon filter cleaning indicator In standard mode, the carbon filter cleaning indicator is not active. If the cooker hood is used as a recirculation hood, the carbon filter cleaning indicator must be activated.
1. Switch off the cooker hood and the lighting.
2. Touch the timer key for 5 seconds.
The lighting key lights up for 5 seconds as confirmation. Switching off the carbon filter cleaning indicator:
1. Switch off the cooker hood and the lighting.
2. Touch the timer key for 5 seconds.
The on/off key lights up for 5 seconds as confirmation. USEEN 8 Cleaning Attention! Before performing any maintenance operation, isolate the hood from the electrical supply by switching off at the connector and removing the connector fuse. Or if the appliance has been connected through a plug and socket, then the plug must be removed from the socket. The cooker hood should be cleaned regularly (at least with the same frequency with which you carry out maintenance of the fat filters) internally and externally. Do not use abrasive products. Do not use alcohol! Attention! Failure to carry out the basic cleaning recommendations of the cooker hood and replacement of the filters may cause fire risks. Therefore, we recommend oserving these instructions. The manufacturer declines all responsibility for any damage to the motor or any fire damage linked to inappropriate maintenance or failure to observe the above safety recommendations. Cooker hood Clean the cooker hood with soapy water and a soft cloth. Then wipe with clean water to rinse. Do not use aggressive cleaning agents such as soda. The cooker hood paintwork will stay looking nice if you wax it occasionally. Stainless steel canopy hoods Do not use any sort of scourer. Treat with a stainless steel care product and polish with the structure of the stainless steel. Metal grease filters Metal grease filters should be cleaned once a month (or when indicated by the filter saturation indication system, if present on your model), using a neutral cleaning agent, preferably by hand or in the dishwasher on a short, low-temperature program. Place the grease filters with the openings facing downwards in the dishwasher so the water can drain out of the filter. Aluminum-colored and black grease filters become dull as a result of dishwasher cleaning agents. This is normal and does not effect the working. MAINTENANCEEN 9 Grease filters Removing the grease filters Switch off the electricity! Remove the plug from the socket or switch the electricity off at the mains. Remove the filters one by one, after having disconnected the relative fastening elements. Carbon filters Cleaning or replacing the carbon filter The carbon filter must always be used if the cooker hood is not ducted. Note:
- The regenerable activated carbon filter can be washed by hand or in the dishwasher at a maximum temperature of 65 °C. The washing cycle must be done without other dishes and without dishwasher detergent. Do not use any cleaning agents!
- Remove excess water. Be careful to avoid damaging the filter. Let the filter dry in the oven for at least 1 hour at a maximum temperature of 80 °C. After a maximum of 3 years (or when the filter is damaged or no longer works properly), the filter will need to be replaced.
- It is important that the grease filters and the regenerable activated carbon filter are properly dried before installation. MAINTENANCEEN 10 Position the activated carbon filter
- Open the front panel and remove the grease filter.
- Centre the carbon filter on the motor frame and turn it to mount it to the motor frame. The functioning:
- More noise is produced when a carbon filter is used than when the cooker hood is used with an exhaust vent.
- A carbon filter functions optimally at a lower motor speed. For this reason, avoid the intensive speed setting.
- Dispose of the old carbon filter properly, with non-recyclable waste. Lighting This hood is fitted with a light system. This light system has to be replaced by an authorized technician. Do not attempt to replace it by yourself. The lamp in this household appliance is only suitable for illumination of this appliance. The lamp is not suitable for household room illumination. MAINTENANCEEN 11 INSTALLATION General This appliance should be connected to the power supply by a recognized fitter who is familiar with, and works according to the correct safety regulations. This appliance meets the European requirements. Important that you know:
- The minimum distance between the supporting surface for the cooking vessels on the gashob and the lowest part of the range hood must be not less than 65 cm. For use with an electric, ceramic or induction hob, this distance must be at least 60 cm.
- If the cooker hood is to be fitted to an existing duct no other appliances, such as a geyser or heater, may be connected to that same duct.
- Consider local regulations with respect to the ventilation of gas appliances.
- The shorter the duct, and the fewer the bends in it, the better the cooker hood will work.
- Before you start drilling check that there are no installation cables present.
- The connecting pipe for the cooker hood has a diameter of 120 mm. It is best also to use a flue pipe of the same diameter.EN 12 INSTALLATION Connection Electric connection This appliance is fitted with an earthed plug, which should be connected to an earthed wall socket. Make sure the supply voltage ratings correspond with those stated on the appliance data plate. The connection to the mains is carried out as follows: BROWN = L live BLUE = N neutral GREEN/YELLOW = earth This canopy hood has been provided with a power plug. When installing the hood, make sure that this plug remains accessible. We recommend installing the wall socket out of view, behind the chimney cover. Attention: If you want to make a fixed connection, ensure that a multi-pole switch with a distance between contacts of 3 mm is installed in the supply cable. max. 140 cm Mounting the cooker hood The last pages of this manual show the steps for mounting the cooker hood.EN 13 APPENDICE Disposal of appliance and packaging By ensuring this product is disposed of correctly, you will help prevent potential negative consequences for the environment and human health, which could otherwise be caused by inappropriate waste handling of this product. The local authorities can provide you with the relevant information. The packaging of this appliance is recyclable. It could have been made from:
- CFK-free polystyrene (PS-hard foam). You need to dispose of these materials responsibly in accordance with official regulations. To draw attention to the fact that the segregated processing of electric household appliances is compulsory, this appliance carries the symbol of a crossed-out dustbin. This means that at the end of its working life, you may not dispose of the appliance as household refuse. Instead, you should hand it in at a special refuse collection centre run by the local authority or at a dealer’s providing this service. Segregated processing of household appliances avoids any negative effects on the environment and public health that might otherwise occur. It enables the recovery of the materials used in the production of this appliance, thus realising considerable savings in terms of raw materials and energy. Declaration of conformity We hereby declare that our products satisfy the applicable European directives, orders and regulations, as well as the requirements stated in the referenced standards.14