
TKA6M273 - Coffee maker BOSCH - Free user manual and instructions
Find the device manual for free TKA6M273 BOSCH in PDF.
| Product type | Drip coffee maker |
| Brand | Bosch |
| Model | TKA6M273 |
| Color | Not specified (usually black or stainless steel) |
| Water tank capacity | Approx. 1.2 L (8 cups of 125 ml) |
| Carafe included | Thermal carafe or glass carafe (depending on model) |
| Aroma intensity function | Yes, extended brewing for a more intense aroma |
| Auto shut-off | Yes, adjustable (20, 40 or 60 minutes) |
| Anti-drip device | Yes |
| Automatic descaling | Yes, with indicator light |
| Water hardness setting | Yes (soft, medium, hard) |
| Power | Approx. 1000 W (estimate) |
| Dimensions (W x H x D) | Approx. 25 x 35 x 30 cm (estimate) |
| Weight | Approx. 2 kg (estimate) |
| Power cord length | Approx. 0.8 m (estimate) |
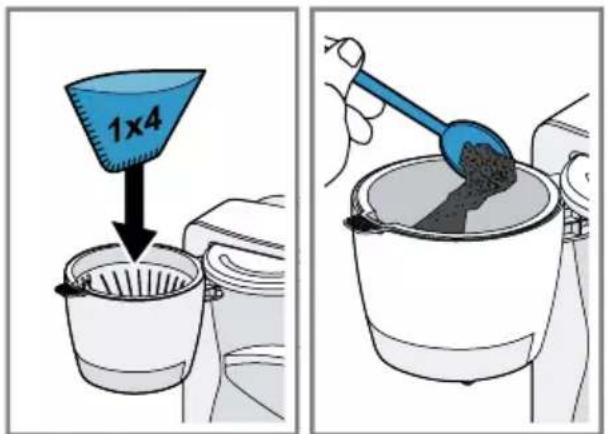
| Filter type | Paper filter size 1x4 or permanent filter (depending on accessories) |
| Care and cleaning | Regular cleaning of removable parts; regular descaling with non-phosphoric product |
| Safety | Auto shut-off, anti-drip device, overheating protection |
| Spare parts | Carafe, filter holder, water tank, permanent filter (if included) |
| Repairability | Only qualified personnel can perform repairs; parts available through Bosch customer service |
Frequently Asked Questions - TKA6M273 BOSCH
User questions about TKA6M273 BOSCH
0 question about this device. Answer the ones you know or ask your own.
Ask a new question about this device
Download the instructions for your Coffee maker in PDF format for free! Find your manual TKA6M273 - BOSCH and take your electronic device back in hand. On this page are published all the documents necessary for the use of your device. TKA6M273 by BOSCH.
USER MANUAL TKA6M273 BOSCH
new device on MyBosch now and get free benefits:
bosch-home.com/ welcome
Filter coffee machine
TKA3M... TKA4M... TKA6M...
text_image
QR code image containing encoded data, no visible human-readable text
| [de] | Scannen Sie den QR-Code oder besuchen Sie die Webseite, um die erweiterten Hinweise zur Benutzung zu öffnen. Dort finden Sie zusätzliche Informationen zu Ihrem Gerät oder Zubehör. |
| [en] | Scan the QR code or visit the website to open the Further Notices for Use. You can find additional information about your appliance or accessory here. |
| [fr] | Scanner le code QR ou visiter le site Web pour ouvrir les informations d'utilisation complémentaires. Vous y trouverez des informations supplémentaires concernant votre appareil ou accessoire. |
| [it] | Scansionare il codice QR oppure visitare il sito Web per indicazioni dettagliate sull'uso. Si trovano informazioni aggiuntive sull'apparecchio o gli accessori. |
| [nl] | Scan de QR-code of bezoek de website om de uitgebreide gebruiksinstructies te openen. Hierin vindt u meer informatie over het apparaat of toebehoren. |
| [da] | Scan QR-koden, eller besøg hjemmesiden, for at åbne de udvidede anvisninger om anvendelse. Der kan der findes yderligere oplysninger om apparatet eller tilbehøret. |
| [no] | Skann QR-koden eller besøk nettstedet for å åpne mer informasjon om bruken. Der finner du mer informasjon om apparatet eller tilbehøret. |
| [sv] | Scanna QR-koden eller gå till webbplatsen och öppna de utökade användningsanvisningarna. Där finns mer information om din apparat eller dina tillbehör. |
| [fi] | Skannaa QR-koodi tai vieraile internet-sivustollamme, jotta voit avata laajennetut käyttötiedot. Sieltä löydät laitetta tai varustetta koskevia lisätietoja. |
| [es] | Para abrir las indicaciones ampliadas sobre el uso, visite la página web o escanee el código QR. Allí encontrará más información sobre el aparato o los accesorios. |
| [pt] | Leia o código QR ou visite a página web para abrir as indicações avançadas relativas à utilização. Aí encontra informações adicionais sobre o seu aparelho ou acessório. |
| [el] | Σαρώστε τον κωδικό QR ή επισκεφτείτε την ιστοσελίδα, για να ανοίξετε τις διευρυμένες υποδείξεις για τη χρήση. Εκεί θα βρείτε πρόσθετες πληροφορίες για τη συσκευή σας ή τα εξαρτήματα. |
| [tr] | Ayrıntılı kullanım bilgilerine ulaşmak için QR kodu taratin veya web sayfasını ziyaret ediniz. Cihaz ve aksesuarlar ile ilgili ayrıntılı bilgileri bu şekilde edinebilirsiniz. |
| [pl] | Aby uzyskać rozszerzone informacje na temat zastosowań urządzenia, należy zeskanować kod QR albo wejść na stronę internetową. Można tam znaleźć dodatkowe informacje na temat posiadanego urządzenia i akcesoriów. |
| [cs] | Pro další informace k používání načtěte QR kód nebo navštivte webovou stránku. Tam najdete další informace ke spotřebiči nebo příslušenství. |
| [sk] | Naskenujte QR kód alebo navštívte webovú stránku, aby ste sa dozvedeli rozšírené informácie o používaní. Tam nájdete d'alšie informácie o vašom spotrebiči alebo príslušenstve. |
| [uk] | Щоб отримати докладніші вказівки з користування, зіскануйте QR-код або відвідайте сайт. Там ви знайдете додаткові відомості про прилад або приладдя. |
| [ru] | Чтобы узнать больше о пользовании, отсканируйте QR-код или зайдите на сайт. Там вы найдете более подробные сведения о приборе и принадлежностях. |

text_image
QR code image containing encoded data, no visible human-readable texthttps://digitalguide.bsh-group.com?mat-no=8001280188
text_image
Diagram illustrating cable installation and outlet installation steps, showing blue cable being inserted into a socket with black arrows indicating direction.2
natural_image
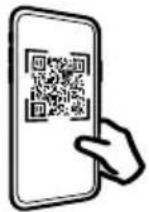
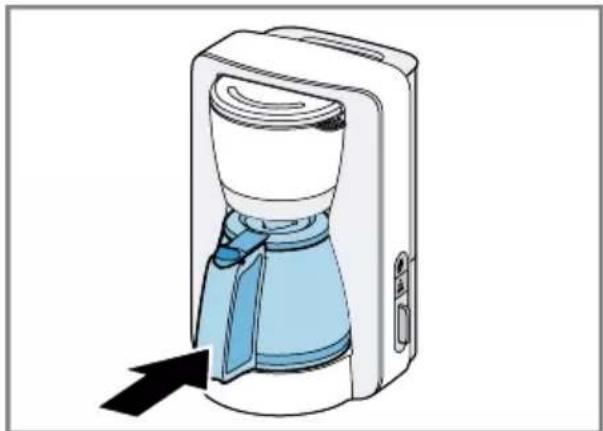
Illustration of a portable coffee maker with a blue cloth cover and black arrow pointing to the lid (no text or symbols)3

text_image
5x 1x4
text_image
ON5
natural_image
Illustration showing a hand pouring liquid into a sink and a water dispenser pouring liquid from a bottle (no text or symbols)6
flowchart
graph TD
    A["① ON"] --> B["②"]
    B --> C["③"]
    C --> D["④"]
    D --> E["⑤"]
    E --> F["⑥ OFF"]
    F --> G["⑦ 5 min."]
    G --> H["⑧ 2x"]
    H --> I["⑨ 6x"]
    I --> J["⑩"]
7

natural_image
Three-panel illustration showing a faucet with blue liquid flowing into a bucket and a bucket pouring liquid from a pan (no text or symbols)8
natural_image
Illustration of a faucet with blue liquid being inserted into a container, shown in two different stages (no text or symbols)9
natural_image
Diagram of a medical device with a blue cover and black arrow indicating a downward motion (no text or symbols present)10
natural_image
Illustration of a blue bucket being inserted into a kitchen sink, with an arrow indicating the direction (no text or symbols present)The image is too blurry to recognize any text content.
text_image
1x412
text_image
CLICKThe image is too blurry to recognize any text content.
natural_image
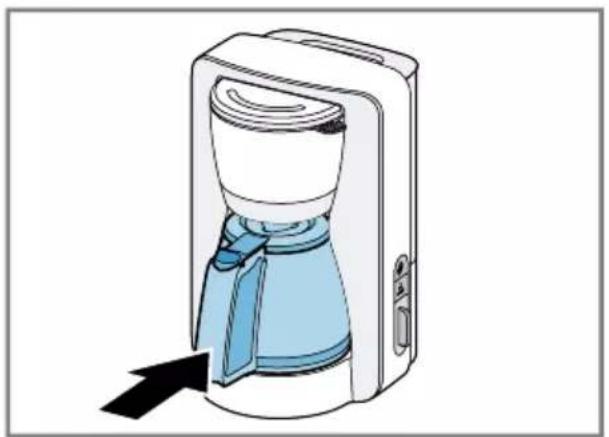
Illustration of a kitchen sink with a blue cloth and arrow pointing to the interior (no text or symbols)14
text_image
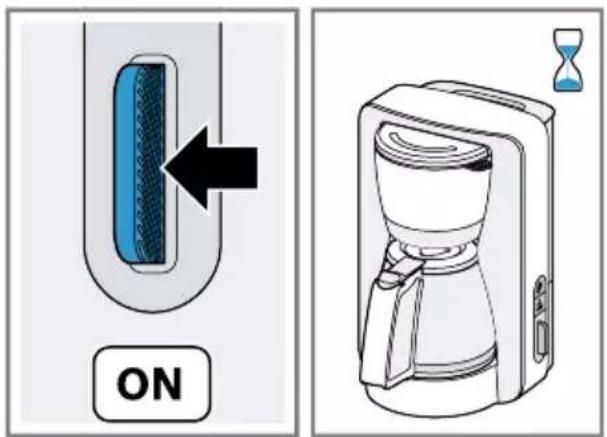
ONThe image is too blurry to recognize any text content.
natural_image
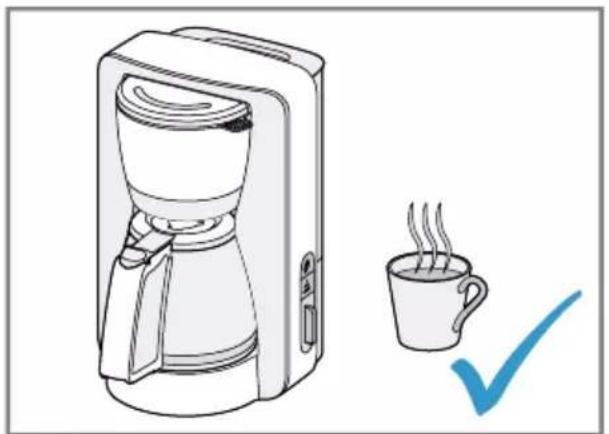
Illustration of a coffee maker with a steaming cup and a checkmark (no text or symbols)16
natural_image
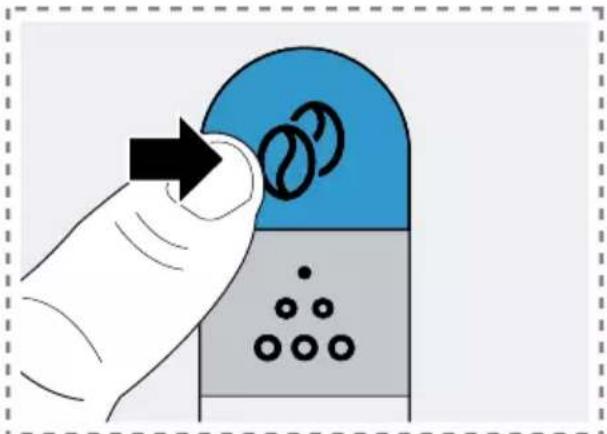
Illustration of a hand pressing down on a blue capsule with circular patterns (no text or symbols)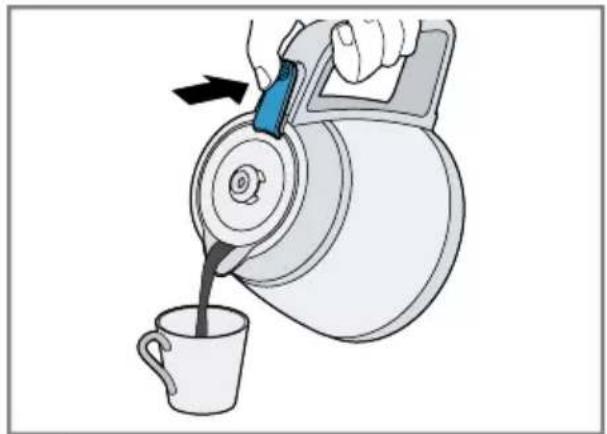
natural_image
Illustration of a hand pouring liquid from a teapot into a cup (no text or symbols)18
text_image
Diagram illustrating a mechanical device with directional arrows and waveform symbols, likely illustrating a motion or signal flow.The image is too blurry to recognize any text content.
text_image
Diagram illustrating a device being opened into a container, showing the process with a speaker icon and directional arrows.20

natural_image
Illustration of a portable coffee maker with a blue cloth cover and black arrow pointing to the lid (no text or symbols)The image is too blurry to recognize any text content.

text_image
6x 1x bosch-home.com TCZ8002A No 0031209322
natural_image
Two-panel illustration showing a container with bubbles and liquid, one partially submerged (no text or symbols)The image is too blurry to recognize any text content.
text_image
>3s ~30 min.24
natural_image
Illustration showing a hand pouring liquid into a sink and a water dispenser with a bag, both without any text or symbols.The image is too blurry to recognize any text content.
flowchart
graph TD
    A["① ON"] --> B["②"]
    B --> C["③"]
    C --> D["④"]
    D --> E["⑤"]
    E --> F["⑥ OFF"]
    F --> G["⑦ 5 min."]
    G --> H["⑧ 6x"]
    H --> I["⑨ 2x"]
    I --> J["⑪ ON"]
26

natural_image
Three-panel illustration showing a faucet with blue liquid flowing into a basin, with a lid and bucket being inserted (no text or symbols)The image is too blurry to recognize any text content.
 | √ | × | × | × | × |
 | √ | √ | × | √ | × |
 | √ | √ | √ | √ | √ |
 | √ | √ | × | × | × |
28

Sicherheit
- Read this instruction manual carefully.
- Keep the instruction manual and the product information safe for future reference or for the next owner.
Only use this appliance:
■ in private households and in enclosed spaces in a domestic environment at room temperature.
■ for normal processing quantities and for normal processing times for domestic use.
■ up to an altitude of max. 2000 m above sea level.
■ for brewing filter coffee.
This appliance may be used by children aged 8 or over and by people who have reduced physical, sensory or mental abilities or inadequate experience and/or knowledge, provided that they are supervised or have been instructed on how to use the appliance safely and have understood the resulting dangers.
Do not let children play with the appliance.
Children must not perform cleaning or user maintenance unless they are at least 8 years old and are being supervised.
Keep children under the age of 8 years away from the appliance and power cable.
- Keep packaging material away from children.
▶ Do not let children play with packaging material. - Keep small parts away from children.
▶ Do not let children play with small parts. - Connect and operate the appliance only in accordance with the specifications on the rating plate.
- Connect the appliance to a power supply with alternating current only via a properly installed socket with earthing.
- The protective conductor system of the domestic electrical installation must be properly installed.
▶ Never operate a damaged appliance.
▶ If the appliance or the power cord is damaged, immediately unplug the power cord or switch off the fuse in the fuse box. - Repairs to the appliance should only be carried out by trained specialist staff.
If the power cord of this appliance is damaged, it must be replaced by the manufacturer, the manufacturer's Customer Service or a similarly qualified person in order to prevent any risk.
▶ Never immerse the appliance or the power cord in water or clean in the dishwasher.
- Liquids must not be spilled on the appliance plug connection.
▶ Ventilate the appliance adequately.
▶ Never operate the appliance in a cupboard.
▶ Never leave the appliance unattended while it is switched on.
▶ Never place the appliance on or near hot surfaces.
▶ Never cover the warming plate.
▶ Only use replacement jugs that are approved for your model by customer service.
▶ Never touch hot appliance parts.
- Allow hot appliance parts to cool down before touching.
▶ Only hold the jug by the handle.
▶ To avoid injuries, only use the appliance for its intended purpose.
▶ Follow the cleaning instructions.
- Clean surfaces which come in contact with food before each use.
- To prevent bacteria forming, do not keep dairy products, baby food or similar foodstuffs in the thermos jug or keep them warm in it.
Preventing material damage
▶ Only use the appliance with fresh, cold, non-carbonated water. Never add milk, ready-made drinks or instant products.
▶ Never operate the appliance when empty or overfilled. Observe the water level indicator.
Leave the appliance to cool down for at least 5 minutes after each use.
▶ Never heat the thermos jug in the microwave or oven.
▶ Never put the thermos jug or the lid of the thermos jug in the dishwasher or in soapy water.
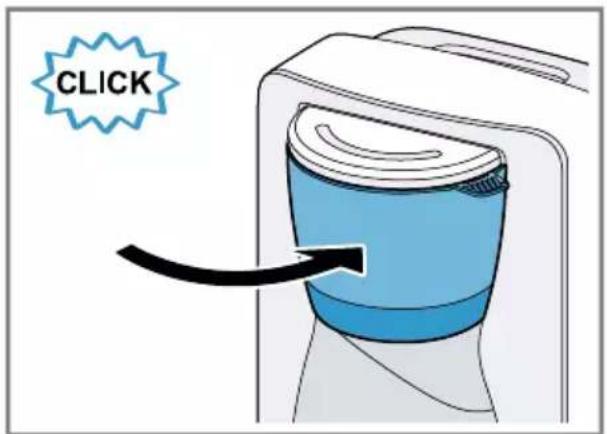
▶ Only place the jug in the appliance with the lid closed.
- Do not remove the jug during the brewing process.
▶ Only use the jug supplied.
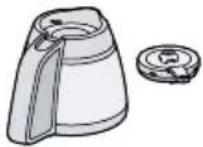
Overview
→ Fig. 1
| A | Coffee machine with thermos jug ^1 |
| B | Coffee machine with glass jug ^1 |
| C | Controls |
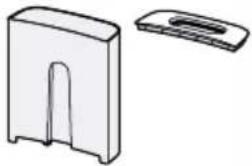
| 1 | Water tank with water level indicator, removable |
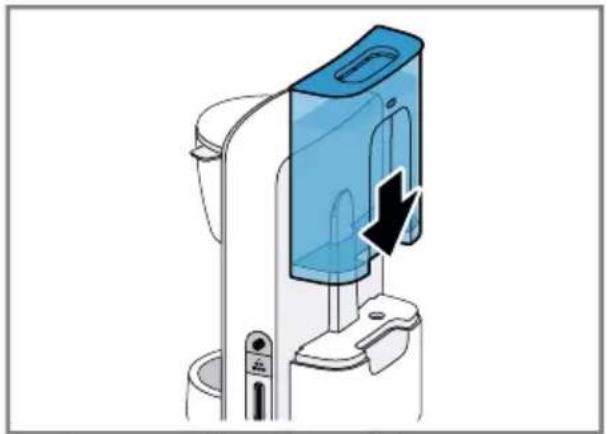
| 2 | Cover for water tank, removable |
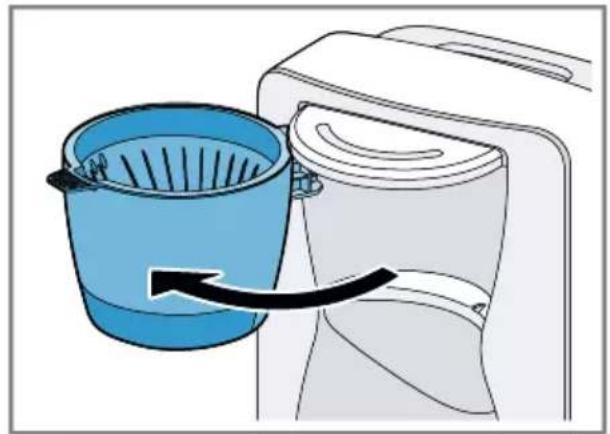
| 3 | Filter holder, removable |
^1 Depending on the model
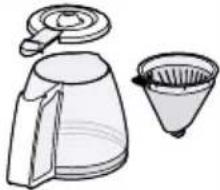
en Preparing the appliance for first use
| 4 | Drip stop |
| 5 | Filter housing, swivelling |
| 6 | Thermos jug with lid ^1 |
| 7 | Lid-opening button |
| 8 | Glass jug with lid ^1 |
| 9 | Warming plate ^1 |
| 10 | Cord storage compartment |
| 11 | Aroma button, illuminated |
| 12 | Descale button, illuminated |
| 13 | On/off button, illuminated |
^1 Depending on the model
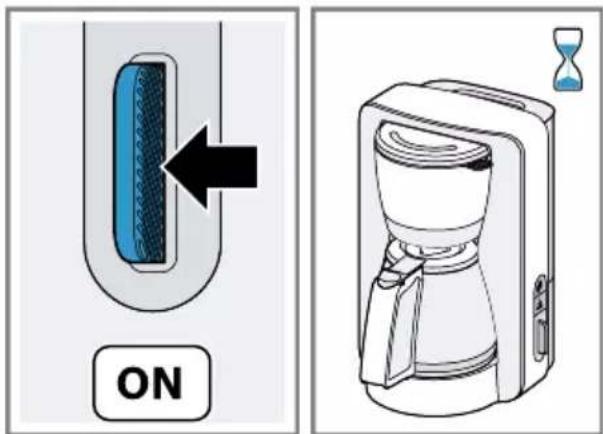
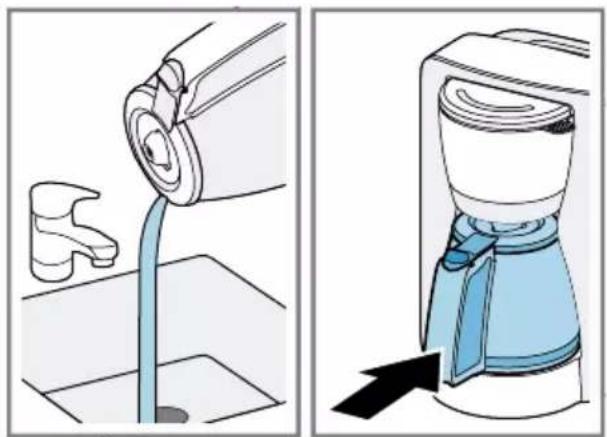
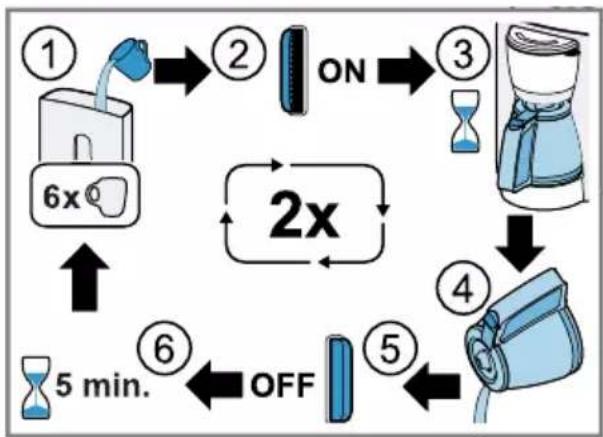
Preparing the appliance for first use
Notes
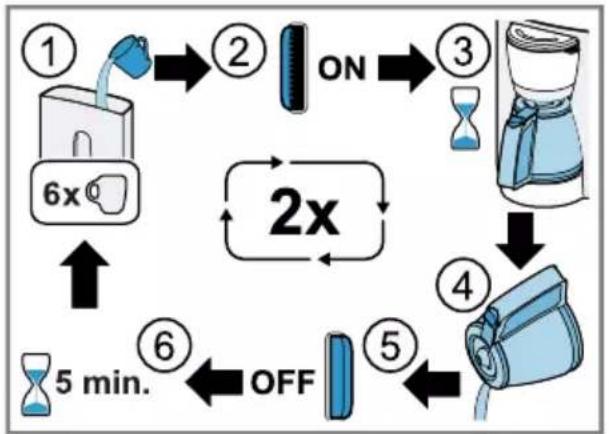
■ Perform the first cleaning process with a mixture of 5 cups of water and 1 cup of vinegar.
■ Before each rinsing process switch off the appliance using the on/off button and leave it to cool down for 5 minutes.
■ Run the rinsing process twice using 6 cups of water without adding vinegar.
Fig. 2 - 8
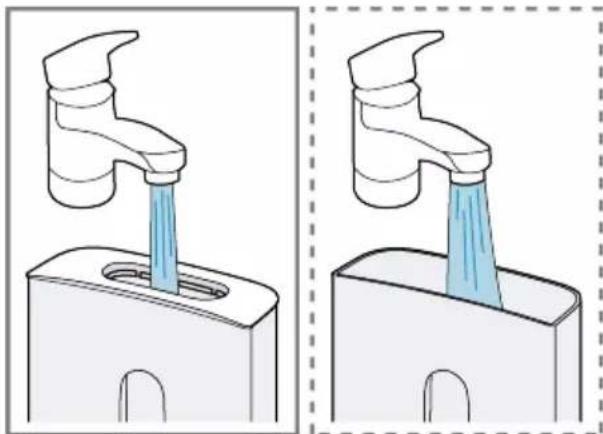
General information
- Observe the water level indicator on the water tank. Fill the water tank to at least the bottom marking line and no more than the top marking line.
■ To attain an adequate coffee temperature and the full aroma, do not brew less than 3 cups of coffee. A cup is approx. 125 ml.
■ Add approx. 6 g medium-ground coffee for each cup.
■ Store ground coffee in a cool place or freeze.
■ Once a pack of coffee has been opened, always close it tightly to preserve the aroma.
■ How coffee beans are roasted affects their flavour and aroma. - Darker roast = more flavour
- Lighter roast = more acidity
■ Condensation may form on the filter housing for technical reasons.
Setting the water hardness
The preset water hardness can be adjusted.
Note: It is important to set the right water hardness so your appliance indicates in good time that it needs descaling.
Requirement: The mains plug is inserted and the appliance is switched off.
- Press and hold and for at least 3 seconds.
√ The last setting saved flashes.
- Press the on/off button within 7 seconds and select the required setting.
| Display Setting | |
| On/off button flashes | Soft |
| flashes | Medium |
| On/off button and flash | Hard ^1 |
^1 Factory setting
Water hardness levels:
| German de-grees in °dH | French hard-ness in °fH | |
| Soft 1-8.4 1-14 | ||
| Me-dium | 8.4-14 14-25 | |
| Hard > 14 > 25 | ||
√ If no further setting is made for 7 seconds, the displayed setting will be saved.
√ The on/off button is no longer lit up and the appliance switches off.
Brewing coffee
Follow the illustrated instructions.
→ Fig. 9 - 16
Aroma intense
Your appliance has a special aroma programme. The coffee is brewed for longer, giving it a more intense aroma.
Using the aroma programme
Note: The aroma programme can only be activated or deactivated within the first minute after brewing starts.
- To activate the aroma programme, press 🔒 button.
→ Fig. 17
√ The symbol lights up white.
√ The aroma programme remains activated for all other brewing processes.
2. To deactivate the aroma programme, press Ⓤ button.
√ The symbol is no longer lit up.
Auto switch-off
Your appliance is equipped with an automatic switch-off function that switches the appliance off after a certain period of time. Models with a thermos jug switch off a few minutes after the end of brewing. Models with a glass jug keep the coffee warm for approx. 40 minutes ^1 and then switch off. The on/off button lights up red until the coffee machine switches off automatically.
Adjusting the switch-off time ^2
The period of time after which the appliance switches off automatically can be adjusted.
Requirement: The mains plug is inserted and the appliance is switched off.
- Press and hold ⓦ for at least 3 seconds.
√ The last setting saved flashes. - Press the on/off button within 7 seconds and select the required setting.
| Display Setting | |
| On/off button flashes | 20 minutes |
| flashes | 40 minutes^1 |
| On/off button and flash | 60 minutes |
^1 Factory setting
√ If no further setting is made for 7 seconds, the displayed setting will be saved.
√ The on/off button is no longer lit up and the appliance switches off.
Thermos jug
The thermos jug has a capacity of around 8 cups.
Notes
■ The seal is not hermetically tight to stop it adhering through a suction effect.
■ Never transport the thermos jug in a horizontal position or coffee might leak out.
■ Do not keep or transport carbonated drinks in the thermos jug.
■ If you rinse the thermos jug with hot water before use, the coffee will stay hot for longer.
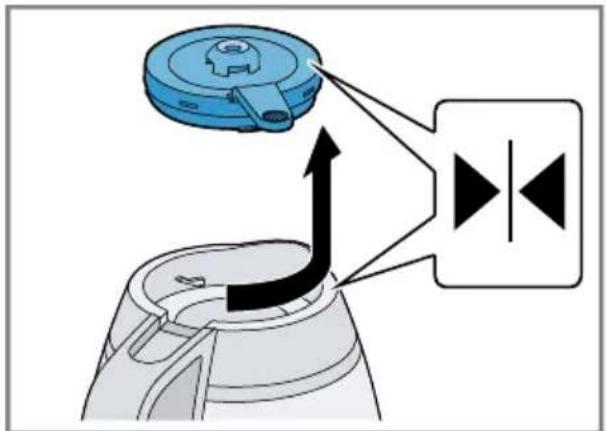
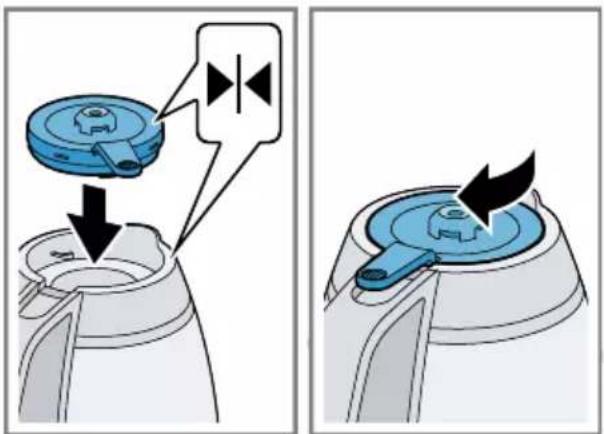
Pouring out the coffee, removing and attaching the lid
→ Fig. 18 - 20
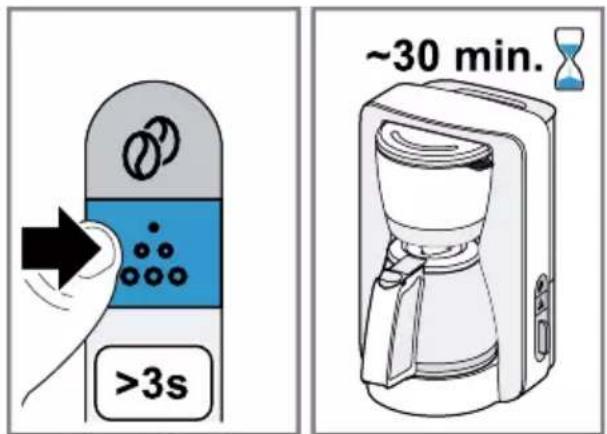
Descaling the appliance
The appliance is equipped with an automatic descaling indicator.
Notes
■ The appliance needs to be descaled if:
- during brewing and On/off button flash
- while keeping warm flashes ^2
en Overview of cleaning
■ Regular descaling:
– prolongs the life of the appliance
– ensures proper functioning
- prevents excessive steam
– shortens the brewing time
- saves energy
If you are descaling the appliance with a commercially available descaler, follow the manufacturer's instructions for use and safety. Do not use descaler with phosphoric acid.
■ If your tap water is very hard, descale the appliance more frequently than indicated.
■ If the appliance is brewing more slowly or switches off before the brewing process ends, descale it.
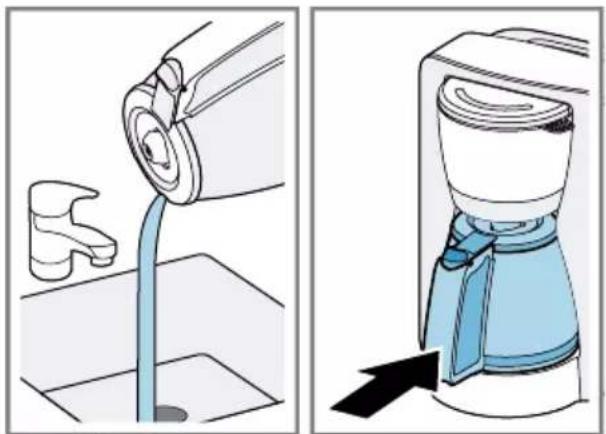
→ Fig. 21 - 27
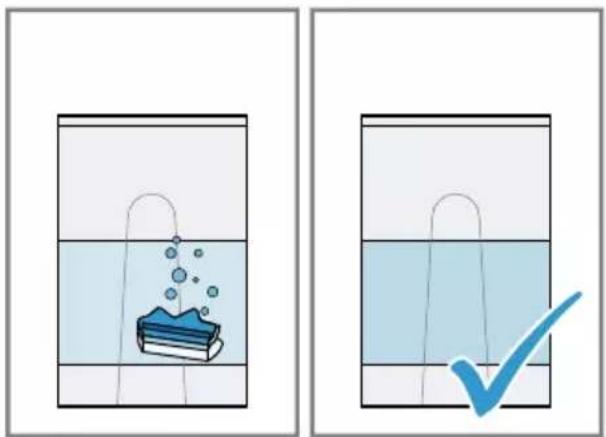
Overview of cleaning
- Do not use cleaning agents containing alcohol or spirits.
- Do not use sharp, pointed or metal objects.
- Do not use abrasive cloths or cleaning agents.
→ Fig. 28
Notes
■ After each use, clean all parts thoroughly and rinse out.
■ Remove stubborn deposits in the thermos jug with a solution of baking soda, dishwasher granulate or denture tablets.
■ Store the thermos jug with the lid open to prevent any odours and bacteria forming.
■ If the drip stop is leaking:
- Remove the filter holder and clean the drip stop under running water.
- Press the drip stop towards the filter holder with your finger several times.
Disposing of old appliance
- Dispose of the appliance in an environmentally friendly manner. Information about current disposal methods are available from your specialist dealer or local authority.

This appliance is labelled in accordance with European Directive 2012/19/EU concerning used electrical and electronic appliances (waste electrical and electronic equipment - WEEE). The guideline determines the framework for the return and recycling of used appliances as applicable throughout the EU.
Customer Service
Detailed information on the warranty period and terms of warranty in your country is available from our after-sales service, your retailer or on our website.
The contact details for Customer Service can be found in the enclosed Customer Service directory or on our website.

Sécurité
I displayet Innstilling
| På/av-tast blinker 20 minutter | |
| ∅ blinker | 40 minutter1 |
| På/av-tast og ∅ blinker | 60 minutter |
^1 Fabrikkinnstilling
text_image
QR code image containing encoded data, no visible human-readable textالأمان
■. Grenية
■ ق أو
electrical and electronic
.(equipment - WEEE
Thank you for buying a Bosch Home Appliance!
Register your new device on MyBosch now and profit directly from:
- Expert tips & tricks for your appliance
- Warranty extension options
• Discounts for accessories & spare-parts
• Digital manual and all appliance data at hand - Easy access to Bosch Home Appliances Service
Free and easy registration – also on mobile phones:
www.bosch-home.com/welcome
BOSCH HOME APPLIANCES SERVICE
Looking for help? You'll find it here.
Expert advice for your Bosch home appliances, help with problems or a repair from Bosch experts.
Find out everything about the many ways Bosch can support you:
www.bosch-home.com/service
Contact data of all countries are listed in the attached service directory.
BSH Hausgeräte GmbH
Carl-Wery-Straße 34
81739 München, GERMANY
www.bosch-home.com
A Bosch Company

8001280185 (030526)
Valid within Great Britain:
Imported to Great Britain by
BSH Home Appliances Ltd.
Grand Union House
Old Wolverton Road
Wolverton, Milton Keynes
MK12 5PT
United Kingdom
de, en, fr, it, nl, da, no, sv, fi, es, pt, el, tr, pl, cs, sk, uk, ru, ar