
TKP3015 - Coffee maker BOSCH - Free user manual and instructions
Find the device manual for free TKP3015 BOSCH in PDF.


| Product Type | Coffee pad machine |
| Model | TKP3015 |
| Brand | Bosch |
| Cup Capacity | 1 or 2 cups (selectable via button) |
| Coffee Pad Type | Soft coffee pads only (not espresso pads, not loose coffee) |
| Water Tank | Detachable, with min and max marks |
| Height-Adjustable Coffee Outlet | Yes |
| Locking Lever | Yes, secures drawer |
| Drawer | Removable, for pad holder insertion |
| Included Pad Holders | 1-cup and 2-cup pad holders |
| Storage Grille | Yes |
| Collecting Tray | Detachable |
| Mains Switch | On/Off |
| Indicator Light | Red LED; flashes for descaling, low water, or fault |
| Controls | Button for 1 or 2 small cups; button for 1 or 2 normal cups |
| Descaling Feature | Automatic descaling program with descaling agent (no vinegar) |
| Dishwasher Safe Parts | Drawer, storage grille, collecting tray |
| Cleaning Instructions | Wipe exterior with damp cloth; clean pad holders under running water; clean center opening with needle; do not immerse appliance |
| Safety Features | Do not immerse; keep children away; use only with pad holders; do not use if damaged; repairs by customer service only; minimum room temperature 10°C |
| Electrical Connection | Operate only according to rating plate specifications |
| Use | Domestic use only, not industrial |
Frequently Asked Questions - TKP3015 BOSCH
User questions about TKP3015 BOSCH
0 question about this device. Answer the ones you know or ask your own.
Ask a new question about this device
Download the instructions for your Coffee maker in PDF format for free! Find your manual TKP3015 - BOSCH and take your electronic device back in hand. On this page are published all the documents necessary for the use of your device. TKP3015 by BOSCH.
USER MANUAL TKP3015 BOSCH
TKP3...

Household Appliances
A

Kurzanleitungde
Quick-reference
instructionsen
Noticesuccinctefr
Guidarapidait
Kortehandleidingnl
Kortvejledningda
Kortanvisningno
Snabböversiktsv
Pikakäyttöohjefi


de 2
en 5
fr 9
it 13
nl 17
da 20
no 24
sv 28
fi 31
es 35
pt 40
el 44
tr 48
pl 52
hu 56
bg 60
ru 65
ar 74
Sicherheitshinweise
Pleasereadtheoperatinginstructions carefullyandkeeptheminasafeplace!
This appliance is designed for domestic and not industrial use.
⚠Riskofelectricshock!
Connectandoperatetheapplianceonly in accordancewiththespecificationsonthe ratingplate.
Keepchildrenawayfromtheappliance.
Donotusetheapplianceifthepowercord and/orappliancearedamaged.
Afteruseorifafaultoccurs, pulloutthemains plug.
Topreventinjury, repairstotheappliance, such as replacingAdamagedpowercord, should be carried out by your customerservice only.
DoNOT
—bringthepowercordintocontactwithhot parts
-pullthepowercordoversharpedges
-carrytheappliancebythepowercord.
Donotplacetheapplianceonornearhot surfaces, e.g. hobs.
Neverimmersetheapplianceormainscable in water.
Usetheappliancewithdrawer 7 and pad holder 11 or 12 only.
Usetheapplianceinsideonlyataroom temperatureofatleast10 °C.
Partsandcontrols
Fig. A
1Button for1or2smallcups
2on/offmainsswitch
3Indicatorlight
4Button for1 or2 normalcups
5 Detachable watertank
6Lockinglever
7Drawer
8Height-adjustablecoffeeoutlet
9Storagegrille
10 Detachable collecting tray
11 Pad holder for 1 cup
12Padholderfor2cups
Beforeusing your appliance for the first time
Switchingontheappliance
- Plugintheappliance.
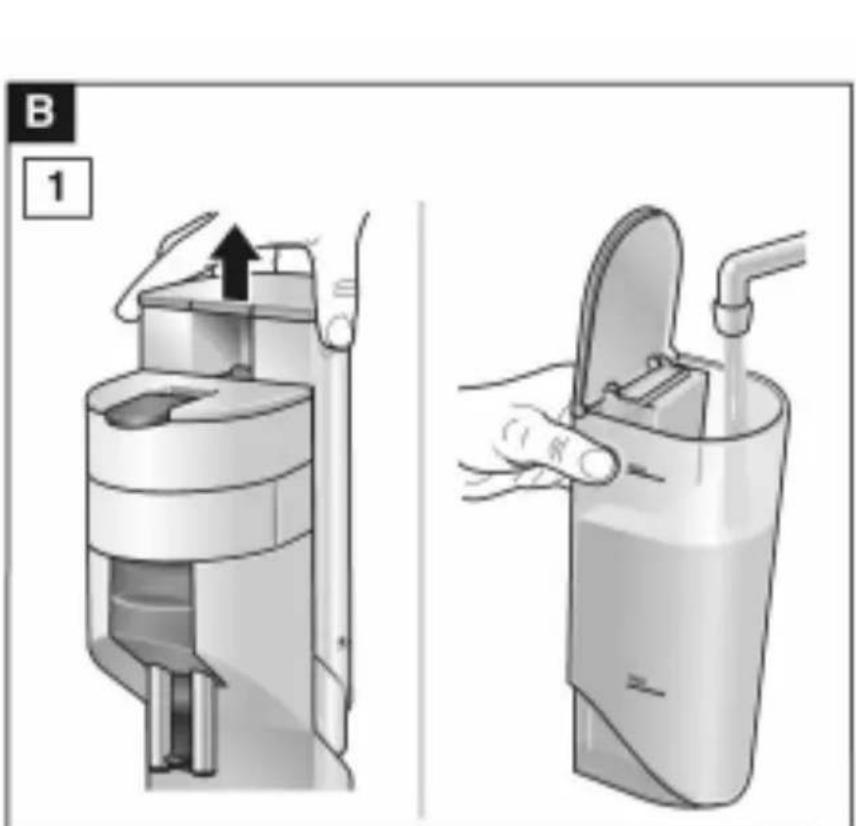
- Remove the water tank, fill with fresh, cold waterupto themaxmarkandre-insert (Fig. B1).
- Press mains switch 2 on/off, the red indicatorlight 3 lightsup.
- Rinse the appliance with the pad holder 11 already inserted but without the coffee pad. Place a cup under the coffee outlet 8 and
pressbutton

The appliance is ready to use.
Makingcoffee
Seealsosummaryofinstructions,
Figs. B1-5.
Tip: Beforemakingcoffee, always operate the appliance once without coffeepad. This will increase the coffee temperature and improve the aroma of the coffee.
- Put the locking lever 6 in an upright position and removethedrawer 7(Fig. B 2).
- Insert pad holder 11 or 12 for one or two cups.
-
Depending on the selected pad holder, insertoneortwocoffeepads with the bulgingsidefaceupintothemiddle of the padholder. The groundcoffeemust bedistributed evenly in the pad (Fig. B 3).
-
Re-insert drawer 7 all the way and secure by putting the locking lever 6 in a horizontal position.
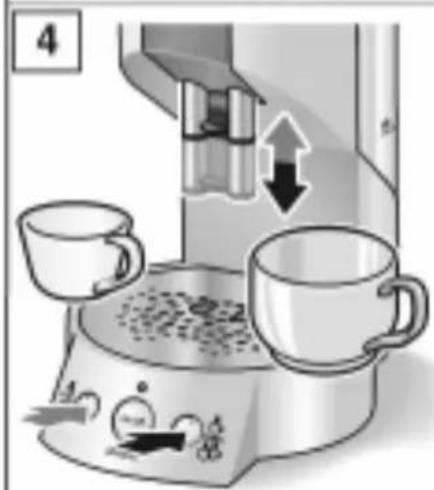
- Place suitably sized cup(s) under the outlet 8 and adjust the height of the coffee outlet 8 to the cup(s) to prevent splashes (Fig. B4).
- Press the ON button 1 or 4.
Press1x = onesmallcup
Press2x =two small cups oronesmallmug
Press1x = onenormalcup
Press2x = twonormalcups oronelargemug
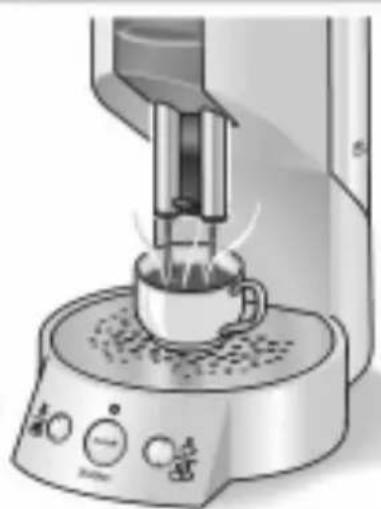
Coffeenowrunsatintervalsintothecup(s).
After each brewing process, dispose of the coffee pad for reason of hygiene and to prevent it from sticking (Fig. B 5). Donotopen locking lever 6 as soon as brewing ends.
Riskofburns
Thecoffeepadisvery hot; beforeremoving, leave to cool down a little.
Stoppingthecoffeeoutletearly
- Press button 1 or button 4 again.
Attention:
Pressonceonly, thecoffeecontinuesrunning briefly!
Importantinformation
Watertank
If the indicator light 3 flashes uniformly, the watertankis almost empty and must be filled.
-Donotpourhotwaterintothewatertank 5!
-Fillthewatertank 5withfresh,coldwater only.Donotuseotherliquids,e.g.milk.
- Thereisaminmarkonthewatertank 5. Beforemakingcoffee,alwayscheckthat thereisadequatewaterinthewatertank.
-Pourinfreshwaterdaily. Therewillalwaysbealittleresidualwater in thetank 5. Thisisquitenormal.
-Donotremovethewatertank 5whilethe applianceisoperating.
Coffeepads
-InsertfreshSoftcoffeepadsonly, donot pourloosecoffeeintopadholder 11 or 12.
- Donotusedamagedcoffeepads.
-Donotuseespressocoffeepads.
Tip: For a particularly strong coffee insert
2 coffeepadsintopadholder 12. Placeasmall cupundertheoutletandpresstheON
button 11x.
Controls
Theindicatorlight 3flashes:
-briefyiftheappliancerequiresdescaling (seethechapteron“Descalingthe appliance”)
-uniformlyifthewatertank 5isalmostempty (refillwithwater).
-veryquicklyandflickersifafaulthas occurred(seethechapteron“Eliminating minorfaultsyourself”).
Cleaningtheappliance
⚠Riskofelectricshock!
Beforecleaningtheappliance,pulloutthe mainsplug.
Neverimmersetheapplianceinwaterorclean inthedishwasher.
Donotuseasteamcleaner.
- Wipetheoutsideoftheappliancewith a dampclothonly.Donotusesharp or abrasivedetergents.
- Clean pad holders 11 and 12 under running water. Cleantheopeninginthecentreofthe padholderwithaneedle(Fig. C).
- Drawer 7, storage grille 9 and collecting tray 10(Fig. D) can be cleaned in the dishwasher.
- Clean the water tank 5 and coffee outlet 8 (Fig. E) underrunningwater, donotusea hardbrush.
- Regularlyrinsetheappliancewithoutcoffee padsbydrawingseveralcupsofwater.
Descalingtheappliance
Regulardescalingprolongstheservicelife of theapplianceandensuresthatthecoffee hasanexcellentflavour.
Iftheredindicatorlight 3keepsonflashing briefly, the appliancemustbedescaled.
Use a commercially available descaling agent.
Important:
Neverdescaletheappliancewithvinegar or vinegar-basedagents!
- Insert pad holder 11 or 12 without coffee pad into the drawer 7. Insert drawer 7 and securewithlockinglever 6.
- Mixdescalingagentwithwateraccording to themanufacturer'sspecificationsandfill up to the min mark on the water tank 5.
- Placeafairlylargereceptacle(min0.5l) underthecoffeeoutlet 6.
- Simultaneouslyholddownbuttons1 and

4 foratleast3 seconds.
Descalingliquidisnowpumpedautomatically intothereceptacleatintervals(forapprox.
8 min.)untilthewatertank 5isalmostempty.
During the descaling process the indicator light 3 flashes briefly again.
Ifthelightflashesuniformly,
- rinseoutthewatertank 5andfillwithfresh water.
- Thoroughly clean the pad holder 11 or 12 andcleantheopeninginthemiddlewith a needle.
- Emptythereceptacleandplaceunderthe coffeeoutlet 8again.
- Press button 4 to rinse.
Theindicatorlight 3islitconstantly.
The appliance is ready to use.
Eliminatingminorfaults yourself
The indicator light 3 flashes very quickly and flickers if a faul th as occurred.
Waituntilthelightstopsflashing.Then:
-Rinseoutandcleanthewatertank 5.
-Check that the watertank 5 has been attached correctly and that there is adequate water in the tank.
- Checkwhetherpadholder 11 or 12 is blocked. If required, cleanpadholder 11 or 12 and cleantheopening in the centre with an needle.
The appliance is ready to use when the indicator light 3 is lit.
Coffeeisnotrunningthrough.
-Thoroughlycleanthepadholder 11 or 12 andcleantheopeninginthemiddlewith a needle.
Disposal

This appliance is labelled in accordance with European Directive 2002/96/EG concerning used electrical and electronic appliances (wasteelectrical and electronicequipment-WEEE). The guided determinesthe framework for the return and recycling of used appliances as applicable throughout the EU.
Please ask your dealer about current means of disposal.
Guarantee
Theguaranteeconditionsforthisapplianceare asdefinedby ourrepresentativeinthecountry inwhichitissold.Detailsregardingthese conditionscanbeobtainedfromthedealer fromwhomtheappliancewaspurchased.
Thebillofsaleorreceiptmustbeproduced whenmakinganyclaimunderthetermsofthis guarantee.
Subjecttochanges
Consignesdesécurité
waste electrical and electronic)
.(equipment - WEEE



- SICHERHEITSHINWEISE
- ⚠RISKOFELECTRICSHOCK
- PARTSANDCONTROLS
- FIG. A
- BEFOREUSING YOUR APPLIANCE FOR THE FIRST TIME
- SWITCHINGONTHEAPPLIANCE
- MAKINGCOFFEE
- SEEALSOSUMMARYOFINSTRUCTIONS
- FIGS. B1-5
- RISKOFBURNS
- STOPPINGTHECOFFEEOUTLETEARLY
- ATTENTION
- IMPORTANTINFORMATION
- WATERTANK
- COFFEEPADS
- CONTROLS
- CLEANINGTHEAPPLIANCE
- DESCALINGTHEAPPLIANCE
- IMPORTANT
- ELIMINATINGMINORFAULTS YOURSELF
- DISPOSAL
- GUARANTEE
- CONSIGNESDESÉCURITÉ
Brand : BOSCH
Model : TKP3015
Category : Coffee maker