
ReadyWarm 9100 Smart Towel - Towel rack CECOTEC - Free user manual and instructions
Find the device manual for free ReadyWarm 9100 Smart Towel CECOTEC in PDF.
| Product Type | Wall-mounted electric towel warmer |
| Brand | Cecotec |
| Model | ReadyWarm 9100 Smart Towel |
| Available Variants | White (05379), Steel (05393), Black (05394) |
| Rated Power | 500 W |
| Voltage | 220-240 V~, 50-60 Hz |
| Protection Rating | IP24 (protection against water splashes) |
| Heating Modes | Comfort, Eco, Anti-frost, Programs P1/P2/P3 |
| Comfort Temperature Range | 5 °C to 35 °C |
| Eco Temperature Range | 1 °C to 31 °C |
| Timer Programming | Daily and weekly programming (adjustable P3) |
| Timer | 0 to 9 hours, quick selection 2/4/8 hours |
| Open Window Function | Yes, automatic shut-off if temperature drop detected |
| Display and Controls | LED screen, touch buttons, remote control included |
| Wall Mounting | Yes, with brackets and screws provided |
| Recommended Use | Supplementary heating, indoor, rooms >4 m² |
| Maintenance | Clean with a damp cloth, vacuum the grilles regularly |
| Safety | Automatic shut-off in case of overheating, anti-frost protection |
| Warranty | 2 years from date of purchase |
| After-Sales Service | +34 9 63 21 07 28 (Cecotec Customer Service) |
| Country of Manufacture | Made in China, designed in Spain |
Frequently Asked Questions - ReadyWarm 9100 Smart Towel CECOTEC
User questions about ReadyWarm 9100 Smart Towel CECOTEC
0 question about this device. Answer the ones you know or ask your own.
Ask a new question about this device
Download the instructions for your Towel rack in PDF format for free! Find your manual ReadyWarm 9100 Smart Towel - CECOTEC and take your electronic device back in hand. On this page are published all the documents necessary for the use of your device. ReadyWarm 9100 Smart Towel by CECOTEC.
USER MANUAL ReadyWarm 9100 Smart Towel CECOTEC
natural_image
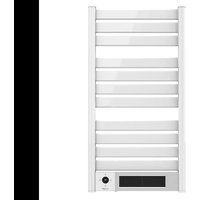
Modern white horizontal barter with metal railings and a digital display unit, no visible text or symbols on the device itself.Safety instructions 6
-
Parts and components 28
-
Before use 28
-
Installation 28
-
Operation 29
-
Cleaning and maintenance 32
-
Technical specifications 32
-
Disposal of old electrical appliances 32
-
Technical support service and warranty 33
SOMMAIRE
EN: This product is not suitable for primary heating purposes. This product is only suitable for well insulated spaces or occasional use.
Read these instructions thoroughly before using the appliance. Keep this instruction manual for future reference or new users. Make sure that the mains voltage matches the voltage stated on the rating label of the appliance and that the wall outlet is grounded.
This appliance is intended for household use only. Do not use for industrial or commercial purposes.
Check the power cord regularly for visible damage. If the cord is damaged, it must be replaced by the official Technical Support Service of Cecotec in order to avoid any type of danger.
Always use it with the fins in an upright position.
Do not place the appliance close to heat sources, flammable substances, wet surfaces where it can fall or be pushed into water or allow it to come into
contact with water or other liquids. Do not operate outdoors.
Do not place the appliance immediately below a power socket. Always unplug the device when not in use.
Do not disconnect the device from the cord, use the plug instead.
Do not move the appliance while it is operating to avoid damage and risk of fire.
Do not leave the device operating and unattended for long periods of time. In that case, ensure it is turned off and disconnected from the power supply.
The device will reach high temperatures during use. Avoid touching its surface while it is operating and immediately after. Do not operate the device in rooms smaller than 4 m^2 .
Do not cover the device in order to avoid overheating.
Keep the appliance clean. Do not allow objects to enter any ventilation or exhaust opening.
If the Remote Control is operated near other products which generate infrared rays, or if other remote


control devices using infra-red rays are used near the unit, it may operate incorrectly.
Allows a safety distance of 1 m to the front and 50 cm to each side of the device. Avoid contact with furniture, cushions, bedding, paper, clothes, curtains etc.
Do not operate the device if it has fallen on the floor or is damaged in any way. Contact the official Technical Support Service of Cecotec for reparation.
Keep the packaging materials out of the reach of children, they could be dangerous.
The appliance is not intended to be used by children under the age of 8. It can be used by children over the age of 8, as long as they are given continuous supervision.
This appliance can be used by children aged 8 and above, and persons with reduced physical, sensory or mental capabilities or lack of experience and knowledge, as long as they have been given supervision or instruction concerning the use of the appliance in a safe way and understand the hazards involved. Children shall not play with the appliance.
Supervise young children to make sure that they do not play with the appliance. Close supervision is necessary when the appliance is being used by or near children.
INSTRUCTIONS DE SÉCURITÉ
00:00 - 01:00; Modo Confort;
01:00 - 08:00: Modo ECO
08:00 - 11:00: Modo Confort:
11:00 - 13:00: Modo Eco
13:00 - 16:00; Modo Confort;
16:00 - 20:00: Modo Eco
20:00 - 00:00: Modo Confort:
P3: (lunes-viernes)
Fig. 11.
00:00 - 01:00; Modo Confort;
01:00 - 05:00: Modo ECO
05:00 - 09:00: Modo Confort:
09:00 - 12:00: Modo Eco
12:00 – 16:00: Moda Confort:
16:00 - 18:00: Mado Eco
18:00 - 00:00: Modo Confort:
P3: (sábado-damingo)
Fig. 12.
Programa ajustable.
00:00 - 01:00: Moda Canfort:
01:00 - 05:00: Modo ECO
05:00 - 00:00: Modo Confort:
- Wall brackets
- Heating elements
- Control panel
Control panel
Fig. 4.
- Standby/Power Indicator
- Comfort mode indicator
- Heating indicator
- ECO mode indicator
- Temperature indicator
- Standby/On/Off button
- Mode button
- Increase button
- Decrease button
- Timer button
2. BEFORE USE
Take the product out of the box.
Remove all packaging materials. Keep the original box.
Make sure all the components are included and in good conditions, otherwise, contact immediately the official Technical Support Service of Cecotec.
3. INSTALLATION
Fig. 2.
Fig. 3.
Drill holes on the wall according to the instructions.
Warning: Be sure to keep the safety distances as shown on the above drawing.
Fit the fastening tube in the hole and fix the bracket on the wall with screws.
Hang the unit on the bracket gently. After ensuring the unit is securely fixed, turn the lock in the bracket as shown on the drawing.
Warning: Before using the heater, make sure it is mounted tightly on the wall.
4. OPERATION
Plug the device to a power supply. The device will beep and the power indicator will light up. Press the on/off button to turn the device on. When operated for the first time, the device will operate with default settings.
Press the on/off button to turn the device off.
Unplug the device from the power supply when not in use.
Setting time and day of the week
Hold down the timer button for 3 seconds to enter the clock and day settings.
The screen will display "d". Use the "+" and "-" button to select the day, from 1 to 7.
1: Monday
2: Tuesday
3: Wednesday
4: Thursday
5: Friday
6: Saturday
7: Sunday
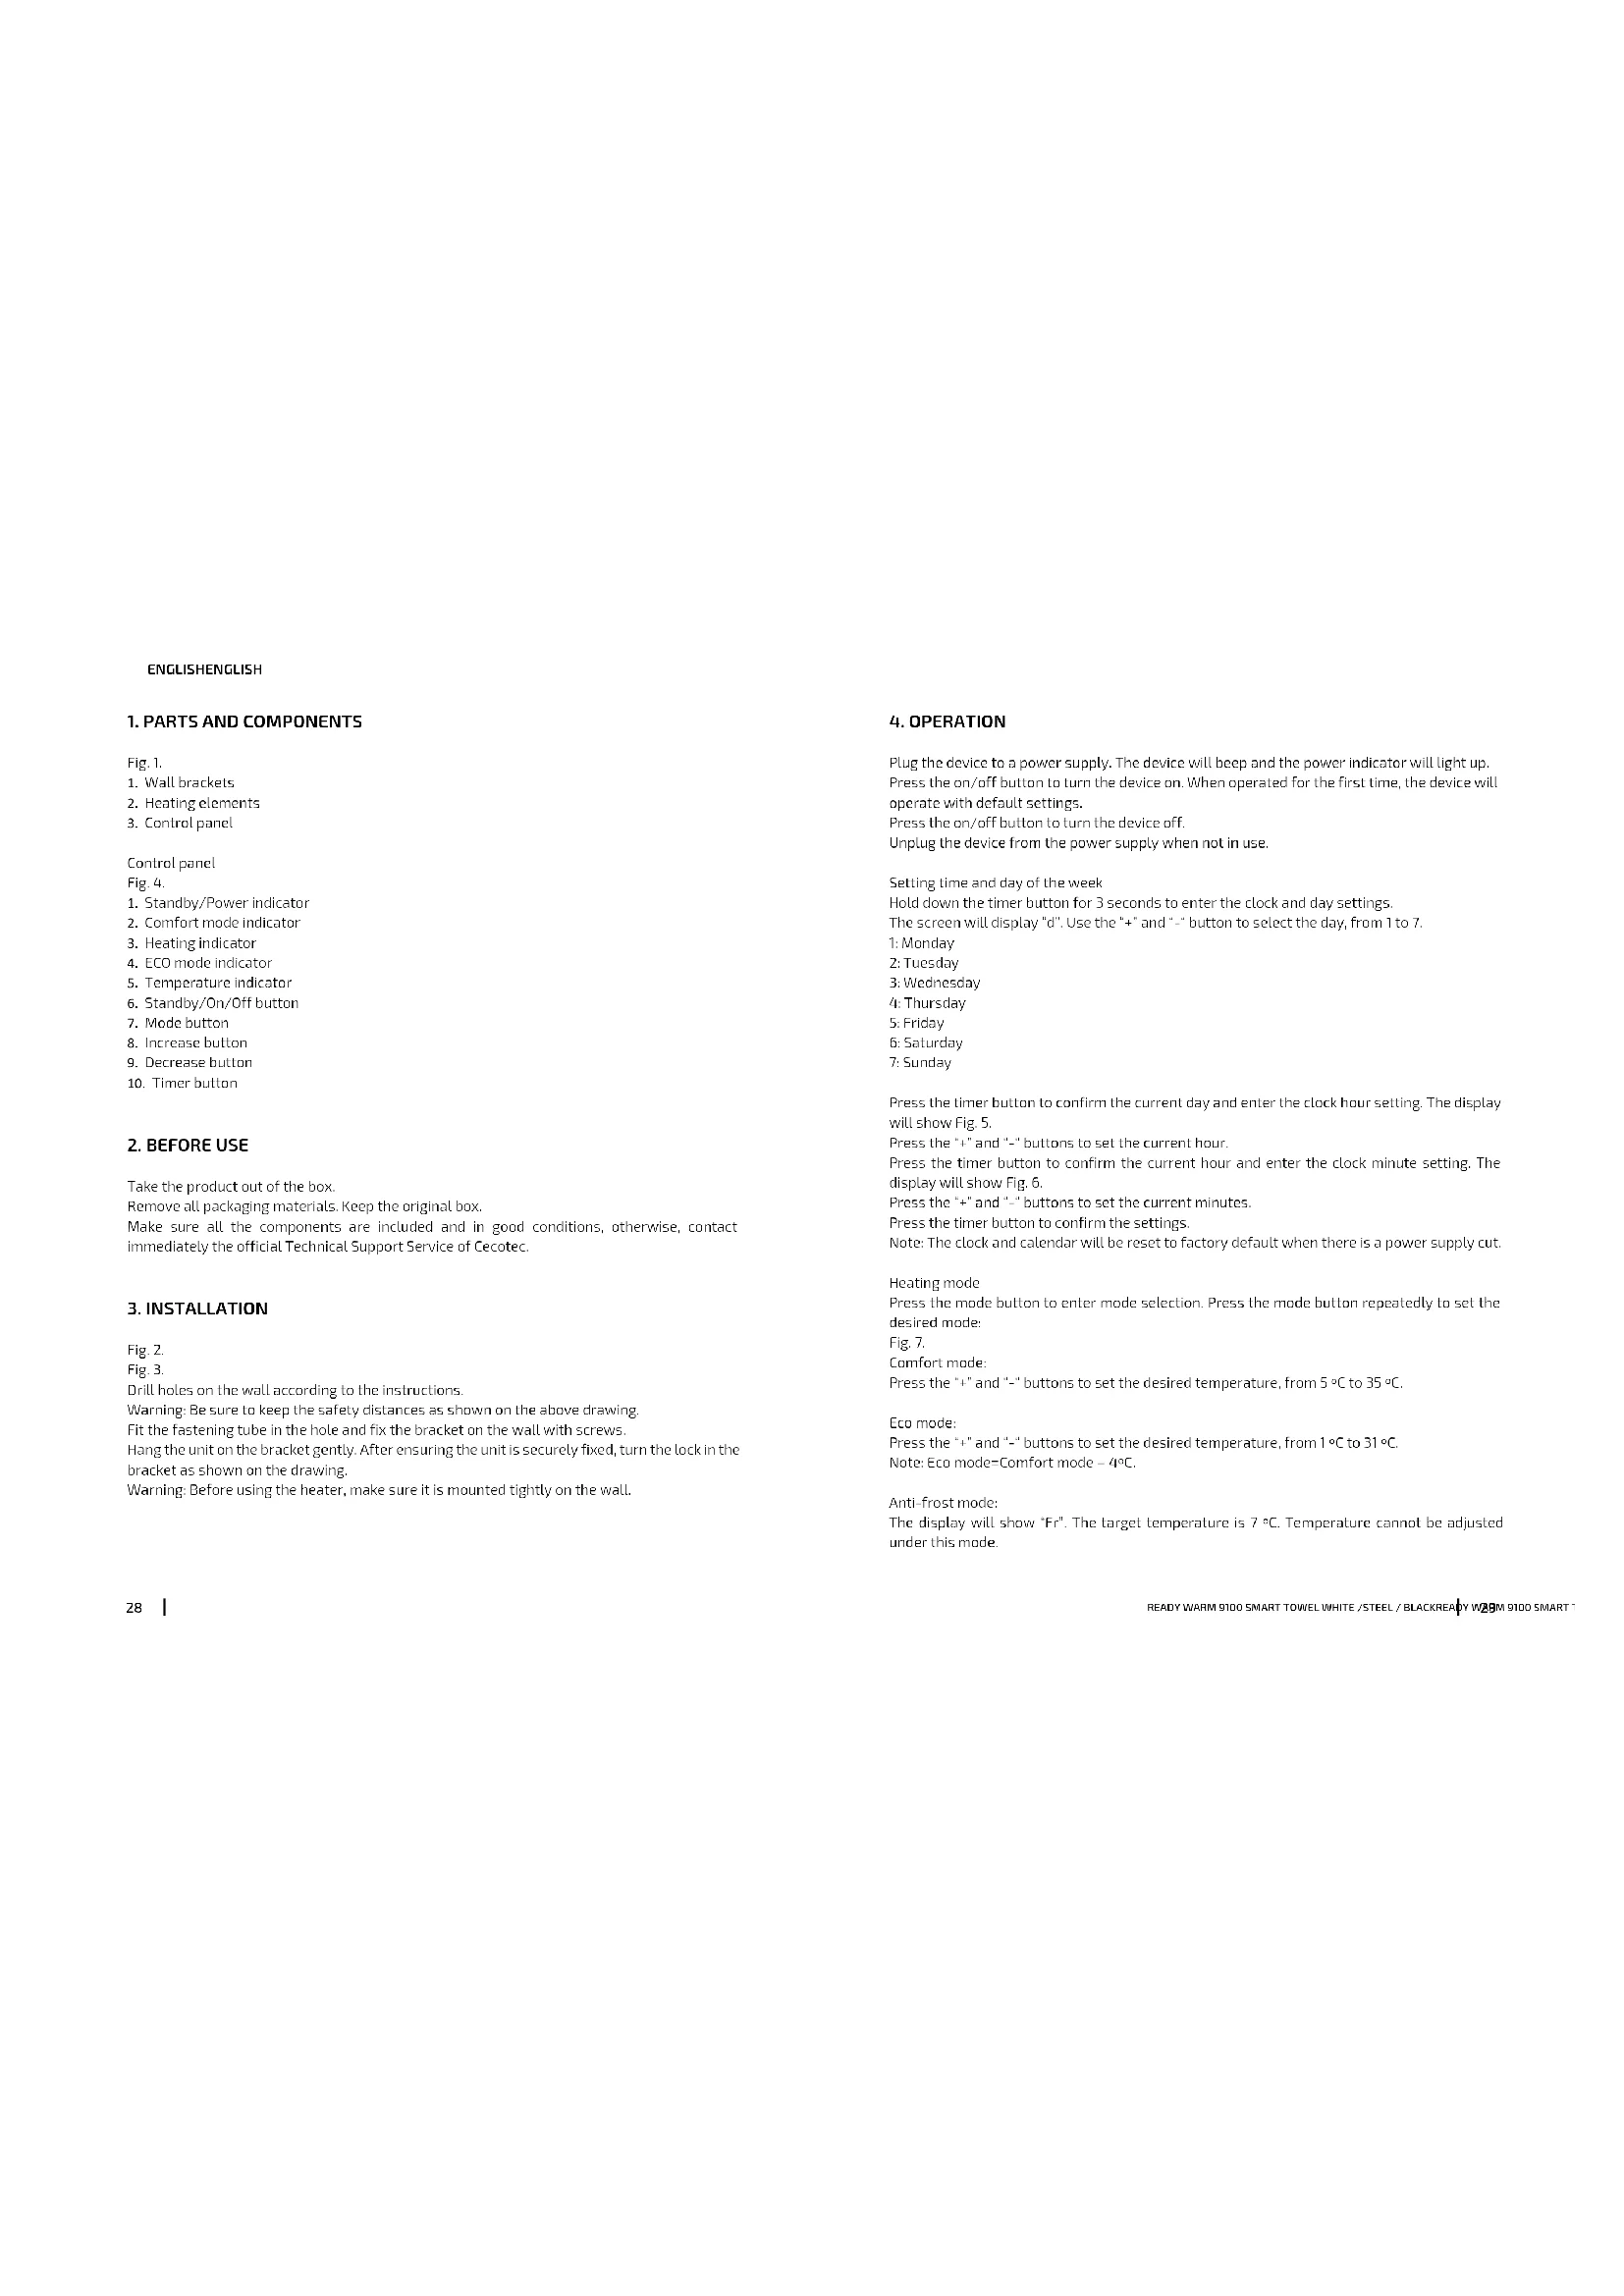
Press the timer button to confirm the current day and enter the clock hour setting. The display will show Fig. 5.
Press the "+" and "-" buttons to set the current hour.
Press the timer button to confirm the current hour and enter the clock minute setting. The display will show Fig. 6.
Press the "+" and *-* buttons to set the current minutes.
Press the timer button to confirm the settings.
Note: The clock and calendar will be reset to factory default when there is a power supply cut.
Heating mode
Press the mode button to enter mode selection. Press the mode button repeatedly to set the desired mode:
Fig. 7.
Comfort mode:
Press the "+" and "-" buttons to set the desired temperature, from 5 °C to 35 °C.
Eco mode:
Press the "+" and "-" buttons to set the desired temperature, from 1°C to 31°C.
Note: Eco mode=Comfort mode - 4°C.
Anti-frost mode:
The display will show "Fr". The target temperature is 7 °C. Temperature cannot be adjusted under this mode.
ENGLISHENGLISH
P1/P2/P3: Pre-set heating program
Note: The current day and time must be set in order to activate any of these pre-set programs.
P1: (Monday–Sunday)
Fig. 8.
Non-adjustable program.
00:00 - 01:00: Comfort mode
01:00 - 07:00: ECO mode
07:00 - 00:00: Comfort mode
P2: (Monday-Friday)
Fig. 9.
Non-adjustable program
00:00 - 01:00: Comfort mode
01:00 - 05:00: ECO mode
05:00 - 09:00: Comfort mode
09:00 - 19:00: Eco mode
19:00 - 00:00: Comfort mode
P2: (Saturday-Sunday)
Fig. 10
Non-adjustable program.
00:00 - 01:00: Comfort mode
01:00 - 08:00: ECO made
08:00 - 11:00: Comfort mode
11:00 - 13:00: Eco mode
13:00 – 16:00: Comfort mode
16:00 - 20:00: Eco mode
20:00 - 00:00: Comfort mode
P3: (Monday–Friday)
Fig. 11.
Adjustable program. Example.
00:00 - 01:00: Comfort mode
01:00 - 05:00: ECO mode
05:00 - 09:00: Comfort mode
09:00 - 12:00: Eco mode
12:00 - 16:00: Comfort mode
16:00 - 18:00: Eco mode
18:00 - 00:00: Comfort mode
P3: (Saturday-Sunday)
Fig. 12.
Adjustable program.
00:00 - 01:00: Comfort mode
01:00 - 05:00: ECO made
05:00 - 00:00: Comfort mode
P3 adjustable program setting
Under P3 mode, hold down the mode button for 3 seconds to enter day setting.
The screen will display 'd1'. Press the '+' and '-' buttons to set the desired day, from d1 to d7 (Monday–Sunday).
Press the mode button to confirm and enter hour setting.
The screen will display "00". Press the "+" and "-" buttons to set the desired hour, from 00 to 23.
Press the mode button to set the desired operating mode for each hour.
Repeat these steps until you have completed the schedule of every hour and every day.
Note:
After setting the desired heating mode for the 23 hours, press the "+" button to return to day setting.
When the screen displays 'd7', press the "+" button to finish setting P3.
Timer function
Press the timer button once, the display will show "0 h" blinking.
Press the "+" and "-" buttons to set the desired operating time, from 0 to 9 hours. Wait 3 seconds for settings to be confirmed.
Quick timer setting:
Press the timer button once, the display will show '0 h'. Press the timer button once to select the operating time: 2 h, 4 h or 8 h.
Open window function
Press the mode and '+' buttons simultaneously. The scree will display 'F O' and after 3 seconds will display the target temperature, or if the timer is set, it will display the remaining operating time. When any of these are displayed, it means the Open window function has been activated. During operation, if the room temperature drops 2 °C in 2 minutes, the Open window function will activate automatically and 'F O' will blink on the display. The device will stop heating.
To exit the Open window function:
Press the mode button to activate the heating function again; or wait 20 minutes, and the device will start operating with the previous settings; or press the On/off button to enter standby mode. The Open window function will be reset when the device is turned back on.
To turn the Open window function completely off, press the mode and * - * buttons simultaneously.
The display will show "F F" and after 3 seconds will display the target temperature.
ENGLISHENGLISH
Turn the device off and unplug it from the power supply when not in use.
5. CLEANING AND MAINTENANCE
Switch off and unplug from the power supply before cleaning.
Using a soft, moist cloth, with or without a mild soap solution, carefully clean the exterior surface of the product.
Allow the product to completely cool down before handling or cleaning it.
Do not allow water or other liquids to run into the interior of the product.
It is recommended to clean the appliance periodically by lightly running a vacuum cleaner nozzle over the guards to remove any dust or dirt that may have accumulated inside or on the unit.
Do not use harsh detergents, chemical cleaners or solvents as they may damage the surface finish.
6. TECHNICAL SPECIFICATIONS
05379 Ready Warm 9100 Smart Towel White
05393 Ready Warm 9100 Smart Towel Steel
05394 Ready Warm 9100 Smart Towel Black
500W, 220-240 V-, 50-60 Hz
IP 24
Made in China | Designed in Spain
7. DISPOSAL OF OLD ELECTRICAL APPLIANCES

The European directive 2012/19/EU on Waste Electrical and Electronic Equipment (WEEE), specifies that old household electrical appliances must not be disposed of with the normal unsorted municipal waste. Old appliances must be collected separately, in order to optimize the recovery and recycling of the materials they contain and reduce the impact on human health and the environment.
The crossed out 'wheeled bin' symbol on the product reminds you of your obligation to dispose of the appliance correctly. If the product has a built-in battery or uses batteries, they should be removed from the appliance and disposed of appropriately.
Consumers must contact their local authorities or retailer for information concerning the correct disposal of old appliances and/or their batteries.
8. TECHNICAL SUPPORT SERVICE AND WARRANTY
This product is under warranty for 2 years from the date of purchase, as long as the proof of purchase is submitted, the product is in perfect physical condition, and it has been given proper use, as explained in this instruction manual.
The warranty will not cover the following situations:
The product has been used for purposes other than those intended for it, misused, beaten, exposed to moisture, immersed in liquid or corrosive substances, as well as any other fault attributable to the customer.
The product has been disassembled, modified, or repaired by persons, not authorised by the official Technical Support Service of Cecotec.
Faults deriving from the normal wear and tear of its parts, due to use.
The warranty service covers every manufacturing defects of your appliance for 2 years, based on current legislation, except consumable parts. In the event of misuse, the warranty will not apply.
If at any moment you detect any problem with your product or have any doubt, do not hesitate to contact Cecotec Technical Support Service at +3/1 963 210 728.
| Information requirements to be met | ||||||
| Model identifiers:05379_Ready Warm 9100 Smart Towel White05393_Ready Warm 9100 Smart Towel Steel05394_Ready Warm 9100 Smart Towel Black | ||||||
| Item Symbol Value | Unit Item | Unit | ||||
| Heat output Type of heat input, for electric | storage local space heater only(select one) | |||||
| Nominal heat output | P_out | 0.5 KW | Manual heat | charge control,with integratedthermostat | Notaplicable | |
| Minimum heat output (indicative) | P_out | N/A KW | Manual heat chargecontrol with roomand/or outdoortemperaturefeedback | Notapplicable | ||
ENGLISHENGLISH
| Maximum continuous heat output | P_max | 0.493 KW | Electronic heat charge control with room and/or outdoor temperature feedback | Not applicable |
| Auxiliary electricity consumption Fan assisted heat | Output | |||
| At nominal heat output | eI_max | 0.000 KW | Type of heat output/room temperature control (select one) | |
| At minimum heat output | eI_mv | 0.000 KW | Single stage heat output and no room temperature control | [no] |
| In standby mode e | ss | 0.201 KW | Two or more manual stages, no room temperature control | [no] |
| With mechanic thermostat room temperature control | ||||
| With electronic room temperature control | ||||
| Electronic room temperature control plus day timer | ||||
| Electronic room temperature control plus week timer | ||||
| Other control options (multiple selections possible) | ||||
| Room temperature control, with presence detection | ||||
| Room temperature control, with open window detection | ||||
| With distance control option | [no] | |||||
| With adaptative start control | [no] | |||||
| With working time limitation | [no] | |||||
| With black bulb sensor | [no] | |||||
| Contact detail Grupo Cecotec | Innovaciones S.L.C/de la Pinadeta s/n, 46930 Quart de poblet, Valencia (Spain) | |||||
FRANÇAISFRANÇAIS
1. PIÈCES ET COMPOSANTS
Img.1.
01:00 - 05:00: Eco-Modus
05:00 - 09:00: Komfort Modus:
09:00 - 19:00: Eco-Modus
19:00 - 00:00: Komfort Modus:
P2: (Samstag-Sonntag)
Abb. 10.
01:00 - 05:00: Eco-Modus
05:00 - 09:00: Komfort Modus
09:00 - 12:00: Eco-Modus
12:00 - 16:00: Komfort Modus:
16:00 - 18:00: Eco-Modus
18:00 - 00:00: Komfort Modus:
P3: (Samstag-Sonntag)
Abb. 12
Einstellbares Programm.
00:00 - 01:00: Komfort Modus:
01:00 - 05:00: Eco-Modus
05:00 - 00:00: Kamfart Modus:
01:00 - 05:00: Tryb Eca
Made in China | Designed in Spain
POLSKIPOLSKI
7. RECYKLING SPRZETU AGD

01:00 - 05:00: Program ECO
05:00 - 09:00: Program komfort:
09:00 - 19:00: PROGRAM ECO
19:00 - 00:00: Program komfort:
P2: (sobota-neděle)
Obr. 10.
Program nelze zastavit.
00:00 - 01:00: Program komfort:
01:00 - 08:00; Program ECO
08:00 - 11:00: Program komfort:
11:00 - 13:00: PROGRAM ECO
13:00 – 16:00: Program komfort:
16:00 - 20:00: PROGRAM ECO
20:00 - 00:00: Program komfort:
P3: (pondělí-pátek)
Obr. 11.
Program lze zastavit. PŘÍKLAD:
00:00 - 01:00: Program komfort:
01:00 - 05:00: Program ECO
05:00 - 09:00: Program komfort:
09:00 - 12:00: PROGRAM ECO
ČEŠTINAČEŠTINA
12:00 - 16:00: Program komfort:
16:00 - 18:00: PROGRAM ECO
18:00 - 00:00: Program komfort:
P3: (sobota-neděle)
Obr.12.
Program lze zastavit.
00:00 - 01:00: Program komfort:
01:00 - 05:00: Program ECO
05:00 - 00:00: Program komfort:
natural_image
Line drawing of a three-tiered horizontal ladder structure with no text or symbolsFig./Img./Abb./Rys./Obc.1

Fig./img./Abb./Rys./Obr.2

Fig./Img./Abb./Rys./Obr.3

Fig./img./Abb./Rys./Obr.4
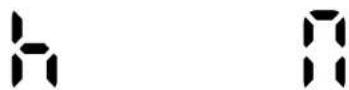
Fig./Img./Abb./Rys./Obr. 5 Fig./Img./Abb./Rys./Obr. 6

flowchart
graph TD
    A["Sun"] --> B["Light Icon"]
    B --> C["P1"]
    C --> D["P2"]
    D --> E["P3"]
    E --> F["F_r"]
    F --> G["Feedback Loop"]
Fig./Img./Abb./Rys./Obr.7

Fig./Img./Abb./Rys./Obr. 8

Fig./Img./Abb./Rys./Obr.9

Fig./img./Abb./Rys./Obr. 10

Fig./img./Abb./Rys./Obr. 11

Fig./img./Abb./Rys./Obr. 12
www.cecotec.es
Quart de Poblet, Valencia (Spain)
YV03201005
- SOMMAIRE
- INSTRUCTIONS DE SÉCURITÉ
- Control panel
- Fig. 4.
- BEFORE USE
- INSTALLATION
- Fig. 2.
- Fig. 3.
- OPERATION
- Setting time and day of the week
- Heating mode
- Fig. 7.
- Eco mode:
- Anti-frost mode:
- ENGLISHENGLISH
- CLEANING AND MAINTENANCE
- TECHNICAL SPECIFICATIONS
- DISPOSAL OF OLD ELECTRICAL APPLIANCES
- TECHNICAL SUPPORT SERVICE AND WARRANTY
- FRANÇAISFRANÇAIS
- PIÈCES ET COMPOSANTS
- POLSKIPOLSKI
- RECYKLING SPRZETU AGD
- ČEŠTINAČEŠTINA
Brand : CECOTEC
Model : ReadyWarm 9100 Smart Towel
Category : Towel rack