
Hydra 6 MR2000 - Router LINKSYS - Free user manual and instructions
Find the device manual for free Hydra 6 MR2000 LINKSYS in PDF.
| Product Type | WiFi 6 Dual-Band AX3000 Router |
| Brand | Linksys |
| Model | Hydra 6 MR2000 |
| Dimensions | 215 mm x 155 mm x 56 mm |
| Weight | 687 g |
| Power Supply | 12 V, 1.5 A |
| Radio Frequencies | 2.4 GHz and 5 GHz |
| Antennas | 2 adjustable external (non-removable) + 1 internal printed |
| Ports | 4 Gigabit Ethernet ports (10/100/1000), 1 Internet port, 1 USB 3.0 port |
| Buttons | Power On/Off, Reset, WPS |
| LEDs | Front panel: multicolor status LED; Rear panel: Ethernet and USB activity LEDs |
| Wireless Security | WPA2 Personal, WPA3 Personal, WPA2/WPA3 Mixed; encryption up to 128-bit |
| Key Features | Mesh WiFi, parental controls, guest network, device prioritization, shared USB storage, speed test, WPS |
| Setup | Via Linksys app (iOS 14.1+ / Android 6.0+); account required |
| Operating Temperature | 0 to 40 °C |
| Storage Temperature | -20 to 60 °C |
| Operating Humidity | 10% to 80% RH non-condensing |
| Care and Cleaning | Clean with a dry cloth; avoid contact with liquids |
| Spare Parts and Repairability | Not applicable (sealed product); contact Linksys support |
Frequently Asked Questions - Hydra 6 MR2000 LINKSYS
User questions about Hydra 6 MR2000 LINKSYS
0 question about this device. Answer the ones you know or ask your own.
Ask a new question about this device
Download the instructions for your Router in PDF format for free! Find your manual Hydra 6 MR2000 - LINKSYS and take your electronic device back in hand. On this page are published all the documents necessary for the use of your device. Hydra 6 MR2000 by LINKSYS.
USER MANUAL Hydra 6 MR2000 LINKSYS
Where to find more help 5
Set Up 6
What you'll need ____ 6
Linksys Whole Home Wi-Fi System Settings 8
Log in to the Linksys app 8
Navigation Menu 9
Dashboard 10
Devices 11
To view or change device details 12
Parental Controls 13
Wi-Fi Settings 14
Advanced Wi-Fi Settings 15
Connect a Device with WPS 16
Guest Network Access 17
Priority 18
Notifications 19
Network Administration 20
Advanced Settings 21
Internet Settings 21
Port Settings 22
Wi-Fi MAC Filters 23
External Storage 24
Speed Check 25
My Account 26
Feedback 27
Help 28
Connect Directly To Your Router 29
Router password 30
How to factory reset your router ____ 31
How to mount your router on the wall 31
Specifications 32
Linksys Hydra 6 32
Environmental 32
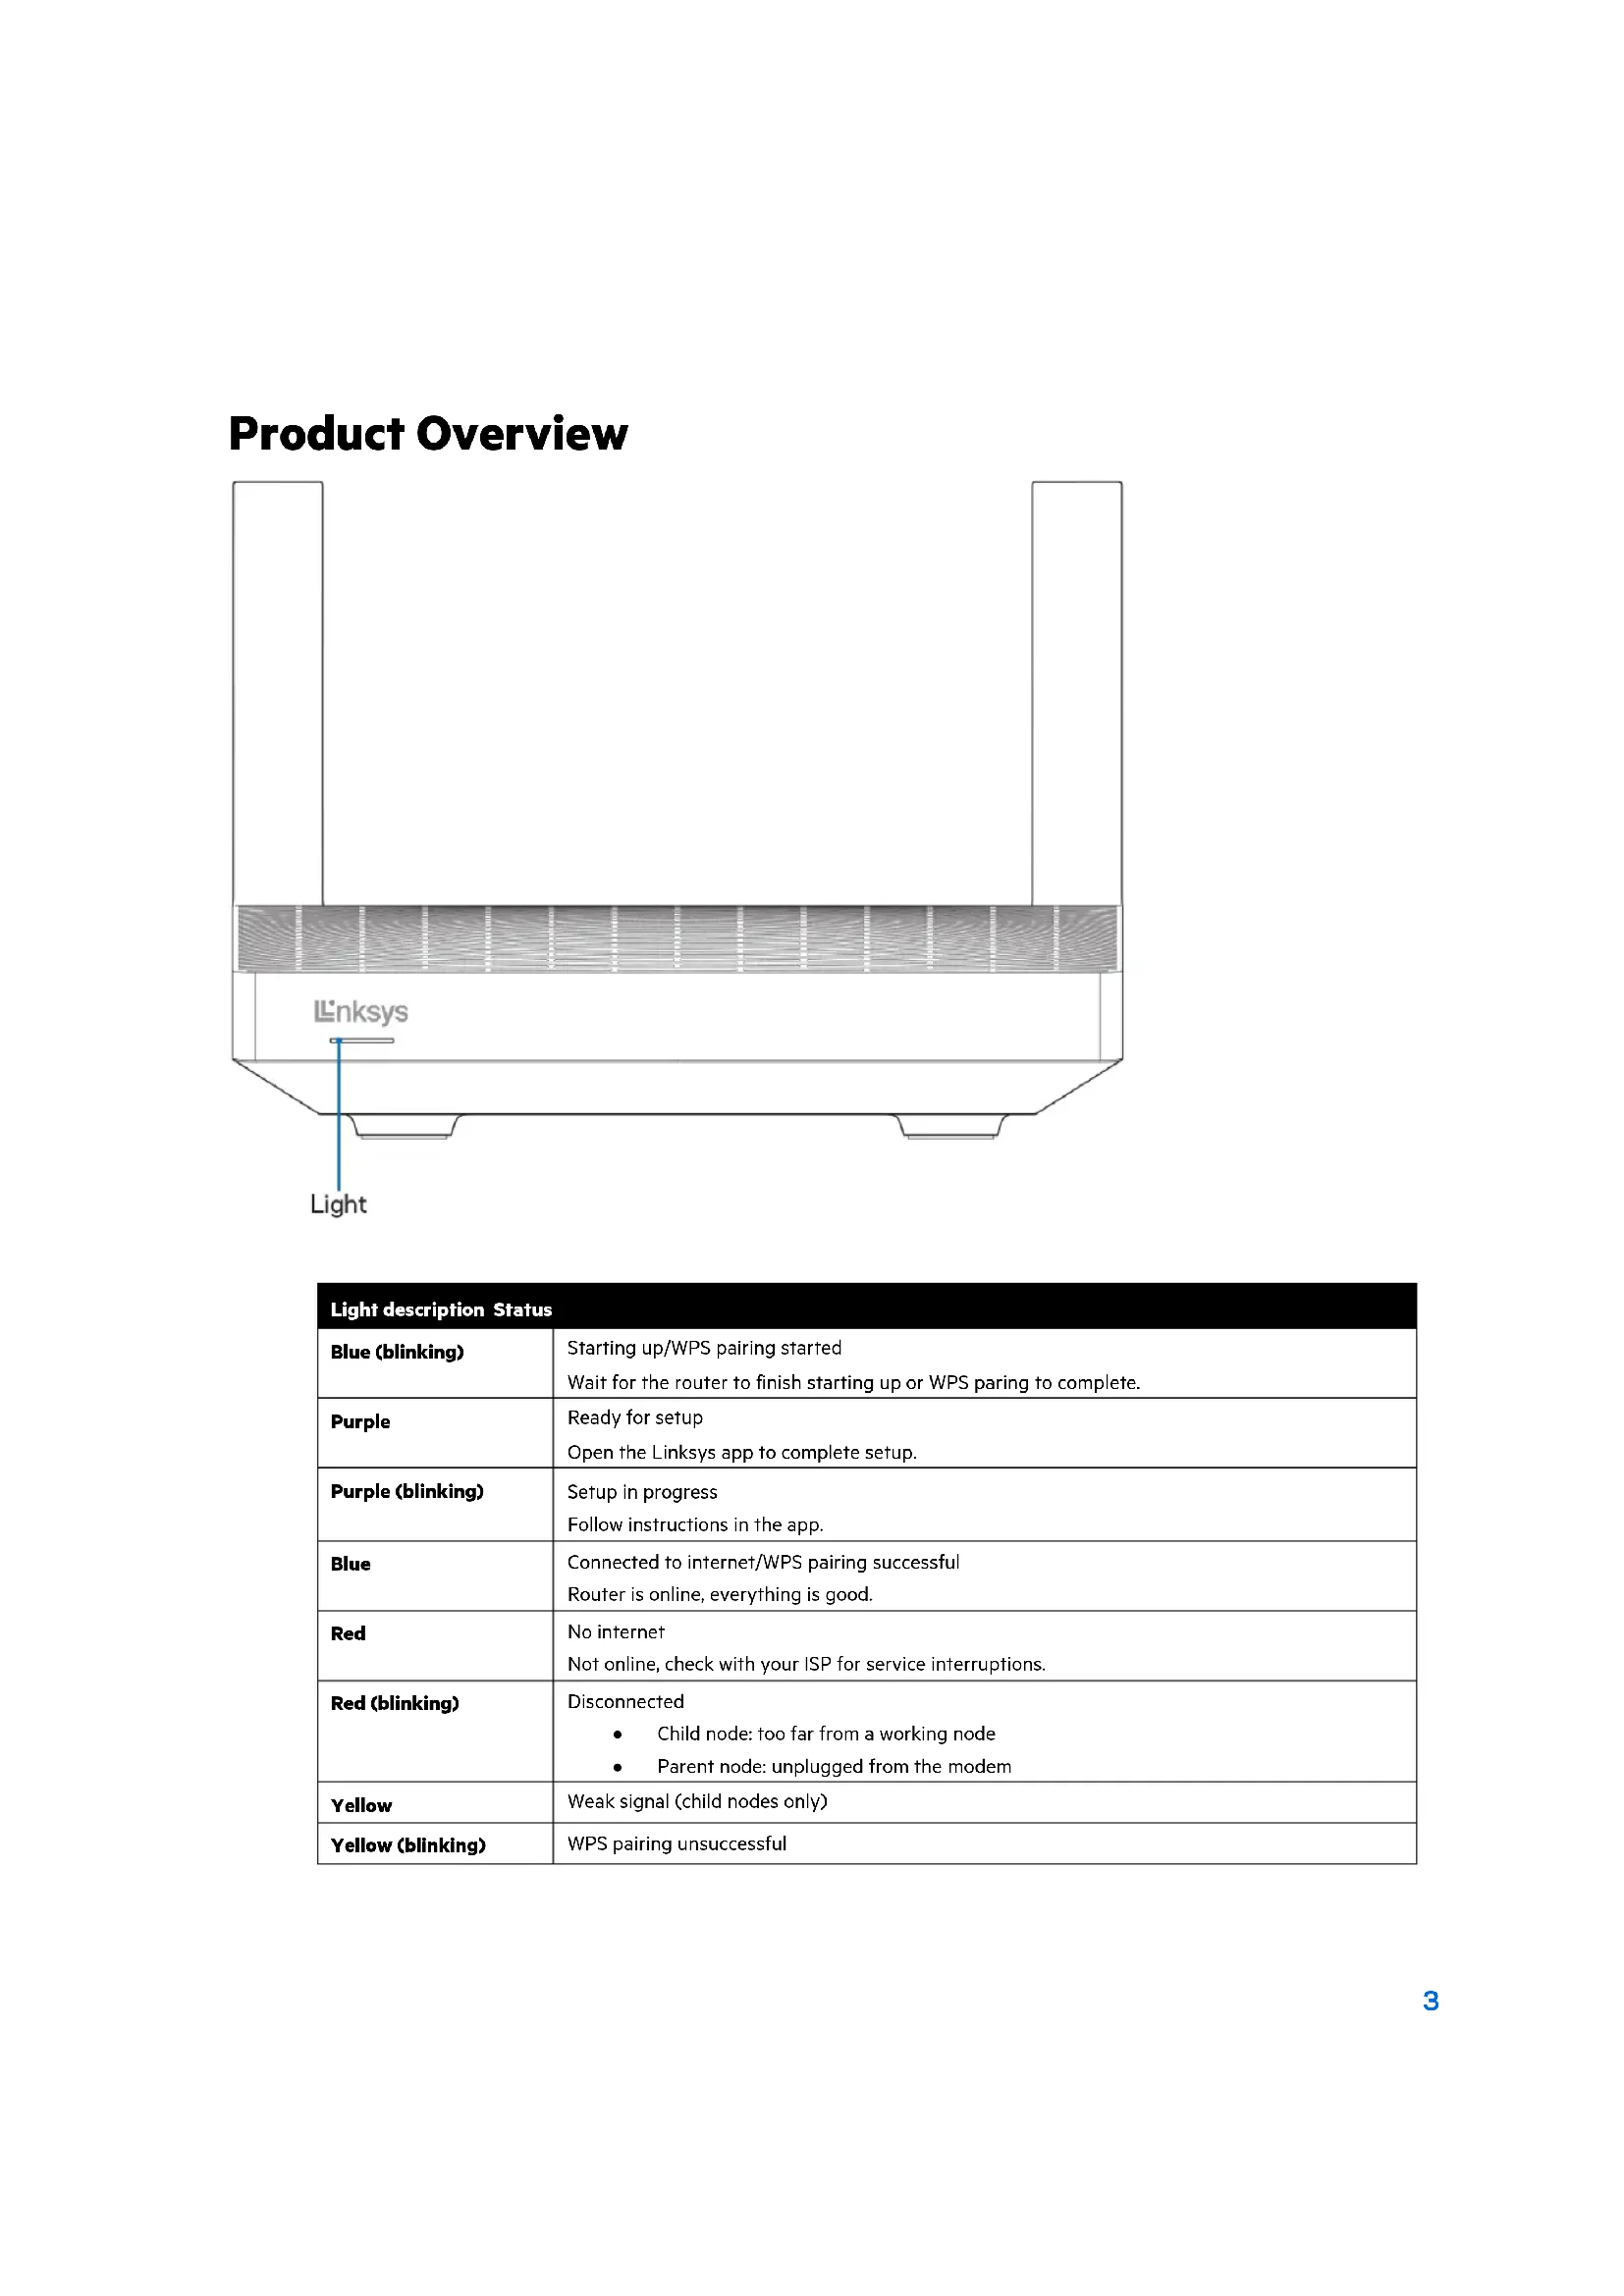
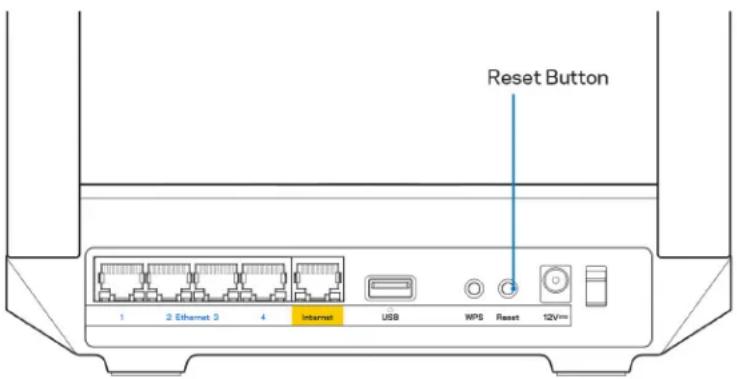
Product Overview
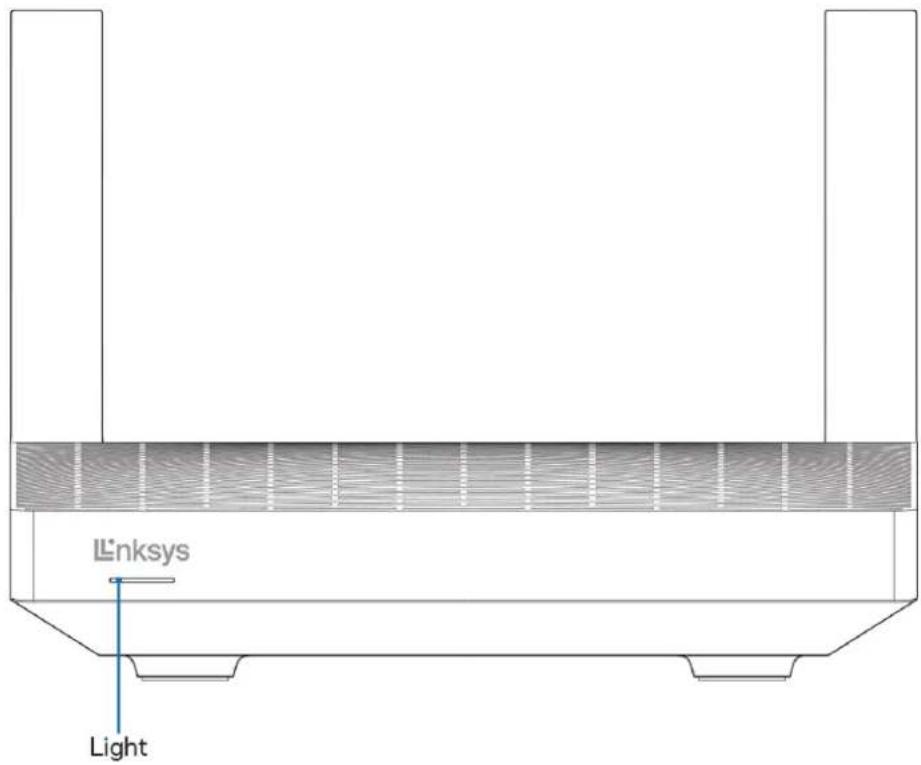
Light description Status
| Blue (blinking) | Starting up/WPS pairing startedWait for the router to finish starting up or WPS paring to complete. |
| Purple | Ready for setupOpen the Linksys app to complete setup. |
| Purple (blinking) | Setup in progressFollow instructions in the app. |
| Blue | Connected to internet/WPS pairing successfulRouter is online, everything is good. |
| Red | No internetNot online, check with your ISP for service interruptions. |
| Red (blinking) | DisconnectedChild node: too far from a working nodeParent node: unplugged from the modem |
| Yellow | Weak signal (child nodes only) |
| Yellow (blinking) | WPS pairing unsuccessful |
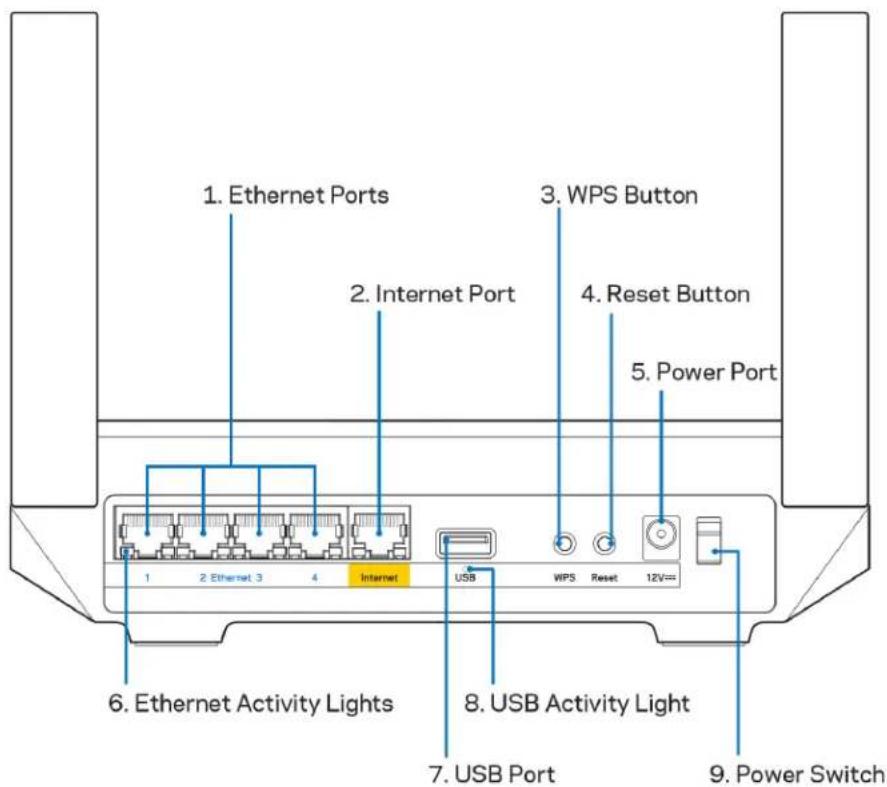
Ethernet ports (1)—Connect ethernet cables to these blue gigabit (10/100/1000) ports, and to wired devices on your network.
Note—For best performance, use CAT5e or higher rated cables on the Ethernet ports.
Internet port (2)—Connect an ethernet cable to the yellow gigabit (10/100/1000) port, and to a broadband internet cable/DSL or fiber modem. If you are using this router as a child node in a mesh Wi-Fi system, you can use this port to create a wired connection to another node.
Note—For best performance, use CAT5e or higher rated cable on the Internet port.
Wi-Fi Protected Setup™ button (3)—Press to connect to WPS-enabled network devices.
Reset button (4)—To factory reset your router, press and hold while the light on top of the router blinks red. Do not release the button until the light goes out and then turns bright red.
Power port (5)—Connect the included AC power adapter.
Ethernet activity lights (6)—Lights indicate data transfer over ethernet cable.
USB 3.0 port (7) — Connect and share USB drives on your network or on the internet.
USB activity light (8)—Light indicates data transfer over USB connection.
Power switch (9)—Press | (on) to turn on the router.
Note — FCC regulations restrict the operation of this device to indoor use only.
Help
Where to find more help
- Linksys.com/support/MR2000
- Linksys app help (launch the app and click Help in the main navigation menu)
Note—Licenses and notices for third party software used in this product may be viewed on http://support.linksys.com/en-us/license. Please contact http://support.linksys.com/en-us/gplcodecenter for questions or GPL source code requests.
Set Up
IMPORTANT—Your MR2000 Series router can be set up as a parent node or a child in a whole home mesh Wi-Fi system. A parent node must be connected with an ethernet cable to your modem or modem-router. Child nodes can be connected wirelessly or with ethernet cables.
If you are adding the router as the parent node for an existing Linksys whole home mesh Wi-Fi system, factory reset all nodes and add them to the system after your MR2000 Series router is setup and working.
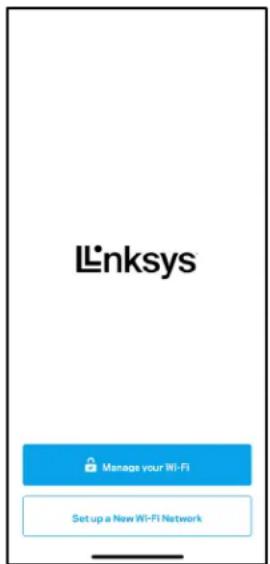
Download the Linksys app. You need this app to set up your router.
Go to the app store for your device and search for Linksys. Look for this icon:
What you'll need
Install the app, open it and follow the instructions.
Note—The app works with iOS 14.1 and later, and Android 6.0 and later.
During setup you will create a Linksys Smart Wi-Fi account so you can use the app to view or change your router system settings from anywhere you have an internet connection.
Among the many things you can do with Linksys Smart Wi-Fi and the Linksys app:
• Change your Wi-Fi name and password
- Set up guest access
- Connect devices to Wi-Fi with WPS
• Block internet with parental controls
• Test your internet connection speed
Note—We'll send you a verification email. While connected to your home network, click the link in the email to link your router with your account.
Other than plugging in the power and the ethernet cable, the app-based setup process does the work for you. Once connected, use the app to personalize your Wi-Fi by giving it a name and password. You also can give your router and any child nodes names based on where they are so you can identify them in the rare case where things need attention.
If you want to add child nodes to create a whole home mesh Wi-Fi system, set them up within range of a working node. Only the parent node has to be wired to the modem or modem-router. Don't worry, the app will help you place your nodes.
Print this page, then record your Wi-Fi and account settings in the table as a reference. Store your notes in a safe place.
| Wi-Fi Name | |
| Wi-Fi Password | |
| Router Password | |
| Guest Network Name | |
| Guest Network Password | |
| Linksys App Login Email Address | |
| Linksys App Password |
Your login email address and password can also be used to log in at LinksysSmartWiFi.com on a computer. You can view or manage your Wi-Fi in an internet browser.
Linksys Whole Home Wi-Fi System Settings
Using your Linksys app, you can view or change Wi-Fi system settings including security and parental controls. You can access settings from anywhere in the world if you have an internet connection. You can also access your system directly from your home network, even if you don't have an internet connection.
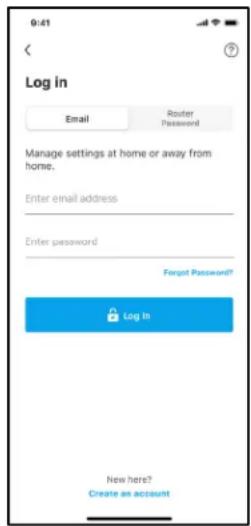
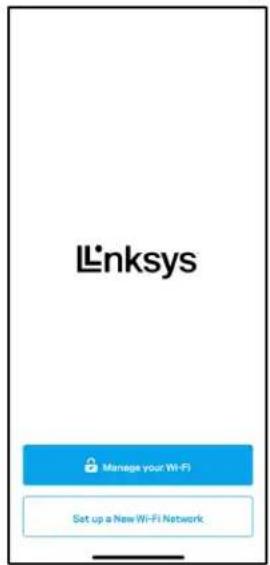
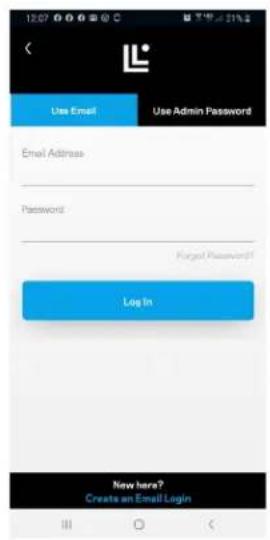
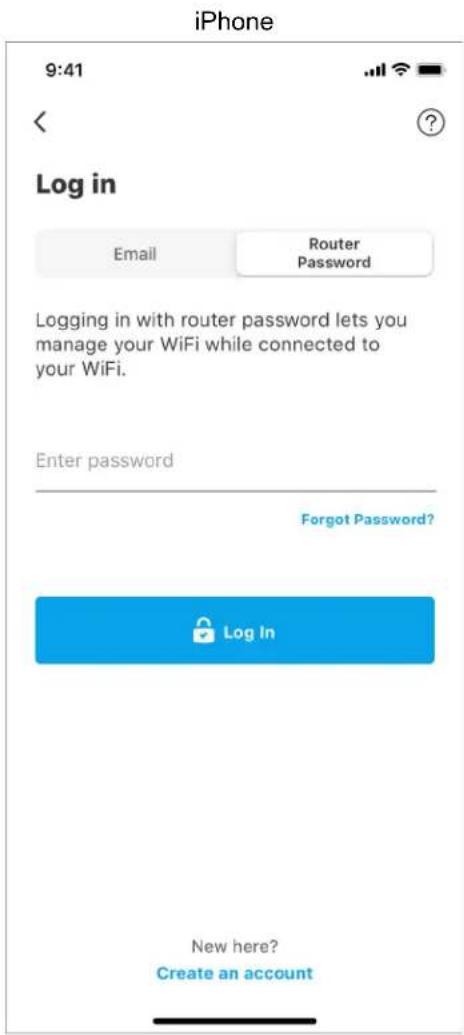
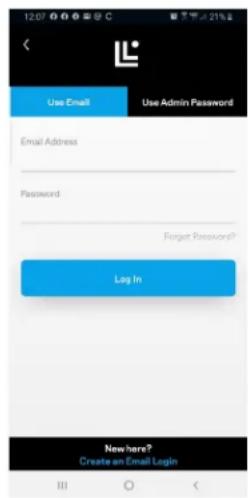
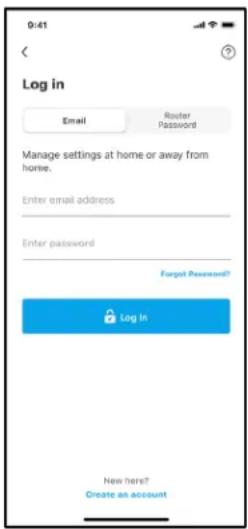
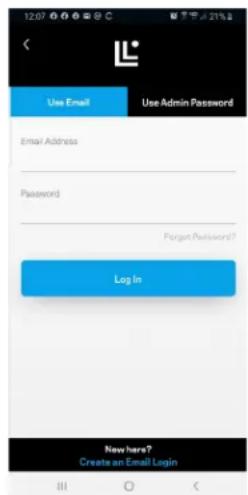
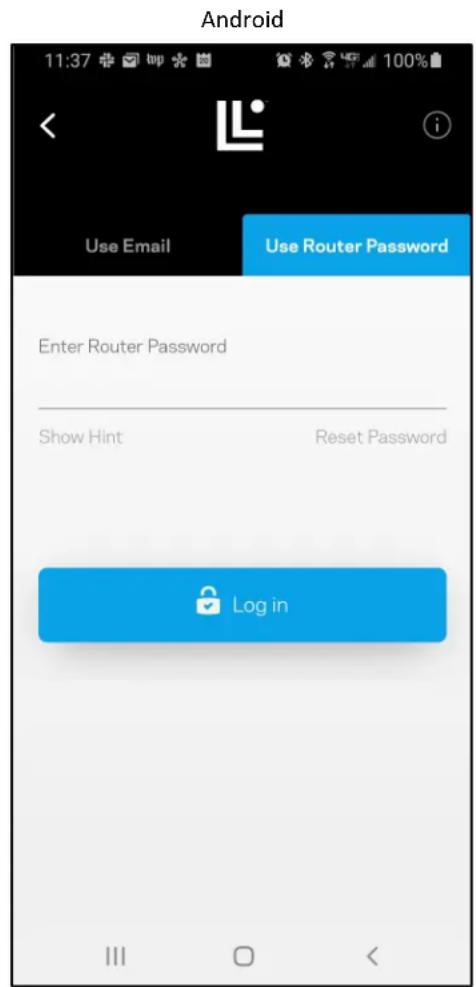
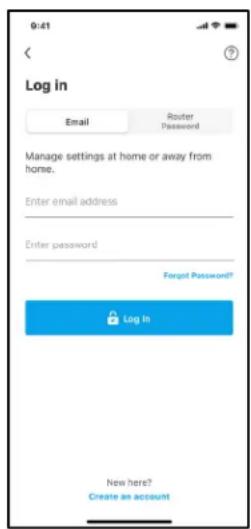
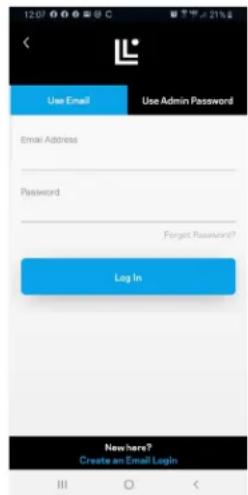
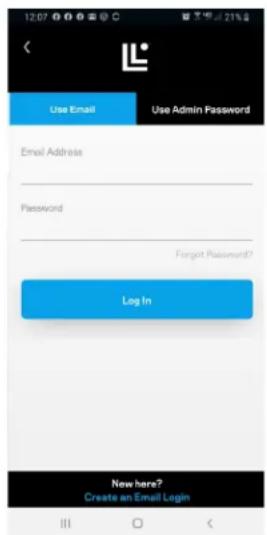
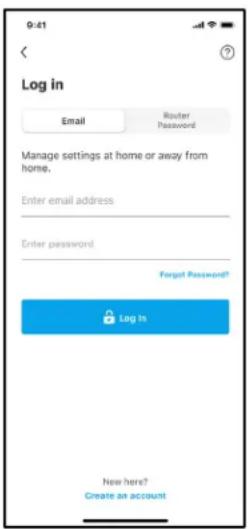
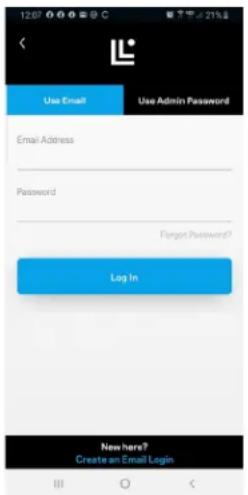
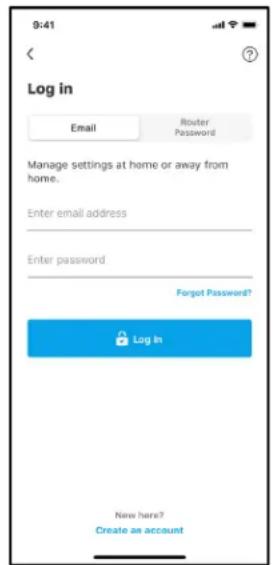
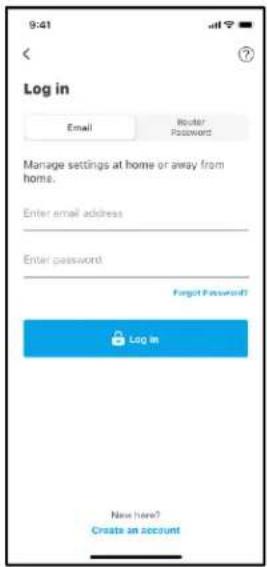
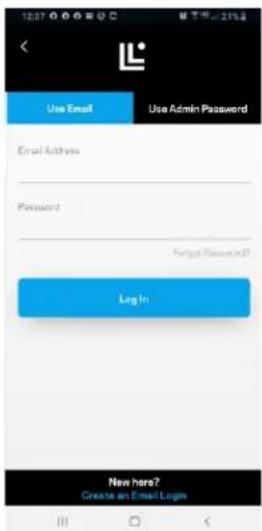
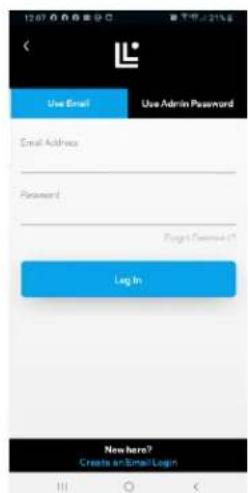
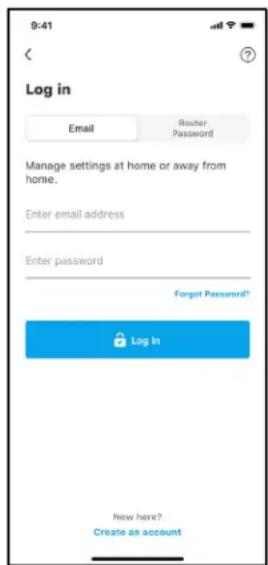
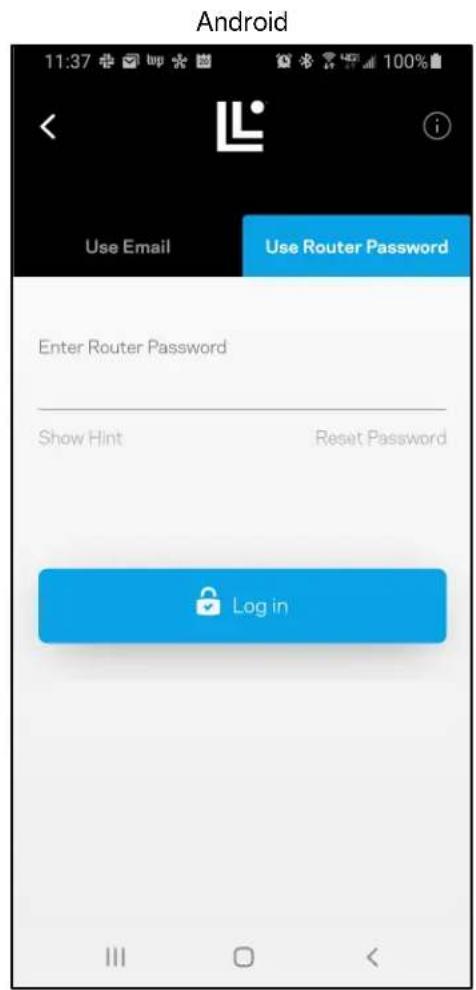
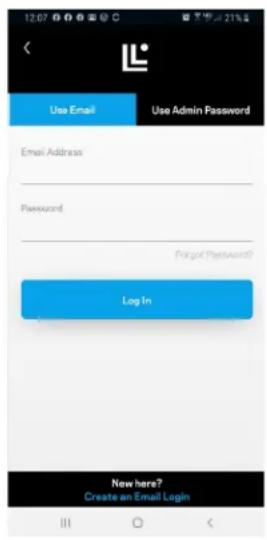
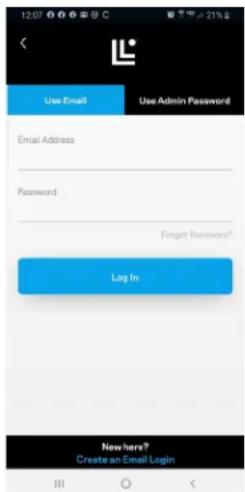
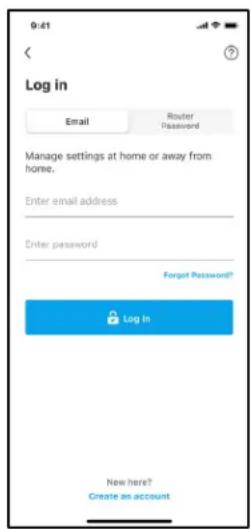
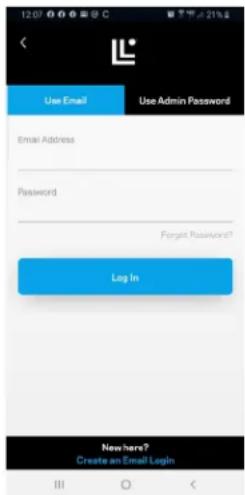
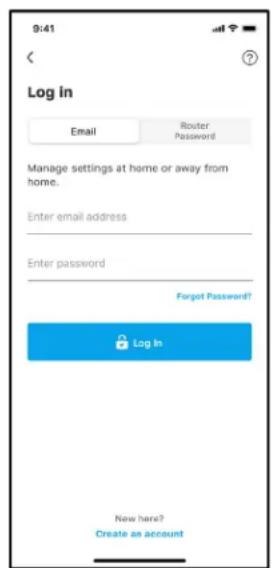
Log in to the Linksys app
- Open the Linksys app, tap Log in.
iPhone

Android


- Enter the email address you used when creating your account.
- Enter your account password.
- Tap Log in.
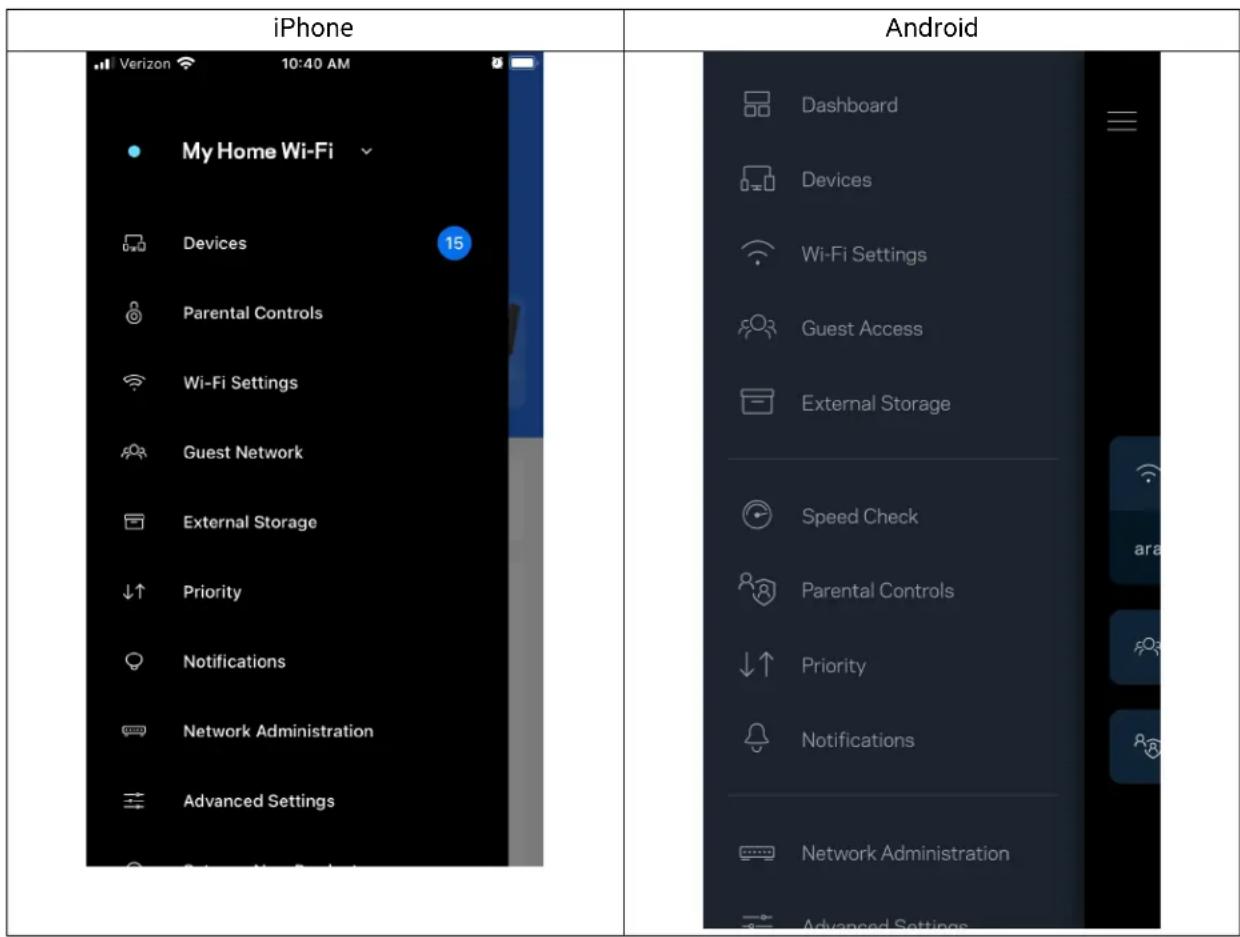
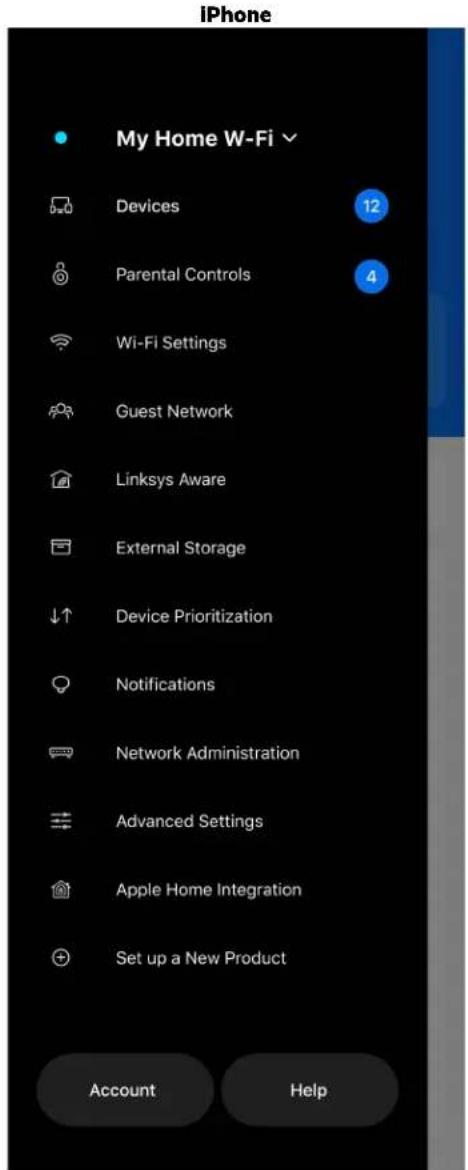
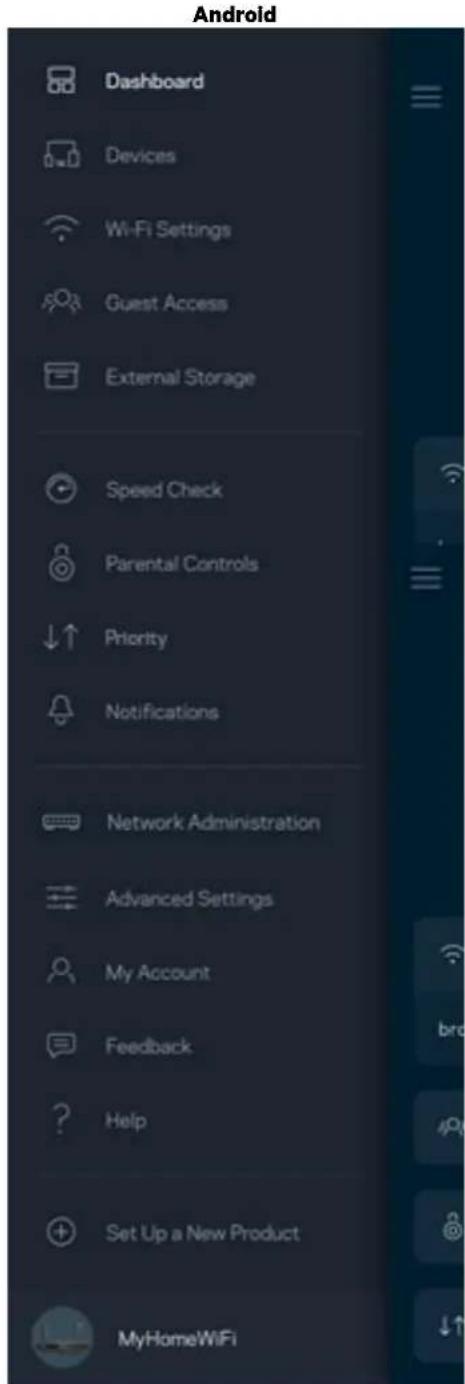
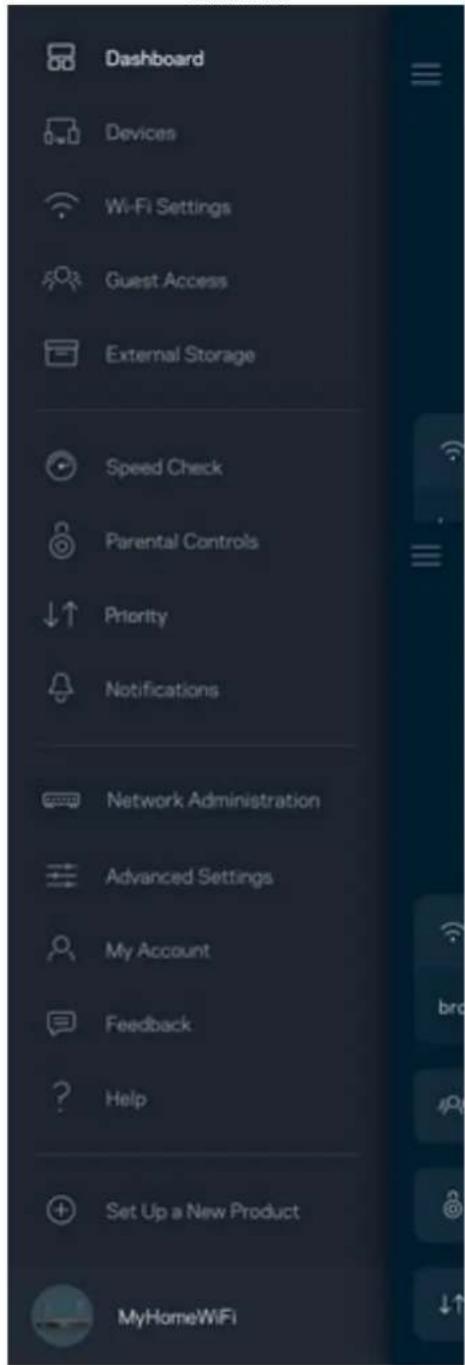
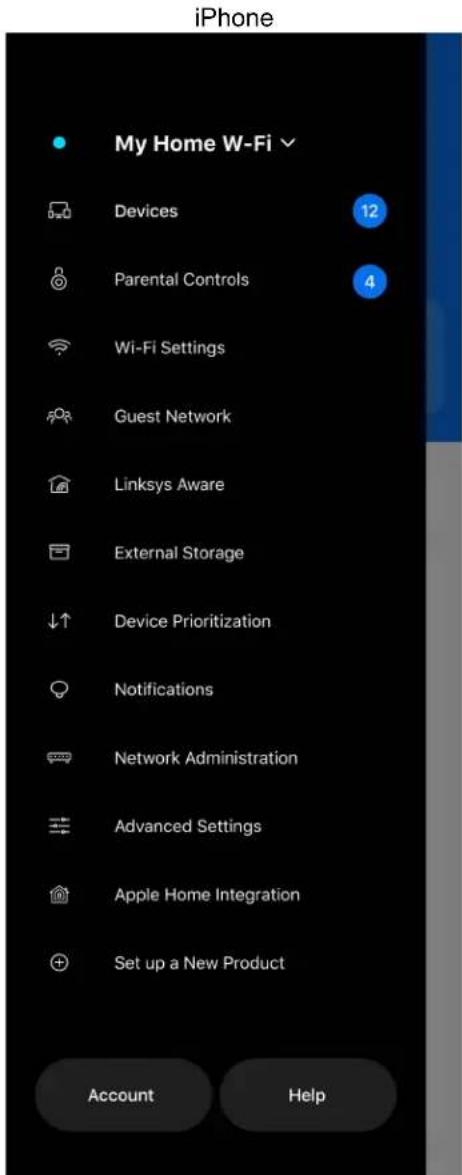
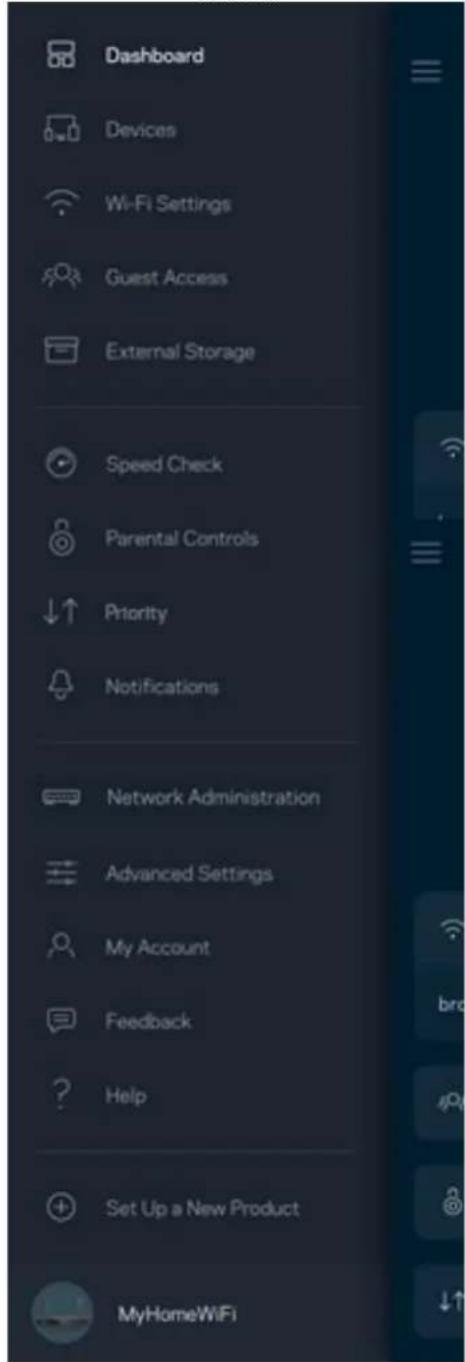
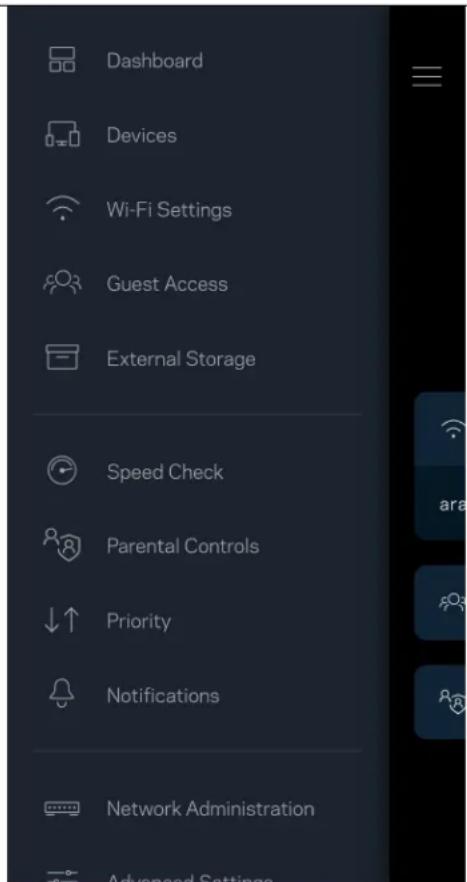
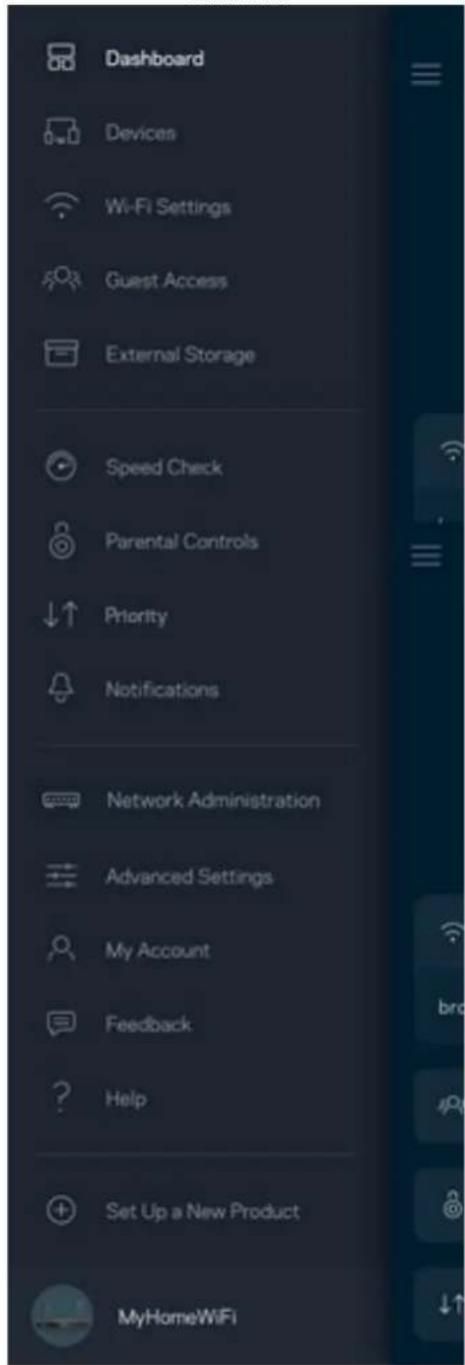
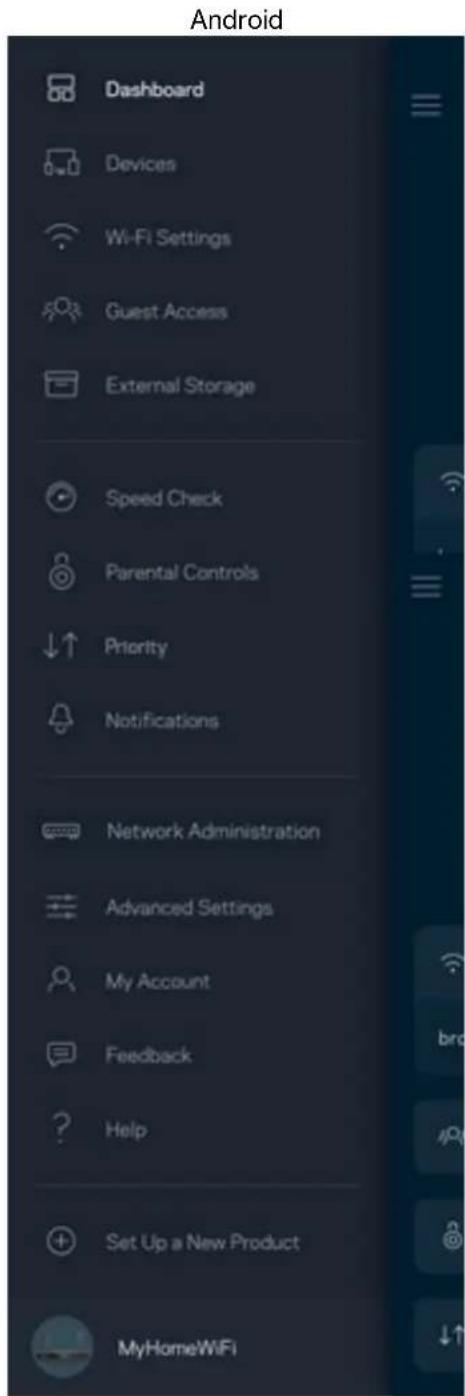
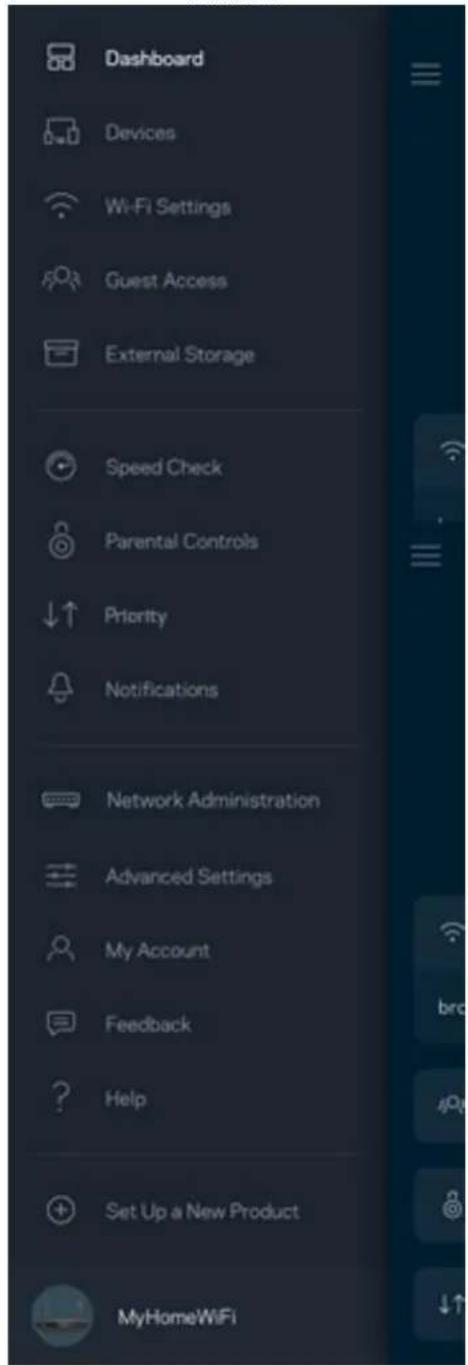
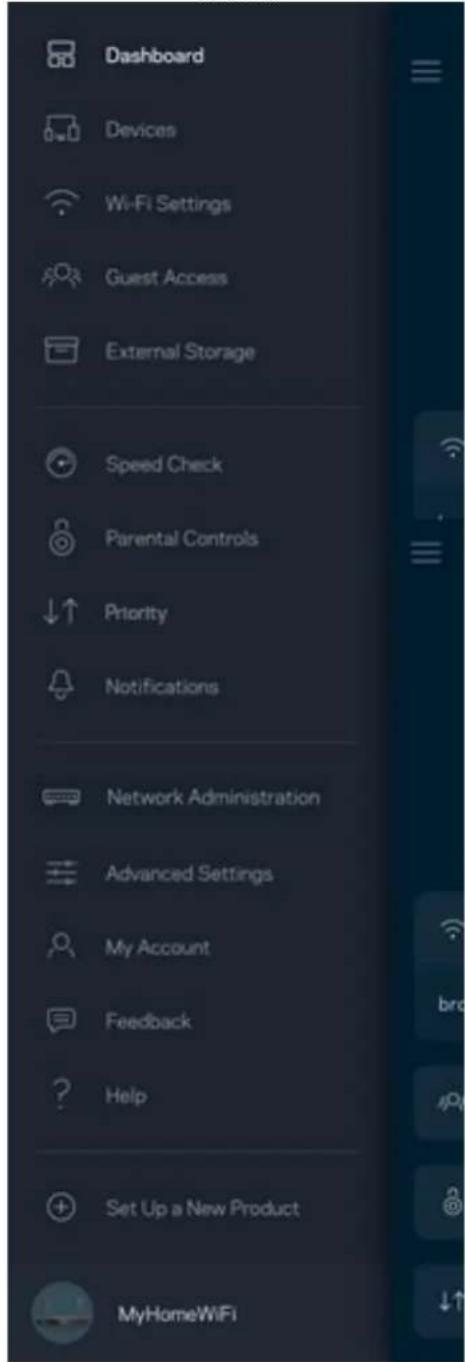
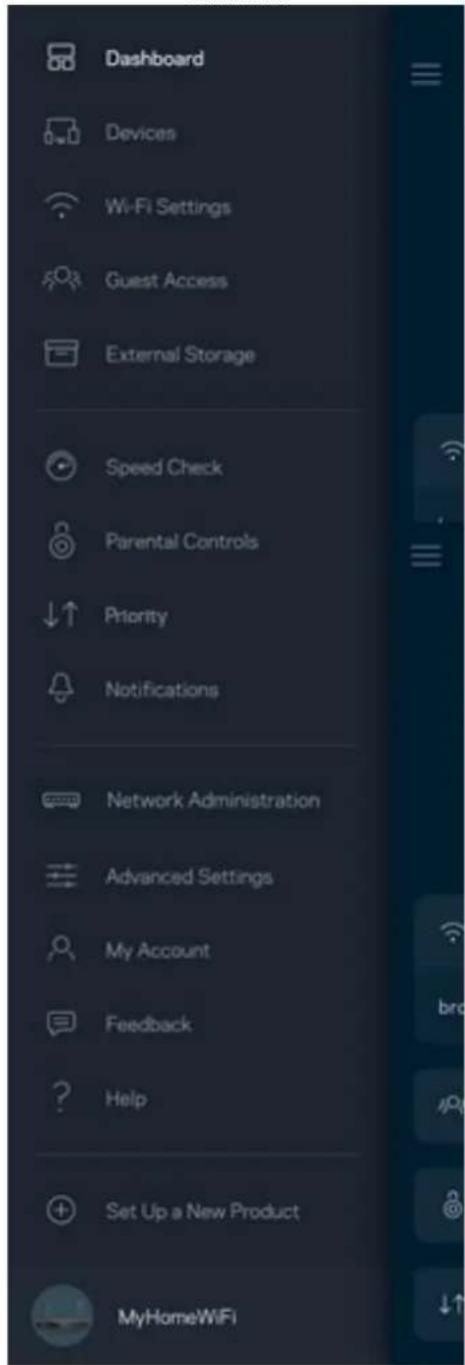
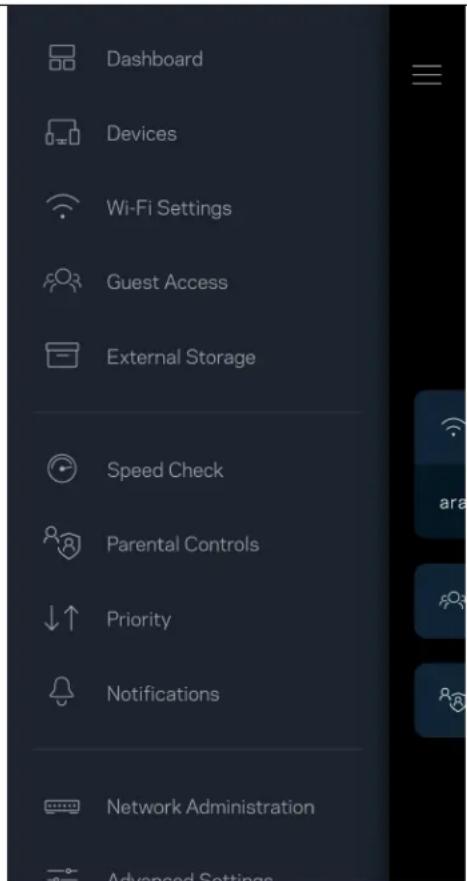
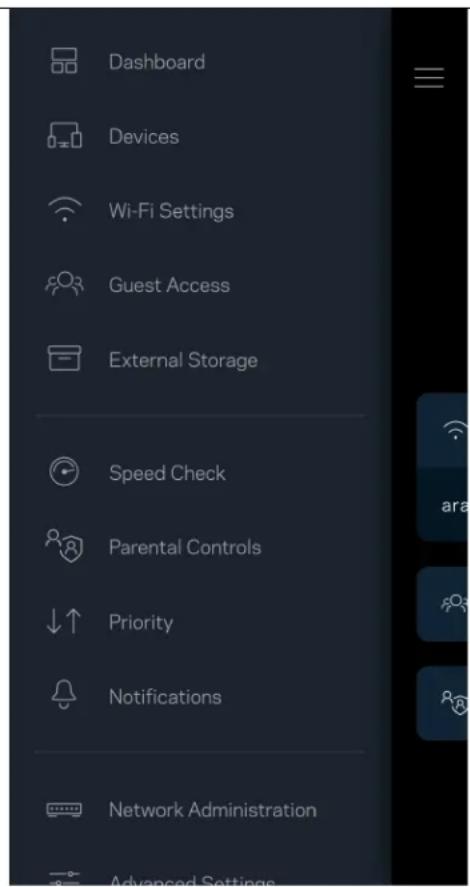
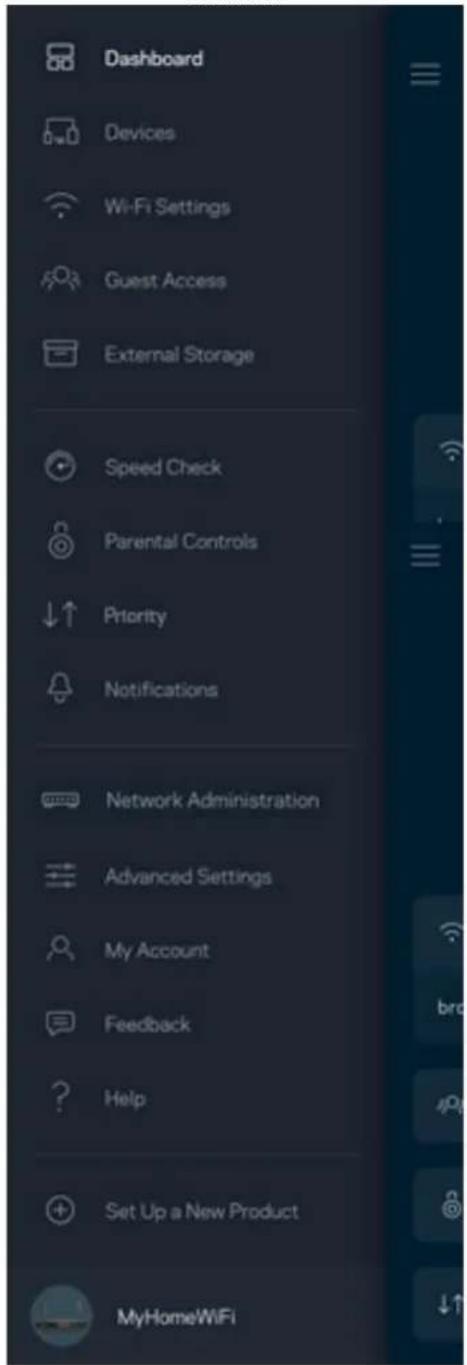
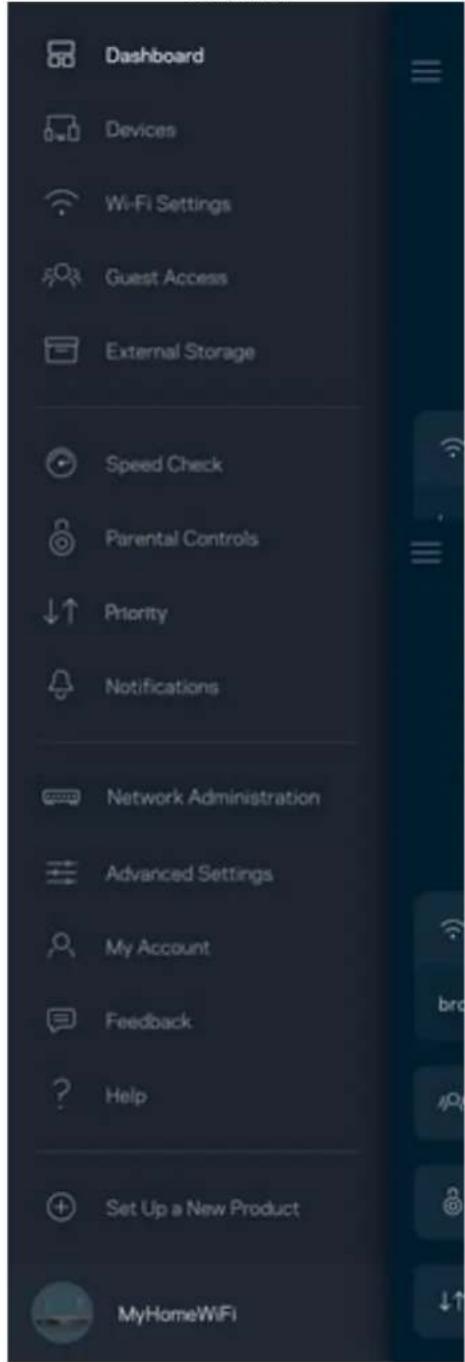
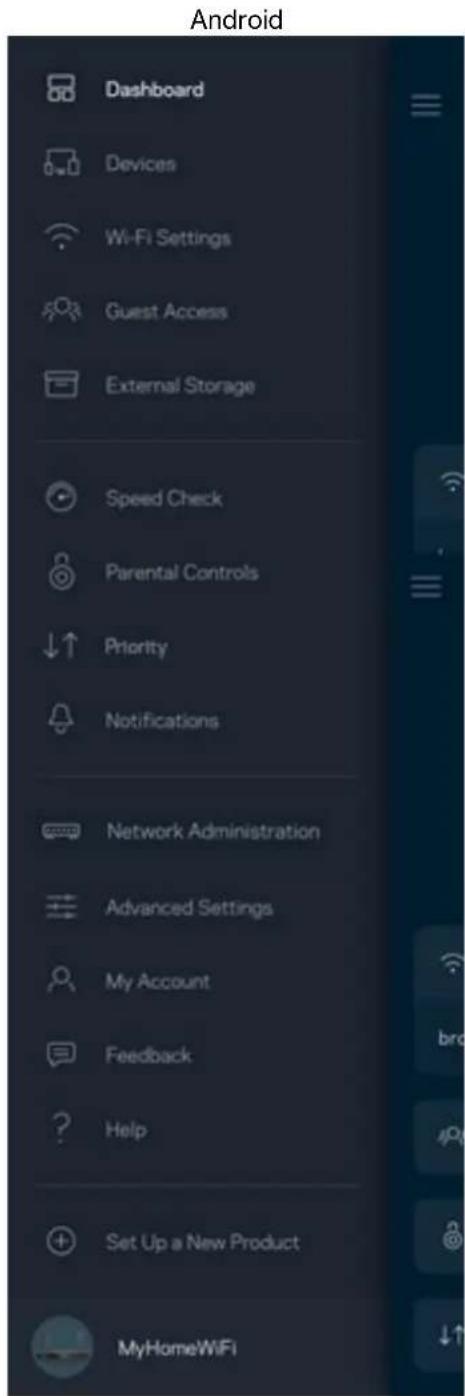
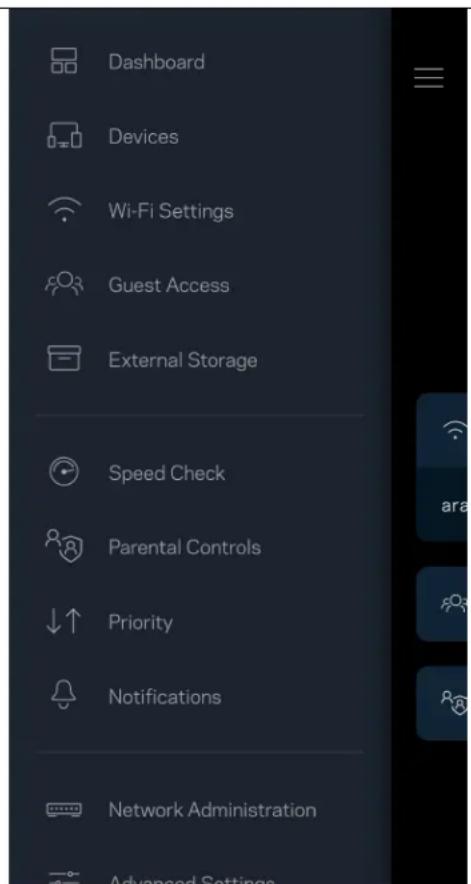
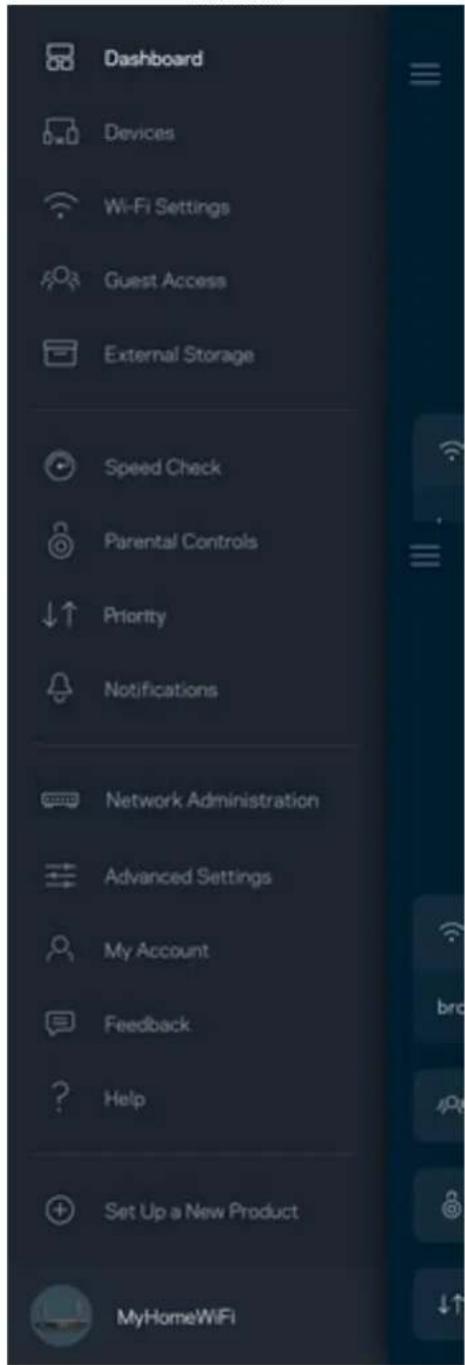
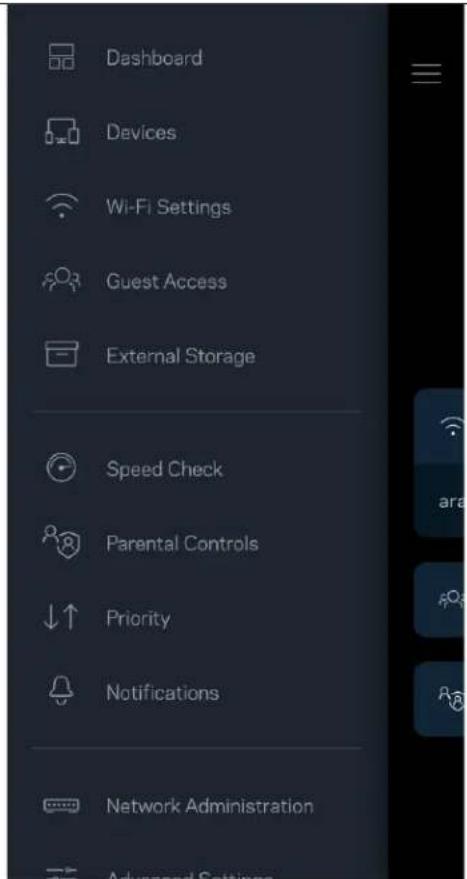
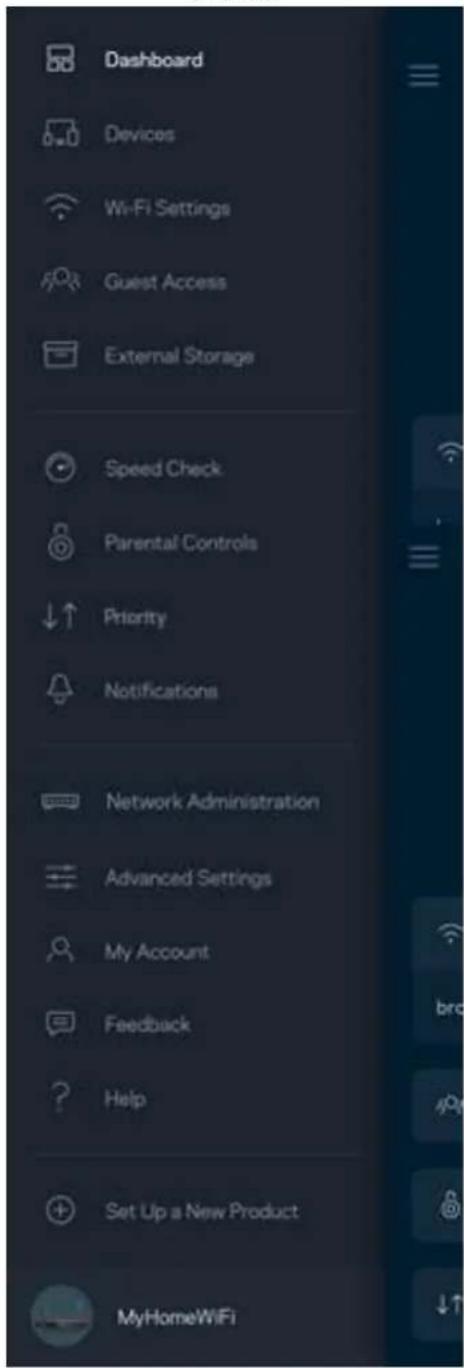
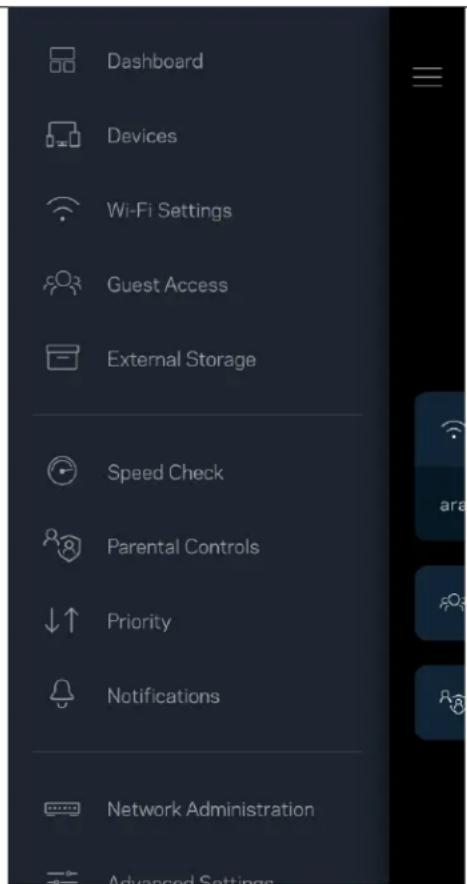
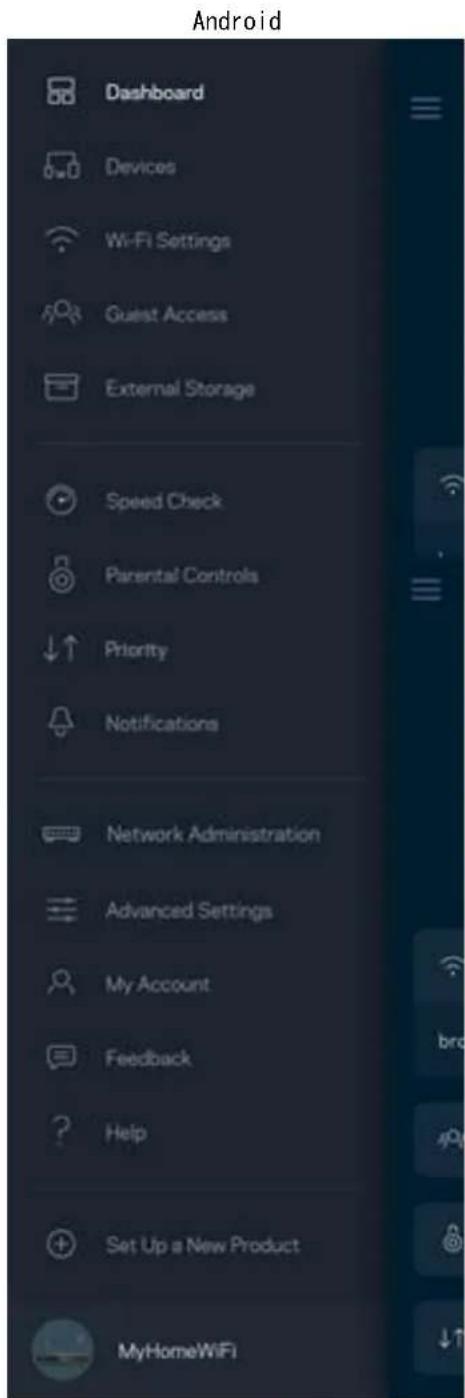
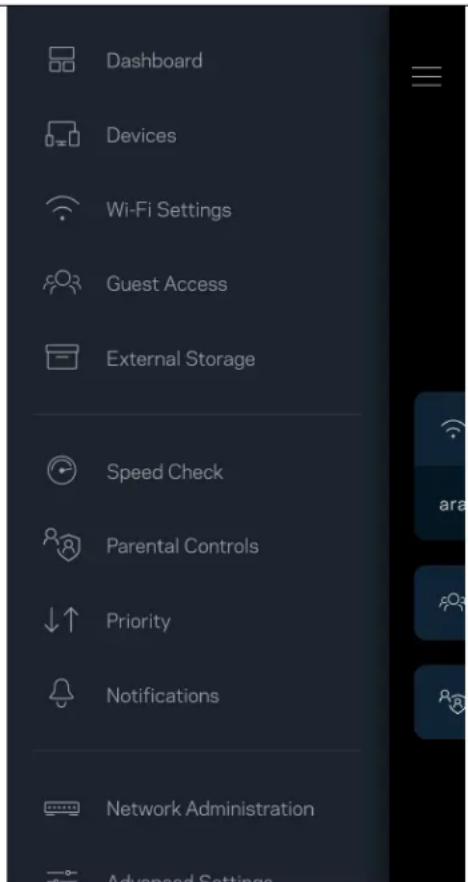
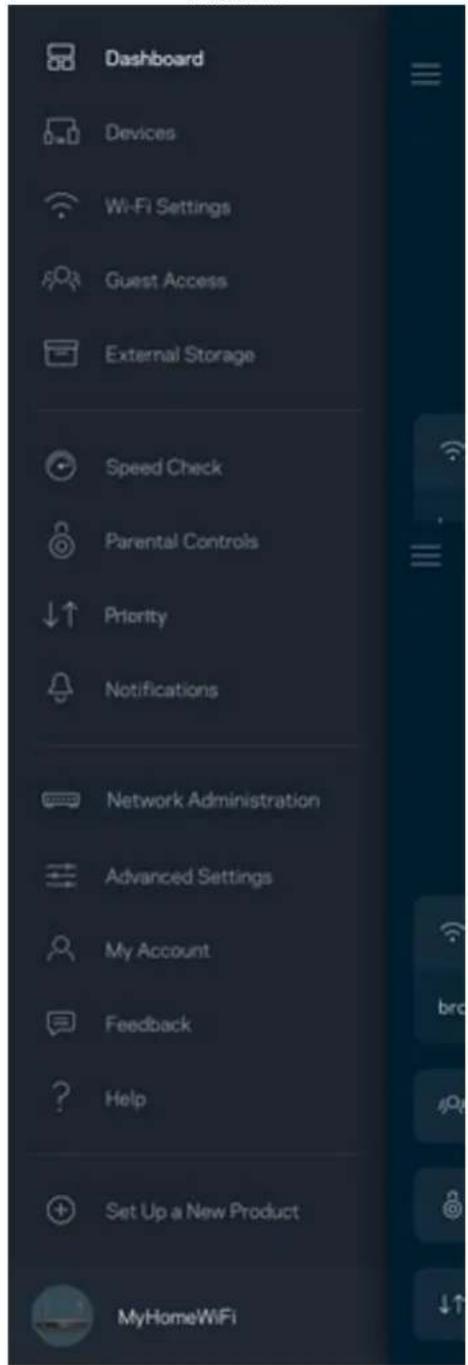
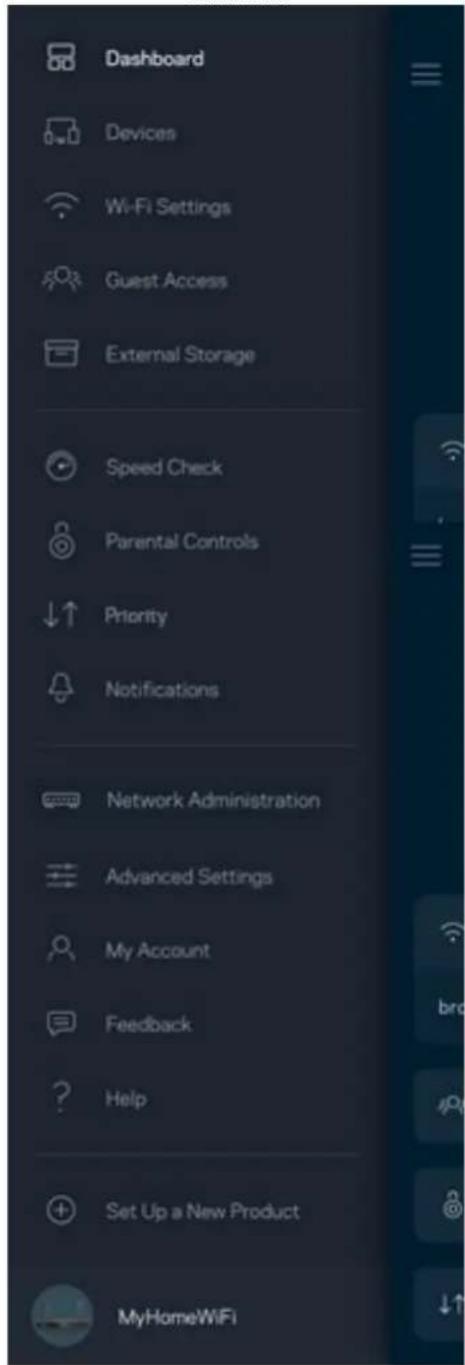
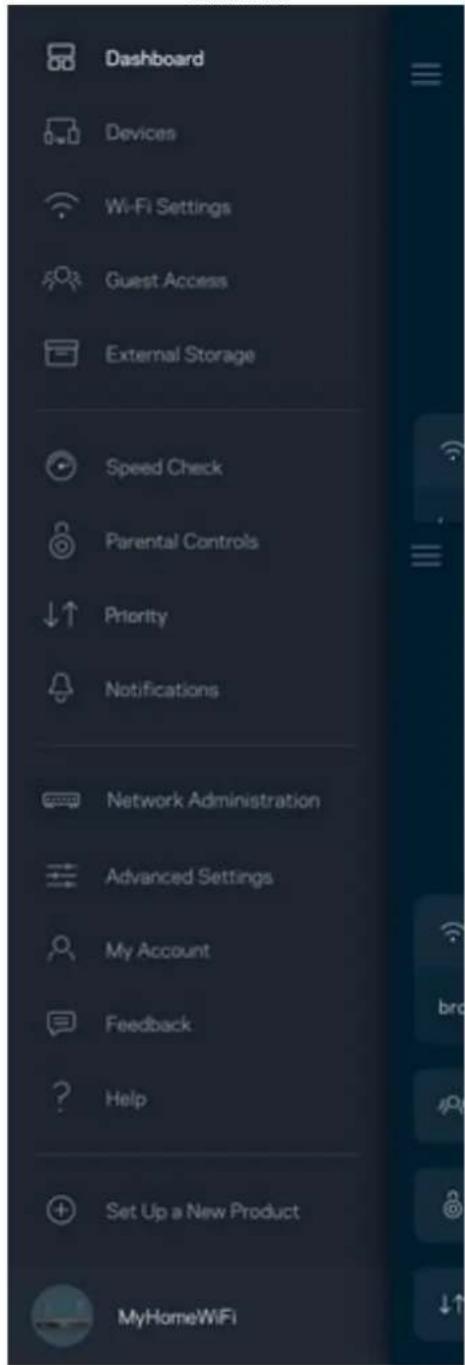
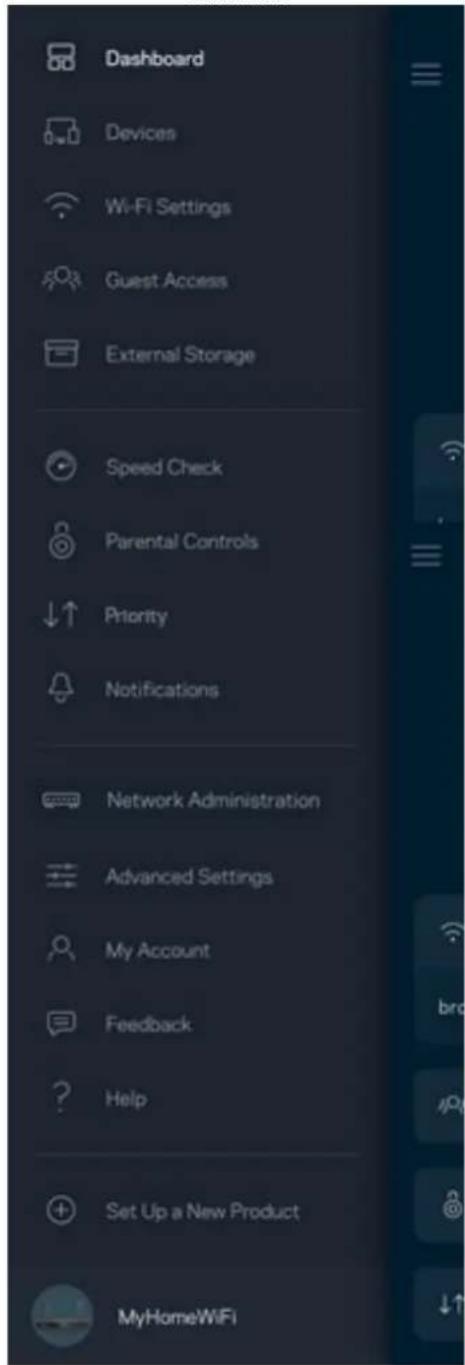
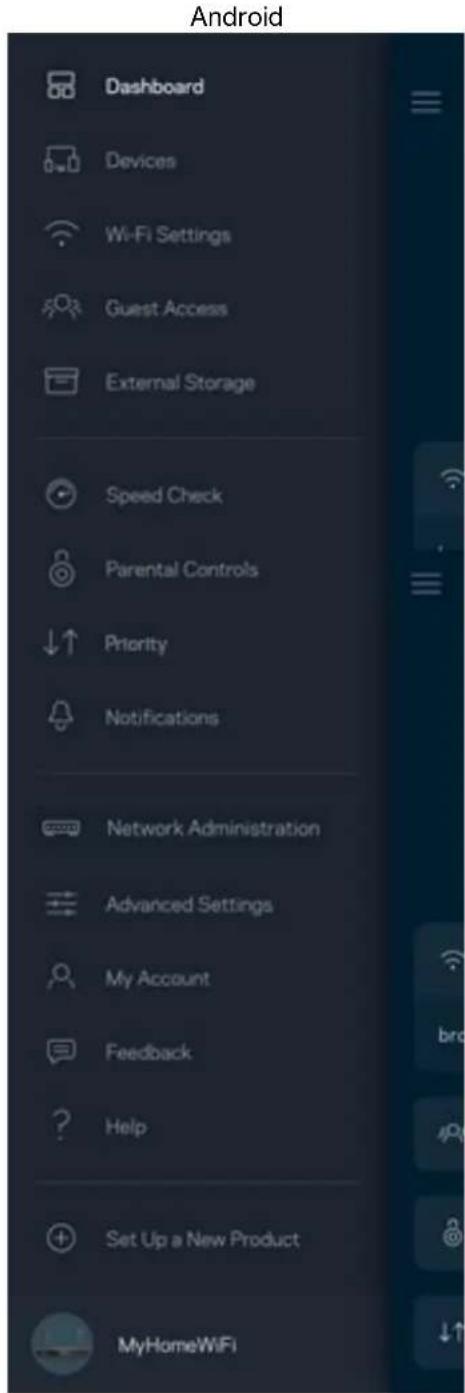
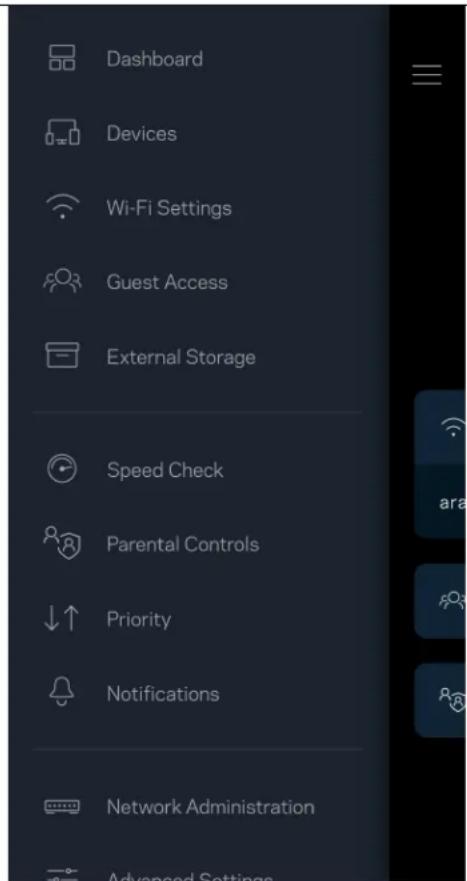
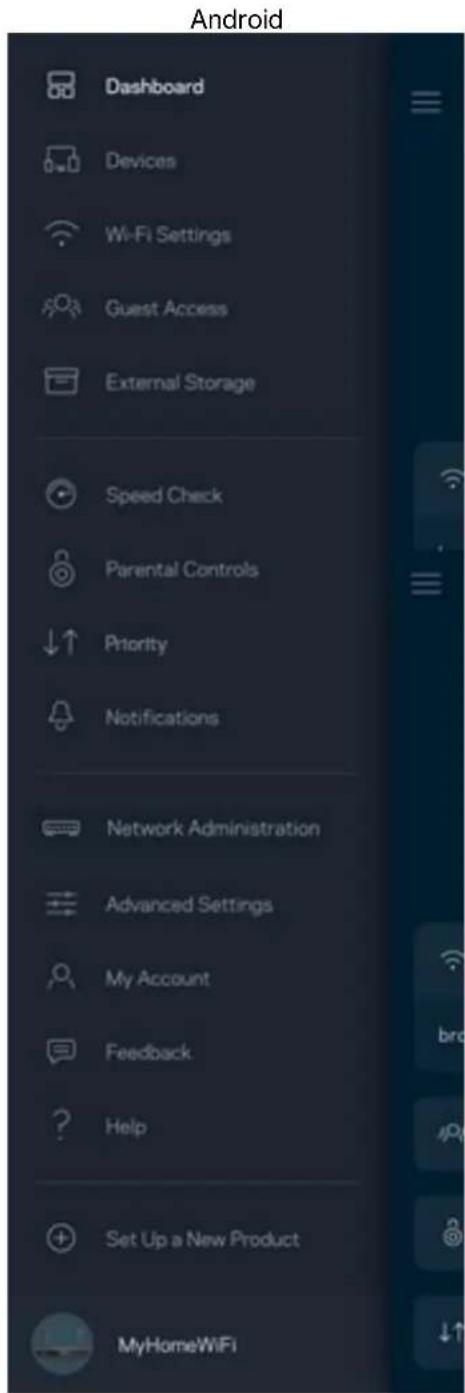
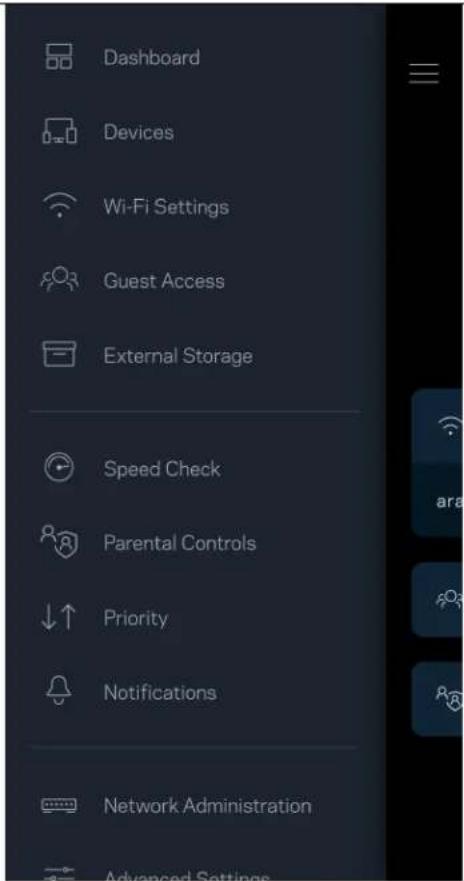
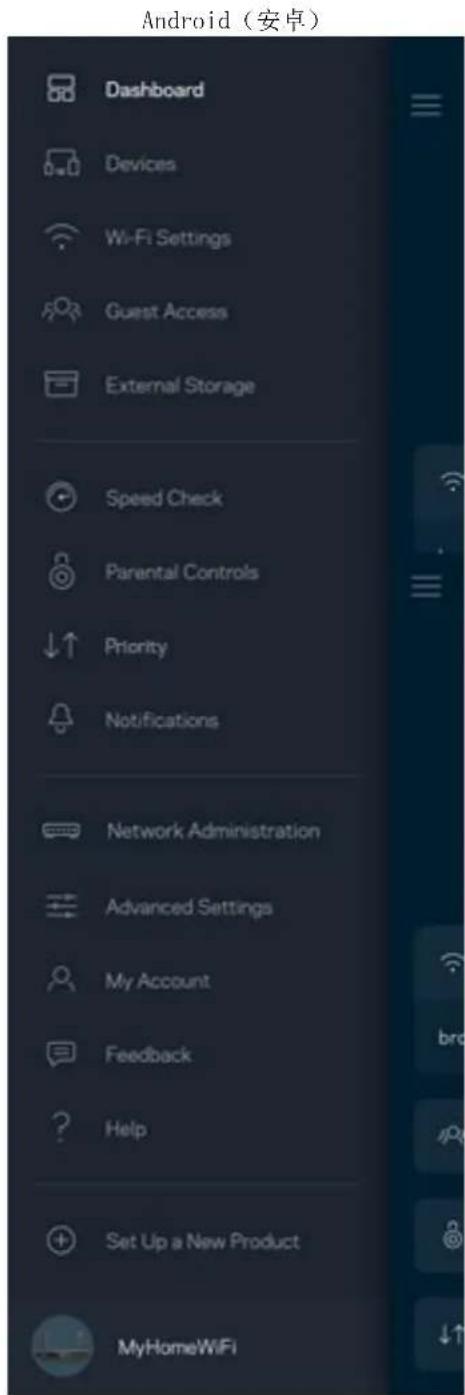
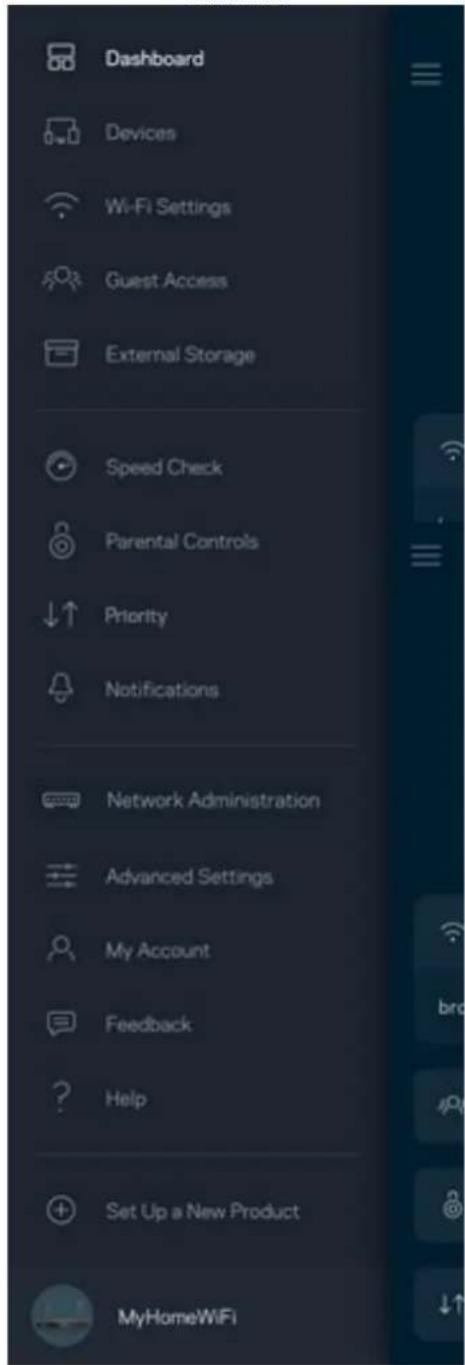
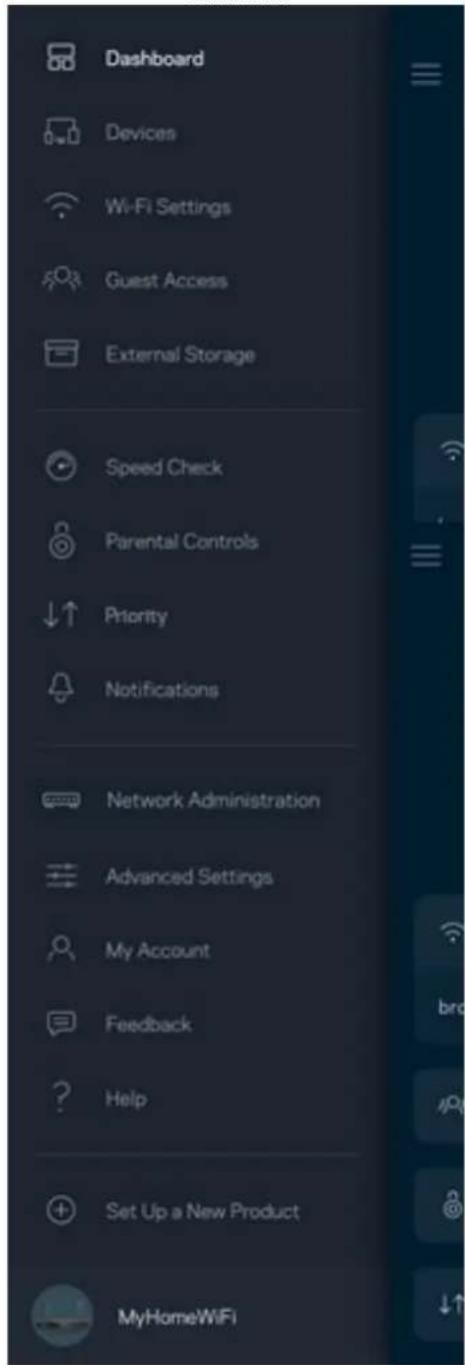
Navigation Menu
Tap the menu icon to navigate around the app.
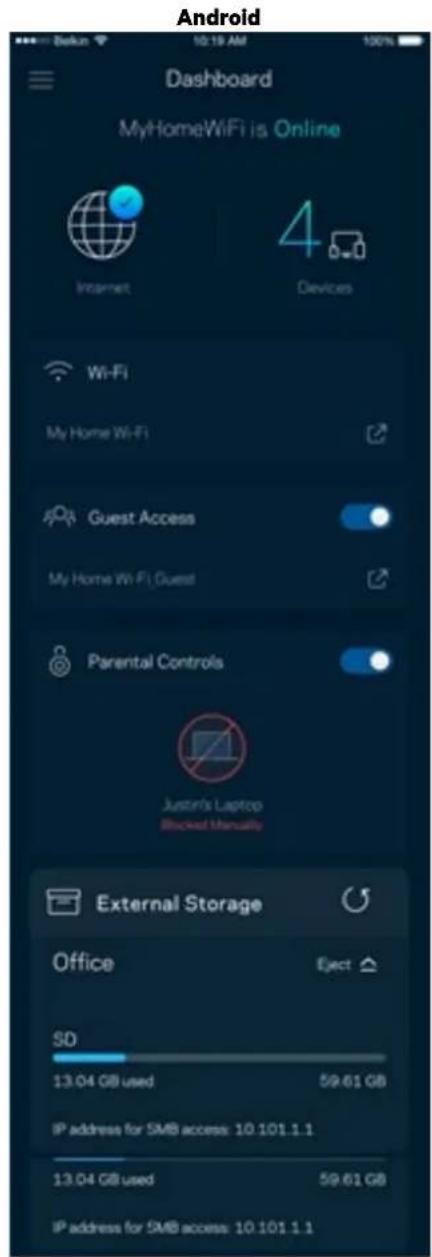
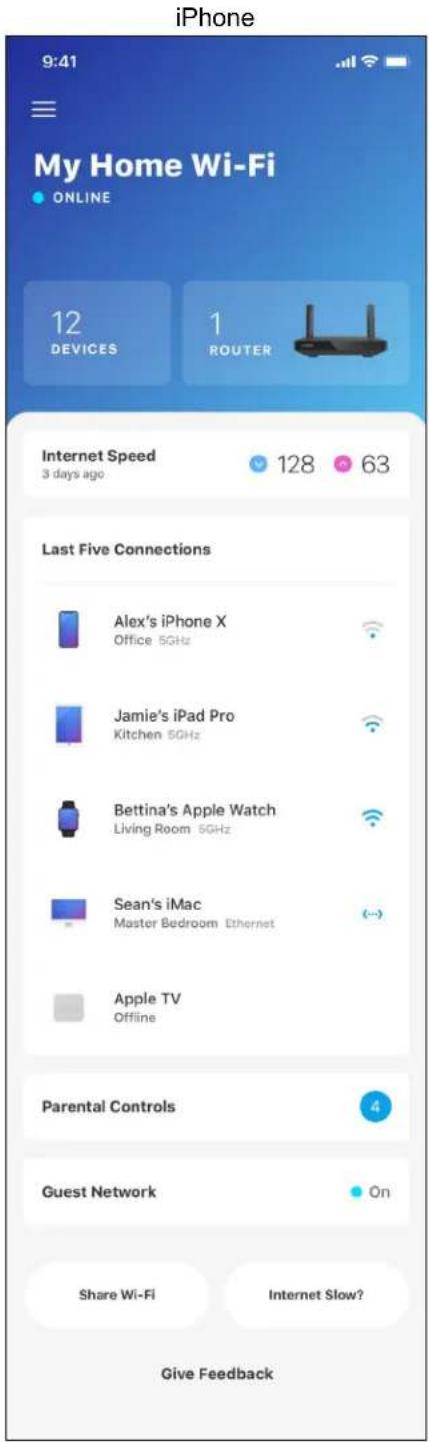
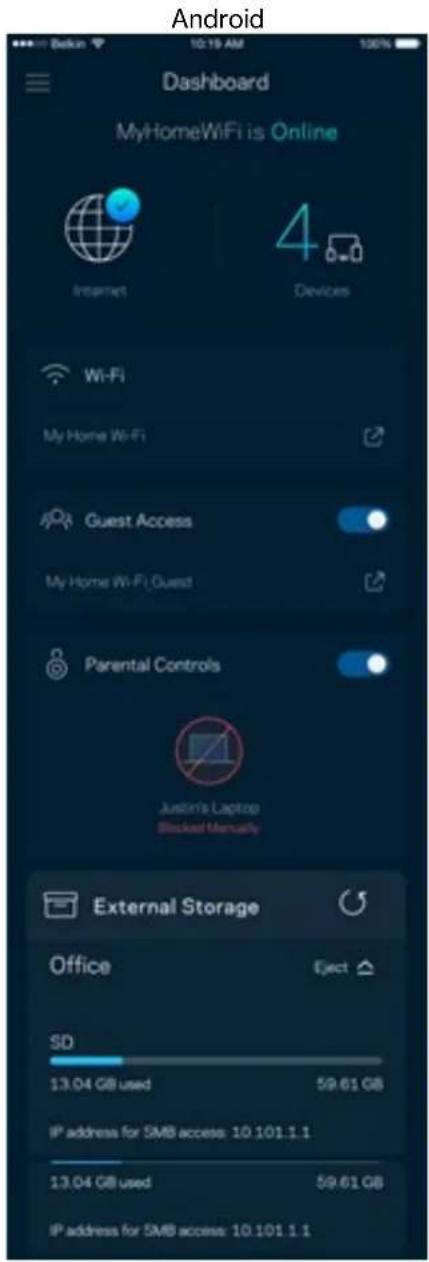
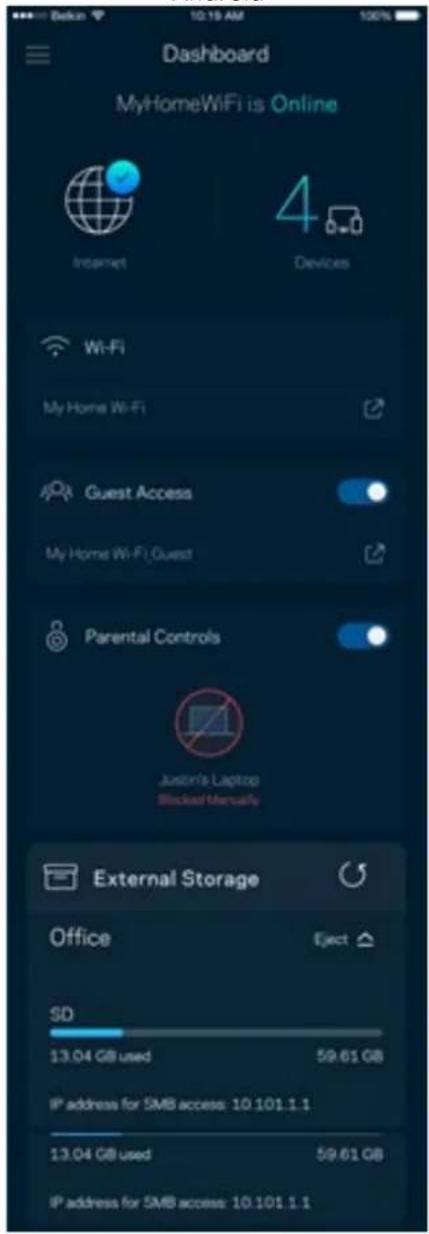
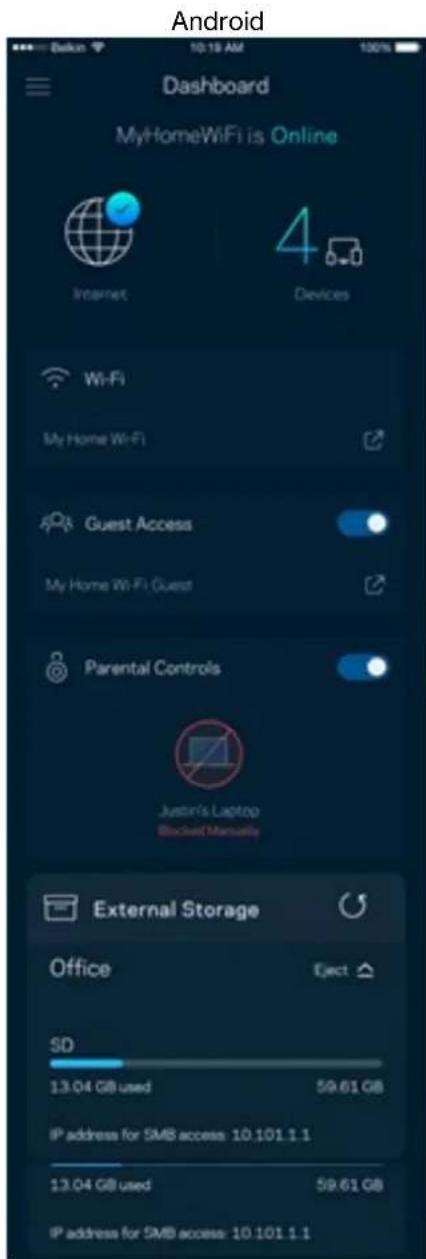
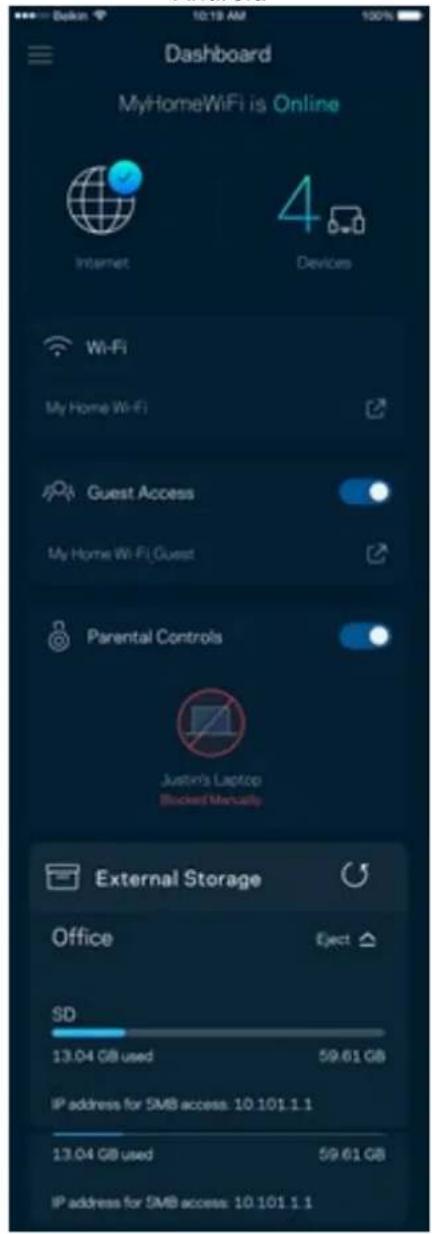
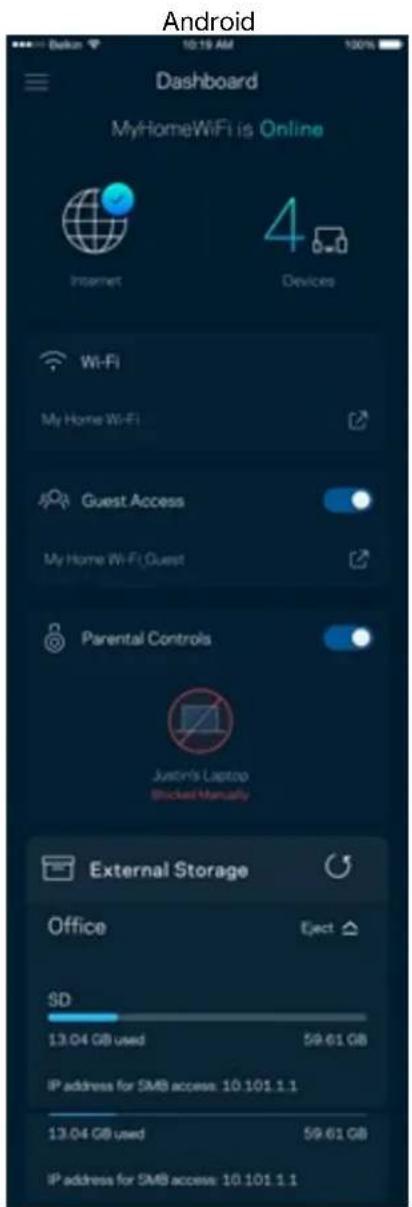
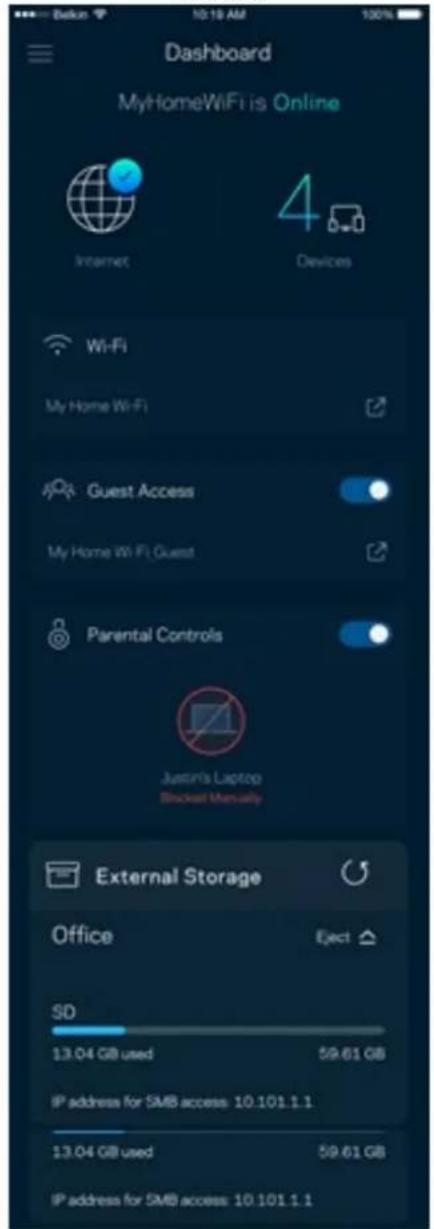
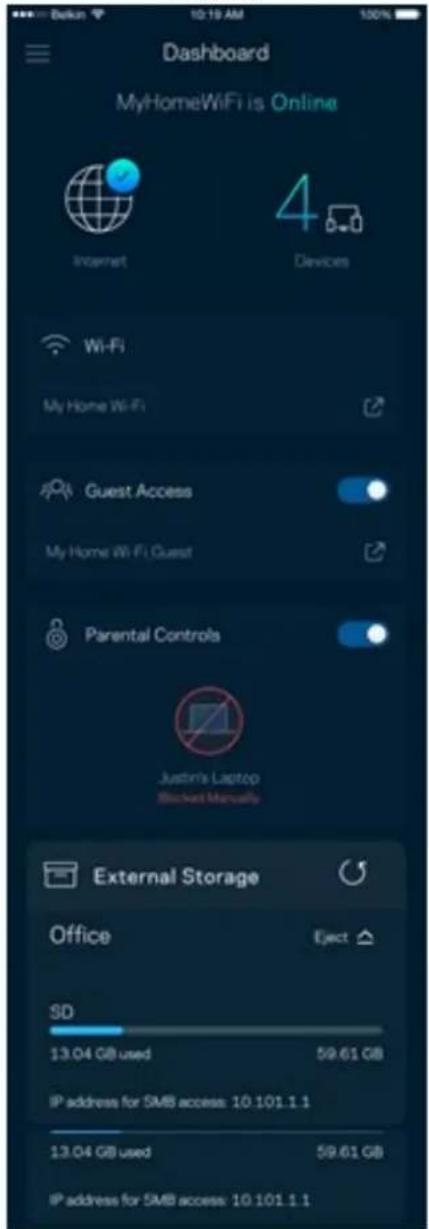
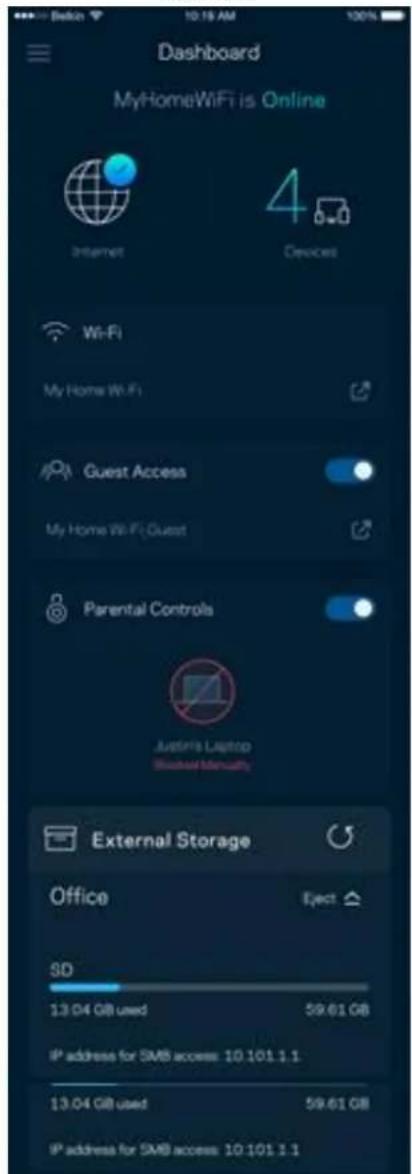
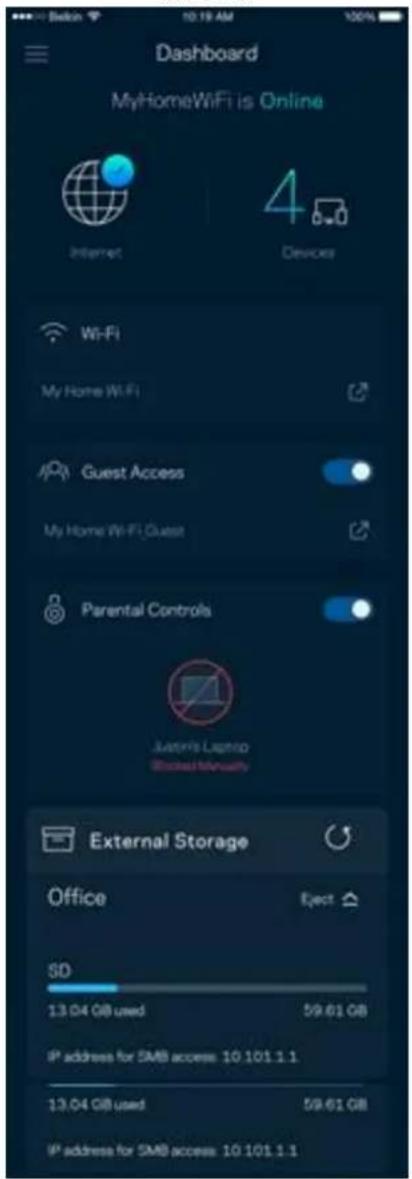
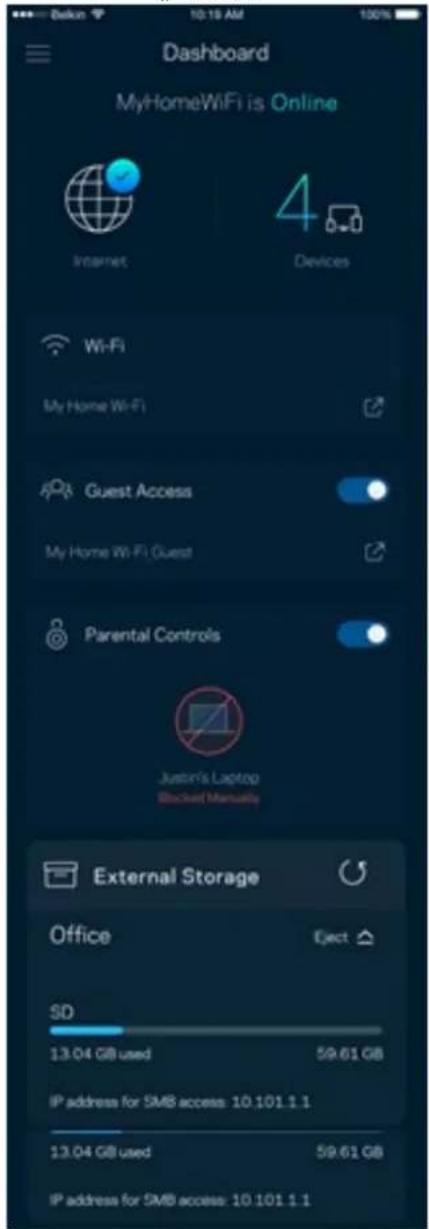
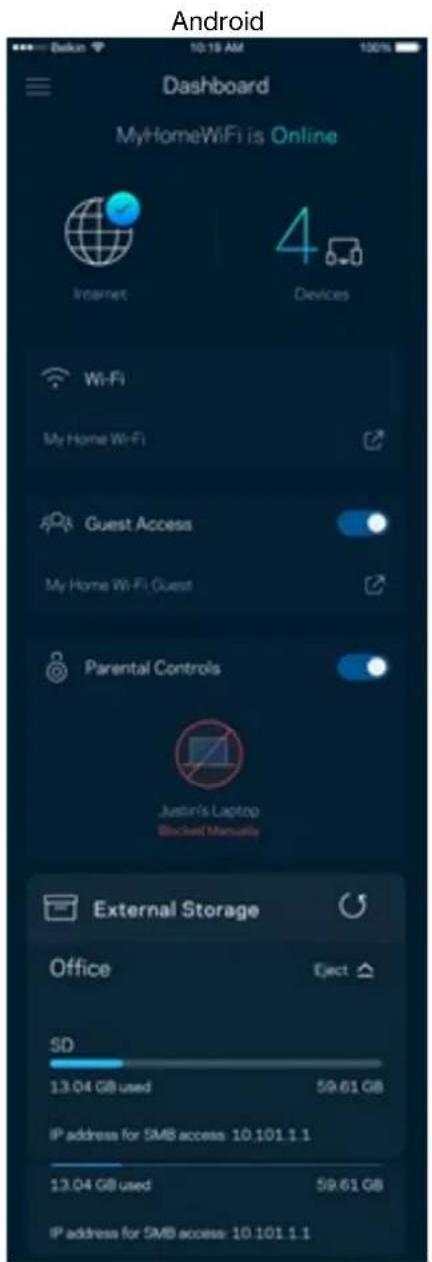
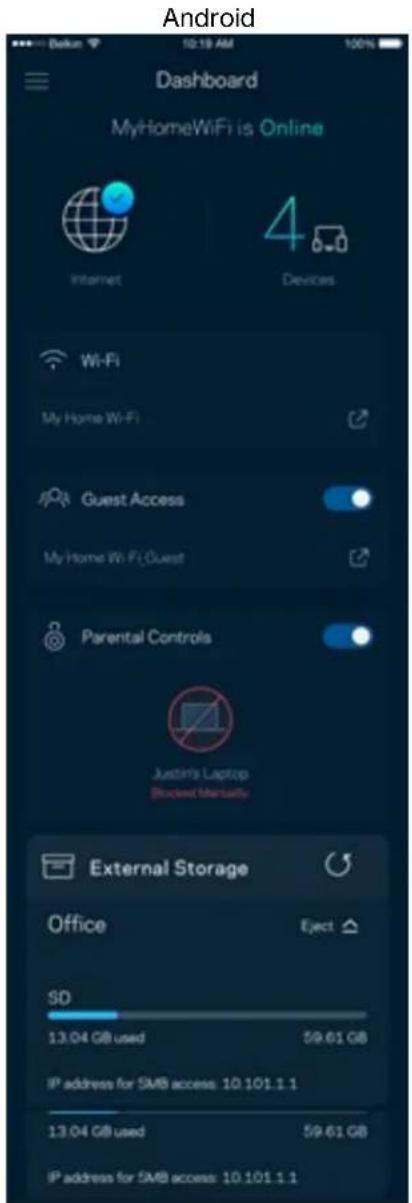
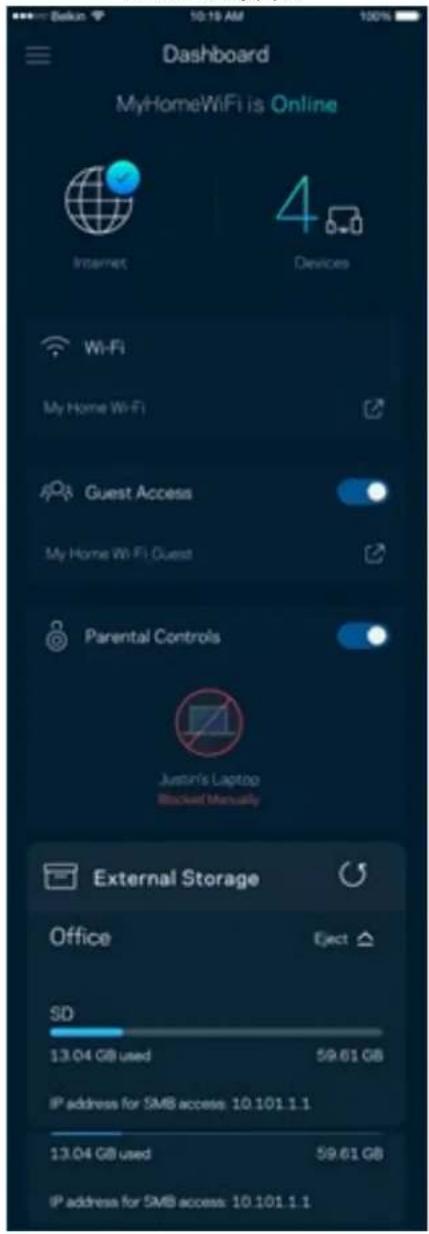
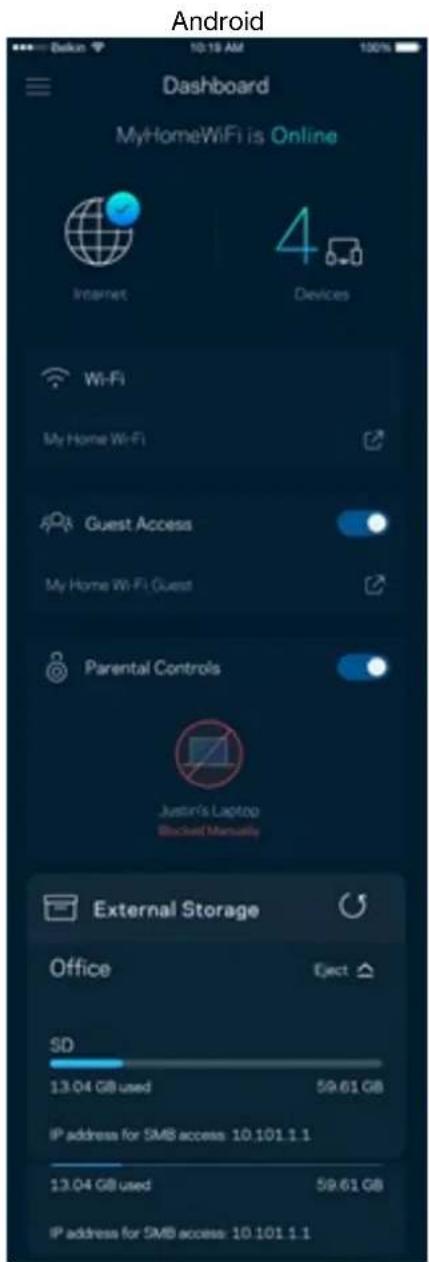
Dashboard
Dashboard is a snapshot of your Wi-Fi. See how many devices are connected to your system. From Dashboard you can share your Wi-Fi password and turn on guest access. Dashboard also shows you if any devices have parental controls on them or have been prioritized for Wi-Fi access.

Devices
View and change details for all devices connected to your Wi-Fi. You can view devices on your main network and your guest network, or display information about each device.
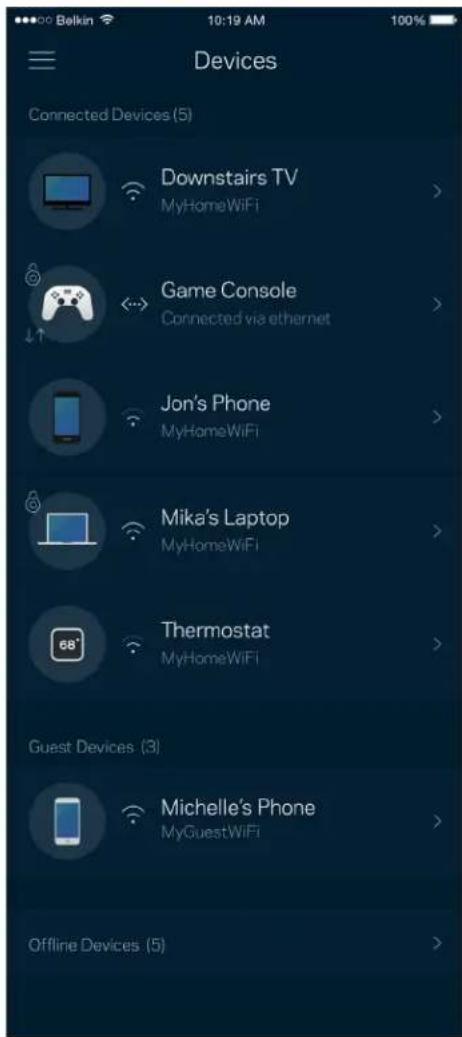
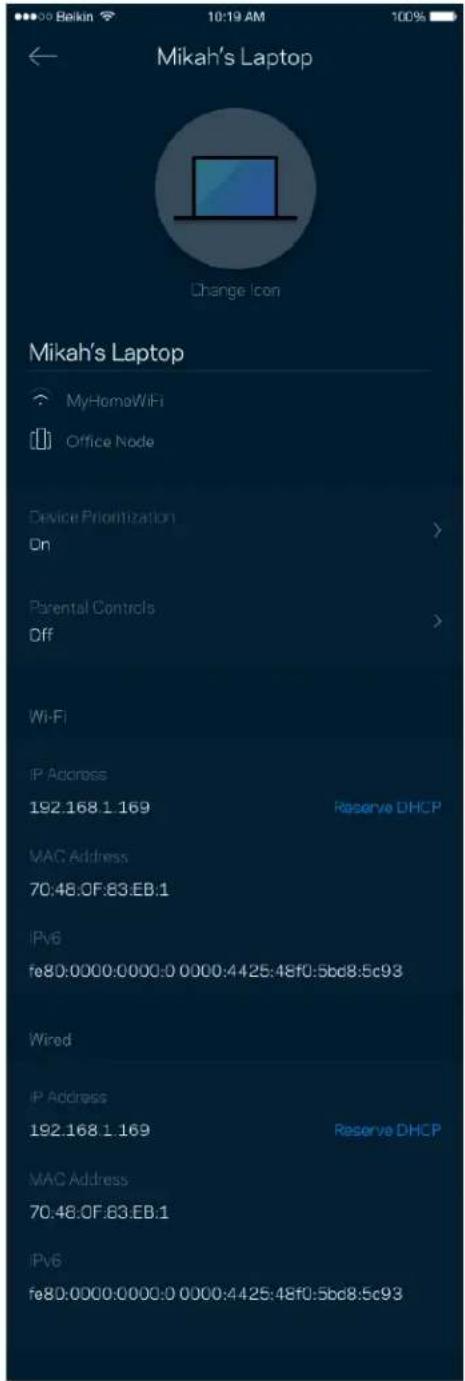
To view or change device details
From the Devices screen you can edit device names and change the device icons. You also can prioritize devices, set parental controls, and see Wi-Fi details. Tap on any device to see details.
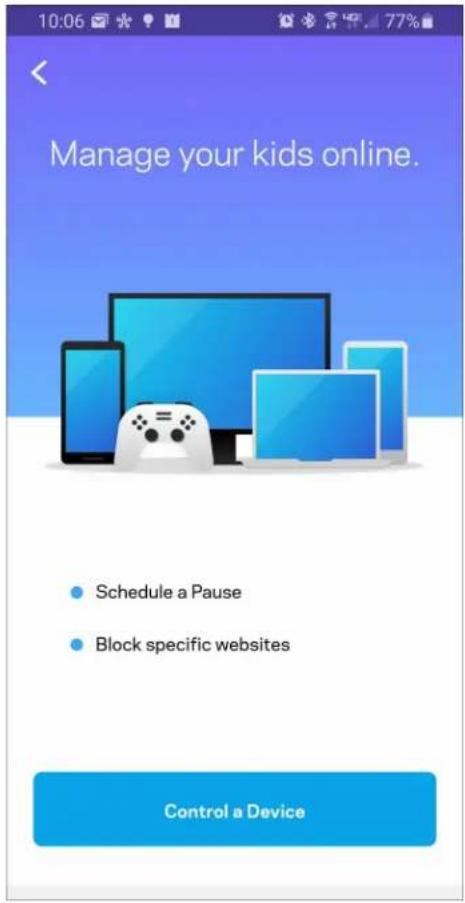
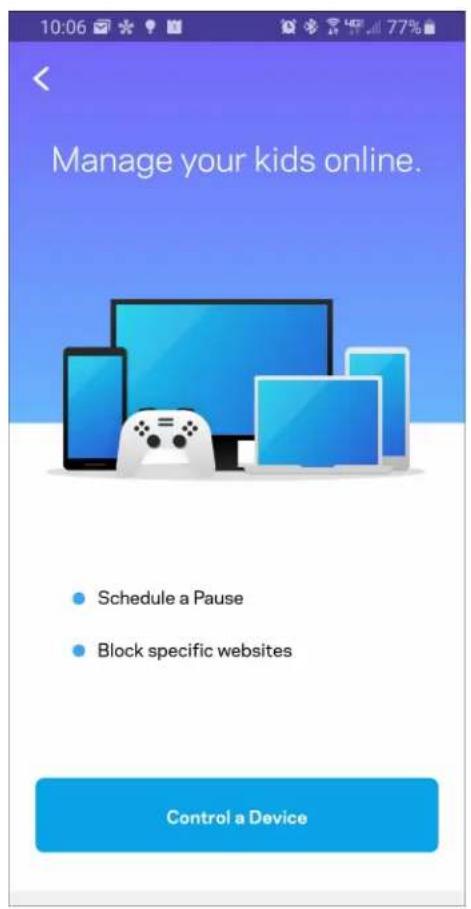
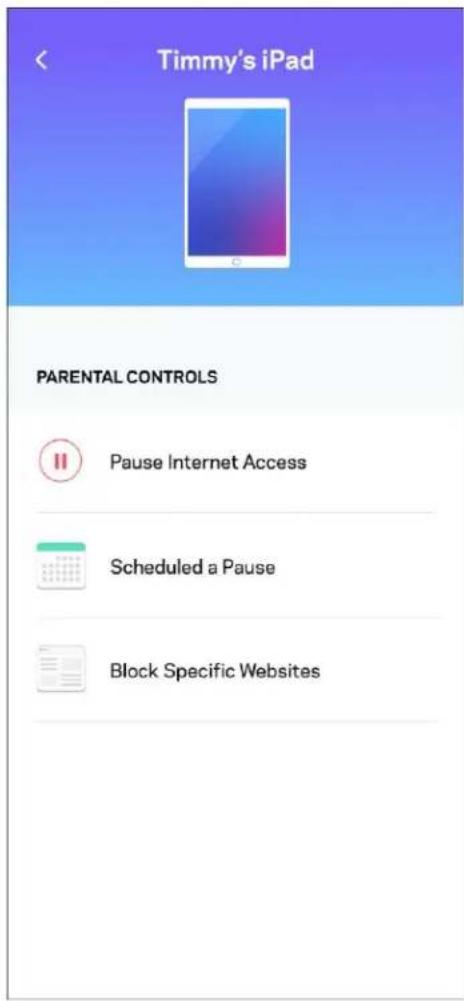
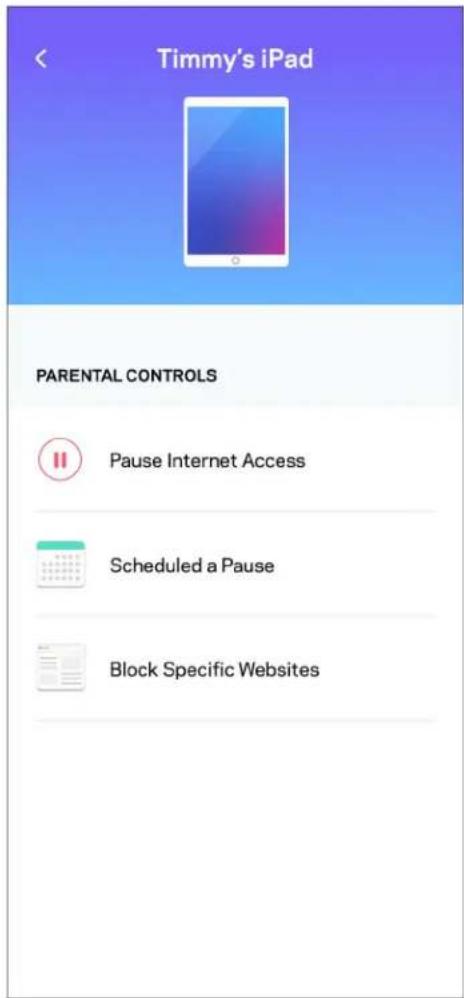
Parental Controls
Parental controls allow you to control when your kids are online and what they're doing there. Pause internet to specific devices, or block specific websites.

Wi-Fi Settings
View or change your Wi-Fi name and password and connect devices using Wi-Fi Protected Setup™.
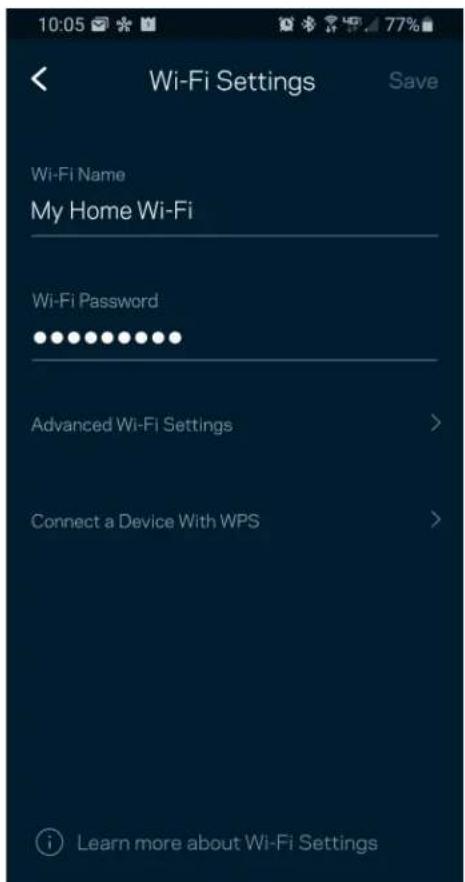
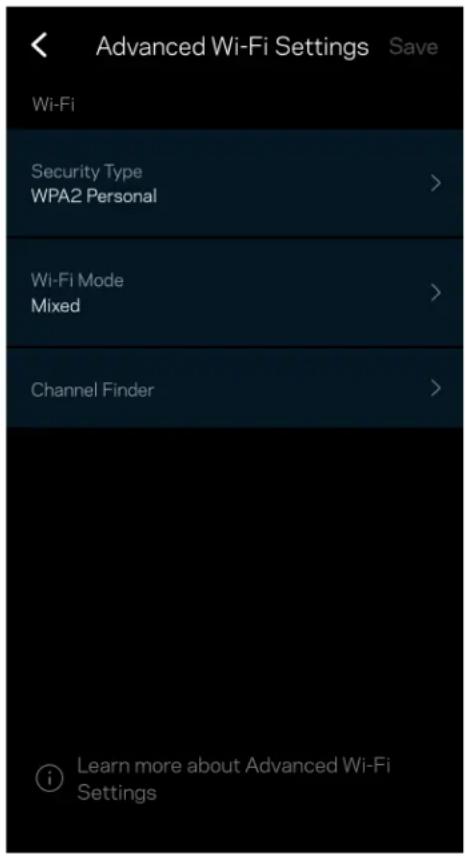
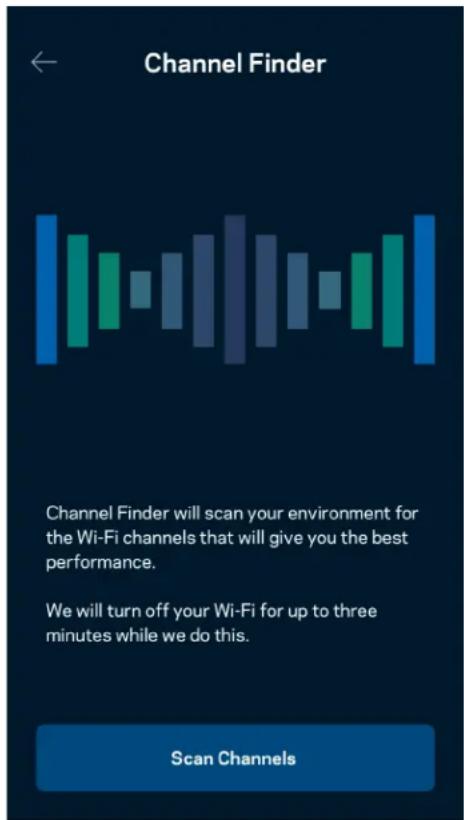
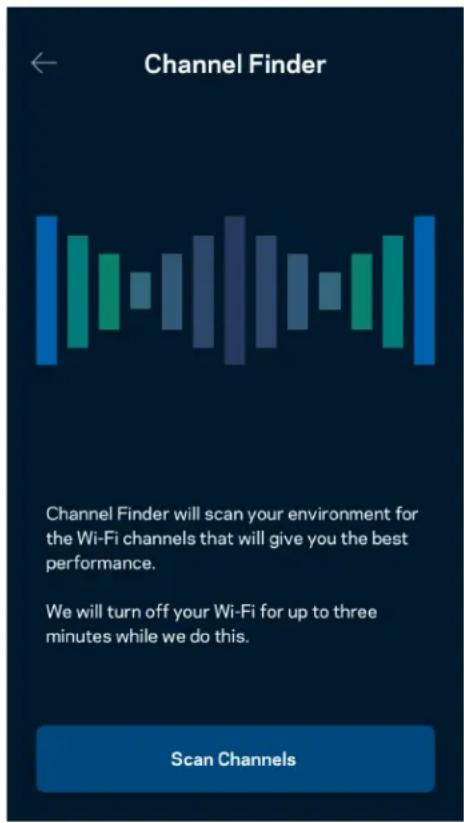
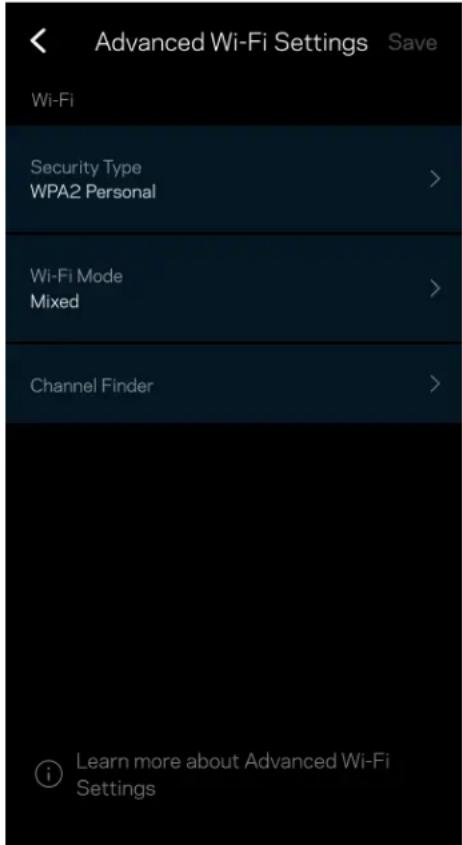
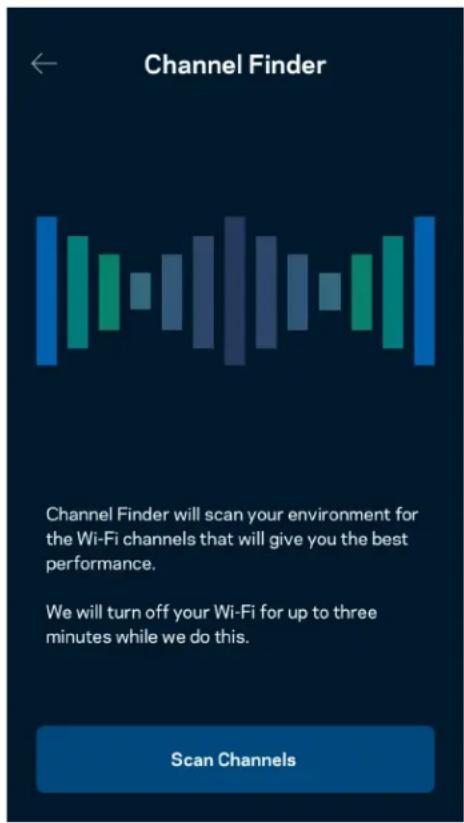
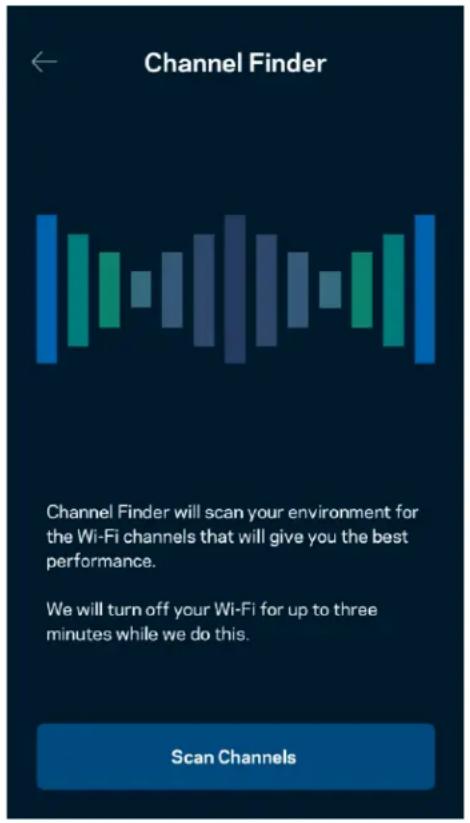
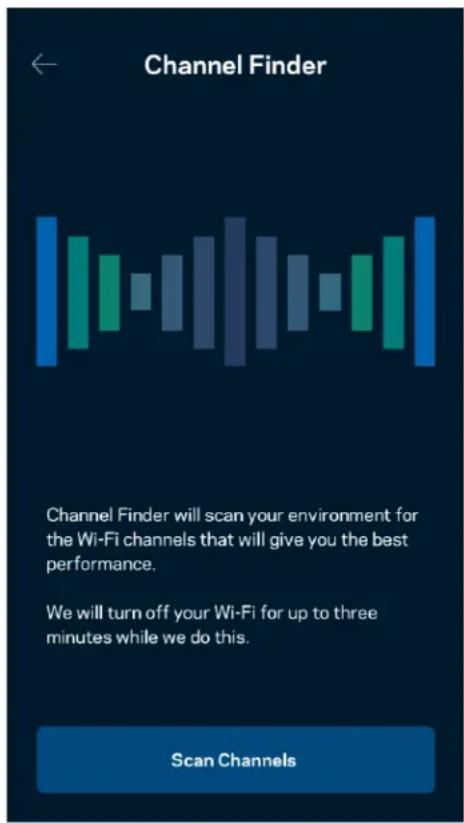
Advanced Wi-Fi Settings
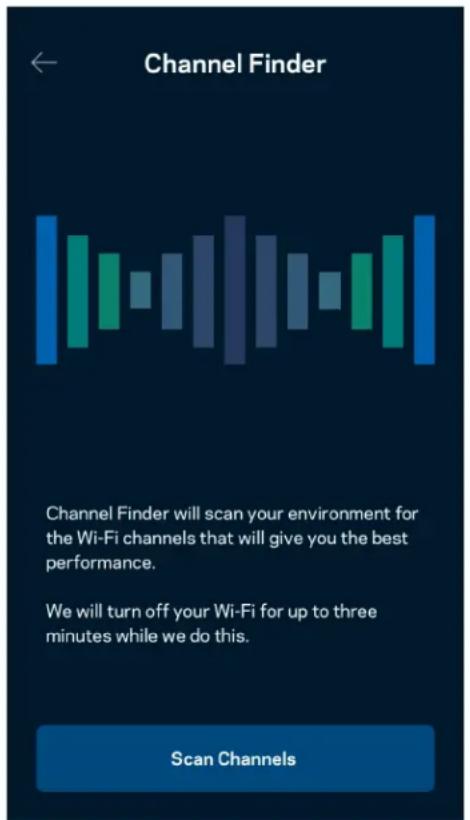
Advanced users can change the default security type and Wi-Fi mode. Do not change these unless you have a lot of experience with Wi-Fi networks. Channel Finder will search for the least populated Wi-Fi channels in your area to ensure you get the best performance from your system. If you have more than one node in your system, Channel Finder will find the best channel for each node.
Connect a Device with WPS
Wi-Fi Protected Setup allows you to easily connect wireless devices to your Wi-Fi without manually entering security settings.

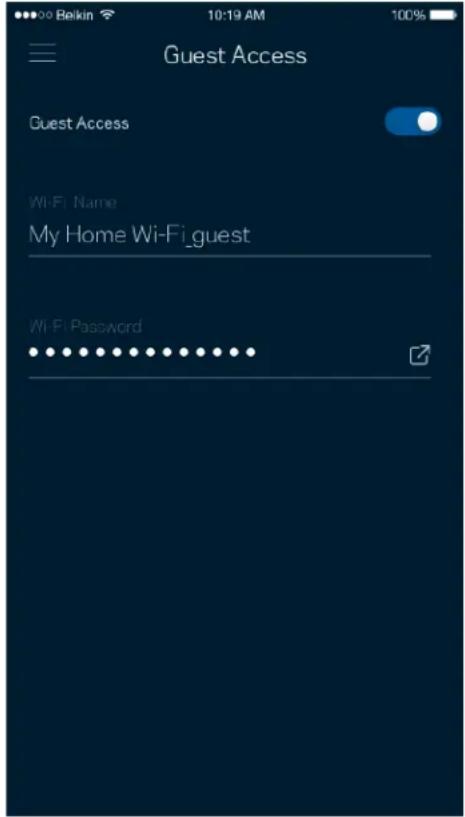
Guest Network Access
Use your Guest Access screen to allow guests to get online while restricting their access to other resources connected to your Wi-Fi. Send the password by text message or email.
Priority
Choose up to three devices for priority usage of your internet connection. Those devices – wired and/or wireless – always will have the best access when connected. Your router runs a speed check to determine how to best distribute Wi-Fi to prioritized devices. Other devices will share the leftover capacity.

Notifications
If you have more than one node, the app can notify you when child nodes in your system go offline. Child nodes are any that are not wired to your modem. You have to turn on notifications in your mobile device settings to allow the app to notify you.

Network Administration
Use the Network Administration screen to change the router password and hint, and check various identifiers (model number, serial number, and IP details) for your router.
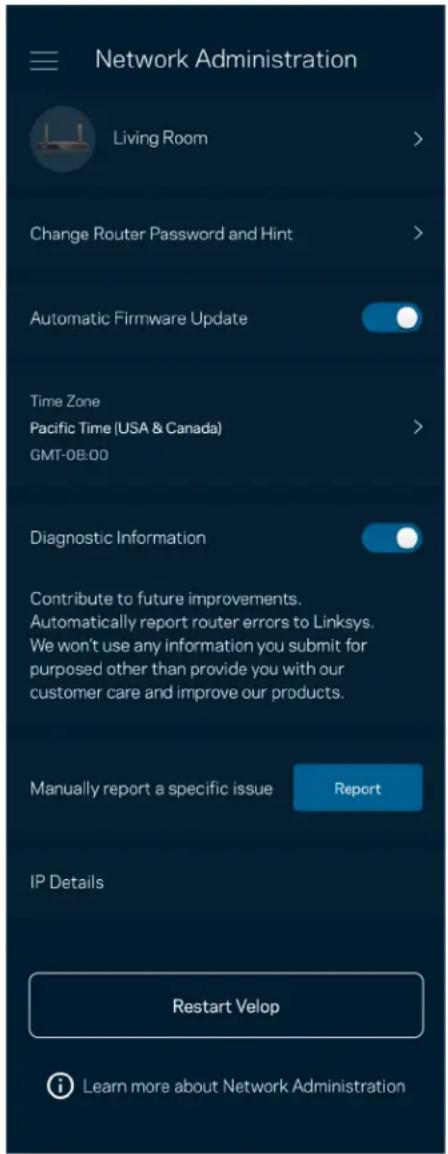
Opt in to automatically report crashes to Linksys and contribute to improving the Wi-Fi experience. You also can manually report specific issues to Linksys.
The following information will be sent with your description of the issue:
| App version | Login Type (cloud: show email address associated, local: display “Router admin”) |
| Device model | WAN Connection type (display Wi-Fi or ethernet) |
| Device OS version | Time: date (mo/day/year, time, time zone) |
Advanced Settings
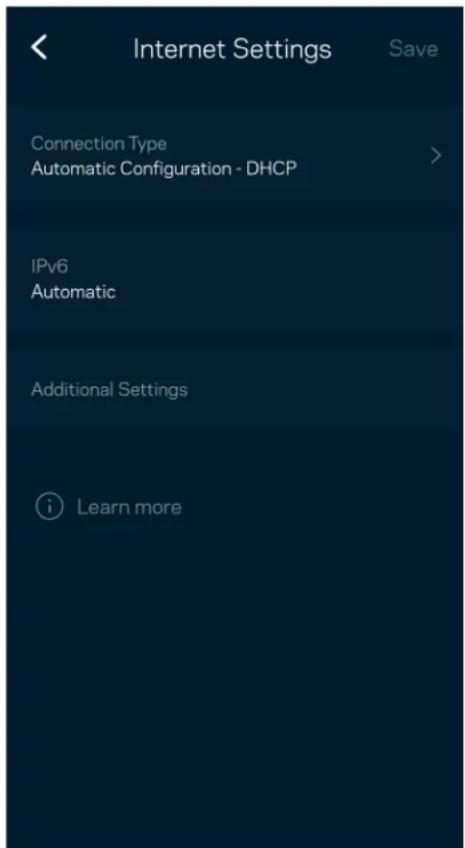
Internet Settings
You can choose how your router connects to the internet. The default is Automatic Configuration – DHCP. Other connection types depend on your internet service provider or how you plan to use your router. Advanced users can use Additional Settings to clone MAC addresses and set MTU (maximum transmission unit).
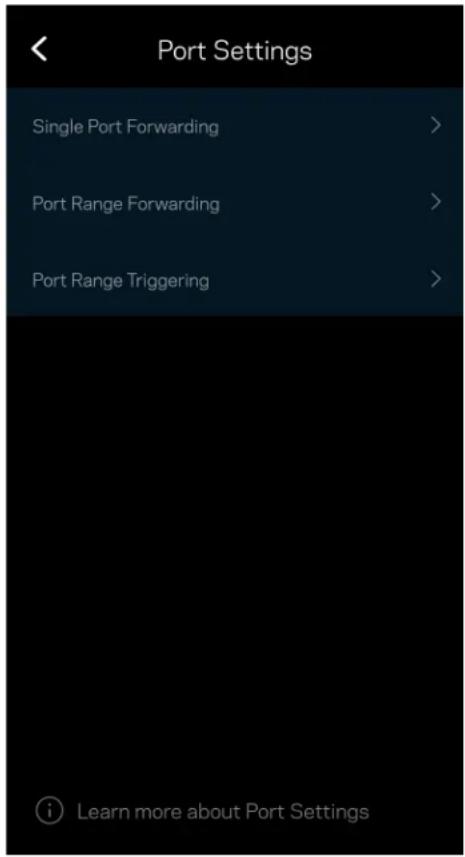
Port Settings
Port forwarding—for a single port, multiple ports or a range of ports—sends traffic inbound on a specific port or ports to a specific device or port on your Wi-Fi. In port range triggering, your router watches outgoing data for specific port numbers. Your router remembers the IP address of the device that requests the data so that when the requested data returns, it is routed back to the proper device.
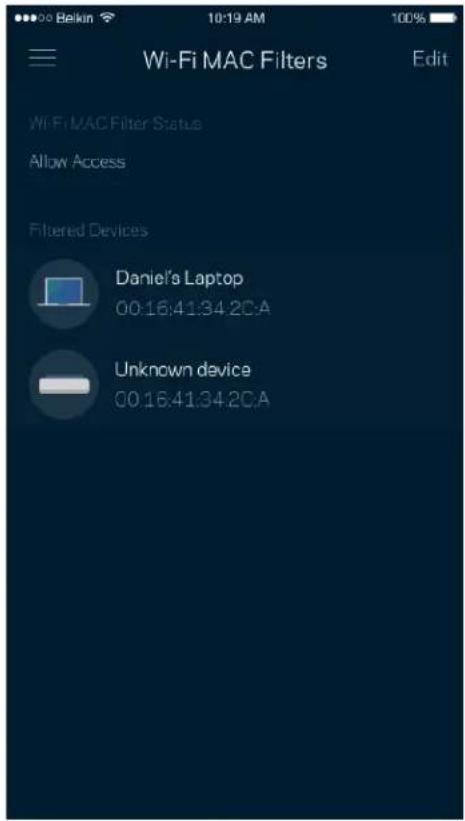
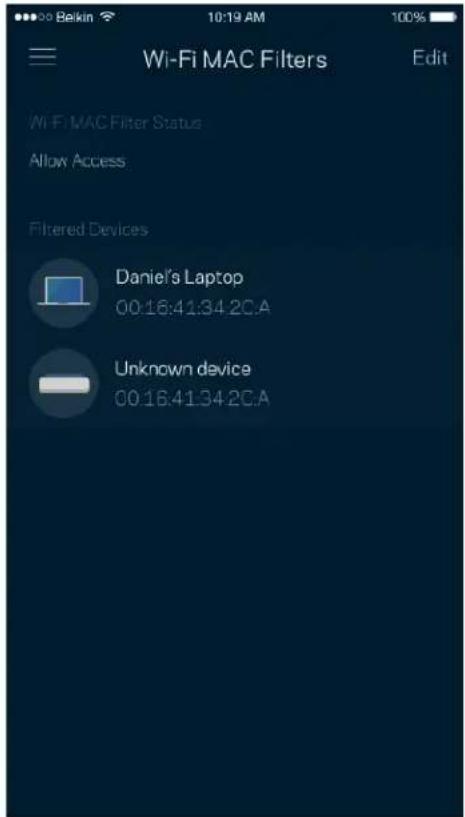
Wi-Fi MAC Filters
Every network device has a unique 12-digit MAC (media access control) address. You can create a list of MAC addresses, and then allow or deny those devices on your Wi-Fi.
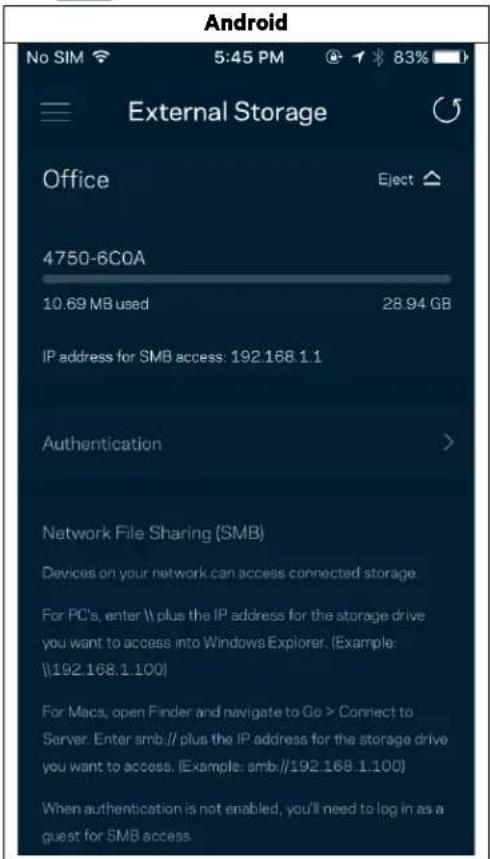
External Storage
In the Dashboard, see which node an external drive is connected to, check the amount of free space left, and enable authentication by setting a username and password. (Only when a drive is plugged in to your router's USB port.) Be sure to tap Eject before removing a drive to avoid losing data.
Speed Check
Run a speed check to make sure you are getting the speeds you pay for. Speed check also helps in Device Prioritization because results determine how Wi-Fi is distributed to the prioritized devices.
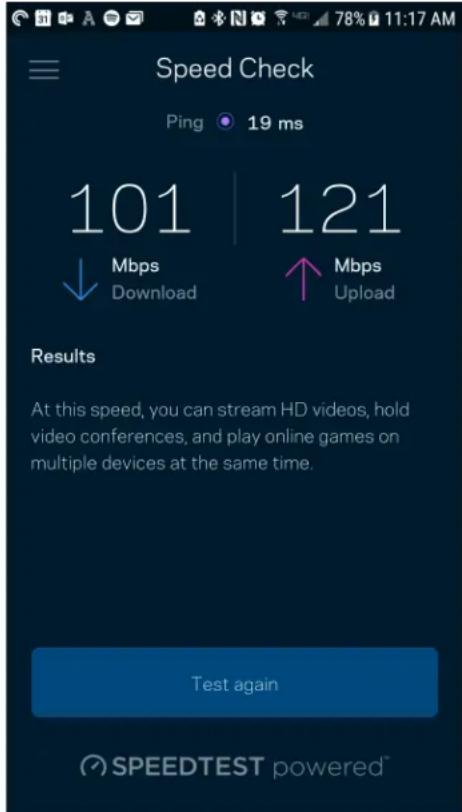
- Download speed is the rate at which internet content is transferred to your router.
- Upload speed is the rate at which you can upload content to the internet.
Note—Internet connection speeds are determined by a variety of factors, including ISP account type, local and worldwide internet traffic, and number of devices in your home that are sharing the internet connection.
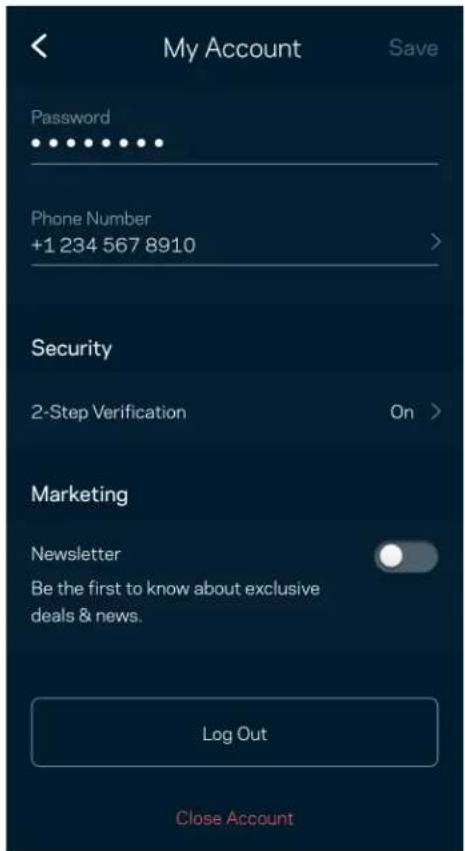
My Account
Change your Linksys app password and opt in to receive the latest news and deals from Linksys. Only available when logged into the app with your email address.
Feedback
Here's your chance to tell us what you think. Rate the app at your app store, send us a suggestion, or report an issue that's keeping you from a great experience.

Help
Having trouble with the app? Just need a little more information about a feature? Tap Help for an explanation.
| Help |
| + Getting Started with Linksys Smart Wi-Fi |
| + Frequently Asked Questions |
| + Browse by Topic or Feature |
| + Subscription |
| + About |
| + Help and Support |
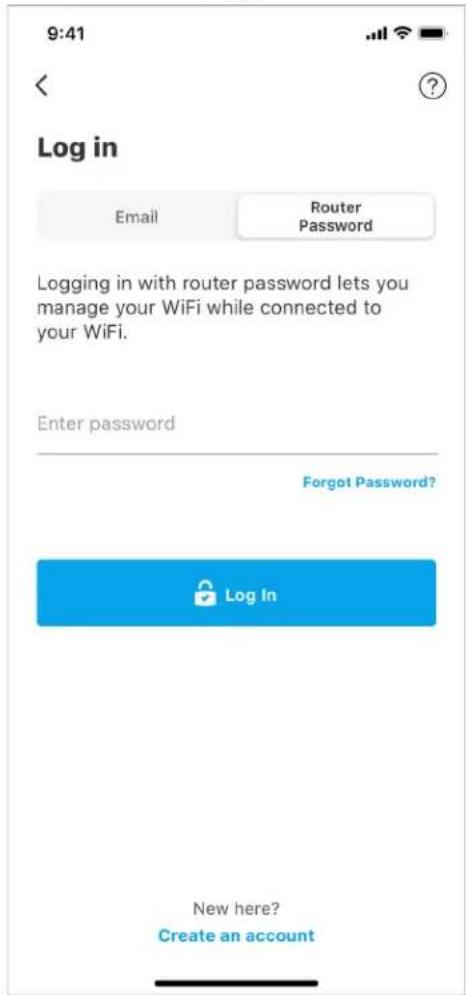
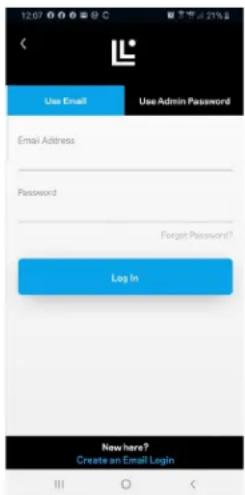
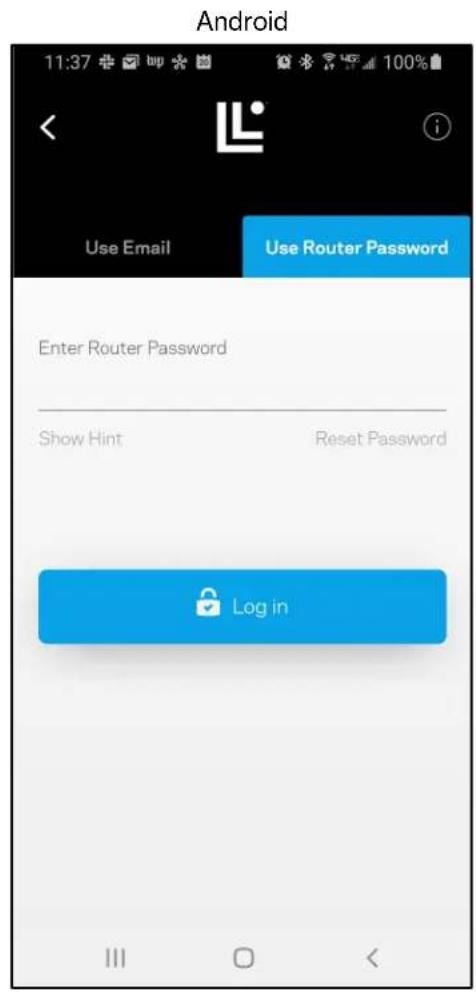
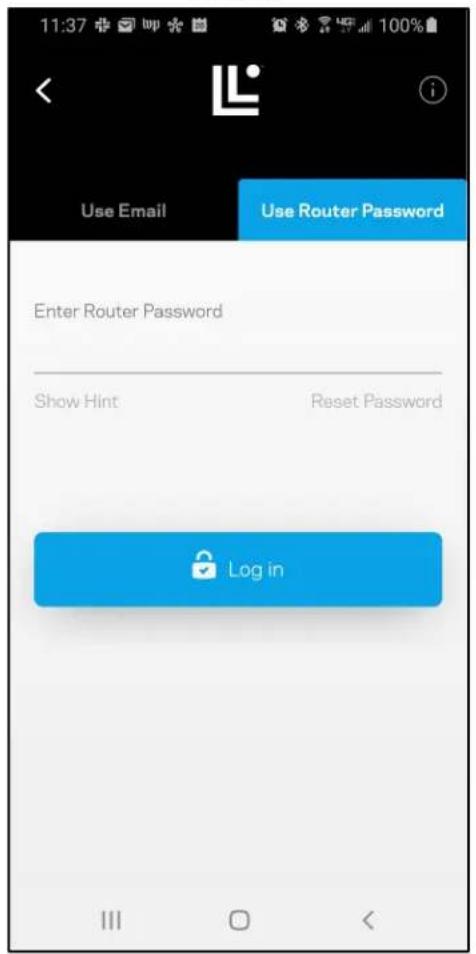
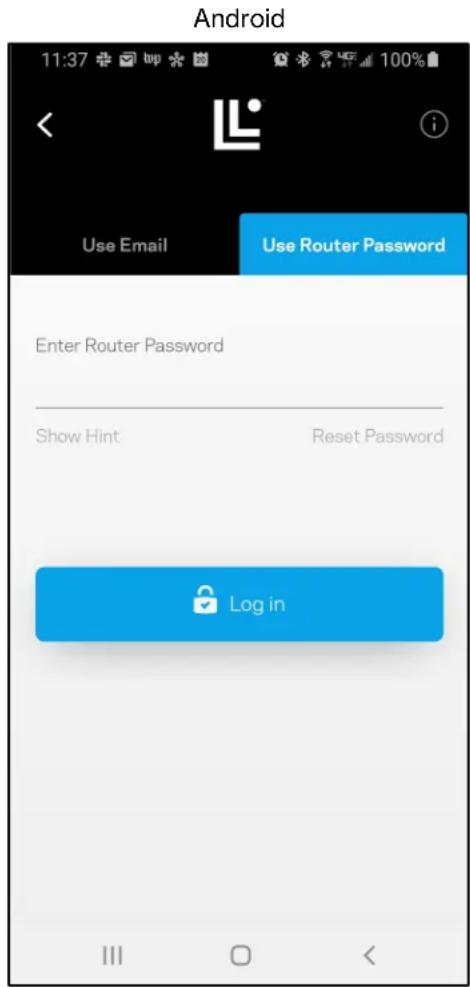
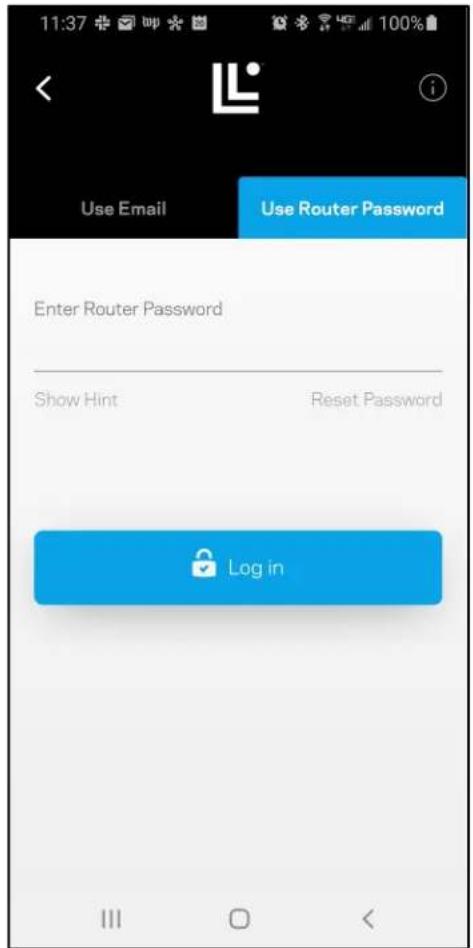
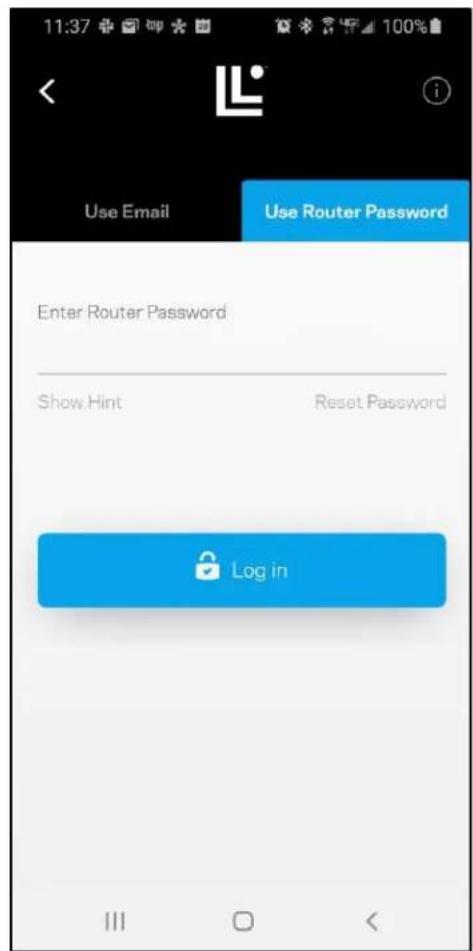
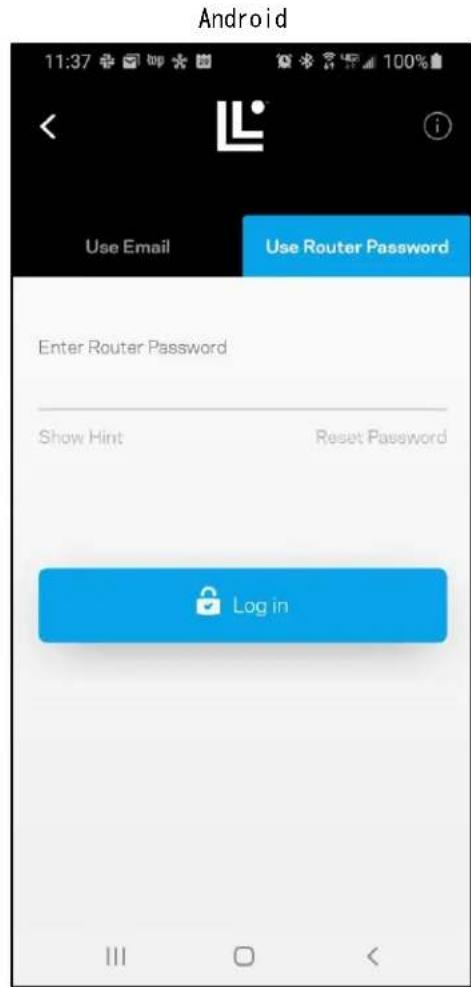
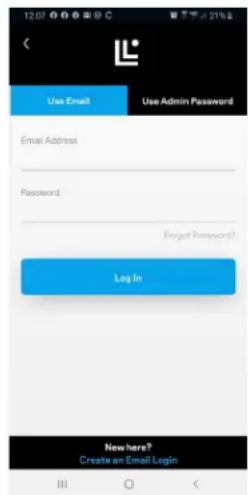
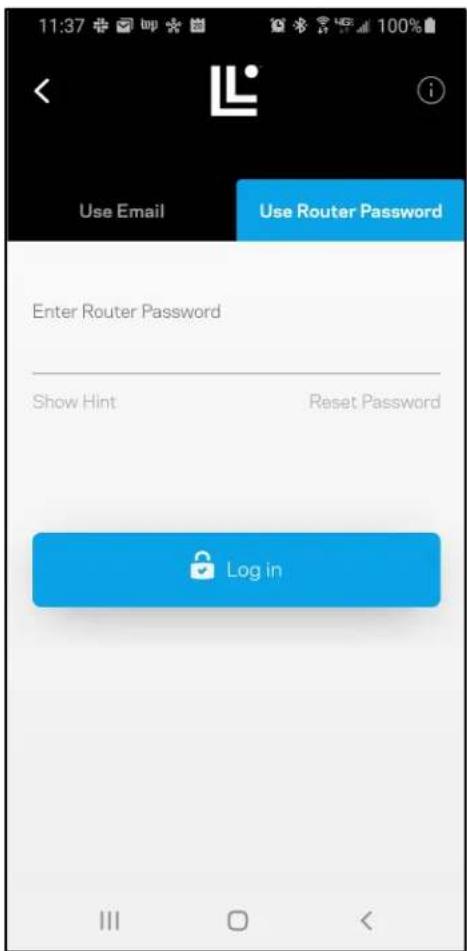
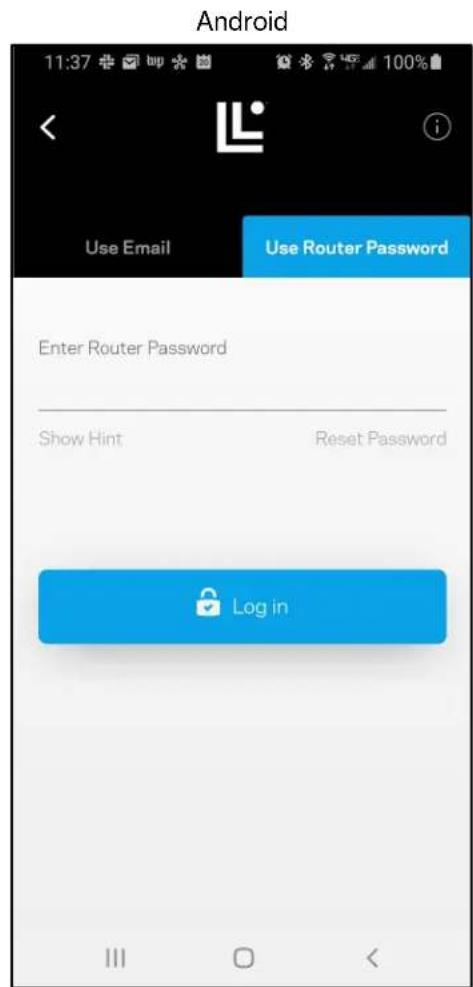
Connect Directly To Your Router
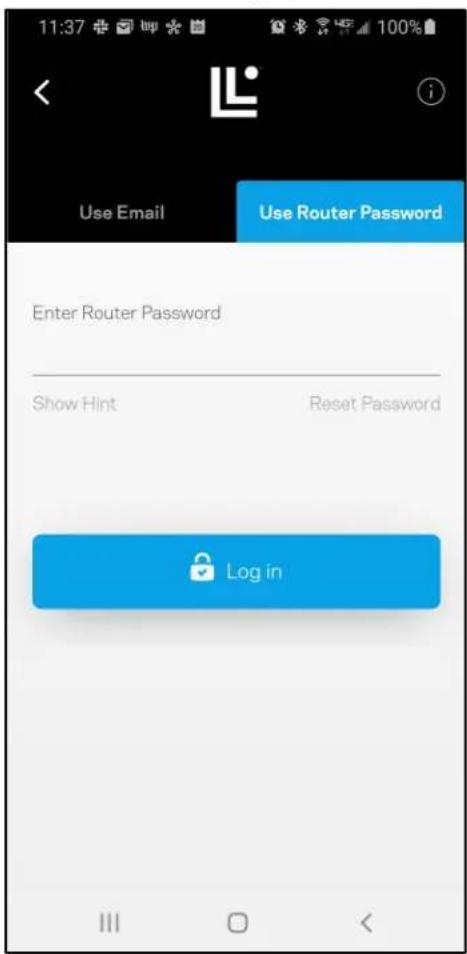
If you are not connected to the internet you still can access your router settings. Connect to your Wi-Fi name, launch the Linksys app and tap Log in with Router Password toward the bottom of the screen. You will not be able to access your Linksys Wi-Fi account when not online.
iPhone
Android

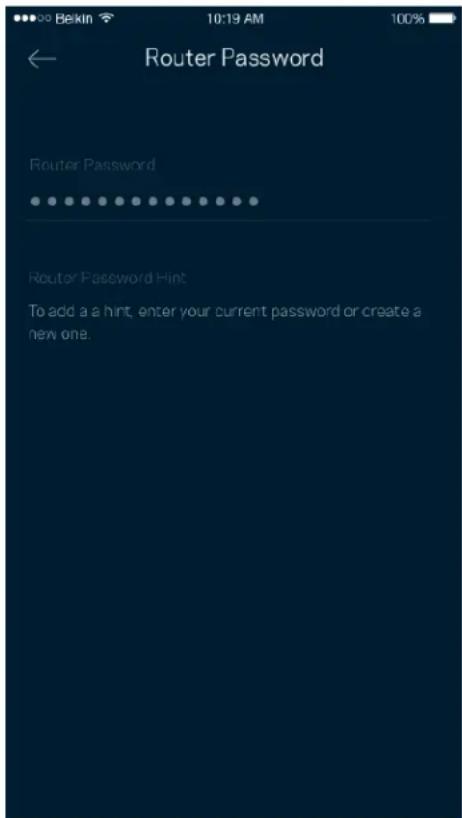
Router password
We created a secure admin password during setup. To change it, tap Network/Router Administration and Change Router Password and Hint.
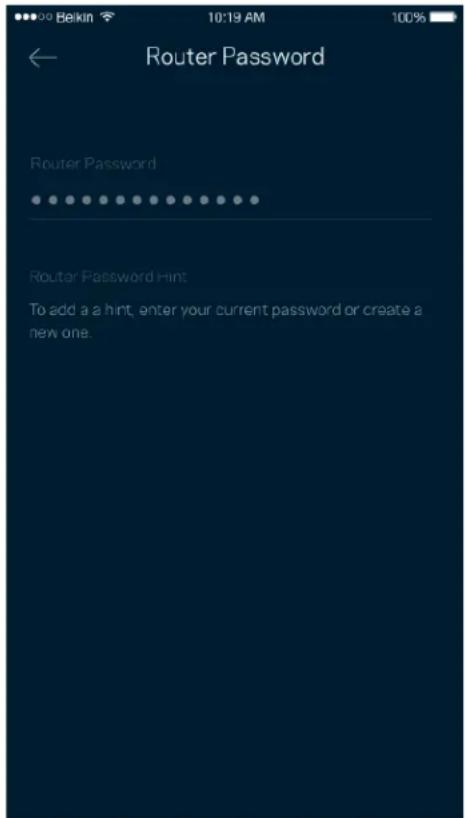
To keep your router secure, we'll send you an email if someone changes the router password.
How to factory reset your router
You should never need to factory reset your MR2000 Series router—a very disruptive process. A factory reset restores your router to the state it was when you took it out of its box, requiring you to go through the setup process again. All settings you have customized in setup and since – things such as Wi-Fi name, passwords, security type – will be erased. All wireless devices will disconnect from your Wi-Fi.
To factory reset :
- With your router connected to power and turned on, press and hold the Reset button on the back panel. The light on top of the router will blink red. Do not release the button until the light goes out and then turns bright red.
How to mount your router on the wall
Your MR5500 series router has holes on its underside for wall mounting.
Hang the router using M3 x 20 mm screws.
Specifications
Linksys Hydra 6
| Model Name | AX3000 Dual-Band WiFi 6 Router |
| Model Number | MR2000, MR20EC, MR20MS, MR20WH |
| Switch Port Speed | 10/100/1000 Mbps (Gigabit Ethernet) |
| Radio Frequency 2.4 GHz and 5 GHz | |
| # of Antennas | 2 external adjustable antennas (non-detachable), 1 internal printed antenna |
| Ports | USB 3.0, Ethernet (1-4), Internet, Power |
| Buttons | Power, Reset, WPS |
| Lights | Front panel: One, multicolor light for power and statusBack panel: USB, ethernet (1-4), internet |
| Security Features | WPA2-Personal, WPA3-Personal, WPA2/WPA3-Personal Mixed |
| Security Key Bits | Up to 128-bit encryption |
| Storage File System Support | FAT 32, NTFS, HFS+, Samba |
Environmental
| Dimensions | 8.46" x 6.10" x 2.20" (215 mm x 155 mm x 56 mm) |
| Unit Weight | 1.51 lbs (687 g) |
| Power 12V/1.5A | |
| Certifications | FCC, IC, CE, Wi-Fi (IEEE 802.11a/b/g/n/ac/ax) |
Operating Temp. 32° to 104° F (0 to 40° C)
Storage Temp. -4° to 140° F (-20 to 60° C)
Operating Humidity 10% to 80% relative humidity, non-condensing
Storage Humidity 5% to 90% non-condensing
Notes:
For regulatory, warranty, and safety information, go to Linksys.com/support/MR2000.
Specifications are subject to change without notice.
Maximum performance derived from IEEE Standard 802.11 specifications. Actual performance can vary, including lower wireless network capacity, data throughput rate, range and coverage. Performance depends on many factors, conditions and variables, including distance from the access point, volume of network traffic, building materials and construction, operating system used, mix of wireless products used, interference and other adverse conditions.
Visit Linksys.com/support/MR2000 for award-winning technical support.
LINKSYS, Atlas, Hydra, Intelligent Mesh and many product names and logos are trademarks of Linksys Holdings, Inc. and/or its affiliates.. Third-party trademarks mentioned are the property of their respective owners.
© 2022 Linksys Holdings, Inc. and/or its affiliates. All rights reserved.
LNKPG-00898 Rev A01
Linksys
GUÍA DEL USUARIO
Linksys Hydra 6
Router 6 de Wi-Fi
Android

Android


Android
Tablero

Dispositivos


Prioridad
Notificaciones
Filtros MAC Wi-Fi
Prueba de velocidad
Su opinión
Ayuda

Android


Android

Android
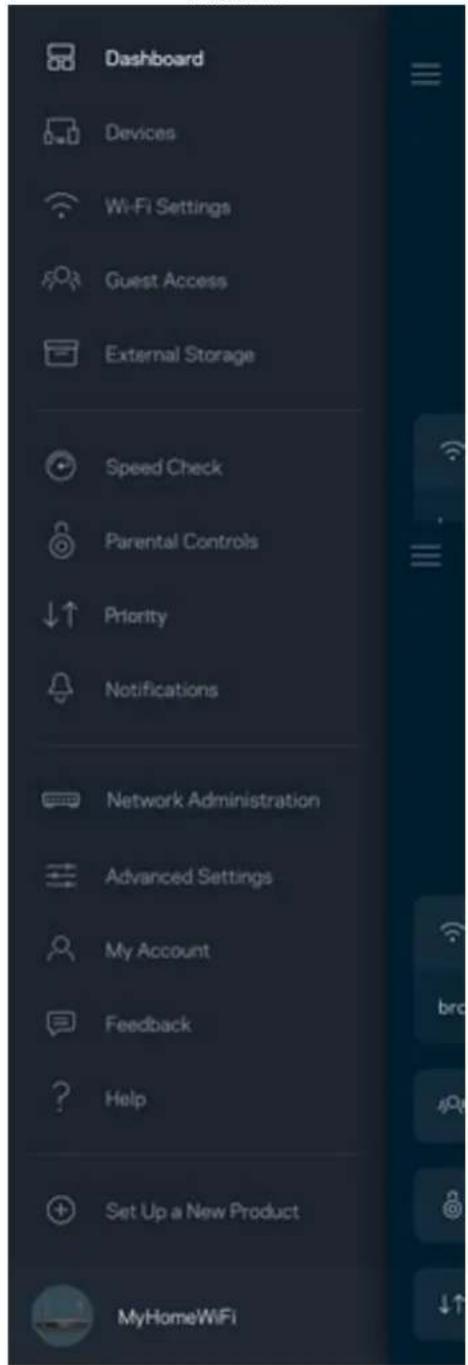
Tableau de bord
Android

Appareils

Priorité
Notifications
Paramètres de ports
Filtres MAC sans-fil
Stockage externe
Contrôle de vitesse
Commentaires
Aide
Android

Android

إ Oberامات
إعدادات المن Fest
| Help |
| + Getting Started with Linksys Smart Wi-Fi |
| + Frequently Asked Questions |
| + Browse by Topic or Feature |
| + Subscription |
| + About |
| + Help and Support |
Router Password and Alert
| iPhone | Android | |
| My Home W-Fi Devices 12 Parental Controls 4 Wi-Fi Settings Guest Network Linksys Aware External Storage ↓↑ Priority Notifications Network Administration Advanced Settings Apple Home Integration Set up a New Product Account Help | ||

Android

Android
Табло за управление

Устройства

Настройки на Wi-Fi

Приоритет
Известия
Wi-Fi MAC филтри
Обратна връзка
Помощ
| Help |
| + Getting Started with Linksys Smart Wi-Fi |
| + Frequently Asked Questions |
| + Browse by Topic or Feature |
| + Subscription |
| + About |
| + Help and Support |

Парола на рутера
Android

Android


Android
Panel
Zařízení

Nastavení Wi-Fi

Priorita
Upozornění
Správa sítě
Nastavení portů
Filtry MAC pro Wi-Fi
Externí úložiště
Rychlostní test
Zpětná vazba
Nápověda
Heslo směrovače
Android

Android


Dashboard
Android
Enheder

Wi-Fi-indstillinger
Avancerede Wi-Fi-indstillinger
Prioritet
Meddelelser
Portindstillinger
Wi-Fi MAC-filtre
Ekstern lagring
Hastighedstjek
Tilbagemelding
Hjælp
| Help |
| + Getting Started with Linksys Smart Wi-Fi |
| + Frequently Asked Questions |
| + Browse by Topic or Feature |
| + Subscription |
| + About |
| + Help and Support |
Knapper Strøm, nulstilling, WPS
Certificeringer FCC, IC, CE, Wi-Fi (IEEE 802.11a/b/g/n/ac/ax)
Android


Android

Android
Dashboard
Android

Geräte

Priorität
Benachrichtigungen
Port-Einstellungen
WLAN-MAC-Filter
Externer Speicher
Feedback
Hilfe
Android
Router-Password
Android


Android


Android

Devices (Συσκευές)

Wi-Fi Settings (Puθμίσεις Wi-Fi)

Προτεραιότητα
Διαχείριση δικτύου
Feedback (Σχόλια)
Help (Βοήθεια)
Android

En Android:

Android
Panel de control

Dispositivos

Ajustes de WiFi

Priorización
Notificaciones
Filtrado MAC de WiFi
Prueba de velocidad
Opinión
Ayuda

Android

Android

- Sisestage e-posti aadress, mida kasutasite oma konto loomisel.
- Sisestage konto parool.
- Puudutage valikut Log in (logi sisse).
Navigeerimismenüü
Android

Esipaneel
Seadmed

Wi-Fi seaded
Täpsemad Wi-Fi seaded

Prioriteet
Teated
Võrgu haldus
Pordi seaded
Wi-Fi MAC-filtrid
Välismälu
Kiirustest
Tagasiside
Abi

Ruuteri parool
Android
Android

Android
Koontinäyttö
Android
Laitteet

Wi-Fi-asetukset
Wi-Fi-lisäasetukset

Vierasverkon käyttö
Prioriteetti
Ilmoitukset
Verkon hallinta
Porttiasetukset
Wi-Fi-verkon MAC-suodattimet
Nopeustarkistus
Palaute
Ohje
Android

Reitittimen salasana
Devices (Appareils) 12
Android


Android


Android
Dashboard (Tableau de bord)
Devices (Appareils)

Wi-Fi Settings (Paramètres Wi-Fi)

Notifications
Wi-Fi MAC Filters (Filtres MAC Wi-Fi)
External Storage (Stockage externe)
Help (Aide)
Android

Android

Navigációs menü

Devices (Eszközök)


Prioritások
Sebességteszt
Help (Súgó)

Jelszó a routerhez
Gombok Power, Reset, WPS
Android

Android


Android
Dasbor
Android
Perangkat

Pengaturan Wi-Fi

Nama Jaringan Tamu
Prioritas
Notifikasi
Pengaturan Port
Filter MAC Wi-Fi
Penyimpanan Eksternal
Uji Kecepatan
Masukan
Bantuan
Android

Kata Sandi Router
Android


Android


Android

Android
Dispositivi

Impostazioni WiFi

Priorità
Notifiche
Impostazioni porta
Filtri MAC WiFi
Test della velocità
Feedback
Guida
Android
Password del router
Nome modello Router WiFi 6 dual band AX3000
Numero modello MR2000, MR20EC, MR20MS, MR20WH
Android
Android

Android
ダッシュボード
Android
デバイス
デバイスの詳細を表示または変更するには

Wi-Fi 設定
詳細 Wi-Fi 設定
デバイスを WPS に接続
ゲストのネットワークアクセス
優先度
通知
ネットワーク管理
ポート設定
Wi-Fi MAC フィルター
外部保存スペース
スピードテスト
フィードバック
ヘルプ
| Help |
| + Getting Started with Linksys Smart Wi-Fi |
| + Frequently Asked Questions |
| + Browse by Topic or Feature |
| + Subscription |
| + About |
| + Help and Support |
ルーターに直接接続
Android
ルーター パスワード
Android

Android

대시보드
Android
장치
Wi-Fi 설정
고급 Wi-Fi 설정
WPS 와 장치 연결
게스트 네트워크 액세스
우선순위
알림
네트워크 관리
포트 설정
Wi-Fi MAC 필터
외부 저장 장치
속도 점검
피드백
도움말
| Help |
| + Getting Started with Linksys Smart Wi-Fi |
| + Frequently Asked Questions |
| + Browse by Topic or Feature |
| + Subscription |
| + About |
| + Help and Support |
사용자의 라우터에 직접 연결
라우터 암호
„Android“


„Android“


„Android“

Valdymo portalas
„Android“
Irenginiai

„Wi-Fi“ nuostatos

Irenginio prijungimas naudojant WPS
Prioritetas
Pranešimai
Prievado nuostatos
„Wi-Fi“ MAC filtrai
Išorinė saugykla
Greičio patikra
Atsiliepimai
Pagalba
„Android“

Android
Android


Android
Android

lerices

Wi-Fi iestatijumi
Uzlaboti Wi-Fi iestatijumi

Ierices savienošana ar WPS
Viesa tîkla piekluve
Prioritāte
Paziņojumi
Tikla pārvaldība
Wi-Fi MAC filtri
Ārējā krātuve
Ātruma pārbaude
Atsauksmes
Palīdzība
Android

Maršrutētāja parole
Android


Android


Android
Dashboard

Apparaten

WiFi-instellingen

Meldingen
Netwerkbeheer
Poortinstellingen
WiFi MAC-filters
Externe opslag
Snelheidscontrole
Feedback
Help
| Help |
| + Getting Started with Linksys Smart Wi-Fi |
| + Frequently Asked Questions |
| + Browse by Topic or Feature |
| + Subscription |
| + About |
| + Help and Support |
Routerwachtwoord
Android


Android


Dashbord
Android

Enheter

Wi-Fi-innstillinger
Avanserte Wi-Fi-innstillinger

Prioritet
Varslinger
Portinnstillinger
Wi-Fi MAC-filtre
Hver nettverksenhet har en unik 12-sifret MAC-adresse (Media Access Control). Du kan lage en liste over MAC-adresser, deretter tillate eller nekte disse enhetene tilgang til ditt Wi-Fi.
Ekstern lagring
Hastighetssjekk
Tilbakemelding
Hjelp
Koble direkte til ruteren

Ruterpassord
Knapper Strøm, Reset, WPS
Sikkerhetsfunksjoner WPA2-Personal, WPA3-Personal, WPA2/WPA3-Personal Mixed
Sikkerhetsnøkkelbiter Opptil 128-biters kryptering
Støtte for fillagringssystem FAT 32, NTFS, HFS+, Samba
Omgivelser
Mål 215 mm x 155 mm x 56 mm
Vekt 687 g
Strøm 12 V / 1,5 A
Sertifiseringer FCC, IC, CE, Wi-Fi (IEEE 802.11a/b/g/n/ac/ax)
Android


Android


Pulpit nawigacyjny

Urządzenia


Priorytet
Powiadomienia
Ustawienia portu
Opinie
Pomoc
| Help |
| + Getting Started with Linksys Smart Wi-Fi |
| + Frequently Asked Questions |
| + Browse by Topic or Feature |
| + Subscription |
| + About |
| + Help and Support |

Hasło routera
Android


Android

Android
Painel de controlo
Dispositivos

Definições de Wi-Fi

Prioridade
Notificações
Filtros MAC Wi-Fi
Armazenamento externo
Comentários
Ajuda

Android

Android


Android
Painel

Dispositivos


Prioridade
Notificações
Filtros MAC do Wi-Fi
Armazenamento externo
Opinião
Ajuda

Senha do roteador
Android


Android

Tablou de bord

Dispositive

Setări Wi-Fi

Acces rețea invitat
Prioritate
Notificări
Setări port
Filtre MAC Wi-Fi
Stocare externă
Verificare viteză
Feedback
Ajutor
Număr model MR2000, MR20EC, MR20MS, MR20WH
Viteză port switch 10/100/1000 Mbps (Gigabit Ethernet)
Caracteristici de securitate WPA2-Personal, WPA3-Personal, WPA2/WPA3-Personal mixt
Certificări FCC, IC, CE, Wi-Fi (IEEE 802.11a/b/g/n/ac/ax)
Android

Android


Панель мониторинга
Устройства

Настройки Wi-Fi

Приоритет
natural_image
Illustration of a desktop computer with smartphone, monitor, and game controller (no text or symbols)Add up to 3 devices to prioritize. Devices not on this list will share what's left of your internet capacity.
Add a Device
Learn more about Priority By Device
Уведомления
Настройки портов
Измерение скорости
Отзыв
Справка
Android
Android (安卓)

导航菜单
点击菜单图标,以在应用内进行导航。

控制面板
Android (安卓)
设备
查看或更改设备详情

Wi-Fi设置
高级 Wi-Fi 设置
使用 WPS 连接设备
来宾网络访问权限
优先级
通知
网络管理
端口设置
Wi-Fi MAC 筛选
外部存储器
速度测试
反馈
帮助
直接连接至您的路由器
Android(安卓)
路由器密码
Priorita (Priority) 18
Android


Android


Android
Tabul'a (Dashboard)
Zariadenia (Devices)
Nastavenia siete Wi-Fi (Wi-Fi Settings)
Pokročilé nastavenia siete Wi-Fi (Advanced Wi-Fi Settings)

Prístup do hostitel'skej siete
Priorita (Priority)
Network Administration (Správa siete)
Nastavenia portov (Port Settings)
Filtre adries MAC (Wi-Fi MAC Filters)
Externé úložisko (External Storage)
Speed Check (Kontrola rýchlosti)
Odozva (Feedback)
Pomocník (Help)
Priame pripojenie k smerovaču
Heslo smerovača
Android


Android


- Vnesite e-poštni naslov, ki ste ga uporabili pri ustvarjanju računa.
- Vnesite geslo računa.
- Dotaknite se polja Prijava.
Glavni meni
Android
Nadzorna plošča

Naprave
Za ogled ali spremembo podrobnosti omrežne naprave

