LASTREE - Chair Kindercraft - Free user manual and instructions
Find the device manual for free LASTREE Kindercraft in PDF.

| Product type | Multifunctional chair (high chair and cradle) |
| Brand | Kindercraft |
| Model | LASTREE |
| Maximum child weight (high chair) | 15 kg (up to 36 months) |
| Maximum child weight (cradle) | 9 kg (from birth) |
| Main material | Plastic, fabric, foam |
| Approximate dimensions (L x D x H) | 55 x 75 x 90 cm (adjustable height) |
| Product weight | Approximately 8 kg |
| Backrest positions | 3 (sitting, semi-reclined, reclined) |
| Height adjustment | 5 positions |
| Footrest adjustment | 3 positions, with extra footrest |
| Wheels | 4 with brakes |
| Harness | 5-point, adjustable |
| Tray | 3 positions, removable, with cup holder |
| Basket | Max capacity 5 kg |
| Play arch | Included with 2 removable toys |
| Care | Insert washable at 30°C; clean frame and cover with damp cloth and mild detergent |
| Safety | Parking brakes, 5-point harness, anti-tip device |
| Warranty | 24 months (extendable to 120 months under conditions) |
| Included accessories | Arch with toys, extra footrest, basket, 4 wheels |
Frequently Asked Questions - LASTREE Kindercraft
User questions about LASTREE Kindercraft
0 question about this device. Answer the ones you know or ask your own.
Ask a new question about this device
Download the instructions for your Chair in PDF format for free! Find your manual LASTREE - Kindercraft and take your electronic device back in hand. On this page are published all the documents necessary for the use of your device. LASTREE by Kindercraft.
USER MANUAL LASTREE Kindercraft
Register now at kinderkraft.com
natural_image
Line drawing of a baby boom chair with patterned backrest and wheels (no text or symbols)
kinderkraft.com

/kinderkraftofficial

kinderkraft

@kinderkraftofficial
(AR) كرسي عالي
(CZ) STOLIČKA NA KRMENÍ 2v1
DE) KINDERSTUHL 2in1
(EN) HIGH CHAIR 2in1
(ES) TRONA PARA COMER 2en1
(FR) CHAISE HAUTE POUR BÉBÉ 2en1
(HU) ETETŐSZÉK 2az1-ben
(IT) SEGGIOLINO DA TAVOLO 2in1
الاستخدام دليل
NÁVOD K OBSLUZE
MANUAL DE INSTRUÇÕES
INSTRUCTIUNI DE UTILIZARE
natural_image
Line drawing of a spiderweb device with geometric frame and mesh base (no text or symbols)1
text_image
a b2
natural_image
Simple line drawing of a rectangular container with a circular hole at the bottom (no text or symbols)3

natural_image
Line drawing of four mechanical components with no text or symbols4
natural_image
Line drawing of a garment sleeve with checkered pattern and fabric band (no text or symbols)5
natural_image
Simple line drawing of a curved, looped structure with two endpoints (no text or symbols)6
natural_image
Illustration of two bird-shaped objects: a leaf tag and a bird with striped pattern and loop (no text or symbols)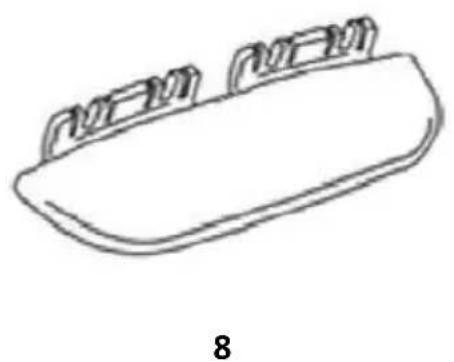
natural_image
Simple line drawing of a rectangular object with three protrusions, labeled '8' below (no text or symbols on the object itself)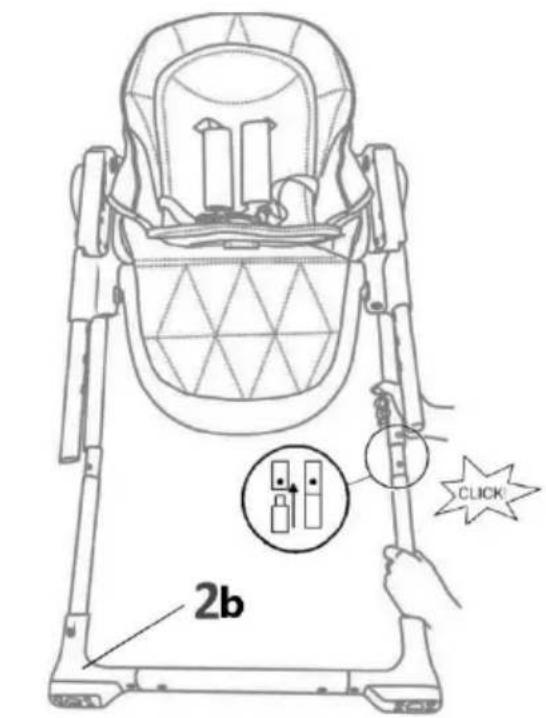
text_image
2b CLICKA
text_image
1B
text_image
2b 2aC
natural_image
Illustration of a person performing a medical or therapeutic procedure on a patient's back, with no visible text or symbols.D
natural_image
Line drawing of a baby boom chair with adjustable legs and seat (no text or symbols)DI
natural_image
Line drawing of a pair of folding scissors (no text or symbols)DII
text_image
5J
natural_image
Line drawing of a mechanical assembly with a black arrow pointing to a circular component (no text or symbols)K
text_image
4 4L
natural_image
Line drawing of a mechanical assembly with a hand adjusting a component (no text or symbols)M
natural_image
Diagram of a car interior showing hand positioning and movement arrows (no text or symbols)N
text_image
5 1NI

natural_image
Line drawing of a hand holding a car seatbelt with directional arrows indicating motion (no text or symbols)0
natural_image
Line drawing of a mechanical tool or clamp assembly (no text or symbols)011
natural_image
Line drawing of hands assembling or holding a device with a numbered arrow indicating rotation (no text or symbols present)P
natural_image
Line drawing of a mechanical tool or device with no visible text, numbers, or symbols01
natural_image
Line drawing of a mechanical tool or device with no visible text, numbers, or symbols0111
natural_image
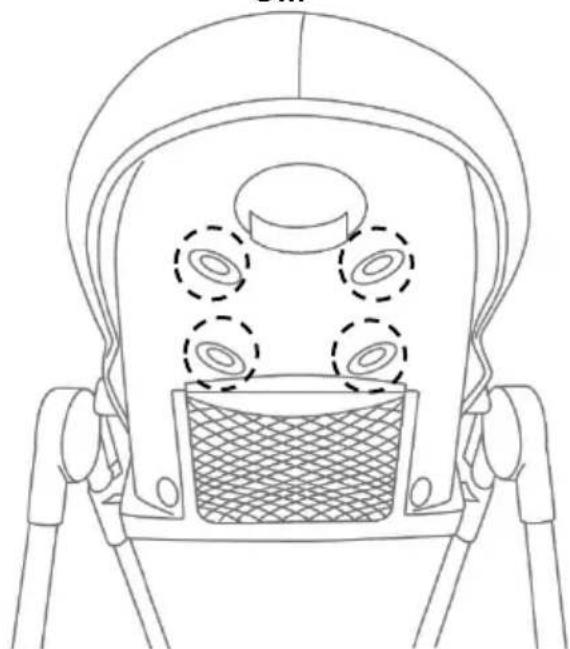
Line drawing of a robot head with four circular features on the chest, enclosed in a mesh basket (no text or symbols)R

natural_image
Line drawing of hands holding a device with arrows indicating movement or force (no text or symbols)S
natural_image
Line drawing of a four-legged tripod-mounted device with a propeller and handle (no text or symbols)T

natural_image
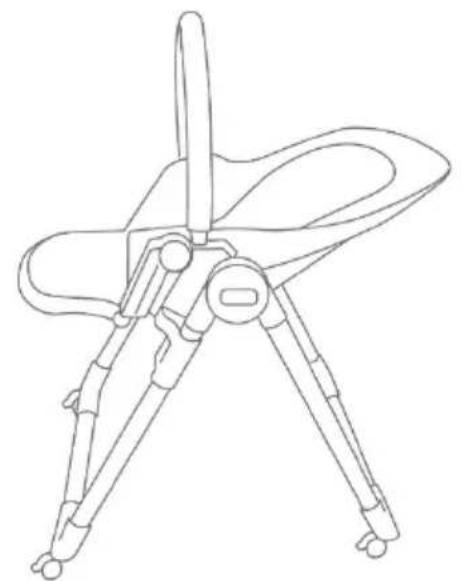
Line drawing of a baby boom chair with adjustable legs and seat (no text or symbols)U
AR
عميلنا المحترم!
نشکرک على اقتناه منتجات شركة Kinderkraft.
والجودة دائم
text_image
Safety warning signs including no pedestrian crossing, seatbelt, weight limit, and safety measuresSeznám dílů
text_image
Prohibition sign with pictograms of a child and adult walking, indicating no smoking or childbirth in the population.
natural_image
Blue circular icon with white silhouette of a person wearing a belt switch (no text or symbols)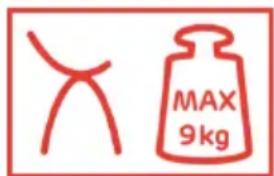
text_image
MAX 9kg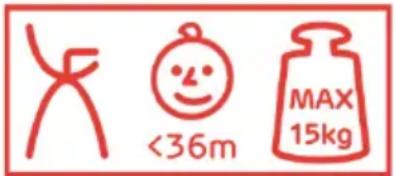
text_image
× <36m MAX 15kgListe der Teile
Thank you for purchasing a Kinderkraft product.
Our products are designed to help your child – we always care about safety and quality, thus ensuring the comfort of the best choice.
IMPORTANT! KEEP THIS MANUAL FOR FUTURE REFERENCE.
SAFETY INSTRUCTIONS AND PRECAUTIONS
WARNINGS!
Always apply the parking device when product is not being moved.
RECLINED CRADLE
- Never leave the child unattended.
- Do not use the reclined cradle once your child can sit unaided.
- This reclined cradle is not intended for prolonged periods of sleeping.
- It is dangerous to use this reclined cradle on an elevated surface, e.g. a table.
- Always use the restraint system.
- Never use the toy bar to carry the reclined cradle.
- Product is intended for children from birth to 9 kg.
- This reclined cradle does not replace a cot or a bed. Should your child need to sleep, then it should be placed in a suitable cot or bed.
- Keep children away when assembling and disassembling the product to avoid injury.
- Do not move or lift the product while the child is inside.
- Keep the product away from open fire and other heat sources such as electric heaters, gas heaters, etc.
- Do not use the reclined cradle if any components are broken or missing.
- Do not use accessories or replacement parts other than those approved by the manufacturer.
HIGH CHAIR
- Never leave the child unattended.
-
Always use the restraint system.
-
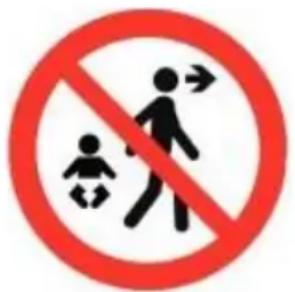
Falling hazard: Prevent your child from climbing on the product.
- Do not use the product unless all components are correctly fitted and adjusted
- Be aware of the risk of open fires and other sources of strong heat in the vicinity of the product.
- Be aware of the risk of tilting when your child can push its feet against a table or any other structure.
- Always check the security and the stability of product before use.
- Make sure that any harness is correctly fitted.
- Do not move or lift the product while the child is inside.
- Do not use the product until the child can sit up unaided.
- Keep children away when unfolding and folding the product to avoid injury.
- High chair is intended for children able to sit up unaided and up to 3 years or a maximum weight of 15 kg.
- Don't use the product if any part is broken, torn or missing.
- Accessories or replacement parts other than those approved by the manufacturer must not be used.
text_image
Prohibition sign with pictograms of a child and adult walking, indicating no smoking or death
natural_image
Blue circular icon with a white human figure and belt switch symbols (no text)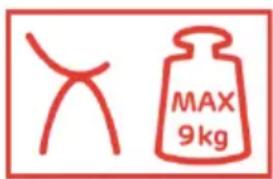
text_image
MAX 9kg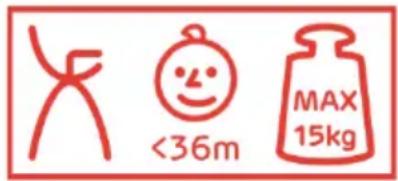
text_image
<36m MAX 15kgList of components
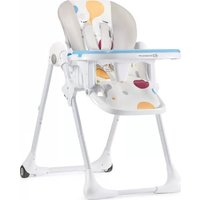
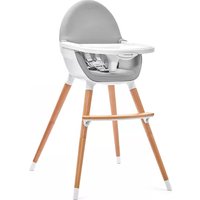
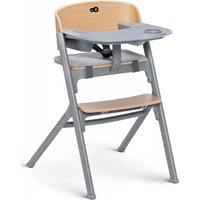
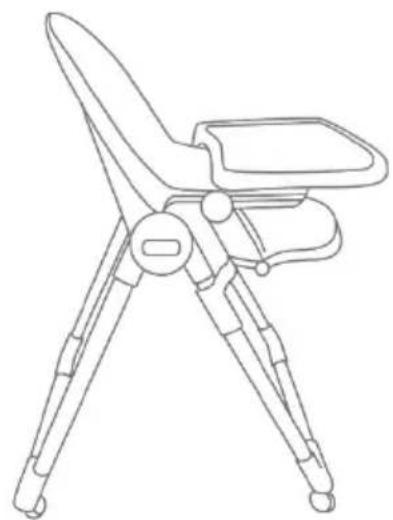
| 1 | Seat with cover and insert | 5 | Basket |
| 2 | Lower legs (a and b) | 6 | Bar |
| 3 | Tray with overlay | 7 | Toys to hang on the bar |
| 4 | Wheels x4 | 8 | Additional footrest |
Change functions and make adjustments only when the chair is unoccupied!
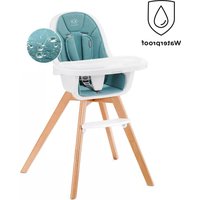
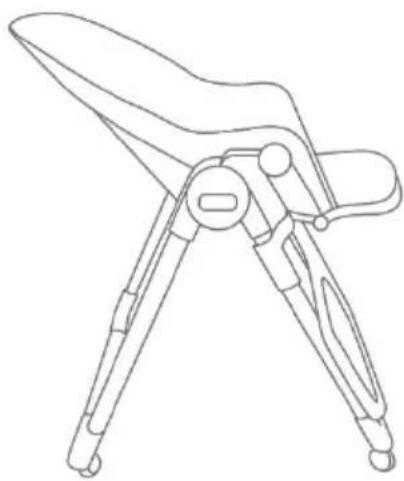
1. Adjustment of the product to cradle function (Fig. T):
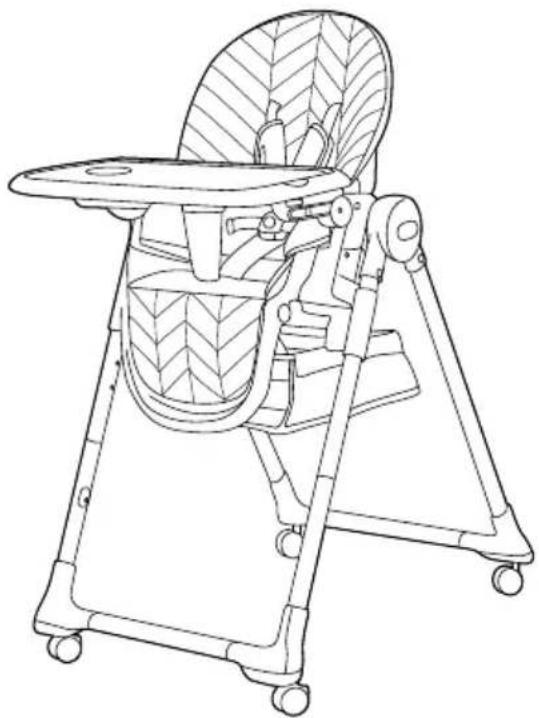
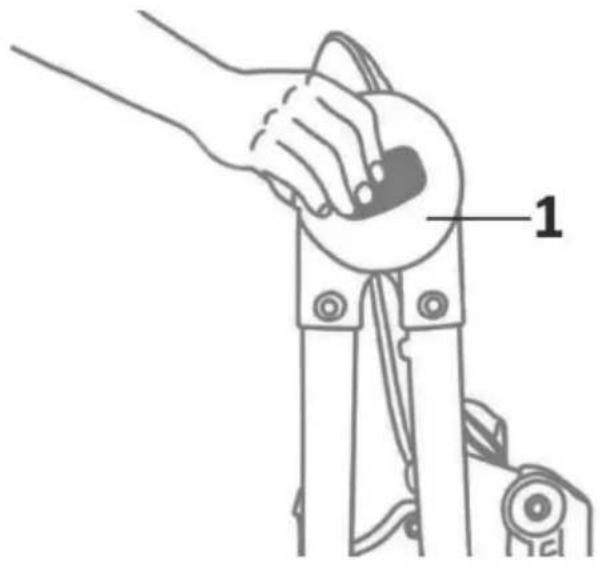
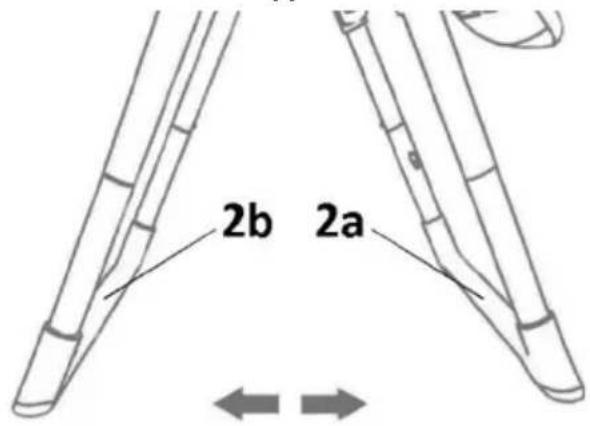
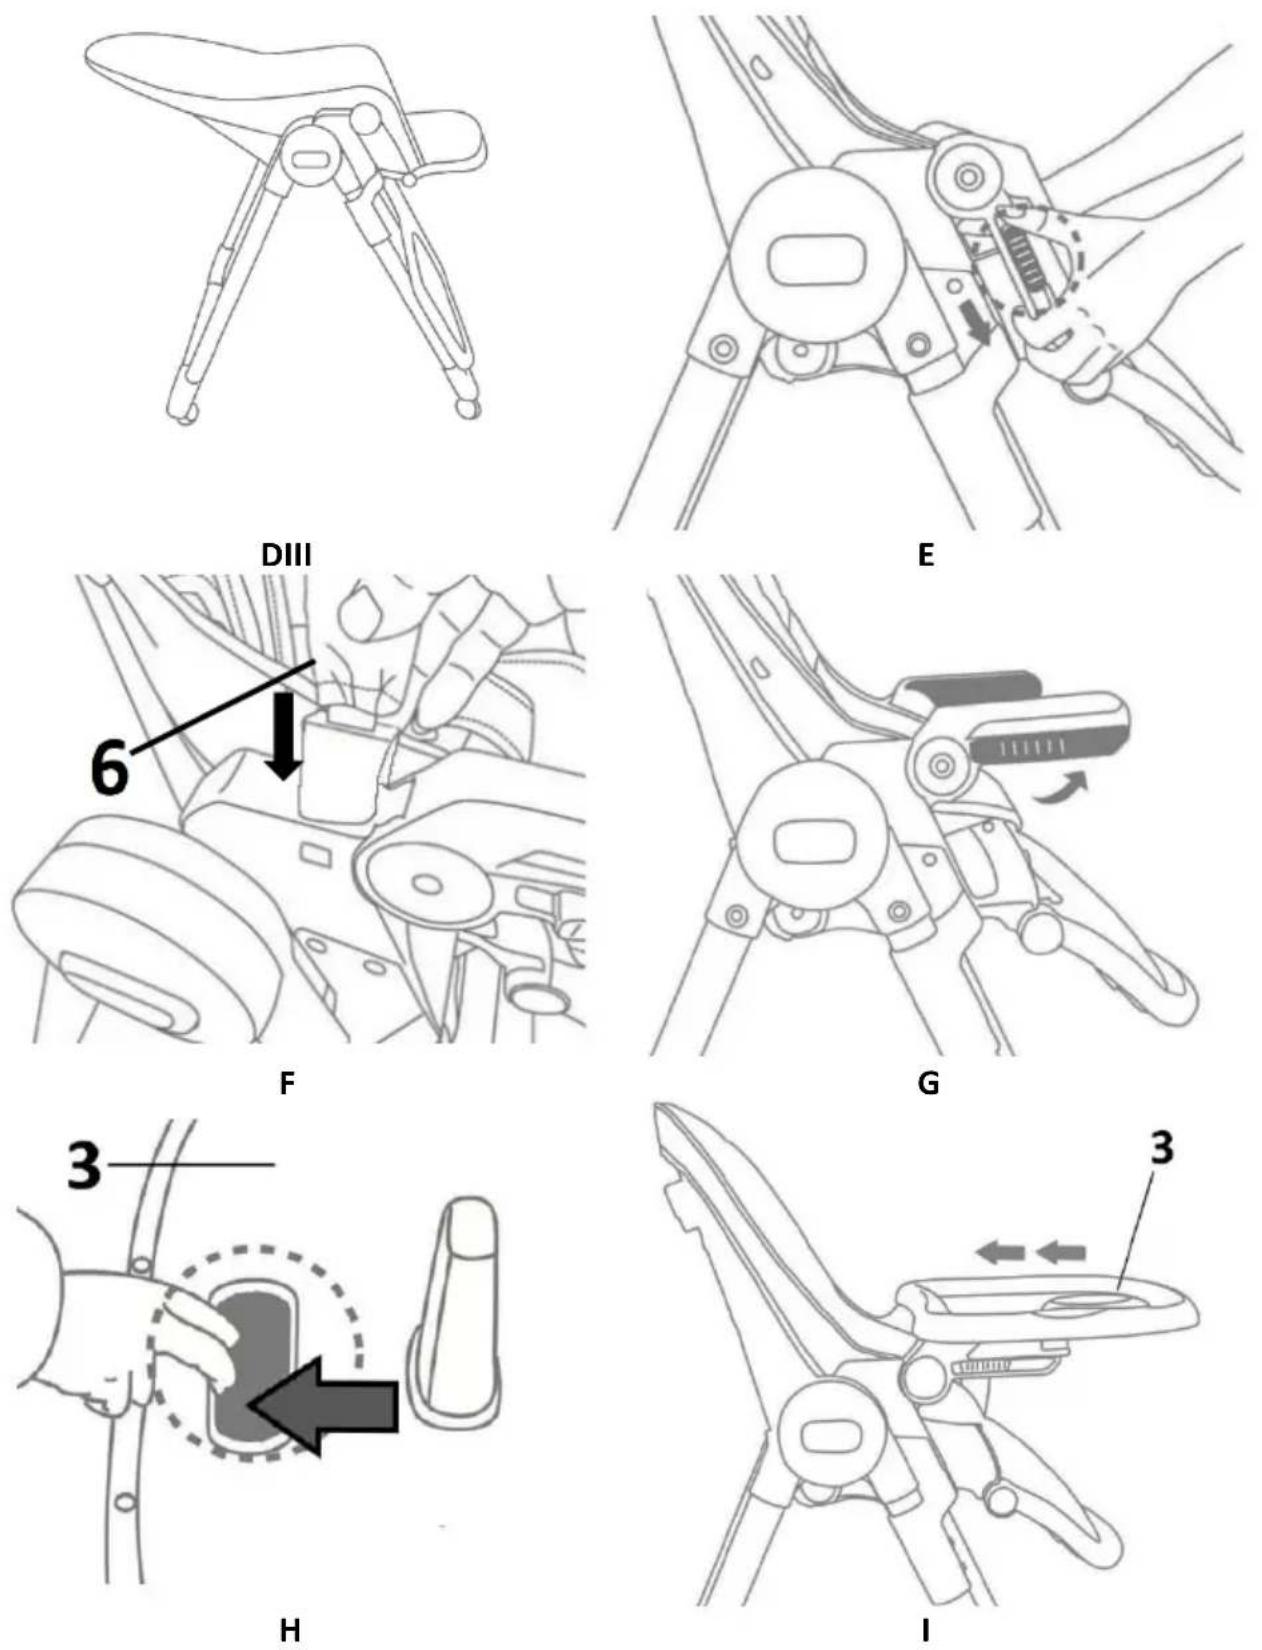
Place the seat (1) on soft ground so that the side with upholstery and belts is at the top. Take the lower leg (2a) and attach it to the upper front leg attached to the seat (1). Ensure the safety device makes a characteristic click. Repeat the same procedure with the other leg (2b) (Fig. A). Note: leg 2a has protruding plastic parts to which is attached the tray (3). To extend the legs, press the buttons on the sides of the seat at the same time (fig. B) and extend the legs (fig. C). The seat backrest has three adjustment positions: sitting (fig. Dl) for the feeding chair and semi-
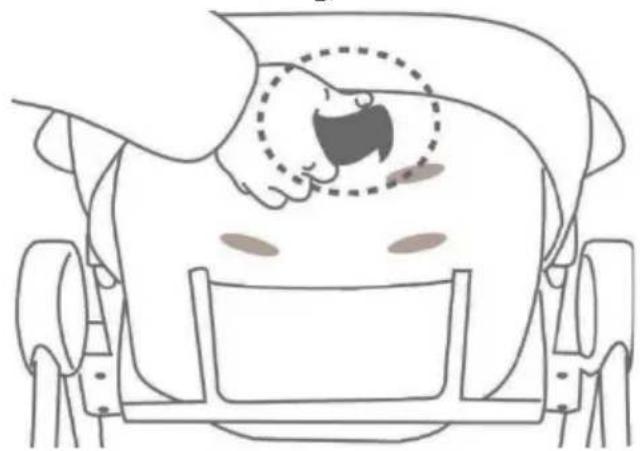
lying (fig. DII) and lying (fig. DIII) for the cradle. To adjust the product to the lying position, press the button at the back of the seat (fig. D) and pull the backrest as far back as possible (fig. DIII). To change from lying to semi-lying position (fig. DII), press the button at the back of the seat and pull the backrest forward one notch. See also chapter 6 on adjusting the footrest regarding cradle function.
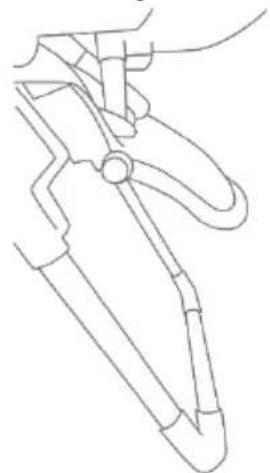
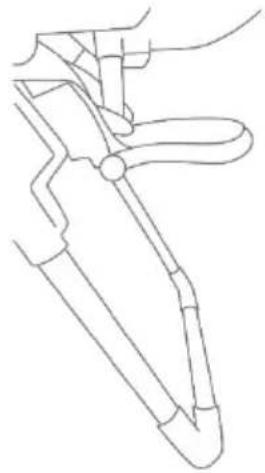
Mounting of the bar:
Attach the toys (7) included with the chair in the round elements of the bar (6). Assemble both guides. Slide the slide on the outside of the guide as shown in fig. (E) towards you while pushing the guide down. Insert the plastic parts at the end of the toy bar (6) into the place behind the guide (Fig. F). Make sure you hear a characteristic click.
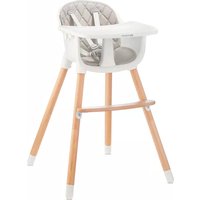
2. Assembly of the feeding chair (Fig. U):
To change the function from cradle to feeding chair, remove the toy bar. Pull the plastic part of the toy bar. Then lift both guides up (fig. G). Change the position of the backrest - press the button at the back of the seat and move the backrest as far forward as possible (fig. DI). See also chapter 6 on adjusting the footrest for the high chair function.
Tray assembly:
The tray consists of two parts: the tray and the overlay, which can be freely removed. Hold the tray (3) so that the cup holder is at the top. Using the button at the bottom of the tray (Fig. H), align the tray with the guides. Press and hold the button, at the same time insert the tray into the guides (fig. I). The tray has three adjustment positions, slide the tray along the guides to the desired position. When the tray (3) changes position you will hear a characteristic click. Additionally check that the tray is properly secured on both sides.
3. Assembly of the basket:
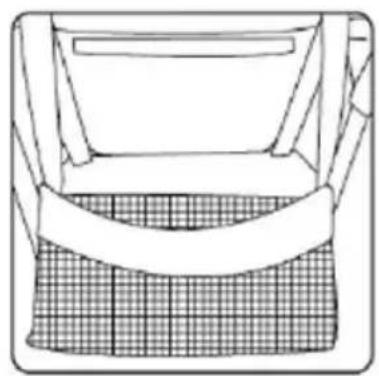
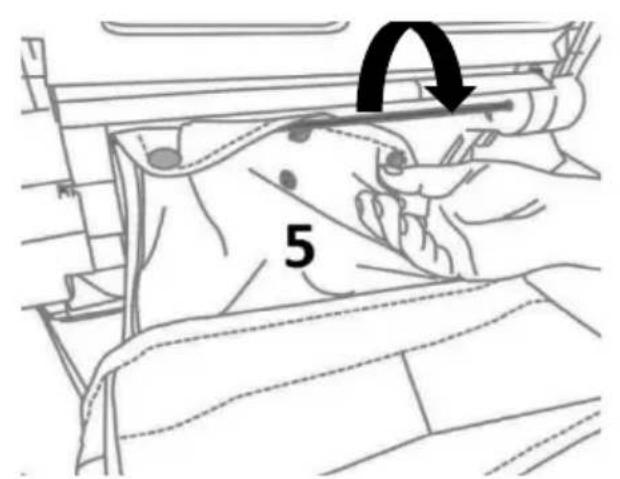
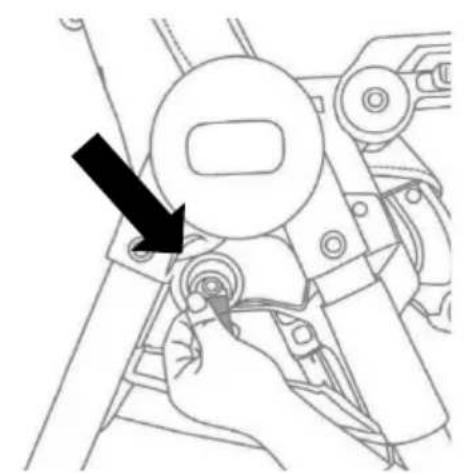
Put the longer part of the basket (5) with the buttons through the metal rod under the seat (Fig. J). Clip the buttons together. Attach the straps (located on the side of the basket and with plastic elements at their and) to the hooks on the sides of the seat (fig. K). Remember. The maximum load for the basket is 5 kg.
4. Mounting the wheels:
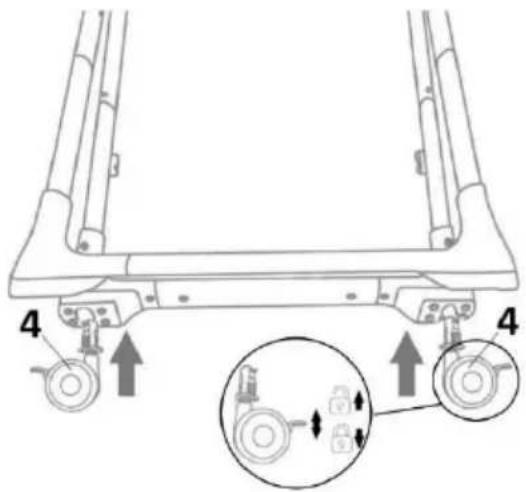
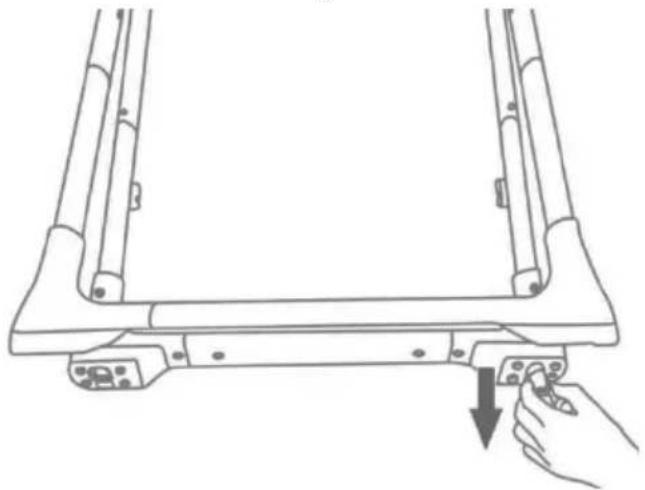
The product can be used with or without four wheels mounted. Each wheel has a brake. Wheels can be unlocked by lifting the safety element (Fig. L). Place the chair on a soft surface. The legs are finished with plastic elements and have 2 holes in them. Insert the protruding plastic part of the wheel into the larger hole (Fig. L). Make sure that the connecting element is correctly positioned. To remove the wheels, pull them towards you (fig. M). Caution! Do not move the product when your child is using it.
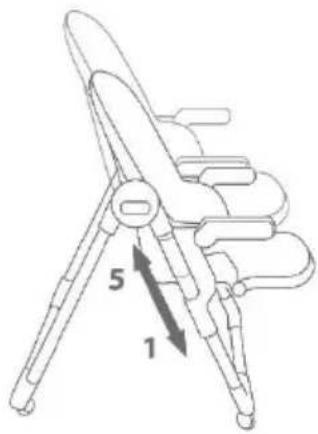
5. Seat height adjustment:
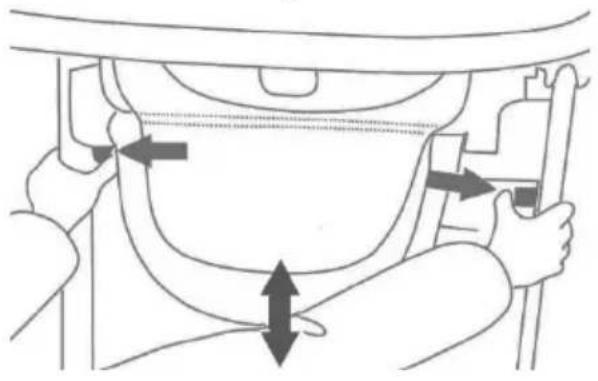
The seat (regardless of whether it is being used as a cradle or a feeding chair) can be set at five selected heights. Press the height adjustment buttons on both plastic parts connecting the seat to the chair legs at the same time (Fig. N). Move the seat up or down to set the selected position (fig. N I). Note: Never adjust the seat height with your child inside!
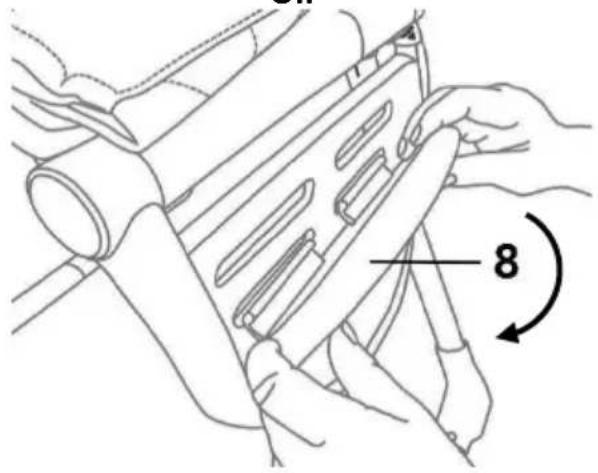
6. Footrest adjustment:
The footrest has three adjustment positions (fig. OI) (fig. OII) (fig. OIII). For the footrest function, set the footrest to the position shown in figure OI. To lift the footrest, pull it up. To lower the footrest, press the buttons on the sides of the footrest and pull it down. For the feeding chair, insert an additional footrest (8) in the selected hole of the main footrest (fig. P).
7. Belt adjustment:
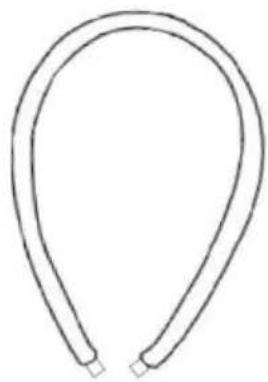
Shoulder straps can be adjusted to the child's height (Figure R). The length of the straps is adjusted by sliding the plastic buckles along the straps.
Removing the straps: unzip the straps by pressing the button on the buckle. The shoulder and waist straps end in a plastic ring, pull them through the hole in the seat, cover and insert. The crotch strap also ends in a plastic ring, pull it through the holes in the seat, cover and insert.
Re-assembly:
Straps with protectors are shoulder straps and are mounted in the upper part of the backrest (Fig. R). Pull the plastic ring through the hole in the insert, cover and seat. Put the hip straps through the cover and seat. Clip the belt rings into the slots at the back of the seat. You should hear a characteristic click. Put the crotch strap through the hole in the insert, cover and seat. All straps are clip into the crotch strap buckle (Fig. S).
8. Removing the insert:
The insert is double-sided. To remove or change the insert's side, remove the straps (see chapter 7) and remove or rotate the insert.
9. Cleaning:
Wash the insert in 30 degrees.
Clean the cover, toys, straps and basket with a soft, moistened cloth and a mild detergent. Clean the tray and the chair frame with a soft, dampened cloth and a mild detergent.
 | Wash at max. 30°C, gentle process. |  | Do not wash. Clean the product gently with a damp cloth and a mild detergent. |
 | Do not tumble dry |  | Do not bleach |
 | Do not dry clean |  | Do not iron |
Warranty
A. All Kinderkraft products are covered by a 24-month warranty. The warranty period begins on the date of releasing the product to the Buyer.
B. The warranty is valid for products sold in the following countries: France, Spain, Germany, Poland, United Kingdom, Italy.
C. In countries not listed above warranty terms and conditions are determined by the Seller.
D. It is possible to extend the warranty period to 120 months (10 years). Full text of the terms and conditions and warranty extension registration form are available at WWW.KINDERKRAFT.COM
E. The warranty is valid only in the country where the purchase was made.
F. Complaints should be submitted by completing the form available at WWW.RMA.KINDERKRAFT.COM
G. The warranty shall not cover:
a. claims arising from product specifications, as long as they comply with those specified by the manufacturer in the instruction manual or other documents of a legislative nature;
b. product damage caused by improper maintenance or use of inadequate chemicals;
c. colour change (discolouration) when the product has been exposed to direct sunlight against the instructions provided in the instruction manual;
d. tear, wear, crack of fabric/plastic that is the fault of the Customer;
e. reduction in the quality of the product and consumables due to normal wear and tear;
f. products which have not been used according to specifications;
H. The warranty period for accessories attached to the device is 6 months from the date of sale, with the exception of mechanical damage.
I. These guarantee terms and conditions are complementary to the Customer's rights in relation to 4KRAFT sp. z o.o. The warranty shall not exclude, limit or suspend the rights of the Customer arising from the provisions on the warranty for defects in the goods sold.
J. Full text of Warranty Terms and Conditions is available at WWW.KINDERKRAFT.COM
All rights to this data are entirely reserved to 4Kraft Sp. z o.o. Any unauthorized use or misuse, including usufruct, copying, duplication and sharing, wholly or partially, without consent of 4Kraft Sp. z o.o. may result in legal consequences.
ES
¡Estimado Cliente!
text_image
Prohibition sign with pictograms of a child and adult walking, indicating no smoking or childbirth
natural_image
Blue circular icon with white human figure and belt symbols (no text)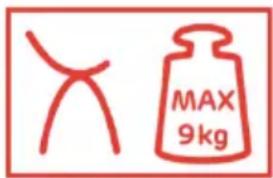
text_image
MAX 9kg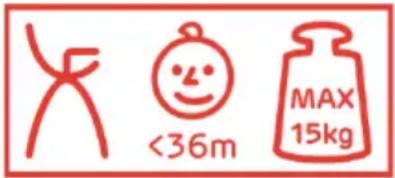
text_image
<36m MAX 15kgtext_image
Safety warning symbols including pictograms, seatbelt, weight limit, and child safety measuresOnderdelenlijst
text_image
Safety warning signs including pictograms, seatbelt, weight limit, and safety measuresLista de peças
SCAUN PENTRU ALĂPTAT
text_image
Prohibition sign with pictograms of a child and adult walking, indicating no smoking or childbirth
natural_image
Blue circular icon with a white human figure and belt symbols (no text)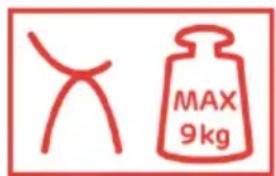
text_image
MAX 9kg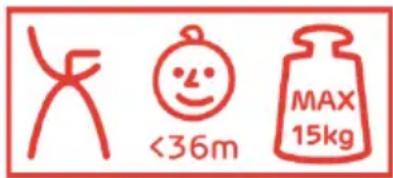
text_image
<36m MAX 15kgLista de piese
text_image
Prohibition sign with pictograms of a child and adult walking, indicating no movement or safety
natural_image
Blue circular icon with a white human figure and belt switch symbols (no text)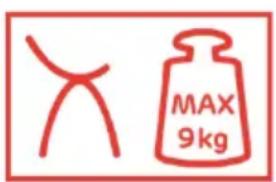
text_image
MAX 9kg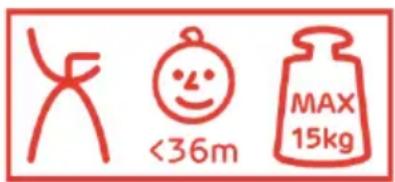
text_image
<36m MAX 15kgСписок деталей
text_image
Prohibition sign with pictograms of a child and adult walking, indicating no smoking or alcohol use
natural_image
Blue circular icon with a white human figure and belt switch symbols (no text)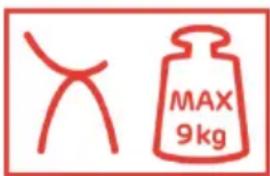
text_image
MAX 9kg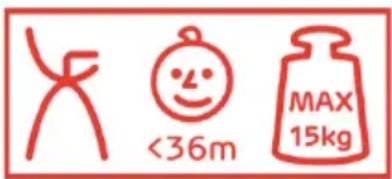
text_image
<36m MAX 15kgZoznam dielov
(EN): In the interests of our Clients - we are at your disposal! If you have a problem with the product you received, contact us in the most convenient way for you!