FINI - Chair Kindercraft - Free user manual and instructions
Find the device manual for free FINI Kindercraft in PDF.
User questions about FINI Kindercraft
0 question about this device. Answer the ones you know or ask your own.
Ask a new question about this device
Download the instructions for your Chair in PDF format for free! Find your manual FINI - Kindercraft and take your electronic device back in hand. On this page are published all the documents necessary for the use of your device. FINI by Kindercraft.
USER MANUAL FINI Kindercraft
natural_image
Line drawing of a baby stool with open lid and seat, no text or symbols present
kinderisraft.com

Kinderkraftofficial

indersraft

kindenkraftofficial
(AR) دليل الاستخدام (CS) Návod k obsluze (DE) Bedienungsanleitung (EN) User manual (ES) Manual de uso (FR) Guide d'utilisation (HU) Használati útmutató (IT) Istruzioni per utente (NL) Gebruiksaanwijzing (PL) Instrukcja obsługi (PT) Manual de instruções (RO) Manual de utilizare (RU) Руководство по эксплуатации (SK) Návod na použitie (SV) Bruksanvisning
(AR) حصير تعليميقة (CS) Stolička na krmení 2v1 (DE) Kinderstuhl 2in1 (EN) High chair 2in1 (ES) Trona para comer 2en1 (FR) Chaise haute pour bébé 2en1 (HU) Etetőszék 2az1-ben (IT) Seggiolino da tavolo 2in1 (NL) Voedingstoel 2in1 (PL) Krzesełko do karmienia 2w1 (PT) Cadeira de alimentação 2em1 (RO) scaun pentru alăptat 2în1 (RU) стул для кормления 2в1 (SK) Stolička na krimenie 2v1 (SV) Barnstol 2i1
/للمنتج کاملاً تمثيلاً تشكل ولا فقط тожيحة لاغراض هي الأشكال. Ilustrace jsou pouze orientační a nepředstavují plné zobrazení produktu./Die gezeigten Bilder dienen nur als Referenz, das tatsächliche Produkt kann von der Abbildung abweichen./The illustrations are for illustration only and do not represent the product./Las ilustraciones son meramente orientativas y no constituyen una representación completa del producto./Les illustrations sont données à titre indicatif et ne constituent pas une représentation complète du produit./Az illusztrációk csak tájékoztató jellegűek és eltérhetnek a valós terméktől./Le immagini sono inserite a scopo dimostrativo e non rispecchiano appieno le caratteristiche del prodotto./De afbeeldingen dienen uitsluitend ter illustratie en geven geen volledig beeld van het product./Ilustracje mają charakter poglądowy i nie stanowią pełnego odwzorowania produktu./As ilustrações têm uma função informativa e não são uma representação fiel do produto./ Ilustrațiile sunt doar pentru referință și nu reprezintă produsul complet./Иллюстрации приведены только для справки и не представляют весь продукт./Obrázky slúžia len na ilustráciu a nie sú úplným predstavením produktu./Illustrationer är endast för referens och representerar inte hela produkten
All rights to this data are entirely reserved to 4Kraft Sp. z o.o. Any unauthorized use or misuse, including usufruct, copying, duplication and sharing, wholly or partially, without consent of 4Kraft Sp. z o.o. may result in legal consequences.
AR....8
CS 11
DE....14
EN....18
ES....21
FR 24
HU 28
IT 31
NL 35
PL....38
PT 41
RO....45
RU....48
SK 52
SV 55
natural_image
Line drawing of a simple chair with legs and armrests (no text or symbols)1
natural_image
Simple line drawing of two cylindrical objects with circular ends, no text or symbols present2
natural_image
Simple line drawing of two cylindrical objects with pointed tips (no text or symbols)3
natural_image
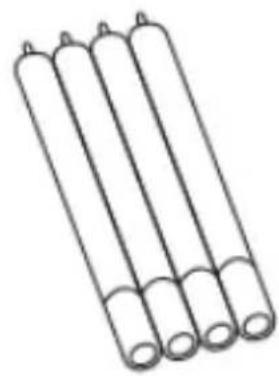
Simple line drawing of five cylindrical objects arranged diagonally (no text or symbols)4
natural_image
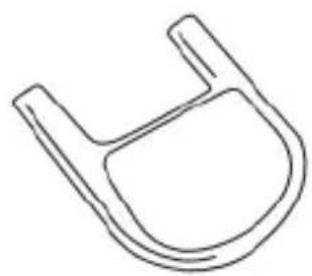
Simple line drawing of a U-shaped object with a rounded base and two protruding ends (no text or symbols)5
natural_image
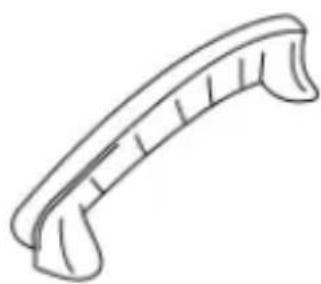
Simple line drawing of a curved, segmented object resembling a tool or bracket (no text or symbols)6
natural_image
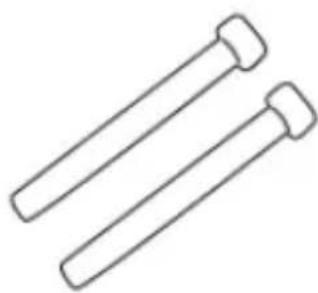
Simple line drawing of two identical cylindrical pins (no text or symbols)7
natural_image
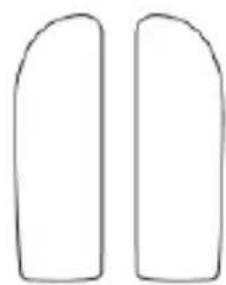
Two simple curved shapes with rounded ends, resembling simplified arches or panels (no text or symbols)8
natural_image
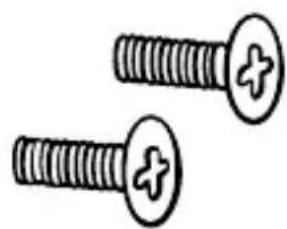
Two screws with circular heads and cross marks, no text or symbols present9
natural_image
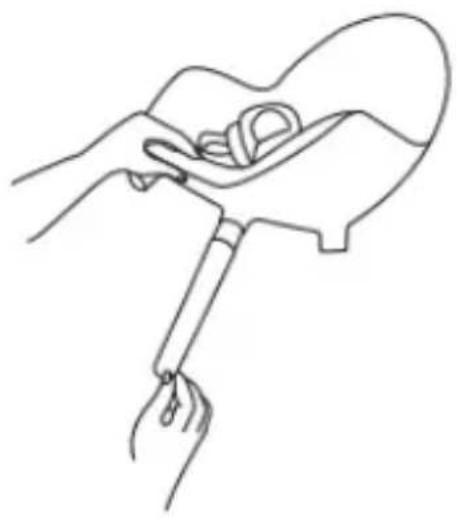
Line drawing of a hand holding a tool, no text or symbols presentA
natural_image
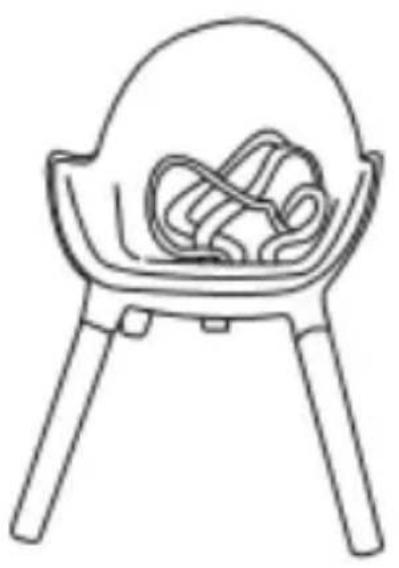
Line drawing of a simple wooden stool with a bowl containing coiled goods (no text or symbols)B
natural_image
Line drawing of a mechanical component with two blades and a knob (no text or symbols)C
natural_image
Line drawing of a hand holding a tool or device with a handle, no text or symbols presentD
natural_image
Line drawing of a hand holding a cylindrical object, possibly a tool or device (no text or symbols present)E
natural_image
Pure technical line drawing of a mechanical joint or bracket (no text or symbols)F
natural_image
Line drawing of a hand using a tool to cut a piece of food (no text or symbols)G
natural_image
Line drawing of a baby in a baby chair with a seatbelt (no text or symbols)H
natural_image
Line drawing of a hand holding a pair of scissors (no text or symbols)|
natural_image
Line drawing of a hand holding a pen, with a curved arrow indicating direction (no text or symbols)J
natural_image
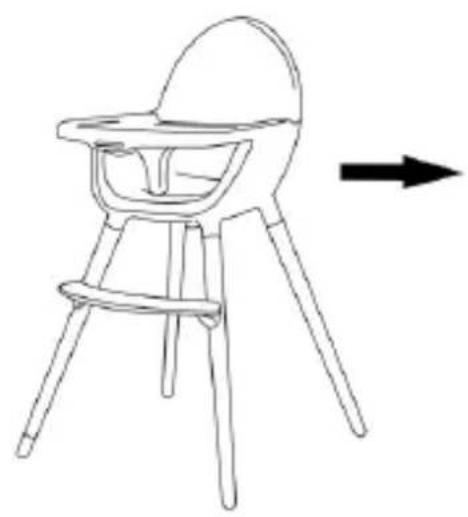
Line drawing of a baby stool with a curved seat and four legs, pointing right (no text or symbols)K
natural_image
Line drawing of a simple chair with legs and seat, no text or symbols present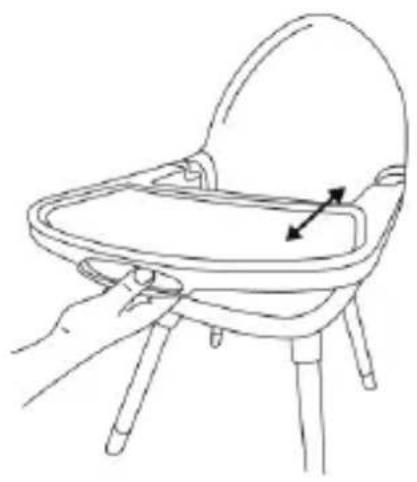
natural_image
Line drawing of a baby seat with a hand holding the seat, showing a finger pointing to the seat area (no text or symbols)L
natural_image
Line drawing of a hand pressing down on a tooth with an arrow indicating upward motion (no text or symbols)M
natural_image
Diagram showing two belt buckle clips with arrows indicating alignment or movement (no text or symbols)N
natural_image
Technical line drawing of a Y-shaped mechanical component with internal components and directional arrows (no text or symbols)0
natural_image
Line drawing of a hand holding a mechanical clamp or tool with three arms (no text or symbols)P
natural_image
Line drawing of a hand holding a cylindrical object with an arrow indicating direction (no text or symbols)R
natural_image
Line drawing of a person climbing a rope, with a black arrow pointing to the rope (no text or symbols)S
عزيزی العميل!
text_image
Prohibition sign with pictograms of a child and adult walking, indicating no movement or behaviorاحتياطات السلامة
کرسی عالي
تحذيرات:
text_image
Warning sign depicting a person inside a triangle with an umbrella symbol above, indicating caution or hazard.text_image
Prohibition sign with pictograms of a child and adult walking, indicating no movement or death.text_image
Warning symbol depicting a person inside a triangle with an object above, indicating caution or hazard.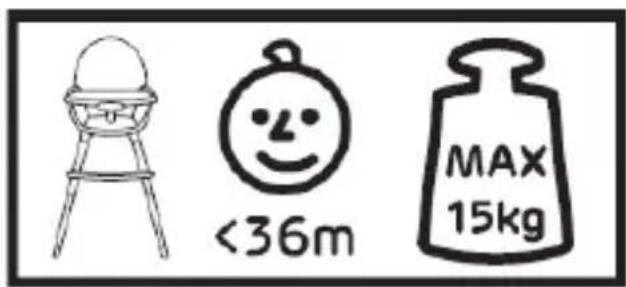
text_image
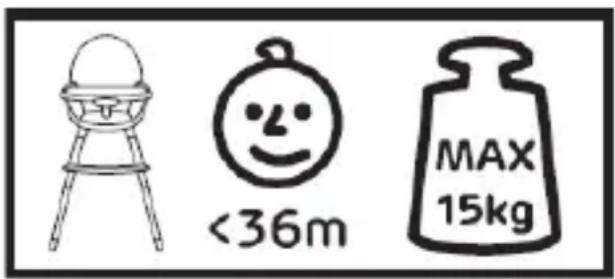
<36m MAX 15kg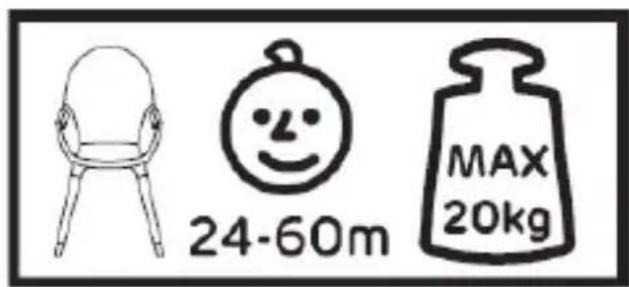
text_image
24-60m MAX 20kgHlavní části
text_image
Prohibition sign with pictograms of a child and adult walking, indicating no movement or behavior in the circle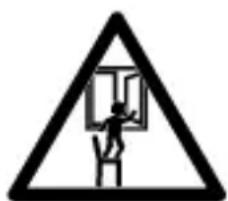
natural_image
Warning symbol depicting a person climbing a rope inside a triangular frame (no text or numbers)Thank you for purchasing the Kinderkraft product.
We create with your babies in mind - we take utmost care to ensure the safety and quality of our products so that you can enjoy the comfort of the best possible choice.
IMPORTANT! READ
CAREFULLY AND KEEP FOR
FUTURE REFERENCE.
Safety precautions
HIGH CHAIR
WARNING!
- Never leave the child unattended.
- High chairs: Always use the restraint system.
- Falling hazard: Prevent your child from climbing on the product.
- Do not use the product unless all components are correctly fitted and adjusted
- Be aware of the risk of open fires and other sources of strong heat in the vicinity of the product.
- Be aware of the risk of tilting when your child can push its feet against a table or any other structure.
- Always check the security and the stability of product before use.
- Make sure that any harness is correctly fitted.

text_image
Prohibition sign with pictograms of a child and adult walking, indicating no movement or behavior in the circle- Do not move or lift the product while the child is inside.
Do not use the product until the child can sit up unaided. Keep children away when assembling and disassembling the product to avoid injury. High chair is intended for children able to sit up unaided and up to 3 years or a maximum weight of 15 kg.
Don't use the product if any part is broken, torn or missing.
Product located under a window could be used as a step by the child and cause the child to fall out of the window.
Accessories or replacement parts other than those approved by the manufacturer must not be used.
SEATING FOR CHILDREN
WARNING!
- DO NOT place this product near a window as it can be used as a step by the child and cause the child to fall out of window
- Be aware of the risk of open fires and other sources of strong heat in the vicinity of the product
- DO NOT place this product near a window where cords from blinds or curtains could strangle a child
- All assembly fittings should always be tightened properly
- not to use seating if any part is broken, torn or missing and use only spare parts approved by the manufacturer
- the restraint system shall be removed/hidden/covered when the product is used as a seating
- This product is intended for babies between the ages of 24 and 60 months, weighing up to 20 kg, who are able to sit up unaided.
text_image
<36m MAX 15kg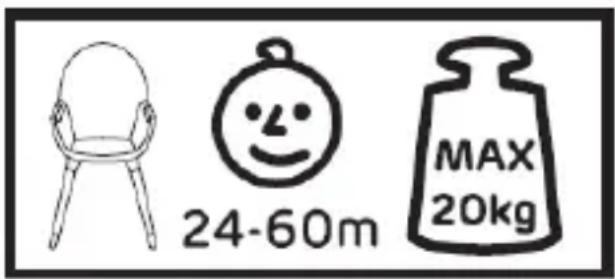
text_image
24-60m MAX 20kgEssential parts
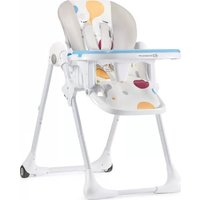
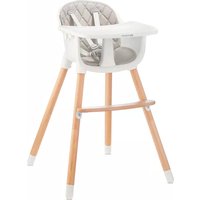
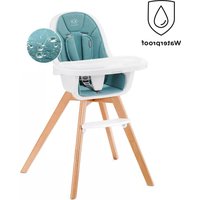
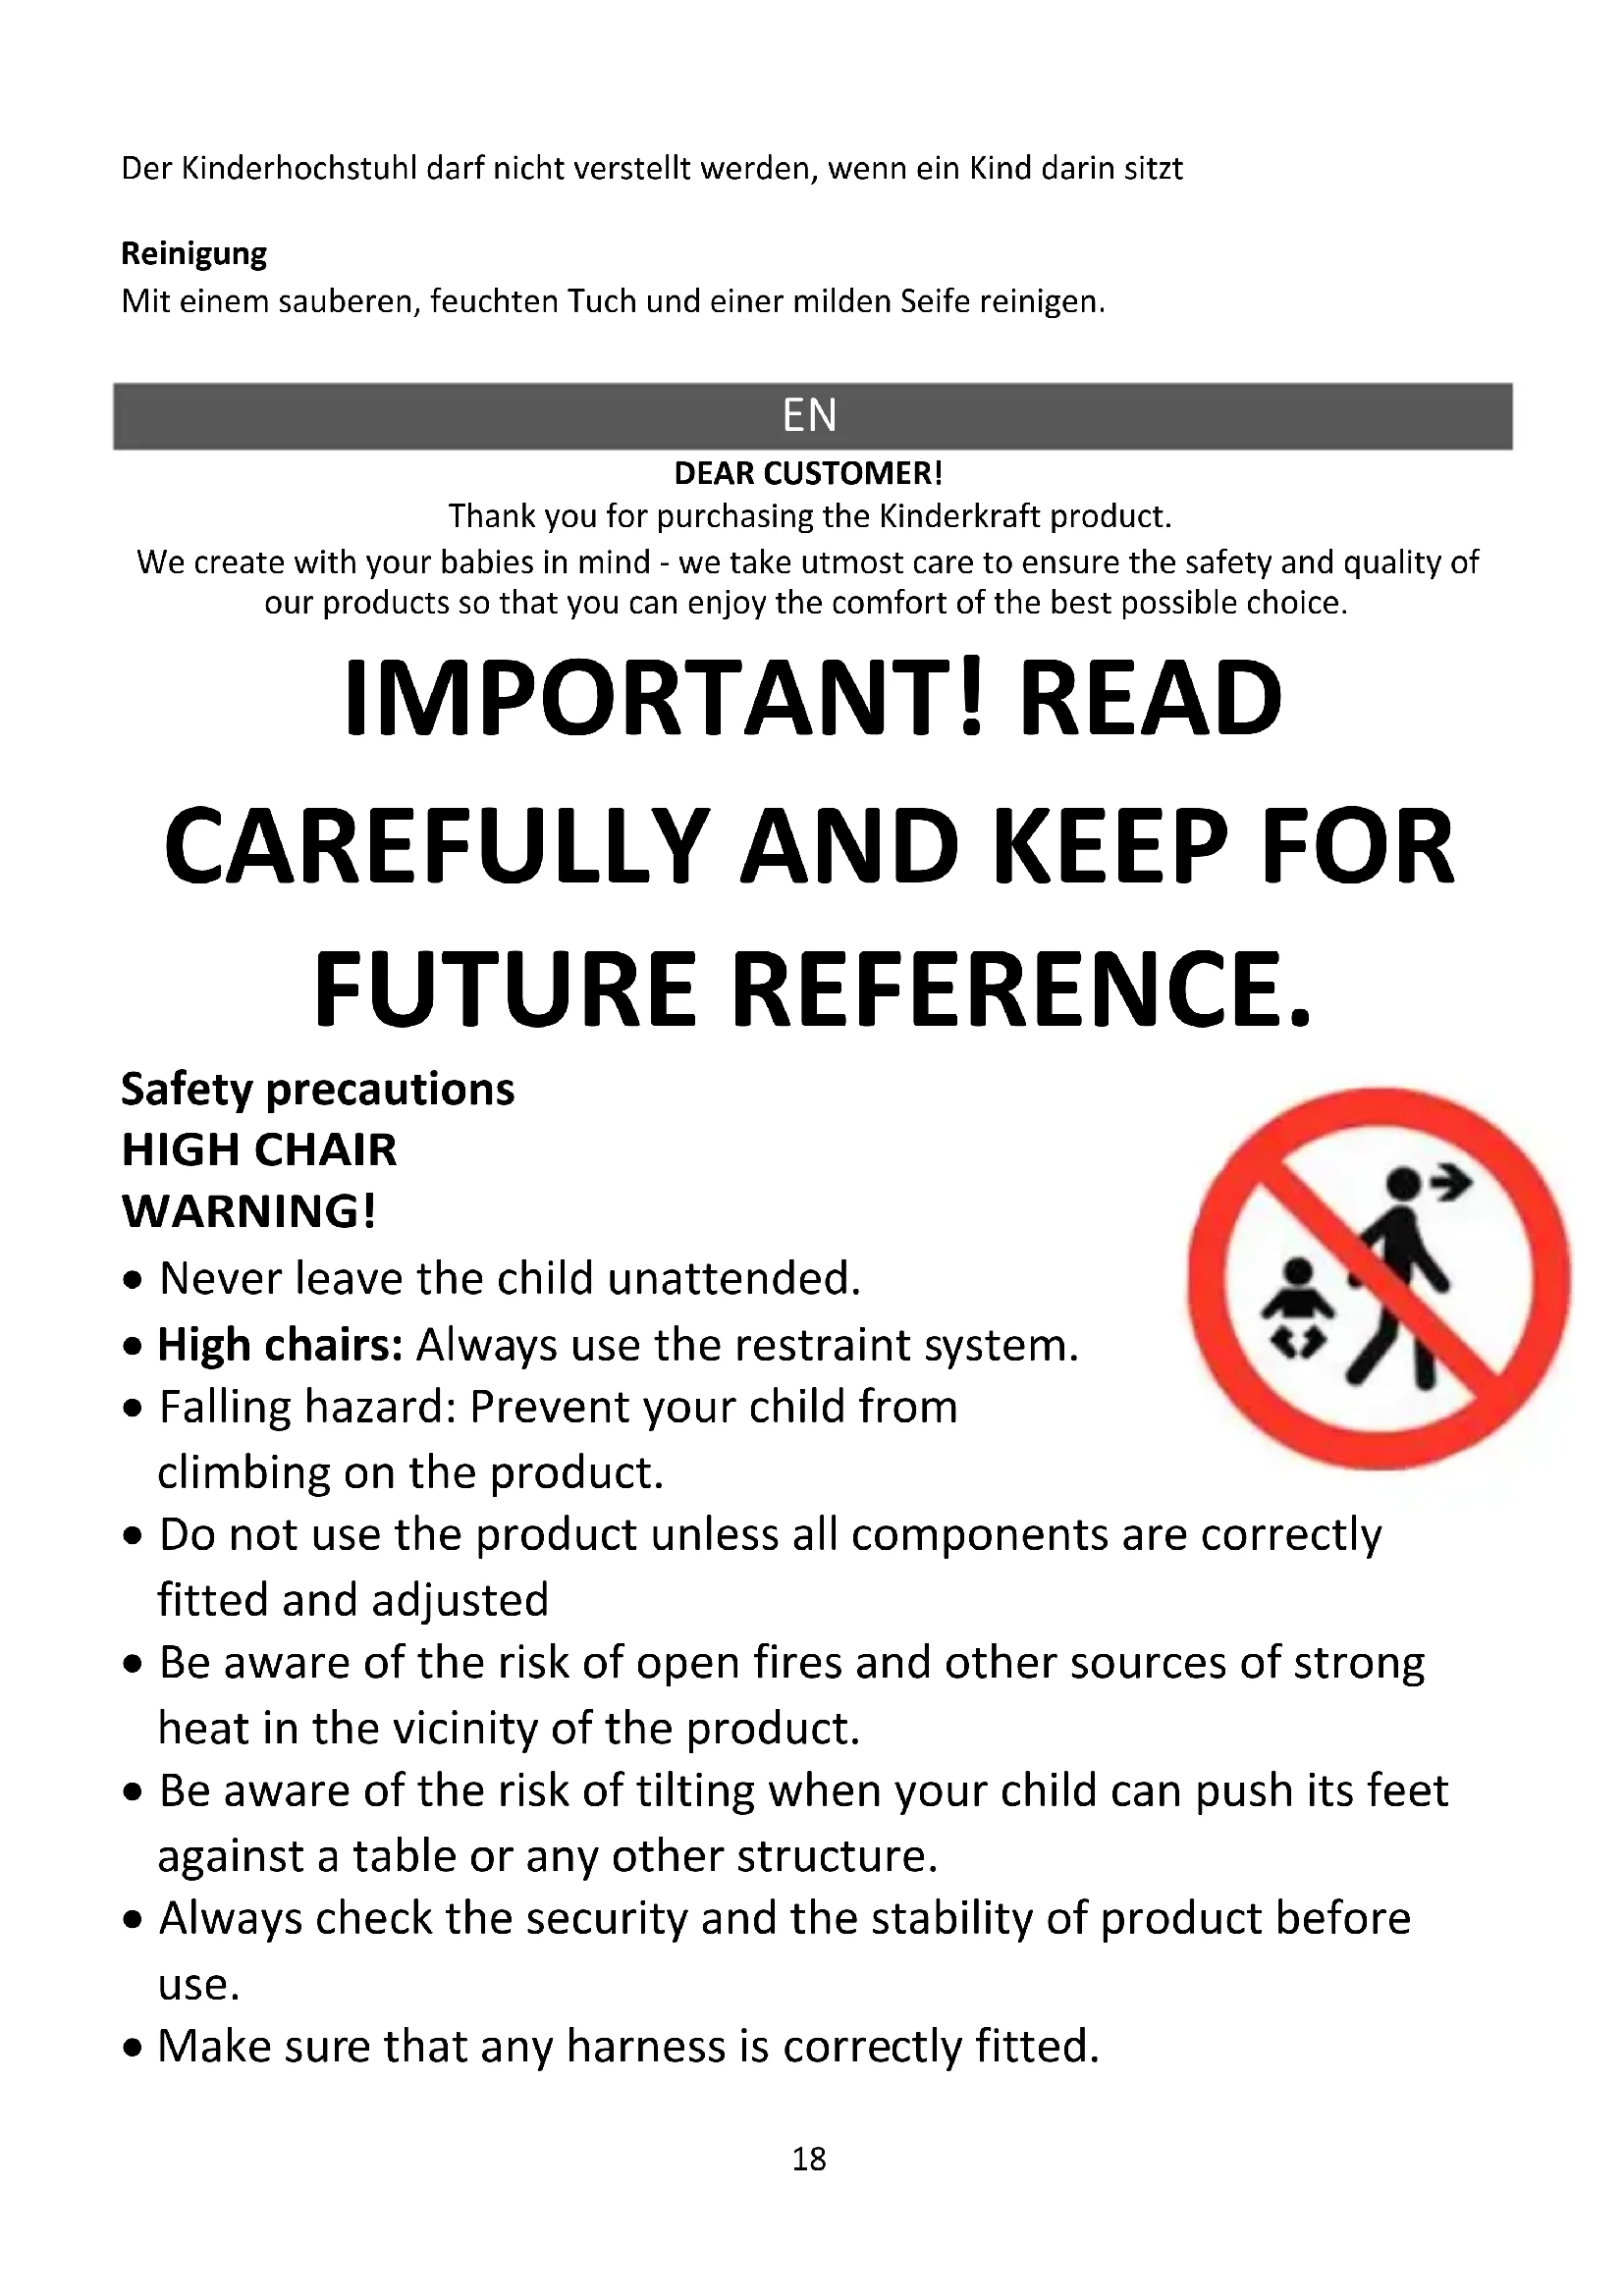
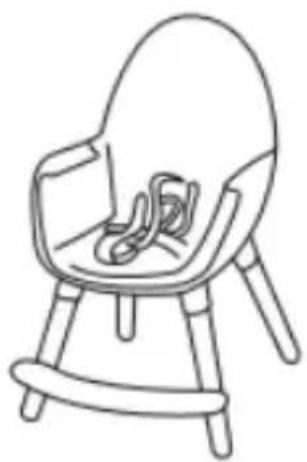
- Seat with seat belts attached

natural_image
Warning symbol depicting a person climbing a ladder inside a triangular frame (no text or numbers present)- Front upper legs with threaded holes x2
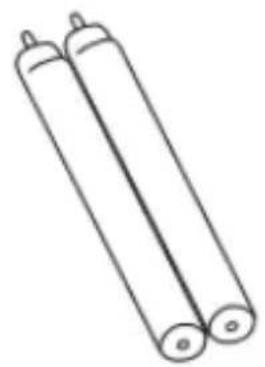
- Rear upper legs x2
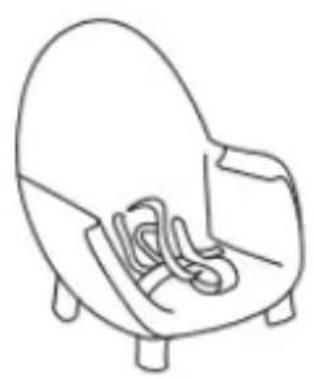
- Lower legs x4
- Tray with plastic cover
- Footrest
- Screws (for footrest assembly) x2
- Armrests x2
- Bolts (for affixing the front top legs) x 2
Assembly
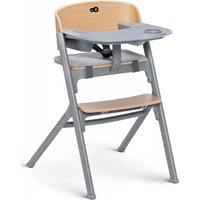
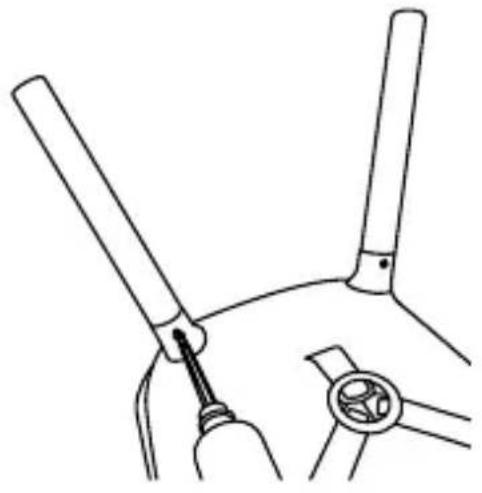
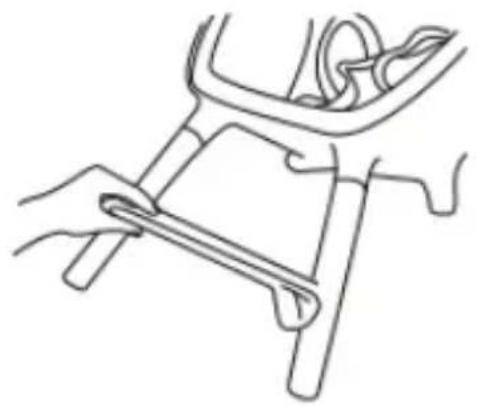
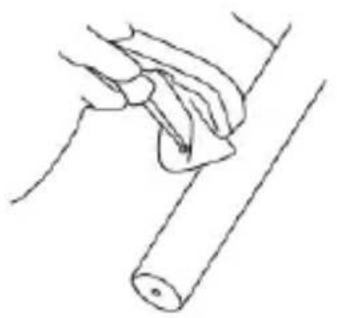
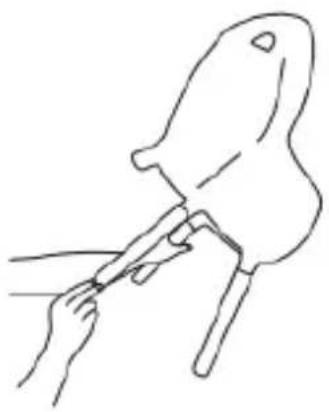
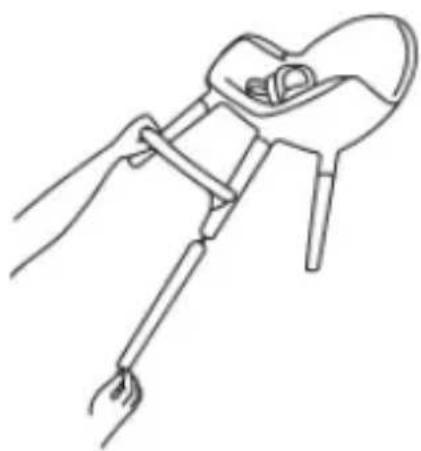
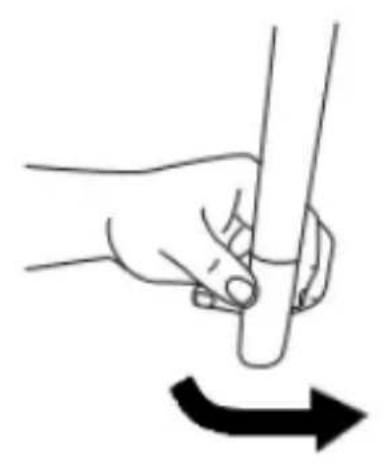
Screw the front upper legs with the threaded holes (2) into the holes in the front of the seat (1) (Figures A and B). Make sure that the openings for affixing the footrest are at the front, and those for affixing the front top legs are at the back. Next, turn the seat with the legs screwed in. Screw the bolts (9) to the legs in the openings in the correct part of the seat (figure C). Screw the footrest (6) to the legs using the screws (7) supplied, follow the instructions shown in figures D, E and F. Then screw the rear upper legs (3) into the holes at the back of the seat (1) (Figures G and H). Tighten the front and rear lower legs (4) (Fig. I). Adjust the white pads at the end of the lower legs so that the whole slanted plane is adjacent to the floor (fig. J).
Mounting and adjustment of the tray
To mount the tray, slide it into the guides while pressing the button on the front of the tray. To adjust the tray, press the button and then select the desired distance (fig. L).
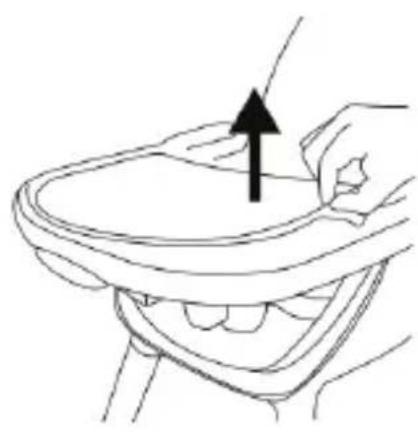
The tray has a removable plastic insert (fig. M) and a safety device.
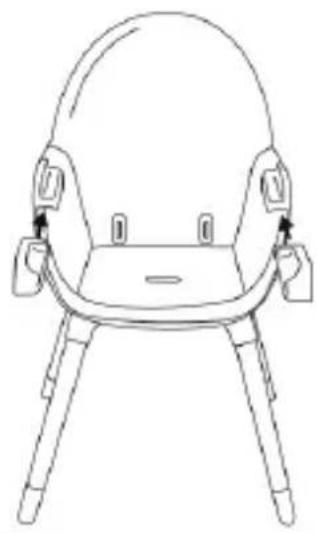
Use of adjustable seat belts
Adjustment:
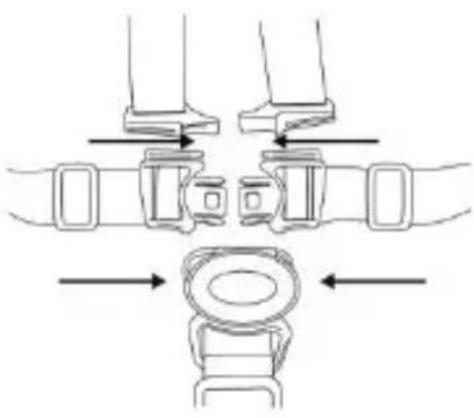
The adjustment is carried out using the plastic parts on the belts. By moving the element up or down the belt you can increase or decrease the length of the belts so that your baby is comfortable. All belts are fastened with a buckle (fig. N).
Removing the belts:
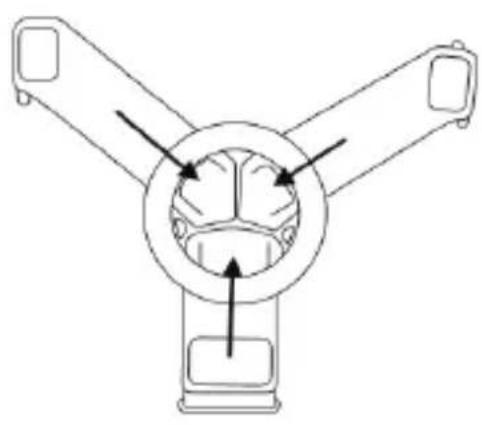
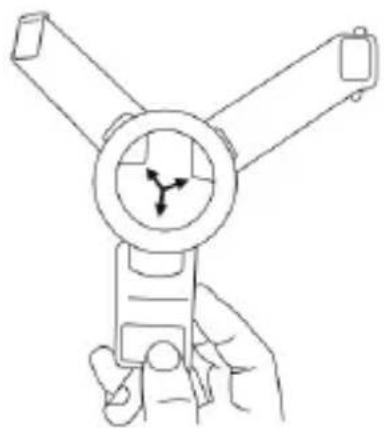
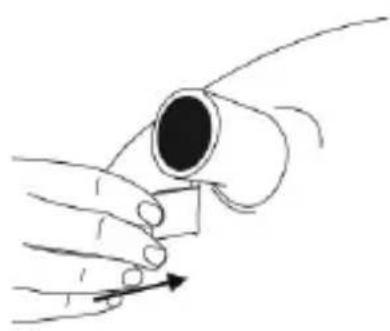
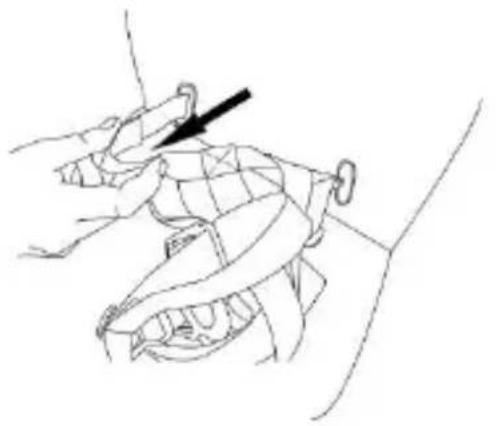
To remove the belts, press the convex part of the plastic connector and pull the belts out of the rim one by one (fig. O,P). Once disconnected, pull the belts through the holes in the chair (fig. R,S).
Mounting the belts:
ATTENTION: Figures O-S illustrate the removal of the belts. To mount the belts again, follow the arrows and the drawings in reverse order.
Pull the unfastened belts through the holes in the chair (Fig. R,S). To mount the belts, press the convex piece of plastic connector and push the belts, one by one, into the rim (fig. O,P).
Highchair for babies
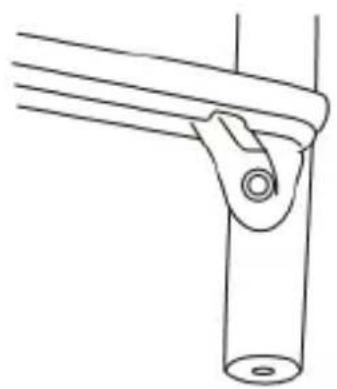
The highchair can be lowered by attaching the lower legs (4) directly to the seat (1). To do that, screw the legs clockwise until they are securely attached. In addition, the armrests (8) (Fig. K)
can be inserted in place of the tray. In the child seat function, the safety harness must be removed.
Attention!
Do not adjust the chair while your baby is sitting in it.
Cleaning
Clean with a clean and moistened cloth, and mild soap.
ES
¡ESTIMADO CLIENTE!
text_image
Prohibition sign with pictograms of a child and adult walking, indicating no movement or behavior in the circlenatural_image
Warning symbol depicting a person climbing a window inside a triangle (no text or numbers present)text_image
Prohibition sign with pictograms of a child and adult walking, indicating no movement or behavior in the circletext_image
Warning sign depicting a person falling into a structure inside a triangletext_image
Prohibition sign with pictograms of a child and adult walking, indicating no movement or avoidancetext_image
Warning sign depicting a person inside a triangle with an umbrella symbol above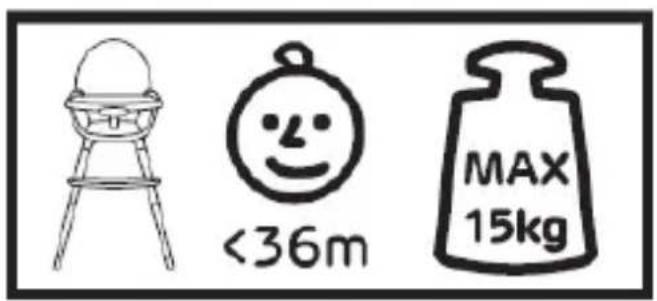
text_image
<36m MAX 15kg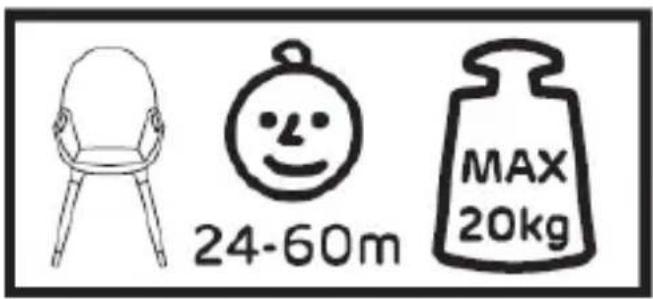
text_image
24-60m MAX 20kgFő alkotóelemek
text_image
Prohibition sign with pictograms of a child and adult walking, indicating no movement or behavior in the circle
natural_image
Warning symbol depicting a person inside a triangle with a window (no text or numbers present)text_image
Prohibition sign with pictograms of a child and adult walking, indicating no religious or social restrictions.natural_image
Warning symbol depicting a person climbing a ladder inside a triangular frame (no text or numbers)text_image
Prohibition sign with pictograms of a child and adult walking, indicating no movement or behavior in the depicted scenario.text_image
Warning sign depicting a person falling into a structure inside a triangletext_image
Prohibition sign with pictograms of a child and adult walking, indicating no religious or social restrictions.text_image
Warning sign depicting a person inside a triangle with an umbrella symbol above, indicating caution or hazard.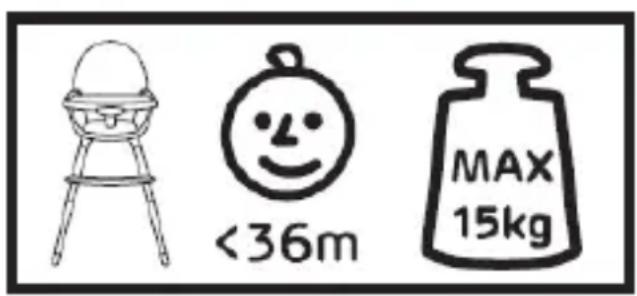
text_image
<36m MAX 15kg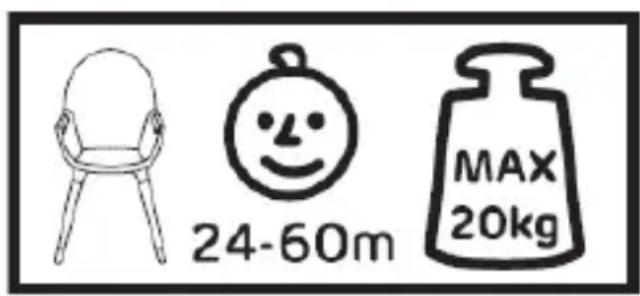
text_image
24-60m MAX 20kgPeças principais
SCAUN PENTRU ALĂPTAT
AVERTISMENT!:
text_image
Prohibition sign with pictograms of a child and adult walking, indicating no movement or behavior in the circletext_image
Warning symbol depicting a person inside a triangle with an umbrella, indicating caution or hazard.text_image
Prohibition sign with pictograms of a child and adult walking, indicating no movement or behavior in the circletext_image
Warning sign depicting a person inside a triangle with an umbrella symbol abovetext_image
Prohibition sign with pictograms of a child and adult walking, indicating no smoking or childbirthtext_image
Warning symbol depicting a person inside a triangle with an object above, indicating caution or hazard.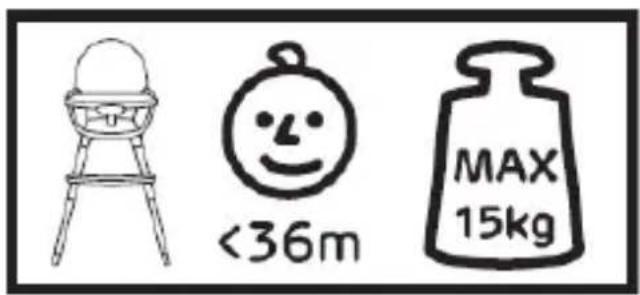
text_image
<36m MAX 15kg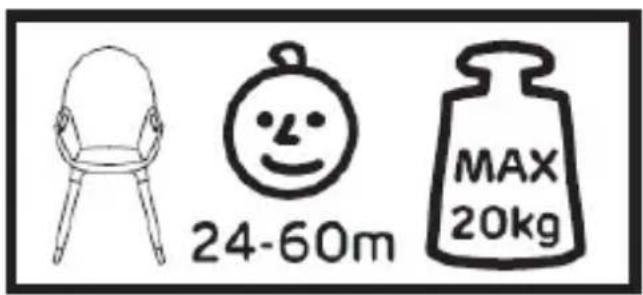
text_image
24-60m MAX 20kgHlavné časti
text_image
Prohibition sign with pictograms of a child and adult walking, indicating no movement or behavior in the circle(EN) In the interests of our Clients - we are at your disposal! If you have a problem with the product you received, contact us in the most convenient way for you!