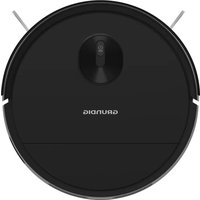
USER MANUAL VCR 4230 GRUNDIG
Robot Vacuum Cleaner
User Manual
natural_image
Two abstract geometric patterns: a woven bamboo design and a square with circular motifs (no text or symbols)
VCR 4230
DE - EN - FR - IT - RO - HR - SV - NO - RU
natural_image
Top-down line drawing of a circular robotic vacuum cleaner with a central sensor (no text or symbols)
Saugroboter
natural_image
Line drawing of a mechanical component with two mounting holes (no text or symbols)
Ladestation
natural_image
Simple line drawing of a medical or electrical device with a coiled cable and connector (no text or symbols)
Netzadapterstecker

natural_image
Technical line drawing of a mechanical component with internal parts and a separate cross-sectional view (no text or symbols)
niedriger Last (10%) : 85.71%
natural_image
Line drawing of a robotic vacuum cleaner with a hand adjusting the component (no text or symbols)
natural_image
Line drawing of a robotic vacuum cleaner with a hand adjusting its lid (no text or symbols)
natural_image
Technical line drawing of an electronic device showing internal components and a hand holding a tool (no text or symbols present)
4 Installation
natural_image
Two technical line drawings of a device with labeled components, showing hand and side views (no text or symbols)

natural_image
Line drawing of a robotic vacuum cleaner with attached electrical outlet (no text or symbols)

natural_image
Pure diagram of three rectangular panels with curved lines and a circular symbol, no text or labels present.
natural_image
Concentric circular diagram with a central square and horizontal dimension line labeled '1.5m' (no text or symbols within the diagram itself)
natural_image
Line drawing of a vacuum cleaner and its mechanical component (no text or symbols)
natural_image
Diagram showing a hand inserting a device into a housing, with an arrow indicating upward motion (no text or symbols present)
natural_image
Technical line drawing of a faucet and a curved mechanical component (no text or symbols)
natural_image
Illustration of hands holding a device with a curved arrow indicating rotation (no text or symbols)
natural_image
Line drawing of a medical procedure showing needle insertion into tissue (no text or labels)
natural_image
Illustration of hands holding a device with sunlight symbol above, showing internal components and motion arrows (no text or symbols)
natural_image
Technical line drawing of a robotic vacuum cleaner with internal components and a close-up view of the device (no text or symbols)
natural_image
Line drawing showing a robotic vacuum cleaner transforming into a mechanical device (no text or symbols present)
natural_image
Line drawing of a hand inserting a component into a device housing, showing internal structure and assembly (no text or symbols)
natural_image
Illustration of hands pouring liquid from a container into a container (no text or symbols)
natural_image
Line drawings of a device's internal structure, showing top view, side view with hand holding clip, and grid layout (no text or symbols)
natural_image
Illustration of household appliances including a faucet, solar panel, fan, clock, and storage tray (no text or symbols)
natural_image
Technical line drawing showing three steps of a robotic device assembly: open top, disassembly, and disassembly with tool (no text or symbols)
natural_image
Line drawing of hands installing or adjusting a device component on a circular base (no text or symbols visible)
natural_image
Technical illustration of a device's internal components with a hand holding a tool, showing assembly and disassembly (no text or symbols present)
natural_image
Technical line drawing of a circular mechanical or electronic device with labeled components and no readable text or symbols.
Please read this guide first!
Dear Customer,
Thank you for choosing a Grundig product. We would like you to achieve the optimal efficiency from this high quality product which has been manufactured with the state of the art technology. Please make sure you read and understand this guide and supplementary documentation fully before use and keep it as a reference. Include this guide with the unit if you hand it over to someone else. Observe all warnings and information herein and follow the instructions.
Symbols and their meanings
Following symbols have been used throughout this guide:

Important information and beneficial advices regarding the usage of the device.

WARNING: Warnings about dangerous situations regarding safety of life and property.

Protection class against electric shock.
1 Important safety and environmental instructions
This section contains safety instructions to prevent hazards that can result in injury or property damage.
Any warranty is void if these instructions are not followed.
1.1 General safety
• This appliance complies with international safety standards.
• This appliance can be used by children 8-years-old over 8 years of age, people with physical, sensory or mental challenges or people with lack of experience or knowledge; as long as control is ensured or information is provided regarding safe usage of the device and the hazards involved. Chil-
dren must not play with the appliance. Cleaning and user maintenance should not be carried out by unattended children.
- Do not use the appliance if the power cord or the appliance is damaged. Contact authorised service.
- Keep the appliance and its cable out of the reach of children under 8 years of age.
- Do not power your device with multi socket.
- Your mains power supply should be in align with the specified information on the type tag of the appliance.
- Do not use the appliance with an extension cord.
1 Important safety and environmental instructions
• To prevent damage to the power cord, prevent it from being pinched, crimped or rubbed against sharp edges.
- Do not touch the plug of the appliance with damp or wet hands while the appliance is plugged in.
- Do not pull on the cord while unplugging the appliance.
- Do not vacuum flamma-ble materials and ensure that the cigarette ashes are cooled down before vacuuming them.
- Do not vacuum water and other fluids.
- Protect the appliance against precipitation, humidity and heat sources.
- Do not use the appliance in or near explosive or flammable environments and substances.
- Unplug the appliance before cleaning and maintenance.
• This product is not de-signed for commercial use, it is intended for use at home and in applications as follows:
- Do not use the appliance in or near explosive or flammable environments and substances.
- Unplug the appliance before cleaning and maintenance.
- This product is not designed for commercial use, it is intended for use at home and in applications as follows:
- In the staff kitchens of the stores, offices and other working environments,
- In farm houses,
- By customers in hotels, motels or other accommodation facilities;
- In hostels, or similar environments.
- Sleeping places and breakfast environments
1 Important safety and environmental instructions
- Do not immerse the appliance or its power cord in water for cleaning.
- Do not disassemble the appliance.
- Use only original parts or parts recommended by the manufacturer.
•To prevent blockage of the filter or damage to the motor, do not vacuum cement, plaster or fragments of compressed paper.
Use the appliance with the adapter delivered with the appliance only.
Do not use the appliance without filters, it may get damaged.
If you keep the packaging materials, keep them out of the reach of children.
•This appliance is not intended to be used by persons, including children, with physical, sensory and mental disabilities or those who have not adequate experience and knowledge regarding its use, unless they are under the supervision of a person responsible for their safety or they are informed about the operation of the appliance.
•The children shall be supervised to prevent them from playing with the appliance.
Unplug the adapter and remove the battery pack before any cleaning or maintenance procedure.
1 Important safety and environmental instructions
• To avoid any risk of hazard, a damaged adapter shall be replaced by the manufacturer, the authorised representative of the manufacturer or a similarly qualified technician.
- Keep your fingers, hair and loose clothes away from moving parts or clearances while vacuuming.
- Please discard used batteries in accordance with local laws and regulations.
• The batteries in this appliance may only be replaced by the authorised service.
- Do not use batteries of different types or old and new batteries together.
- Do not short circuit the supply terminals.
- Shall be used with ME1XXFG CM 2600 mAh batteries only.
• This appliance shall not be operated by children and people with limited physical, sensory and cognitive skills or people with lack of experience and knowledge unless they are under supervision or they are provided with the relevant instructions.
• The children shall be supervised to prevent them from playing with the appliance.
- Do not put weight on the appliance. Make sure that the children and domestic animals do not get on the appliance.
1 Important safety and environmental instructions
- Do not run the appliance on high grounds like table or chair.
• The appliance is only to be used with the unit provided.
• The appliance is not to be used by persons (including children) with reduced physical, sensory or mental capabilities, or lack of experience and knowledge, unless they have been given supervision or instruction.
• This appliance can be used by children aged from 8 years and above and persons with reduced physical, sensory or mental capabilities or lack of experience and knowledge if they have been given supervision or instruction concerning use of the appliance in a safe way and understand the hazards involved.
• Children being supervised not to play with the appliance.
- Cleaning and user maintenance shall not be made by children without supervision.
• This appliance contains batteries that are only replaceable by skilled persons.
1 Important safety and environmental instructions
1.2 Compliance with the WEEE regulations and waste disposal

This product complies with EU WEEE Directive (2012/19/EU). This product bears a classification symbol for waste electrical and onic equipment (WEEE).
This symbol indicates that this product shall not be disposed with other household wastes at the end of its service life. Used device must be returned to official collection point for recycling of electrical and electronic devices. To find these collection systems please contact to your local authorities or retailer where the product was purchased. Each household performs important role in recovering and recycling of old appliance. Appropriate disposal of used appliance helps prevent potential negative consequences for the environment and human health.
The product's packaging is made of recyclable materials, in accordance with the National
Do not dispose of the packaging waste with the household waste or other wastes, dispose it to the packaging collection areas specified by local authorities.
1.4 Waste batteries

This symbol on rechargeable batteries/ batteries or on the packaging indicates that the rechargeable battery/battery may not be disposed of with regular house hold rubbish. For certain rechargeable batteries/batteries, this symbol may be supplemented by a chemical symbol. Symbols for mercury (Hg) or lead (Pb) are provided if the rechargeable batteries/batteries contain more than 0,0005 % mercury or more than 0,004 % lead.
Rechargeable batteries/batteries, including those which do not contain heavy metal, may not be disposed of with household waste. Always dispose of used batteries in accordance with local environ mental regulations. Make enquiries about the applicable disposal regulations where you live.
As Arçelik A.Ş., we declare that this product and/or these products comply with the directive 2014/53/EU. The full text of the EU declaration of conformity is available at the following website: grundig.com.tr
1.6 What to do for energy saving
- When using your appliance, adjust the speed settings according to the surface, in order to save energy.
- Normally, lower speeds are used when cleaning hard surfaces while high speeds are used for cleaning carpets.
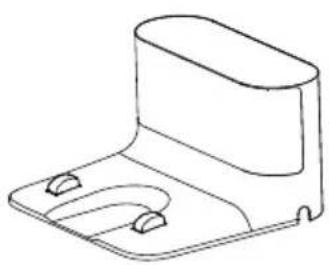
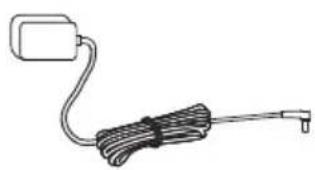
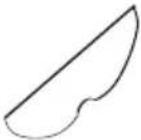
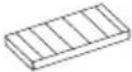
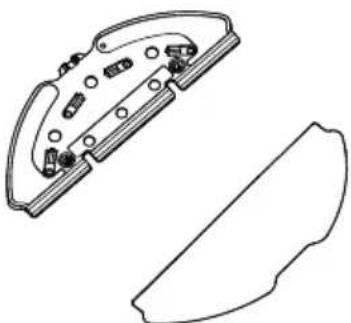
2 Box content
natural_image
Top-down line drawing of a circular robotic vacuum cleaner with a small sensor icon on the inner ring (no text or symbols)

natural_image
Line drawing of a mechanical housing or enclosure component (no text or symbols)
natural_image
Simple line drawing of a cable with a looped connector (no text or symbols)
Robot Vacuum Charging dock Charge adaptor

natural_image
Technical line drawing of a mechanical component with internal parts and a separate cutaway view (no text or symbols)
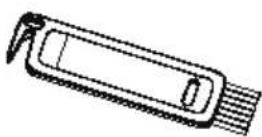
User's manual and Mopping clothMopping tool product documentation (2 pcs)
Cleaning brush
Spare accessories supplied
 | 1 side brush |
 | 1 mopping cloth |
 | 1 filter |
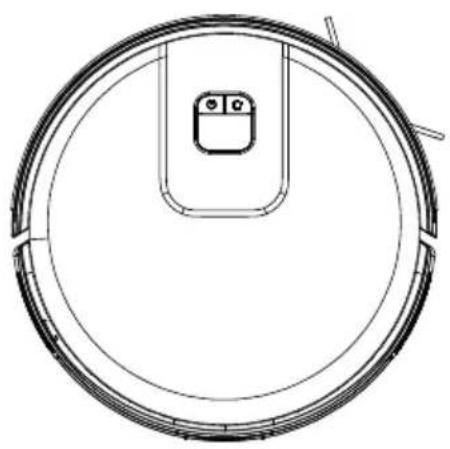
3 Overview

3.1 Checks and components
- Upper body
- Central body
- Start Cleaning-Pause Button / Sending to Charging Stand button
- Recharge Sensor
- Front bumper
- Charging pins
- Fall prevention sensor
- Charging pins
- Front rotating wheel
- Rotating brush
- Rotating brush cover
- Rear wheel
- Side brush
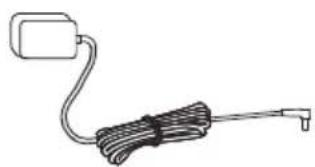
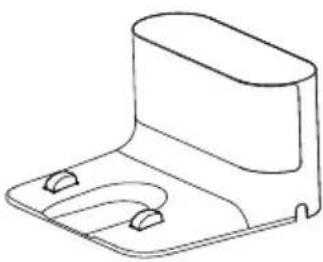
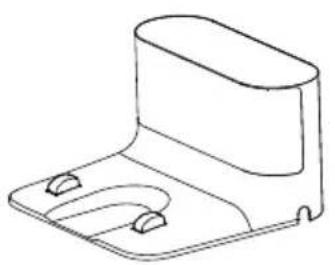
- Charging dock
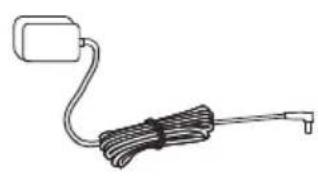
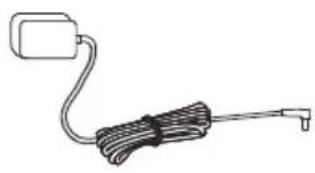
- Charge adaptor
- Robot vacuum container
EPA filter opening lid
- Mop water container filling lid
- Robot vacuum dust container ejection button
- Mop water container
- Dust container
- EPA filter
- Cleaning brush
- Mopping tool
- Mopping cloth
3.2 Technical data
| Adapter voltage 100-240V, 50/60 Hz |
| Adapter output 19 V 0.6 A | |
| Battery Li-ion: 14.4V / 2.6 Ah |
| Charging period: 4-5 hours |
| Operation time | Up to 150 minutes (in mute position) |
| Dust container capacity 0.4 L |
| Water tank capacity 0.3 L | |
| 2.4G Wi-Fi frequency range | 2.400-2.4835 GHz |
| Supported Connections | WLAN IEEE 802.11 b/q/n wireless |
| 2.4G Wi-Fi maximum RF output power | 17.5 dBm |
| RF exposure information 2.4G Wi-Fi maximum |
| 2.4G Wi-Fi maximum RF output power | 13 dBm |
| Operating time | Maximum: 80 minsPowerful: 90 minsStandard: 120 minsQuiet: 150 mins |
RF exposure information : The maximum allowed exposure level is calculated according to the 20 cm distance between the appliance and the human body. To comply with the RF exposure condition, a distance of 20 cm should be put between the appliance and the person.
The rights to make technical and design changes are reserved.
3 Overview
Parameter of External Power Supply
Manufacturer :
E-TEK Electronics Manufactory Co., LTD
Model Identifier : ZD012A190060EU
Output Current : 0.6 A
Output Power : 11.4W
Average active
efficiency : 86.37%
Efficiency at
low load(10%) : 85.71%
No-load power
consumption : 0.074W
4 Installation
1 - Remove the protective sponges.
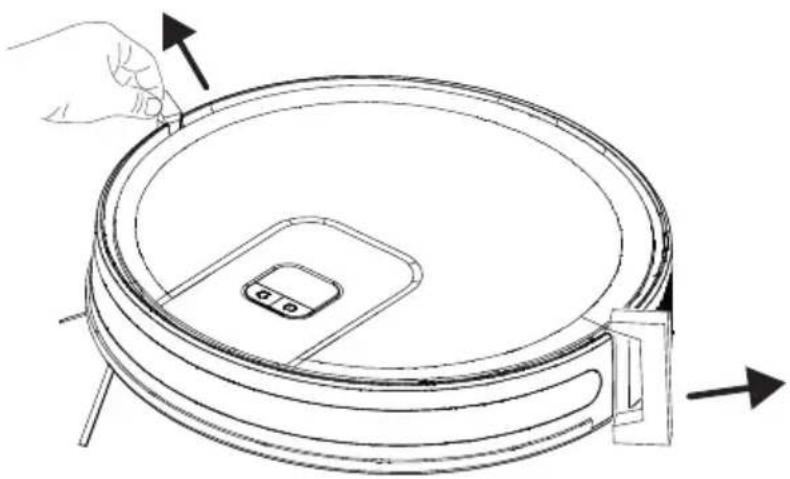
natural_image
Line drawing of a robotic vacuum cleaner with a hand adjusting the lid (no text or symbols)
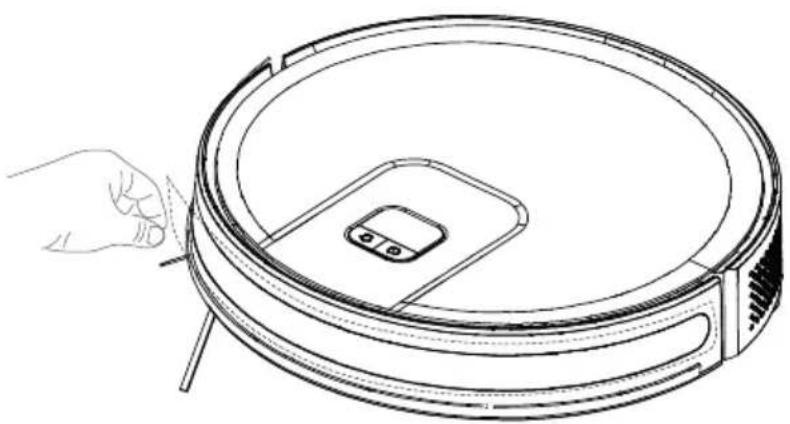
2- Remove the protective film
Remove the protective film on the front of the front impact bumper before use.
natural_image
Line drawing of a robotic vacuum cleaner with a hand adjusting its lid (no text or symbols)
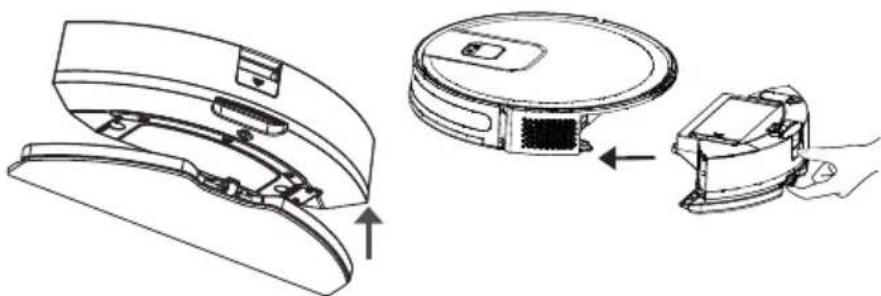
3- Install the side brush
Side brush installation: align the holes and press gently to fix the side brush on the device.

natural_image
Technical line drawing of a device's internal components, showing a hand holding a tool above two views (no text or symbols present)
4 Installation
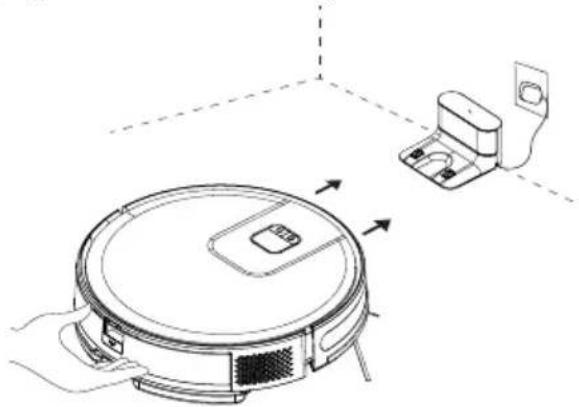
4- Install the charging station.
Install the adaptor plug to the charging station and set the cables up to prevent the adaptor cable from wrapping around the machine during vacuuming.

natural_image
Two technical line drawings of electronic devices with connectors and a hand holding a cable (no text or symbols)

Install the charging station in a location where it can easily be accessed by the vacuum cleaner. Install the charging station on a hard and level ground rather than a carpet.
To ensure a smooth operation of the robot, it is advised that no obstacles are present within 1.5 m on the front and within 0.5 m on the left and right sides.


Always keep the charging station plugged, otherwise the robot vacuum cleaner cannot return to the charging station automatically.

For a smooth charging operation, do not move the charging station.
5 Operation

Please charge the machine before first use.
5.1 Intended use
This appliance is intended for household use and it is not suitable for industrial use. Press and hold the ⚙ for 3 seconds to turn on. Press and hold the ⚣ for 3 seconds to turn off.
- Place the appliance to the charging station so that it shall be aligned with the charging communication pins.
natural_image
Line drawing of a robotic vacuum cleaner with control panel and mounted device (no text or symbols)

Charging starts when the white indicator on the charging station goes off, charging will begin.
5.2 Operation
Press and hold the ⚙ for 3 seconds to turn on. Press and hold the ⚙ for 3 seconds to turn off.
Starting the cleaning
natural_image
Pure diagram of three rectangular panels with wavy lines and a circular symbol, no text or labels present.
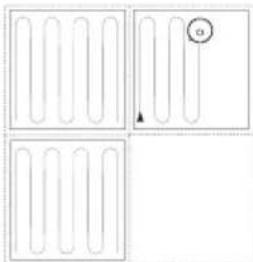
Short press the Ⓕ to start the automatic cleaning mode. The robot will leave the recharging dock after being turned on, clean in "Z" route, and then clean the area along the wall, and delimit another 4m x 4m area.
It repeats the above process continuously till cleaning of the whole room is completed, and additionally cleans areas uncovered in the
process, and returns to the recharging dock after cleaning.
5 Operation

WARNING: If the charging level is too low, the cleaning cannot be started. Please charge the appliance before starting the cleaning.

WARNING: Before the cleaning, tidy up all cables to prevent disconnections due to entanglement/pulling of the cables and to prevent damage to the furniture.

WARNING: In the auto mode, by default the machine will do sweeping twice if the sweep duration is shorter than 10 minutes.

WARNING: Do not move the charging dock during cleaning and make sure that the station is plugged; otherwise the robot vacuum cleaner may not be able to return for recharging.
Pausing
Pressing any button will stop the robot while working.
Automatic charging: The robot vacuum cleaner returns automatically to recharge after the cleaning is completed.
Manual charging: a. Please press ⏻ shortly when pausing to begin automatic recharging. b. Please manually put the robot back to recharging dock if the robot is stuck or cannot find the recharging dock.
5 Operation
Spot Cleaning (supported with the relevant mobile application only)

natural_image
Concentric circular diagram with a small square at the center, labeled '1.5m' (no other text or symbols)
Move the sweeping robot to the area to be cleaned, press the ⏻ twice. After the mode is activated, the sweeping robot will sweep the circular area with a diameter of 1.5 m calculated from its own position.

The sweeping robot cannot enter the fixed-point sweeping mode on the recharging dock.
Vacuum power selection
(Supported with the relevant mobile application only) You may select the desired cleaning power from the application:
- Quiet
- Standard
- Powerful
- Maximum
Remote controlled cleaning
(Supported with the relevant mobile application only) You may direct the robot vacuum cleaner to the area to be cleaned by using the manual remote control mode through the application.
Sleep
If it is inactive and the charging dock is not connected for 10 minutes, the machine will automatically switch to hibernation mode.
The robotic vacuum cleaner will switch to the sleep mode automatically if there is operation within 10 minutes after it is fully charged.
Resetting the system
For APP account delete, the customer can press “remove the product and clear the account” button on the APP to delete all the data on the APP and cloud like clean histories, shared machine, WIFI account password...etc.
Press "button for 15 seconds in standby position to reset the system. When the system is reset, the original settings on the robot vacuum cleaner are deleted.
5 Operation
5.2.1 Operation with the application
Download the application
To download the application, search for "HomeDirect-SDA" application in the mobile app store. Review the mobile application manual for detailed information.
Reset Wi-Fi
Press "☐" "buttons simultaneously until you hear the aural warning and see the light blinking.
Add a device
- Open the app, create a new account and follow the instructions in the application.
- Before setting up the Wi-Fi, ensure that the robot vacuum cleaner and the Wi-Fi network meet the following requirements.
A. Robot Vacuum Cleaner:
- The charging level of the robot vacuum cleaner shall be over 20% or the robot vacuum cleaner shall be placed on the charging dock.
B. Wi-Fi network:
- Make sure the password of your wireless network (router) is correct.
- Do not use any VPN (Virtual private Network).
- Wi-Fi router shall support, 802.11b/g/n and IPv4 protocols.
- The router shall be in the 2.4GHz frequency band or a dual-band router that supports the 2.4GHz band shall be used. The robot vacuum cleaner does not support the 5GHz frequency band.
- If the robot vacuum cleaner cannot connect the 2.4/5GHz dual-band Wi-Fi network, please select 2.4GHz network for Wi-Fi settings. You may switch back to the other frequency band when the setting is completed.
- If you are connecting to a hidden network, please ensure that you enter the network name [SSID (sensitive to capitalization)] correctly and that you are connected to a 2.4GHz wireless network.
- If you are using a wireless network extender, please ensure that the network name (SSID) and the password are the same with the main network.
5 Operation
Wi-Fi connection error
| Wi-Fi Status Indicator Cause Solution | |
| White indicator normally on | The robot has been connected to the router, but cannot connect to the network. | ·Ensure that the modem is connected to the net-work.·Contact your network operator to see if there is a problem in the internet data. |
| Flashing slowly in white | The robot cannot connect to your wireless router. | ·Check whether the net-work name and pass-word have changed.·Reset Wi-Fi connections if necessary. |
| Your Wi-Fi connection has been reset or not yet set previously. | ·Establish Wi-Fi connection with the robot.·Reset Wi-Fi connections if necessary. |
| Flashing rapidly in white | The robot cannot receive a network signal. | ·Please clean up the electronic products around the robot.·If necessary, please reset the WiFi and select the AP mode. |
- If other operations are triggered during the networking process, the indicator light changes, and the device still maintains the network configuration status.
- If the connection between the mobile phone and the robotic vacuum cleaner fails, you can reset the Wi-Fi to enter the network configuration mode and add the device again.
- Due to version upgrades and updates, please follow the APP internal guide for actual operation.
5 Operation
Network security requirements:
Use TKIP, PSK and AES/CCMP encrypted WPA and WPA2 networks.
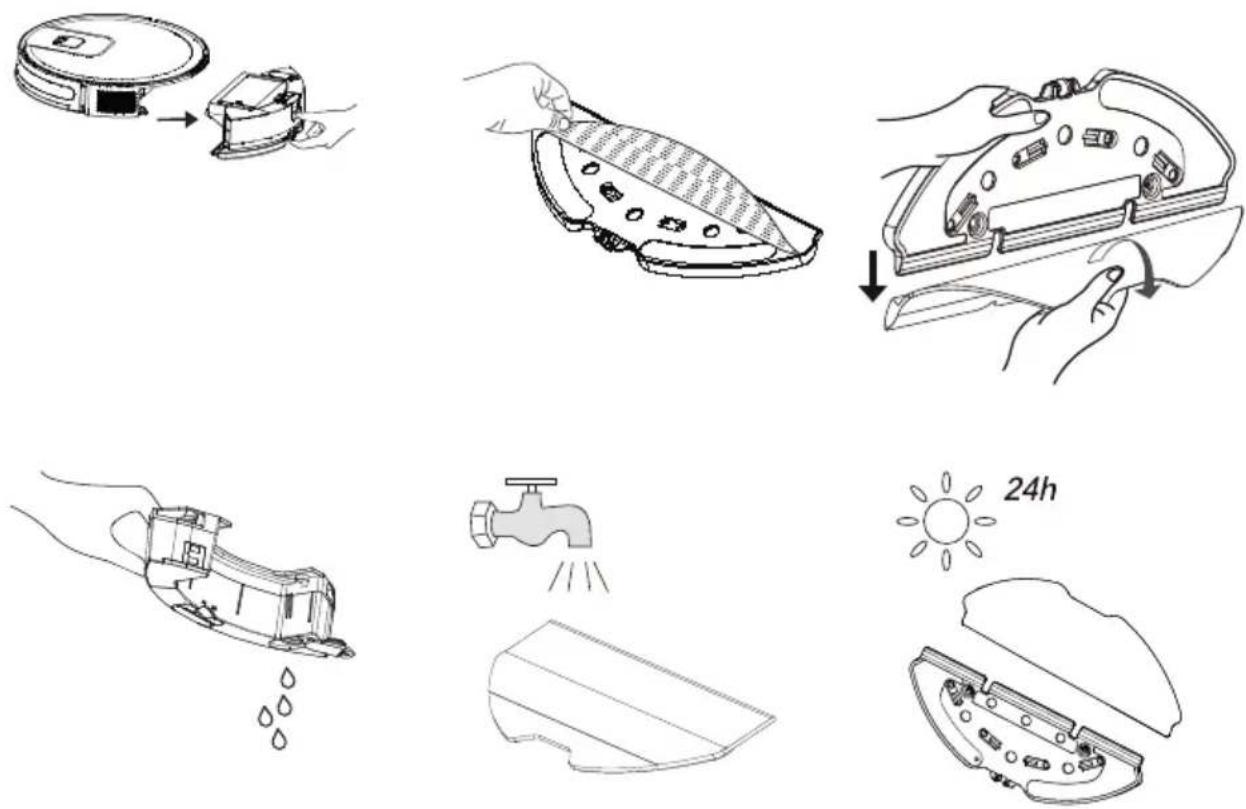
5.3 Operation of the mop
 | WARNING: Do not use the mopping mode on a carpet. |
 | WARNING: Do not put bleach or detergent in the water tank. These chemicals may damage the liquid channels that ensure the water flow in the robot vacuum cleaner or the pump. |
 | WARNING: Remove the mopping unit while the robot vacuum cleaner is being charged or when it is not operated. |
 | WARNING: Remove the mopping unit immediately after the mopping operation is completed to prevent damage to your wooden floors. |
 | WARNING: The robot vacuum cleaner cuts off the water automatically when mopping is paused or ended. However, the mop remains wet and thus it shall not be kept at this condition for a long period and removed without delay. |
5 Operation
5.3.1 Installation of the wet mopping unit
natural_image
Line drawing of a vacuum cleaner and its electrical switch (no text or symbols)
Remove the dust container and the water tank assembly (2 in 1).
natural_image
Diagram showing a hand inserting a device into a housing, with an arrow indicating upward motion (no text or symbols present)
Remove the dust container.

natural_image
Technical illustration of a faucet and a curved mechanical component (no text or symbols)
Remove the rubber plug and add water to the water tank from the water inlet.

Remove the swab on the mop retainer as it is shown.
Moisten the swab before each mopping.
Place the swab to the mop retainer.
natural_image
Technical line drawing of a robotic vacuum cleaner with internal components and a close-up view of the device (no text or symbols)
Install the mop retainer to the dust container and the water tank assembly (two in one) in the direction of the arrow.
Install the dust container and the water tank assembly (two in one) to the appliance, their places in the direction of the arrow.
5 Operation
5.3.2 Wet mopping setting
You may start the cleaning operation by selecting the cleaning mode and set the level of wetness during mopping as desired in the application.
It is suggested remove carpets from the floor to prevent the device from wetting the carpet when mopping the floor.
6 Cleaning and maintenance
Turn off the appliance and unplug it before cleaning it.

WARNING: Never use gasoline, solvent, abrasive cleaners, metal objects or hard brushes to clean the appliance.
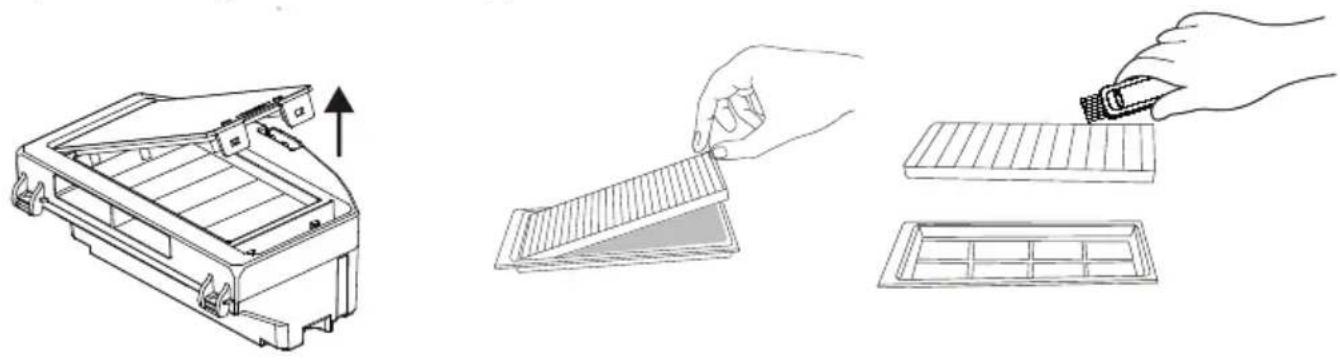
6.1 Cleaning the dust container and filters

You may call our call center to order a new filter when your filter reaches the end of its expected life, is deformed or needs to be replaced for a reason.

To achieve the maximum performance with EPA filter, clean it with a brush after each cleaning.
EPA filter is a replaceable accessory.
If you performed a cleaning operation in a space where there is construction dust and dust with very tiny particles, replace your filter with a new one in order not to experience a loss of performance.
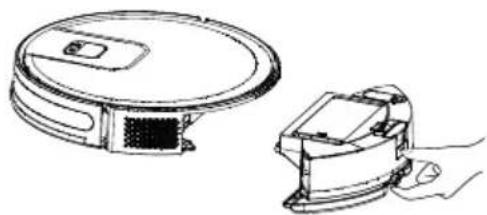
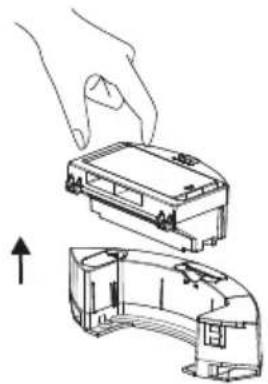
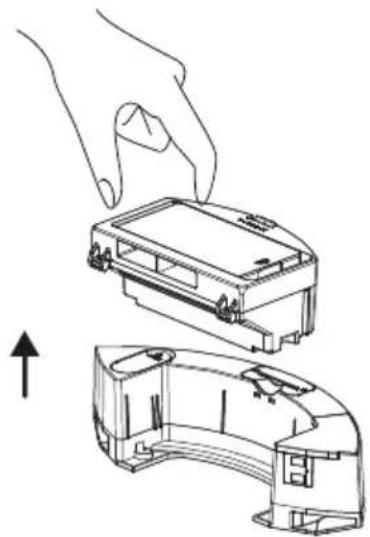
- Remove the dust container and the water tank assembly (2 in 1) by pressing the button as shown below.

natural_image
Line drawing showing a robotic vacuum cleaner transforming into a mechanical device (no text or symbols present)
6 Cleaning and maintenance
- Remove the dust container by pulling it in the direction of the arrow.
natural_image
Line drawing of a hand pressing down on a device casing, showing top and side views (no text or symbols)
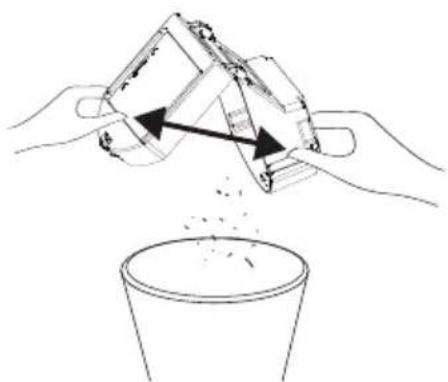
- Open the dust container as it is seen below and empty it as it is shown.
natural_image
Illustration of hands pouring liquid into a cup (no text or symbols)
- Remove the high performance filter and clean the filter using the cleaning brush provided together with the appliance.
natural_image
Illustration showing three steps of a cleaning or packaging process: opening a device, handling a filter, and finally adjusting a grid-patterned tray (no text or symbols present)
6 Cleaning and maintenance
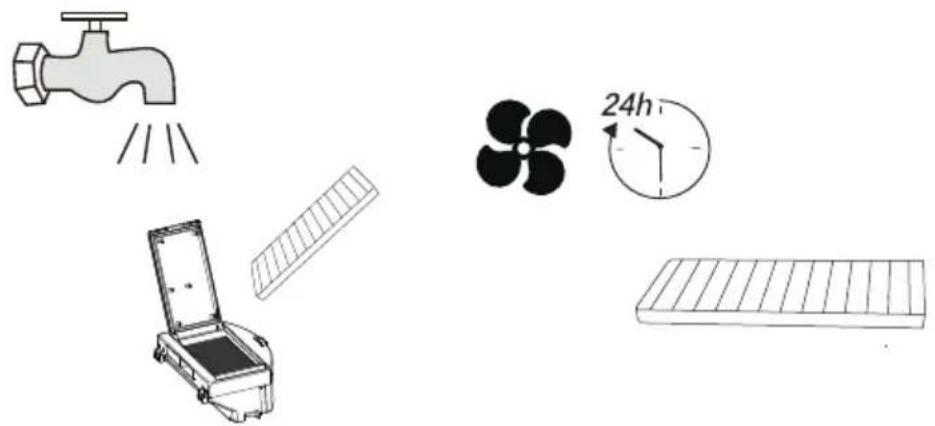
- Wash the water tank, dust container and filter assembly periodically with cold water as required as per the frequency of operation.
natural_image
Illustration of household appliances including a faucet, fan, timer, and storage tray (no text or symbols)
- Leave the water tank, dust container and filter assembly to dry after washing, and ensure that they are completely dried.

Drying may take 24 to 48 hours.
- Assemble the water tank, dust container and filter assembly after drying them and then install the assembly to the vacuum cleaner.

WARNING: Do not operate the robot vacuum cleaner without installing the filter group. Otherwise, the appliance may get damaged.
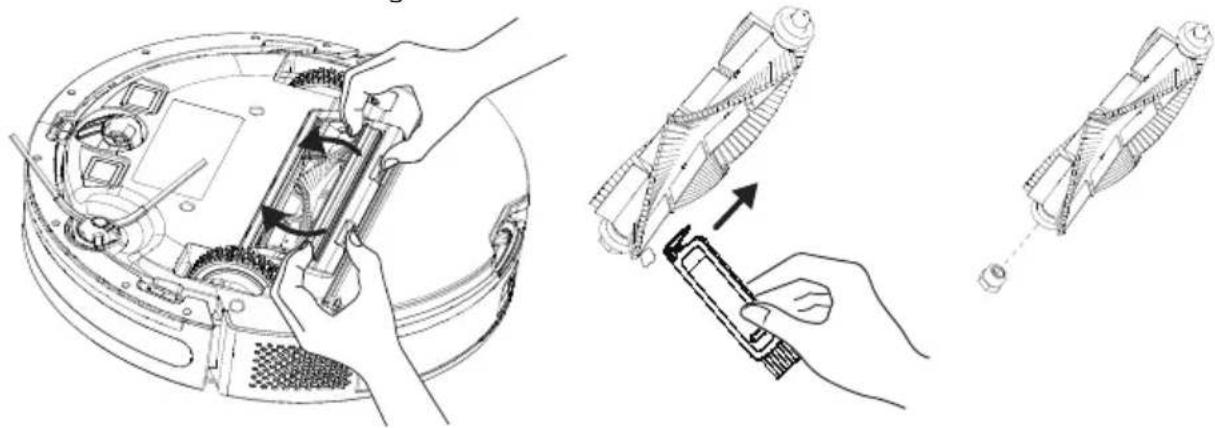
6.2 Cleaning of the brush
- Open the upper cover of the main brush by pressing on the tabs. Pull and remove the main roll upwards. Cut the hair lapped on the roller brush with the cutting and sharp side of the cleaning brush. Then clean the dusts on the roller brush with the bristles of the cleaning brush.
natural_image
Technical line drawing showing three-step assembly: open lid, mechanical component, and disassembled device (no text or symbols)
6 Cleaning and maintenance
- Replace the brush after cleaning it and close the cover in the direction of the arrow.

natural_image
Line drawing of hands installing or adjusting a mechanical device component (no text or symbols visible)
6.3 Cleaning and installation of the side brush

natural_image
Technical illustration of a device's internal components, showing a hand holding a screwdriver and a close-up view of the internal structure (no text or symbols present)
In the long term use, wash the side brush with warm water in order to eliminate the shape deformation. Install it to the robot as it is shown after it has dried.
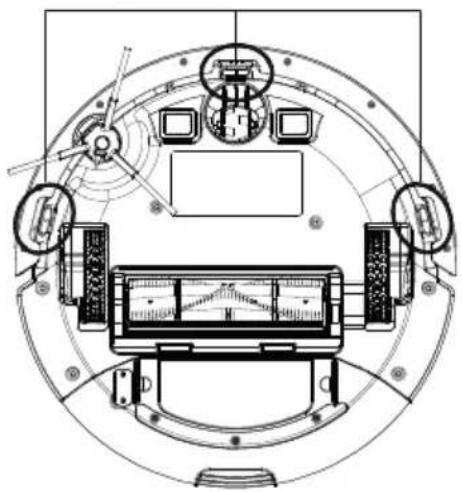
6.4 Cleaning of the Sensors & Front wheel
Clean the sensors and charging pins/electrodes regularly and remove the dust using a dry and soft cloth or a cleaning brush.
Information: You get a notification via the application when sensor cleaning is required.

6 Cleaning and maintenance

Fall prevention sensor
6 Cleaning and maintenance
6.5 Cleaning of the mopping unit
We recommend that you remove the mop holder from one side, drain the water tank, rinse the mop with water and then leave it to dry after each operation of the mopping unit. You may wash the mop in a washing machine.
7 Troubleshooting
Troubleshooting
The power indicator will flash in red and the buzzer will give a beep in case that there is an abnormality in the operation of the sweeping robot. Please check the table below to solve your problems.
| Voice Prompts Solution | |
| The robot cannot start. | - Make sure the robot is connected to power supply.- Make sure the battery is fully charged.- If the problem persists, please reset the robot . |
| The robot suddenly stops working. | - Check whether the robot is stuck or blocked by obstacles.- Check whether the battery is too low.- If the problem persists, please shut it down, wait for 3 seconds, and then restart it. |
| Cannot make a sweep schedule | - There are too many obstacles around the charging dock. Please place the charging dock to an area free of obstacles.- The robot vacuum cleaner is too far away from the charging dock. Bring the robot vacuum cleaner closer to the charging dock and try again.- Make sure that the charging stand station is plugged and there is energy. |
| Suction too weak | - Check the suction inlet for any obstruction.- Empty the dustbin.- Clean filters with water.- Check whether filters are wet due to water or other liquids on the floor. Let filters dry naturally thoroughly before use. |
| Cannot charge the machine | - Please check whether the charging dock is correctly connected to the power supply, and the indicator light illuminates when the power is on.- When the robot is normally connected to the charging dock, the indicator light extinguishes.- If the robot is connected to the charging dock, but the indicator light does not extinguish and the robot does not respond, please use a dry cloth to wipe the charging pole piece at the bottom of the robotic vacuum cleaner and the charging piece of the charging dock, and then try again.- If the robot still can not be charged after performing the above operations, please contact the after-sales department or your dealer. |
7 Troubleshooting
Troubleshooting
The power indicator will flash in red and the buzzer will give a beep in case that there is an abnormality in the operation of the sweeping robot. Please check the table below to solve your problems.
| Voice Prompts Solution | |
| The robot cannot return to the charging dock. | - Clear the charging dock of objects within 0.5m on the left and right sides and within 1.5m ahead.- Make sure that the robot starts sweep from the charging dock without abnormal movement.- When the robot is near the charging dock, it can return faster. But if the charging dock is located far away, the robot will need more time to return.- Please wait during its return.- Clean charging electrodes. |
| The rolling brush does not rotate | - Clean the rolling brush.- Check whether the main brush and the main brush cover are installed correctly. |
| Abnormal action or sweep route of the robot | - Carefully clean the sensor with dry cloth.- Restart the robot. |
| No water released during mopping | - Make sure there is enough water in the water tank.-Check whether the mop module is installed correctly.- Check whether the water outlet is blocked. |
| The machine cannot connect to your Wi-Fi network. | - Ensure that your Wi-Fi router supports 2.4GHz and 802.11b/g/n bands as this equipment does not support 5GHz bands. For more details, For more details, please refer to the “Faults in Wi-Fi Connection” section herein. |

Please contact our customer service promptly if any fault cannot be eliminated with the above measures.
Cher/Chère client(e),
natural_image
Top-down line drawing of a circular robotic vacuum cleaner with a small sensor icon on the inner ring (no text or symbols)

natural_image
Line drawing of a toilet or sink component with two slots (no text or symbols)
natural_image
Simple line drawing of a cable with a terminal connector (no text or symbols)
natural_image
Technical line drawing of a mechanical component with internal parts and a separate cross-sectional view (no text or symbols)
Outil de net-
toyage
Chiffon de net-
toyage

Manufactory Co., LTD
natural_image
Line drawing of a robotic vacuum cleaner with a hand adjusting the component (no text or symbols)
natural_image
Line drawing of a robotic vacuum cleaner with a hand holding the lid (no text or symbols)
natural_image
Technical line drawing of two views of an electronic device with a hand adjusting a cable (no text or symbols present)
4 Installation
natural_image
Two technical line drawings of electronic devices with labeled components and an upward arrow indicating motion (no text or symbols present)

natural_image
Line drawing of a robotic vacuum cleaner with control panel and mounted device (no text or symbols)

natural_image
Pure diagram of three rectangular panels with curved lines and a circular symbol, no text or labels present.
natural_image
Concentric circular diagram with a central square and horizontal dimension line labeled 1.5m (no text or symbols within the diagram itself)
natural_image
Line drawing of a robotic vacuum cleaner and its internal component (no text or symbols)
natural_image
Diagram showing a hand inserting a device into a device housing, with an arrow indicating the process (no text or symbols present)
natural_image
Technical line drawing of a faucet and curved mechanical component (no text or symbols)
natural_image
Technical line drawing of a device with three views: top view, side view, and close-up (no text or symbols)
natural_image
Line drawing showing a robotic vacuum cleaner transforming from its internal structure to a hand holding the device (no text or symbols present)
natural_image
Line drawing of a hand holding a device casing with an arrow indicating upward motion (no text or symbols)
natural_image
Illustration of hands pouring liquid into a cup (no text or symbols)
natural_image
Illustration showing three steps of a device cleaning process: opening a rack, folding a gridded panel, and adding a tool to a grid (no text or symbols present)
natural_image
Illustration of household appliances including a faucet, solar panel, fan, and timer with 24-hour clock (no text or symbols)
natural_image
Technical line drawing showing three-step assembly of a device with hands operating the internal components (no text or symbols present)
natural_image
Line drawing of hands installing or adjusting a device component on a circular base (no text or symbols visible)
natural_image
Technical illustration of a device's internal components, showing a hand holding a screwdriver and a close-up view of the component (no text or symbols present)
natural_image
Technical line drawing of a mechanical or electronic component with no visible text, numbers, or symbols.
natural_image
Top-down line drawing of a circular robotic vacuum cleaner with a central sensor (no text or symbols)
natural_image
Line drawing of a mechanical bracket or housing component (no text or symbols)

natural_image
Simple line drawing of a medical or electrical device with a coiled cable and connector (no text or symbols)
natural_image
Technical line drawing of a mechanical component with internal parts and a separate outline (no text or symbols)
E-TEK Electronics Manufactory Co., LTD
Identificatore del modello : ZD012A190060EU
carico (10%) : 85.71%
Consumo di energia
a vuoto : 0,074W
4 Installazione
natural_image
Line drawing of a robotic vacuum cleaner with a hand adjusting the component (no text or symbols)
natural_image
Line drawing of a robotic vacuum cleaner with a hand adjusting its lid (no text or symbols)
natural_image
Technical line drawing of two views of an electronic device with internal components and a hand adjusting a cable (no text or symbols present)
4 Installazione
natural_image
Two technical line drawings of electronic devices with connectors and a pull-up arrow (no text or symbols)


natural_image
Line drawing of a robotic vacuum cleaner with control panel and mounted device (no text or symbols)

natural_image
Pure diagram of three rectangular panels with internal wavy lines and a small circular symbol in the top-right corner (no text or labels)
natural_image
Concentric circular diagram with a central square and horizontal line labeled 1.5m (no text or symbols within the diagram itself)
natural_image
Line drawing of a robotic vacuum cleaner and its internal clamp device (no text or symbols)
natural_image
Diagram showing a hand pressing down on a device housing into a closed housing (no text or symbols present)
natural_image
Technical line drawing of a faucet and curved mechanical component (no text or symbols)
natural_image
Technical line drawing of a vacuum cleaner's internal components, showing exploded view and assembled view (no text or labels)
natural_image
Line drawing showing a robotic vacuum cleaner transforming into a compact device (no text or symbols present)
natural_image
Line drawing of a hand pressing down on a device casing, showing top and side views (no text or symbols)
natural_image
Illustration of hands pouring liquid from a container into a plastic cup (no text or symbols)
natural_image
Illustration showing three steps of a cleaning or assembly process: opening a device, handling a grating, and cutting into a grid (no text or symbols present)
natural_image
Illustration of household appliances including a faucet, fan, timer, and solar panel (no text or symbols)
natural_image
Technical line drawing showing three stages of a robotic device assembly: open top, assembled with tool, and disassembled (no text or symbols)
natural_image
Line drawing of hands installing or adjusting a device component on a circular base (no text or symbols visible)
natural_image
Technical illustration of a device's internal components with a hand holding a tool, showing assembly and disassembly (no text or symbols present)
natural_image
Technical line drawing of a circular mechanical or electronic device with multiple components and no visible text or symbols
natural_image
Top-down line drawing of a circular robotic vacuum cleaner with a central control knob (no text or symbols)
Robot Aspirator

natural_image
Line drawing of a toilet or sink component with two mounting holes (no text or symbols)
Stație de încărcare

natural_image
Simple line drawing of a medical or electrical device with a coiled cable and terminal connector (no text or symbols)
natural_image
Technical line drawing of a mechanical component with internal parts and a separate cutaway view (no text or symbols)
Producător : E-TEK Electronics Manufactory Co., LTD
Identificator de model : ZD012A190060EU
Tensiune de intrare : 100-240V
natural_image
Line drawing of a robotic vacuum cleaner with a hand adjusting the component (no text or symbols)
natural_image
Line drawing of a robotic vacuum cleaner with a hand adjusting its lid (no text or symbols)
natural_image
Technical line drawing showing two views of an electronic device with internal components and a hand holding a tool (no text or symbols present)
4 Instalarea
natural_image
Two technical line drawings of a device with labeled components, showing hand and torso views (no text or symbols)

natural_image
Line drawing of a robotic vacuum cleaner with attached electrical connector (no text or symbols)

natural_image
Pure diagram of three rectangular panels with curved lines and a small circle, no text or symbols present.
natural_image
Concentric circular diagram with a central square and scale marker (1.5m), no text or symbols present.
natural_image
Technical line drawing of a circular device and a mechanical clamp (no text or symbols)
natural_image
Diagram showing a hand inserting a device into a housing, with an arrow indicating the process (no text or symbols present)
natural_image
Technical line drawing of a faucet and mechanical component (no text or symbols)
natural_image
Illustration of hands holding a device with a downward arrow indicating rotation (no text or symbols)
natural_image
Line drawing of a hand holding a tool over a piece of material (no text or symbols)
natural_image
Illustration of hands holding a device with arrows indicating rotation or change, sun symbol above (no text or symbols)
natural_image
Technical line drawing of a device's rear panel showing internal components and an upward arrow (no text or symbols)
natural_image
Diagram showing a robotic vacuum cleaner with a close-up view of its internal structure (no text or symbols present)
natural_image
Line drawing showing a robotic vacuum cleaner transforming into a mechanical device (no text or symbols present)
natural_image
Line drawing of a hand holding a device casing, showing front and side views (no text or symbols)
natural_image
Illustration of hands pouring liquid into a container (no text or symbols)
natural_image
Illustration showing three steps of a device cleaning process: opening a rack, folding a gridded panel, and inserting into a grid (no text or symbols present)
natural_image
Illustration of household appliances including a faucet, solar panel, fan, and grid tray (no text or symbols)
natural_image
Technical line drawing showing three stages of a mechanical device assembly: disassembly, assembly, and final assembly (no text or symbols present)
natural_image
Line drawing of hands installing or adjusting a circular device component with visible internal components and parts (no text or symbols)
natural_image
Technical illustration of a device's internal components, showing a hand holding a tool and a magnified view of the internal structure (no text or symbols present)
□ □ Convector electric
Model / Serie:
VÂNZĂTOR
Nr. factură:......Data:......
natural_image
Top-down line drawing of a circular robotic vacuum cleaner with a small central component (no text or symbols)
Robotski usisavač
natural_image
Line drawing of a mechanical bracket or housing component (no text or symbols)
Dock za punjenje
natural_image
Simple line drawing of a medical or electrical device with a coiled cable and connector (no text or symbols)
Adapter za punjenje
natural_image
Technical line drawing of a mechanical component with internal parts and a separate cutaway view (no text or symbols)
natural_image
Line drawing of a robotic vacuum cleaner with a hand adjusting the component (no text or symbols)
2- Uklanjanje zaštitne folije
natural_image
Line drawing of a robotic vacuum cleaner with a hand holding the lid (no text or symbols)
natural_image
Technical line drawing of two views of an electronic device with a hand holding a tool (no text or symbols present)
4 Instalacija
natural_image
Two technical line drawings of electronic devices with connectors and a pull-up arrow (no text or symbols)


Neka stanica za skupljanje prašine i punjenje uvijek budu ukopčani u zidnu utičnicu, u protivnom usisivač se ne može automatski vratiti.

Za neometan postupak punjenja, ne pomičite često stanicu za skupljanje prašine. Kada se promijeni položaj usisivača, tada se može izbrisati dostupna karta i kreirati nova zbog pogreške u pozicioniranju.
5 Rukovanje
5.1 Namjena
natural_image
Line drawing of a robotic vacuum cleaner with attached appliance and control panel (no text or symbols)

natural_image
Pure diagram of three rectangular panels with wavy lines and a circular symbol in the center, no text or labels present.
natural_image
Concentric circular diagram with a small square at the center, labeled '1.5m' (no other text or symbols)
natural_image
Technical line drawing of a vacuum cleaner and its internal component (no text or symbols)
Uklonite sklop spremnika za prašinu i spremnika za vodu (2 u 1).

natural_image
Diagram showing a hand pressing down on a device component, with an arrow indicating motion (no text or symbols present)
Uklonite spremnik za prašinu.

natural_image
Technical illustration of a faucet and curved mechanical component (no text or symbols)
Uklonite gumeni čep i kroz otvor za ulijevanje vode dodajte vodu u spremnik za vodu.

flowchart
graph LR
    A["Hand positioning on device"] --> B["Close-up of tool path"]
    B --> C["Arrow indicating light or motion toward Sun"]
    C --> D["Acturing hand movement with tool path"]
natural_image
Technical line drawing of a robotic vacuum cleaner with internal components and a close-up view (no text or symbols)
natural_image
Line drawing showing a robotic vacuum cleaner transforming into a compact device (no text or symbols present)
natural_image
Line drawing of a hand inserting a plastic housing into a curved internal component (no text or symbols)
- Otvorite spremnik za prašinu, kako je prikazano dolje. Približite spremnik za prašinu kanti za smeće i bacite grubu prašinu laganim lupkanjem po spremniku.

natural_image
Illustration of hands pouring liquid into a cup (no text or symbols)
- Uklonite visokoučinkoviti filtar i očistite ga s četkicom za čišćenje isporučenom s uređajem.

natural_image
Illustration showing three steps of a cleaning or assembly process: opening a device, handling a tray, and holding a tool (no text or symbols present)
natural_image
Illustration of household appliances including a faucet, solar panel, fan, and timer (no text or symbols)
- Pustite neka se sklop spremnika za vodu, spremnika za prašinu i filtra osuši nakon pranja i provjerite je li potpuno suh.

Sušenje može potrajati 24 do 48 sati.
- Sastavite sklop spremnika za vodu, spremnika za prašinu i filtra nakon sušenja na zraku i instalirajte sklop u usisivač.

UPOZORENJE: Ne rukujete usisivačem ako niste instalirali sklop filtra. U protivnom uređaj se može oštetiti.
6.2 Čišćenje četke
natural_image
Technical line drawing showing three stages of a robotic vacuum cleaner assembly: open top, assembled with tool, and disassembled with a tool (no text or symbols present)
natural_image
Line drawing of hands installing or adjusting a device inside a circular device (no text or symbols visible)
6.3 Čišćenje i instalacija bočne četke

natural_image
Technical illustration of a robotic vacuum cleaner with internal components and a hand holding a tool (no text or symbols present)
natural_image
Top-down line drawing of a circular robotic vacuum cleaner with a small sensor module (no text or symbols)
natural_image
Line drawing of a 3D mechanical component with two mounting holes (no text or symbols)

natural_image
Simple line drawing of a cable with a plug and terminal connector (no text or symbols)
natural_image
Technical line drawing of a mechanical component with internal parts and a separate outline (no text or symbols)
natural_image
Line drawing of a robotic vacuum cleaner with a hand adjusting the component (no text or symbols)
natural_image
Line drawing of a robotic vacuum cleaner with a hand holding the lid (no text or symbols)
3- Installera sidoborste
natural_image
Technical line drawing of two views of a robotic vacuum cleaner with a hand adjusting the component (no text or symbols present)
4 Installation
natural_image
Two technical line drawings of electronic devices with connectors and wiring, no text or symbols present.


natural_image
Line drawing of a robotic vacuum cleaner with control panel and mounted device (no text or symbols)

natural_image
Pure diagram of three identical wavy lines with a small circle and arrow, no text or symbols present.
natural_image
Concentric circular diagram with a small square at the center, labeled '1.5m' (no other text or symbols)
natural_image
Line drawing of a vacuum cleaner and its internal component (no text or symbols)
natural_image
Diagram showing a hand inserting a device into a housing, with an arrow indicating the process (no text or symbols present)
natural_image
Technical line drawing of a faucet and a mechanical component (no text or symbols)
natural_image
Illustration of a shoe being held, showing step-by-step assembly from opening to cutting (no text or symbols)
natural_image
Technical line drawing of a robotic vacuum cleaner with internal components and a close-up view of the component (no text or symbols)
natural_image
Line drawing showing a robotic vacuum cleaner transforming into a compact device (no text or symbols present)
natural_image
Line drawing of a hand pressing down on a device casing, showing top and side views (no text or symbols)
natural_image
Illustration of hands pouring liquid into a cup (no text or symbols)
natural_image
Line drawings of a device's internal structure, showing top view, side view with hand holding panel, and side view with tray (no text or symbols)
natural_image
Illustration of household appliances including a faucet, fan, timer, and storage tray (no text or symbols)
natural_image
Technical line drawing showing three stages of a robotic device: open top, mechanical assembly, and disassembly (no text or symbols)
natural_image
Line drawing of hands installing or adjusting a device component on a circular base (no text or symbols visible)
natural_image
Technical illustration of a device's internal components, showing a hand holding a tool and a close-up view of the internal structure (no text or symbols present)
natural_image
Top-down line drawing of a circular robotic vacuum cleaner with a small sensor module (no text or symbols)
Robotstøvsuger Ladedokk

natural_image
Line drawing of a mechanical housing or enclosure component (no text or symbols)
natural_image
Simple line drawing of a cable with a handle and terminal connector (no text or symbols)
Ladeadapter

natural_image
Technical line drawing of a mechanical component with internal parts and a separate cutaway view (no text or symbols)

Produsent : E-TEK Electronics Manufactory Co., LTD
Modellidentifikator : ZD012A190060EU
Inngangsspenning : 100-240V\~
Inngangsfrekvens : 50/60Hz
Inngangsstrøm : 0,5 A
Utgangsspenning : 19,0 V DC
Utgangsspenning : 0,6 A
Utgangseffekt : 11,4 W
Gjennomsnittlig aktiv effektivitet: : 86.37%
Effektivitet ved lav belastning (10 %): : 85.71%
natural_image
Line drawing of a robotic vacuum cleaner with a hand adjusting the component (no text or symbols)
natural_image
Line drawing of a robotic vacuum cleaner with a hand holding the lid (no text or symbols)
3- Installer sidebørsten
natural_image
Technical line drawing of two views of an electronic device with a hand adjusting a cable (no text or symbols present)
4 Montering
natural_image
Two technical diagrams showing a device with cable and a separate package with internal components, no text or symbols present.


natural_image
Line drawing of a robotic vacuum cleaner with attached appliance and control panel (no text or symbols)

Ladingen starter när den hvite indikatoren på ladestasjonen slukker, ladingen starter.
5.2 Betjening
natural_image
Pure diagram of three rectangular panels with wavy lines and a circular symbol, no text or labels present.
natural_image
Concentric circular diagram with a central square and a 1.5m label, no readable text or symbols beyond the label.
natural_image
Line drawing of a vacuum cleaner and its internal component (no text or symbols)
natural_image
Diagram showing a hand inserting a device into a housing, with an arrow indicating upward motion (no text or symbols present)
natural_image
Technical illustration of a faucet and a curved mechanical component (no text or symbols)
natural_image
Technical line drawing of a robotic vacuum cleaner with internal components and a close-up view of the device (no text or symbols)
natural_image
Line drawing showing a robotic vacuum cleaner transforming into a compact device (no text or symbols present)
natural_image
Diagram showing a hand pressing down on a device housing with an arrow indicating motion (no text or symbols present)
natural_image
Illustration of hands pouring liquid from a container into a cup (no text or symbols)
natural_image
Illustration showing three steps of a device processing process: opening, folding, and cutting into a grid (no text or symbols present)
natural_image
Illustration of household appliances including a faucet, solar panel, fan, and timer (no text or symbols)
natural_image
Technical line drawing showing three stages of a robotic device assembly: intact, disassembled, and assembled (no text or symbols present)
natural_image
Line drawing of hands installing or adjusting a mechanical component inside a circular device (no text or symbols visible)
natural_image
Technical illustration of a device's internal components, showing a hand holding a tool and a close-up view of the internal structure (no text or symbols present)
natural_image
Abstract geometric pattern composed of interlocking black lines on white background (no text or symbols)

natural_image
Simple line drawing of a decorative border with circular motifs (no text or symbols)
VCR 4230
RU
natural_image
Top-down line drawing of a circular robotic vacuum cleaner with a small sensor icon on the inner ring (no text or symbols)
natural_image
Line drawing of a toilet or shower unit with two slots and a handle (no text or symbols)
станция

natural_image
Simple line drawing of a cable with a handle and connector (no text or symbols)
natural_image
Technical line drawing of a mechanical component with internal parts and a separate outline (no text or symbols)
Manufactory Co., LTD
natural_image
Line drawing of a robotic vacuum cleaner with a hand adjusting the lid (no text or symbols)
natural_image
Line drawing of a robotic vacuum cleaner with a hand holding the lid (no text or symbols)
natural_image
Technical line drawing of an electronic device showing internal components and a hand holding a tool (no text or symbols present)
4 Установка
natural_image
Two technical diagrams showing a device with cable and a separate package with connectors and a directional arrow (no text or symbols)


natural_image
Line drawing of a robotic vacuum cleaner with attached electrical connector (no text or symbols)

natural_image
Pure diagram of three rectangular panels with internal curved lines and a small circle containing a triangle, no text or symbols present.
natural_image
Concentric circular diagram with a central square and a 1.5m scale indicator (no text or symbols beyond the scale)
natural_image
Technical line drawing of a robotic vacuum cleaner and its internal component (no text or symbols)
natural_image
Diagram showing a hand inserting a device into a housing, with an arrow indicating the process (no text or symbols present)
natural_image
Technical illustration of a faucet and its internal components (no text or symbols)
natural_image
Illustration of a hand holding a shoe with a foot, showing the process from opening to opening using a tool (no text or symbols present)
natural_image
Technical line drawing of a vacuum cleaner's internal components, showing part assembly and mounting mechanism (no text or symbols)
natural_image
Line drawing showing a robotic vacuum cleaner transforming into a compact device (no text or symbols present)
natural_image
Line drawing showing a hand pressing down on a plastic housing component, with an arrow indicating upward motion (no text or symbols)
natural_image
Illustration of hands pouring liquid into a cup (no text or symbols)
natural_image
Line drawings of a device's internal structure, showing top view, side view with hand holding clip, and side view with grid (no text or symbols)
natural_image
Illustration of household appliances including a faucet, fan, timer, and solar panel (no text or symbols)
natural_image
Technical line drawing showing three stages of a mechanical device assembly: top view, side view, and final view (no text or symbols present)
natural_image
Line drawing of hands installing or adjusting a device component on a circular base (no text or symbols visible)
natural_image
Technical illustration of a device's internal components, showing a hand holding a tool and a magnified view of the internal structure (no text or symbols present)