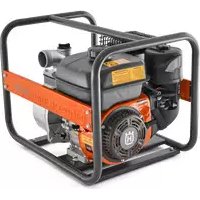
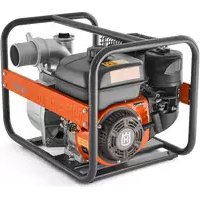
W25PEN - Pump HUSQVARNA - Free user manual and instructions
Find the device manual for free W25PEN HUSQVARNA in PDF.
| Product type | Centrifugal pump with 2-stroke engine |
| Brand | Husqvarna |
| Model | W25PEN |
| Main use | Spraying of pesticides and herbicides |
| Engine type | Single-cylinder 2-stroke air-cooled |
| Displacement | 25.4 cm³ |
| Maximum power | 0.75 kW at 7000 rpm |
| Idle speed | 3000 ± 200 rpm |
| Maximum flow rate | 110 L/min |
| Maximum suction head | 8 m |
| Maximum discharge head | 32 m |
| Fuel | Unleaded gasoline / 2-stroke oil mixture (ratio 25:1 or 50:1 with Husqvarna oil) |
| Fuel tank capacity | 0.6 L |
| Spark plug | LD L7T, gap 0.6–0.7 mm |
| Dimensions (L × W × H) | 385 × 345 × 350 mm |
| Net weight | 9.44 kg |
| Gross weight | 10.98 kg |
| Starting type | Rope starter (easy start) |
| Safety devices | Stop switch, protective cover, control valve |
| Regular maintenance | Air filter, fuel filter, spark plug, muffler every 25–100 h |
| Original spare parts | Use exclusively Husqvarna parts |
| Repairability | Refer to an authorized center for any repair not covered in the manual |
Frequently Asked Questions - W25PEN HUSQVARNA
User questions about W25PEN HUSQVARNA
0 question about this device. Answer the ones you know or ask your own.
Ask a new question about this device
Download the instructions for your Pump in PDF format for free! Find your manual W25PEN - HUSQVARNA and take your electronic device back in hand. On this page are published all the documents necessary for the use of your device. W25PEN by HUSQVARNA.
USER MANUAL W25PEN HUSQVARNA
EN Operator's manual 2-14
TROUBLE SHOOTING....12
TRANSPORTATION AND STORAGE....13
TECHNICAL DATA....14
INTRODUCTION
Operator's manual Intended use
The initial language of this operator's manual is English. Operator's manuals in other languages are translations from English.
Product description
This product is a water pump for transportation of water. Check with your servicing dealer for more information.
This product has been designed mainly for the purpose of draining or supplying fresh water to and from a location. Please do not use it for any other purposes or tasks, as this may cause unforeseen accidents.
Note: National or local regulations may regulate the use. Comply to given regulations.
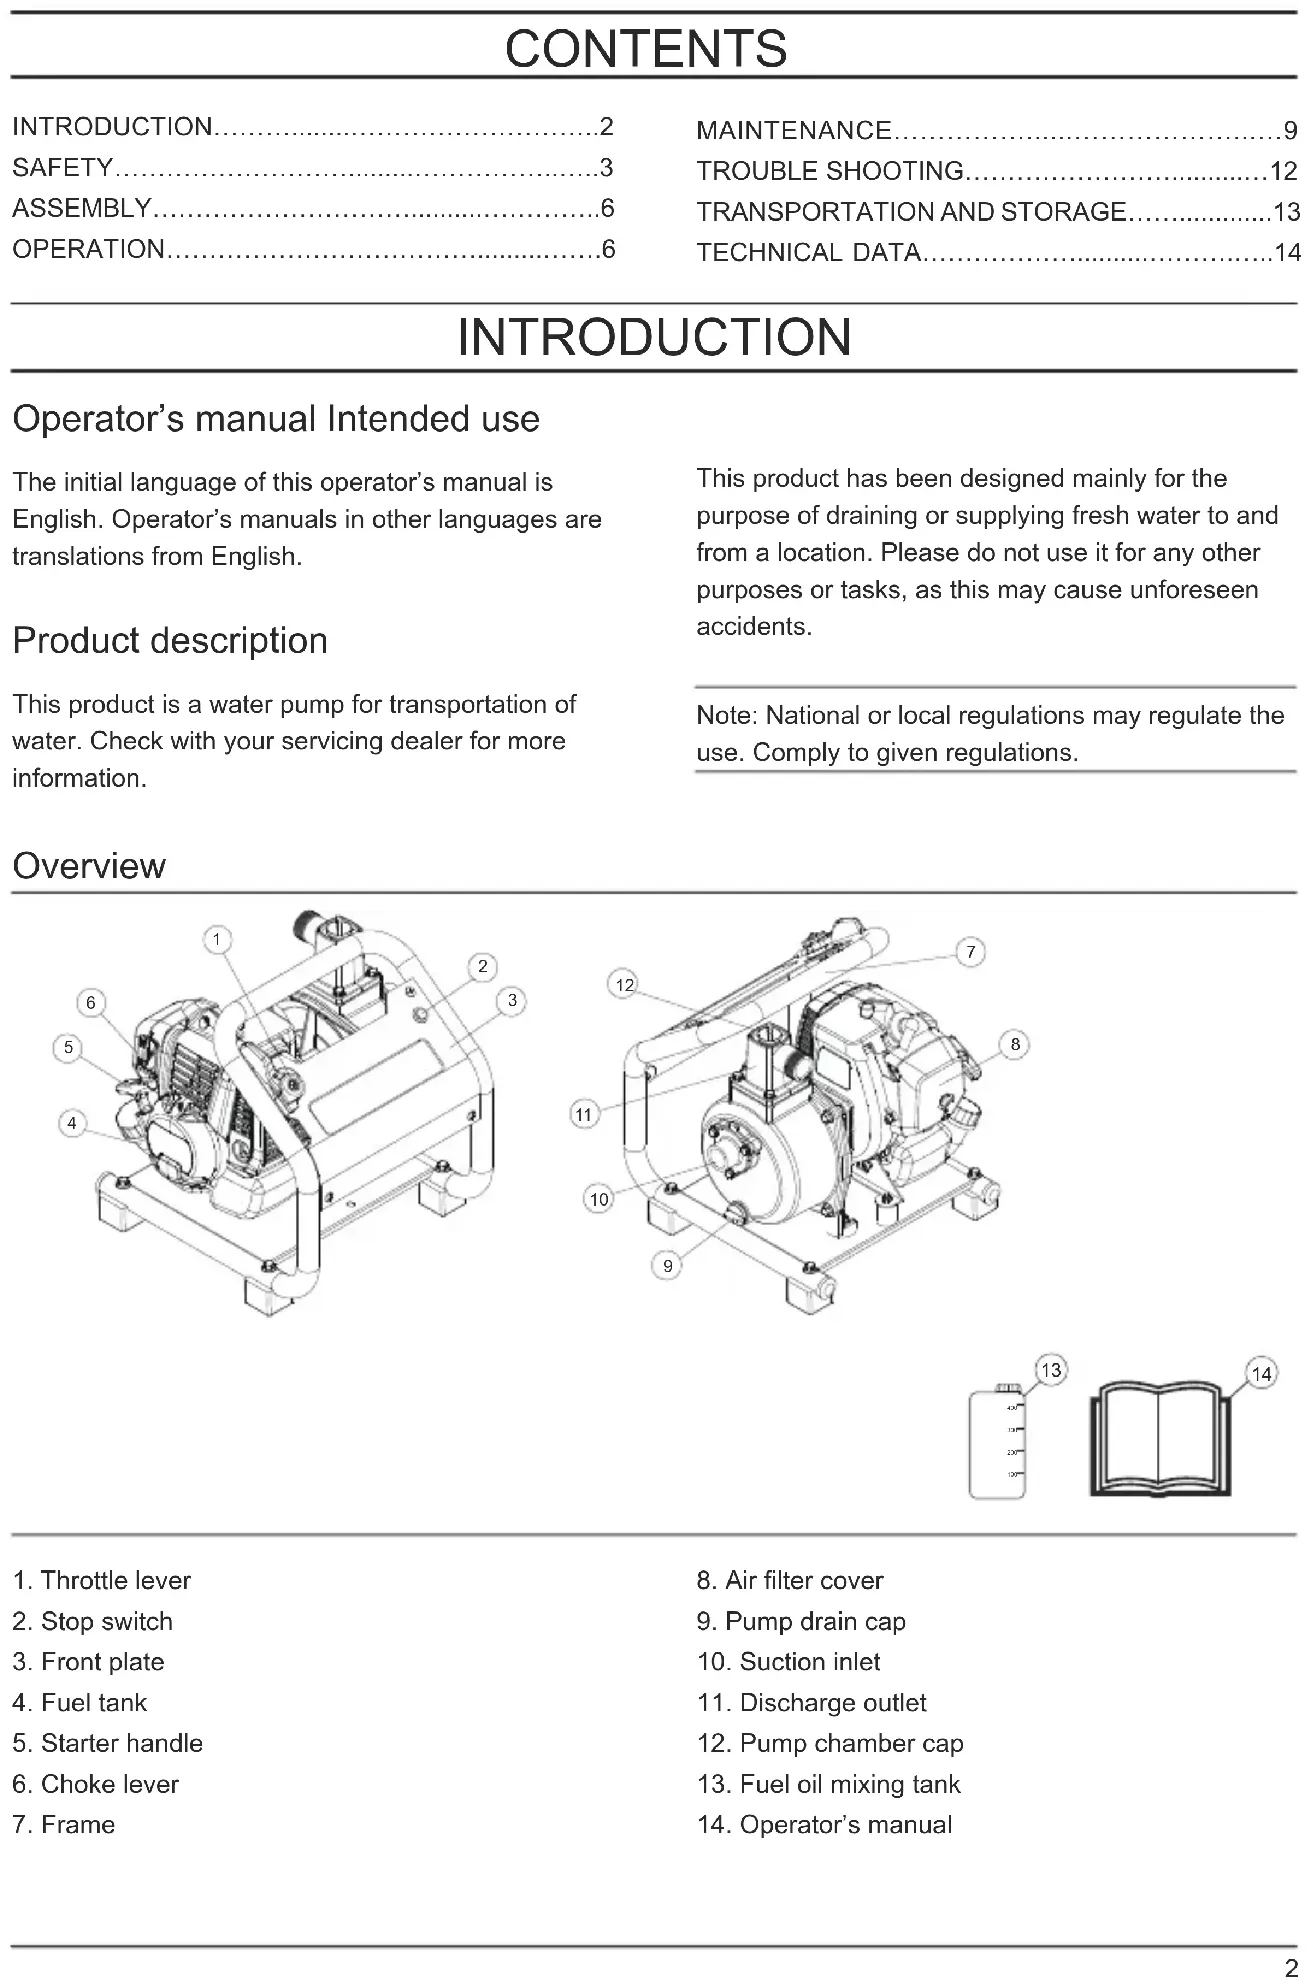
Overview

text_image
Technical diagram of a mechanical device with numbered components for identification
text_image
Technical diagram of a mechanical pump assembly with numbered components for identification
text_image
Diagram showing a container and an open book with labeled parts 13 and 14-
Throttle lever
-
Stop switch
-
Front plate
-
Fuel tank
-
Starter handle
-
Choke lever
-
Frame
-
Air filter cover
-
Pump drain cap
-
Suction inlet
-
Discharge outlet
-
Pump chamber cap
-
Fuel oil mixing tank
-
Operator's manual
Symbols on the product

Hot surface

The port to refuel the MIX GASO-LINE

The direction to close the choke

The direction to open the choke

Primer

Low speed

High speed
Note: Other symbols/decals on the product refer to certification requirements for other commercial areas.
Product liability
As referred to in the product liability laws, we are not liable for damages that our product causes if:
• the product is incorrectly repaired.
• the product is repaired with parts that are not from the manufacturer or not approved by the manufacturer.
• the product has an accessory that is not from the manufacturer or not approved by the manufacturer.
- the product is no repaired at an approved service center or by an approved authority.
SAFETY
Safety definitions
The definitions below give the level of severity for each signal word.

WARNING: Injury to persons.

CAUTION: Damage to the product.
Note: This information makes the product easier to use.
General safety instructions

WARNING: Read the WARNING instructions that follow before you use the product.
- Use the product correctly. Injury or death is a possible result of incorrect use. Only use the product for the tasks found in this manual. Do not use the product for other tasks.
- Read, understand and follow the instructions and the symbols in this manual. If the operator does not follow the instructions and the symbols, injury, damage or death is a possible result.
- Do not discard this manual. Use the instructions to assemble, to install attachments and accessories, to operate and to keep the product in good condition. Only use approved attachments and accessories.
- It is not possible to give WARNING on every situation that can occur during operation and maintenance of the product. Always be careful and use your common sense.
- Make sure that parts are not damaged before you use the product. Follow the maintenance schedule. Only do the maintenance work that instructed in this manual. An approved service center must do all other maintenance work.
- Do not operate the product or do maintenance on the product if you are not sure of the situation. Turn to the approved dealer, service agent or service center for information.
- Disconnect the spark plug cable before assembly, storage or maintenance of the product.
- Do not use the product if it is changed from its initial specification. Do not change any part of the product without approval from the manufacturer. Only use parts approved by the manufacturer. Injury or death is a possible result of incorrect maintenance.
- Do not breathe in the fumes from the engine. Long-term inhalation of the engine exhaust fumes is a health risk.
- Do not start the product indoors or near flammable material. The exhaust fumes is hot and contain spark which can start a fire. Not sufficient airflow can cause injury or death because of asphyxiation or carbon monoxide.
- When you use this product the engine makes an electromagnetic field. The electromagnetic field can cause damage to medical implants. Check with your physician and medical implant manufacturer before you use the product.
- Do not let a child or a person without knowledge of the instructions operate the product.
- Make sure that you always monitor a person, with decreased physical capacity or mental capacity, that uses the product. A responsible adult must be there at all times.
- Lock the product in an area that children and unapproved persons cannot access.
- The product can eject objects and cause injuries. Obey the safety instructions to decrease the risk of injury or death.
- Do not leave the product when the engine is on.
- The operator of the product shall be responsible for any accident occurs.
- Make sure that you are minimum 15 m (50 ft) away from other persons or animals before you use the product. Make sure that persons in the adjacent area know that you will use the product.
- Refer to national or local laws. They can prevent or decrease the operation of the product in some conditions.
- Do not use the product if you are fatigued or influenced by alcohol, drugs or medicine. They can have effects on your vision, alertness, coordination or judgment.
Safety instructions for operation
- Make sure the product is fully assembled before using it.
- Put the product on an even ground 3 m (10 ft) away from the position where you filled the fuel
tank before starting the engine.
- The product can cause objects to eject, which can cause damage to the eyes. Always use an approved eye protection when you operate the product.
- Be careful, a child can come near the product without your knowledge during operation.
- Do not operate the product if there are persons in the work area. Stop the product if a person goes into the work area.
- Make sure that you are always in control of the product.
- Do not use the product if you cannot receive aid in case of an accident. Always make sure others know you will operate the product before you start.
- Do not turn with the product before you make sure that no persons or animals are in the safety area.
- Remove all unwanted materials from the work area before you start.
- Do not use the product in bad weather like fog, rain, strong winds, risk of lightning or other weather conditions. Dangerous conditions such as slippery surfaces can occur because of bad weather.
- Make sure that you can move freely and work in a stable position.
- Make sure that you cannot fall when you use the product. Do not tilt when you operate the product.
- Do not touch the bevel gear which is hot and can cause injury after the engine stops.
- Stop the engine before you move the product.
Personal protective equipment

WARNING: Read the WARNING instructions that follow before you use the product.
• Always use correct personal protective equipment when you operate the product. The personal protective equipment does not erase the risk of injury. The personal protective equipment decreases the grade of injury if an accident
occurs.
• Always use an approved eye protection while you operate the product.
- Do not operate the product with bare feet or with open shoes. Always use heavy-duty slip-resistant boots.
- Use heavy, long pants.
- If it is necessary, use approved protective gloves.
- Use a helmet if it is possible that objects fall on your head.
• Always use approved ear protection while you operate the product. Noise for a long period can cause noise-induced hearing loss.
- Make sure that you have a first aid kit nearby.
Protective devices on the product
- Make sure that you regularly do the maintenance to the product.
• The life of the product increases. - The risk of accidents decreases.
- Let an approved dealer or an approved service center regularly examine the product to do adjustments or repairs.
- Do not use a product with damaged protective equipment. If the product is damaged, speak to an approved service center.
Check valve and throttle trigger
- Before start the engine, make sure that the check valve is at the off position and the throttle trigger at the turtle position. Start with the check valve pulled out is dangerous, as chemical fluid may spray out of the nozzle as soon as the engine is started.
Stop switch
- Start the engine. Make sure that the engine stops when you press the stop switch.
Fuel
- Do not start the product if there is fuel or engine oil on the product. Remove the unwanted fuel or oil and let the product dry.
- If you spill fuel on your clothing, change clothing immediately.
- Do not get fuel on your body, which can cause injury. If you get fuel on your body, use a soap and water to remove the fuel.
- Do not start the engine if you spill oil or fuel on the product or on your body.
- Do not start the product if the engine has a leak. Examine the engine for leaks regularly.
- Be careful with fuel. Fuel is flammable and the fumes are explosive and can cause injuries or death.
- Do not breathe in the fuel fumes, it can cause injury. Make sure that there is a sufficient airflow.
- Do not smoke near the fuel or the engine.
- Do not put warm objects near the fuel or the engine.
- Do not add the fuel when the engine is on.
- Make sure that the engine is cool before you refuel.
- Before you refuel, open the fuel tank cap slowly and release the pressure carefully.
- Do not add fuel to the engine in an indoor area. Not sufficient airflow can cause injury or death because of asphyxiation or carbon monoxide.
- Tighten the fuel tank cap carefully or a fire can occur.
- Move the product at a minimum of 3 m (10 ft) away from the position where you filled the tank before a start.
- Do not fill too much fuel in the fuel tank.
- Make sure that a leak cannot occur when you move the product or fuel container.
- Do not put the product or a fuel container where there is an open flame, spark or pilot light. Make sure that there is no flame within the storage area.
- Only use approved containers when you move the fuel or put the fuel into storage.
- Clean the product and empty the fuel tank before long-term storage. Obey the local law on where to dispose fuel.
- Remove the spark plug cable before you put the product into storage to make sure that the engine does not start accidentally.
Safety instruction for maintenance
- In order to maintain the functions of the product, regularly carry out the maintenance inspections listed in this Manual. Please consult approved product supplier or nearest Husqvarna product dealer if maintenance or parts replacement are required but not listed in this Manual.
-
Never keep the engine running while carrying out inspections or maintenance.
-
Do not modify the product or dismantle the engine. This could lead to breakdown and serious accidents during operation.
- Do not touch the muffler or spark plug with bare hands immediately after stopping the engine, since the high temperature can cause burns.
- For replacement parts, please use original Husqvarna parts or brands designated by Husqvarna
ASSEMBLY
- Use hoses and hose connectors with a supplied hose clamp.
- Make sure that the hoses cannot compress during operation. The hoses must have a strong construction.
- Make sure that the hoses are fully sealed and that there are no types of holes in the hoses.
- Make sure that the suction hose aligns with the
dimension of the suction inlet. For information about minimum hose dimension, refer to Technical data on page 13.
- Make sure that the suction hose is not too long for the operation to keep the best result. Obey the instructions for installation of the product. Refer to Installation on page 7.
- Select a short discharge hose with a large diameter to get the best result.
OPERATION

WARNING: Read and understand the safety chapter before you operate the product.
Before you operate the product
- Make sure the product is on even ground.
- Make sure that the ON/OFF switch is in the OFF position.
- Examine the product for damages.
-
Remove unwanted material from the product. Clean around the muffler and the starter unit.
-
Make sure that all nuts, bolts, screws and hose connectors and clamps are tight.
- Make sure that there is no damage on the suction hose or discharge hose.
- Make sure that the sealing washer and strainer on the suction hose connector is installed correctly and not damaged.
- Do a check of the fuel levels. Make sure that there are no fuel leaks.
- Do a check of the air filter.
To use fuel

WARNING: This product has a two-cycle engine. Use a mixture of gasoline and two-cycle engine oil. Make sure to use the correct quantity of oil in the mixture. Incorrect ratio of gasoline and oil can cause damage to the engine.
Gasoline

CAUTION: Do not use gasoline with an octane number less than 90 RON (87 AKI). This can cause damage to the product.

CAUTION: Do not use gasoline with more than 10% ethanol concentration (E10). This can cause damage to the product.

CAUTION: Do not use leaded gasoline. This can cause damage to the product.
• Always use new unleaded gasoline with a minimum octane number of 90 RON (87 AKI) and with less than 10% ethanol concentration (E10).
- Use gasoline with a higher octane number if you frequently use the product at continuously high engine speed.
• Always use a good quality unleaded gasoline/oil mixture.
Two-cycle engine oil
- Use only the two-cycle engine oil of high quality, especially HUSQVARNA two-cycle engine oil. Use only the oil of an air cooled engine.
• Mixture ratio 50:1 (2%). - Oil of low quality and high oil/fuel ratio can decrease the lifetime of catalytic converters.
- Check with the approved dealer when you select an oil.
- If Husqvarna two-stroke oil is not available, you can use another two-stroke oil of good quality that is intended for air cooled engines.
- Do not use the two-stroke oil for water-cooled outboard engines. The two-stroke oil is sometimes referred to as outboard oil.
| Gasoline, liter | Oil, liter |
| 2% (50:1) | |
| 5 | 0.1 |
| 10 | 0.2 |
| 15 | 0.3 |
| 20 | 0.4 |
To mix the fuel
Note: Always use a clean fuel container when you mix the fuel. Do not use fuel mixture made over 30 days.
- Add half of the gasoline.
- Add all of the oil.
- Shake the fuel mixture to mix.
- Add the remaining half of gasoline.
- Shake the fuel mixture again to mix.
- Fill the fuel tank.
To fill the fuel tank
- Make sure that the fuel mixture is correct and is in a fuel container with an antispill valve.
- If fuel is on the container, remove the unwanted fuel and let the container dry.
- Make sure that the area near the fuel tank cap is clean.
- Remove the fuel tank cap.
- Shake the fuel container before you add the fuel mixture to the fuel tank.
- Put back the fuel tank cap.
To fill the product with water
Before operation, it is necessary to fill the product with water to prevent damage to the product.
- Remove the pump chamber cap (A) from the pump chamber

natural_image
Technical diagram of a mechanical assembly with labeled component A (no text or symbols beyond label)- Fill water to the lower surface of the discharge outlet (B).

text_image
B- Install and tighten the pump chamber cap.
Installation
To install the product
- Put the product on stable and level ground near the water surface.
- Make sure that the product has a free space of a minimum of 1 m.
- Make sure that there are no flammable objects near the engine.
- Make sure that the level difference for the suction hose (A) is as low as possible for the operation. The level difference for the suction hose must not be more than 7.5 m/25 ft.

text_image
C B ANote: The level difference for the discharge hose (B) can be more if it is necessary. But, a lower total level difference (C) gives the best result.
To install suction hose
- Attach the hose connector (D) to the suction hose (F) with a hose clamp (E). Make sure that the sealing washer for the hose connector is in good condition.
-
Install the strainer (H) at the end of the suction hose with the hose clamp (G).
-
Tighten the hose connector on the pump suction inlet (C).
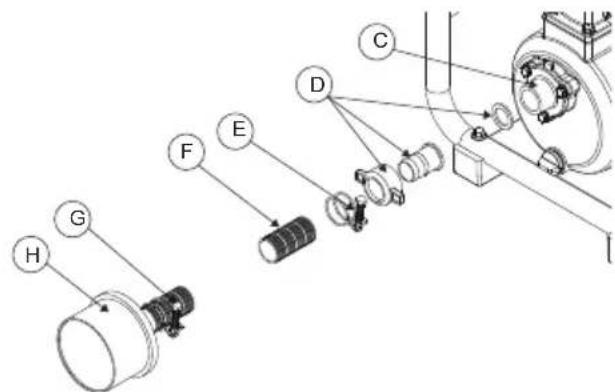
text_image
Technical diagram showing labeled mechanical components with numbered parts H through G
text_image
Technical diagram of a mechanical assembly with labeled components F, E, and DTo install discharge hose
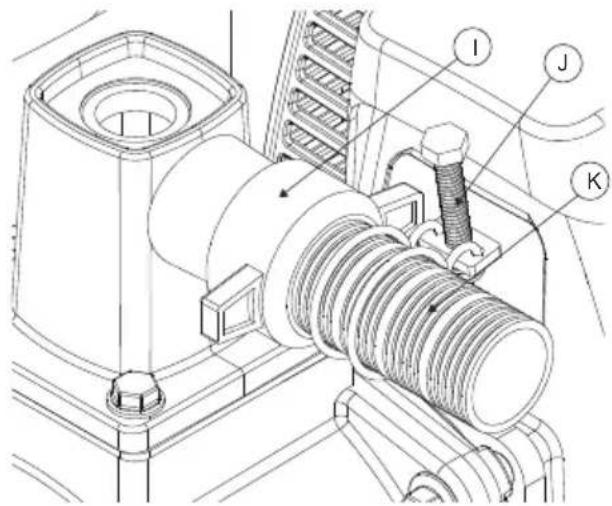
- Attach the hose connector (I) to the pump outlet.
- Install the discharge hose (K) to the hose connector and tighten the hose clamp (J).
text_image
Technical diagram of a mechanical assembly with labeled parts I, J, and KTo start and stop
Before you start the engine
- Examine the product for missing, damaged, loose or worn parts.
- Examine the nuts, screws and bolts.
- Examine the air filter.
- Examine the check valve and throttle trigger.
- Examine the stop switch.
- Examine the product for fuel leaks.
- Examine the inlet hose, inlet filter, outlet hose, return hose and spray lance for correct connection.
To start a cold engine

WARNING: Make sure that you put the product on an even ground. Do not touch the cover or use a product with damaged spark plug cap. It can burn your skin and cause electrical shock if the spark plug cap is damaged.

CAUTION: Do not pull all the starter rope out. Hold the starter rope handle when it is fully extended.
Note: Do not twist the starter rope around your hand.
- Press the air purge ten times.
- Move choke lever to the choke position.
- Pull out starter rope slowly until you feel resistance. Pull starter rope quickly with force. Keep doing it until you hear the engine starts.
- Set the choke lever to the run position, then pull the starter rope until the engine starts.
- Pull the throttle trigger slightly and run at low speed for 60 seconds.
To start a cold engine
- Press the air purge ten times.
- Set the choke lever to the run position, then pull the start rope until the engine starts.
To stop the engine
- Press the stop switch to stop the engine.
MAINTENANCE

WARNING: Read and understand the safety chapter before you clean, repair or do maintenance on the product.
To stop the engine
• After every 25 hours of operation, please remove the air cleaner cover and inspect the air cleaner. If it is too dirty, wash it carefully in warm water containing a neutral detergent, and put it back to its original position after drying it thoroughly.
- If the air cleaner is distorted or damaged, please replace it with a new one.
- If the air cleaner is blocked, the efficiency of the engine will be reduced. In addition, the engine interior will suffer abnormal wear if it is operated without filter or if continually operated with a distorted or damaged filter.
To check the fuel filter
- After every 25 hours of operation, empty the fuel tank, detach the fuel filter from the tank, and remove all dirt. If the filter is too clogged, please replace it with a new one.
- If the fuel filter is clogged, the engine speed may be limited or speed fluctuations may occur.
- If the engine is operated without a fuel filter, dirt will accumulate in the carburetor and cause it to malfunction
To check the spark plug
-
Do not touch the spark plug with your bare hands immediately after operation, as there is the risk of burns due to high temperature.
• After every 25 hours of operation, detach the spark plug and remove dirt from the electrodes with a wire brush or similar. -
The correct electrode gap is 0.6 to 0.7mm.
- When replacing plugs, please use designated items.
- If too much fuel is absorbed or poor quality oil is used, the spark plug electrodes become dirty, making the engine harder to start.
- Note that using any spark plug other than those designated may result in the engine failing to operate properly or in the engine becoming overheated and damaged.
- To install the spark plug, first turn the plug until it is finger tight, then tighten it a quarter turn more with a socket wrench.
TIGHTENING TORQUE: 14.7 to 21.6 N.m.
(150 to 220 kgf-cm)
To check the fuel filter

WARNING: Inspect periodically, the muffler for loose fasteners, any damage or corrosion. If any sign of exhaust leakage is found, stop using the machine and have it repaired immediately. Failing to do so may result in the engine catching on fire.
- Perform the procedures follows after every 100 hours of operation
- Remove the muffler, insert a screwdriver into the vent, and wipe away any carbon buildup. Wipe away any carbon buildup on the muffler exhaust vent and cylinder exhaust port at the same time.
- Tighten all screws, bolts, and fittings.
- Check and wipe off if any oil or grease left in between the clutch lining and drum with oil-free and lead-free gasoline.
To check the cooling system

WARNING: Never touch the cylinder, muffler, or spark plug with your bare hands immediately after stopping the engine. The engine can become very hot when in operation, and doing so could result in severe burns.
- When checking the product, check the area around the muffler and remove any staffs that attached, in case the muffler is overheated or even the engine catch on fire.
- Check the intake air cooling vent and the area around the cylinder cooling fins for blockage every 25 hours of use, in case of engine overheat or even product failure.
- Note that it is necessary to remove the upper cover and the lower cover in order to be able to view the upper part of the cylinder.
To adjust engine speed
- Although the engine is adjusted before leaving the factory, it may require readjustment or maintenance after repeated use. Please consult the original supplier regarding inspections and maintenance other than those shown below.
To adjust idle speed
Note: Warm up the engine before adjusting the idle speed.
- If the engine stops or the pump continues to work at idle speed with the throttle trigger at the turtle position, readjust the engine speed with the idle speed adjustment screw on the left of the carburetor.
Turn the idle adjustment screw: - Counter-clockwise to reduce engine speed
- Clockwise to increase engine speed
Maintenance schedule
Make sure you obey the maintenance schedule. The intervals are calculated from daily use of the product. The intervals are different if you do not use the product every day. Only do maintenance written in this manual. Speak to an approved service center about other maintenance not found in this manual.
| Maintenance procedure | Daily | Weekly Monthly Note | ||
| Overall | ||||
| Inspect the whole unit for damage, leakage or spillage | √ | |||
| Inspect all accessible fasteners Tighten or replace if necessary | ||||
| Inspect all screws/nuts/bolts | √ | Tighten or replace if necessary. Adjusting screws are not included. | ||
| Check the hoses and fittings | √ | |||
| Clean for any debris | √ | |||
| Engine | ||||
| Inspect and clean the fuel tank | √ | |||
| Inspect and clean the fuel filter | √ | |||
| Inspect and clean the air cleaner | √ | |||
| Check the operation of the throttle lever and stop switch | √ | |||
| Empty the fuel tank | √ | |||
| Clean or re-adjust the spark plug gap | √ | Make sure the gap is 0.6-0.7mm (.025in). Replace if necessary | ||
| Inspect the muffler for damage. | √ | Replace if necessary | ||
| Clean the muffler and the cylinder exhaust port | √ | |||
| Clean the cylinder fins and intake air cooling fan | √ | |||
| Pump | ||||
| Check the impeller and impeller clearance. | √ | |||
| Check the pump inlet valve. | √ | |||
TROUBLE SHOOTING
Trouble shooting
| Problem Possible causes Remedy | ||
| Engine does not start | Electrode spark plug is wet or fouled | Clean or replace the spark plug |
| Cracked spark plug insulator | Replace the spark plug | |
| Engine flooded | Crank engine with choke open and full throttle to clear excess fuel | |
| Incorrect or stale fuel | Drain and replace with correct fuel/oil mixture | |
| No fuel in tank | Refuel with correct fuel/oil mixture | |
| Insufficient power | Clogged air cleaner | Clean and lubricate air cleaner |
| Fuel line/passage clogged | Contact Service Centre or see authorized dealer | |
| Carbon build up in muffler | Contact Service Centre or see authorized dealer | |
| Use incorrect or stale fuel | Drain and replace with correct fuel/oil mixture | |
| Piston seizure | Contact Service Centre or see authorized dealer | |
| Machine is overworked | Operate properly - do not overload | |
| Engine stops during operation | Switch is bumped | Restart the engine |
| Shorting of spark plug | Clean spark plug or replace | |
| Piston scored | Contact Service Centre or see authorized dealer | |
| Fuel tank is empty | Refuel with correct fuel/oil mixture | |
| Carburetor or fuel tank clogged | Contact Service Centre or see authorized dealer | |
| Engine is difficult to stop | Stop wire disconnected from the switch | Attach stop wire to switch |
| Overheated engine | Contact service Centre or see authorized dealer | |
| Unit main body | Loose engine and/or pump mounts | Retighten engine and/or pump mount screws |
| Leak at the tube connections | Retighten the hose clip or replace if damaged | |
| No or decreased pump output | There is no water in the pump chamber. | Fill water to the lower surface of the discharge outlet |
| The suction hose is damaged. | Replace the suction hose. | |
| The strainer is above the water surface. | Put the strainer fully into water. | |
| There is an air leakage at the hose connector. | Replace the sealing washer if it is damaged.Tighten the hose connector and hose clamp. | |
| The strainer is clogged. | Clean the strainer. | |
| Replace the strainer.The strainer is damaged. | ||
| The level difference of the hoses is too high. | Change the location of the product and/or the hoses. | |
| The hoses are damaged or too long. | Replace and select the correct hose for the operation. | |
| The hoses has an incorrect diameter. | Select the correct hose for the operation. | |
If running difficulties continue, contact your closest Authorized Dealer or Service Centre.
TRANSPORTATION AND STORAGE
Transportation
- Keep product and equipment safe and in a dry and frost-proof area during transportation to prevent damage and accidents.
• Empty the fuel and clean the product. - Replace or repair damaged components.
- Use the correct protective cover on the product that does not keep moisture.
- Keep the product tightly attached during transport.
Storage

WARNING: When draining fuel, please be careful not to spill it. If fuel is spilt, wipe off thoroughly. In addition, please be sure to close the storage container cap tightly.

CAUTION: If fuel is left in the engine for protracted periods, the inside of the carburetor may become clogged and cause engine faulty starting and insufficient output.
- On completion of all work procedures with no plan to use the product for a protracted period, please do the following pre-storage care to prevent trouble caused by time-lapse changes.
- Clean the suction filter and wipe off all the unwanted stuff that attached.
- Remove dirt from the product and check for any damage or looseness. If any abnormality is found, correct it thoroughly in preparation for future use of the unit.
- Drain the fuel tank.
- Start the engine, and leave it at idle speed until all the fuel in the carburetor is consumed and the engine comes to a natural stop.
- Remove spark plug and put a few drops (1 to 2 cc) of 2-cycle oil into the engine. After pulling the starter rope 2 or 3 times, return the spark plug to its original position and stop in compressed position.
- After oiling the throttle trigger and other metal parts with anti-corrosive oil, cover the product and store indoors in a low-humidity location.
TECHNICAL DATA
Technical data
| Product model W25P | ||
| Pump | Type | Centrifugal Pump |
| Impeller Type | diam. 70mm - Cast iron | |
| fitting suction | ||
| fittings outlet | ||
| Max. Suction head lift 8m | ||
| Total head lift 32m | ||
| Flow rate 110L/min | ||
| Engine | Type | Single-cylinder air-cooled 2-stroke gasoline engine |
| Engine Displacement (cc) | 25.4 | |
| Max. Power/Speed (kW/rpm) | 0.75/7000 | |
| Engine Operating Speed (rpm) | 7000±500 | |
| Idling Speed (rpm) | 3000±200 | |
| Fuel Type | Gasoline/Oil Mixture | |
| Oil | 2-strok oil | |
| Admixture ratio | 25:1,50:1(Only Husqvarna genuine oil) | |
| Starter system | Easy starter | |
| Spark plug | LD L7T | |
| External dimensions of main unit (mm) L*W*H: | 385*345*350 | |
| Net weight / Gross weight (kg) | 9.44 / 10.98 | |
| Capacity of fuel tank (L) | 0.6 | |
ÍNDICE
INTRODUCCIÓN 15
SEGURIDAD 16
MONTAJE 19
FUNCIONAMIENTO 20
MANTENIMIENTO 23
text_image
Technical diagram of a mechanical device with numbered components for identification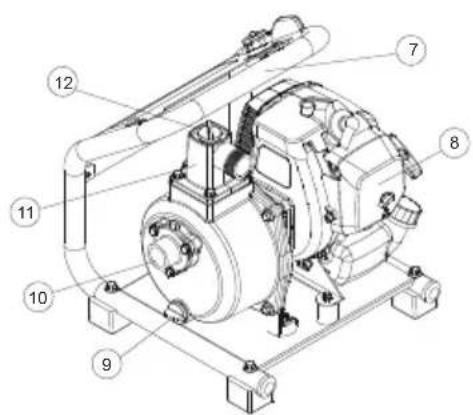
text_image
Technical diagram of a mechanical device with numbered components for identification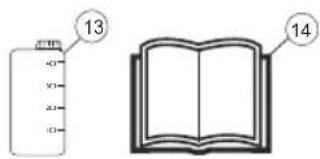
text_image
13 14natural_image
Technical diagram of a mechanical assembly with labeled component A (no text or symbols present)text_image
Technical diagram showing labeled mechanical components with numbered parts H through G
text_image
Technical diagram of a mechanical assembly with labeled parts F, E, and Dtext_image
Technical diagram of a mechanical assembly with labeled parts I, J, and Ktext_image
Technical diagram of a mechanical device with numbered components for identification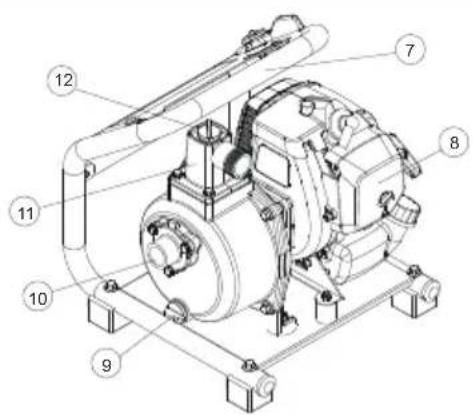
text_image
Technical diagram of a mechanical device with numbered components for identification
text_image
13 14natural_image
Technical diagram of a mechanical assembly with labeled component A (no text or symbols beyond label)text_image
Technical diagram showing labeled mechanical components with numbered parts H through G
text_image
Technical diagram of a mechanical assembly with labeled components F, E, and DPara instalar a mangueira de descarga
- Ligue o conector da mangueira (I) à saída da bomba.
- Instale a mangueira de descarga (K) no conector da mangueira e aperte a braçadeira da mangueira (J).

text_image
Technical diagram of a mechanical assembly with labeled parts I, J, and KPara iniciar e parar
Antes de ligar o motor
DONNÉES TECHNIQUES....59
INTRODUCTION
text_image
Technical diagram of a mechanical device with numbered components for identification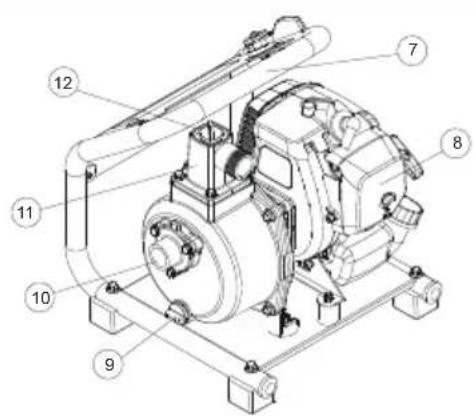
text_image
Technical diagram of a mechanical device with numbered components for identification
text_image
Diagram showing a container with volume and a closed book with labeled parts 13 and 14natural_image
Technical diagram of a mechanical assembly with labeled component A (no text or symbols beyond label)text_image
Technical diagram showing labeled mechanical components with numbered parts H through G
text_image
Technical diagram of a mechanical assembly with labeled components F, E, and Dtext_image
Technical diagram of a mechanical assembly with labeled parts I, J, and Ktext_image
Technical diagram of a mechanical device with numbered components for identification
text_image
Technical diagram of a mechanical device with numbered components for identification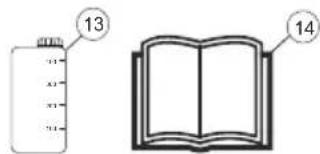
text_image
13 14-
Tuas pendikit
-
Suis berhenti
-
Plat hadapan
-
Tangki bahan api
-
Pemegang pemula
-
Tuas pencekik
-
Bingkai
-
Penutup penapis udara
-
Penutup aliran pam
-
Salur masuk sedutan
-
Salur keluar pelepasan
-
Penutup kebuk pam
-
Tangki pencampur minyak bahan api
-
Manual pengendali
natural_image
Technical line drawing of a mechanical assembly with labeled component A (no text or symbols beyond label)text_image
Technical diagram showing a mechanical or electrical component with labeled parts A, B, and C, including directional arrows and dimension lines.text_image
Technical diagram showing labeled mechanical components with numbered parts H through G
text_image
Technical diagram of a mechanical assembly with labeled components F, E, and Dtext_image
Technical diagram of a mechanical assembly with labeled parts I, J, and Ktext_image
Technical diagram of a mechanical pump assembly with numbered components for identification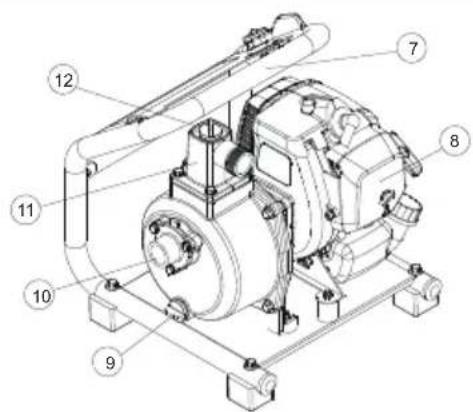
text_image
Technical diagram of a mechanical device with numbered components for identification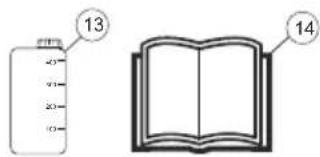
text_image
13 14natural_image
Mechanical assembly diagram showing a motor and gear assembly with labeled component A (no text or symbols beyond label)text_image
Technical diagram showing labeled mechanical components with numbered parts H through G
text_image
Technical diagram of a mechanical assembly with labeled parts F, E, and DĐề lắp ông xả
text_image
Technical diagram of a mechanical assembly with labeled parts I, J, and KKhôi động và dùng
text_image
Technical diagram of a mechanical device with numbered components for identification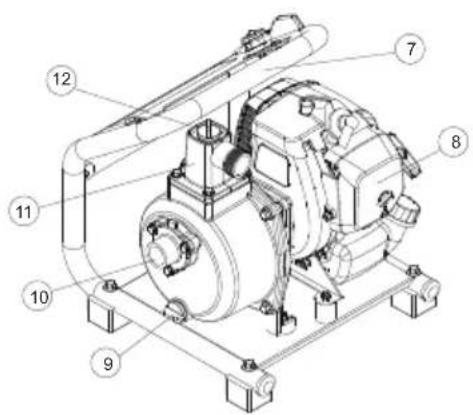
text_image
Technical diagram of a mechanical device with numbered components for identification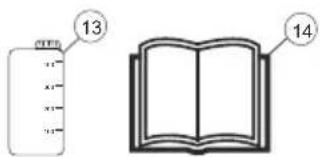
text_image
13 14natural_image
Technical diagram of a mechanical assembly with labeled component A (no text or symbols beyond label)text_image
Technical diagram showing a mechanical or electrical component with labeled parts A, B, and C, including dimension lines and arrows.text_image
Technical diagram of mechanical assembly with labeled components (A-F) and exploded viewtext_image
Technical diagram of a mechanical assembly with labeled parts I, J, and Kเพื่อสตาร์ทและหยุด
text_image
Technical diagram of a mechanical pump assembly with numbered components for identification
text_image
Technical diagram of a mechanical device with numbered components for identification
text_image
13 14text_image
Technical diagram showing labeled mechanical components with numbered parts H through G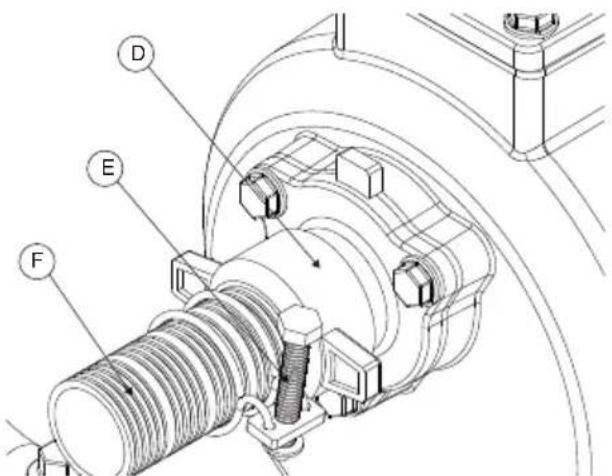
text_image
Technical diagram of a mechanical assembly with labeled parts F, E, and Dلتركيب خرطوم الصرف
text_image
Technical diagram of a mechanical assembly with labeled parts I, J, and Ktext_image
Technical diagram of a mechanical assembly with labeled component A and directional arrow indicating motion or forcetext_image
Technical diagram of a mechanical device with numbered components for identification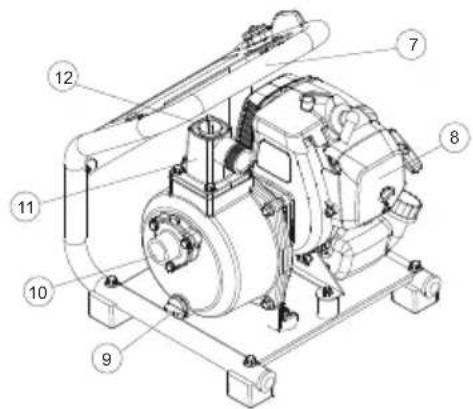
text_image
Technical diagram of a mechanical device with numbered components for identification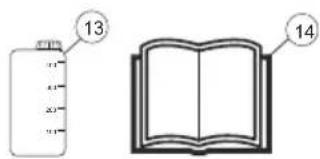
text_image
13 14natural_image
Technical diagram of a mechanical assembly with labeled component A (no text or symbols present)text_image
Technical diagram showing a mechanical or electrical component with labeled points A, B, and C, and directional arrows indicating flow or movement.text_image
Technical diagram showing labeled mechanical components with numbered parts H through G
text_image
Technical diagram of a mechanical assembly with labeled parts F, D, and E安装排放软管
text_image
Technical diagram of a mechanical assembly with labeled parts I, J, and K启动和停止发动机
启动发动机之前
Original instructions
2022-3-31