
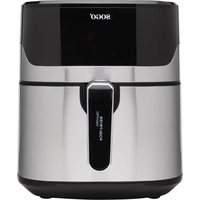
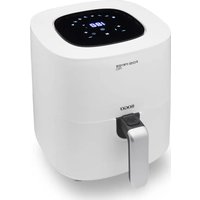
SS10130 - Deep fryer Sogo - Free user manual and instructions
Find the device manual for free SS10130 Sogo in PDF.
| Product type | Air fryer / 8-in-1 multifunction grill |
| Brand | Sogo |
| Model | SS10130 |
| Capacity | 4 liters |
| Power | 1500 - 1700 W |
| Voltage | 220 - 240 V ~ 50/60 Hz |
| Cooking functions | Air Crisp, Roast, Dehydrate, Bake, Pizza, Grill (4 modes), Manual |
| Temperature range | 50 °C to 230 °C (120 °F to 450 °F) |
| Timer | 1 min to 60 min (Air Crisp, Broil, Manual); up to 120 min (Bake, Manual); up to 240 min (Roast); up to 24 h (Dehydrate) |
| Display | LED with alternating temperature/time display |
| Included accessories | Non-stick grill plate, non-stick baking pan, air fryer basket, 8-inch pizza pan |
| Material | Stainless steel and plastic (motor part) |
| Dimensions (approx.) | Approximately 35 x 30 x 35 cm (not exactly specified) |
| Weight (approx.) | Approximately 5 kg (not exactly specified) |
| Safety | Automatic shut-off when lid is open > 4 min; end-of-cooking shut-off; protection against electric shock (Class I) |
| Maintenance and cleaning | Accessories dishwasher safe (except motor part); clean with soft cloth and mild detergent |
| Spare parts and repairability | Repairs by qualified technician; parts from after-sales service (www.sogosat.com) |
| Warranty | Legal warranty (not specified, contact customer service) |
| General information | Indoor household use; external timer not recommended; made in PRC, designed by SOGO (EU) |
Frequently Asked Questions - SS10130 Sogo
User questions about SS10130 Sogo
0 question about this device. Answer the ones you know or ask your own.
Ask a new question about this device
Download the instructions for your Deep fryer in PDF format for free! Find your manual SS10130 - Sogo and take your electronic device back in hand. On this page are published all the documents necessary for the use of your device. SS10130 by Sogo.
USER MANUAL SS10130 Sogo
Caution: please read and preserve these important instructions
IMPORTANTE:
natural_image
Black rectangular plastic tray with internal compartments (no text or symbols)natural_image
Black rectangular plastic tray with handles and side compartments (no text or symbols visible)- Always read the instruction book carefully before use.
- This manual can be downloaded from our website, www.sogo.es
- Keep these instructions for future reference.
SAFETY INSTRUCTIONS FOR THE USER
- Please read the instructions carefully before using the appliance.
- This product is designed for indoor household, non-industrial and non-commercial use. Do not use the item outdoors or for any other purpose. Misuse or improper handling can cause problems with the appliance and can cause injury to the user.
- Make sure that the voltage indicated on the rating plate matches the main wall outlet voltage before plugging in the appliance.
• Always remove the plug from the outlet when the appliance is not in use. Do not leave the appliance unattended when it is switched on. - Before cleaning or storing your appliance, always unplug the appliance from the power source and allow it to cool.
- The appliances are not intended to be operated by means of an external timer or separate remote-control system.
- Do not place or operate the appliance near sources of water.
- Never immerse the appliance or the plug in water or any other liquid. In the event of the
appliance being dropped into water, immediately disconnect it from the main supply and take it to an authorized service agent for repair before using it again.
- Neither immerse the housing, which contains electrical components and the heating elements in water, nor rinse it under the tap.
- To protect against electric shock do not immer-se cord, plugs, or housing in water or any other liquid.
- Do not place or use the appliance and its power cord on or near hot surfaces (for example, cooktops) or open flames.
- Do not leave the power cord hanging by sharp edges and keep it away from hot objects and flames. Do not wrap the cord around the appliance and do not bend it.
- Do not use the appliance if the cord or plug is damaged. In the event that the cord is damaged, it should only be replaced by the manufacturer, its service agent, or similarly qualified persons, to avoid hazards.
- In the event of a malfunction of the appliance or if it has been damaged in any way, return the appliance to the nearest authorized service center for examination, repair or adjustment.
- In case of hardware problems, do not try to repair the product yourself. Repair should only be carried out by qualified technicians.
- When you want to remove the plug from the wall socket, do so by pulling the plug and not by the cord or the appliance itself.
- Make sure your hands are dry before plugging or unplugging.
- This appliance is not to be used by the persons (including children) with reduced physical, sensory or mental capabilities or lack of experience and knowledge, unless they have been given supervision or instruction.
- This appliance can be used by children aged from 8 years and above, and persons with reduced physical, sensory or mental capabilities or lack of experience and knowledge if they have been given supervision or instruction concerning, use of the appliance in a safe way and understand the hazards involved.
• Children must be supervised to ensure that they do not play with the appliance.
- Children should not perform cleaning or maintenance, unless they are over 8 years old and supervised.
- Keep the appliance and its cord out of reach of children less than 8 years.
- Do not allow the children to use the appliance without supervision.
- Do not use the appliance for any other purpose than described in this manual.
- Do not let the appliance operate unattended.
- Never use accessories that are not recommended by the manufacturer.
- Always disconnect the appliance from the mains when it is left unattended and before assembling, disassembling or cleaning.
- Do not use the appliance for any other purpose than described in this manual.
- Do not let the appliance operate unattended.
- Do not place the appliance against a wall or against any other appliance. Leave at least 10
cm free space from the all sides before placing the appliance.
- Unplug from outlet when not in use and before cleaning. Allow to cool before putting on or taking out accessories.
- Ensure that the appliance is placed on a horizontal, even and stable surface.
• After cooking, frying basket and inner pot should not be placed directly on the countertop to avoid burning the countertop.
- Do not place the following items in the grill for grilling, such as paper, cards, plastic, cloth, and flammable items.
- This appliance is intended to be used in household and similar applications such as:
a. staff kitchen areas in shops, offices and other working environments;
b. farm houses;
c. by clients in hotels, motels and other residential type environments;
d. bed and breakfast type environments.
Instruction to be followed while using the appliance
• Always put the ingredients to be fried in the basket, to prevent it from coming into contact with the heating elements.
- Do not cover the air inlet and the air outer openings while the appliance is operating.
- Do not fill the pan with oil as this may cause a fire hazard.
- Extreme caution must be taken when moving an appliance containing hot oil or other hot li-
quids.
- Never touch the internal part of the appliance while in use.
- The temperature of accessible surfaces may be high when the appliance is operating
- Do not place anything on top of the appliance to prevent from any type of burn cause of hot surface.
- During air frying, hot steam is released through the air outlet openings, Keep your hands and face at a safe distance from the steam and from the air outlet openings.
- Also be careful of hot steam and air when you remove the pan from the appliance.
- Immediately unplug the appliance if you see dark smoke coming out of the appliance. Wait for the smoke emission to stop before you remove the pan from the appliance.
- WARNING: Do not touch hot surfaces.
- WARNING: This equipment shall be used with CAUTION as this electrical appliance contains a heating function. Surface of this appliance is also different from other functional surfaces which can produce high temperatures. Since temperatures are differently perceived by different persons. The equipment must be touch only at intended handles and gripping surfaces with the help of heat protectors like gloves or similar type of clothing. Otherwise let it for sufficient time to cool down before touching the hot surfaces.
Introduction
This electric multifunction grill provides an easy and healthy way of preparing your favourite dishes. The best part of using the multifunction grill is that you can prepare as many types of dishes and have them without worry and or being conscious about consuming fatty foods, as it does not consume oil at all or if it consumes oil, then only a very little quantity. By using hot rapid air circulation, it is able to make numerous dishes. The best part is that the multifunction grill heats food at all directions and most of the ingredients do not need any oil.
TECHNICAL SPECIFICATIONS
| Model No. Voltage | Power Frequency | Capacity | ||
| SS-10130 220- | 240V 1500-1700W | 50-60Hz 4L |
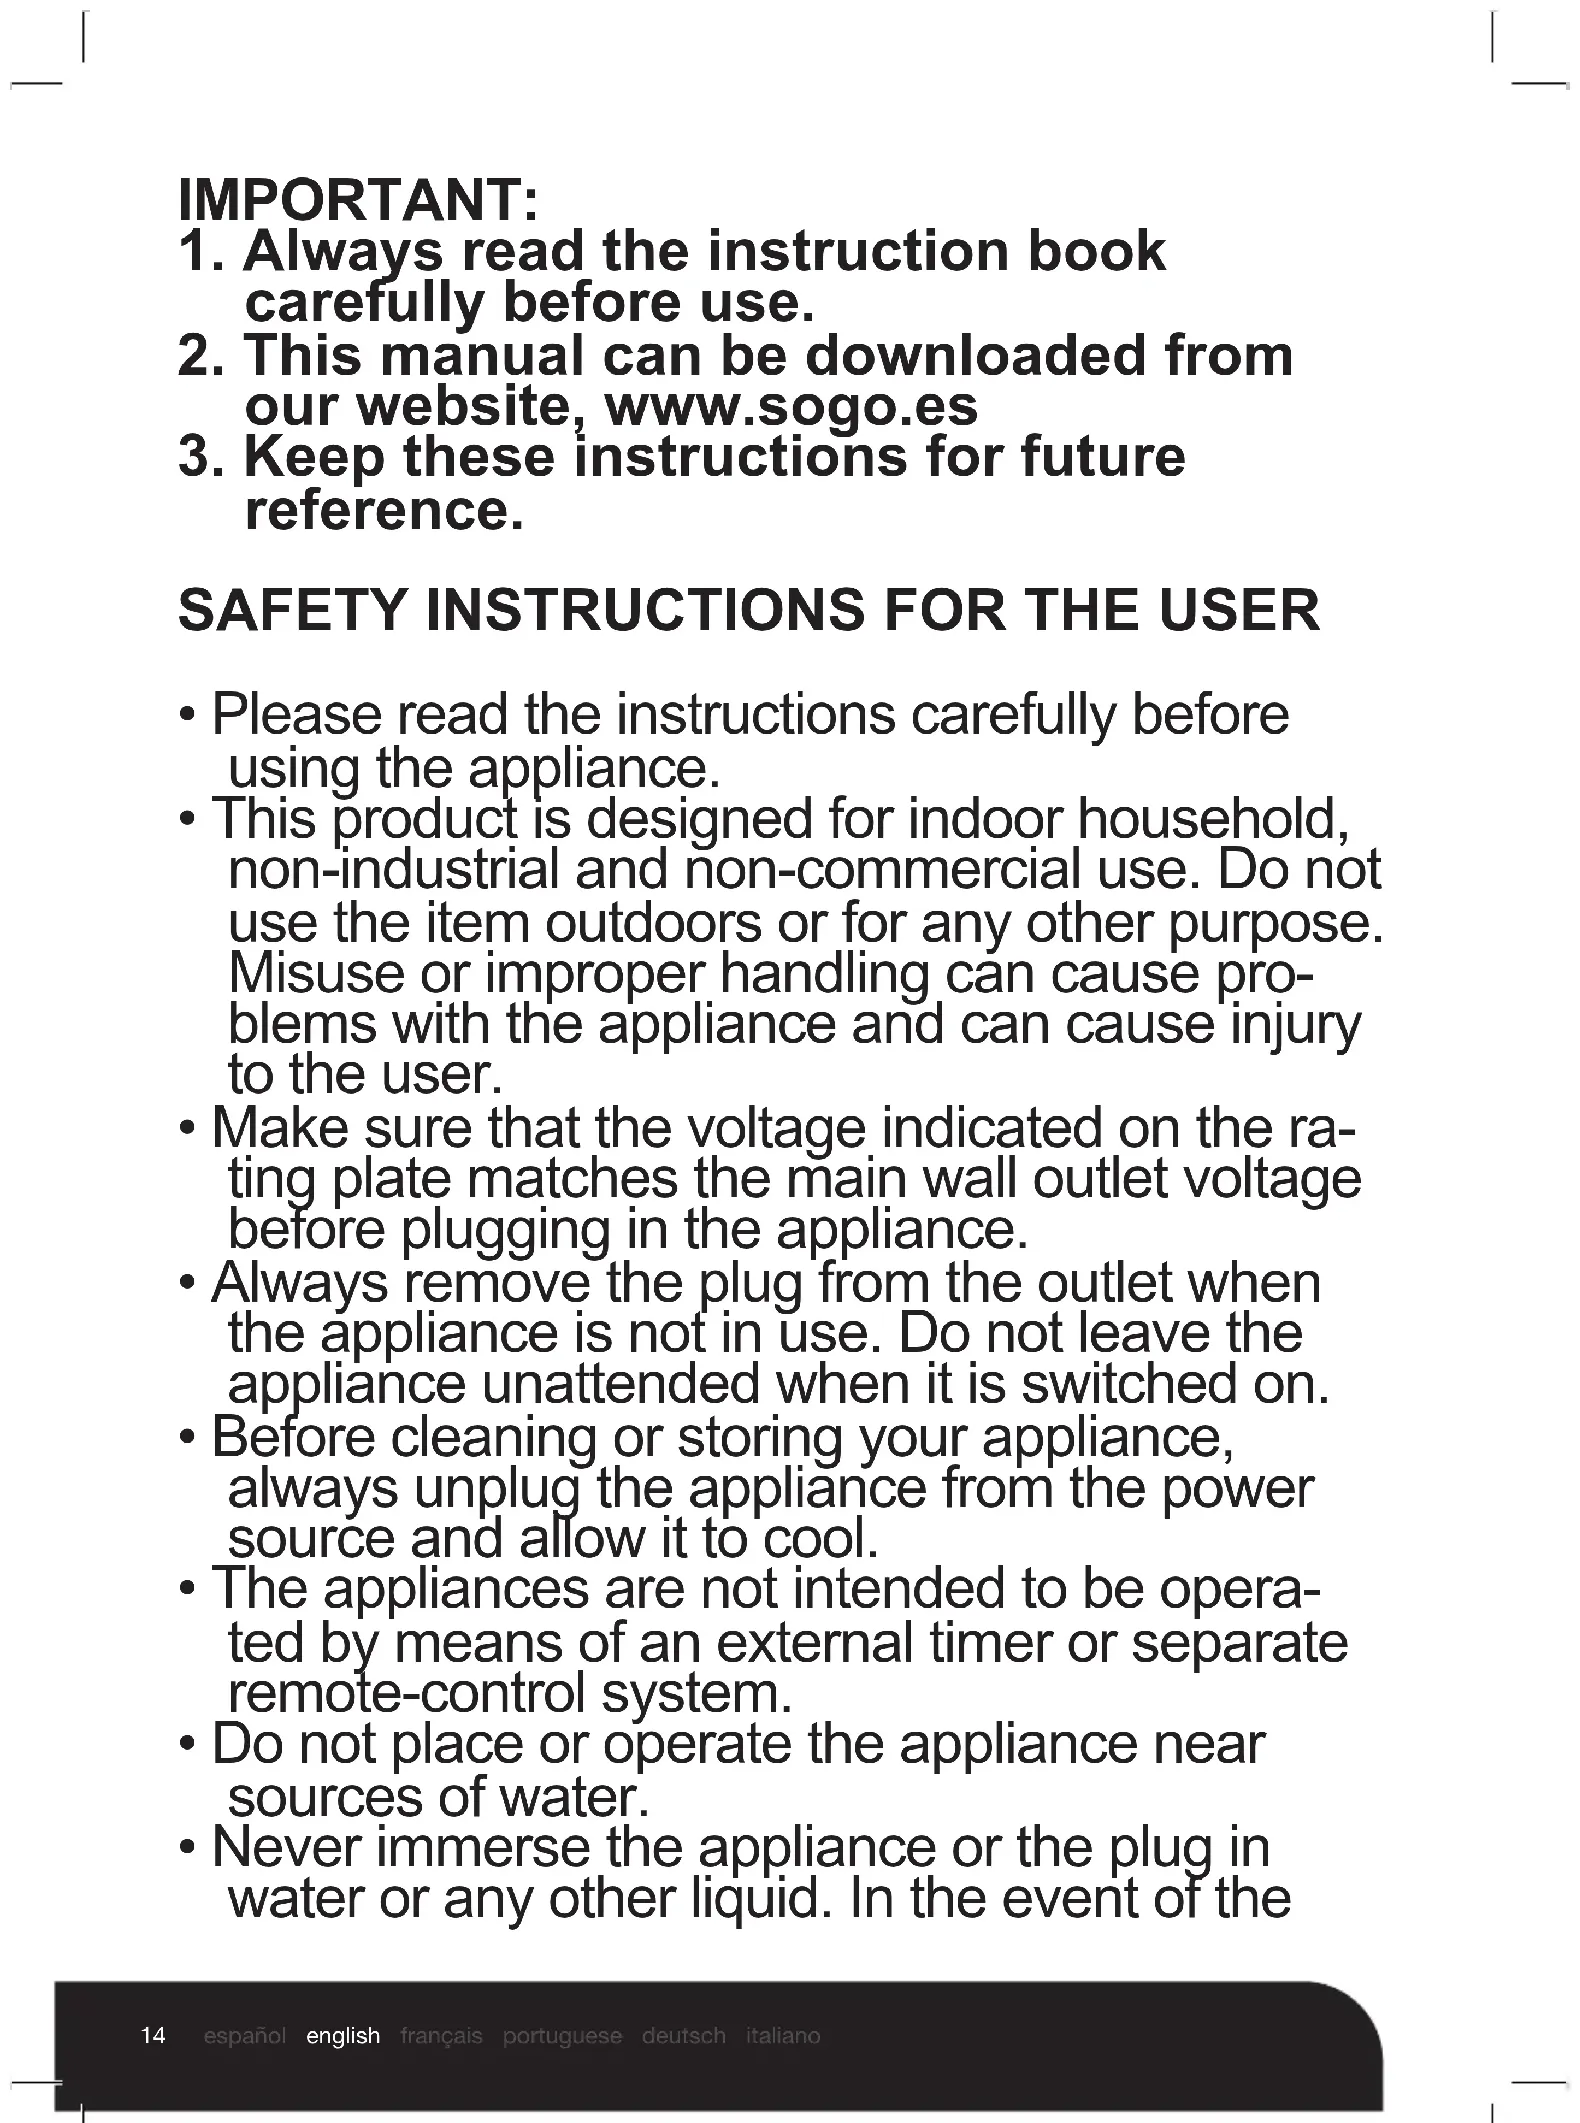
NAMES OF MAIN PARTS
ACCESSORIES
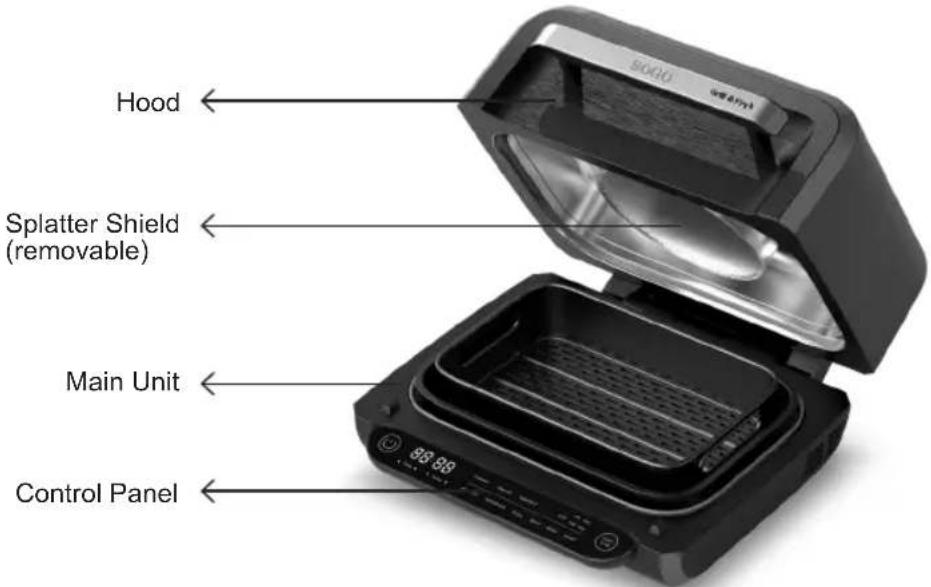
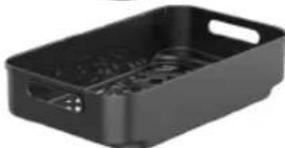
Non-Stick Grill Plate: Use to Grill the food, by keeping it inside the Non-stick cooking pot.
natural_image
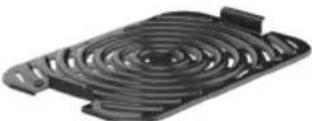
Black rectangular plastic tray with internal compartments (no text or symbols)Non-stick cooking pot: Can be used to place underneath cooking grill plate and also can be used to dehydrate, Broil and Roast.
natural_image
Black rectangular plastic tray with handles and side compartments (no text or symbols visible)Air fryer basket: Use to cook fried food.

Non-stick Pizza pan or baking pan: Use to bake the pizza of 8" and also baking the cakes.
KNOW YOUR AIR FRYER GRILL CONTROL PANEL
The control panel display shows time in an HH:MM format. Also displays cooking temperature and cooking time alternating way.

CONTROL PANEL FUNCTIONS
| S.No. Functions Functionality | ||
| 1 | Air crisp | This program can be used to air fry the food, for crispiness and crunch with little or no oil, like French fries. |
| 2 Roast To tenderize meats. | roast vegetables and more. | |
| 3 | Dehydrate | To dehydrate meats, fruits and vegetables for healthy homemade snacks. |
| 4 | Bake | This function can be used to bake cakes, cookies and many more baking desserts. |
| 5 | Pizza | To use to cook pizza 8 inches size. With this appliance a 8” pizza pan has been provided. |
| 6 Broil This function is suitable for thawing all kinds of meat. | ||
| 7 | Manual | This is an additional function for manual setting for different kinds of food you want to prepare. With the help of this function you can cook any kind of food, according to your need and choice by adjusting the time and temperature. |
| 8 Grill Grill indoors while creating even char, grill marks and grilled flavour.There are 4 grill functions are available in this appliance.To bring on to the Grill function press the grill function and then keep pressing until you get the desired grill function mode. | ||
Note:
- The default grill mode is on high temperature, and can be changed accordingly pressing the grill touch function.
- In this function the temperature is fixed but the time can be changed, as per need with the help of time left and right touch arrows buttons.
TIPS BUTTONS
Preheat: Press the START/STOP button to begin preheating after choosing the pre-set program (Function buttons above mentioned), The light of preheat button will turn on. It takes about 5 minutes to preheat, depending on the selected temperature setting.
NOTE: Time or temperature of preheat process are set, cannot be adjusted. If no need the preheat process, press the chosen function/program button again during the preheat process, then cancel
Add food: When preheating is complete, the unit will beep and the light of Add Food button will turn on. Open the hood and place food on the cooking plate. Once the hood is closed, cooking will begin and the timer will start counting down.
Note:
- If need to open the hood during the cooking process, unit will enter into the stand by mode. Once close the hood, unit will continue the cooking automatically, no need to press START/STOP button again.
- The cooking process can be paused by pressing the Start/ Stop button.
- During the cooking process, time and temperature can be adjusted by pressing the TIME & TEMP arrow buttons.
- If you do not open the hood to add the food inside once the preheat process finishes, unit will keep working in the preheat mode.
OPERATING BUTTONS
Power Button:
Once the unit is plugged in, press the power button ⏻ to turn on the unit. It will enter into the standby mode, lights of power button and display turn on. While pressing during cooking process it stops the current cooking function and turns off the unit.
Once the cooking process finished, unit will beep 5 sounds and display shows END, lights of buttons will be off, except the Power button, heating element stops working, motor will keep working 1 minute after that and then display turn off. When all lights turn off, automatically unit enters into switch off mode. If need to stop cooking just press the power button to switch off.
TEMP arrows:
Use the left and right ◀ TEMP ▶TEMP arrows to adjust the cooking temperature in any function. you can choose any program and then adjust the cooking temperature if needed and once changed then press START/STOP button to start cooking.
While using the Grill function, by pressing the GRILL button or TEMP arrow button Grills different modes can be changed from -LOW, MED, HIGH and MAX.
To adjust the temperature, press the Temp arrow in Right or Left direction, by pressing the Right arrow direction, it increases the temperature and by pressing the left arrow button it decreases the temperature. Temperature can be changed 10^ F/ 5^ C by pressing once the arrow button and keep pressing the arrows buttons until you get the desired temperature. If keep pressed the arrow buttons more than 2 seconds, the temperature can be changes more rapidly as per 30^ F/ 10^ C.
TIME arrows:
Use the left and right ◀ TIME ▶TIME arrows to adjust the cooking time in any function, choose any program and then adjust the cooking time as per need, then press START/STOP button to start cooking.
To adjust the time, press the time arrow in Right or Left direction, by pressing the Right arrow direction, it increases the time and by pressing the left arrow button it decreases the time. Time can be changed with the deviation of 1 minute by pressing once the arrow button and keep pressing the arrows buttons until you get the desired time. If keep pressed the arrow buttons more than 2 seconds, the time will change more rapidly as per 5 min. / per pressing.
NOTE: To adjust temperature or time during cooking, press the right and left arrow keys. The time and temperature setting can be changed at any time before starting cooking or while cooking process. It is recommended to change the time and temperature before starts cooking. Changing time and temperature during preheat and cooking process, will be only for the cooking process and not for the preheat process.
START/STOP button: once changed the time and temperature, press the START/STOP button to begin cooking. If during the preheat process the START/STOP button being pressed the unit enters into the pause mode and display starts flashing and shows the remaining time of cooking process. To restart the cooking process, press START/STOP button again and unit will continue working.
If need to change the function mode during the preheat and cooking process, need to press START/STOP button and then re-choose the function which you desire and press again Start/Stop button and unit will start cooking with the new selected function.
STANDBY MODE: The unit will enter into the standby mode if there is not any interaction with the control panel for about 1 min.
Also, the unit will enter into the standby mode if choosing function is stop or cancelled and there is not any interaction with the control panel for 5 min.
Note: while the unit is in standby mode, at the same time, press Temperature ▶ arrow button and Broil button together to change temperature unit from °C to °F, display will show temperature in F, and if need to change again do the same process again to penal displays the temperature in °C mode. During the preheat and cooking process also the temperature unit can be changed following the same process as mentioned above.
BEFORE FIRST USE
- Remove all packaging material, promotional labels, and tape from the unit.
- Remove all accessories from the package and read this manual carefully. Please pay particular attention to operational instructions, warnings, and important safeguards to avoid any injury or property damage.
- Wash the grill grate, splatter shield, Air fryer basket, cleaning brush, veggie tray, grill plate and cooking pot with warm, soapy water, then rinse and dry thoroughly. The grill plate, splatter shield, Air fryer basket, cooking pot are also dishwasher safe. NEVER clean the main unit (motor part) in the dishwasher.
USING YOUR 8 IN 1 INDOOR GRILL AND AIR FRYER
SPLATTER SHIELD
Located on the underneath of the hood, the splatter shield keeps the heating element clean. ALWAYS ensure the splatter shield is installed while cooking, Failure to use the splatter shield will result in oil build up on the heating element, which can cause smoking at the time of cooking.
Removing the splatter shield
Remove the splatter shield for cleaning after every use. First switch off the appliance and detach the cord from the wall outlet, allow the splatter shield to cool completely, then remove it by using your thumb to release the front clip by pushing the front clip upward and using your other hand to pull one of the tabs. This will release the splatter shield, allowing you to pull it out of the slot along the back of the hood.
Installing the splatter shield
To install, gently push the splatter shield into the back of the hood. Insert the back tab o shield with the slot on the back of the hood. Then push the splatter shield upward until it clicks into the clip on the front of the hood.
COOKING FUNCTIONS
Ensure the unit is plugged in before turning it on, Press the power button.
GRILL
- Place the cooking pot in the unit with the indent on the pot aligned with the rear bump on the main unit. Then place the grill grate in the pot.
- Press the GRILL button. The default temperature is HIGH 400°F / 205°C and time is 20 minutes. Press Grill or TEMP arrow buttons to adjust the temperature setting or grill mode available including Low, Med, High and Max. if need press TIME arrow to adjust cooking time from 1 min to 30 min.
- Press the START/STOP button to begin preheating. The light will turn on during preheating.
- When Preheating is complete, the light will turn off and unit will beep for 5 times.
- The light of ADD FOOD will turn on.
- Open the hood and place ingredients on the grill grate. Once the hood is closed, cooking will begin and the timer will start counting down.
NOTE: During cooking, you can open the hood to check or flip your food. The timer will pause when the hood is opened and then automatically resume after it is closed.
- When cooking is completed, the unit will beep 5 times and END will appear on the LED display screen. Keep the hood open after removing the food, so that the unit will cool down more quickly.
GRILL CONTROL
When using the Grill function, you will need to select the grill grate temperature setting. Below are recommended temperature levels for common food ingredients.
| LOW300°F/150°C | MED350°F/175°C | HIGH400 °F/205°C | MAX450°F/230°C |
| Bacon Sausages Frozen meats Steaks Fruits | |||
| Using thick barbecue sauce | Marinated sauced meat | Chicken wings Frozen seafood | |
| Calzones Whole Chicken Kebabs | |||
| Hot dogs | |||
AIR CRISP
- Place the cooking pot in the unit with the indent on the pot aligned with the bump on the main unit. Place the air fryer basket in the pot, then close the hood.
- Press the AIR CRISP button. The default temperature is 400^ F / 205^ C and default time is 18 minutes. Press TEMP arrow button to adjust the temperature setting from 120^ F / 50^ C to 450^ F / 230^ C and press TIME arrow to adjust cooking time from 1min to 60 mins.
- Press the START/STOP button to begin preheating. The light will turn on during preheating.
- When Preheating is completed, the light will turn off and unit will beep for 5 times.
- The light of ADD FOOD will turn on.
- Open the hood and place ingredients on the air fryer basket. Once the hood is closed, cooking will begin and the timer will start counting down.
- For best result, we recommend shaking ingredients frequently. When you open the hood, the unit will enter into the pause mode. Use silicone tipped tongs when tossing your food or oven mitts to shake the basket. When done, replace the basket and close the hood. Cooking will automatically resume after hood is closed.
ROAST
- Place cooking pot in the unit with the indent on the pot aligned with the bump on the main unit, then close the hood.
- Press the ROAST button. The default temperature is 400^ F / 205^ C and default time 25 mins will display. Use the TEMP arrows to adjust cooking temperature from 120^ F / 55^ C to 425^ F / 220^ C and press TIME arrow to adjust cooking time from 1 min to 240 mins.
- Press the START/STOP button to begin preheating. The light will turn on during preheating.
- When Preheating is complete, the light will turn off and beep for 5 times.
- The light of ADD FOOD will turn on.
- Open the hood and place ingredients in the pot. Once the hood is closed, cooking will begin and the timer will start counting down.
BAKE
- Place cooking pot in the unit with the indent on the pot aligned with the bump on the main unit, then close the hood.
- Press the BAKE button. The default temperature is 350^ F / 175^ C and default time is 25mins will display. Use the TEMP arrows to adjust cooking temperature from 120^ F / 50^ C to 400^ F / 205^ C and press TIME arrow to adjust cooking time from 1 min to 120 min.
- Press the START/STOP button to begin preheating. The light will turn on during preheating.
- When Preheating is completed, the light will turn off and beep for 5 times.
- The light of ADD FOOD will turn on.
- Open the hood and place ingredients in the pot. Once the hood is closed, cooking will begin and the timer will start counting down.
DEHYDRATE
- Place cooking pot in the unit with the indent on the pot aligned with the bump on the main unit, then add a single layer of ingredients to the bottom of the pot. Place the Air Fryer basket in the pot and add a layer of ingredients to the bottom of the basket. Close the hood.
- Press the DEHYDRATE button. The default temperature is 120^ F / 50^ C and default time is 360mins will display. Use the TEMP arrow buttons to adjust cooking temperature from 120^ F / 50^ C to 200^ F / 90^ C and press TIME arrow buttons to adjust cooking time from 0.5H to 24H. Note: By pressing longer than normal or continue keep pressing the button, the time will change in the intervals of 30 minutes.
- Press the START/STOP button to begin. The unit does not need to preheat.
- When dehydration time is complete, the unit will beep and END will appear on the display screen. Remove your food and close the hood.
Note: Preheat function does not work in this cooking mode.
PIZZA
- Place pizza plate in the unit with the indent on the pot aligned with the bump on the main unit, then close the hood.
- Press the Pizza button. The default temperature is 380^ F / 195^ C and default time is 25mins will display. Use the TEMP arrows to adjust cooking temperature from 120^ F / 50^ C to 400^ F / 205^ C and press TIME arrow to adjust cooking time from 1min to 90 mins.
- Press the START/STOP button to begin preheating. The light will turn on during preheating.
- When Preheating is completed, the light will turn off and unit will beep for 5 times.
- The light of ADD FOOD will turn on.
- Open the hood and place ingredients in the pizza plate. Once the hood is closed, cooking will begin and the timer will start counting down.
- Can keep checking the cooking status by opening the hood and machine will automatically enters into the pause condition, once the cooking process is completed the unit will beep for a while and END message status will appear on the screen.
BROIL
- Place cooking pot in the unit with the indent on the pot aligned with the bump on the main unit, Place ingredients in the pot, then close the hood.
- Press the Broil button. The default temperature is 400^ F / 205^ C and default time is 10mins will display. Use the TEMP arrows to adjust cooking temperature from 120^ F / 50^ C to 450^ F / 230^ C and press TIME arrow to adjust cooking time from 1min to 60 min.
- Press the START/STOP button to begin. The unit does not preheat in Broil mode.
- When cook time is complete, the unit will beep and END will appear on the display screen. Remove your food and close the hood.
Note: Preheat function does not work in this mode.
MANUAL
- In this function user can set the time and temperature according the food ingredients and voice.
- The default temperature is 120^ F / 50^ C and default time is 1 min, Use the TEMP arrows to adjust cooking temperature from 120^ F / 50^ C to 450^ F / 230^ C and press TIME arrow to adjust cooking time from 1 min to 120 min.
CLEANING AND MAINTENANCE
- Unplug the power cord from the wall outlet and allow the grill to cool down completely, before start cleaning the indoor grill.
- The inner and outer surfaces of the grill, grill plate, cooking pot and crisper basket can be cleaned with a soft cotton cloth or sponge with a neutral detergent and cleaned with water.
- Do not use hard brushes or articles for cleaning to avoid damaging the inner surface of the grill and the protective layer of the accessories.
- Do not use toxic and corrosive cleaning agents such as gasoline, thinners, or polish.
- The cleaned parts must be wiped dry before plugging in.
- Please do not clean the heating tube.
- Do not immerse the grill in a liquid such as water.
SPECIAL FEATURES AND CONDITIONS
- Under any condition, if heating element works, motor should work at the same time if not take the unit to your nearest service center or call company service center.
- Under working condition, if open the hood, unit goes into pause stage, heating element and motor should stop working. Close the hood, unit resume working.
- During working condition, if open the hood more than 4 minutes no other operation, unit beeps 2 sounds every 10 seconds, after 1 minute, unit switches off automatically.
- Under working or standby mode, open the hood, display shows OPEN; under switch off mode, open the hood, display shows - - - .
- Unit with function self-checking and defectives notification.
IMPORTANT:
natural_image
Black rectangular plastic tray with internal compartments (no text or symbols visible)natural_image
Black rectangular plastic tray with handles and side compartments (no text or symbols visible)FONCTIONS DU PANNEAU DE COMMANDE
natural_image
Black rectangular plastic tray with internal compartments (no text or symbols)natural_image
Black plastic tray with handles and internal compartments (no text or symbols visible)natural_image
Black rectangular plastic tray with internal compartments (no text or symbols)natural_image
Black rectangular plastic tray with handles and internal compartments (no text or symbols visible)FUNKTIONEN DES BEDIENFELDS
natural_image
Exploded view of a black plastic kitchen appliance showing top, front, side, and interior views (no text or symbols)FUNZIONI DEL PANNELLO DI CONTROLLO
NOTE: To adjust temperature or time during cooking, press the right and left arrow keys. The time and temperature setting can be changed at any time before starting cooking or while cooking process. It is recommended to change the time and temperature before starts cooking. Changing time and temperature during preheat and cooking process, will be only for the cooking process and not for the
preheat process.
DECLARATION OF CONFORMITY
This device complies with Low Voltage Directive 2014/35/EC, Electromagnetic Compatibility Directive 2014/30/EU, Directive 2015/863/EU on the restriction of the use of certain hazardous substances in electrical and electronic equipment and Directive 2009/125/EC on the eco-design requirements applicable to energy-related products.


DÉCLARATION DE CONFORMITÉ
This symbol means that in case you wish to dispose of the product once its working life has ended, take it to an authorised waste agent for the selective collection of waste electrical and electronic equipment (WEEE).

Imported by:
Sanysan Appliances S.L, NIF: B98753056, C/ Barcas 2, 2
46002 Valencia, Spain
Product made in P.R.C. – Designed by SOGO based on the European Quality Standards
Customer Service: www.sogosat.com / sogosat@sogosat.com / 0034 902 222 161
- IMPORTANTE:
- SAFETY INSTRUCTIONS FOR THE USER
- Instruction to be followed while using the appliance
- Introduction
- TECHNICAL SPECIFICATIONS
- NAMES OF MAIN PARTS
- ACCESSORIES
- KNOW YOUR AIR FRYER GRILL CONTROL PANEL
- CONTROL PANEL FUNCTIONS
- Note:
- TIPS BUTTONS
- OPERATING BUTTONS
- Power Button:
- TEMP arrows:
- TIME arrows:
- BEFORE FIRST USE
- USING YOUR 8 IN 1 INDOOR GRILL AND AIR FRYER
- SPLATTER SHIELD
- Removing the splatter shield
- Installing the splatter shield
- COOKING FUNCTIONS
- GRILL
- GRILL CONTROL
- AIR CRISP
- ROAST
- BAKE
- DEHYDRATE
- PIZZA
- BROIL
- MANUAL
- CLEANING AND MAINTENANCE
- SPECIAL FEATURES AND CONDITIONS
- IMPORTANT:
- FUNZIONI DEL PANNELLO DI CONTROLLO
- DECLARATION OF CONFORMITY
- DÉCLARATION DE CONFORMITÉ
- Imported by:
Brand : Sogo
Model : SS10130
Category : Deep fryer