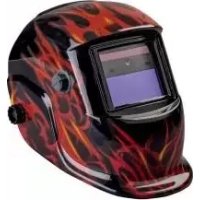
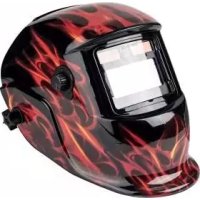
PSHL 2 A1 - Welding helmet PARKSIDE - Free user manual and instructions
Find the device manual for free PSHL 2 A1 PARKSIDE in PDF.

| Product Type | Auto-darkening welding helmet |
| Filter dimensions | 110 x 90 x 10 mm |
| Field of View | 9.2 x 4.2 cm |
| Light State | DIN 4 |
| Dark State (adjustable) | DIN 9 to DIN 13 |
| Switching time light → dark | 0.23 to 0.72 ms |
| Switching time dark → light | 0.15 to 0.45 s |
| UV/IR Protection | DIN 16 |
| Power Supply | Solar cell (batteries for LED lighting) |
| Compatible welding processes | MMA, MIG, MAG, TIG, plasma, plasma cutting |
| Operating temperature | -5 °C to +55 °C |
| Storage temperature | -20 °C to +70 °C |
| Maximum lifespan | Approximately 6 years |
| Settings | Shade level, sensitivity, delay, headband |
| Maintenance | Soft dry cloth, pure alcohol or disinfectant; do not use water on the filter |
| Safety | Do not use for laser or oxyacetylene welding; do not place on hot surfaces; do not open the housing |
| Spare parts | Protective lens (109.9 x 85.8 mm), gasket (98.3 x 45.9 mm) |
| Warranty | 3 years |
| Package contents | 1 helmet, 1 instruction manual |
Frequently Asked Questions - PSHL 2 A1 PARKSIDE
User questions about PSHL 2 A1 PARKSIDE
0 question about this device. Answer the ones you know or ask your own.
Ask a new question about this device
Download the instructions for your Welding helmet in PDF format for free! Find your manual PSHL 2 A1 - PARKSIDE and take your electronic device back in hand. On this page are published all the documents necessary for the use of your device. PSHL 2 A1 by PARKSIDE.
USER MANUAL PSHL 2 A1 PARKSIDE
text_image
PDF online www.lidl-service.com PARKSIDEAUTO-DARKENING WELDING HELMET PSHL 2 A1

AUTO-DARKENING WELDING HELMET
Operation and Safety Notes
Translation of the original instructions

AUTOMATISCHE LASHELM
Before reading, unfold the page containing the illustrations and familiarise yourself with all functions of the device.
DK
GB / IE / NI Operation and Safety Notes Page 5
text_image
Technical diagram showing exploded view of a mechanical assembly with numbered components and labeled parts
text_image
A ON LED OFF TANT 10 11 12 13 14 A OPEN LOCK D 15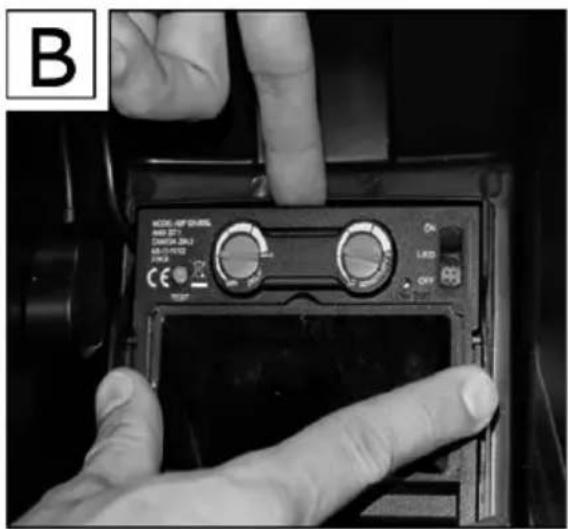
text_image
B MODEL REF SERIES OFF 371 DINJAM 280Ω LPG/LOTE 240Ω CE OFF OK 1.500 OFF
text_image
C OFFICE LOCK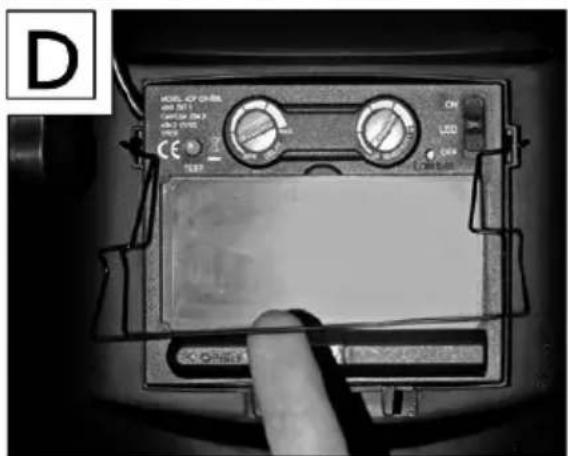
text_image
D MODEL: CIP ON-REF OFF SET CANCE ON 3 OFF ON CE OFF ON LED OFF OFF OFFList of pictograms used....Page 6
Introduction Page 6
Intended use Page 6
Parts Description ......Page 6
Technical Data Page 7
Scope of delivery Page 7
Safety instructions....Page 7
Initial use....Page 9
Cleaning and Maintenance......Page 10
Environmental instructions and disposal information......Page 10
Troubleshooting......Page 11
Warranty and service information....Page 11
Warranty terms ......Page 11
Extent of warranty....Page 11
Processing of warranty claims Page 12
Service......Page 12
Label meanings Page 12
EU Conformity Declaration......Page 13
| List of pictograms used | |||
 | Caution!Read instructions for use! |  | Attention, potential dangers! |
 | Do not dispose of electrical equipment in household waste! |  | Important notice! |
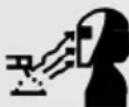 | Attention: The welding helmet does not provide any eye, ear or face protection! | 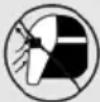 | Warning: arc rays can injure the eye's retinas! |
Auto-Darkening Welding Helmet PSHL 2 A1
- Introduction

Congratulations! You have chosen a high-quality product from our
company. Familiarise yourself with the product before using it for the first time. In addition, please carefully refer to the instructions for use and the safety instructions below.
KEEP OUT OF THE REACH OF CHILDREN!
- Intendeduse
This welding helmet protects the eyes and face from sparks, splashes and UV rays while welding and automatically adapts to the lighting conditions. It ensures an immediate, sensor-controlled darkening upon arc ignition as well as automatic illumination at the end of the welding procedure (including a short delay to protect against afterglow). This welding helmet provides a freely adjustable DIN protection level with a lateral adjustment wheel and is also adjustable for flying sparks during grinding work. Only use the product as described and for its indicated purpose. Keep these instructions in a safe place. When passing this product on to others, please also include all the documents. Any use other than the intended is prohibited and
potentially dangerous. Damages resulting from noncompliance or misuse are not covered by the warranty and are not included in the manufacturer's liability. This device has been designed for household use and may not be used for commercial or industrial purposes.
- Parts Description
1 Viewing pane
2 Helmet casing
3 Solar cell
4 Rear pane
5 Headband
6 Adjustable headband button
7 Adjustable headband buttons
8 UV filter
9 Darkening regulator
10 Test button
11 Delay setting
12 Sensitivity setting
13 Low battery display
14 LED Lighting switch
15 Battery compartment
16 Bracket
- Technical Data
Filter cartridge size: 110 x 90 x 10 mm
Field of vision: 9.2 x 4.2 cm
Bright state: DIN 4
Dark state: DIN 9-DIN 13
Switching times
Bright to dark: 0.23\~0.72 ms
Dark to bright: 0.15\~0.45 s
Switch on / off: Fully automatic
Energy supply: Solar cell
UV / IR protection: DIN 16
Operating temperature: -5 °C to +55 °C
Storage temperature: -20 °C to +70 °C
Welding procedure: MMA, MIG, MAG,
TIG, plasma cutting and
plasma welding
Maximum service life: approx. 6 years
- Scope of delivery
1 Auto-Darkening Welding Helmet
1 Set of instructions for use

Safety instructions
Please carefully read the instructions for use and follow the specified notices. Familiarise yourself with the equipment, its proper use and the safety notices using these instructions for use. All technical data about this welding helmet is on the label, please learn about this product's technical facts.
■ This device may be used by children aged 16 years and up, as well as by persons with reduced physical, sensory or mental
capacities, or lacking experience and / or knowledge, so long as they are supervised or instructed in the safe use of the device and understand the associated risks. Do not allow children to play with the product. Cleaning and user maintenance should not be performed by children without supervision.
■ The welding helmet with automatic darkening is not suitable for laser and gas welding.
■ Never place the welding helmet on hot surfaces.
■ Never open the welding helmet. Never carry out repairs on or modifications to the welding helmet. These may only be carried out by trained experts.
■ Please ensure that you have set the automatic darkening before each welding procedure.
■ The safety visor should not be opened. It protects the filter from dirt and damage.
If the filter does not automatically darken, then immediately end the welding procedure and contact the manufacturer.
- Only use the welding helmet in temperatures between -5 °C and +55 °C. The filter's reaction time will slow down if this temperature has not been reached or is exceeded.
■ Clean the filter, the surface of the helmet and the solar cells regularly.
■ Replace the protective visor if scratches or damages appear.
■ The welding helmet does not provide protection against impact.
- Frequent use, cleaning or storage can mean that the service life is less than 6 years. Replace the welding helmet immediately if the viewing panel gets scratched or the viewing panel is visibly damaged in any other way.

ATTENTION! Materials that
come into contact with the wearer's skin may cause allergic reactions in people with sensitive skin.

ATTENTION! Eye protection
can represent a hazard for the wearer if it is worn over normal corrective glasses due to the impact from high-speed particles.

ATTENTION! If protection
against high-speed particles at extreme temperatures is required, the eye protection chosen must be labelled with the letter T directly after the letter for the impact intensity, i. e. FT, BT or AT. If the letter for the impact intensity is not followed by the letter T, the eye protection may only be used against high-speed particles at room temperature.
- Initial use
Note: Only use the welding helmet with the rear pane mounted 4.
Note: Keep the UV filter's sensors 8 clean and clear.

Check that the welding helmet and the protective screen are intact before each use. If the protective screen has scratches, cracks or irregularities, it must be replaced before use, as serious injuries may occur otherwise.
■ Remove the protective film from the inside and the outside of the visor.
Put on the welding helmet with the help of the headband 5. Press the adjustment buttons 6 to make the welding helmet tighter and the adjustment button 7, to fix the welding helmet. When adjusting, ensure that your head is placed as far into the helmet as possible and that it sits as close as possible to your face.
■ Set the appropriate darkening shade before the welding procedure (see the following table). The darkening shade may be manually
adjusted from 9 to 13 by twisting the darkening regulator 9 on the outside of the helmet.

ATTENTION! The darkening regulator 9
has the setting position "grind". If the darkening regulator 9 is set to this position the automatic darkening is deactivated.
Only use this setting when you do not wish to use the welding helmet for welding. The automatic darkening is then no longer active.
- Check the light density before each use.
Test procedure: Bring the viewing panel closer to an external light source with a value of more than 40 W and examine whether or not the screen darkens or illuminates. To do so, turn the darkening control 9 clockwise from "Grind" to the next position. This sets the filter to auto-darkening mode. If you turn the darkening control 9 anticlockwise back to "Grind", the filter's auto-darkening feature is once again deactivated.
To replace the UV filter/solar cell, press the locking lugs on both sides of the filter outwards (see figure B). Then use a finger to lift the filter at the notch at the top of the filter. (Variant: Black)
Table for setting the darkening shades
| Arc current (ampere) | |||||||||||||||||||||||||
| 1,5 | 6 | 10 | 15 | 30 | 40 | 60 | 70 | 100 | 125 | 150 | 175 | 200 | 225 | 250 | 300 | 350 | 400 | 450 | 500 | 600 | |||||
| SMAW | 8 | 9 | 10 | 11 | 12 | 13 | 14 | ||||||||||||||||||
| MAG | 8 | 9 | 10 | 11 | 12 | 13 | 14 | ||||||||||||||||||
| TIG / GTAW | 8 | 9 | 10 | 11 | 12 | 13 | |||||||||||||||||||
| MIG (heavy) | 9 | 10 | 11 | 12 | 13 | 14 | |||||||||||||||||||
| MIG (light) | 10 | 11 | 12 | 13 | 14 | ||||||||||||||||||||
| PAC | 9 | 10 | 11 | 12 | 13 | ||||||||||||||||||||
| PAW | 4 | 5 | 6 | 7 | 8 | 9 | 10 | 11 | 12 | ||||||||||||||||
SMAW:
MIG (heavy):
MIG (light):
welding with coated electrodes
MIG welding heavy metals
MIG welding light metals
and alloys
TIG / GTAW:
MAG:
PAC:
PAW:
welding with inert gases
welding with metal active gass
plasma cutting
plasma welding
To replace the UV filter/solar cell, pull the bracket 16 at the bottom edge of the filter over the two protruding locking pins and outwards (see figure C). Flip the bracket upwards (see figure D). With your thumbs centred underneath the filter, lift the filter and pull it down to remove it. (Variant: With flames)
- You can use the test button to check whether the welding helmet's darkening feature is working properly.
- You can adjust the delay setting to configure whether or not the auto-darkening feature should be switched off immediately after stopping welding work, depending on the type of welding work. At the lowest setting, auto-darkening is switched off immediately. Turn the rotary switch clockwise towards the highest setting to prolong the time the auto-darkening feature remains active after welding work. This feature is very useful for handling afterglow.
- You can use the sensitivity setting to adjust the light sensitivity of the sensor. With low incident light, the control can be adjusted to the highest setting to ensure that the auto-darkening feature is activated even for a weak light source. Even with this additional feature, you can also adjust the light sensitivity of the sensor to suit your own personal requirements.
The lowlight sensor switches the LED lamp on in dark environments and off in brightly lit environments. This helps to illuminate the object being welded in dark working conditions. The LED lamp can be switched on and off using the lamp control 14. If the battery charge level is too low, you can replace the batteries. To do so, slide the left side of the battery compartment 15 to the left (see figure A). A low battery charge level is indicated with a red warning light on the display 13.
- Cleaning and Maintenance
- Do not use any harsh cleaning agents to clean the helmet casing 2.
■ Never bring the UV filter into contact with water.
- Clean the product with a soft, dry cloth, with a cloth dampened with pure alcohol or with a cloth dampened with disinfectant.
● Environmental instructions and disposal information

Don't waste, recycle!
The device, accessories and packaging should be recycled in an environmentally friendly manner.
Do not throw the auto-darkening welding helmet into household rubbish, fire or water. If possible, non-operational equipment should be recycled. Contact your local retailer for information.
- Troubleshooting
| Error Cause Solution | ||
| The filter does not darken in a normal way or flickers. | The protector does not darken in a normal way or flickers. | Clean the protector or replace it. |
| The arc sensor is not clear. Clean the arc sensor's surface. | ||
| The welding current is too low. Set the sensitivity to the maximum degree. | ||
| The reaction is slow. The ambient temperature is too low / high. | Only use the welding helmet in temperatures between -5 °C and +55 °C. | |
| The visibility is poor. The protector / the protective screen is dirty. | Clean the protector and the protective screen. | |
| The welding helmet slips. | The headband 5 has been put on incorrectly. | Put on the headband 5 again tighter. |
● Warranty and service information
Creative Marketing Consulting GmbH warranty
Dear customer, the warranty for this device is 3 years from the date of purchase. In the event of product defects, you have legal rights against the retailer of this product. Your statutory rights are not limited in any way by our warranty detailed below.
- Warranty terms
The warranty period begins on the date of purchase. Please keep the original receipt in a safe place. This document is required as your proof of purchase. Should this device show any fault in
materials or manufacture within 3 years from the date of purchase, it will be repaired or replaced – at our choice – by us free of charge. This warranty is conditional on the defective device and the receipt of purchase being presented within the 3 year warranty period, and that there is a brief written description of the nature of the defect and of the date it arose.
If the defect is covered by our warranty, you will receive the product which has been repaired or a new product. A repair or exchange of the device does not begin a new warranty period.
• Extent of warranty
The appliance has been manufactured to strict quality guidelines and meticulously examined before delivery.
The warranty applies to defects in material or manufacture. This warranty does not apply to product parts subject to normal wear and tear and which can therefore be considered as wear items, or to damage to fragile parts, e.g. switches, storage batteries or glass parts.
This warranty becomes void if the device has been damaged or improperly used or maintained. All instructions provided in the instructions for use must be followed strictly to constitute proper use of the product. Purposes and practices which the operating instructions warn of or advise against must be avoided without fail.
This product is intended for private, non-commercial use only. Any incorrect or improper use of the device, use of force and changes not performed by our authorized service branch will void the warranty.
- Processing of warranty claims
Please follow the instructions below to ensure your claim is processed quickly:
When inquiring about your product please have your receipt and product number (e.g. IAN) ready as your proof of purchase.
The product number can be found on the type plate, an engraving, the cover page of your instructions (bottom left) or the decal at the back or bottom. In the event of malfunctions or other defects, please first contact the service department below by phone or e-mail.
A product recorded as defective, along with the proof of purchase (sales receipt) and a description of the defect and when it occurred, can then be returned free of charge to you to the service address provided.

Note:
Onwww.lidl-service.com you can download this as well as many other manuals, product videos and software.
- Service
Only use original accessory parts: Viewing pane 109.9 mm x 85.8 mm Rear pane 98.3 mm x 45.9 mm.
How to contact us:
GB, IE, NI
Name: C. M. C. GmbH
Website: www.cmc-creative.de
E-mail: service.gb@cmc-creative.de
Phone: 0-808-189-0652
Registered office: Germany
IAN 286805
Please note that the following address is not a service address. Please first contact the service point named above.
Address:
C. M. C. GmbH
Katharina-Loth-Str. 15
DE-66386 St. Ingbert
DEUTSCHLAND
Ordering spare parts:
www.lidl.com/contact-us
- Label meanings
Safety viewing panels approved according to DIN EN 166: CMC 1 F CE
Legend:
CMC = manufacturer code
1 = optical class
F = low power shock
CE = CE symbol)
ADF approved according to DIN EN 379:
Legend:
4 = bright state
9-13 = dark state
CMC = manufacturer code
number 1 = optical class
number 2 = scattered light grade
number 3 = homo-geneity class
number 4 = angle dependency class
379 = test standard
CE = CE symbol
Welding helmet case
Manufacturer identification: CMC GmbH
Number of the standard: EN 175
Area(s) of application (if required): S, F, B
Mass in grams (if required)
| Symbol | Protection type | Description of scope of application |
| S increased strength | Mechanical strength | |
| -F Low energy impact | Mechanical strength | |
| -B Medium energy impact | Mechanical strength | |
If the symbols F, B and A are not obtained for the viewing panel as well as the supporting body, the entire eye protection device is to be conferred with a lower rating.
Certification body:
Responsible for documentation: Mark Uhle
Katharina-Loth-Str. 15
66386 St. Ingbert
Germany
declare in our sole responsibility the product
Auto-Darkening Welding Helmet
IAN: 286805
Series number: 2093 / 2094
Year of manufacture: 2018/15
Model: PSHL 2 A1
meets the basic safety requirements of European Directives
EC Electromagnetic Compatibility Directive
2014 / 30 / EU
RoHS Directive
2011 / 65 / EU
Personal Protective Equipment Directive
89 / 686 / EEC
and its amendments.
The conformity assessment is based on the following harmonised standards:
EN 379:2009-07
EN 175:1997-08
EN 166:2002-04
www.lidl.com/contact-us
www.lidl.com/contact-us
www.lidl.com/contact-us
www.lidl.com/contact-us