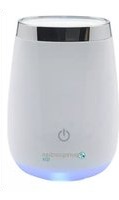
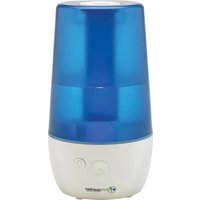
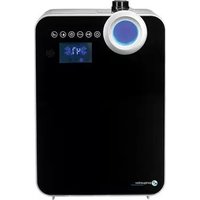
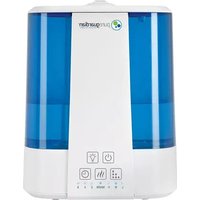
HTR410B - Heating PureGuardian - Free user manual and instructions
Find the device manual for free HTR410B PureGuardian in PDF.

User questions about HTR410B PureGuardian
0 question about this device. Answer the ones you know or ask your own.
Ask a new question about this device
Download the instructions for your Heating in PDF format for free! Find your manual HTR410B - PureGuardian and take your electronic device back in hand. On this page are published all the documents necessary for the use of your device. HTR410B by PureGuardian.
USER MANUAL HTR410B PureGuardian
To the consumer, Guardian Technologies LLC warrants this product to be free of defects in materials or workmanship commencing upon the date of the original purchase. In order to be eligible for this Limited Warranty, an original sales receipt or comparable substitute proof of purchase bearing the date of original purchase is required. Refer to the original product carton or specific product/model page on the Guardian Technologies website for warranty length for your particular model. This warranty applies only to the original purchaser of this product from the original date of purchase. This warranty covers product purchased from authorized distributors only.
This warranty applies to repair or replacement of product found to be defective in materials or workmanship. This warranty does not apply to damage resulting from unusual wear, commercial, abusive, unreasonable use or supplemental damage. This warranty does not cover damage from unauthorized repairs or from any use not in accordance with the instruction manual. Defects that are the result of normal wear and tear will not be considered manufacturing defects under this warranty.
If this product should become defective within the warranty period, we will repair or replace any defective parts free of charge. All warranty repairs must be completed by Guardian Technologies LLC. This warranty gives you specific legal rights and you may also have other rights (other rights may vary from state to state in the U.S.A.)
To submit product under warranty the complete machine must be delivered pre-paid to Guardian Technologies LLC. Please include complete information including: the problem, the model number of the product, the day of purchase, and a copy of the original sales receipt along with your name, address, and telephone (email optional). Address returns to the attention of: Customer Service, at the address below. Additional questions or comments can be made toll free to the number listed below.
USA and Canada
Guardian Technologies LLC
26251 Bluestone Blvd.
Euclid, Ohio 44132
1.866.603.5900
www.guardiantechnologies.com
Please go to www.guardiantechnologies.com to register your product. We consider the registration process important to ensuring superior service to our customers, however submitting the warranty registration is optional and does not affect your rights to utilize this warranty according to the conditions stated above.
Additional copies of the instruction manual can be obtained by accessing and printing directly from our website or calling customer service.

guardian
technologies™
Guardian Technologies LLC
26251 Bluestone Blvd. • Euclid, OH 44132
1.866.603.5900 • www.guardiantechnologies.com
©2016 Guardian Technologies LLC

guardian
technologies™
USE & CARE INSTRUCTIONS
natural_image
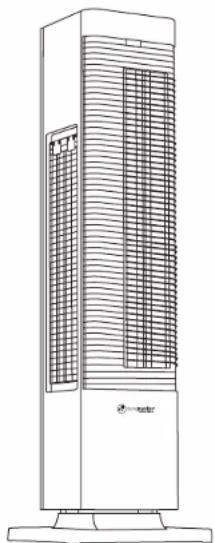
Line drawing of a tall industrial air conditioner unit with cooling fins and ventilation grilles (no text or symbols)All Season 2-in-1 Heater & Fan Tower
Model No. HTR410
1-Year Limited Warranty
Customer Service
1.866.603.5900
www.guardiantechnologies.com
Date Purchased month ____ year ____
English E - 1 French F - 1 Spanish S - 1
Use GENUINE Guardian Technologies replacement parts only.
REV0918
READ AND SAVE THESE INSTRUCTIONS WARNINGS
Failure to comply with the warnings listed below may result in electric shock or serious injury.

This product should only be used in accordance with the specifications outlined in this manual. Usage other than what has been specified here may result in serious injury. When using electrical appliances, basic precautions should always be followed to reduce the risk of fire, electric shock and injury to persons including the following:
- Read all instructions before using appliance.
- ALWAYS PLUG THIS APPLIANCE DIRECTLY INTO A WALL OUTLET/RECEPTACLE. NEVER USE WITH AN EXTENSION CORD.
- DO NOT plug the product into any other cord connected device, such as a power strip, surge protector, multiple outlet adapter, cord reel or outlet-type air freshener. The use of such devices may create a fire hazard. Plug unit directly into a 120V wall outlet only.
WARNING: Faulty wall outlet connections may cause the wall outlet to overheat. Be sure that the appliance plug fits tightly into outlet before each use. During use, check to make certain the plug is not overheating. If necessary have a qualified electrician check and/or replace the wall outlet.
- Make certain that the room is equipped with a working smoke detector.
- Make certain that the power source conforms to the electrical requirements of the appliance.
- Extreme caution is necessary when any appliance is used by or near children or people with disabilities and whenever the appliance is left operating unattended.
- This appliance has a polarized plug (one blade is wider than the other). To reduce the risk of electric shock, this plug is intended to fit in a polarized outlet only one way. If the plug does not fit fully in the outlet, reverse the plug. If it still does not fit, contact a qualified electrician. Do not attempt to defeat this safety feature.
- Do not operate any appliance with a damaged cord or plug or after the appliance malfunctions, or has been dropped or damaged in any manner.
- To disconnect, turn the appliance OFF then remove the plug from the outlet.
• Always unplug appliance when not in use. Unplug power cord before servicing or moving it. - Do not insert or allow fingers or foreign objects to enter any ventilation or exhaust opening as it may cause an electric shock, fire, or damage the appliance. Do not block or tamper with the appliance in any manner while it is in operation.
- To prevent a possible fire, do not block air intakes or exhaust in any manner. Do not place on soft surfaces, like a bed, where openings may become blocked.
• Always place the appliance on a stable, flat, level surface when operating, to avoid the chance of the appliance overturning. Locate the Power Cord so the appliance or other objects are not resting on it. Do not run Power Cord under carpeting. Do not cover Power Cord with throw rugs, runners, or similar coverings. Arrange Power Cord away from room traffic and where it will not be tripped over. -
This appliance is HOT when used in Heater mode. To avoid burns, do not let bare skin touch hot surfaces. Always use handle when moving this Heater. Keep combustible materials, such as furniture, pillows, bedding, papers, clothes and curtains at least 3 feet (0.9 m) from the front of the Heater and keep them at least 1 foot (0.3 m) from the sides and rear.
-
A Heater has hot and arcing or sparking parts inside. Do not use the appliance in areas where gasoline, paint, or flammable liquids are used or stored. DO NOT use the appliance in locations where flammable or explosive chemicals are stored, or in wet atmospheres. This appliance is intended for general use ONLY.
- This appliance is not intended for use in wet or damp locations. This appliance is not intended for use in bathrooms, laundry areas and similar indoor locations. Never locate an appliance where it may fall into a bathtub or other water container.
- Do not use this appliance outdoors.
- Remote controls for other appliances or electronic equipment can sometimes interfere with the operation of this appliance. If this occurs, move it to another location.
- Keep the appliance remote control unit away from chairs and your bed where it may be sat or laid upon and inadvertently turn on the appliance.
- The user is cautioned that changes and modifications made to the equipment without the approval of manufacturer could void the user's authority to operate this equipment.
- This appliance is not suitable for use in agricultural facilities including areas where livestock, poultry or other animals are confined. Please refer to National Electric Code (NEC) Article 547-7 (2008), or applicable state or local codes or standards relating to electrical requirements for Agricultural Buildings. THIS APPLIANCE DOES NOT MEET THE REQUIREMENTS OF NEC ARTICLE 547-7 (2008).
• This appliance is not suitable for use in hazardous locations. Please refer to National Electric Code (NEC) Article 500 or applicable state or local codes or standards relating to electrical requirements for Hazardous locations. THIS APPLIANCE DOES NOT MEET THE REQUIREMENTS OF NEC ARTICLE 500 (2008).
WARNING: REDUCE THE RISK OF FIRE OR ELECTRIC SHOCK – DO NOT USE THIS APPLIANCE WITH ANY SOLID STATE SPEED CONTROL DEVICES.

WARNING: This product can expose you to chemicals including lead or lead compounds, which are known to the State of California to cause cancer or birth defects or other reproductive harm. For more information go to www.P65Wamings.ca.gov.
PRODUCT SPECIFICATIONS AND PARTS
OPERATING INSTRUCTIONS
Before operating
-
Select a firm, level and flat location for the heater/fan.
-
For proper air flow, locate the unit at least 1 foot from any wall or furniture.
• Make sure none of the grills are blocked.
NOTE: When switching on the appliance for the first time, allow it to run at full power for approximately two hours to get rid of any unpleasant odor.
- Plug the power cord into a 120V AC outlet.
- When moving the unit, always lift it by the handle.
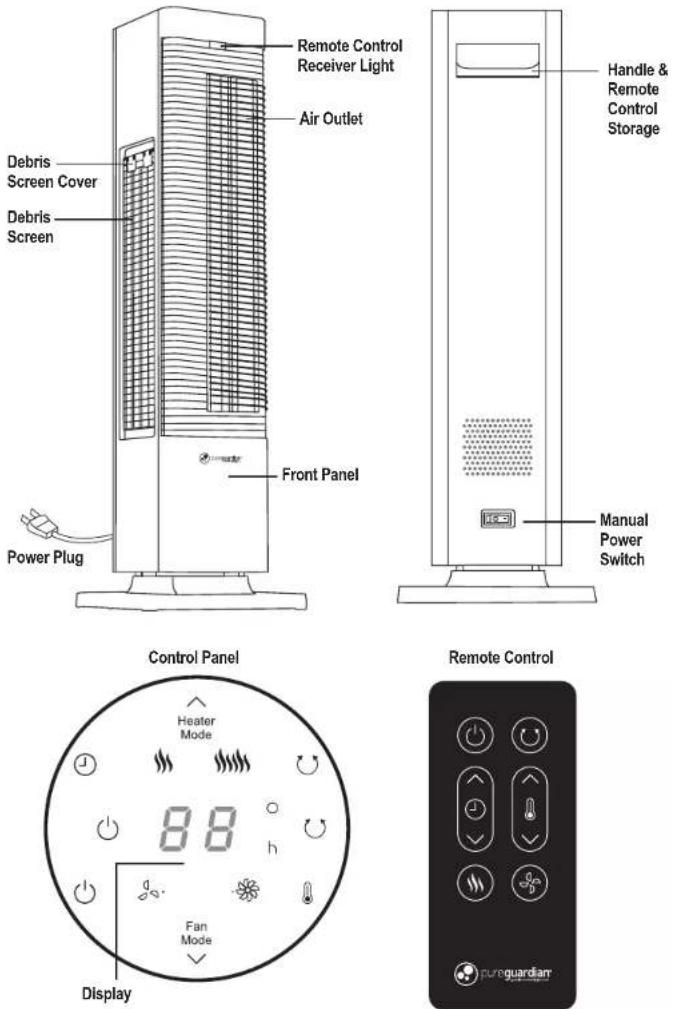
Control Panel
When initially plugged in, there will be a "beep" and an orange IR light will come on indicating that there is power to the unit. The unit will be in standby mode. The light will remain lit until the unit is unplugged from the electrical outlet or the manual power switch is turned OFF (O).

Confirm manual power switch located on the back of the unit is turned ON (I).

Press on/off control to turn the display on.
The display will show the current room temperature.
Select either Heater Mode or Fan Mode (see instructions below). After plugging in and turning on, the default power mode is: Heater on with Low speed heat setting. The default temperature setting is 77^ .
Heater Mode
Heater 1. Press the Heater Mode touch control.
Mode
2. Select low or high speed heat by pressing the heat mode touch control again.
The display will show:
Low speed heat.

High speed heat. High speed will take approximately 30 seconds before the speed increases.

Select Desired Temperature
- Press the automatic temperature touch control. The temperature display numbers will blink until set.
- Press the arrows by each "mode" control to move the temperature up/down.
The temperature selection range is 59 - 95° Fahrenheit.
If a temperature below the room temperature is selected, the unit will not run.

Oscillation
Press the Oscillation Touch Control to allow the unit to rotate back and forth. The oscillation icon will light on the display when in use. To stop the oscillation, press the oscillation icon again. When the heater is in Automatic Temperature Control, the oscillation function will stop when the set temperature is reached and resume when the heater turns back on.

Timer
Select the number of hours before the heater shuts off by pressing the timer touch control. The display
hours will blink until set. Use the arrows to select the number of hours. The timer range is 1-12 hours.
The number of hours selected will appear with an "h".
NOTE: the display will show the room temperature. If the timer and the temperature are both set, the display will rotate between the two at 30 second intervals.
Fan Mode Optoins
Fan 1. Select Fan Mode by pressing the touch control.
- Select low or high speed circulation by pressing the fan mode touch control.
The display will show:

Low speed

High speed

Oscillation
See oscillation instruction on page E5.

Timer
See timer instruction on page E5.
Auto Dim
After 1 minute of no interaction, the display lights will dim. This reduces the light from the product in dark rooms. Press the power control to turn the unit OFF. The fan will briefly continue to run before shutting down completely. When the unit is turned back on, the last settings used will resume.
Remote Control
-
The remote control uses one (1) CR2032 battery (included) for operation.
-
All the functions performed using the Remote Control work identically to the Manual Controls.
-
When in use, make sure to align the remote with the IR light (orange light) on the front of the unit.
NOTE: Remove the battery from the remote during storage or if not using for an extended period of time otherwise battery may damage your remote control.
Battery Disposal - Please dispose of the used battery per municipal or provincial law.
SAFETY
TIP OVER SWITCH: This heater is equipped with a safety tip-over switch, which is located on the bottom of the heater. This feature cuts the main power to the heater if it gets knocked over. If the heater does tip over simply stand it upright in order to resume operation.
THERMAL PROTECTION/RESETTING THE APPLIANCE: This heater includes an Overheat Protection System that shuts the unit off when a potential overheat temperature is reached. If this occurs, the heater can only resume its normal operation after resetting it.
To reset the heater:
-
Unplug the heater and wait 10 minutes for the unit to cool down.
-
After the 10 minutes, plug the unit in again and operate normally.
AUTOMATIC SHUT DOWN: When the machine is running without the timer function, it will automatically shut down after 12 hours.
Cleaning
Always unplug the appliance before you clean it. Never immerse the appliance in water or any other liquid. Never use aggressive or flammable clearing agents such as bleach or alcohol to clean any part of the appliance.
-
Press the Power Button to turn the heater OFF and unplug the heater before moving or cleaning.
-
The debris screen can be removed and vacuumed.
- Open the screen door on the side of the unit by pulling the 2 tabs then removing the door.
• Vacuum any dust from the screen. If there is an extreme amount of dust on the screen, it can be removed and gently hand washed with dish soap. Screen should be completely dry before returning to unit.
-
Interior dust can often be removed by using a vacuum cleaner with a crevice tool attachment.
-
Once cleaned, replace screen door.
Storage
-
Perform the cleaning procedures described above.
-
Wipe all parts dry.
-
Remove battery from remote during storage.
-
Store it in a cool, dry place. We recommend that you store the heater in its original carton.
TROUBLE SHOOTING GUIDE
| PROBLEM | SOLUTION |
| If your heater fails to operate. | Check to confirm manual power switch located on the back of the unit is turned ON.Make sure the electrical outlet or circuit breaker is working.Check for obstructions. If you find an obstruction, turn the heater OFF,and UNPLUG THE UNIT. Carefully remove the obstruction and follow thereset instructions. |
| If the heater stops working. | Check to confirm manual power switch located on the back of the unit is turned ON.Check fails to operate troubleshooting.Check that unit is in heater mode and not fan mode.Check to see if timer is set.Check to see if temperature was set and has been met or is set for a lower temperature in the room. |
| Touch buttons won't operate. | Check to confirm manual power switch located on the back of the unit is turned ON.Be sure you are pressing the direct area of the icon selected. |
| UP/Down arrow touch buttons not operating. | The arrow buttons only work when the temperature control or timer controlhas been selected. Be sure you are pressing the direct are of the arrow icons. |
| Unit won't turn off. | Fan temporarily stays on to cool unit down.Orange light stays on unless unit unplugged or the manual power switch is turned OFF. |
| Remote doesn't operate. | Change the battery with new and same type if the remote controldoes not operate well. |
GARANTIE LIMITÉE
Guardian Technologies LLC
26251 Bluestone Blvd
Euclid, Ohio 44132
1 866 603-5900
www.guardiantechnologies.com
Guardian Technologies LLC
26251 Bluestone Blvd. • Euclid, OH 44132
1.866.603.5900 • www.guardiantechnologies.com
©2016 Guardian Technologies LLC

guardian
technologies™
UTILISATION ET INSTRUCTIONS D'ENTRETIEN

natural_image
Line drawing of a tall industrial air conditioner unit with cooling fins and ventilation grilles (no text or symbols)Guardian Technologies LLC
26251 Bluestone Blvd.
Euclid, Ohio 44132
1.866.603.5900
www.guardiantechnologies.com
Guardian Technologies LLC
26251 Bluestone Blvd. • Euclid, OH 44132
1.866.603.5900 • www.guardiantechnologies.com
©2016 Guardian Technologies LLC

guardian
technologies™
natural_image
Line drawing of a tall industrial tower with ventilation grilles and a base (no text or symbols)