FXRB224 - Lawn mower Fuxtec - Free user manual and instructions
Find the device manual for free FXRB224 Fuxtec in PDF.
User questions about FXRB224 Fuxtec
0 question about this device. Answer the ones you know or ask your own.
Ask a new question about this device
Download the instructions for your Lawn mower in PDF format for free! Find your manual FXRB224 - Fuxtec and take your electronic device back in hand. On this page are published all the documents necessary for the use of your device. FXRB224 by Fuxtec.
USER MANUAL FXRB224 Fuxtec
natural_image
Line drawing of a car with illuminated roof and side wheels, shown in perspective against black background (no text or symbols)
natural_image
Orange icon of a person reading a book (no text or symbols)
natural_image
Icon of a hand pointing at an open book with horizontal lines representing text (no actual text or symbols)Manual\_FX-RB224\_Int24\_rev1
DEUTSCHE VERSION 6
ENGLISH VERSION.... 31
VERSION FRANCAISE 54
POLSKA WERSJA JEZYKOWA....204
SVENSK VERSION 181
Inhalt
DEUTSCHE VERSION 6
- Presentation.... 31
- Safety instructions 32
- Planning.... 33
- Installation 37
- SETTING and START.... 39
- Maintenance and winter storage: 45
- Status/error messages 47
- Technical data 52
- WaSte disposal....52
- EU Declaration of Conformity 53
VERSION FRANCAISE 54
POLSKA WERSJA JEZYKOWA....204
natural_image
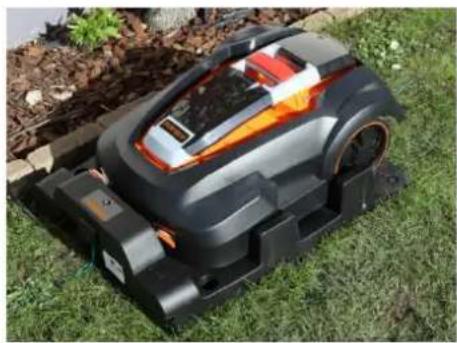
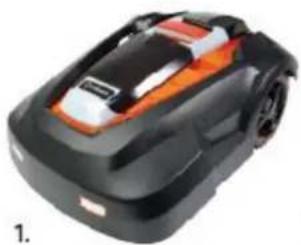
Black and orange robotic lawn mower (no visible text or symbols)2.
natural_image
Black rectangular electronic device with a vertical screw and control buttons (no visible text or symbols)
natural_image
Black plastic seat with ventilation slots and mounting feet (no text or symbols visible)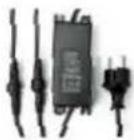
4.
5.
6.
7.

8.

9.
10.
Paketinhalt:
natural_image
Person using a black mechanical device on grass, wearing boots and hands (no visible text or symbols)natural_image
Person kneeling on grass next to a device and equipment (no visible text or symbols)text_image
IN OUT IN OUT- IN
natural_image
Person working on a metal mesh device outdoors on grass, no visible text or symbolsnatural_image
Three-panel image showing a black electric shock absorber, a close-up of an electric vehicle labeled 'FUXTEV', and a robotic lawn mower on grass (no visible text or symbols)natural_image
Close-up of a black electronic device with a red annotation highlighting a component, no visible text or symbols on the device itself.natural_image
Close-up of an orange industrial machine component with a circular dial and a blue arrow pointing to it (no visible text or symbols)STOP-Taste (2):
natural_image
Close-up of an orange and black automotive engine component with a blue arrow pointing to a red 'STO' logo (no readable text or symbols beyond branding)HOME-Taste (3):
MD Directive: 2006 / 42 / EC
Angewandte Normen / applicable standards
EN 60335-1:2012+A11:2014+A13:2017
EN 62233:2008
Hereby we declare that the above mentioned machine meet the essential safety and health requirements of the above stated EC directives.
natural_image
Black and orange robotic lawn mower (no visible text or symbols)2.
natural_image
Black rectangular device with a vertical metallic grille and control buttons (no visible text or symbols)
natural_image
Black plastic folding chair with slats and metal legs (no text or symbols visible)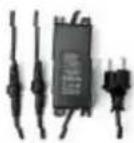
4.
5.

6.
7.

8.

9.

10.
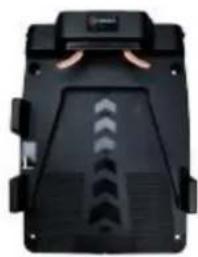
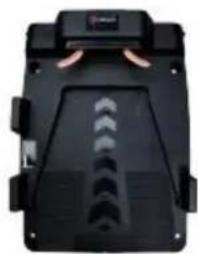
Package contents:
- robot mower
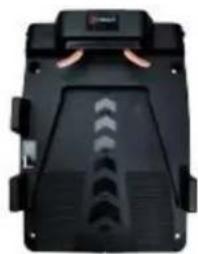
- charging station
- cover (optional)
- adapter for charging station
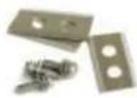
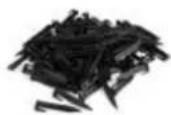
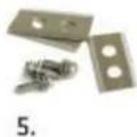
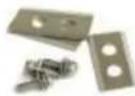
- blade sets including screws (3 pcs)
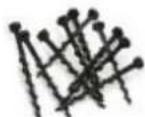
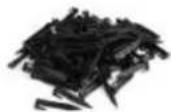
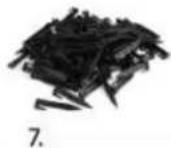
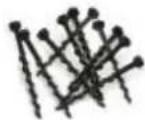
- ground pegs for charging station and cover (6 pcs.)
- ground pegs for the cabling (150 pcs)
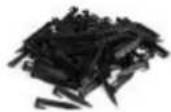
- wire connections (4 pcs.)
- 100 m cable
- spacer gauge (in the box for detaching)
Introduction
Congratulations on your choice of this exceptional quality product.
The robotic lawnmower is a DC (battery) powered mower that uses a microcomputer, timer and sensors to achieve autonomous and unattended operation within a defined garden area. It is mainly intended for mowing and lawn maintenance in private households.
To get the best results from your RM18 robotic mower, you need to know how it works. This user manual contains important information about the mower, how to install it and how to use it. If in doubt, you can search for more information on our website www.fuxtec.de.
Symbols used on the robotic lawnmower
The following symbols are shown on the robotic lawnmower:

Read the operating instructions carefully in order to use the robotic lawnmower correctly.

To use the mower safely and efficiently, the warnings and safety precautions in this user manual must be followed carefully.

Inspection and maintenance must be carried out with the mains switch (0) switched off.
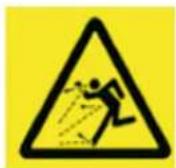
Objects can be thrown away from the mower during operation. Keep a safe distance from the machine during operation. Be careful.
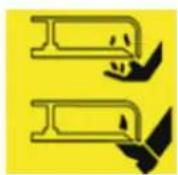
Always keep hands and feet away from the rotating blades
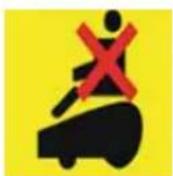
Do not use the mower as a means of transport.
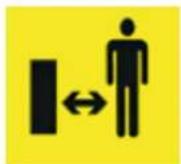
Keep a sufficient distance from the mower and ensure that children and pets cannot get close to the mower.
12. SAFETY INSTRUCTIONS
Read the operating instructions carefully before use. Keep them in a safe place for future reference. Read the instructions carefully. Familiarise yourself with the controls and the correct use of the machine. Never allow persons who are not familiar with these instructions or children to use the machine. Local regulations may restrict the age of the operator.
The operator or user is responsible for accidents or hazards that occur to other persons or their property.
Preparation
- Please always keep the adapter clean and in a safe place.
- Ensure that the perimeter wires are installed correctly and in accordance with regulations
- Regularly inspect the robot's working area and remove all stones, sticks, wires, bones and other foreign objects.
- Check regularly that the blades, blade bolts and blade disc are not worn or damaged. Replace worn or damaged blades and bolts in sets to maintain the correct balance.
During use
- Keep hands and feet away from rotating parts / blades.
- Never lift or carry a machine while the engine is running.
-
Switch off the mains switch (0):
-
Before you move an obstacle out of the way in front of the machine
- Before checking, cleaning or working on the machine.
Important: Do not leave the machine unattended if you know that pets, children or people are in the vicinity.
Maintenance and storage:
- Never clean the underside of the mower with running water. It should only be cleaned with a brush/cloth (slightly damp at most).
- All nuts, bolts and screws must be firmly tightened to ensure that the machine is in a safe operating condition.
- Worn or damaged parts must be replaced for safety reasons.
- Ensure that only authorised parts are used when replacing blades and screws.
- Ensure that the batteries are only charged with the correct charger / adapter recommended by Fuxtec. Improper use can lead to electric shock, overheating or leakage of corrosive liquid from the battery.
- In the event of leakage from the battery, rinse with water or neutralising agent and seek medical assistance in the event of eye contact etc.
- The machine should be maintained in accordance with the manufacturer's instructions.
Please also note the point: Maintenance and winter storage.
13. PLANNING
Determination of the working area:
To ensure that the robot can mow in the desired area - and only in this area - you must mark the area with a boundary wire.
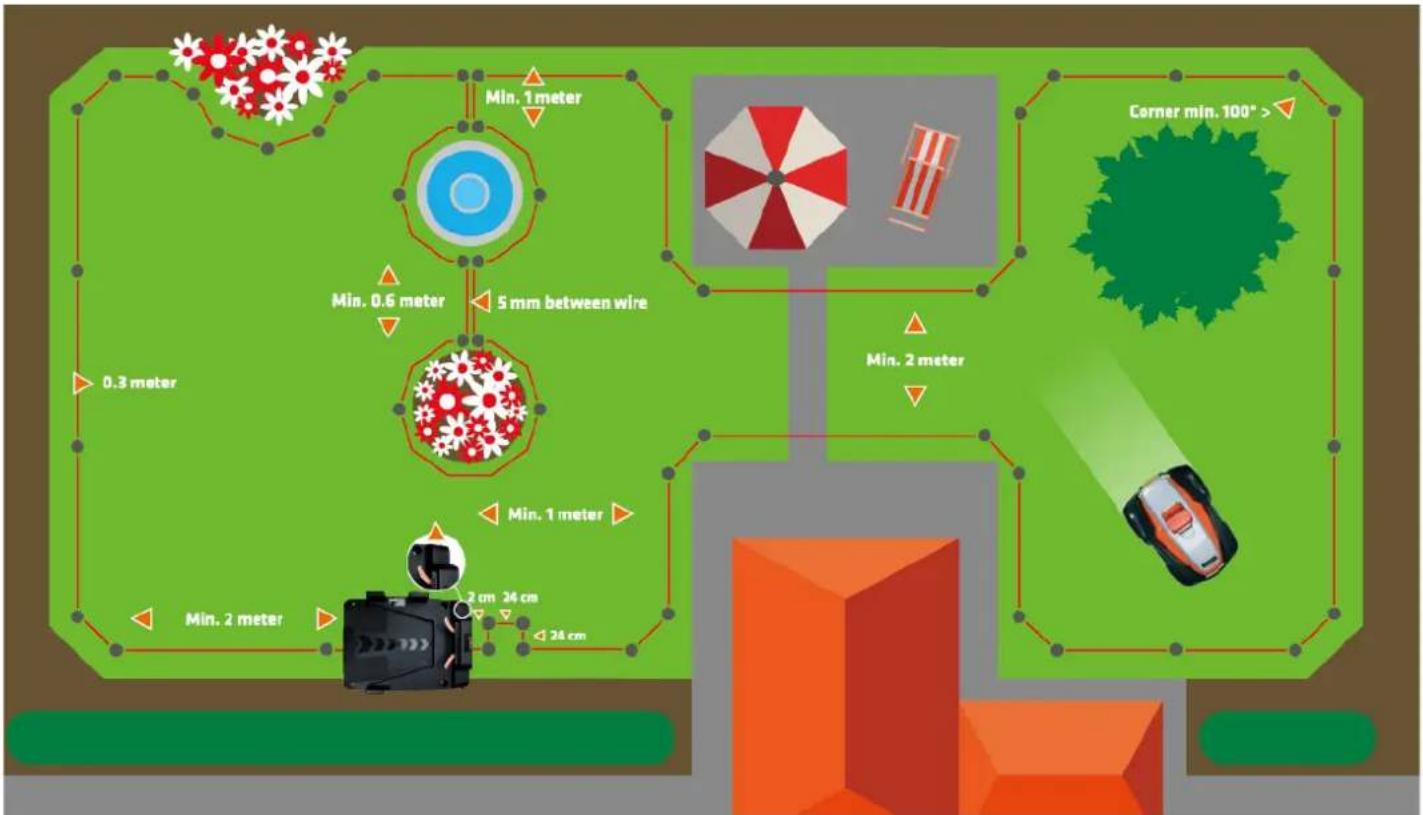
Before you start, it is important to make a sketch of the robot's working area and the "obstacles" it is to avoid, which should therefore also be marked with boundary wire. The boundary wire should be laid so that the distance between the robotic lawnmower and the boundary wire is never more than a maximum of 15 metres.
If your neighbour also has a robotic lawnmower, it is important that you lay your boundary wire and docking station at least 100 cm away from your neighbour's boundary wire. To maximise the signal, we recommend that you do not lay more than 400 m of wire.
To avoid problems later on, you should follow the sketch carefully to lay the boundary wire correctly.
IMPORTANT: Before installing the robotic lawnmower, mow the lawn to a maximum height of 3 cm with your conventional mower. This will avoid the error message E8 (grass too high).
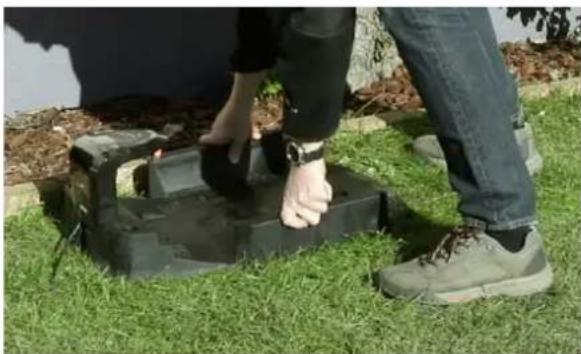
Positioning the charging station
Start by placing the charging station on your sketch at an appropriate distance from your outdoor socket (230 V). The mains cable of the charging station is 8 m long. It is important to position the cover so that the LED indicator of the charging station is under the cover.
natural_image
Person installing or adjusting a black concrete structure on grass, wearing boots (no text or symbols visible)The charging station must be placed on a firm, level surface with the "IN" arrow on the charging station pointing towards the work area.
natural_image
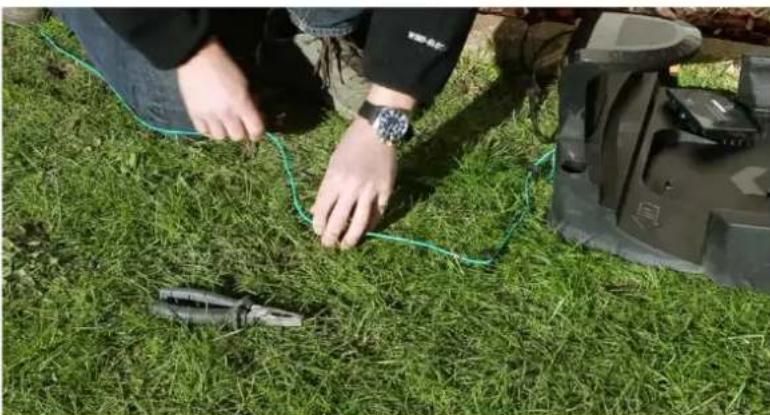
Person kneeling on grass next to a green cable and a small device, with no visible text or symbols.Avoid placing the charging station:
• in a corner of the lawn,
• in low-lying areas where the charging station or the robotic lawnmower could be damaged by
puddles,
- on a slope or
• under a tall tree due to the risk of lightning strikes
Note: It is important that the adapter and the electrical plug are always be kept dry!
You must allow 2 metres of free space without obstacles in front of the charging station so that the appliance can easily return to the station. A clearance of 1 m is required behind the charging station.
Laying the boundary wire
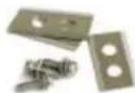
- The boundary wire must be connected to form a continuous wire without interruptions or crossings. 100 metres of wire are included in the scope of delivery.
- There should be a maximum of 1 m between each peg. 150 pegs are included in the scope of delivery.
- Do not form right-angled (90°) corners. The corners must be at least 100° (see drawing).
- The boundary wire must be laid 35 cm from the boundary line of the lawn.
text_image
Min. 1 meter Min. 0.6 meter 5 mm between wire 0.3 meter Min. 2 meter Min. 1 meter 2 cm 24 cm 24 cm Corner min. 100° > Min. 2 meter- Create islands by encircling obstacles, e.g. flower beds, with the boundary wire if you do not want your robot to mow within this area. The incoming and outgoing wire must not be more than 5 mm apart.
- Stones can be approached by your robotic lawnmower without any problems if they are so heavy that the robot cannot move them. However, if the stone has an inclined surface that the robot could accidentally climb, you should remove the stone from the working area or place it vertically with a minimum height of 15 cm.
- If you have trees with roots protruding from the ground, these areas should be enclosed with boundary wire to protect the trees. If there are no visible roots, no boundary wire is required.
- If the boundary wire is laid under low-hanging branches of bushes or trees, you must cut back the branches so that they do not obstruct the free movement of the mower. At the same time, these branches can cause the rain sensor to activate if raindrops from the branches hit the robot. In this case, the robot will return to the charging station even in dry weather (rain sensor symbol is shown on the display).
- If your driveway or garden paths are level with your lawn, your robotic lawnmower can easily drive over them. If you want to avoid this, you only need 10 cm between the boundary wire and the driveway. However, if your driveway is covered with gravel or similar, the robotic lawnmower cannot drive over it. In this case, you need a distance of 30 cm between the boundary wire and the driveway.
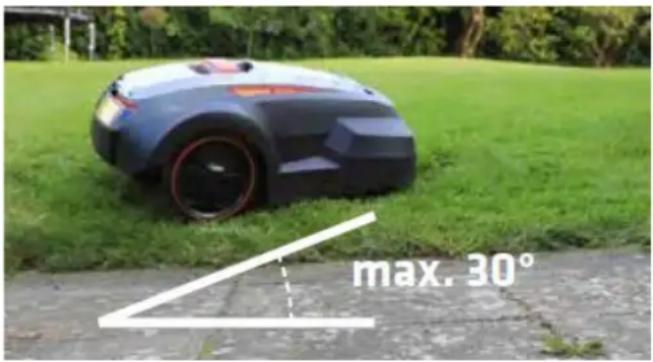
- The robotic lawnmower is capable of travelling on slopes up to a maximum of 30^ . If the surface becomes steeper, the robot has a sensor that causes it to stop. If the surface slopes more than 25^ towards the boundary wire, the robot may slip out of the working area when the grass is wet. We therefore recommend laying the boundary wire up to 40 cm away from the boundary line in such sloping terrain.
text_image
max. 30°14. INSTALLATION
Prepare the materials:
- Remove the boundary wire, wire connections, pegs and the distance meter from the box.
- You will also need: Hammer, pliers, spanner
Prepare the lawn:
- The grass should not be higher than 60 mm when the boundary wire is inserted. If it is higher, it is advisable to mow the lawn with a normal lawn mower first. The wire can then be laid as close to the ground as possible, which prevents the robotic lawnmower from cutting the wire and people from tripping over it. After a short time, the wire will disappear into the turf.
Lay the boundary wire:
- Place the robot's charging station as indicated on your sketch (on the side) and insert the starting peg. Make sure that you reserve 0.5 m of additional cable for the final installation of the docking station.
- Lay your cabling loosely around the work area in the garden according to your sketch. You can then easily adjust it as you go along.
- Now you can start inserting the pegs. Keep the desired distance to the edge (35 cm) with the help of your measuring boxes. The distance between the pegs must not exceed 1 metre. We recommend placing the pegs closer together in the corners, which should always be at least 100°.
- If there are areas in your lawn that you do not want your robot to mow, surround the area with boundary wire as indicated.
Note: max. 5 mm between incoming and outgoing boundary wire (see drawing).
- Insert the last peg when you are back at the charging station.
- If the 100 metres of cable supplied are not sufficient, you can purchase additional cables. Use the supplied cable connections for installation. You do not need to strip the wire ends for installation.
Connect the boundary wire to the charging station:
- The connectors included in the scope of delivery must be clamped to the cable using flat-nose pliers. If they are too loose, the cable will fall off => no connection
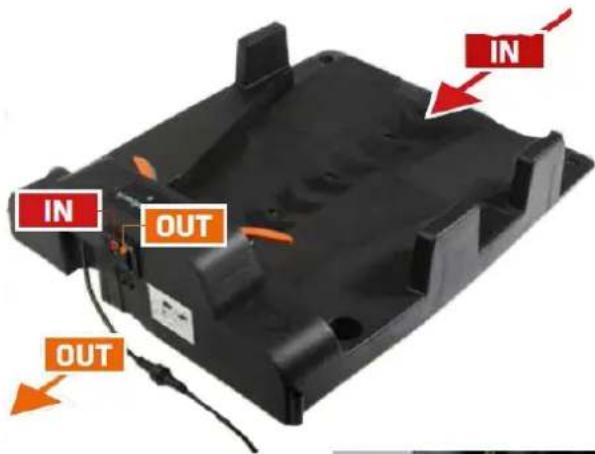
- When you connect the wire ends to the charging station, there is an IN wire and an OUT wire as indicated. The IN wire is threaded through the wire holder under the charging station and must be connected to the IN plug, while the OUT wire must be connected to the OUT plug (see following pictures).
text_image
IN OUT IN OUT- IN
- from under the charging station (end of the cable)
- OUT
- to the lawn (start of the cable).
natural_image
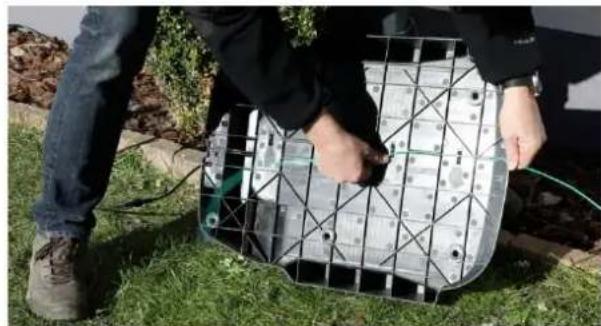
Person working on a metal grid-based device outdoors on grass, no visible text or symbolsAfter you have connected the two ends (IN and OUT), put on the protective cover
- You can now attach the charging station to the floor.
Charging and checking the charging station
- Place the robotic lawnmower in the charging station for charging, even if the robot has been pre-charged at the factory.
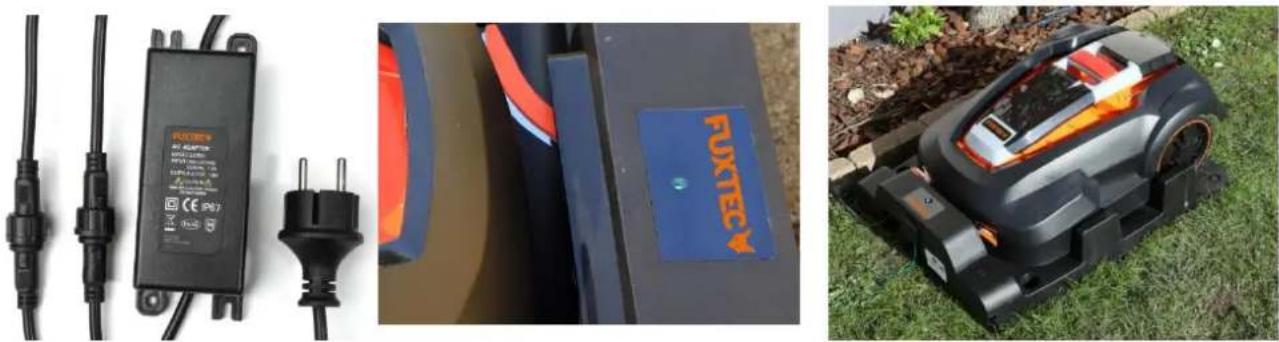
- Connect the cable to the adapter and then to the main power supply. The LED indicator on the charging station lights up.
RED: No connection to the boundary wire,
or boundary wire is interrupted somewhere.
FLASHING GREEN: Charging and correct connection to the boundary wire.
GREEN CONSTANT: Fully charged and correctly connected to the boundary wire.
- The charging station is now ready for operation.
natural_image
Three-panel image showing a black RIOE® power adapter, an open electrical plug, and a black FUKTECY robotic lawn on grass (no visible text or symbols)Important: The "IN" arrow at the charging station must always point in the direction of the working area / towards the lawn.
natural_image
Close-up of a black electronic device with a red annotation highlighting a component, no visible text or symbols on the device itself.15. SETTING AND START
Please remove all foreign objects such as roots, stones, branches, toys, etc. from the lawn.
Setting:
After installation and charging, you are now ready to make the settings.
The appliance can be set to either manual or automatic start.
text_image
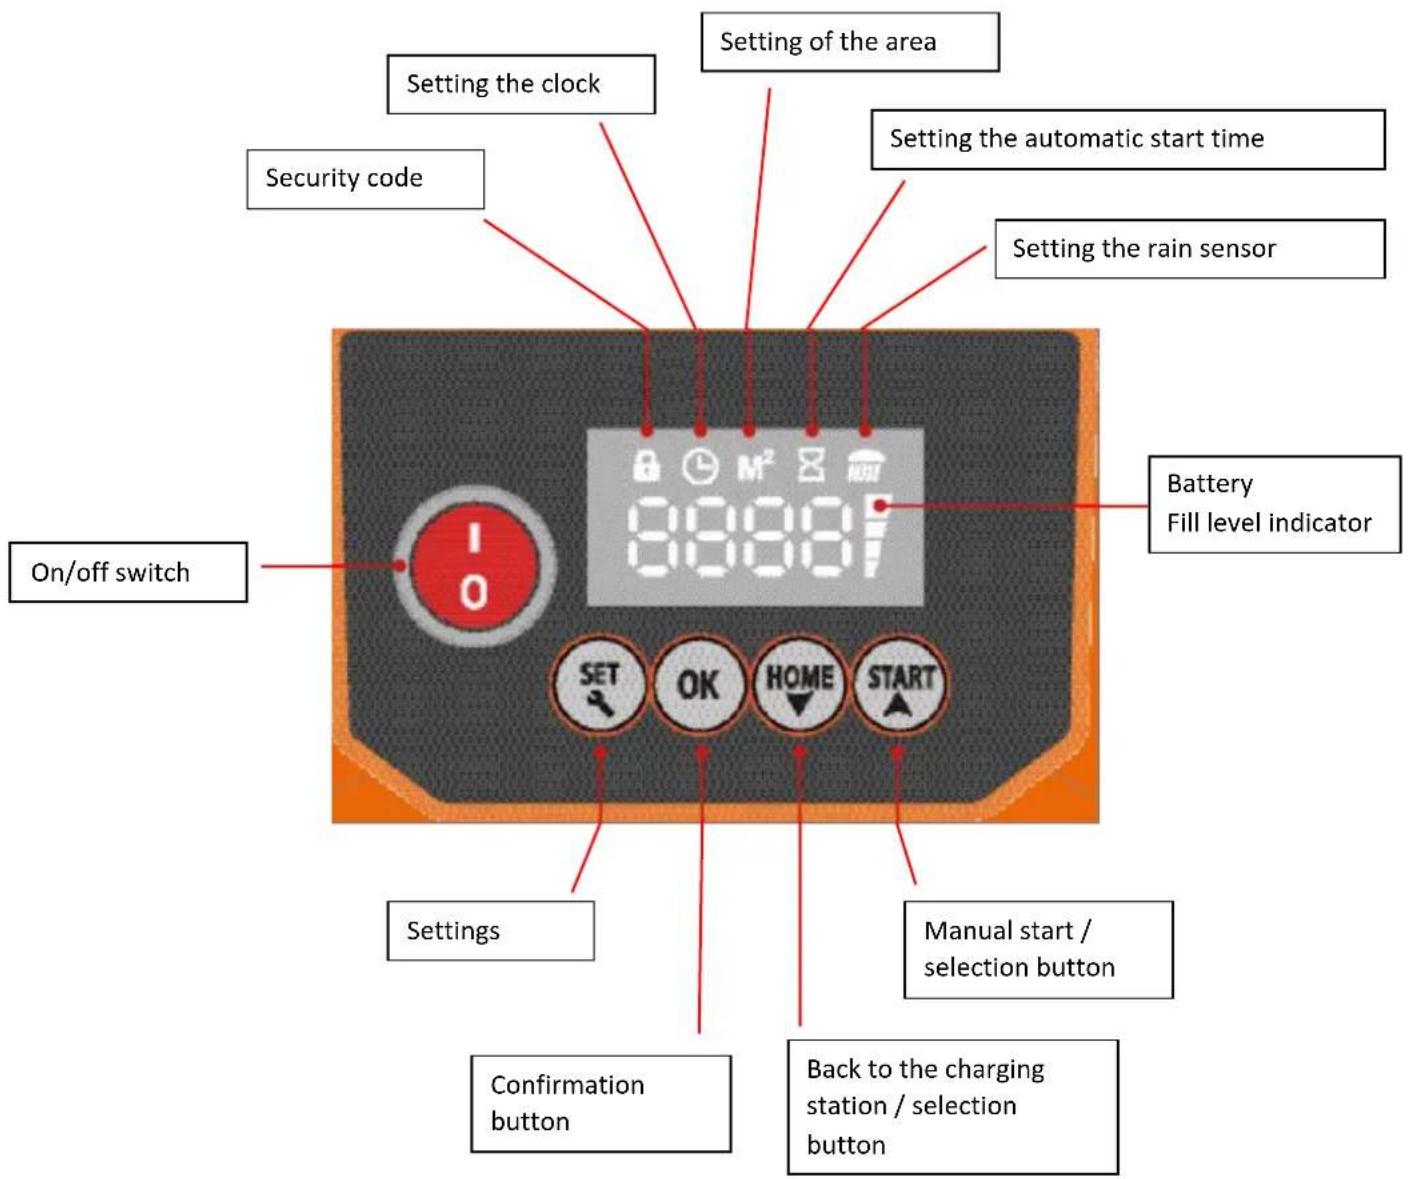
Setting the clock Setting of the area Setting the automatic start time Security code Setting the rain sensor On/off switch Battery Fill level indicator 8:00:07 10 SET OK HOME START Settings Manual start / selection button Confirmation button Back to the charging station / selection buttonSetting the clock
- Press the "SET" button until the clock symbol lights up.
- Enter the time using the selection buttons / arrow buttons ("HOME" and "START") and confirm with the "OK" button.
Setting the surface
- Press the "SET" button until the M ^2 symbol lights up.
- Use the arrow buttons ("HOME" and "START") to enter the size of the area to be mowed in increments of 50 m ^2 and confirm with "OK".
Automatic start
- Press "SET"
- Enter your 4-digit security code / factory code (0000) and confirm with "OK"
- Press "Confirm" until the area to be mowed is set in ^2 and confirm with "OK".
Setting the automatic start time
- Press "SET" until the hourglass symbol lights up.
- Use the arrow buttons ("HOME" and "START") to press the desired start time and confirm with "OK".
- If the 4 digits 0000 light up constantly, the start time is set.
- Press "START".
Note: When the appliance has finished its work cycle, it automatically restarts 48 hours later at the same time.
Manual start
- Press "SET"
- Enter your 4-digit security code/factory code (0000) and confirm with "OK".
- Press "START"
Setting the security code
- The factory default security code is: 0000. If you want to keep this code, proceed as described above.
- If you want to change the code, first enter the factory code 0000 + START.
- The machine leaves the docking station and starts to run.
• After a few metres, press STOP and the error code E1 appears on the display. - Press START and hold the START button for 10 seconds until the code U133 appears on the display.
- Press SET. The lock symbol (picture) flashes. Confirm the factory code 0000 in succession with OK until the digits 0000 light up constantly.
- Press SET again and the lock symbol flashes.
- Now enter your personalised 4-digit security code and confirm with OK.
- Your personal security code is now set and lights up constantly.
• Finally, press START and the appliance will continue to run.
• REMEMBER YOUR CODE!
Note: If you have forgotten your personal code, the robotic lawnmower must be sent to Fuxtec for resetting.
More buttons
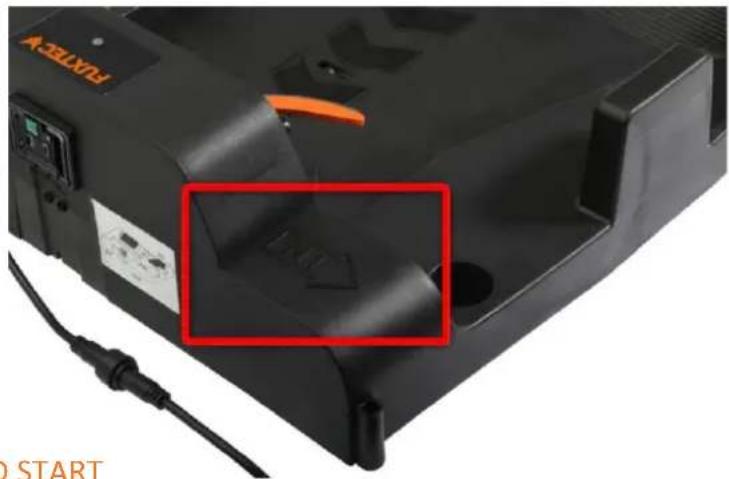
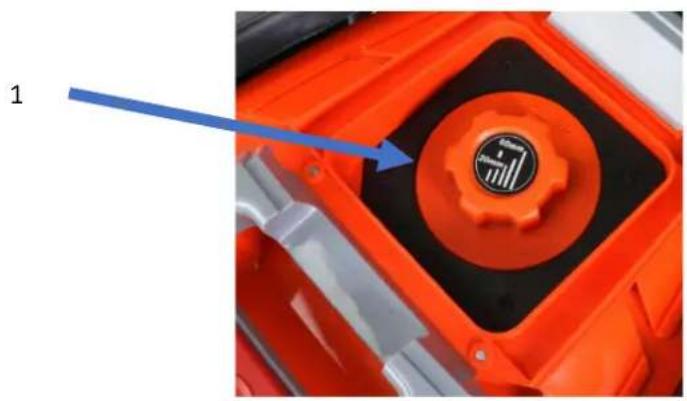
Cutting height (1):
Adjust the cutting height by turning the adjusting wheel (1)
Note the numbers on the dial and stop at the desired height.
natural_image
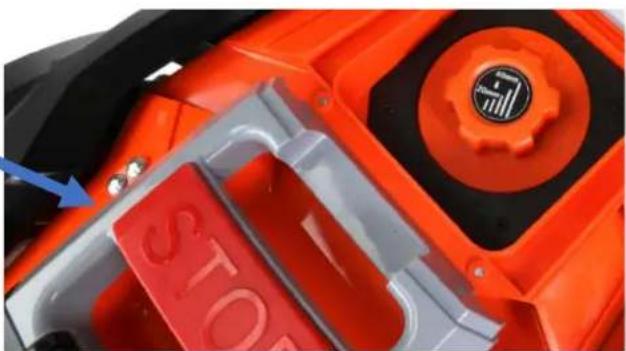
Close-up of an orange industrial machine with a circular dial and mechanical knob (no visible text or symbols)STOP button (2):
• You can stop the robotic lawnmower at any time by pressing the emergency STOP button.
- You can also use the STOP button to override the function of the machine. For example, if you want to prevent the machine from travelling along the boundary wire every time: Let the machine drive out of the docking station - as soon as it starts to run, press the STOP button and then place the machine 2 m in front of the docking station against the boundary wire.
- Press "SET"
- Enter your 4-digit security code/factory code and confirm with "OK".
- Press "START".
Note: The emergency stop button does not delete your personal settings.
2
natural_image
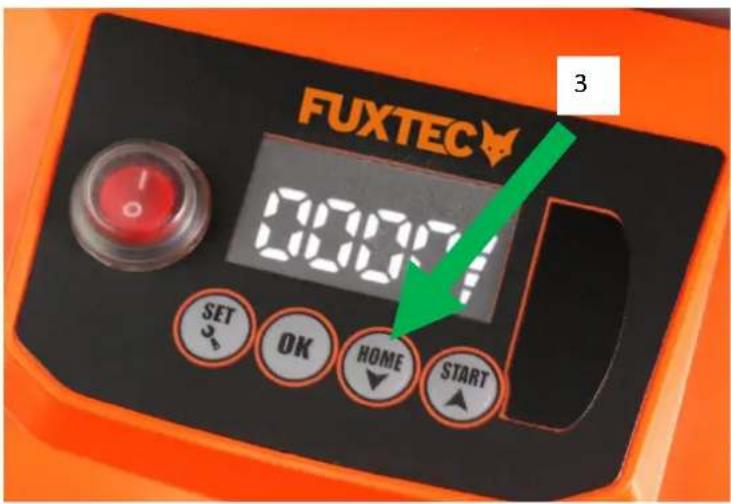
Close-up of a red and black industrial machine component with a blue arrow pointing to a component labeled 'STON' (no readable text or symbols beyond branding)HOME button (3):
- Press "STOP"
- Press "SET"
- Enter your 4-digit security code/factory code and confirm with "OK".
- Press "HOME"
Note: The HOME button does not delete your personal settings.
text_image
FUXTEC 00:00 SET OK HOME START 3Press the START/RESTART button:
- Press "SET"
- Enter your 4-digit security code/factory code and confirm with "OK".
- Press "START"
Note: If only one bar is visible on the battery level indicator, the robotic lawnmower no longer has sufficient power and can only be restarted in the charging station
Sensors
Obstacle/touch sensor:
- If the robotic lawnmower encounters an obstacle, it reverses and changes direction to avoid the obstacle.
- If it does not find a new path within 3 seconds, the blade stops.
- If it does not find a new path within 10 seconds, the robot switches itself off and requires a manual restart to get it running again.
Rain sensor:
- When it rains, the robot automatically returns to the docking station and starts cutting when the next work cycle begins.
- Raindrops from overhanging branches can activate the rain sensor; in this case, the robot returns to the docking station (see display).
Lifting sensors:
- These sensors are located near the 2 front wheels and measure the contact of the wheels with the surface.
- If the robot is lifted manually or if one or both wheels run into a hole, the robot switches off and must be restarted manually.
- A restart on the lawn can only take place if you move the machine so that it is at a maximum distance of 50 cm from the boundary wire.
- To start, you must select the area and then press the "START" button. The work cycle is not changed.
Tilt sensor:
- A 6-axis sensor is integrated into the robotic lawnmower, which measures the angle of inclination in all directions.
- If the angle of inclination exceeds 30^ , the blades are stopped immediately, but the robot continues to move.
- If the angle decreases again within 10 seconds, the blades restart automatically. However, if the angle does not decrease within 10 seconds, the mower switches off and requires a manual restart.
- A restart on the lawn can only take place if you move the machine so that it is at a maximum distance of 50 cm from the boundary wire
- To start, you must select the area and then press the "START" button. The work cycle is not changed.
16. MAINTENANCE AND WINTER STORAGE:
To get the most out of your robotic lawnmower, it is important that you inspect the machine and its mowing area regularly.
Regular cleaning:
- You will extend the service life of your robotic lawnmower if you keep it clean regularly by removing leaves, branches and dirt.
Note: It is very important to ONLY use a brush or dry cloth for cleaning. The use of water can damage the electrical system.
Top cover
- Lift the top cover and clean it with a soft brush to remove grass and dirt. You can wipe it with a damp cloth (DO NOT rinse with water because of the electronics).
Underside
- Also clean the underside with a soft brush.
- Ensure in particular that the blades and the blade holder can rotate freely.
Note: Remember to switch off the mains switch before cleaning!
If the robotic lawnmower frequently runs in wet grass, more grass automatically settles in the cutting chamber.
This significantly reduces the cutting performance and it is therefore very important to remove the grass. You also need to clean the rotor blades regularly so that they can rotate.
Charging station
- You must also clean the charging station regularly by removing dirt and grass from the base plate to prevent poor contact between the charging contacts of the charging station and the robot.
- It is important to check that the respective charging contacts are correctly connected to each other.
- Over time, the charging station may sink a little as the surface sinks due to the decomposition of the grass.
Charging contacts
- Clean the charging contacts on the robotic lawnmower and charging station a few times during the season with fine emery paper or steel wool.
It is important to ensure that all bolts, screws and nuts are always correctly tightened so that the robotic mower has the best possible working conditions.
Replacing spare parts:
Blades:
- The blades have 2 sharp edges and can be rotated if they have become blunt on one edge.
- If both edges are blunt, the blades can be easily replaced with a screwdriver.
Note: Remember to switch off the mains switch before starting work. on the robot.
- Once you have removed the screw, it is important that you remove grass and other dirt from the blade holder.
- You can then insert the new blade.
- Screw the blade screw in tightly. Check whether the blades can be turned.
Note: It is important that all 3 blades are reversed or replaced at the same time.
Battery:
- In general, the battery life is 5 years, depending on the workload and maintenance of the robotic lawnmower.
Note: Always use original/authorised spare parts!
Storage in winter:
- We recommend that you store the robotic lawnmower plus charging station in a dry and frost-free room over the winter after you have removed grass and other dirt (only with a dry cloth and scraper).
- Carefully clean the charging tentacles of the docking station and the copper plates of the machine to prevent corrosion. Polish with steel wool and apply a little acid-free oil.
Note: You should charge the device every 2 months in winter to maximise the service life of the battery.
extend the battery.
Software update
Update software via USB:
- Save the software on an empty USB data carrier
- Switch off the robotic lawnmower and insert the USB stick
- Switch on the robotic lawnmower and you will see a flashing number on the screen.
- When the flashing stops, the software has been successfully updated;
- Switch the robotic lawnmower off and then on again to check whether the desired software is displayed on the screen.
• Desired software on the screen. - Uxxx stands for the software of the main board, Cxxx stands for the limitation software.
17. STATUS/ERROR MESSAGES
As a quick guide in the event that the robotic lawnmower is not working properly, you can view the error codes on the device or follow the troubleshooting steps below to solve the problem. If the error persists, please contact Fuxtec customer service.
Error message on the robot:
Display Error description Action
| E1 | Emergency switch activated. | Restart the robot. |
| E2 | Lift sensor activated. | Is the wheel blocked? Remove the obstacle and restart the robot. |
| E3 | The robot is located outside the boundary wiring. | Place the robot inside the boundary wire. |
| E4 | Boundary wire is broken. | Is the LED flashing red? Repair the boundary wire and restart the robot. |
| E5 | Obstacle/contact sensor activated. | Are there any obstacles? Restart the robot. |
| E6 | Power consumption on left drive motor too high. | Is the grass too high? Over 4 cm? Is the left wheel blocked? Restart the robot. |
| E7 | Power consumption on right drive motor too high. | Is the grass too high? Over 4 cm? Is the right wheel blocked? Restart the robot. |
| E8 | Overcurrent on the cutting motor. | Is the grass too high? Is the blade disc blocked? Restart the robot. |
| E9 | Error in the charging status. | Malfunction of the battery. Please contact Fuxtec customer service. |
| E10 | Overvoltage/undervoltage. | Malfunction of the battery. Please contact Fuxtec customer service. |
| E11 | Tilt sensor activated. | Is the tilt angle over 20 degrees? Restart the robot. |
| E12 | Flat obstacle. | Circle the obstacle with the boundary wire. Restart the robot. |
| E13 or "HOT" | Overheating. | To protect the battery from overheating (high outside temperature), the mower should be parked in the shade. |
| F1 | The robot does not start. Signal present | Is the robot outside the boundary wire? Is the boundary wire connected correctly? |
| F2 | The robot does not start. No signal (charging station). | Is the boundary wire/power supply connected correctly? |
| F3 | The robot does not start. The charging contacts are defective. | Clean the charging tentacles and copper plates. If the voltage is between 28 - 32 V Please contact Fuxtec customer service. |
| F4 | Battery voltage too low. | Fully charge the robot. |
Restart the robot:
1) Place the robot on the boundary wire.
2) Enter the security code.
3) Activate the Start button.
Further troubleshooting
Status Error description Possible problemProblem solution
Note: If you have problems restarting the robot, place it at a maximum distance of 50 cm from the boundary wire and restart it. Your personal settings will remain unchanged.
| Planning/Installation | The robot does not leave the charging station | The charging station LED lights up red. | -Check the perimeter wire for breaks.-Robot not sufficiently charged |
| The charging station LED flashes green. | - Continue charging the robot until the indicator lights up green. | ||
| Incorrect installation of the charging station | The "In" arrow must point in the direction of the working area. | ||
| Excess cable is rolled up under the docking station. | Shorten the boundary wire to avoid contact and thus interference. | ||
| Corrosion on the charging contacts | Clean the charging contacts with steel wool | ||
| Charging contacts on the station do not touch the charging contacts of the robot correctly. | Check whether the station has sunk / is still on the scales. | ||
| The rain sensor is active | Clean all metal contacts with Spritus | ||
| When travelling along the boundary wire for the first time, the robot's track is abnormal or it turns in some sections of its path. | The function for recognising the boundary wire is faulty. There may be external interference signals in the vicinity, e.g. underground power grids, high-performance electrical devices, etc. | Enclose this interference area with your boundary wire to keep the robot away from this area. | |
| The nearest boundary wire to your neighbour should be laid at least 2 m away from yours. | Set the boundary wire so that the robot can recognise the signal normally. | ||
| The robot does not connect to the charging contacts when it returns to the charging station. | Uneven structure of the charging station | Check the structure of the charging station with a spirit level and smooth the surface of the lawn if necessary. | |
| First use | The robot stops and the battery level indicator only shows a dash. | The battery is empty | Return the robot to the charging station and allow it to charge.Note: If the robot indicator lights up green constantly, the battery is OK. If the robot indicator flashes green for more than 2 hours, the battery is faulty or there is no contact between the charging contacts of the station and the contacts of the robot. |
| Robot drives over the boundary wire and stops near it. | The wheels may be covered with mud and debris, resulting in poor grip. | Clean the robot's wheels and, if necessary, the lawn. | |
| The angle in the corners of the perimeter wire is less than 100° | Increase the angle accordingly. | ||
| The signal of the perimeter wire is faulty | Check that the plug connection is correctly seated. Check the cable for breaks. | ||
| During normal use | Loud noises and vibrations | The blades are blunt and the cutting system runs out of round.Blade disc was damaged. | Turn the cutting blades or replace them. Please do both for all blades at the same time.Replace the disc. |
| Screws for fastening the blade disc are loose. | Fasten the corresponding screws carefully. | ||
| Foreign objects have got between the disc and drive | Remove the foreign bodies completely. | ||
| The robot runs, but does not cut the grass | The cutting height is set incorrectly. | Set the cutting height appropriately | |
| The regular working time after each charging process has become shorter. | The charging contacts are dirty | Clean all charging contacts carefully. | |
| The capacity of the battery has decreased after frequent charging and discharging. | A new battery is required to be able to work efficiently again | ||
| Robot does not routinely come out after prior activation of the rain sensor. | The rain sensor is still active | Clean all metal contacts thoroughly with Spritus | |
| Robot drives round itself in circles | It finds no signal | Check that no more than 250 metres of cable have been laid (total number) | |
| Black screen | Place the machine back in the charging station and charge the mower for at least 10 minutes. Then switch the mower off and switch it on again after approx. 1 minute. The screen should now display again. |
18. TECHNICAL DATA
| Lithium battery Voltage | 28V |
| Lithium battery capacity | 3Ah |
| Engine | Brushless electric motor |
| Cutting speed | 2900 rpm |
| Cutting system | 3 blades with mulching function |
| Possible area size | 1000 m^2 |
| Maximum angle of ascent | 30° |
| Maximum running speed | 0.5m /sec |
| Charging time | 120min |
| Runtime | 60min |
| Noise level | 65dB(A) |
| Cutting width | 24cm |
| Cutting heights | 25mm - 65mm |
| Cutting mode | Straight lines and random mode |
19. WASTE DISPOSAL

WARNING!
Make disused power tools unusable before disposal:
- Mains-powered electric tools by removing the plug,
- battery-operated power tools by removing the battery.

For EU countries only
Do not dispose of power tools in household waste! In accordance with European Directive 2012/19/EC on waste electrical and electronic equipment and its transposition into national law, used electrical appliances must be collected separately and recycled in an environmentally friendly manner. Raw material recovery instead of waste disposal. Appliances, accessories and packaging

should be recycled in an environmentally friendly manner. Plastic parts are labelled for recycling by type.

WARNING!
Do not dispose of rechargeable batteries/batteries in household waste, in fire or in water. Do not open used rechargeable batteries. Rechargeable batteries/batteries should be collected, recycled or disposed of in an environmentally friendly manner.
For EU countries only: In accordance with Directive 2006/66/EC, defective or used rechargeable batteries/batteries must be recycled.

NOTE
Please contact your local authority/city for information on disposal options,
Recycle the raw materials instead of disposing of them with household waste.
20. EU DECLARATION OF CONFORMITY
Manufacturer / Producer FUXTEC GmbH
EC directive MD Directive: 2006 / 42 / EC
Angewandte Normen / applicable standards
EN 60335-1:2012+A11:2014+A13:2017
EN 62233:2008
We hereby declare that the above-mentioned machine, in the version placed on the market by us, complies with the basic safety and health requirements of the EC Directive listed.
Hereby we declare that the above mentioned machine meet the essential safety and health requirements of the above stated EC directives.
Storage of the technical documents: FUXTEC GmbH ● Kappstraße 69 ● 71083 Herrenberg ● Germany, T. Gumprecht, Managing Director
Herrenberg, 01.12.2021
Tian Gumpreck
natural_image
Black and orange robotic lawn mower (no visible text or symbols)2.

natural_image
Black rectangular electronic device with a vertical screw and ventilation slots (no visible text or symbols)
natural_image
Black plastic folding chair with ventilation slots and metal legs (no text or symbols visible)


Contenu :
natural_image
Person stepping on a black plastic stepping block outdoors on grass, with no visible text or symbolsnatural_image
Person handling a green cable on grass next to a device and a small tool (no visible text or symbols)text_image
IN OUT IN OUT
natural_image
Person working on a metal frame structure outdoors on grass, no visible text or symbolsIN
natural_image
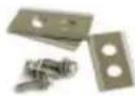
Three black electrical connectors with terminal labels, no visible text or symbols on the devices themselves.
text_image
FUXTEC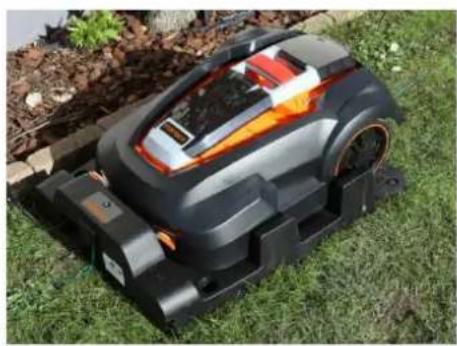
natural_image
Black and orange lawn mower on grass, no visible text or symbolsnatural_image
Close-up of a black electronic device with a red annotation highlighting a component, attached to a cable (no visible text or symbols)natural_image
Close-up of an orange industrial machine component with a circular dial and blue arrow pointing to it (no visible text or symbols)Bouton Stop (2):
natural_image
Close-up of an orange industrial machine component with a blue arrow pointing to a red 'STO' button (no readable text or symbols beyond branding)Bouton HOME (3):
Directive CE / EC directive
MD Directive: 2006 / 42 / EC
Normes appliquées / applicable standards
EN 60335-1:2012+A11:2014+A13:2017
EN 62233:2008
natural_image
Black and orange robotic lawn mower (no visible text or symbols)2.

natural_image
Black rectangular electronic device with a vertical screw and control buttons (no visible text or symbols)
natural_image
Black plastic folding chair with ventilation slots and metal legs (no text or symbols visible)


natural_image
Person working on a black rectangular device outdoors on grass, no visible text or symbolsnatural_image
Person working on grass near a robotic arm and equipment (no visible text or symbols)text_image
IN OUT IN OUT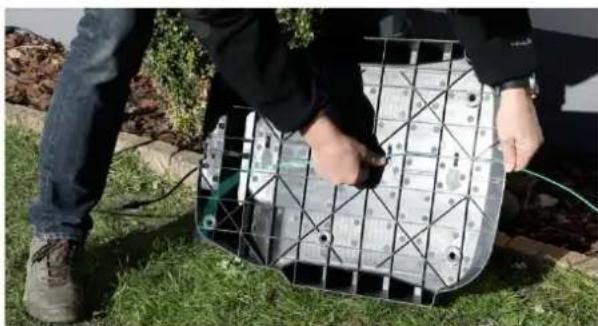
natural_image
Person handling a metal mesh device on grass, no visible text or symbols1. IN
natural_image
Three-panel image showing a FUXTEC power adapter, a black electrical plug, and a small robotic lawn on grass (no visible text or symbols)natural_image
Close-up of a black electronic device with a red annotation highlighting a component, no visible text or symbols.natural_image
Close-up of an orange industrial machine component with a circular dial and a blue arrow pointing to it (no visible text or symbols)Tasto STOP (2):
natural_image
Close-up of an orange and black vehicle's engine compartment with a red 'STOP' logo and a circular emblem (no readable text or symbols)Tasto HOME (3):
Norme applicate / applicable standards
EN 60335-1:2012+A11:2014+A13:2017
EN 62233:2008
Hereby we declare that the above mentioned machine meet the essential safety and health requirements of the above stated EC directives.
Conservazione della documentazione tecnica: FUXTEC GmbH • Kappstraße 69 • 71083 Herrenberg • Germany, T. Gumprecht, Geschäftsführung
Herrenberg, 01/12/2021
Tian Gumpreck
natural_image
Black and orange lawn mower on a wheeled vehicle (no visible text or symbols)2.

natural_image
Black rectangular device with a vertical metallic grille and control buttons (no visible text or symbols)
natural_image
Black plastic folding chair with metal legs and side supports (no text or symbols visible)
4.

5.
6.

7.

8.

9.
10.
natural_image
Person working on a grassy outdoor setup with a black rectangular device and hands adjusting it (no visible text or symbols)natural_image
Person kneeling on grass next to a small mechanical device and equipment (no visible text or symbols)text_image
IN OUT IN OUT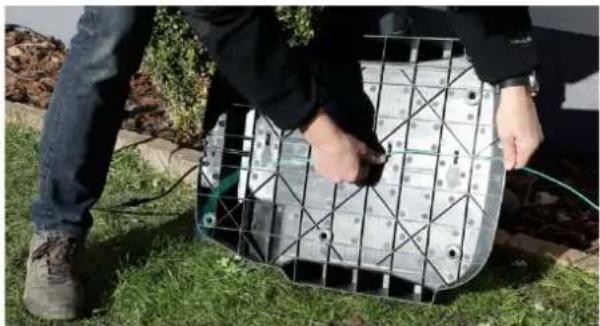
natural_image
Person kneeling on grass next to a metal grid device with attached wires (no visible text or symbols)1. EN
natural_image
Three-panel image showing a black automotive power strip, a close-up of a blue FUXTEC robotic car with visible flame, and a separate photo of its lawn on grass (no text or symbols)natural_image
Close-up of a black electronic device with a red highlighted component and cable, no visible text or symbols.natural_image
Close-up of an orange industrial machine component with a circular orange knob and a blue arrow pointing to it (no visible text or symbols)STOP-Sabor (2):
natural_image
Close-up of an orange and black automotive component with a blue arrow pointing to a red 'STON' button (no readable text or symbols)INICIO-Sabor (3):
natural_image
Black and orange robotic lawn mower (no visible text or symbols)2.

natural_image
Black rectangular electronic device with a vertical screw and ventilation slots (no visible text or symbols)
natural_image
Black plastic folding chair with ventilation slots and metal legs (no text or symbols visible)


natural_image
Person using a black rectangular device on grass, wearing boots and gloves (no visible text or symbols)natural_image
Person working on grass with a green cable and a small device nearby (no visible text or symbols)text_image
IN OUT IN OUT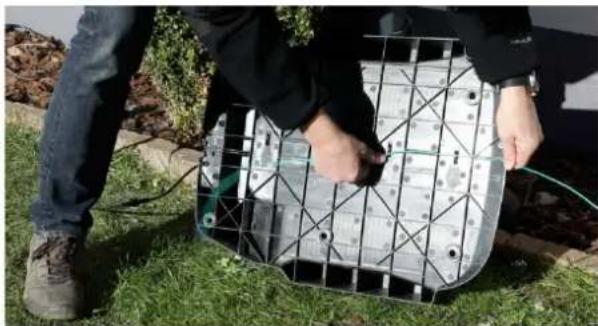
natural_image
Person handling a metal grid-based device outdoors on grass, no visible text or symbols- EM
natural_image
Three black electrical connectors with terminal labels, no visible text or symbols on the main body.
text_image
FUXTEC V
natural_image
Black and red lawn mower on grass, no visible text or symbolsnatural_image
Close-up of a black electronic device with a red highlighted component and cable, no visible text or symbols.natural_image
Close-up of an orange industrial machine component with a circular dial and a blue arrow pointing to it (no visible text or symbols)STOP-Sabor (2):
natural_image
Close-up of a red and black automotive engine compartment with a blue arrow pointing to a component labeled 'STOP' (no readable text beyond label)CASA-Sabor (3):
text_image
FUXTEC 3 0 SET OK HOME STARTnatural_image
Black and orange robotic lawn mower (no visible text or symbols)2.

natural_image
Black rectangular electronic device with a vertical screw and control buttons (no visible text or symbols)
natural_image
Black plastic folding chair with ventilation slots and metal legs (no text or symbols visible)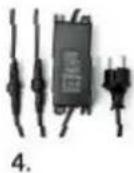


natural_image
Person using a black mechanical device on grass, wearing casual boots (no visible text or symbols)natural_image
Person kneeling on grass next to a portable device and a small tool, no visible text or symbolstext_image
IN OUT IN OUTnatural_image
Person working on a metal grid-based device outdoors on grass, no visible text or symbolsManual\_FX-RB224\_Int24\_rev1
natural_image
Three-panel image showing a black electric shock absorber, a black plug-in socket, and a black tracked robot on grass (no visible text or symbols)natural_image
Close-up of a black FXNTEV printer with a red annotation highlighting a mechanical component (no visible text or symbols on the device itself)natural_image
Close-up of an orange industrial machine component with a circular dial and arrow pointing to it (no visible text or symbols)STOP-Smaak (2):
natural_image
Close-up of an orange SUV engine compartment with a blue arrow pointing to a red 'STOP' component (no text or symbols on the main body)HUIS-Smaak (3):
natural_image
Black and orange lawn mower on a wheeled vehicle (no visible text or symbols)2.
natural_image
Top-down view of a black electronic device with a vertical screw and control buttons (no visible text or symbols)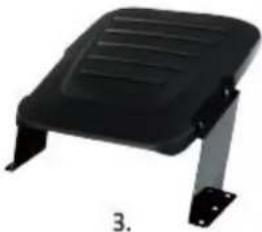
natural_image
Black plastic exercise chair with slatted top and support legs (no text or symbols visible)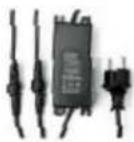
4.
5.
6.
7.

8.

9.

10.
paketets innehåll:
natural_image
Person installing or adjusting a black mechanical component on grass, no visible text or symbolsnatural_image
Person kneeling on grass next to a small mechanical device and equipment (no visible text or symbols)text_image
IN OUT IN OUTnatural_image
Person working on a metal frame with grid pattern, outdoors on grass (no visible text or symbols)natural_image
Exterior view of a black electrical terminal block with two side connectors and three terminal plugs (no visible text or symbols)
text_image
FUXTEC
natural_image
Top-down view of a black and orange lawn mower on grass, no visible text or symbolsnatural_image
Close-up of a black electronic device with a red annotation highlighting a component, no visible text or symbols on the device itself.75. INSTÄLLNING OCH START
natural_image
Close-up of an orange industrial machine component with a circular dial and a blue arrow pointing to it (no visible text or symbols)STOP-Smak (2):
natural_image
Close-up of an orange and black automotive engine component with a blue arrow pointing to a red 'STO' logo (no readable text or symbols beyond branding)HEM-Smak (3):
text_image
FUXTEC 3 SET OK HOME STARTPOLSKA WERSJA JEZYKOWA
81. PREZENTACJA
natural_image
Black and orange robotic lawn mower (no visible text or symbols)2.

natural_image
Black rectangular device with a vertical metallic grille and control buttons (no visible text or symbols)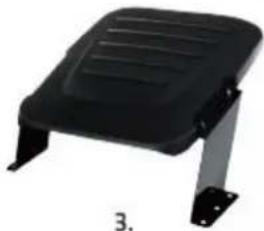
natural_image
Black plastic folding chair with metal legs and side supports (no text or symbols visible)
4.
5.

6.

7.

8.

9.
10.
Zawartość Paczki:
natural_image
Person standing on grass next to a black rectangular structure, wearing gloves and boots (no visible text or symbols)natural_image
Person kneeling on grass next to a portable device and a small tool, no visible text or symbolstext_image
IN OUT IN OUT- W
natural_image
Person handling a large metal grid-based device outdoors on grass, no visible text or symbolsManual_FX-RB224_Int24_rev1
natural_image
Three black electrical connectors with terminal labels and a central black device labeled 'PT-7' (no readable text beyond branding)
text_image
RUKTEC