Berta MR18Z - Lawn mower Zoef Robot - Free user manual and instructions
Find the device manual for free Berta MR18Z Zoef Robot in PDF.

| Product type | Robot lawn mower |
| Brand | Zoef Robot |
| Model | Berta MR18Z |
| Cutting width | 18 cm |
| Cutting height adjustment | 20 to 60 mm |
| Maximum recommended area | 600 m² |
| Weight | 9.5 kg |
| Power supply | AC 100-240 V, 50/60 Hz |
| Battery type | Li-ion, 28 V, 2 Ah |
| Mowing autonomy | Approximately 45 minutes |
| Charging time | Approximately 45 minutes |
| Sound power level | 60 dB(A) |
| Protection rating | IP56 |
| Built-in sensors | Rain, collision, lift, tilt, slip |
| Programming | Automatic or manual start, area and time setting |
| Automatic return to base | Yes, with automatic recharging |
| Security code | 4-digit PIN code (customizable) |
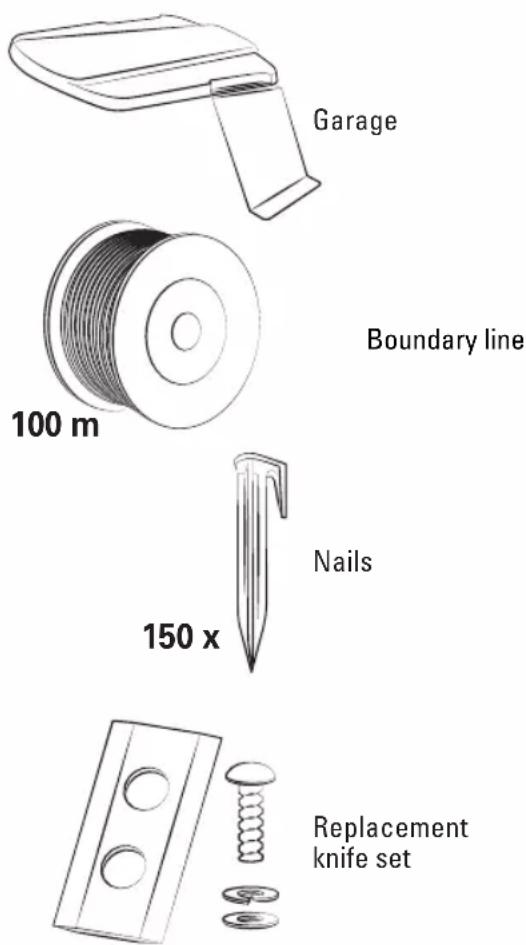
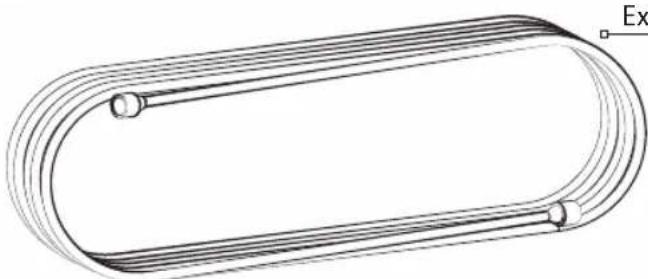
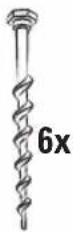
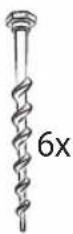
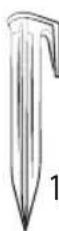
| Included accessories | 100 m boundary wire, 150 pegs, 4 connectors, 2 clamps, 9 replacement blades with screws, power adapter, extension cable |
| Maintenance | Regular cleaning, replacement of blades every 2 months |
| Warranty | 24 months (1 year for battery) |
Frequently Asked Questions - Berta MR18Z Zoef Robot
User questions about Berta MR18Z Zoef Robot
0 question about this device. Answer the ones you know or ask your own.
Ask a new question about this device
Download the instructions for your Lawn mower in PDF format for free! Find your manual Berta MR18Z - Zoef Robot and take your electronic device back in hand. On this page are published all the documents necessary for the use of your device. Berta MR18Z by Zoef Robot.
USER MANUAL Berta MR18Z Zoef Robot
natural_image
Close-up of a black and orange robotic lawn mower with visible blades and wheels (no text or symbols)DE/EN/NL/FR
natural_image
Illustration of a coiled cable or wire with no text or symbolsnatural_image
Technical line drawing of a mechanical component with three circular holes and three separate views (no text or symbols)natural_image
Pure diagram of a U-shaped pipe or tube with a central rod, no text or symbols presentVerlängerungskabel
Erstinbetriebnahme

natural_image
Line drawing of a printer with no text or symbolsnatural_image
Diagram of a printer with a downward arrow indicating compression or disassembly (no text or symbols present)natural_image
Diagram of a mechanical component with downward arrows indicating force or movement (no text or symbols)Ladestation fixieren
natural_image
Simple line drawing of a person operating a device with a lightning bolt (no text or symbols)Abdeckung entfernen
6

natural_image
Pure electrical circuit lines without any symbolsnatural_image
Pure electrical circuit lines without any symbolsnatural_image
Pure mechanical cross-section diagram without any text, numbers, or symbolsAbdeckung aufsetzen
natural_image
Diagram of a mechanical component with directional arrows indicating motion or force (no text or symbols)natural_image
Diagram of a car interior showing a handle and keyhole with a downward arrow indicating action (no text or symbols present)natural_image
Line drawing of a robotic lawn curler with a cloth, no text or symbols presentnatural_image
Technical line drawing of a mechanical gear assembly with a lever (no text or symbols)natural_image
Line drawing of a hand inserting a plug into a printer (no text or symbols)natural_image
Line drawing of a robotic lawn mower with no text or symbolsnatural_image
Technical line drawing of a mechanical gear assembly (no text or symbols)natural_image
Mechanical gear assembly diagram showing two downward arrows indicating rotational motion (no text or symbols)natural_image
Mechanical assembly diagram showing a rotating component with two downward arrows indicating motion (no text or symbols)Table of Contents Welcome
Technical Information 14
Welcome 14
Safety Instructions.... 15
Notice Signs on the Appliance 16
Warranty 16
Planning the Installation....17
Appliance Overview 18
Initial Set-Up 20
Status Messages / Error Messages .... 21
Automatic Start....22
Use 22
Manual Start 23
Cleaning....24
Storage 24
Replacing the Knife....25
Technical Information
Charging voltage ...... AC100-240V
Frequency 50/60 Hz
Height adjustment....20–60 mm
Cutting width....18 cm
Weight ....approx. 9.5kg
Maximum area 600 m2
Battery capacity....2 Ah Li-ion
Battery voltage....28 V
Charging time.....approx. 45 min
Operating time ....approx. 45 min
Sound power level LWA....60 dB(A)
Protection class IP56
You are purchasing a high-quality product, showing that you have high expectations to it. For effective and safe operation, read and follow these instructions and the safety instructions contained therein carefully. Keep this manual and the original packaging for future reference and for repackaging for transfer. We want you to choose our appliances and products in future as well.
Optional accessories
Safety information
EN
Persons aged 14 years or over with reduced physical, sensory or mental capabilities, lack of experience or knowledge may only use the appliance, clean or service it if they are supervised by a person who is responsible for their safety or if they have been shown how to use the appliance safely and they have understood the risks inherent in its use.
This appliance must not be used by children. Children should not play with the appliance. Keep the appliance and power cable away from children under 14 years old.
Periodically check the appliance for damage and tighten the screws. Never operate defective appliances.
Repairs on the appliance are only permitted by a specialist. Improper repairs may cause considerable dangers to the user.
Only use genuine accessories approved by the manufacturer.
If the appliance is used for purposes other than those specified by the manufacturer, operated incorrectly, or not repaired professionally, we will not accept any liability for any resulting damage. In this case, the warranty claim will be void.
Do not remove/deactivated any safety elements installed on the appliance (e.g. protective flaps/lids, safety switch).
Protection class III for increased appliance safety.
The appliance is not intended for commercial use.
Attention: Do not operate the appliance near any easily flammable liquids/gases or dust – danger of explosion!
Familiarise yourself with the appliance before initial use while the motor is turned off.
Warning: when the machines is running, people who have not read and understood the instructions carefully, please do not come within one meter of the running machine!
Attention: Always turn off the appliance and wait for standstill of the appliance parts for transport, maintenance, repair work, cleaning, emptying of the collection basket, partial or complete lifting of the appliance, passing of non-grass areas or unsupervised leaving of the appliance – danger of injury!
Do not put any objects and / or fingers into any openings of the appliance.
Securely hold the appliance, ensure a safe stance. Comply with the safety distance.
Do not etc. wear loose jewellery, clothing etc. and tie back long hair.
At clogs/scratches on an object: Turn off the motor at once, check the appliance for damage.
Never operate the appliance on wet or slippery/iced surfaces. Caution when working on steep slopes/uneven terrain.
Keep unauthorised persons/animals away from the working area. Turn off unused/unsupervised appliances.
Do not operate the appliance if you are drowsy, physically unwell, under the influence of drugs/alcohol/medicines, etc.
Comply with public provisions for resting times.
Only perform cleaning and maintenance work after complete standstill of the knife. Attention: The knife lags!
Allow the appliance to cool down before stowing it away.
Power supply: The voltage must correspond to the information on the charging station nameplate.
Check the charging station/power cable for damage. Never take the damaged charging station into operation. Repairs on the charging station only by specialists for reasons of safety.
Never pull on the mains cable, e.g. to pull the mains plug. Keep the mains cable away from hot surfaces/objects, oils, sharp edges and moved objects.
Safety information
We advise connecting the charging station to an earth leakage circuit breaker (max. 30 mA).
Only use a cable with a matching mains plug. NEVER modify the cable / mains plug!
Fluid leaks may occur during improper use of the battery. Body contact with this fluid must be avoided. In case of eye contact you must consult a physician.
Do not expose the battery to direct sunlight/liquids. Charge and store the battery at room temperature.
Do not keep the unused battery near any coils, keys, nails, screws or other metal objects.
Only use the genuine charging station and genuine battery.
Attention: Always remove the battery for transport, before setting the appliances, before replacing accessories, maintenance, partial or complete lifting of the appliance or when leaving the appliance unsupervised – danger of injury!
Battery safety circuit
The battery turns off automatically if it grows too hot, has too much current, is nearly drained.
Charge the battery every 3 months in order to avoid deep discharge. Do not store the battery in temperatures of less than -5 °C or above 50 °C.
Disposal/environmental protection
Never dispose of this appliance with household waste. Ask your municipal authority about the nearest official collection point and only use this. If appliances are disposed of unchecked, contaminants can leak out and poison the food chain, flora and fauna. Your point of sale is obliged to take back used appliances. We would therefore ask that you support us by making an active contribution to environmental protection by returning this appliance to the manufacturer. The manufacturer guarantees professional disposal according to the local directives. Professionally dispose of the battery in accordance with the local provisions. Not domestic waste!
Notice signs on the appliance
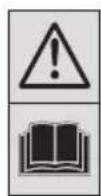
WARNING - Read the operating instructions before commissioning of the machine.
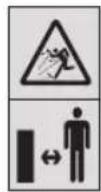
WARNING - Comply with a safety distance from the machine during operation.
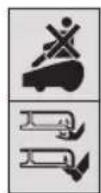
WARNING - Do not ride on the machine.
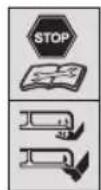
WARNING - Turn off the machine before working on the machine or lifting.
Warranty for the appliance
This product was produced based on the highest quality standards. A manufacturer's warranty of 24 months is granted, starting on the date of the sale, when purchasing a new product. The warranty covers only defects that are due to material and/or manufacturing defects and non-compliance of promised properties. Wear parts are exempted from the warranty. When asserting a warranty claim the original receipt with sales date must be enclosed. Warranty repairs must only be performed by authorised workshops or service stations. A warranty claim only applies at intended use. The warranty shall not include any damage caused by the following events: Abuse, overload or neglect, commercial use (industry, trade, renting), repairs by unauthorised offices, damage by foreign bodies, substances or accidents. Warranty for battery 1 year.
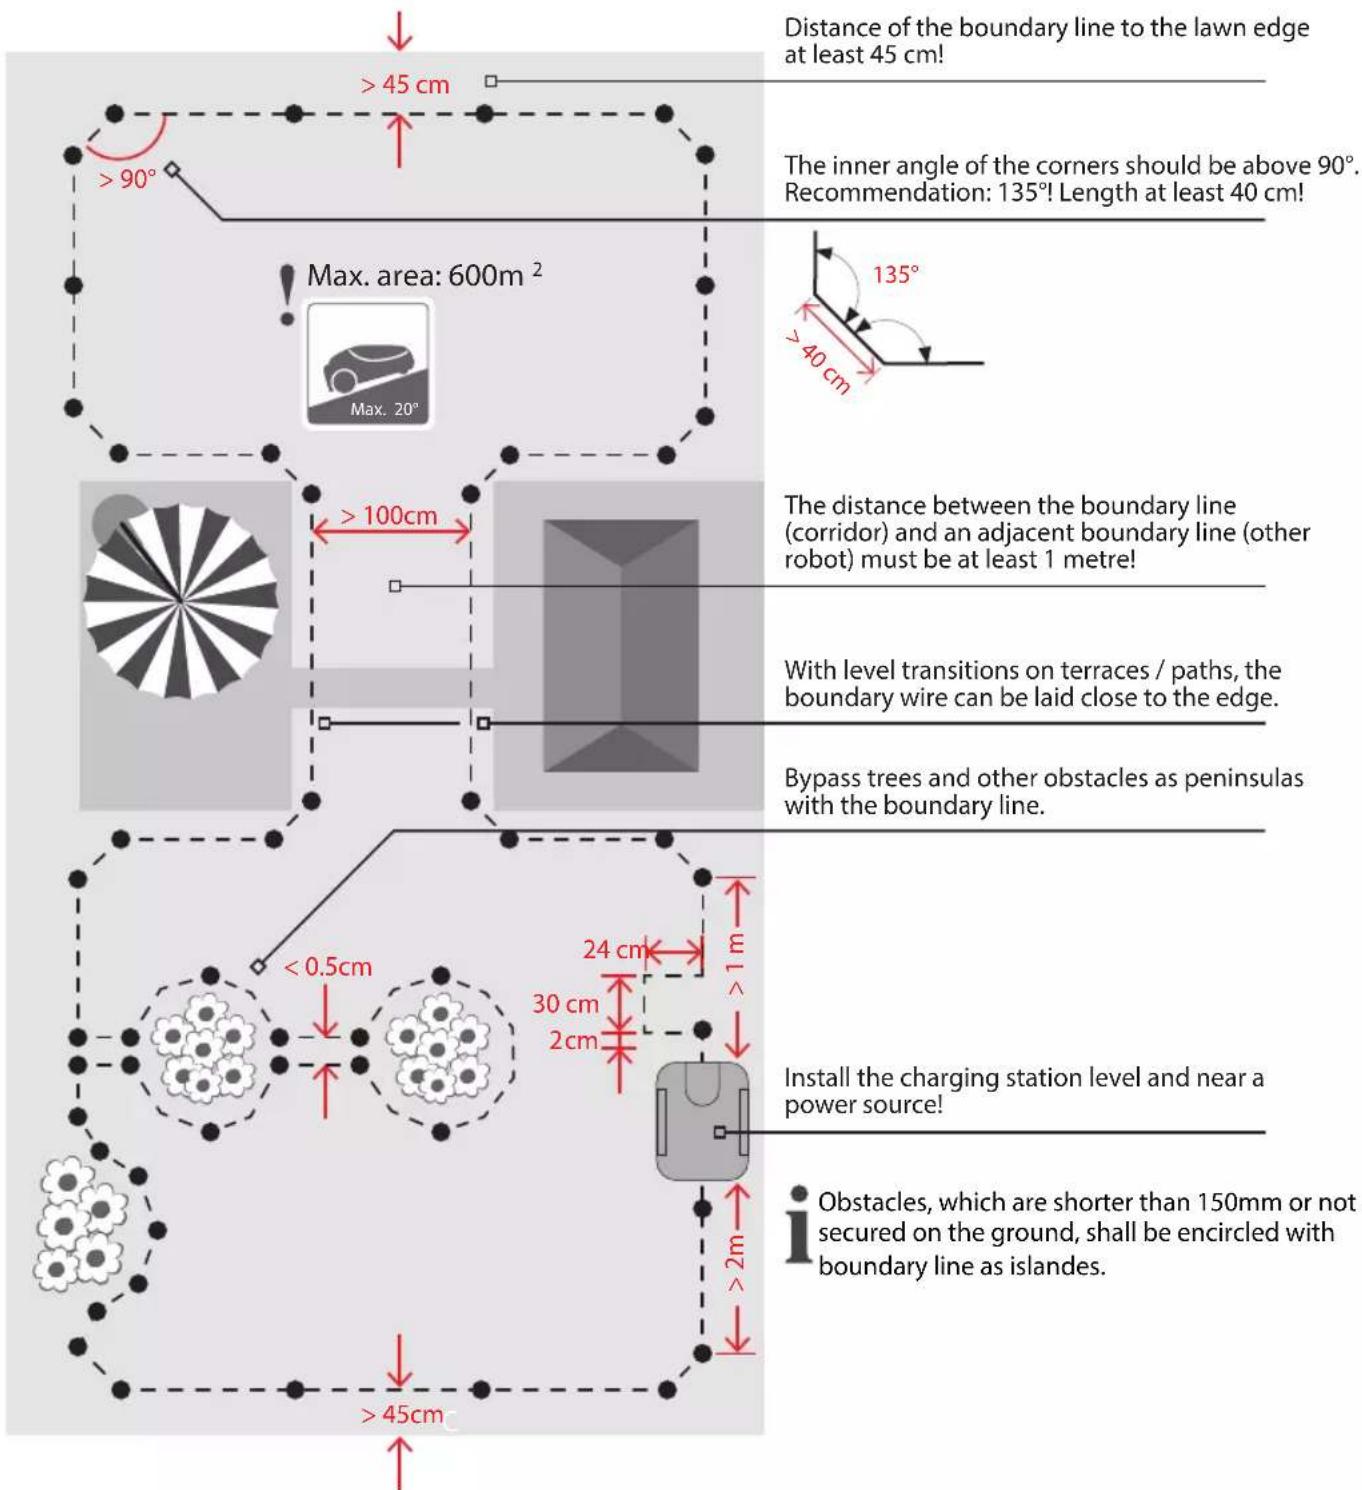
Planning the Installation
EN

RecommendationCreate a sketch with working area and all obstacles in order to simplify the installation!
Note: Reinforcement armouring irons in subterranean buildings/adjacent boundary lines and power cables of other electrical appliances produce magnetic fields that may cause navigation interferences.
Note: Turn off the appliance during long periods of rain. The ground will be muddy after strong rain. The mowing output may be impaired under such circumstances, and the lawn appearance may suffer.
Appliance overview
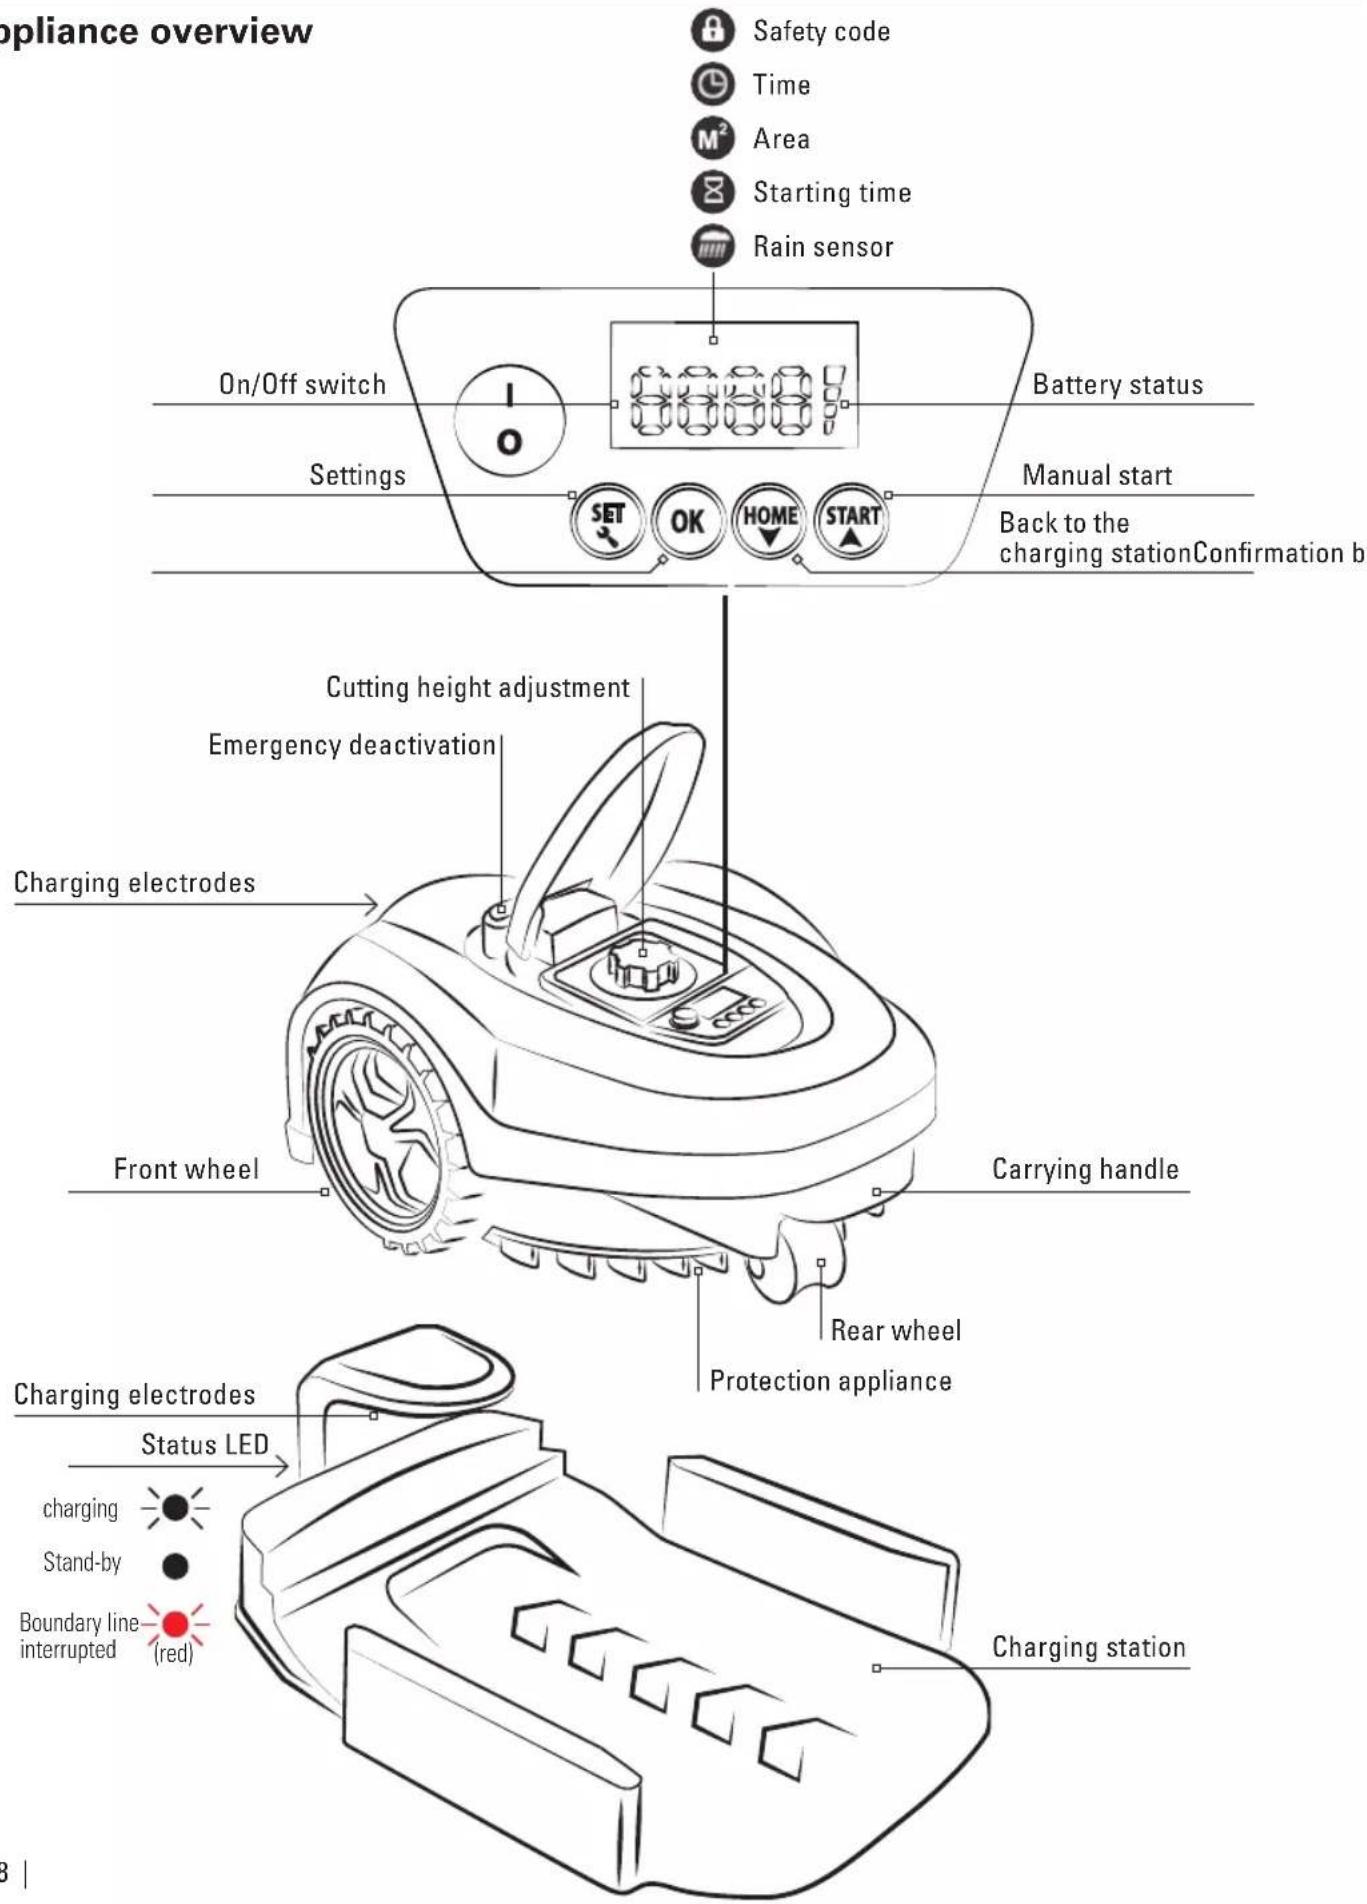
EN
natural_image
Illustration of a coiled cable or wire with no text or symbols100m boundary line

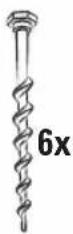
150 nails6 pegs
4 boundary line connectors
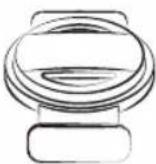
2 boundary line clamp
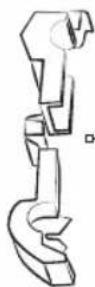
natural_image
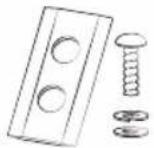
Technical line drawing of a mechanical component with three circular holes and three separate views (no text or symbols)9 replacement blades with screws
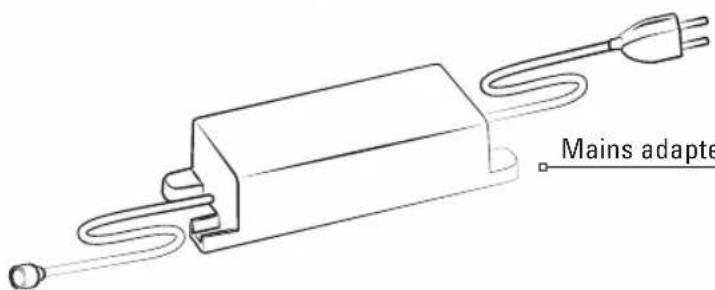
Mains adapter
natural_image
Pure technical line drawing of a U-shaped pipe or duct with a central bolt, no text or symbols presentExtension cable
Initial setup

Please read safety instructions before setup. Check the appliance for completeness.
1

natural_image
Line drawing of a mechanical device with internal components (no text or symbols)Place the charging station
Comply with distances and alignment!
• Install the charging station level and near a power source!
2

natural_image
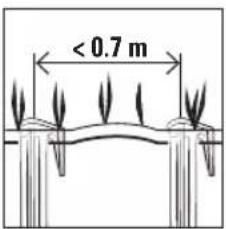
Diagram of a printer with a downward arrow indicating compression or disassembly (no text or symbols present)Place the boundary line under the charging station in a cable groove
Consider at least 50 cm reserve at the ends!
3
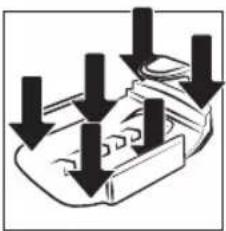
natural_image
Diagram of a mechanical component with downward arrows indicating force or movement (no text or symbols)Fasten the charging station
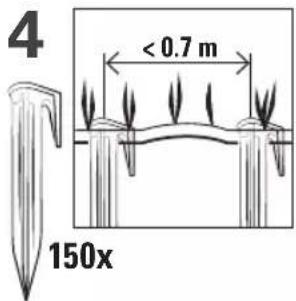
4
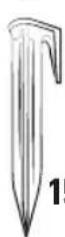
Place the boundary line taut with the nails
Place the boundary line <2 - 3 cm in the ground! Recommendation: Place the boundary line taut on the lawn. The boundary line will grow into the lawn.
5
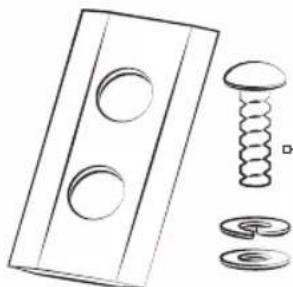
natural_image
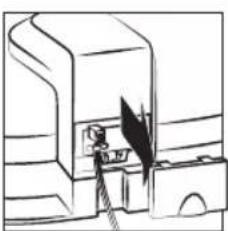
Simple line drawing of a person operating a device with a lightning bolt (no text or symbols)Remove the cover
6
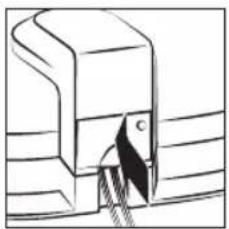
natural_image
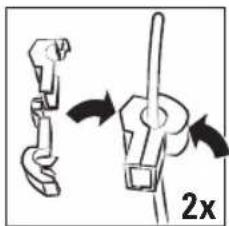
Diagram showing a mechanical assembly with arrows indicating motion, no text or symbols presentPlace the wire in the clamp and close it firmly
Strip the boundary line if necessary!
7
natural_image
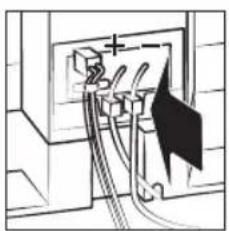
Pure electrical circuit lines without any symbolsConnect the terminals
Connect the boundary line under the charging station to the plus
- connection! Connect a different cable to the minus connection!
8
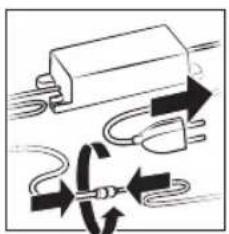
natural_image
Pure electrical circuit lines without any symbolsConnect the mains unit
- Correct installation
Defective installation: (kink/interruption/loose contact)
9
natural_image
Pure mechanical cross-section diagram without any text, numbers, or symbolsApply the cover
Completely charge the robot before initial commissioning!
[Non-Text]
Status messages/error messages
EN
E1 Emergency off actuated Re-start the robot
E2 Lifting sensor triggered Rear wheel blocked or lifted? Restore the rear wheel then re-start the robot.
E3 Robot outside of the boundary line primeter. Place robot inside, restart
E4 Boundary line cut Red indicator LED flashes? Repair - boundary line, restart robot
ES Collision sensor triggered Obstacles? Re-start the robot
E6 Overcurrent on the left drive-motor. Grass too high? (>4cm)? Left wheel blocked? Re-start the robot
E7 Overcurrent on the right drive-motor. Grass too high? (>4cm)? Right wheel blocked? Re-start the robot
E8 Overcurrent at the cutting motor Grass too high? (>4cm)? Cutting sleeve blocked? Re-start the robot
E9 Error charging status Malfunction of the battery. Re-start the robot multiple times, if the issues persists, contact service.
E10 Over-/undercurrent of the robot. Malfunction on the PCB bodard. Restart the robot multiple times, if the issues persist, contact service.
E11 Tilting sensor tripped Inclination in excess of 20 degrees? Re- start the robot
E12 Wheel slipping Grass too high or too wet? Re-start the robot.
E13 Overheating on battery Wait for the battery to cool down. Re-start the robot.
F1 Robot does not start, signal present Robot is started outside of the boundary line or too far from it? Restart the robot.
F2 Robot does not start, no signal (charging station) Boundary line/mains adapter correctly connected?
F3 Robot does not start The power of robot mower is turned off previously? Bring it onto the charging station and restart it.
F4 Battery voltage too low Completely charge the robot
Re-start the robot
- Place the robot on the boundary line Enter the safety code2. Push the start button3.
If the robot is turned off previously, it can only be started on the charging station.
Usage instructions

Observe the safety instructions!
1 Prepare the lawn
Ensure that there are not objects (pine cones, branches, rocks, etc.) that may damage the robot or be ejected by it. During the first mowing process, always set the cutting height MAX in order to avoid damage to the boundary line! Cut the lawn to m at most during first mowing.
2
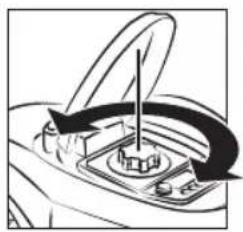
natural_image
Diagram of a car's dashboard with directional arrows indicating motion (no text or symbols)Set the cutting height (2 - 6 cm)
Recommendation: Do not set the cutting height too short in try weather in order to avoid drying out of the lawn!
3 Programme automatic start or:
Manual start

Emergency deactivation: Push the STOP button at once and turn off the robot in case of dangers, accidents or if the appliance vibrates strongly.
The robot returns to the charging station on its own for charging. Automatic resumption of mowing.
- Rain sensor - Robot returns to the charging station if it rains. Next start in the 48-hours interval.
■ Robot stops automatically at inclinations of > 20°!
■ Collision sensor! Robot moves around obstacles.
■ Danger of injury! Never reach into running knives.
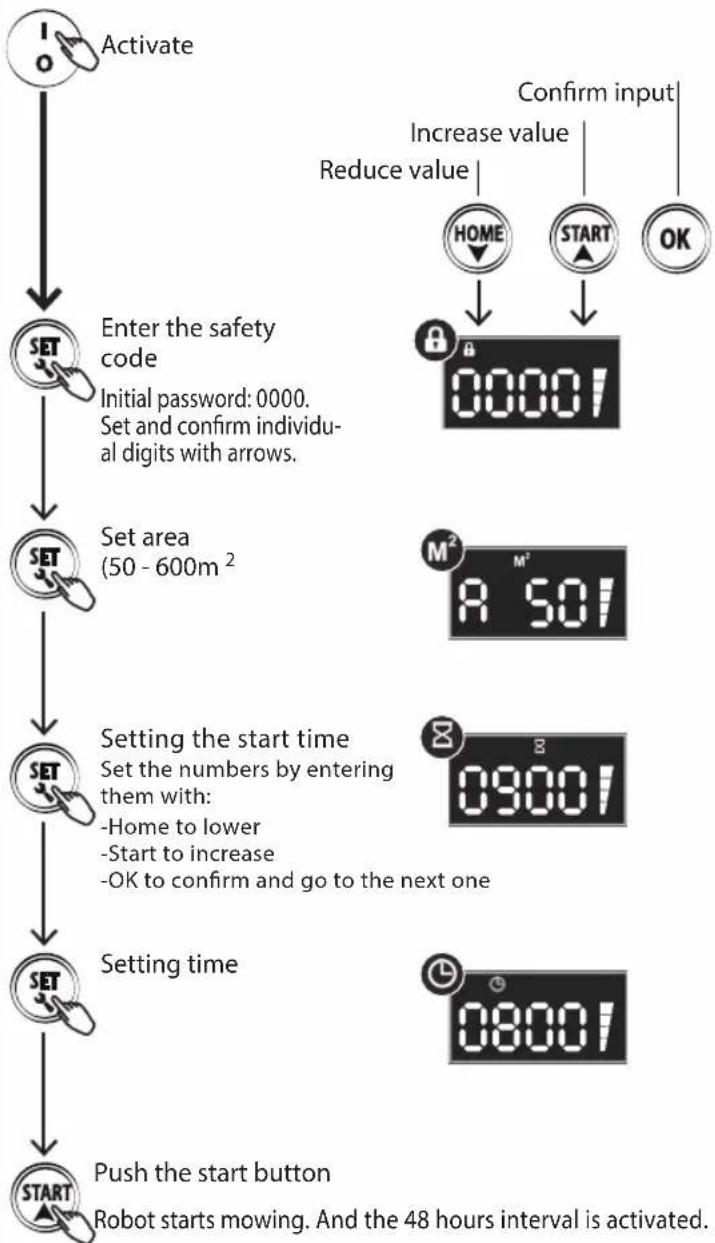
Programme automatic start
After activation, the individual digits of the safety code must be entered! First connect the mains. Completely charge the robot before initial commissioning!
flowchart
graph TD
    A["Activate"] --> B["Enter the safety code"]
    B --> C["Set area (50 - 600m²)"]
    C --> D["Setting the start time"]
    D --> E["Setting time"]
    E --> F["Push the start button"]

    G["Increase value"] --> H["HOME"]
    G --> I["START"]
    G --> J["OK"]

    K["Reduce value"] --> L["00001"]

    M["Confirm input"] --> N["08001"]

    O["SET"] --> P["SET"]
    Q["SET"] --> R["SET"]
    S["SET"] --> T["SET"]
    U["SET"] --> V["SET"]
    W["SET"] --> X["SET"]
    Y["SET"] --> Z["SET"]
Manual start

After activation, the individual digits of the safety code must be entered! First connect the mains. Completely charge the robot before initial commissioning!
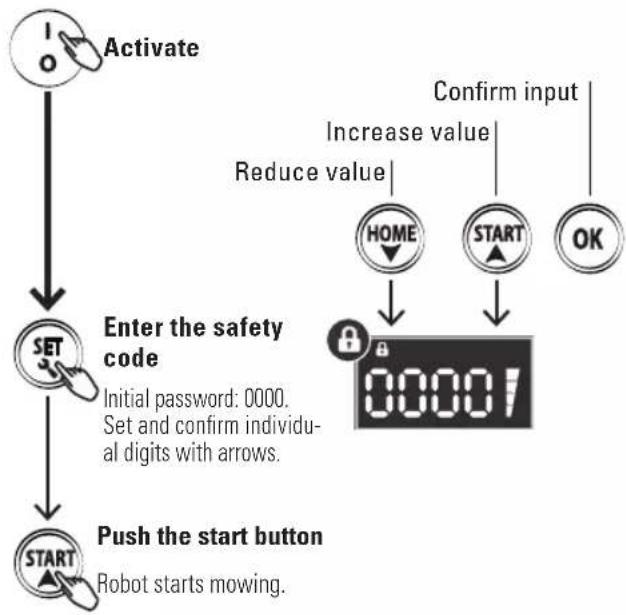
flowchart
graph TD
    A["Activate"] --> B["SET"]
    B --> C["Enter the safety code"]
    C --> D["Push the start button"]
    D --> E["Robot starts mowing."]
    F["Confirm input"] --> G["Increase value"]
    G --> H["HOME"]
    G --> I["START"]
    G --> J["OK"]
    H --> K["0000!"]
    I --> K
    J --> K
Back to the charging station
EN
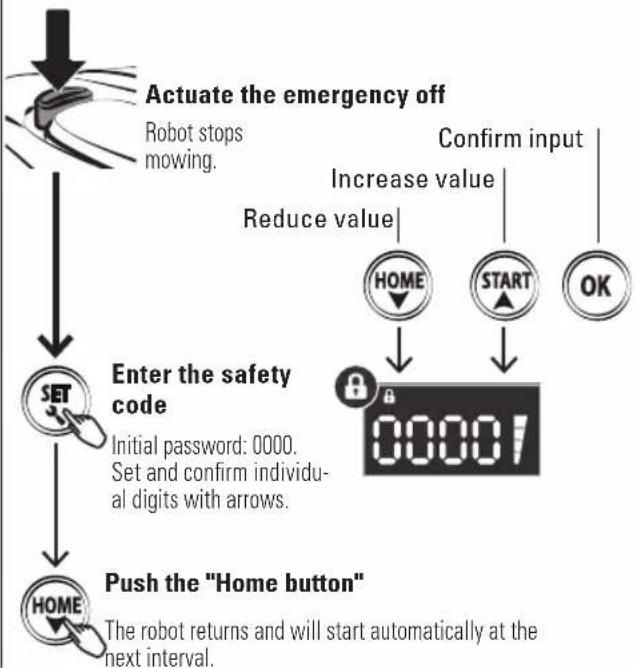
flowchart
graph TD
    A["Start"] --> B["SET"]
    B --> C["Enter the safety code"]
    C --> D["Push the "Home button""]
    D --> E["Robot stops mowing"]
    E --> F["Actuate the emergency off"]
    F --> G["Increase value"]
    G --> H["HOME"]
    G --> I["START"]
    G --> J["OK"]
    H --> K["00001"]
    I --> K
    J --> K
    K --> L["The robot returns and will start automatically at the next interval."]

If the robot is switched off, it must be started at the charging station.
Working time: 100 m^2 = 120 min . (mowing time + charging time).
If you want to change the code
Start by pressing the factory code 0000 + START.
The machine leaves the docking station and starts operating.
After a few meters • press STOP - error code E1 appears on the display.
- Press START and hold the START button for 10 seconds until the code U133 appears on the display.
- Press SET. The lock icon (image) flashes. Press the factory code 0000 one by one with OK, until 0000 is lit continuously.
- Press SET again and the lock icon flashes.
Now • press the 4-digit security code that you have personally chosen and then press OK.
Your personal security code has now been set and is lit continuously.
Finally, press START and the machine will continue to run.
Note: If you forget your personal code, the machine must be sent to the distributor to be reset.
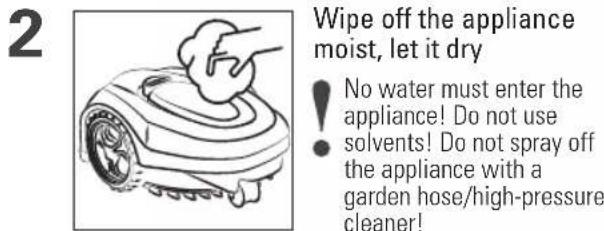
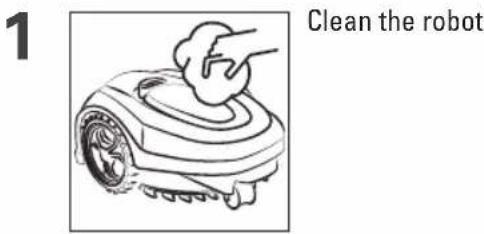
Cleaning
i Important: Clean the robot at regular intervals. If too much grass collects, the mowing result will suffer.

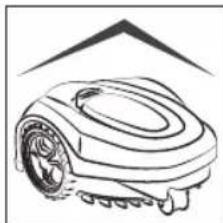
Positioning
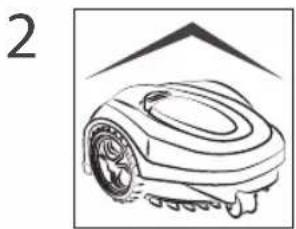
! Charge the robot fully first.
2 Store the robot, charging station and charging cable frost-protected
natural_image
Line drawing of a robotic lawn mower (no text or symbols)The boundary line placed may be left on the lawn. Keep the appliance in a dry location outside of the reach of children, protected from direct sunlight and extreme temperatures!
Charge the battery every 3 months in order to avoid deep discharge. Do not store the battery in temperatures of less than -5 °C or above 50 °C. Remove the robot from the charger after charging.
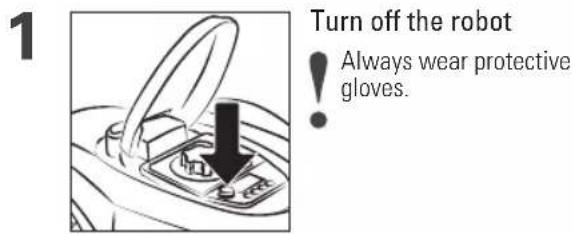
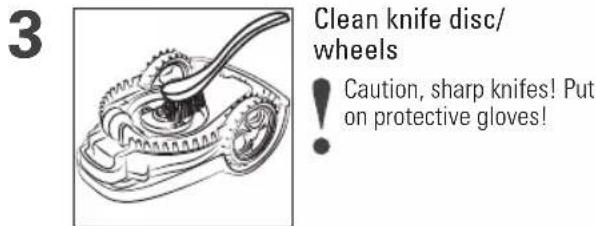
Replace the knife/remove caught objects
EN
Turn off the on/off switch first and put on protective gloves.
1
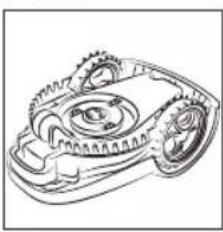
natural_image
Technical line drawing of a mechanical gear assembly (no text or symbols)Reverse the robot, remove caught objects if necessary
2
natural_image
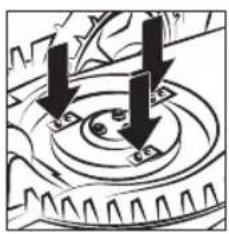
Mechanical gear assembly diagram showing two downward arrows indicating rotational direction (no text or symbols)Release the screws, remove defective knives
Check the knives every 2 months and replace them
● at the same time if necessary if the robot is used every day. Replace defective knives at once.
3
natural_image
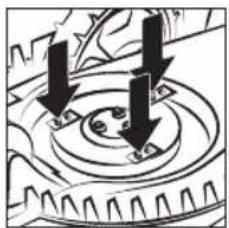
Mechanical gear assembly diagram showing two downward arrows indicating rotational motion (no text or symbols)Insert new knives and new screws
3x
i Ensure that the knives turn and work properly!
Inhoud
natural_image
Line drawing of a printer or printer with no visible text, numbers, or symbolsnatural_image
Diagram of a printer with a downward arrow indicating compression or disassembly (no text or symbols present)natural_image
Diagram showing downward arrows pointing to a mechanical component or assembly (no text or symbols)natural_image
Simple line drawing of a mechanical device with a gear and lever (no text or symbols)natural_image
Diagram showing a mechanical assembly with two arrows indicating motion, labeled '2x' (no text or symbols present)natural_image
Pure electrical circuit lines without any symbolsnatural_image
Pure electrical circuit lines without any symbolsVerbind de adapter en kabel
natural_image
Technical diagram of a mechanical component with a labeled section (C), showing internal structure without any readable text or symbols.natural_image
Diagram of a car interior showing a valve and directional arrows indicating motion (no text or symbols)natural_image
Line drawing of a car interior showing a door handle and a switch with a black arrow pointing to the button (no text or symbols)natural_image
Line drawing of a robotic arm with a hand cleaning the rim (no text or symbols)natural_image
Line drawing of a mechanical gear assembly with a lever (no text or symbols)natural_image
Line drawing of a hand inserting a small object into a printer (no text or symbols)natural_image
Line drawing of a robotic arm with a hand cleaning the rim (no text or symbols)Maak de robot schoon
natural_image
Line drawing of a robotic lawn mower with no text or symbolsnatural_image
Line drawing of a robotic lawn mower with no text or symbolsnatural_image
Technical line drawing of a mechanical gear assembly (no text or symbols)natural_image
Mechanical gear assembly diagram showing two downward arrows indicating rotational direction (no text or symbols)natural_image
Mechanical gear assembly diagram showing three downward arrows indicating rotational motion (no text or labels)natural_image
Line drawing of a printer or printer device with no visible text or symbols
natural_image
Diagram of a printer with a downward arrow indicating compression or disassembly (no text or symbols present)natural_image
Diagram of a mechanical component with downward arrows indicating force or movement (no text or symbols)Fixez la station de charge
4

150x
natural_image
Simple line drawing of a mechanical device with a handle and base, no text or symbols presentnatural_image
Diagram showing two mechanical components with directional arrows indicating motion, labeled '2x' (no text or symbols on the diagram itself)natural_image
Pure electrical circuit lines without any symbolsnatural_image
Pure electrical circuit lines without any symbolsnatural_image
Technical diagram of a mechanical component with a labeled section (C), showing internal structure without any readable text or symbols.Posez le couvercle