
Puur - Steam cleaner Zeegma - Free user manual and instructions
Find the device manual for free Puur Zeegma in PDF.
| Product Type | Steam Cleaner |
| Brand | Zeegma |
| Model | Puur |
| Power Supply | Electric, mains cable |
| Power | 1500 W (estimate) |
| Tank Capacity | 300 ml (estimate) |
| Heating Time | Approximately 30 seconds |
| Steam Adjustment | Yes, rotating knob |
| Steam Mop Function | Yes, with swivel head |
| Handheld Steam Cleaner Function | Yes, with accessories |
| Included Accessories | Microfiber cloth, carpet glider, window cloth, small brush, large brush, angled nozzle, squeegee, adapter, textile cloth |
| Compatible Surface Types | Hard floors, tiles, shower, mirrors, oven, worktop (test on a hidden area) |
| Recommended Water | Demineralized water only |
| Cloth Maintenance | Machine wash at 30°C, mild detergent, no bleach or fabric softener |
| Body Maintenance | Soft dry cloth |
| Storage | Empty tank, dry, store in a dry place |
| Safety | Do not direct steam towards people, animals, or electrical appliances |
| Service Contact | support@zeegma.com |
| Warranty | Compliant with EU directives |
Frequently Asked Questions - Puur Zeegma
User questions about Puur Zeegma
0 question about this device. Answer the ones you know or ask your own.
Ask a new question about this device
Download the instructions for your Steam cleaner in PDF format for free! Find your manual Puur - Zeegma and take your electronic device back in hand. On this page are published all the documents necessary for the use of your device. Puur by Zeegma.
USER MANUAL Puur Zeegma
Thank you for placing trust in us and choosing Zeegma.
We provide you with a product perfect for everyday use thanks to the use of high-quality materials and modern solutions.
We are convinced that they product will satisfy your requirements as it has been designed with utmost care.
Before the first use, please read this manual carefully.
Should you have any remarks or questions concerning the product, please do not hesitate to contact us:
support@zeegma.com
IMPORTANT
Please read this manual before you start using the device to see all its functions and use them in accordance with intended use.
A failure to follow the safety instructions or use at variance with the manual may lead to electric shock, fire or serious injuries.
Please keep this manual for further reference.

WARNING: Danger of scalding
CAUTION: Hot Surface
The device generates hot water steam. Particular elements of the device which have a contact with water steam become hot as well. Please be careful when using the device to avoid burning.
-
The device is intended for home use only. Do not use it outdoors.
-
Never leave the plugged device unattended.
- Before you start maintenance works or after you finish using, always unplug the device.
- This appliance can be used by persons with reduced physical, sensory or mental capabilities or lack of experience and knowledge if they have been given supervision or instruction concerning use of the appliance in a safe way and understand the hazards involved. Children shall not play with the appliance. Keep the appliance out of reach of children when it is energized or cooling down.
- Never point the steam towards people, animals, plants or electric devices.
- Do not immerse the device in any liquids.
- Do not switch the device on if you have noticed any damage; this applies to both a cable and plug.
- Do not use the device when it starts acting up, has been dropped or wetted.
- Do not grab the cable to pull or move the device. Do not place any items on it. Do not pull it through sharp edges of walls and furniture and do not wrap it too tight.
- Unplug the device after every use. Unplug from the socket by grabbing a plug, never a cable.
- Do not use the device and do not touch the plug if your hands are wet.
- Do not use the device to clean floors if the material tip has not been attached.
- Do not use the device if there is no water in the tank.
- If you have noticed any leaks, stop using the device, switch it off and then contact the manufacturer's service center.
- If you switch the device on and electric fuses activate, stop using the product immediately.
- Do not use the device in the inflammable, explosive or toxic atmosphere.
- Do not use the device on the skin, wax furniture and floors, unsecured wood or woodblock floor, synthetic materials, velvet or other steam-sensitive materials.
-
Always test the device on a small and invisible piece of surface cleaned to make sure it does not get damaged by the water steam.
-
Do not use the device for other purposes than designed.
- Keep the device away from sources of heat, high temperatures, hot surfaces, sources of ignition, naked flame, oils and sharp edges.
- To fill the tank, use demineralized water only. Do not use the tap water because it may lead to accumulation of scale and in effect damage.
- Do not add any anti-rust agents, anti-odor substances, alcohol and detergents to the tank as they may damage the tank.
- Before the use, clean strong dirt from the surface cleaned.
DEVICE OUTLINE
Main elements

A. Handle
B. Main body
C. Tube
D. Steam head
E. Microfiber sheath
F. Carpet slip
G. Window-cleaning sheath
H. Small brush
I. Large brush
J. Angle nozzle
K. Scraper
L. Accessories adapter
M. Textile sheath
Detailed elements

- Handle
- Hook
- Tube
- Water tank
- Water tank cap
- Grip
- Feeder cable
- Steam adjustment knob
- On/off switch
- Head rotating unit
- Steam head
- Water filter
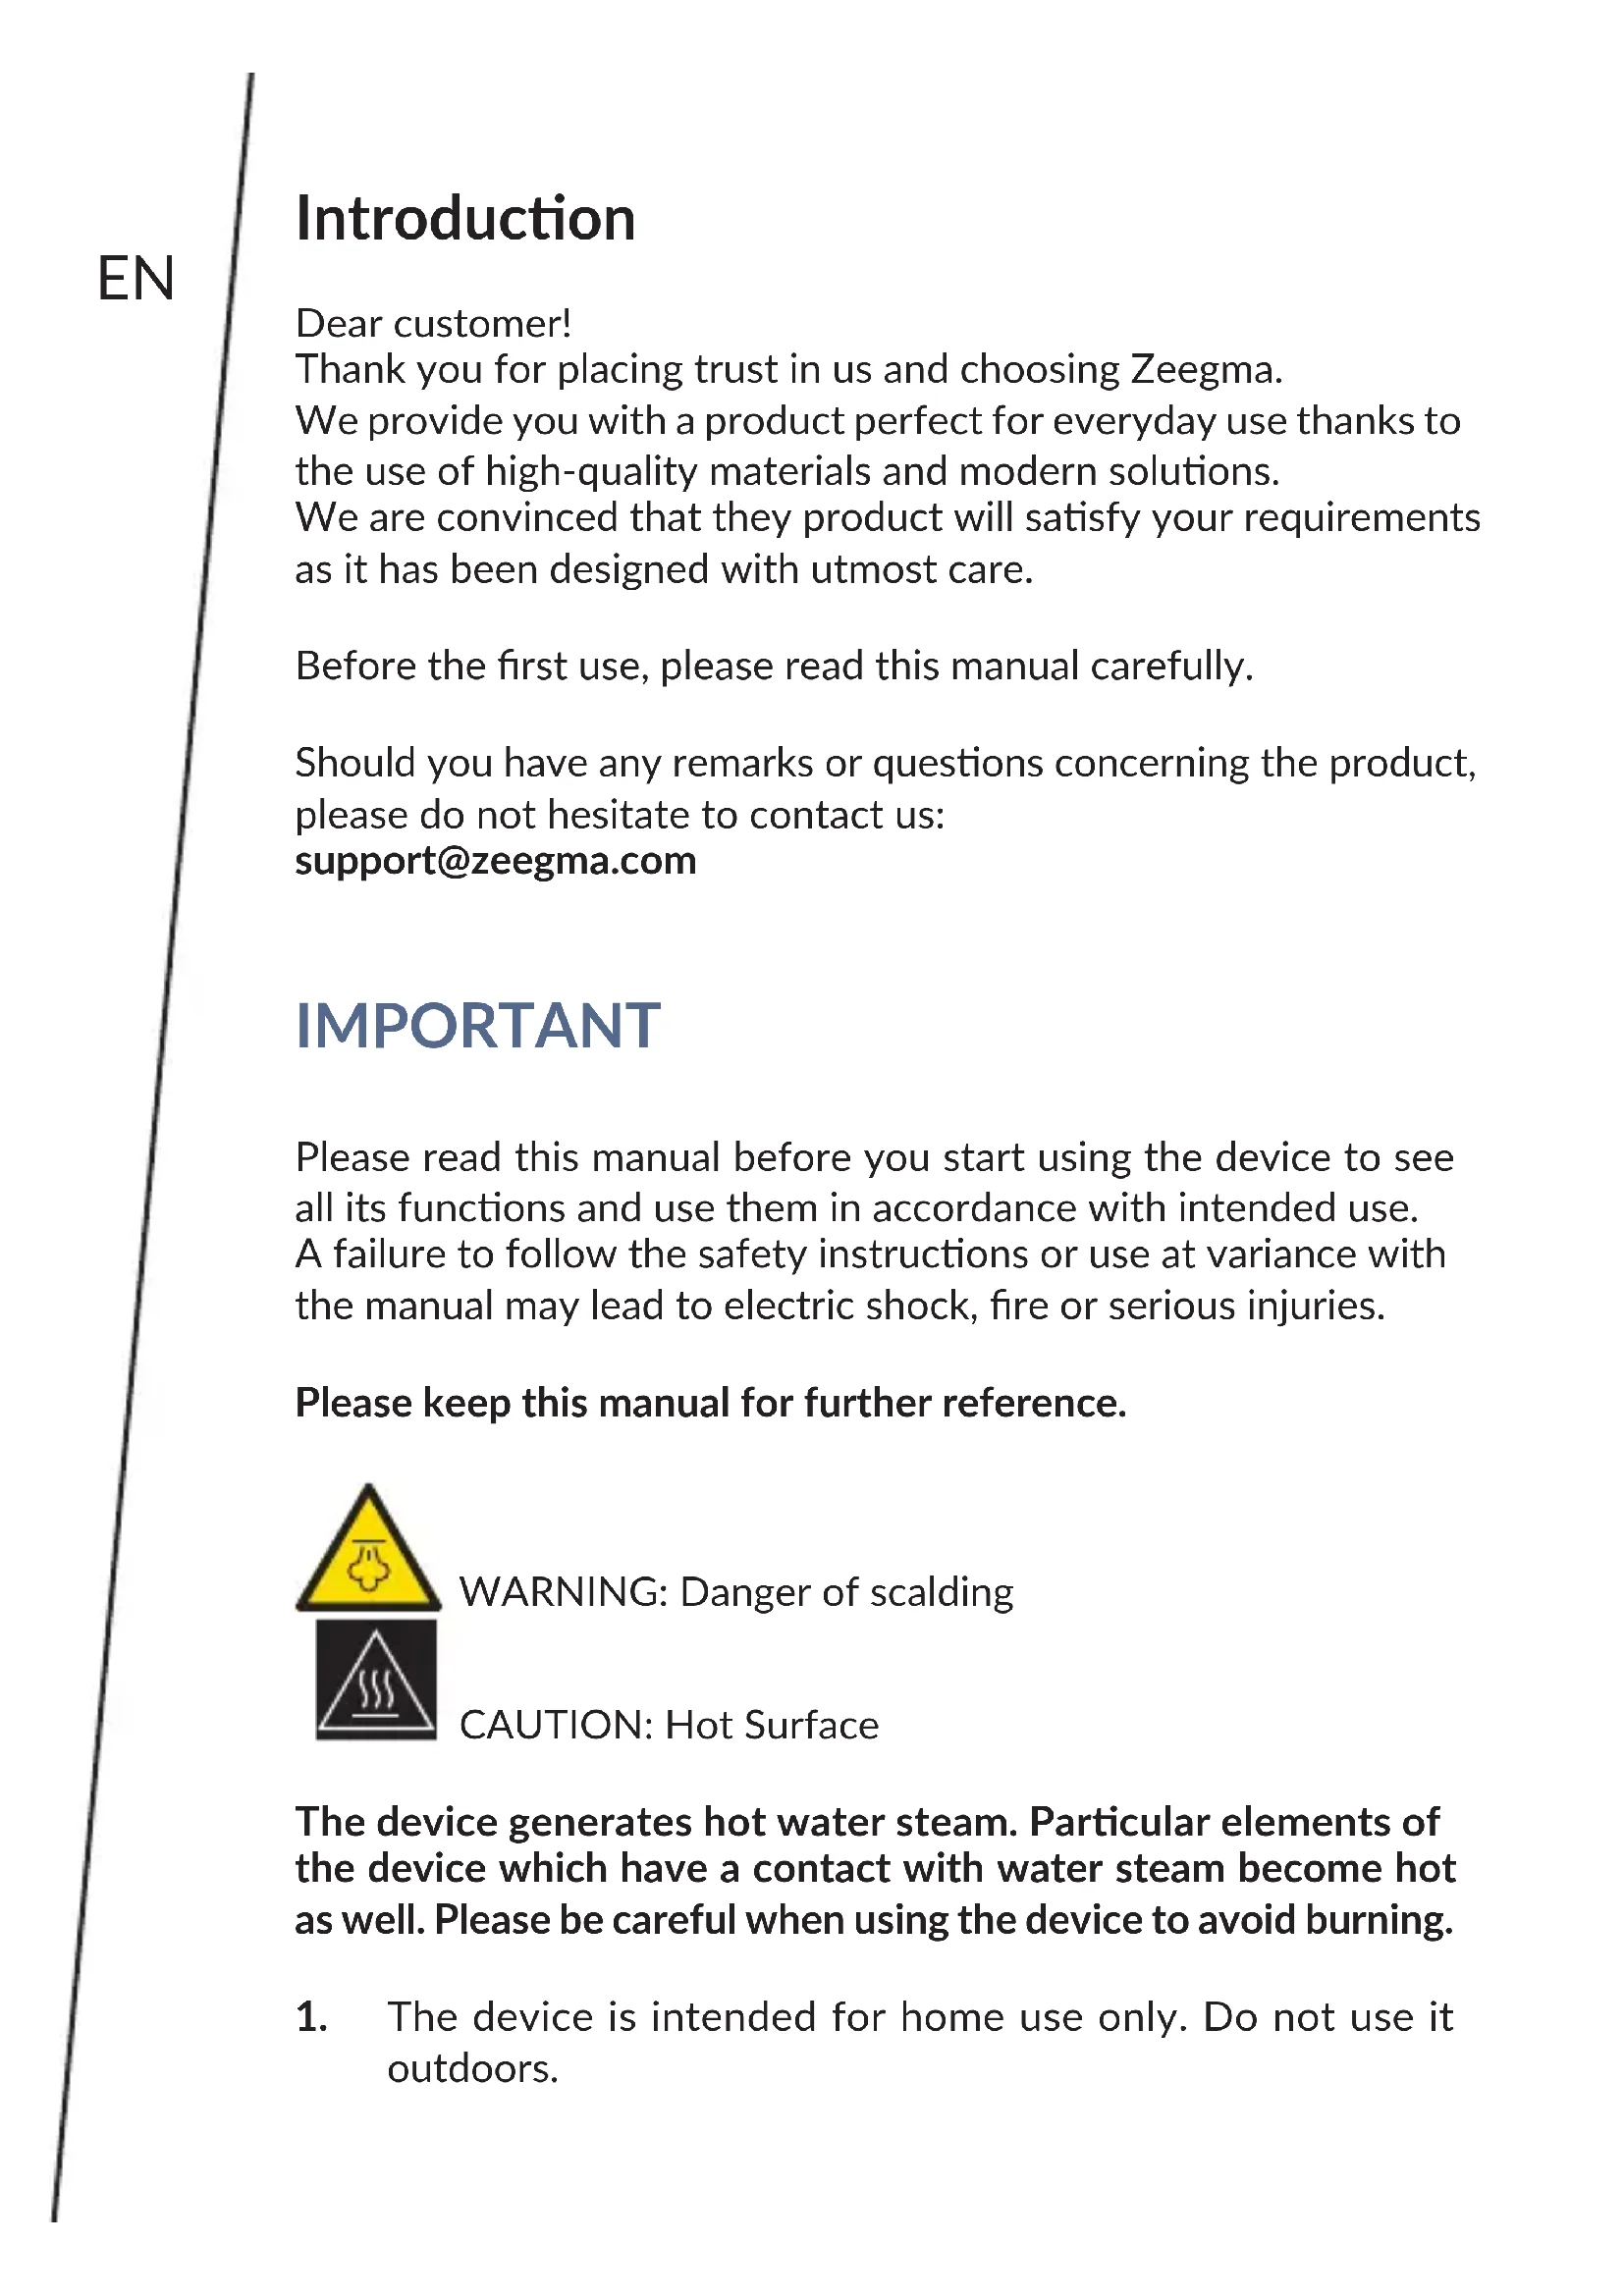
STEAM MOP ASSEMBLY
Note: every steam mop is tested before it is packed in the factory. You may see water remains in the tank before you use the product for the first time.
Warning: before you start assembling, make sure the device has been switched off, unplugged, cooled and that water tank is empty or water level is minimum.
Water tank assembly
-
Place the water tank (4) in the main body of the device (B).
-
To remove the tank, press the protection key located in the main body above the tank.
Handle assembly
- Press the tube (C) into the handle (A), adjust it until you can hear a distinctive click.
-
Press the tube with handle into the main body (B), adjust it until you can hear a distinctive click.
-
To remove the handle, press the protection key.
Steam head assembly
- Insert the lower part of the main body (B) in the steam head (D). Adjust until you can hear a distinctive click.
- You can easily remove the steam head (D) by pressing the protection key.

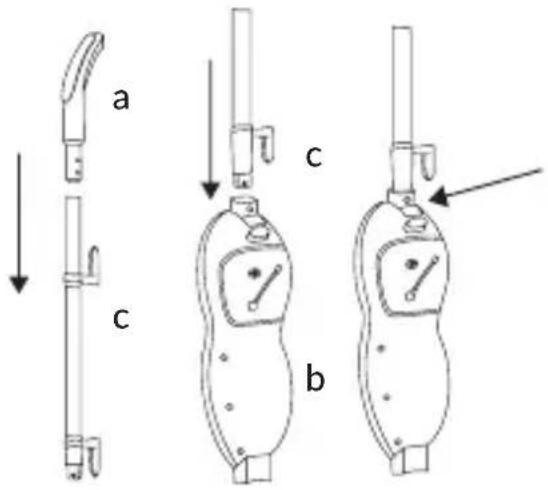
Sheath assembly
The microfiber sheath (E) must be mounted with the use of Velcro. All you need to do is put the sheath on the ground and press the steam head (D) against the sheath.

Carpet slip assembly
Put the steam head (D) with a pad attached on the carpet slip.

natural_image
Technical line drawing of a mechanical assembly with a downward arrow and labeled component 'f' (no text or symbols beyond label)HOW TO USE
- Pour water into the tank:
NOTE: To fill the tank, use demineralized water only. Do not use tap water because it may lead to accumulation of scale and in effect damage.
NOTE: Refill the tank with water when the device is inactive and unplugged!
• Take the tank (4) out of the main body (BS).
- Remove the cap from the water tank (5).
• Pour water into the tank (4).
- Close the cap.
- Put the tank back into the body.

- Insert the device plug into the socket.
- Switch the device on with the on/off switch (9). Red light around the knob (8) shows that the steam mop is heating up.
- When it is hot, the light will turn blue.
- The steam head can rotate at various angles thanks to which you can clean corners and low areas.
NOTE: The surface of the steam head may be hot during and immediately after use.

natural_image
Line drawings of two household appliances: a triangular fan and a rectangular appliance (no text or symbols)- Use a knob (8) to adjust the amount of steam. Knob clockwise to increase the amount and anti-clockwise to reduce the amount. Two indicators under the knob indicate the amount of steam generated.
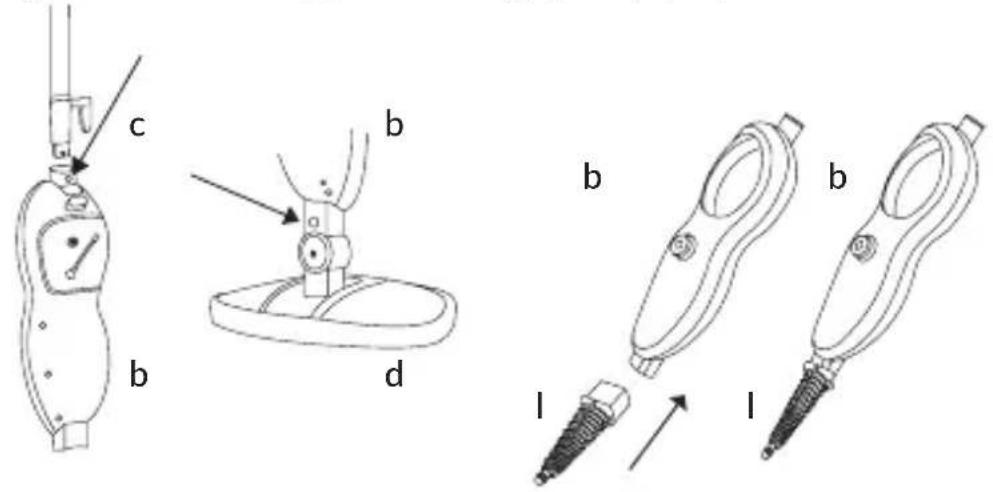
USE AS MANUAL STEAM WASHER
NOTE: Before you start assembling the mop as a manual steam washer and before you replace accessories, switch the device off and unplug. Make sure the device is not hot.
- Remove the tube (C) from the main body (B).
- Remove the steam head (D) from the main body (B).
- Insert the accessories adapter (L) into the main body.
- Choose relevant accessories and put the adapter as showed by the arrow. Turn right to secure it.
- To generate steam, press the grip key (13).
Accessories
NOTE: The steam mop/washer is not intended for all kinds of surfaces and materials. Pay attention to safety guidelines in this manual and surface/material guidelines. Always test the device on a small and invisible piece of surface cleaned to make sure it is not damaged by the water steam.
| Accessories Suggested use | ||
| Window-cleaning sheath |  | Shower cubicle door, mirrors – to remove soap remains and other. Clothes, drapes, tablecloths – to remove creases. |
| Small and large brush |  | Ovens, microwave ovens, kitchen tops, showers, bathtubs, tap fittings, tiles, grouts, toys, refrigerators, etc. |
| Angle nozzle |  | Cooker tops, tap edges, grouts, microwave ovens, sinks, difficult-to-access spots, etc. |
| Scraper |  | Scraping off burnt food, dirt and fat. Removing dirt and deposits from such surfaces as tops and stoves. |
| Textile sheath |  | The sheath intended for clothes, drapes, tablecloths, etc. |
| Microfiber sheath | 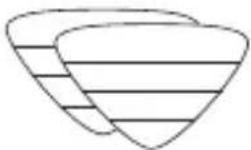 | Intended to clean dirty flooring and refresh carpets. |
MAINTENANCE AND CLEANING
NOTE: Make sure the device is inactive and unplugged before you start performing maintenance works.
To fill the tank, use demineralized water only. Do not use tap water because it may lead to accumulation of scale and in effect damage.
- Pour water out of the tank after every use.
- Microfiber sheaths may be washed at the temperature of 30^ C. Use soft detergents. Do not use bleaches and softeners. It is advisable to dry in the room temperature in the lying position.
- To clean accessories, use water, never detergents.
- Clean the main body, tube and head with a soft and dry cloth.
Storage
- After the use, switch the device off and then unplug.
- Take the water tank out, empty it and dry.
- When all elements of the device have cooled, you can clean them.
- Clean the microfiber sheath to make it ready for another use.
- Keep the device in a dry place and out of reach of children.
CE
The product complies with requirements of EU directives. Pursuant to the Directive 2012/19/EU, this product is subject to selective collection. The product must not be disposed of along with domestic waste as it may pose a threat to the environment and human health. The worn-out product must be handed over to the electrics and electronics recycling center.
The pictures and diagrams are for reference only. The real design of the products may differ from the pictures and diagrams presented.
Einleitung
natural_image
Diagram showing a mechanical assembly with a downward arrow and labeled component 'f' (no text or symbols beyond label)GEBRAUCHSWEISE
natural_image
Abstract line drawing of a curved, layered structure with a central circular element (no text or symbols)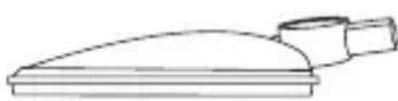
natural_image
Simple line drawing of a showerhead with a handle and base (no text or symbols)Zubehör
natural_image
Diagram of a mechanical device with a lever and base, showing a downward force arrow (no text or symbols)SPOSÓB UŻYCIA
natural_image
Line drawings of a triangular device and a flat plate (no text or symbols)natural_image
Diagram of a mechanical device with a lever and base, showing a downward force arrow (no text or symbols)METODO D'USO
natural_image
Line drawings of a showerhead and a lid device (no text or symbols)REMARQUE: surface chaude
natural_image
Diagram of a mechanical assembly with a lever and base, showing a downward force arrow (no text or symbols)MODE D'EMPLOI
flowchart
graph TD
    A["Device with bandage"] --> B["Inserted part"]
    B --> C["Close-up view of device"]
natural_image
Line drawings of two household appliances: a triangular fan and a rectangular appliance (no text or symbols)natural_image
Diagram of a mechanical assembly with a lever and base, showing a downward force arrow (no text or symbols)FORMA DE USO
flowchart
graph TD
    A["Device with internal components"] --> B["Insertion of part"]
    B --> C["Close-up of package"]
natural_image
Line drawings of a triangular device and a rectangular device (no text or symbols)natural_image
Diagram of a mechanical device with a downward arrow and labeled component 'f' (no text or symbols beyond labels)GEBRUIKSMETHODE
natural_image
Line drawings of a showerhead and a tray device (no text or symbols)natural_image
Technical line drawing of two mechanical tools labeled 'b' and 'l', showing a tool with a bolted head and a screw inserted (no text or symbols present)Accessoires
natural_image
Diagram of a mechanical assembly with a lever and base, showing a downward force arrow (no text or symbols)СПОСІБ ВИКОРИСТАННЯ
natural_image
Line drawings of a triangular device and a rectangular device (no text or symbols)natural_image
Diagram of a mechanical device with a lever and base, showing a downward force arrow (no text or symbols)NAUDOJIMO BÜDAS
- Pripilkite vandens i rezervuarą:
natural_image
Line drawings of two household appliances: a triangular fan and a rectangular appliance (no text or symbols)UPOZORENJE: Opasnost od opeklina
natural_image
Diagram of a mechanical device with a lever and base, showing a downward force arrow (no text or symbols)NAČIN KORIŠTENJA
1. Napuni spremnik vodom.
PAŽNJA! Za punjenje spremnika koristi isključivo destiliranu vodu. Ne smije se koristiti vodu iz slavine, jer može dovesti do stvaranja kamenca i u rezultatu oštetiti uređaj.
natural_image
Line drawings of a showerhead and a shower bottle (no text or symbols)BrandLine Group Service - Support
List of Authorized Service Centers: Liste der Autorisierten Herstellerservicezentren: Lista autoryzowanych centrów serwisowych: Elenco dei centri di assistenza autorizzati: Liste des centres de service autorisés: Lista de centros de servicio autorizados: Lijst met erkende servicecentra: Список уповноважених сервісних центрів: Igaliotų aptarnavimo centrų sąrašas: Popis ovlaštenih servisnih centara:
www.zeegma.com/en/service


- IMPORTANT
- DEVICE OUTLINE
- Detailed elements
- STEAM MOP ASSEMBLY
- Water tank assembly
- Handle assembly
- Steam head assembly
- Sheath assembly
- Carpet slip assembly
- HOW TO USE
- USE AS MANUAL STEAM WASHER
- Accessories
- MAINTENANCE AND CLEANING
- Storage
- CE
- Einleitung
- GEBRAUCHSWEISE
- Zubehör
- SPOSÓB UŻYCIA
- METODO D'USO
- MODE D'EMPLOI
- FORMA DE USO
- GEBRUIKSMETHODE
- Accessoires
- СПОСІБ ВИКОРИСТАННЯ
- NAUDOJIMO BÜDAS
- NAČIN KORIŠTENJA
- Napuni spremnik vodom.
- BrandLine Group Service - Support
Brand : Zeegma
Model : Puur
Category : Steam cleaner