WC201 - Alarm clock radio Perel - Free user manual and instructions
Find the device manual for free WC201 Perel in PDF.
| Product type | Electronic sports scoreboard |
| Brand | Perel |
| Model | WC201 |
| Power supply | 100-240 V~ / 12 VDC, 3 A |
| Power consumption | < 25 W |
| Dimensions | 620 x 405 x 275 mm |
| Weight | 4.75 kg |
| Clock accuracy | < 0.5 s/day |
| Maximum range | 50 m |
| Display | LED |
| Sports modes | Stopwatch & score, score & periods, stopwatch, fight & key, round & rest, metronome, programmed stopwatch, clock & alarm |
| Main functions | Countdown, score, periods, immobilization stopwatch, metronome, alarm, interval programming |
| Settings | Dedicated keys per mode (M+1/M-1, S+1/S-1, START/STOP, RESET, GAME SELECT, etc.) |
| Included accessories | Power adapter |
| Maintenance | Clean with a dry cloth, do not use solvents |
| Safety | Indoor use only, do not expose to water |
| Warranty | 24 months (private use), see manual for conditions |
Frequently Asked Questions - WC201 Perel
User questions about WC201 Perel
0 question about this device. Answer the ones you know or ask your own.
Ask a new question about this device
Download the instructions for your Alarm clock radio in PDF format for free! Find your manual WC201 - Perel and take your electronic device back in hand. On this page are published all the documents necessary for the use of your device. WC201 by Perel.
USER MANUAL WC201 Perel
text_image
BONUS 8:00 BONUS HOME PERIOD 1 2 3 4 GUEST FOULS FOULSUSER MANUAL 2
HANDLEIDING 11
MODE D'EMPLOI 20
MANUAL DEL USUARIO 29
To all residents of the European Union
Important environmental information about this product


This symbol on the device or the package indicates that disposal of the device after its lifecycle could harm the environment. Do not dispose of the unit (or batteries) as unsorted municipal waste; it should be taken to a specialized company for recycling. This device should be returned to your distributor or to a local recycling service. Respect the local environmental rules.
If in doubt, contact your local waste disposal authorities.
Thank you for choosing Perel! Please read the manual thoroughly before bringing this device into service. If the device was damaged in transit, do not install or use it and contact your dealer.
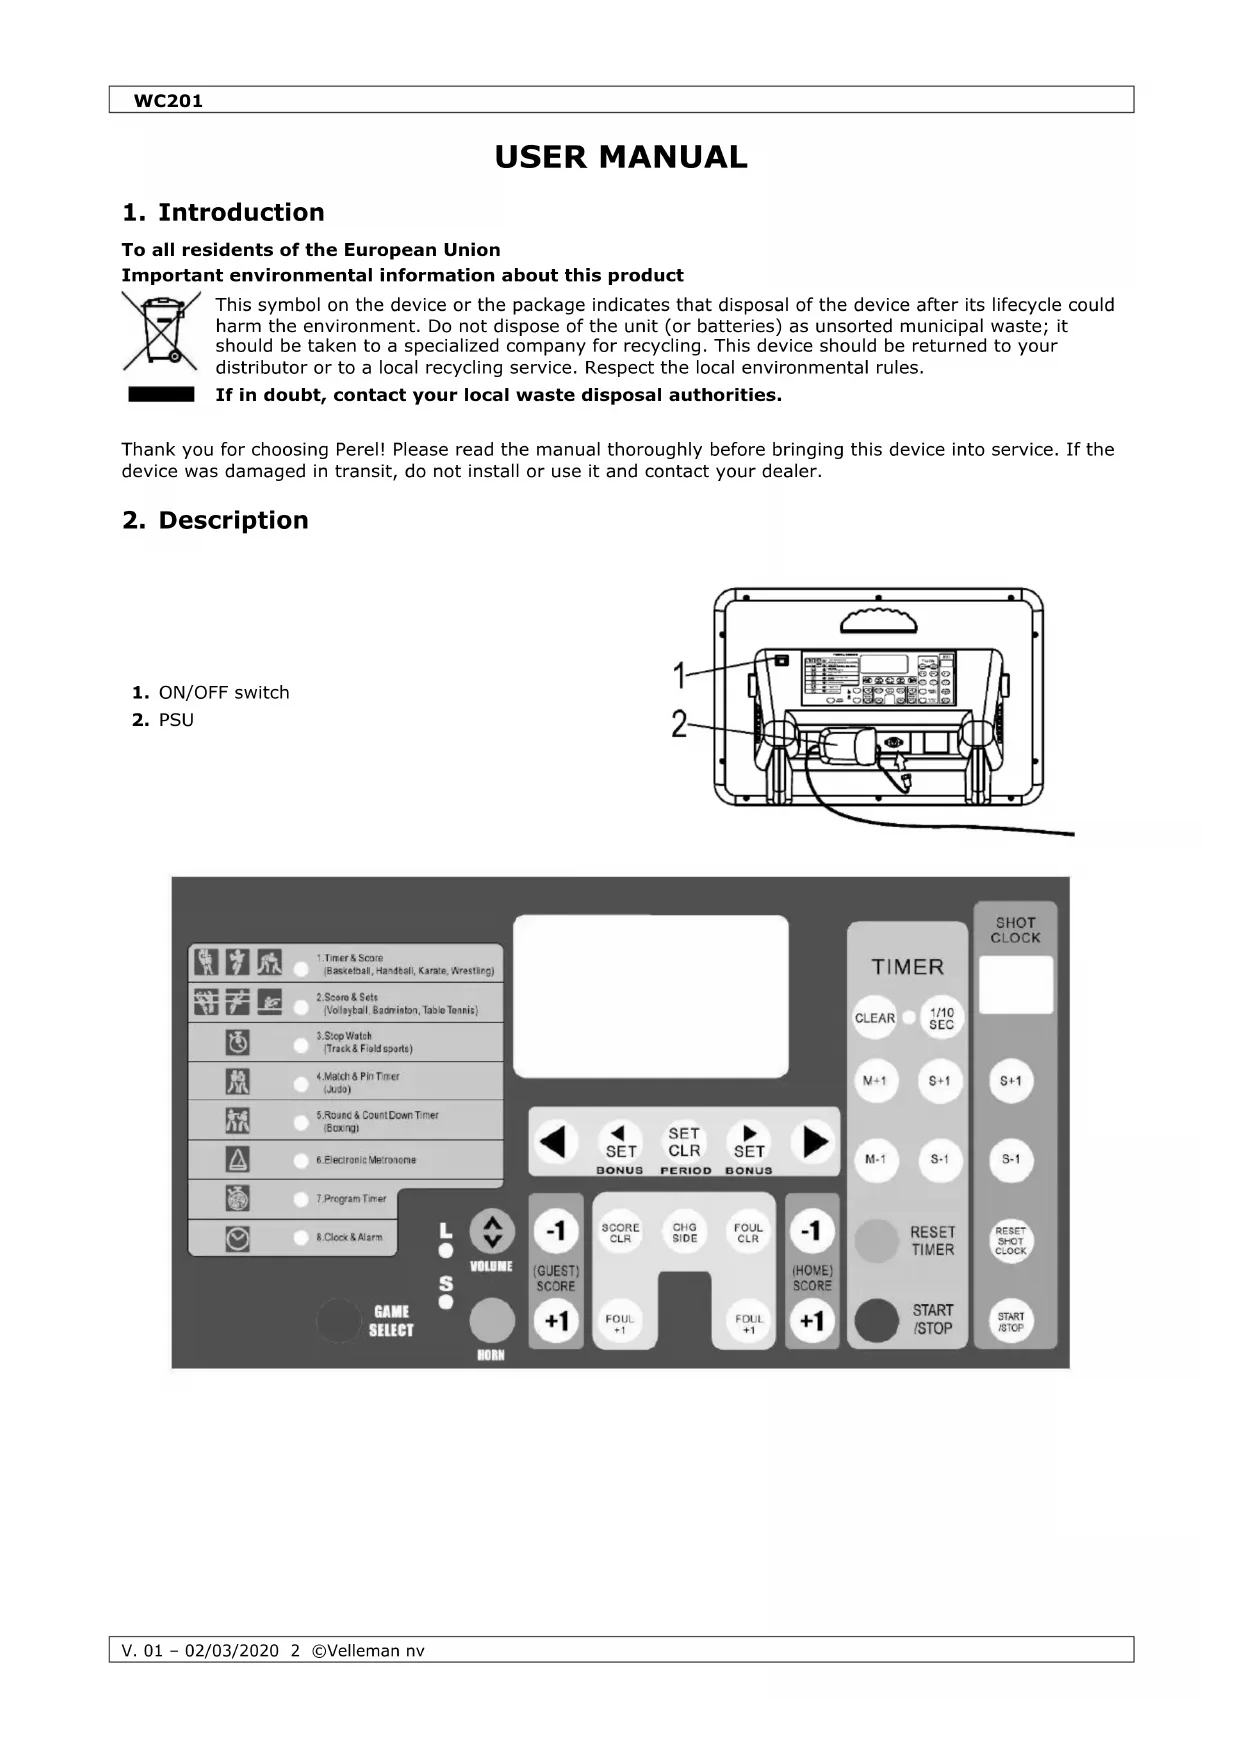
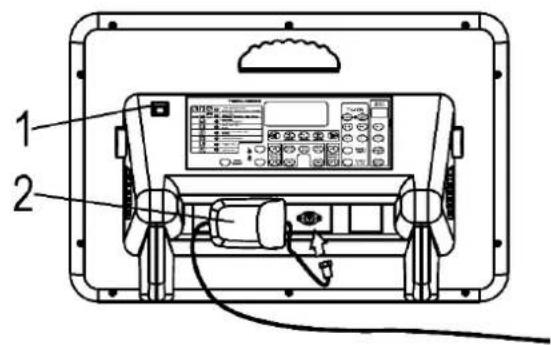
2. Description
- ON/OFF switch
- PSU
text_image
Technical diagram of a device rear panel with labeled components and control buttons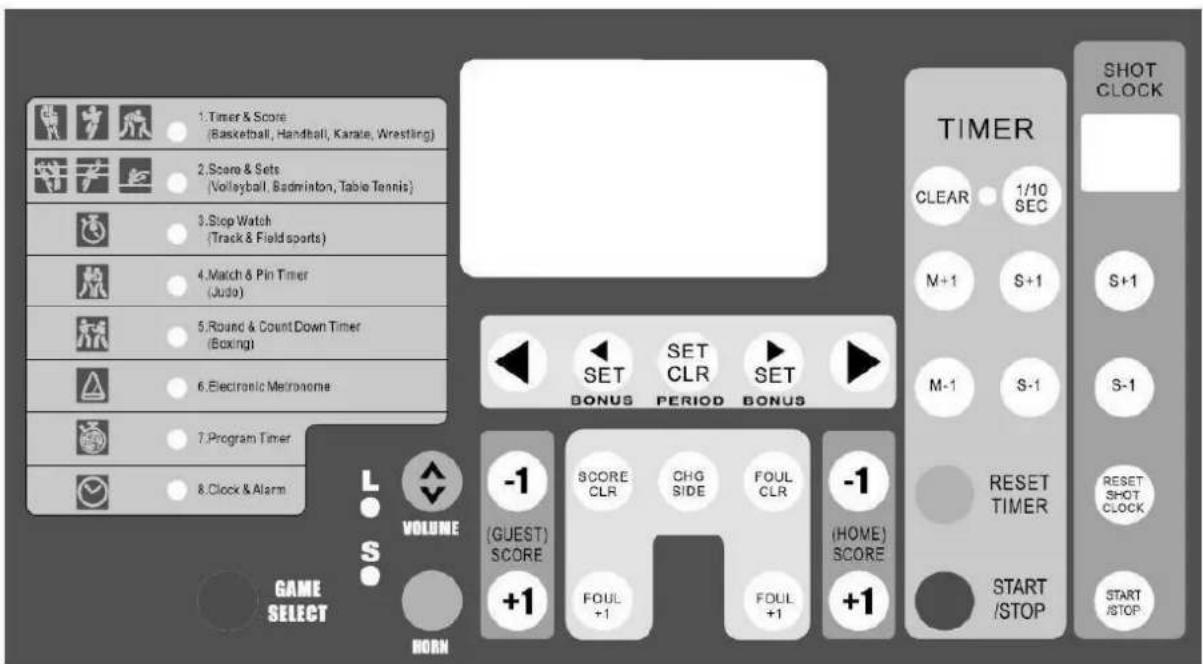
text_image
1. Timer & Score (Basketball, Handball, Karate, Wrestling) 2. Score & Sets (Volleyball, Badminton, Table Tennis) 3. Stop Watch (Track & Field sports) 4. Match & Pin Timer (Judo) 5. Round & Count Down Timer (Boxing) 6. Electronic Mironome 7. Program Timer 8. Clock & Alarm L S VOLUME GAMES SELECT HORN -1 (GUEST) SCORE +1 FOUL +1 SET BONUS SET CLR PERIOD SET BONUS -1 SCORE CLR CHG SIDE FOUL CLR -1 (HOME) SCORE +1 FOUL +1 +1 SET BONUS SET CLR PERIOD SET BONUS TIMER CLEAR 1/10 SEC M+1 S+1 M-1 S-1 RESET TIMER START /STOP SHOT CLOCK S+1 S-1 RESET SHOT CLOCK START /STOP.3. Setting Up the Scoreboard
- Supply power to the board by connecting the PSU with the power input (see fig. 1). Plug the PSU into the mains.
- Turn on the scoreboard with the ON/OFF switch. It takes a few moments for the board to initialize.
- Press GAME SELECT once. The timer & score mode LED blinks.
- Press CLEAR. Next, set the desired timer with M+1/M-1 and S+1/S-1, and set the shot clock with S+1/S-1 under the shot clock panel.
- Press the timer START/STOP button to start the timer and the shot clock, and let it run for a few seconds. Press the timer START/STOP button again.
- Press RESET TIMER and RESET SHOT CLOCK. The display will show the last memorized data.
- Press GAME SELECT to exit the setup mode.
4. Operation
A. TIMER & SCORER (basketball, handball, karate, wrestling)
This game mode displays the remaining game time and the score.
Upper display: game time (max. 99:59)
Lower display: score (max. 199)
| Countdown Game Timer | ||||
| Operation | Key | Display | Buzzer | |
| Timer | Shot Clock | |||
| 1. Select game | 0:000 0 | |||
| 2. Recall last memory | 20:000 0 | |||
| 3. Erase previous settings | CLEAR | 0:000 0 | ||
| 4. Set game time (e.g. 20 min) | M+1 M-1 | 20:000 0 | ||
| 5. Set shot clock | S+1 S-1 | 20:000 0 |
| 6. Shot clock time is memorized | 19:590 0 | |||
| 7. Set period | 1234····· | |||
| 8. Shot hits rim | RESETSHOTCLOCK | 19:580 0 | ||
| 9. Game interrupted | 19:500 0 | |||
| 10. Restart game & shot clock starts | 19:490 0 |
| 10.1. 30 seconds expire | 19:280 0 | |||
| 10.2. Reset to 30 seconds | RESETSHOTCLOCK | 19:280 0 |
WC201
| 10.3. Restart game | 19:270 0 |
| 11. Game time expires | 0:000 0 | |||
| 12. Reset game time |  |  | 20:000 0 |
- Game timer stopped too late: use and to adjust the difference.
- Press to sound the buzzer.
| Score | ||
| Operation | Key | Display |
| 1. Guest team scores |  | 19:200 1 |
| 2. Home team scores |  | 19:151 1 |
| 3. Home team loses point or erroneous point adding |  | 19:150 1 |
| 4. Reset scores |  | 19:150 0 |
| Foul | ||
| Operation | Key | Display |
| 1. Guest team commits foul |  | 19:200 1 |
| 2. Home commits foul |  | 19:151 1 |
| 3. Home commits second foul |  | 19:152 1 |
| 4. Reset |  | 19:150 0 |
- Press ◀ or ▶ to toggle between the home team and the guest team. Press 🔊 or 🔊 for bonus points.
| Count-up Game Timer | ||||
| Operation | Key | Display | Buzzer | |
| Timer | Shot Clock | |||
| 1. Select game |  | 20:000 0 | ||
| 2. Erase previous settings |  | 0:000 0 | ||
| 3. Set display to chrono mode |  | 0:000 0 | ||
| 4. Set game time (e.g. 20 min) | [M+  I-I] I-I] | 20:000 0 | ||
| 5. Recall shot clock memory |  | 20:000 0 | ||
WC201
| 6. Game time returns to 0:00 |  | 0:000 0 | |||
| 7. Start game & shot clock simultaneously |  | 0:010 0 | |||
| 8. Game interrupted |  | 0:090 0 | |||
| 9. Reset shot clock |  | 0:090 0 | |||
| 10. Restart game |  | 0:100 0 | |||
| 11. Stop shot clock |  | 0:190 0 | |||
| 12. Game time expires | 20:000 0 | ||||
| 13. Reset game time |  | 0:000 0 |
- Game timer stopped too late: use and to adjust the difference.
- Press and then to return to the countdown timer.
B. SCORE & SETS (volleyball, badminton, table tennis)
This game mode displays the sets won and the score.
Upper display: score (max. 99)
Lower display: sets (max. 199)
| Operation | Key | Display |
| 1. Select game |  | 0 00 0 |
| 2. Home / guest team gets serve |  | • 0 00 0 |
| 3. Home team scores |  | 1 00 0 |
| 4. Guest team scores |  | 1 10 0 |
| 5. Guest team wins set |  | 1 10 1 |
| 6. Change courts |  | 1 11 0 |
| 7. Reset scores |  | 0 00 0 |
- Press to deduct a point.
- Press and add the exact sets in case of error.
C. STOPWATCH
Upper display: minutes and seconds (max. 59:59)
Lower display: hours (max. 199) and 1/100 second (max. 99)
| Stopwatch | |||
| Operation | Key | Display | |
| 1. Select mode |  | 0:0000 | |
| 2. Start stopwatch |  | START/STOP | 0:0001 |
| 3. Stop stopwatch |  | START/STOP | 15:242 93 |
| 4. Reset stopwatch |  | RESET TIMER | 0:0000 |
- Press ☐ while the stopwatch is running to stop the time on the display. The stopwatch is keeps running internally. UP will blink on the display. Press ☐ to continue.
D. MATCH & PIN TIMER (judo)
This game mode displays the match time and elapsed pinning time.
Upper display: match time (max. 99:59)
Lower display: pinning time (max. 30)
| Match & Pin Timer | |||
| Operation | Key | Display | |
| Timer | Shot Clock | ||
| 1. Select mode |  | 5:0030 | |
| 2. Set match time (e.g. 5 min) |  M-1 M-1 | 5:0030 | |
| 3. Save pin time into memory |  | 5:000 | |
| 4. Reset pin time if necessary |  START/STOP START/STOP | 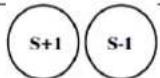 | |
| 5. Start match | 5:001 | ||
| 6. If pin does not begin, pause pin time and reset |  | 4:530 | |
| 7. Pin begins |  START/STOP START/STOP |  | 4:531 |
| 8. Stop match during pinning, pause pin timer | 4:3512 | ||
| 9. Restart match, resume pin timer | ○START/STOP |  | 4:3413 |
| 10. Pin broken free |  | 4:2522 | |
| 10.1. Next pin begins | START/STOP | 1:311 | |
| 10.2. 30 seconds have elapsed, match time automatically stops, buzzer sounds | 1:0030 | ||
| 11. Match time expires, buzzer will not sound if pin is in progress | 0:0022 | ||
| 12. Reset match time | RESET TIMER | 5:000 |
- Match timer stopped too late: use ⚪ and ⚪ to adjust the difference.
- Pinned judoka already has waza-ari (becomes ippon after 25 seconds): press during pin countdown. 25 will appear on the lower left display and the buzzer will sound after those 25 seconds have elapsed. Press again to cancel the 25-second display.
- Match time reaches 0:00 during a pin: the match will continue without buzzer so the pin count will not be interrupted. When the pin is broken free, press 😊 The buzzer will sound and the match will end.
E. ROUND & BREAK COUNTDOWN TIMER (boxing)
This game mode displays the round time and number.
Upper display: round timer (max. 99:59)
Lower display: round number (max. 99)
| Round & Break Countdown Timer | |||||
| Operation | Key | Display | Buzzer | ||
| Timer | Shot Clock | ||||
| 1. Select game |  | 0:000 | |||
| 2. Set round time (e.g. 3 min) |  |  | 3:000 | ||
| 3. Enter round time into memory |  |  | 0:000 | ||
| 4. Set break time (e.g. 1 min) |  |  | 1:000 | ||
| 5. Enter break time into memory |  |  | 0:000 | ||
| 6. Set number of rounds (e.g. 3 rounds) |  |  | 0:003 | ||
| 7. Return to round time display |  |  | 3:001 | ||
| 8. Start match |  |  | 2:591 | ||
| 9. Interrupt match |  |  | 2:351 | ||
| 10. Restart match |  |  | 2:341 | ||
| 11. Knockdown |  | 1:341 | |||
| 12. Match continues |  | 1:281 | |||

| 12.1. Knockdown |  | 1:201 |  | |||
| 12.2. 10 seconds expire, stop countdown and round timer |  | START/STOP |  | 1:101 | ||
| 12.3. Match over, sound buzzer |  | 1:101 |  | |||
| 13. First round completed | 0:001 |  | ||
| 14. Break time | 0:591 | |||
| 15. Break time ends | 0:001 |  | ||
| 16. Next round time and number are displayed | 3:002 | |||
| 17. Designated number of rounds completed |  RESET TIMER RESET TIMER | 0:003 |  | |
| 18. Begin new match | 3:001 |
- Match timer stopped too late: use 📊 and 🔒 to adjust the difference; use shot clock 🔒 to adjust the round difference.
- Round time reaches 0:00 during countdown: the match will continue without sounding the buzzer so the countdown will not be interrupted.
- Modifying round/break times: press and reset.
- In the final round, the break time will not display.
F. ELECTRONIC METRONOME
Upper display: rhythm
Lower left display: number of buzzes per minute
Lower right display: length of a buzz
| Electronic Metronome | ||||
| Operation | Key | Display | Buzzer | |
| Set buzz length |  |  | 0120 6 | |
| Set buzz number |  |  | 0113 6 | |
| Start metronome |  |  | 1113 6 |  |
| Stop metronome |  |  | 5113 6 |  |
| Reset metronome |  | RESET TIMER | 0113 6 | |
G. PROGRAM TIMER (interval training)
The timer may be programmed to consecutively count down and display max. 9 time periods.
Upper display: timer (max. 99:59)
Lower left display: number of repetitions (max. 9)
Lower right display: program number (max. 9)
| Program Timer | |||
| Operation | Key | Display | Buzzer |
| 1. Set desired time for program 1 (P1) |  | 5:001 P1 | |
| 2. Enter P1 into memory and enter times for following programs if desired |  RESET TIMER RESET TIMER | 0:001 P2 | |
| 3. Complete program setting. Set the desired number of repetitions using the shot clock Press and . The current round is displayed and the timer will stop. |  RESET TIMER RESET TIMER | 5:001 P1 | |
| 4. P1 will start counting down and buzzer will sound when it reaches 0:00. P2 will subsequently start. Completion of all programs is considered one round. |  START /STOP START /STOP | 4:591 P10:001 P23:001 P30:001 P45:001 P5..4:592 P1 | |
| 5. Stop |  START /STOP START /STOP | 2:289 P1 | |
| 7. Return to the beginning of the program |  RESET TIMER RESET TIMER | 5:000 P1 | |
- Change set times: Press and reset timers.
H. CLOCK & ALARM
This scoreboard displays the time in 12h format but displays the time in 24h format when editing.
Upper display: hours and minutes
Lower right display: seconds
| Clock & Alarm | |||
| Operation | Key | Display | |
| Timer | Shot Clock | ||
| 1. Stop clock to adjust time | START/STOP | 0:0000 | |
WC201
| 2. Set hour, use the timer buttons to adjust the hour and minutes, use the shot clock buttons to adjust the seconds | 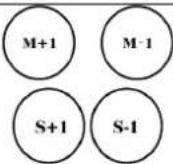 | S+1 S-1 | 14:49 13 | |
| 3. Confirm time |  | START /STOP | 2:49 13 | |
| 4. Alarm mode |  | 12:00 AL oF | ||
| 5. Alarm on/off |  | 12:00 AL on | ||
| 6. Set alarm time | 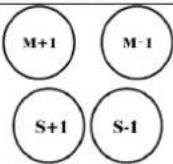 | 13:41 AL on | ||
| 7. Return the time display |  | 2:51 25 | ||
- The scoreboard will buzz during 5 seconds when the time reaches the alarm time.
- Current time and alarm time will not be memorized in case of a power cut.
I. OTHER FUCNTIONS
- Press to sound the buzzer at any time.
- Adjust the volume of the buzzer with
- Press (when LED is lit) to display the final minute in seconds.
5. Technical Specifications
| power supply | 100-240 V~, 12 VDC - 3 A |
| power consumption | < 25 W |
| max. viewing distance | 50 m |
| time accuracy | < 0.5 s per day |
| dimensions | 620 x 405 x 275 mm |
| weight | 4.75 kg |
Use this device with original accessories only. Velleman nv cannot be held responsible in the event of damage or injury resulting from (incorrect) use of this device. For more info concerning this product and the latest version of this manual, please visit our website www.velleman.eu. The information in this manual is subject to change without prior notice.
© COPYRIGHT NOTICE
The copyright to this manual is owned by Velleman nv. All worldwide rights reserved. No part of this manual may be copied, reproduced, translated or reduced to any electronic medium or otherwise without the prior written consent of the copyright holder.
HANDLEIDING
1. Inleiding
text_image
Technical diagram of a device rear panel with labeled components and control buttons
text_image
1. Timer & Score (Basketball, Handball, Karate, Wrestling) 2. Score & Sets (Volleyball, Badminton, Table Tennis) 3. Stop Watch (Track & Field sports) 4. Match & Pin Timer (Judo) 5. Round & Count Down Timer (Boxing) 6. Electronic Melanome 7. Program Timer 8. Clock & Alarm L S VOLUME GAMES SELECT BORN -1 (GUEST) SCORE +1 FOUL +1 SET BONUS SET CLR PERIOD SET BONUS -1 SCORE CLR CHG SIDE FOUL CLR -1 (HOME) SCORE +1 FOUL +1 +1 SET BONUS TIMER CLEAR 1/10 SEC M+1 S+1 M-1 S-1 RESET TIMER START /STOP SHOT CLOCK S+1 S-1 RESET SHOT CLOCK START /STOPtext_image
Technical diagram of a device rear panel with labeled components and control buttons
text_image
1. Timer & Score (Basketball, Handball, Karate, Wrestling) 2. Score & Sets (Volleyball, Badminton, Table Tennis) 3. Stop Watch (Track & Field sports) 4. Match & Pin Timer (Judo) 5. Round & Count Down Timer (Boxing) 6. Electronic Metronome 7. Program Timer 8. Clock & Alarm L S VOLUME GAMES SELECT BORN -1 (GUEST) SCORE +1 FOUL +1 SET BONUS SET CLR PERIOD SET BONUS -1 SCORE CLR CHG SIDE FOUL CLR -1 (HOME) SCORE +1 FOUL +1 +1 SET BONUS SET CLR PERIOD SET BONUS TIMER CLEAR 1/10 SEC M+1 S+1 M-1 S-1 RESET TIMER START /STOP SHOT CLOCK S+1 S-1 RESET SHOT CLOCK START /STOPtext_image
Technical diagram of a device rear panel with labeled components and control panel
text_image
1. Timer & Score (Basketball, Handball, Karate, Wrestling) 2. Score & Sets (Volleyball, Badminton, Table Tennis) 3. Stop Watch (Track & Field sports) 4. Match & Pin Timer (Judo) 5. Round & Count Down Timer (Boxing) 6. Electronic Merionome 7. Program Timer 8. Clock & Alarm L S VOLUME GAMES SELECT BORN -1 (GUEST) SCORE +1 FOUL +1 SET BONUS SET CLR PERIOD SET BONUS -1 SCORE CLR CHG SIDE FOUL CLR -1 (HOME) SCORE +1 FOUL +1 +1 SET BONUS SET CLR PERIOD SET BONUS TIMER CLEAR 1/10 SEC M+1 S+1 M-1 S-1 RESET TIMER START /STOP SHOT CLOCK S+1 S-1 RESET SHOT CLOCK START /STOPtext_image
Technical diagram of a device rear panel with labeled components and control buttons
text_image
1. Timer & Score (Basketball, Handball, Karate, Wrestling) 2. Score & Sets (Volleyball, Badminton, Table Tennis) 3. Stop Watch (Track & Field sports) 4. Match & Pin Timer (Judo) 5. Round & Count Down Timer (Boxing) 6. Electronic Metroneme 7. Program Timer 8. Clock & Alarm L S VOLUME GAMES SELECT BORN -1 (GUEST) SCORE +1 FOUL +1 SET BONUS SET CLR PERIOD SET BONUS -1 SCORE CLR CHG SIDE FOUL CLR -1 (HOME) SCORE +1 FOUL +1 +1 SET CLR M+1 S+1 M-1 S-1 RESET TIMER START /STOP SHOT CLOCK S+1 S-1 RESET SHOT CLOCK START /STOPF. ELEKTRONISCHES METRONOM
text_image
Diagram of a device rear panel with labeled components and control buttons, showing internal wiring and display screen.
text_image
1. Timer & Score (Basketball, Handball, Karate, Wrestling) 2. Score & Sets (Volleyball, Badminton, Table Tennis) 3. Stop Watch (Track & Field sports) 4. Match & Pin Timer (Judo) 5. Round & Count Down Timer (Boxing) 6. Electronic Metronome 7. Program Timer 8. Clock & Alarm L S VOLUME GAMES SELECT BORN -1 (GUEST) SCORE +1 FOUL +1 SET BONUS SET CLR PERIOD SET BONUS -1 SCORE CLR CHG SIDE FOUL CLR -1 (HOME) SCORE +1 FOUL +1 +1 SET CLR M+1 S+1 M-1 S-1 RESET TIMER START /STOP SHOT CLOCK S+1 S-1 RESET SHOT CLOCK START /STOPtext_image
Technical diagram of a device rear panel with labeled components and control buttons
text_image
1. Timer & Score (Basketball, Handball, Karate, Wrestling) 2. Score & Sets (Volleyball, Badminton, Table Tennis) 3. Stop Watch (Track & Field sports) 4. Match & Pin Timer (Judo) 5. Round & Count Down Timer (Boxing) 6. Electronic Melanome 7. Program Timer 8. Clock & Alarm L S VOLUME GAMES SELECT HORN -1 (GUEST) SCORE +1 FOUL +1 SET BONUS SET CLR PERIOD SET BONUS -1 SCORE CLR CHG SIDE FOUL CLR -1 (HOME) SCORE +1 FOUL +1 +1 SET BONUS SET CLR PERIOD SET BONUS TIMER CLEAR 1/10 SEC M+1 S+1 M-1 S-1 RESET TIMER START /STOP SHOT CLOCK S+1 S-1 RESET SHOT CLOCK START /STOP3. Instalar o Marcador Desportivo
Velleman® Service and Quality Warranty
Since its foundation in 1972, Velleman® acquired extensive experience in the electronics world and currently distributes its products in over 85 countries.
All our products fulfil strict quality requirements and legal stipulations in the EU. In order to ensure the quality, our products regularly go through an extra quality check, both by an internal quality department and by specialized external organisations. If, all precautionary measures notwithstanding, problems should occur, please make appeal to our warranty (see guarantee conditions).
General Warranty Conditions Concerning Consumer Products (for EU):
- All consumer products are subject to a 24-month warranty on production flaws and defective material as from the original date of purchase.
- Velleman® can decide to replace an article with an equivalent article, or to refund the retail value totally or partially when the complaint is valid and a free repair or replacement of the article is impossible, or if the expenses are out of proportion.
You will be delivered a replacing article or a refund at the value of 100% of the purchase price in case of a flaw occurred in the first year after the date of purchase and delivery, or a replacing article at 50% of the purchase price or a refund at the value of 50% of the retail value in case of a flaw occurred in the second year after the date of purchase and delivery.
- Not covered by warranty:
- all direct or indirect damage caused after delivery to the article (e.g. by oxidation, shocks, falls, dust, dirt, humidity...), and by the article, as well as its contents (e.g. data loss), compensation for loss of profits;
- consumable goods, parts or accessories that are subject to an aging process during normal use, such as batteries (rechargeable, non-rechargeable, built-in or replaceable), lamps, rubber parts, drive belts... (unlimited list);
- flaws resulting from fire, water damage, lightning, accident, natural disaster, etc....;
- flaws caused deliberately, negligently or resulting from improper handling, negligent maintenance, abusive use or use contrary to the manufacturer's instructions;
- damage caused by a commercial, professional or collective use of the article (the warranty validity will be reduced to six (6) months when the article is used professionally);
- damage resulting from an inappropriate packing and shipping of the article;
- all damage caused by modification, repair or alteration performed by a third party without written permission by Velleman®.
- Articles to be repaired must be delivered to your Velleman® dealer, solidly packed (preferably in the original packaging), and be completed with the original receipt of purchase and a clear flaw description.
- Hint: In order to save on cost and time, please reread the manual and check if the flaw is caused by obvious causes prior to presenting the article for repair. Note that returning a non-defective article can also involve handling costs.
• Repairs occurring after warranty expiration are subject to shipping costs.
- The above conditions are without prejudice to all commercial warranties.