Multilink - Remote control DJI - Free user manual and instructions
Find the device manual for free Multilink DJI in PDF.
| Product type | Secondary remote controller for drone |
| Brand | DJI |
| Model | Multilink |
| Intended use | Creation of a master/slave network with Inspire 2 and Cendence remote controllers |
| Maximum number of slaves | 3 |
| Operating frequencies | 2.4 GHz (2400-2483.5 MHz) / 5.8 GHz (5725-5850 MHz) |
| EIRP power (2.4 GHz) | FCC < 25 dBm, CE < 20 dBm, SRRC < 20 dBm |
| EIRP power (5.8 GHz) | FCC < 29 dBm, CE < 14 dBm, SRRC < 19 dBm |
| Maximum communication distance | 150 m (2.4 GHz) / 100 m (5.8 GHz) |
| Power supply (input) | 4.2 to 5.5 V, 1 A max |
| Latency (min/max) | 2.5 ms (5.8 GHz) to 11.1 ms (2.4 GHz) |
| Operating temperature | -20 to 40 °C |
| Status indicator | Solid red (master disconnected), solid violet (slave disconnected), solid green (connected), solid white (update), flashing blue (error), off (fault) |
| Connectivity | CAN port for connection with remote controller and accessories |
| Compatibility | Inspire 2 and Cendence remote controllers, patch antenna, DJI Focus, Inspire 2 GPS module |
| Main functions | Master/slave network, gimbal control (master and slave 1), camera control (all), firmware update |
| Security | Configurable access password for the network |
| Audio beep | Beeps at each connection/disconnection |
| Dimensions (approx.) | Approximately 60 x 40 x 20 mm (estimate) |
| Weight (approx.) | Approximately 50 g (estimate) |
| Maintenance | Clean with a dry, soft cloth. Do not use solvents. |
| Warranty | Refer to DJI warranty terms |
Frequently Asked Questions - Multilink DJI
User questions about Multilink DJI
0 question about this device. Answer the ones you know or ask your own.
Ask a new question about this device
Download the instructions for your Remote control in PDF format for free! Find your manual Multilink - DJI and take your electronic device back in hand. On this page are published all the documents necessary for the use of your device. Multilink by DJI.
USER MANUAL Multilink DJI
Disclaimer and Warning
Congratulations on purchasing your new DJI™ product. The information in this document affects your safety and your legal rights and responsibilities. Read this entire document carefully to ensure proper configuration before use. Failure to read and follow instructions and warnings in this document may result in serious injury to yourself or others, damage to your DJI product, or damage to other objects in the vicinity. This document and all other collateral documents are subject to change at the sole discretion of DJI.
By using this product, you hereby signify that you have read this disclaimer and warning carefully and that you understand and agree to abide by the terms and conditions herein. You agree that you are solely responsible for your own conduct while using this product, and for any consequences thereof.
You agree to use this product only for purposes that are proper and in accordance with all applicable laws, rules, and regulations, and all terms, precautions, practices, policies and guidelines DJI has made and may make available.
DJI accepts no liability for damage, injury or any legal responsibility incurred directly or indirectly from the use of this product. The user shall observe safe and lawful practices including, but not limited to, those set forth in this document.
Notwithstanding above, your statutory rights under applicable national legislation are not affected by this disclaimer.
DJI is a trademark of SZ DJI TECHNOLOGY CO., LTD. (abbreviated as "DJI") and its affiliated companies. Names of products, brands, etc., appearing in this document are trademarks or registered trademarks of their respective owner companies. This product and document are copyrighted by DJI with all rights reserved. No part of this product or document shall be reproduced in any form without prior written consent of or authorization from DJI.
Product Profile
Introduction
Multilink is designed specifically for use with the INSPIRE ^TM 2 remote controller and CENDENCE ^TM remote controller. It can create a master-slave controller network with up to three slave remote controllers. The multiple slave controllers form a star network with the master controller as the hub, sending commands to the aircraft via the master controller. Slave controllers receive the image and video signal from the aircraft directly.
Features
• Master-slave network
Can create a master-slave network with up to three slave remote controllers.
Each controller is responsible for the following:
Master-Pilot, Slave 1-Gimbal Operator, Slave 2-Assistant A, Slave 3-Assistant B
- Gimbal control
The Master remote controller and Slave controller 1 can both control the gimbal, but not simultaneously. Slave 2 and Slave 3 cannot control the gimbal.
- Camera control
Camera control is shared between all of the remote controllers.
• Support for Inspire 2 and Cendence remote controllers
Both the Inspire 2 and Cendence remote controllers can be used as a master or slave.
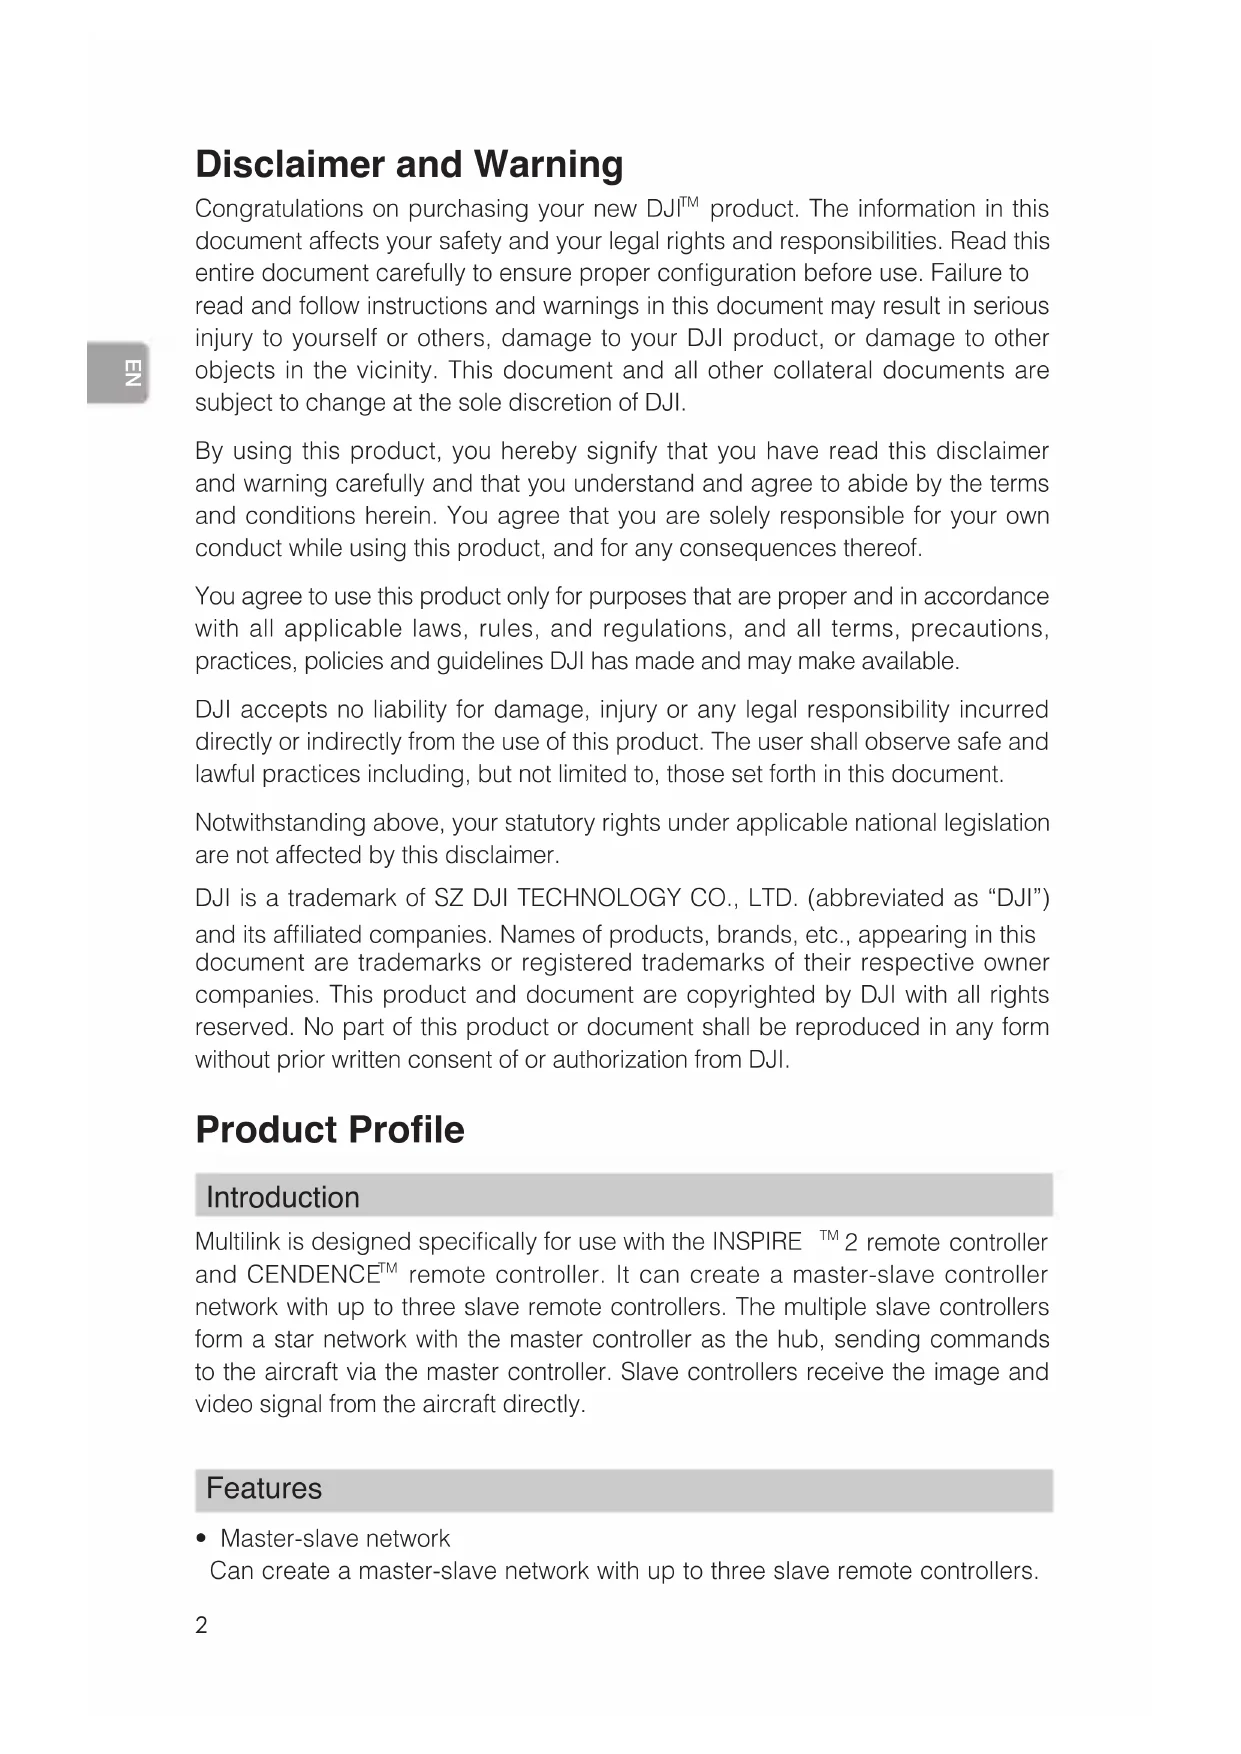
Overview
text_image
Status Indicator CAN Port Antenna Inspire 2 Remote Controller Mount Locking Knob Mounting Arm Cendence Remote Controller Mount CAN CableUsage
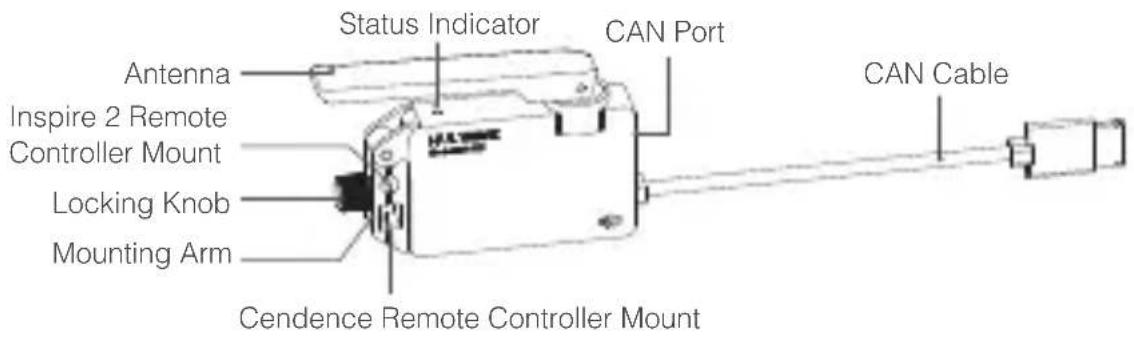
Installation and Connection
Multilink can be installed onto both the Inspire 2 Remote Controller and Cendence Remote Controller using different holes on the mounting arm. Their installation steps are otherwise similar. The steps provided below use the Cendence as an example.
- Mount the Multilink module onto the back of the remote controller and tighten the locking knob to secure it.
- Connect the CAN cable to the remote controller's CAN port.
flowchart
graph LR
    A["Engine with fan blade"] --> B["Motor parts with valve"]
    B --> C["Assembly of the engine into a motor part"]


The CAN cable can be also be connected to the Patch Antenna module if a Patch Antenna is used. Make sure the Patch Antenna is connected correctly.
Assigning Roles
The following steps explain how to set the Multilink as master or slave remote controller. There are three roles that you can assign for the slave remote controller: Gimbal Operator, Assistant A, and Assistant B.
Master remote controller
- Turn on the remote controller. Make sure the Multilink is connected correctly.
- Set the Multilink as master remote controller using the Remote Controller Setting page in DJI GO ^TM 4 app.
- Set an access password.
Slave remote controller
- Turn on the remote controller. Make sure the Multilink is connected correctly.
- Set the Multilink as slave remote controller using the Remote Controller Setting page in DJI GO 4 app. Determine which role you would like to assign to the slave, and then select the desired role in DJI GO 4 app. At this time, the Status Indicator of the Multilink will light up steady purple.
- Enter the access password.
- The Status Indicator will turn steady green after the role is successfully assigned. The remote controller icon shown in app will turn to 📄.
- If you'd like to switch a slave to a different role, go to the Remote Controller Setting page in DJI GO 4 app to do so.
Usage Details
- The Master can control the aircraft, gimbal, camera and vision systems.
- Slave 1 can control the gimbal and camera.
- Slave 2 and 3 can only control the camera (can be disabled in Remote Controller Setting page).

- Firmware upgrades can be handled in DJI GO 4 app by connecting the Multilink to the remote controller.
- The CAN port on the Multilink can be connected to other DJI devices with a CAN port.
- For best results, use the Multilink together with a Patch Antenna.
- The Multilink will make a beeping sound every time it is connected or disconnected.
Appendix
Specification
Operating Frequency 2400-2483.5 MHz, 5725-5850 MHz
| 2.4 GHz: FCC< 25 dBm, CE< 20 dBm, SRRC< 20 dBm | |
| EIRP | 5.8 GHz: FCC<29 dBm, CE< 14 dBm, SRRC< 19 dBm |
Maximum Communication Distance 150 m (2.4 GHz), 100 m (5.8 GHz)
Input 4.2-5.5 V, 1 A Max
Maximum Delay (From Master to Slave 3) 7.5 ms (5.8 GHz) / 11.1 ms (2.4 GHz)
Minimum Delay (From Master to Slave 1) 2.5 ms (5.8 GHz) / 3.7 ms (2.4 GHz)
Operation Environment Temperature -4^ to 104^ (-20° to 40°C)
| Compatible DJI Devices for CAN Port | DJI FocusInspire 2 GPS module for the remote controllerPatch Antenna |
Status Indicator
Indicator Description
Steady Red Disconnected; assigned as the master remote controller.
Steady Purple Disconnected; assigned as a slave remote controller.
Steady Green Connected.
Steady White Firmware updating.
Blinking Blue Communication status error.
| Off | Current remote controller firmware version not matched / remote controller not initialized / hardware failure. |
免责声明
text_image
Diagram showing three-step installation of a device with labeled components and directional arrows indicating process flow.
natural_image
Illustration of a mechanical device with a lever and handle, no visible text or symbols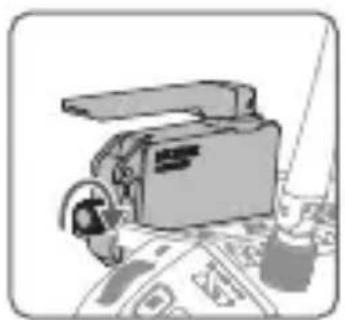
natural_image
Illustration of a vintage camera with a lens and attached probe (no text or symbols)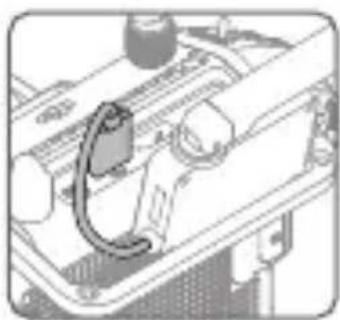
natural_image
Diagram of a mechanical assembly with a curved pipe inserted into a housing (no text or symbols visible)
text_image
Diagram showing three-step installation of a mechanical device with labeled components and directional arrows indicating process flow.
text_image
Diagram showing three-step assembly process of a device with labeled parts and directional arrows
text_image
Diagram showing three-step assembly process of a device with labeled parts and directional arrows
text_image
Diagram showing three-step installation of a device with Chinese labels and component illustrations
text_image
Diagram showing three-step assembly process of a device with labeled parts and directional arrows
Telecomando principal
Changes or modifications not expressly approved by the party responsible for compliance could void the user's authority to operate the equipment.
This device complies with Part 15 of the FCC Rules. Operation is subject to the following two conditions: (1) this device may not cause harmful interference, and (2) this device must accept any interference received, including interference that may cause undesired operation.
This equipment has been tested and found to comply with the limits for a Class B digital device, pursuant to Part 15 of the FCC Rules. These limits are designed to provide reasonable protection against harmful interference in a residential installation. This equipment generates, uses and can radiate radio frequency energy and, if not installed and used in accordance with the instructions, may cause harmful interference to radio communications. However, there is no guarantee that interference will not occur in a particular installation.
If this equipment does cause harmful interference to radio or television reception, which can be determined by turning the equipment off and on, the user is encouraged to try to correct the interference by one or more of the following measures:
-- Reorient or relocate the receiving antenna.
-- Increase the separation between the equipment and receiver.
-- Connect the equipment into an outlet on a circuit different from that to which the receiver is connected.
-- Consult the dealer or an experienced radio/TV technician for help.
This equipment complies with FCC radiation exposure limits set forth for an uncontrolled environment. End user must follow the specific operating instructions for satisfying RF exposure compliance. This transmitter must not be co-located or operating in conjunction with any other antenna or transmitter except the transmitter listed in user manual.
The portable device is designed to meet the requirements for exposure to radio waves established by the Federal Communications Commission (USA). These requirements set a SAR limit of 1.6 W/kg averaged over one gram of tissue. The highest SAR value reported under this standard during product certification for use when properly worn on the body
Canada ISED Compliance notice
This device contains licence-exempt transmitter(s)/receiver(s) that comply with Innovation, Science and Economic Development Canada's licence-exempt RSS(s).
Operation is subject to the following two conditions: (1) This device may not cause interference. (2) This device must accept any interference, including interference that may cause undesired operation of the device.
This equipment complies with ISED radiation exposure limits set forth for an uncontrolled environment. End user must follow the specific operating instructions for satisfying RF
exposure compliance. This transmitter must not be co-located or operating in conjunction with any other antenna or transmitter. The portable device is designed to meet the requirements for exposure to radio waves established by the ISED. These requirements set a SAR limit of 1.6 W/kg averaged over one gram of tissue. The highest SAR value reported under this standard during product certification for use when properly worn on the body.
EU Compliance Statement: SZ DJI TECHNOLOGY CO., LTD. hereby declares that this device is in compliance with the essential requirements and other relevant provisions of the Directive 2014/53/EU.
A copy of the EU Declaration of Conformity is available online at www.dji.com/euro-compliance
EU contact address: DJI GmbH, Industriestrasse 12, 97618, Niederlauer, Germany
CAUTION: RISK OF EXPLOSION IF BATTERY IS REPLACED BY AN INCORRECT TYPE. DISPOSE OF USED BATTERIES ACCORDING TO THE INSTRUCTIONS
Environmentally friendly disposal

Old electrical appliances must not be disposed of together with the residual waste, but have to be disposed of separately. The disposal at the communal collecting point via private persons is for free. The owner of old appliances is responsible to bring the appliances to these collecting points or to similar collection points. With this little personal effort, you contribute to recycle
valuable raw materials and the treatment of toxic substances.